Table of Contents
Advertisement
Quick Links
Advertisement
Table of Contents

Related Manuals for GRAPHTEC CELITE-50


Summary of Contents for GRAPHTEC CELITE-50
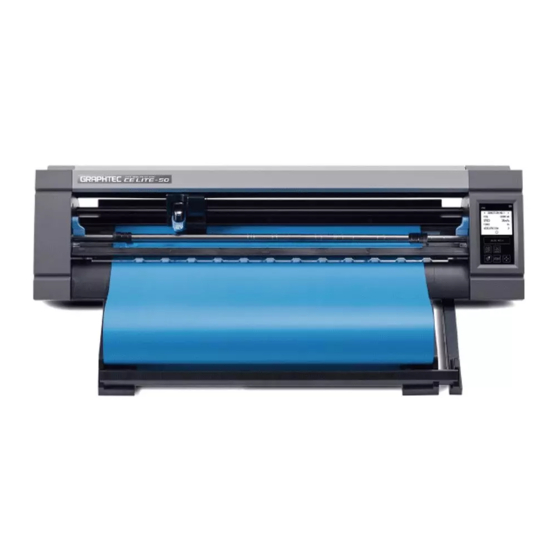
- Page 1 USER’S MANUAL CE LITE-50-UM-151...
-
Page 3: Introduction
(2) The product specifications and other information in this manual are subject to change without notice. (3) While every effort has been made to provide complete and accurate information, please contact your sales representative or nearest Graphtec vendor if you find any unclear or erroneous information or wish to make other comments or suggestions. -
Page 4: After Attachment To The Main Unit
Introduction Precautions on Handling the Cutter Blade This product uses a blade. In order to prevent injury accidents due to the blade, please be very careful when handling the cutter blade such as when attaching the cutter pen to the main unit. Cutter Pen The tip is a sharp blade. -
Page 5: Before Work
Introduction Before Work • Be sure to read through the included "TO ENSURE SAFE AND CORRECT USE" Performing work without reading this section may lead to an unexpected accident or cause a fire. Precautions when Using Curled Media • An upward curl, even when weak, can cause the media to jam. •... -
Page 6: Table Of Contents
Contents CONTENTS Introduction ..............Notes on this Manual . - Page 7 Graphtec Pro Studio ........
- Page 8 Contents Setting the Distance Adjustment ........Setting the Blade Tip Orientation Initialization Position .
- Page 9 Contents Confirming the Main Unit Firmware Version....... . . Appendix Standard Specifications .
-
Page 11: Chapter 1 Notes Before Use
Chapter 1 Notes Before Use An overview of this device and connections with a computer are explained in this chapter. Standard Accessories Names and Functions of Each Component Operation Panel Installing the Main Unit Media Size and Cutting Area Installing the Driver and Software Connecting and Turning ON the Power Connecting a Computer Settings when Turning the Power ON for the First Time... -
Page 12: Standard Accessories
Chapter 1 Notes Before Use Standard Accessories Please confirm that all accessories are included. If any of the accessories are missing, please immediately contact your store of purchase or our company's customer service. Cutter Set (Standard Blade) [PM-BS-001] 1 set Blade Tip Cap Jig 1 unit Cross Cutter [PM-CC-001] 1 unit Software Activation Code... -
Page 13: Names And Functions Of Each Component
Chapter 1 Notes Before Use Names and Functions of Each Component Push roller Media holding roller (movable) Push roller positioning guide Tool holder Media set lever - left Tool carriage Push roller Media sensor Media set lever - right Cutter groove Operation panel Front Guide Roll media stocker... -
Page 14: Operation Panel
Chapter 1 Notes Before Use Operation Panel Types of Screens and Operations HOME Screen and Functions of Buttons "MENU" button: Used to transition to the "MENU" screen. "CONDITION NO. Selection" buttons: Used to select the CONDITION NO. "CONDITION" button: Used to transition to the CONDITION (cutting condition) setting screen. -
Page 15: Other Displays And Operations
Chapter 1 Notes Before Use Input Screen Number Input Drum Selection List Selection Touch the buttons to input a Rotate the drum to scroll through Touch the item you wish to select number. the list and select a setting value. from the list to set the item. -
Page 16: Installing The Main Unit
Chapter 1 Notes Before Use Installing the Main Unit Installation Space Secure enough space to install the device so that the cutting operation is not affected. • The space required to the front and rear of the device will vary depending on the size of the media being used. -
Page 17: Media Size And Cutting Area
Chapter 1 Notes Before Use Media Size and Cutting Area Compatible Media Sizes This cutter is able to use only width of standard media size as shown in the table below. Use the carrier sheet when the media width is other than below. For more information on the carrier sheet, refer to "4.2 Cutting using the Carrier Sheet". -
Page 18: Installing The Driver And Software
Graphtec Studio & Cutting Master 4 (Mac) Macintosh Mac OS X 10.11 - 10.7 / mac OS 10.13 - 10.12 (Graphtec Studio is also compatible with Mac OS X 10.6) Please confirm the latest compatible OS environment on our company website. -
Page 19: Connecting And Turning On The Power
Chapter 1 Notes Before Use Connecting and Turning ON the Power Connect this device and the AC outlet via the standard accessory of AC adapter, and then turn ON the power. Connect the AC adapter and the AC cable (1). Connect the AC adapter to the power supply connector of this device (2). -
Page 20: Connecting A Computer
Chapter 1 Notes Before Use Connecting a Computer Connect this device and a computer by using the supplied USB Cable. • For Windows: Connect the USB cable after the device driver was installed to the PC. Turn OFF the power. Touch the touch panel and confirm that the screen does not start up. -
Page 21: Settings When Turning The Power On For The First Time
Chapter 1 Notes Before Use Settings when Turning the Power ON for the First Time When the device is started up for the first time, it will be necessary to set the language and the unit for lengths. Language Selection When the power of this device is turned ON for the first time, the startup screen will be followed by a language selection screens. -
Page 23: Chapter 2 Basic Operations
Chapter 2 Basic Operations Perform basic cuts by following the items explained in this chapter. Setting the Tool Setting the Media Set Levers Setting the Push Rollers Loading Sheet Media Confirming the CONDITION NO. (Cutting Condition) Precautions when Creating Data Sending Cutting Data Ordinary Care... -
Page 24: Setting The Tool
Chapter 2 Basic Operations Setting the Tool The cutter pen (PM-BS-001) is an consumption goods. Purchase a new cutter pen when the cutter blade becomes dull. Adjusting the Blade Depth of the Cutter The blade depth needs to be adjusted in order to perform optimal cutting. Perform the test cutting several times to set an optimal blade depth. -
Page 25: Setting The Tool
Chapter 2 Basic Operations Setting the Tool To attach the tool, insert the tool into the tool holder completely, and then fix the tool by the locking lever. CAUTION • Don't touch to the tool while it is moving, it is extremely dangerous. •... -
Page 26: Setting The Media Set Levers
Chapter 2 Basic Operations Setting the Media Set Levers Set the media set levers to the locked position, except the following conditions. Moving the push roller position or removing jammed media. When this device will not be used for a long period, set the media set levers to the released position. The "SET THE MEDIA SETTING LEVER."... -
Page 27: Setting The Push Rollers
Chapter 2 Basic Operations Setting the Push Rollers Adjust the positions of the left and right push rollers to suit the width of the media. Set the push rollers positioned onto both edges of the media. Positioning Groove Moving the Push Rollers Push Roller To move the push rollers, raise the media set levers and release the push rollers. -
Page 28: Loading Sheet Media
Chapter 2 Basic Operations Loading Sheet Media Use the standard media size of sheet media. Use the carrier sheet when using the non standard media size of sheet media. • Depending on the type of media (especially with high transparency), the media cannot be set because CE LITE-50 cannot detect the leading edge /width /position of the media. - Page 29 Chapter 2 Basic Operations Evenly position the edge of the sheet media up against the push rollers. Pass the sheet media under the push roller positioning guide and load it so that it is parallel with the front guide. Edge of Sheet Media Push Roller Push Roller Edge of Sheet Media...
-
Page 30: Loading The Media Upon Releasing The Push Rollers
Chapter 2 Basic Operations Loading the Media upon Releasing the Push Rollers Raise the media set levers and release the push rollers. Set the push roller on the left side at the position of the " " mark. Set the push roller on the right side according to the width of the sheet media. Insert the front edge of the sheet media in until it reaches the cutting mat (white translucent mat) behind the push rollers. -
Page 31: Unloading Sheet Media
Chapter 2 Basic Operations Unloading Sheet Media Confirm that the cutting operation has stopped. Touch the "UNLOAD MEDIA" and the media will be unloaded from the front of the device. -
Page 32: Confirming The Condition No. (Cutting Condition)
Chapter 2 Basic Operations Confirming the CONDITION NO. (Cutting Condition) Select a CONDITION NO. to which a cutting condition for the tool is registered and confirm the setting details. That which is displayed in the currently selected CONDITION NO. and cutting condition. Select the CONDITION NO. -
Page 33: Precautions When Creating Data
Chapter 2 Basic Operations Precautions when Creating Data Notes regarding the Cutting Origin Position The position of the cutting origin will vary depending on the settings for "Cutting Area". Create cutting data in reference to the following: Tilt correction: Enabled Tilt correction: Disabled Tilt correction: Disabled Margin: Normal/Expanded... -
Page 34: Notes Regarding The Cutting Area
Chapter 2 Basic Operations Notes regarding the Cutting Area The cutting area will vary depending on the media and the settings for "Cutting Area". Create cutting data in reference to the following: Media: Sheet media Media: Sheet media Tilt correction: Enabled/Disabled, Margin: Normal Tilt correction: Enabled/Disabled, Margin: Expanded Front Edge: 5 mm / Left/Right: 10 mm / Rear Edge: 30 mm Front Edge: 5 mm / Left/Right: 5 mm / Rear Edge: 30 mm... -
Page 35: Sending Cutting Data
From a computer, send cutting data created in one of the environments listed below. For more details, refer to the manuals respective to each software. • Dedicated software: Graphtec Pro Studio Plus (optional) • Dedicated software: Graphtec Pro Studio •... -
Page 36: Ordinary Care
Chapter 2 Basic Operations Ordinary Care Conduct ordinary care while being careful of the items listed below. • Refrain from lubricating the mechanical section. • To clean the main unit, wipe the unit with either a dry cloth or a cloth soaked in a diluted neutral detergent. Refrain from using substances such as paint thinner, benzene, or alcohol, etc. -
Page 37: Chapter 3 Cutting Along Printed Data
Chapter 3 Cutting along Printed Data "Printing & Cutting" which involves cutting the media along printed data is explained in this chapter along with registration marks. What is Printing & Cutting? Simple Printing & Cutting Registration Mark Scanned Printing & Cutting Types and Arrangement of Registration Marks Flow of Creating Registration Marks to Cutting... -
Page 38: What Is Printing & Cutting
Chapter 3 Cutting along Printed Data What is Printing & Cutting? Stickers, etc. can be created by placing a cutting line in the media along with the cutting of printed data. In order to realize this printing & cutting function, this device has been equipped with two functions. Use each function according to the environment of use. -
Page 39: Simple Printing & Cutting
Chapter 3 Cutting along Printed Data Simple Printing & Cutting When the media is loaded, the position and tilt of the media is scanned in order to layer the cutting line over the printed media. • As this method does not use registration marks, it is not affected by issues such as not being able to scan the registration marks depending on the image on the base. - Page 40 Chapter 3 Cutting along Printed Data Deciding the Distance Adjustment Volume Measure the lengths of X (vertical) and Y (lateral) for the shape of the data (printed media) and the shape that was cut. Media Intended Shape to be Cut Origin Shape Actually Cut...
-
Page 41: Registration Mark Scanned Printing & Cutting
Chapter 3 Cutting along Printed Data Registration Mark Scanned Printing & Cutting With this method, cuts will be made upon scanning the registration marks (reference lines) drawn on the media. High-precision cutting is realized with this method as displacement of the printing position is adjusted when cutting the outline of a printed shape or when re-cutting media. -
Page 42: Types And Arrangement Of Registration Marks
The types of registration marks that can be scanned with this device are explained in this chapter. Upon understanding the details, create the registration marks using the dedicated application software of "Graphtec Pro Studio", "Cutting Master 4", or "Graphtec Studio for Mac". Download the application software from our company website. -
Page 43: Positions For Registration Mark Arrangement
Chapter 3 Cutting along Printed Data Positions for Registration Mark Arrangement Registration marks are arranged on the edge of the media with a margin. Unit: mm Registration Mark Type 1 Registration Mark Type 2 Numbers within brackets "( )" are for when the margin is expanded 10 (5) 10 (5) -
Page 44: Automatic Registration Mark Position Detection
Chapter 3 Cutting along Printed Data Automatic Registration Mark Position Detection The area of "A" is scanned from the registration mark scan starting position (position of the tool), and if a registration mark is not located in the area of "A", the area of "B" is scanned. Registration marks can be recognized as registration marks if they exist within the areas of "A"... -
Page 45: Flow Of Creating Registration Marks To Cutting
The flow from creating the registration marks using the dedicated application to cutting the plot is explained in this chapter. Graphtec Pro Studio [1] Creating the registration marks Using the "Rectangle" tool in Graphtec Pro Studio, create a rectangle over the design. A margin is required at the edge of the media when creating the rectangle. Margin... - Page 46 Chapter 3 Cutting along Printed Data [2] Creating data for printing & cutting Create data for printing & cutting. Registration Mark Type 1 Registration Mark Type 2 Select the printing data, and then select "Effects" – "Contour Cut...". On the "Design Central" screen, select the offset for the outline. On the "Design Central"...
- Page 47 "Add Device" screen will be displayed. Follow the on-screen instructions to select "CE LITE-50" for the model name and "Graphtec USB" for the connection destination. Click the "Send". A confirmation screen will appear. Registration Mark Type 1...
-
Page 48: Cutting Master 4
Chapter 3 Cutting along Printed Data Cutting Master 4 [1] Creating the registration marks Using the "Rectangle" tool in Illustrator or CorelDRAW, create a rectangle over the design. A margin is required at the edge of the media when creating the rectangle. Margin As the printing position may vary depending on the printer used to print the design, it is recommended that a few extra millimeters be allowed for... - Page 49 Chapter 3 Cutting along Printed Data [2] Creating data for printing & cutting Create data for printing & cutting. Registration Mark Type 1 Registration Mark Type 2 It is recommended that the printing data and cutting data be created on separate layers. Cutting Data [3] Printing the created data Print the created data.
- Page 50 "Add Device" screen will be displayed. Follow the on-screen instructions to select "CE LITE-50" for the model name and "Graphtec USB" for the connection destination. Click the "Send". A confirmation screen will appear. Registration Mark Type 1...
-
Page 51: Graphtec Studio
Chapter 3 Cutting along Printed Data Graphtec Studio [1] Creating the registration marks From the "Registration Marks" tab in Graphtec Studio, create registration marks over the design. A margin is required at the edge of the media when creating the Margin registration marks. - Page 52 Chapter 3 Cutting along Printed Data [3] Printing the created data Print the created data. CAUTION Be careful to observe the following items as doing otherwise will lead to not being able to scan the registration marks and perform the cutting. •...
-
Page 53: Chapter 4 Convenient Functions
Chapter 4 Convenient Functions Convenient cutting functions that this device is equipped with are explained in this chapter. Cutting Roll Media Cutting using the Carrier Sheet Plotting with the Drawing Pen Cutting from a USB Memory Cutting Multiple Media using the Same Data (Copy Function) Cutting upon Specifying the Cutting Position Expanding the Cutting Area... -
Page 54: Cutting Roll Media
Chapter 4 Convenient Functions Cutting Roll Media To use roll media, load media to the roll media stocker. Roll media of standard media width can be used. • Depending on the type of media (especially with high transparency), the media cannot be set because CE LITE-50 cannot detect the leading edge /width /position of the media. - Page 55 Chapter 4 Convenient Functions Slide the rollers toward forward when using a 2 inch media core or toward backward when using a 3 inch media core. Loosen the knob to move the roller and fasten the knob to fix the roller in place. Place the roll media on top of the rollers so that the media can be pulled out from the top.
-
Page 56: Loading And Scanning Roll Media
Chapter 4 Convenient Functions Loading and Scanning Roll Media There are two types of ways to load roll media with this device. ROLL START EDGE Use this option if you wish to cut from the edge of the roll media. The width and the leading edge of the roll media will be scanned. - Page 57 Chapter 4 Convenient Functions Evenly position the leading edge of the roll media up against the push rollers. Pass the roll media under the push roller positioning guide and load it so that it is parallel with the Front front guide. Leading Edge of Roll Media Push Roller Push Roller...
- Page 58 Chapter 4 Convenient Functions Loading the Media upon Releasing the Push Rollers When loading the roll media upon releasing the push rollers, there are two types of ways to scan the roll media - "ROLL START EDGE" and "ROLL CURRENT POSITION". Raise the media set levers on both sides and release the push rollers.
- Page 59 Chapter 4 Convenient Functions Pull out the roll media and create slack in the roll media that is the same amount as the length used at the front of the main unit. Create slack equivalent to length being used On the "HOME" screen, touch the "LOAD MEDIA". When Scanning at the Edge of the Roll Media By touching the "ROLL START EDGE", the width and the leading edge of the roll media will be scanned and the roll...
-
Page 60: Setting The Page Length
• This device guarantees page feeding precision for up to 100 cm (when using media and setting conditions specified by Graphtec). • When loading media to cut a long item, load the media so that the tension is even at both sides in the direction of the media's width. -
Page 61: Cutting Using The Carrier Sheet
In such case, replace with a new carrier sheet. • As media to attach to the carrier sheet, use media recommended by Graphtec. When using commercially available inkjet media, media coated on both sides cannot be used. When using inkjet media that is coated on a single side, attach the side that is not coated onto the carrier sheet. -
Page 62: Loading Media Onto The Carrier Sheet
Chapter 4 Convenient Functions Loading Media onto the Carrier Sheet • When loading media onto the carrier sheet, be sure to load the media within the range that can be cut (adhesive surface). • Load the media so that it is parallel with the adhesive surface. •... -
Page 63: Loading The Carrier Sheet
Chapter 4 Convenient Functions Loading the Carrier Sheet • Depending on the type of media, the center of the media may be lifted up because the push rollers cannot hold down the media sufficiently. In this case, move the Media holding rollers (movable) to the position where the media is lifted up. - Page 64 Chapter 4 Convenient Functions Align the left edge of the carrier sheet with the "I" marking of the " " mark on the front guide. Front Guide Sheet Media / Carrier Sheet Marking Carrier Sheet The device pulls the carrier sheet in to set. If an error is displayed, operate the device by following the on-screen instructions.
- Page 65 Chapter 4 Convenient Functions Loading the Media upon Releasing the Push Rollers Raise the media set levers and release the push rollers. Set the push roller on the left side at the position of the " " mark. Set the push roller on the right side according to the width of the carrier sheet. Insert the front edge of the carrier sheet in until it reaches the cutting mat (white translucent mat) behind the push rollers.
-
Page 66: Plotting With The Drawing Pen
Chapter 4 Convenient Functions Plotting with the Drawing Pen A commercially available drawing pen can be used for plotting by using the optional pen adapter. Setting the Drawing Pen in the Pen Adapter Three types of screws are included with the main body of the pen adapter. Use the screw appropriate for the thickness of the drawing pen being used. -
Page 67: Setting The Pen Adapter
Chapter 4 Convenient Functions Setting the Pen Adapter Locking Lever Pull the locking lever to open the lock. Locking indicator Unlock Lock Insert the pen adapter to the tool holder while holding it. Locking Lever Locking Lever Push the locking lever until it clicks to hold the cutter pen. Confirm the locking indicator became the white. - Page 68 Chapter 4 Convenient Functions Touch the selection box for "TOOL". Select "PEN" and touch the (Confirm). Configure various settings for the "PEN". Load the media and send the cutting data from the computer. 4-16...
-
Page 69: Cutting From A Usb Memory
Create cutting data and save this on a USB memory. • Files other than files with the extension ".xpf" created using Graphtec Pro Studio or Cutting Master 4 and ".plt" plot files for GP-GL-or HP-GL will not be displayed. •... -
Page 70: Cutting Barcode-Equipped Data
Cutting Barcode-equipped Data Barcodes for information regarding the output file can be created with Cutting Master 4 and Graphtec Pro Studio, etc. in order for it to be printed on the media together with the design and registration marks. Starting Mark The printed barcode is scanned when cutting that particular media and the corresponding cutting data (.xpf) within the USB memory is detected to... -
Page 71: Cutting Multiple Media Using The Same Data (Copy Function)
Chapter 4 Convenient Functions Cutting Multiple Media using the Same Data (Copy Function) Using cutting data retained in the buffer memory, a cut can be repeated for a specified number of times. • Refrain from sending new data while copying is in progress. Doing so will erase the cutting data in the buffer memory. - Page 72 Chapter 4 Convenient Functions Input the number of copies and confirm the input with the (Confirm). Touch the "SPACING FOR COPIES". Use the " " and " " to select the spacing for copies and confirm the selection with the (Confirm).
-
Page 73: Copying Repeatedly On Multiple Media
Chapter 4 Convenient Functions Copying Repeatedly on Multiple Media The same cut can be performed for a set number of times on multiple media. • Sheet media or the carrier sheet is used for this procedure. • At the end of every cut, a message prompting the user to change the media will appear. When the (Exit) is touched, the copying will be aborted and the display will return to the "HOME"... -
Page 74: Cutting Upon Specifying The Cutting Position
Chapter 4 Convenient Functions Cutting upon Specifying the Cutting Position Set the position at which to start cutting (cutting origin). The cutting origin can be set at any position. Once you are done with the setting, touch the (Exit) to return to the "HOME" screen. Original Origin New Origin Touch the... -
Page 75: Expanding The Cutting Area
Chapter 4 Convenient Functions Expanding the Cutting Area The cutting area can be expanded by setting the margin for the media width. When "EXPAND" is selected, the cutting area is expanded on the left and right sides compared to when "NORMAL"... -
Page 76: Aborting And Pausing During A Cut
Chapter 4 Convenient Functions Aborting and Pausing during a Cut The cutting operation of a cut or test, etc. can be aborted or paused. To stop a cut while it is in progress, touch the (Stop). As the operation method accompanying confirmation of whether to exit the operation will appear, make a selection according to the situation. -
Page 77: Withdrawing The Tool Carriage
Chapter 4 Convenient Functions Withdrawing the Tool Carriage The tool carriage can be withdrawn to the home point. Withdrawing the tool carriage after a cut has been completed will make it easier to confirm the results of the cut. Tool Carriage Home Point The media moves... -
Page 79: Chapter 5 Detailed Settings
Chapter 5 Detailed Settings Adjustments in regard to cutting and settings for operation of the device are explained in this chapter. Individually Registering Settings for Cutting Conditions Adjusting the Cutting Quality Adjusting the Cutting Time Cutting Thick Media Performing Cut Tests Registration Mark Scan Settings Adjusting the Media Operation Setting Commands... -
Page 80: Individually Registering Settings For Cutting Conditions
Chapter 5 Detailed Settings Individually Registering Settings for Cutting Conditions With settings for cutting conditions, eight types of cutting conditions from CONDITION NO. 1 through 8 can be set and registered. Set and register conditions according to the type of tool and media to be cut. TOOL: Select the type of tool to be used. -
Page 81: Adjusting The Cutting Quality
Chapter 5 Detailed Settings Adjusting the Cutting Quality The quality of the cut can be adjusted by setting the cutting conditions. Confirm the quality of the cut in relation to the setting by actually performing a cut. For more details, refer to "5.5 Performing Cut Tests". -
Page 82: Setting The Cutting Force
Chapter 5 Detailed Settings Setting the Cutting Force Set the cutting force to use the tool with. Adjust this value if the cuts are too shallow or too deep. Configurable range: 1 - 26 Touch the (CONDITION) on the "HOME" screen to open the CONDITION NO. -
Page 83: Setting The Condition Priority
Chapter 5 Detailed Settings Setting the Condition Priority Select "MANUAL" or "PROGRAM" for the condition of the tool. MANUAL: Cutting conditions sent from the software are invalidated while the conditions set with the operation panel are made valid. PROGRAM: The cutting conditions can be changed from both the operation panel and the software making it possible to overwrite the setting with new cutting conditions at any time. -
Page 84: Setting The Blade Tip Orientation Initialization Position
Chapter 5 Detailed Settings Setting the Blade Tip Orientation Initialization Position Place the blade against the media either immediately after turning the power ON or prior to cutting after setting the pen conditions and adjust the orientation of the blade tip. As this operation involves putting the blade on the media, set the position at which the blade tip orientation is initialized so that the initialization is performed at a position that will not scratch the cut. -
Page 85: Adjusting The Cutting Time
Chapter 5 Detailed Settings Adjusting the Cutting Time The cutting time can be adjusted by setting the "cutting speed", "speed when starting the cut (acceleration)", and "moving speed when the tool is lifted". As setting a speed that is too fast can affect the cutting quality, set values that suit the type of tool and media to be used. -
Page 86: Setting The Tool Up Speed
Chapter 5 Detailed Settings Setting the Tool Up Speed Set the moving speed of the tool when it is raised during cutting. The AUTO setting will apply the same speed as the cutting speed (when the tool is lowered). Configurable values: AUTO, 10, 20, 30, 40, 50 (cm/s) From the "MENU"... -
Page 87: Cutting Thick Media
Chapter 5 Detailed Settings Cutting Thick Media Configure settings for when cutting cutting thick media. • Media having a total thickness of 0.3 mm or more (inclusive of the carrier sheet) cannot be cut. Once you are done with the settings, touch the (Exit) to return to the "HOME"... -
Page 88: Setting The Overcuts
Chapter 5 Detailed Settings Setting the Overcuts Set the lengths of the overcuts created when using the tangential mode. An overcut length can be set for each the start and end of the lines. Configurable range: 0.0 - 0.9 (mm) Touch the (CONDITION) on the "HOME"... -
Page 89: Performing Cut Tests
Chapter 5 Detailed Settings Performing Cut Tests Confirm the quality of the cut with the setting values of the CONDITION NO. (cutting condition) by looking at how nicely the media has been cut and the rounding of corners. 1 PIECE: One " "... -
Page 90: Cutting 3 Tests To Include Setting Values ± 1
Chapter 5 Detailed Settings Cutting 3 Tests to include Setting Values ± 1 Set the same media and tool as the actual cut. On the "HOME" screen, use the " " and " " to select the CONDITION NO. to perform the cut test with and touch the (CUT TEST) to open the setting screen. -
Page 91: Registration Mark Scan Settings
Chapter 5 Detailed Settings Registration Mark Scan Settings Setting the Scan Mode Select the scan mode for the sensors to use in order to scan the registration marks. Select a mode according to the media being used. Once you are done with the setting, touch the (Exit) to return to the "HOME"... -
Page 92: Confirming Registration
Chapter 5 Detailed Settings Confirming Registration Detect the state of the media being used and display the recommended conditions for such as the scan mode, registration mark color, and registration mark base color to select. Once you are done with the setting, touch the (Exit) to return to the "HOME"... - Page 93 Chapter 5 Detailed Settings Confirming the Registration Marks Actually detect the registration marks to confirm operation of registration mark detection. Load the media on which the registration marks have been drawn. From the "MENU" screen, open the "ARMS 1/2" screen. Touch the "CHECK MARK SCAN".
-
Page 94: Correcting The Registration Mark Position
Chapter 5 Detailed Settings Correcting the Registration Mark Position The sensor that scans the registration marks is located in a position that is away from the tip of the blade tool. For this reason, it is necessary to make a correction so that the position actually being cut matches the coordinates at which the registration marks were scanned. - Page 95 Chapter 5 Detailed Settings Measure by how much the registration mark for comparison is displaced from the registration mark for correction. Measure the distance between the center of each line. In the case of the image on the bottom in Step 5, the correction needs to be made in the negative direction for both X and Y so the correction values for each will be a negative value.
- Page 96 Chapter 5 Detailed Settings Touch the "SCAN". Use the " ", " ", " " and " " to move the tool to the registration mark scan starting area and touch the (OK). Registration Mark Scan Starting Area Registration Mark for Correction Scan the registration mark and then plot a registration mark to use for comparison.
-
Page 97: Setting Automatic Registration Mark Position Detection
Chapter 5 Detailed Settings Setting Automatic Registration Mark Position Detection When the position of the tool is close to the registration mark scan starting area while in a state where "AUTO MARK SCAN" is set to "ON", the registration mark positions will be automatically searched when starting automatic scanning of the registration marks. -
Page 98: Adjusting The Media Operation
Chapter 5 Detailed Settings Adjusting the Media Operation Set items related to the operation of the media. Once you are done with the settings, touch the (Exit) to return to the "HOME" screen. Setting the Pre Feed Operation Set the operation for preventing displacement of the media by first transporting the media by a set amount and placing traces of the rollers on the media. -
Page 99: Setting The Auto Pre Feed
Chapter 5 Detailed Settings Setting the Auto Pre Feed Set the operation for preventing displacement of the media by first transporting the media by a set amount and placing traces of the rollers on the media. When feeding long media, breaking in the media to the environment removes expanded or contracted areas and enables the media to be fed in a stable manner. -
Page 100: Setting The Media Width Detection
Chapter 5 Detailed Settings Setting the Media Width Detection This device uses the width detection sensor to detect the leading edge/ width/ position of the media. Depending on the type of media (especially with high transparency), the media cannot be set correctly because of the detection error for the leading edge/ width/ position of the media. - Page 101 Chapter 5 Detailed Settings Select "ON" or "OFF" for "WIDTH DETECTION". 5-23...
-
Page 102: Setting Commands
Chapter 5 Detailed Settings Setting Commands There are two types of commands handled by this device. These are GP-GL and HP-GL. Match this with the setting value of the software being used or set this to AUTO. However, depending on the application being used, the device may not operate properly with the AUTO setting. -
Page 103: Setting The Gp-Gl Step Size
Chapter 5 Detailed Settings Setting the GP-GL Step Size The distance that the tool moves by for a single step of the command can be changed. If the setting values do not match, the size of the cutting may become irregular. Match this with the setting value of the software being used. -
Page 104: Setting The Operation Panel
Chapter 5 Detailed Settings Setting the Operation Panel Perform advanced settings for the operation panel. Once you are done with the setting, touch the (Exit) to return to the "HOME" screen. Language Selection Set the language that will be displayed in the operation panel. From the "MENU"... -
Page 105: Chapter 6 Troubleshooting
Chapter 6 Troubleshooting Refer to this chapter when operation seems irregular or you are having trouble with the device. This chapter also explains how to confirm the settings of the device and cutting data as well as how to plot the test pattern. Responding to Trouble Confirming Error Messages Confirming the Operation of the Main Unit... -
Page 106: Responding To Trouble
AC outlet. Confirm that power is coming to the AC outlet. The device is broken. Contact your sales representative or nearest Graphtec dealer if the problem still exists. Operation is Irregular Symptom Possible Cause... -
Page 107: Confirming Error Messages
Chapter 6 Troubleshooting Confirming Error Messages GP-GL Command Errors Error No. Displayed Solution An order that cannot be recognized was forwarded. Touch the (Confirm). In the menu of the software, perform settings for Noise was input when the computer was turned ON. operating the device. -
Page 108: Arms Errors
Chapter 6 Troubleshooting Error No. Displayed Solution E03011 An invalid byte was received following an ESC code. Check the program. Error 11 E03012 An invalid byte was received amongst device control Check the program. Error 12 orders. E03013 A parameter outside of the acceptable range was Check the program. -
Page 109: Confirming The Operation Of The Main Unit
Chapter 6 Troubleshooting Confirming the Operation of the Main Unit Plotting the Self Test Pattern Plot the self test pattern to check the operation of the device. Once the printing is started, the process cannot be paused or canceled midway. Load media that is at least A3-sized. -
Page 110: Adjusting The Width Detection Sensor
Chapter 6 Troubleshooting Adjusting the Width Detection Sensor This device uses the width detection sensor to detect the leading edge/ width/ position of the media. Adjust the width detection sensor if errors related to the leading edge/ width/ position occur with media that could be loaded without any problem. -
Page 111: Confirming The Main Unit Firmware Version
Chapter 6 Troubleshooting Confirming the Main Unit Firmware Version The version of the system within the device can be confirmed. The version no. is displayed in the "ADVANCE 3/3" screen. -
Page 113: Appendix
Appendix The specifications, etc. of the device are explained in this chapter. Standard Specifications A.2 Supply Items A.3 Appearance Drawing A.4 Menu Tree A.5 List of Initial Values... -
Page 114: Standard Specifications
Windows 8.1 (Windows 8.1/Pro/Enterprise) Windows 8 (Windows 8/Pro/Enterprise) Windows 7 (Ultimate/Enterprise/Professional/Home Premium) Mac OS X 10.6 - 10.13 (10.6 is compatible with only Graphtec Studio) Standard Software Graphtec Pro Studio, Graphtec Studio for Mac, Cutting Master 4, Windows Driver Warranty Period... -
Page 115: Supply Items
Appendix Supply Items Product Name Model No. Cutter Set (Standard Blade) PM-BS-001 Cutter Set (Thick Blade) PM-BS-002 Carrier Sheet (13-inch) PM-CM-003 Pen Adapter PM-BH-001 Cutting Mat PM-CR-001 Cross Cutter PM-CC-001... -
Page 116: Appearance Drawing
Appendix Appearance Drawing Units: mm Dimension error: ± 5 mm... -
Page 117: Menu Tree
Appendix Menu Tree HOME MENU MENU page [TOOL] [TANGENTIAL MODE] [SPEED] [OVERCUT START] [FORCE] [OVERCUT END] [LOAD MEDIA] [ACCELERATION] [DISTANCE ADJUST] Load the Media Next Page... - Page 118 Appendix HOME Previous Page [3 PIECES] [SELECT FILE]...
- Page 119 Appendix MENU [TOOL] [ARMS] [MODE 1] [SENSOR OFFSET ADJ.] [MODE 2] [MODE 3] [CHECK MARK SCAN] Next Page...
- Page 120 Appendix MENU Previous Page [AREA] [MEDIA] [INTERFACE] [ADVANCE] [TEST]...
-
Page 121: List Of Initial Values
Appendix List of Initial Values HOME Screen Menu Item Setting Item Initial Value LOAD MEDIA (No setting items) – COPY MEDIA CHANGE MODE NUMBER OF COPIES SPACING FOR COPIES CUT TEST (No setting items) – MOVE TO ORIGIN (No setting items) –... - Page 122 Appendix Menu Item Setting Item Initial Value TEST SELF TEST – CUTTING PRO – ADJUST WIDTH SENSOR – DIAGNOSTICS – TOOL COND. (CONDITION NO.) Setting Screen Menu Item Setting Item Initial Value CONDITION NO. 1 TOOL PM-BS-001 TOOL OFFSET SPEED 30 cm/s ACCELERATION FORCE...
-
Page 123: Index
INDEX INDEX Cut Test button ......Cut Tests .......5-11 4-24 Aborting . - Page 124 INDEX Loading Sheet Media ..... Registration Mark Scan Settings ... . .5-13 Loading the Carrier Sheet .
- Page 125 INDEX Stop button ......Storage Method ......2-14 Supply Items .
- Page 126 Specifications are subject to change without notice. CE LITE-50 User's Manual CE LITE-50-UM-151 January 22, 2018 1st edition GRAPHTEC CORPORATION...
Need help?
Do you have a question about the CELITE-50 and is the answer not in the manual?
Questions and answers