
Related Manuals for Brother 891-Z08


Summary of Contents for Brother 891-Z08
- Page 1 Operation Manual Cutting Machine Product Code: 891-Z08 Be sure to read this document before using the machine.
-
Page 2: Introduction
We assume no responsibility for damages arising from earthquakes, fire, other disasters, actions of third parties, the user’s intentional or negligent operation, misuse or operation under other special conditions. ● For additional product information, visit our website at www.brother.com IMPORTANT SAFETY INSTRUCTIONS Symbols Used in This Document The following symbols are used in this document. -
Page 3: Table Of Contents
CONTENTS INTRODUCTION .......... 1 Drawing ..............39 Using Drawing Functions to Fill Patterns/Make IMPORTANT NOTICE ........1 Outlines Thicker ........... 41 IMPORTANT SAFETY INSTRUCTIONS ..1 Cutting Around Drawings ........43 Symbols Used in This Document......1 CaptureMat FUNCTION ......46 TRADEMARKS .......... -
Page 4: Machine Features
USB cable connection..P. 17 3. Register the cutting machine with ScanNCutCanvas..P. 20 * You must register with ScanNCutCanvas first. 4. Send patterns to the machine and cut them out..P. 33 ScanNCutCanvas website: http://ScanNCutCanvas.Brother.com/ Devices That Can Connect to This About This Manual Machine The icons at the beginning of each step indicate the following operation information. -
Page 5: Getting Started
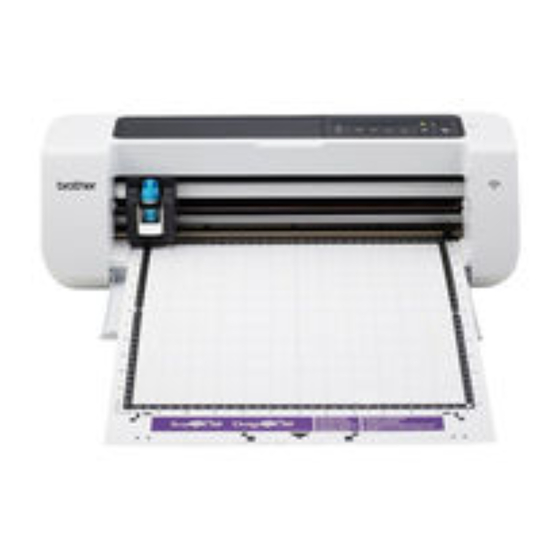
Chapter 1 GETTING STARTED PARTS AND FUNCTIONS c Grips Unit Descriptions - Front Grasped when moving the machine. d Feed Slot Roller Feeds in or out a mat. The mat is fed by the feed rollers on both sides. e Front Tray Cover Protects the feed rollers, carriage and holder. -
Page 6: Unit Descriptions - Operation Panel
Unit Descriptions - Operation Panel Included Accessories For details on the included accessories, refer to the “Included Accessories” insertion. a LCD Panel Displays the current settings, instructions for performing operations and error messages. Long messages scroll in the LCD. b Power indicator Lights up when the machine is turned on, and flashes when the machine enters the sleep mode (power- saving mode). -
Page 7: Turn On The Machine
TURN ON THE MACHINE Plug the power cord into an electrical outlet. Removing the Transport Packing Materials Press in the operation panel. Before turning on the machine, remove the shipping tape and the cardboard shock-absorbing material. Note • The carriage and mat move to their initial positions. -
Page 8: Designncut Manager Windows
DesignNCut Manager WINDOWS This section describes the windows of the dedicated 1. No. Displays the machine number of the connected control application used to cut out or draw patterns. machine. ■ Main Window 2. Search Searches for connected machines. Computer With the mobile device version, tap [No.] (1) to search for a machine. - Page 9 ■ Preview Window 1. Load data Imports cutting/drawing patterns from Computer ScanNCutCanvas or a computer. 2. Operation Select [Cut] or [Draw] from the drop-down list. Other settings may appear in the drop-down list if a separately sold accessory kit is detected. With the mobile device version, tap [Operation] to display a screen for selecting [Cut] or [Draw].
-
Page 10: Settings Screens
SETTINGS SCREENS ■ 2. Machine Info Settings for various functions can be selected or changed. 1. No. Displays the machine number for this machine. 2. Ver. Machine Settings Displays the version of this machine’s software. 3. Name Press in the operation panel to display Displays the name that was specified for the machine the settings screen. -
Page 11: Designncut Manager Settings
1. Support Page a You can specify a name for the connected Displays the website for the Brother Solutions Center. machine. b Select the machine’s display language. 2. Guidance c Select the measurement units displayed in the Displays the setup procedures, from specifying windows. - Page 12 1. Settings (Operation) Click [Settings], then [Operation]. After specifying the desired settings, click [OK] to apply the settings. d With [Fill Line Spacing], adjust the spacing of the lines filling the pattern. With [Fill Direction], adjust the direction of the lines filling the pattern.
-
Page 13: Connecting The Machine And Computer
CONNECTING THE MACHINE AND COMPUTER ■ If the Machine Is Not in Wireless Selecting the Connection Method Mode If the following message appears in the screen when the machine is turned on, set the machine to wireless mode. ■ Step 1 Open DesignNCut Manager (application for Standby (USB) selecting cut settings), installed on the computer. -
Page 14: Setting Up A Wireless Connection (Standard Connection (Recommended))
Select the number for the machine that will be Setting Up a Wireless Connection connected, and then click [OK]. (Standard Connection (Recommended)) There are multiple ways to set up the wireless connection. We recommend the method that uses a wizard from the dedicated application. Select [Wireless LAN] in the window for selecting the connection method, and then click [Next]. -
Page 15: Setting Up A Wireless Connection (Custom Connection)
Select the connection method, and then click Setting Up a Wireless Connection [Next]. (Custom Connection) Select the connection method to the wireless network. Select [Wireless LAN] in the window for selecting the connection method, and then click [Next]. For details on methods A through D, refer to the following pages. - Page 16 ■ A: Connecting Using a Push Button ■ C: Connecting Manually Since this machine is compatible with WPS (push The SSID and network key can be manually entered button method) if your wireless LAN access point/router from the machine’s operation panel. is equipped with a WPS button, a connection can easily In order to connect the machine to a wireless be established by pressing...
- Page 17 ■ D: Connecting Using a USB Cable Enter the network key (password) noted in step , and then press The wireless connection can be set up using the dedicated application “WLAN Assistant Wizard” (WAW Repeatedly press until the following <USB>) and connecting the machine and computer characters appear.
-
Page 18: Connecting Using A Usb Cable Without A Wireless Network (Windows Only)
Windows 7 Connecting Using a USB Cable Click > [Control Panel] > [Hardware and Without a Wireless Network (Windows Sound] > [AutoPlay]. Uncheck [Use AutoPlay for all media and devices], then click [Save] Only) to apply the settings. Windows 8.1 With a USB cable, directly connect the machine and Move your mouse to the lower right corner of your desktop. -
Page 19: Checking The Wireless Lan Settings/Connection Status
Checking the Wireless LAN Settings/ Setting Up Manually Connection Status Click [DesignNCut] in the main window of When a connection to the wireless network cannot DesignNCut Manager, click [Settings], and then be established. select [Network]. Click [DesignNCut], then [Settings], and then Memo select [Network]. - Page 20 b Use when proxy settings are required. c Displays the MAC address. After specifying the settings, click [OK].
-
Page 21: Registering The Machine With Scanncutcanvas
REGISTERING THE MACHINE WITH ScanNCutCanvas After the machine is registered with ScanNCutCanvas Type in the login ID and password registered (http://ScanNCutCanvas.Brother.com/), various with ScanNCutCanvas, and then click editing operations can be performed and data can be [Register]. transferred. This section describes the procedure for linking a Note machine with a specific number to a login ID. - Page 22 ■ Changing to a Different ■ Deleting a Registered ScanNCutCanvas Login ID ScanNCutCanvas Login ID Click [ScanNCutCanvas] in the main window of Click [ScanNCutCanvas] in the main window of DesignNCut Manager, and then click [Change DesignNCut Manager, and then click Account].
-
Page 23: First Steps
FIRST STEPS The following procedures describe basic operations, from preparing the materials to cutting. Mat and Material Combinations The recommended material thickness is 0.1 mm to 0.3 mm for paper and 0.2 mm to 1.5 mm for fabric. Refer to the following table for the appropriate mat and sheet for fabric cutting according to the material to be used for cutting or drawing. - Page 24 Sheet for fabric cutting Use one of the following two sheets for fabric cutting when cutting fabric. Standard mat High adhesive strength mat; use with Iron-on fabric • Reinforces the fabric so that various patterns can be cut out. cutting fabric. appliqué...
-
Page 25: Attaching The Material To The Mat
If any problems occur when testing attaching, use Attaching the material to the mat different material. After preparing the mat and sheet (when cutting fabric) appropriate for the material, attach the material to the mat. For the mat and sheet appropriate for the material, see “Mat and Material Combinations”... - Page 26 ■ Fabric (Other Than for Quilt Piecing) Firmly attach all of the material to the mat so that there are no wrinkles and no part can curl off. • Otherwise, curls in the material may become caught when the mat is inserted. a Standard mat b Iron-on fabric appliqué...
- Page 27 Cut the iron-on fabric appliqué contact sheet to Peel off the backing from the contact sheet. a size 2 cm (3/4") or more larger than the Before peeling off the backing, allow all parts to cool. outline of the pattern to be cut. a Contact sheet b Backing With the side of the fabric that the contact...
- Page 28 Peeling Off the Material (Excluding Quilt Note Piecing) After cutting the material, use a spatula to peel off • Do not wash fabrics attached with a double- the fabric together with the attached contact sided adhesive contact sheet. sheet. • When attaching fabrics with the double-sided adhesive, iron carefully, being sure that the material and adhesive surfaces are properly heat-set.
- Page 29 Test attaching the material. Note Before attaching the material to the mat, use a corner of the adhesive side of the mat to test attaching it. If • Do not discard the protective sheet peeled off any problems occur when testing attaching, use the mat;...
- Page 30 Firmly move the spatula handle across the Note surface of the fabric to remove any wrinkles and firmly attach the fabric to the mat. • The support sheet may be unintentionally peeled off while you are removing the fabric from the mat under the following conditions: - The adhesive between the mat and the support sheet is becoming weak after repeated uses.
-
Page 31: Adjusting The Blade Extension
Adjusting the Blade Extension The appropriate blade extension differs depending on the material type and thickness. Before installing the holder in the carriage, turn the holder cap to adjust the blade extension, and then perform trial cutting. For details on trial cutting, see “Trial Cutting” on page 35. ■... - Page 32 With the reference line on the holder facing Appropriate Blade Extension toward you, fully turn the cap to the right to Adjust the blade extension to slightly exceed the thickness of the material that will be cut. Use the extend the blade tip to its maximum. markings on the holder to make the adjustment.
-
Page 33: Installing And Uninstalling The Holder
Push down on the holder lock lever. Installing and Uninstalling the Holder Firmly push down until the holder is locked in place. After adjusting the blade extension, install the holder in the machine. For the blade extension appropriate for the material, see “Adjusting the Blade Extension” on page 30. -
Page 34: Basic Operations
Chapter 2 BASIC OPERATIONS PATTERN CUTTING ■ Loading the Mat The following procedures use patterns to describe the entire series of operations, from selecting a Attach the material that will be cut to the mat. pattern and editing it to cutting. •... - Page 35 ■ Sending Patterns to the Machine Click [Load data] in the main window of DesignNCut Manager, and then click [Load Start up DesignNCut Manager. from ScanNCutCanvas] to import the pattern. Memo • With the mobile device version, tap [Load data] Log in to ScanNCutCanvas, and edit the in the main screen.
-
Page 36: Trial Cutting
■ Trial Cutting Example: Settings when positioned in the lower-left corner of the mat Adjust the blade extension according to the material, Vertical: 11-12 and then use the same material to be used in your Horizontal: 0-1 project to perform trial cutting. Memo •... - Page 37 ■ Unloading the Mat Note Press on the operation panel to feed out • Depending on the material being used, it may not be cut cleanly if the cutting pressure is not the mat. correctly adjusted. For details on the appropriate cutting pressure, see “Cutting Settings”...
- Page 38 ■ Checking the Trial Cutting Results Adjusting the Cutting Speed/Pressure Click [Settings] in the DesignNCut Manager Adjust the blade extension according to the trial ● window that appears when cutting to display a cutting results. window where settings can be adjusted. Repeatedly perform trial cutting and adjust the ●...
- Page 39 • To stop cutting, click [Stop]. If it is clicked again, the blade and the mat will return to their original positions. • When cutting is finished, press to feed out the mat.
-
Page 40: Advanced Operations
Chapter 3 ADVANCED OPERATIONS DRAWING FUNCTIONS With a pen and pen holder, you can draw patterns Remove the cap from the pen, and then insert on material. Using the seam allowance settings also the pen into the pen holder with the point allows you to draw patterns with seam allowances down. - Page 41 Load the mat with the material for drawing The pattern appears in the drawing/cutting settings window of DesignNCut Manager. (cutting) attached. • For details on attaching material to the mat, see Select [Draw] from the [Operation] drop-down “Mat and Material Combinations” on page 22. list.
-
Page 42: Using Drawing Functions To Fill Patterns/Make Outlines Thicker
Memo Using Drawing Functions to Fill • With the mobile device version: Preview Patterns/Make Outlines Thicker Window →[Settings] → [FILL / ADDITIONAL →[Settings] → LINE] or Main window→ [Operation] Note • Depending on the material and pen being used, After selecting a design under [Fill Pattern], material drawn with a filled pattern may be difficult to peel off or may tear. - Page 43 ■ Making Pattern Outlines Thicker Note Additional lines can be drawn to make pattern outlines appear thicker. • Refer to the following examples when specifying settings for “Additional Line” and See steps through in “Filling Patterns” on “Additional Line Spacing”. page 41 to specify the drawing settings.
-
Page 44: Cutting Around Drawings
Cutting Around Drawings In ScanNCutCanvas, select the pattern to be In this example, we will specify a seam allowance drawn, and then specify the seam allowance. for a pattern and draw the pattern, then cut an outline around it. • For details on editing patterns, click ScanNCutCanvas, and then refer to “Creating ■... - Page 45 ■ Drawing ■ Cutting Select [Draw] from the [Operation] drop-down Select [Cut] from the [Operation] drop-down list. list. Memo Memo • With the mobile device version: • With the mobile device version: Preview window→[Operation]→[Draw] Preview window→[Operation]→[Cut] Adjust the drawing pressure. Click [Apply].
- Page 46 Remove the pen holder, and then install the blade holder. Note • After use, remove the pen from the pen holder, and then attach the cap to the pen before storing it. CAUTION • Before installing the blade holder in the machine, remove the protective cap.
-
Page 47: Capturemat Function
CaptureMat FUNCTION ■ Photographing Material and A printed image (paper or sticker), as stamped page or an original hand-drawn illustration can be Importing the Data captured and its outline can be cut out or drawn. This is useful for capturing images for paper crafts, Registering the Calibration Data of the then cutting them out. - Page 48 Place the included calibration sheet on a flat Click [Select], and then select the image saved surface, and then photograph it from directly in step above. The name of the imported image appears in the box. Save the photo to the computer. Memo Note •...
-
Page 49: Creating Cutting Data
Importing an Image of Material Attach the material to be photographed to the mat. Select the name of the registered camera from Memo the [Camera] drop-down list. • The 12" × 24" (305 mm × 610 mm) mat cannot Click [Select] beside [Mat Image]. be used. -
Page 50: Appendix
Chapter 4 APPENDIX CONSUMABLES Replacement Criteria Replacing the Blade For the safe operation of this machine, replace the ■ Removing following consumables according to the replacement criteria. To purchase parts, contact the retailer who Twist off the holder cap to remove it. sold you this machine or the nearest authorized service center. - Page 51 Pull up the holder to leave the blade in the Twist on the holder cap to attach it to the rubber area. holder. Fully tighten the cap until the blade extension reaches its maximum, and then loosen the cap until the blade is no longer visible.
-
Page 52: Care And Maintenance
CARE AND MAINTENANCE Cleaning Note • Do not use alcohol or water to clean the mat. • When the mat is not being used, clean it, and ■ Cleaning the Mat then store it with the protective sheet affixed. If the protective sheet is not affixed, the mat’s Cuttings and cut edges of patterns attached to the mat adhesive strength will decrease. - Page 53 Using a commercially available brush, clean off Remove the holder from the carriage. cuttings, lint, and dust. Specifically clean off lint and dust around the blade. If lint and dust accumulate between the blade and holder, the blade may no longer rotate or the cutting quality may become poor.
-
Page 54: Adjusting The Mark Sensors
Press to select the horizontal Adjusting the Mark Sensors adjustment value, and then press The following message appears. If the cutting position is misaligned when cutting using the “CaptureMat” function, the machine can be manually adjusted. Horizontal 0 Example: If the horizontal adjustment value was If the cutting position is shifted upward or ●... -
Page 55: Troubleshooting
If the machine stops operating correctly, check the following possible problems before requesting service. You can solve most problems by yourself. If you need additional help, the Brother Solutions Center offers the latest FAQs and troubleshooting tips. Visit us at “ http://s.brother/cpqaa/ ”. - Page 56 Symptom Possible Causes (or Results) Solutions Reference The material extends from the Attach the material while keeping it page 24 The material to be cut/ adhesive area of the mat. within the adhesive area of the mat. drawn cannot be The mat’s adhesive strength has attached to the mat.
- Page 57 Symptom Possible Causes (or Results) Solutions Reference A blade appropriate for the material Use a blade appropriate for the material page 30 being cut is not used. being cut. The blade extension from the blade Remove the holder from the carriage, page 31 holder is too little.
-
Page 58: Error Messages
ERROR MESSAGES The following table lists some of the messages that may appear while the machine is operating as well as their corresponding solutions. Perform the necessary operation according to the instructions in the message or the solution described here. If the problem persists, contact the retailer who sold you this machine or the nearest authorized service center. - Page 59 When Setting Up the Wireless Network Error Messages (Cutting Machine) Cause/Solution The wireless network setting is not activated. Connection failed (Err-01). Press [OK] button. Activate the wireless network. The wireless access point/router cannot be detected. 1. Check the following 4 points. - Make sure that the wireless access point/ router is powered on.
-
Page 60: Designncut Manager Error
Error Messages (Cutting Machine) Cause/Solution As shown below, the cause and solution differ depending on when this message appeared. - Appeared after running [2.Setup Wizard] to search for an SSID Possible Cause: Failed to detect an SSID Solution: Check the information described for 1. of (Err-02). Cannot find SSID. - Page 61 Error Code (Cutting Error Messages (DesignNCut Manager) Causes / Solutions Machine) Try the following. - Ungroup the pattern. - Change the fill settings. This data is too intricate to be converted to E221 - Reduce the number of fill patterns. a filling pattern.
- Page 62 Error Code (Cutting Error Messages (DesignNCut Manager) Causes / Solutions Machine) Check the following. - Check that your wireless access point/router is turned on. E507 Not connected to a network. - Check that the network cable of your wireless access point/router is plugged in.
- Page 63 Error Code (Cutting Error Messages (DesignNCut Manager) Causes / Solutions Machine) Failed to load the captured image. The photo is too small. E549 Use an image that is captured a whole mat Take the photo without zooming and so the entire mat without zooming in.
-
Page 64: Updating The Software
Update Procedure Using Computer UPDATING THE SOFTWARE The machine’s software can be updated using either If an upgrade file is posted on the Brother Solutions an Internet connection or a USB cable. For update Center (http://s.brother/cpqaa/), download the file, information, refer to details posted on the Brother and then update the machine according to the Solutions Center (http://s.brother/cpqaa/). -
Page 65: Optional Accessories
“DesignNCut” logo. The machine will not operate correctly if any other mat is used. This product is only compatible with line embossing. For the complete list and newest information on optional accessories, refer to the Brother Solutions Center (http://s.brother/cpqaa/). PRODUCT SPECIFICATIONS Items Specifications Approx. -
Page 66: Index
INDEX Adjusting the cut position (CaptureMat) ......53 Replacement criteria ............49 Auto shut down .............9 Required material condition (capturing) ...... 46 Basic pattern cutting ...........33 ScanNCutCanvas ............3 Blade extension ............30 Registering/Changing/Deleting ......20 Seam allowance ............43 Settings CaptureMat ..............46 DesignNCut Manager .......... - Page 67 Please visit us at http://s.brother/cpqaa/ where you can get product support and answers to frequently asked questions (FAQs). This machine is approved for use in the country of purchase only. Local Brother companies or their dealers will only support machines purchased in their own countries.
Need help?
Do you have a question about the 891-Z08 and is the answer not in the manual?
Questions and answers