Advertisement
EN
Print to Cut
About Print to Cut
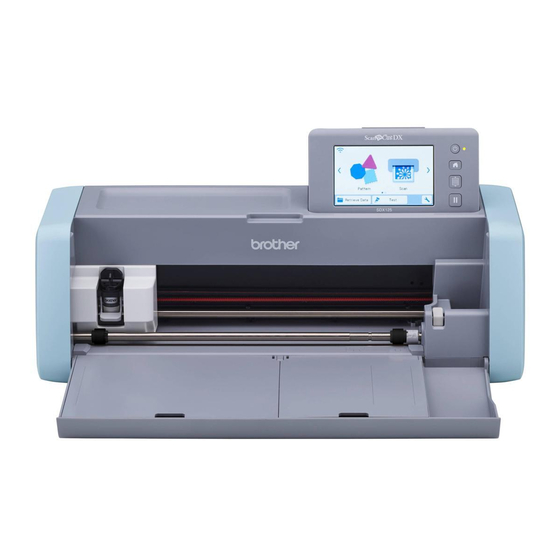
With the Print to Cut function of CanvasWorkspace, registration marks can be added in order to use the scanning function of a
Brother ScanNCut DX series cutting machine to detect the cutting position. By using material printed with images and registration
marks together with cutting data created in CanvasWorkspace, you can efficiently cut the same image with the machine or cut out a
specific part of the image.
This function is an alternative to using the Direct Cut function in the machine to create the cut data only once and directly cut each
material.
This function is available only with the Brother ScanNCut DX cutting machine.
Step 1: Activate the Print to Cut function in CanvasWorkspace.
Step 2: Add registration marks.
Step 3: Import an image into CanvasWorkspace and create cutting data.
Step 4: Save the created data as a PDF file for printing, and print it with a printer.
Step 5: Transfer the FCM file (cutting data) to the cutting machine.
Step 6: Cut the printed material with the cutting machine.
Precautions
In order to use the Print to Cut function, make the following preparations in advance.
●
- It is necessary to update the software of the cutting machine to the latest version. For detailed instructions on updating the
machine, refer to the Operation Manual supplied with it.
- The dedicated application CanvasWorkspace (Windows/Mac) (ver. 2.4.0 or later) must be installed on your computer. The
latest version of the application can be downloaded from the Brother support website (http://s.brother/cuoad/). If it is
already installed, update it to the latest version.
* This feature is not supported by CanvasWorkspace for Web.
- Activate the function on CanvasWorkspace with the included activation card.
For detailed instructions on using the cutting machine, refer to the Operation Manual supplied with it.
●
The contents of this document are subject to change without notice.
●
The screens shown in this manual may differ from the actual ones.
●
1
Version 0
Advertisement
Table of Contents

Summary of Contents for Brother ScanNCut DX Series
- Page 1 With the Print to Cut function of CanvasWorkspace, registration marks can be added in order to use the scanning function of a Brother ScanNCut DX series cutting machine to detect the cutting position. By using material printed with images and registration marks together with cutting data created in CanvasWorkspace, you can efficiently cut the same image with the machine or cut out a specific part of the image.
- Page 2 Activating the Function Activate the function in CanvasWorkspace. ■ Preparation In order to use CanvasWorkspace, a CanvasWorkspace login ID is required. If you do not have a free account, click [Create ● New Account] in the screen that appears after installation, and then follow the on-screen instructions to create an account. If CanvasWorkspace is already installed on your computer and you want to update it to the latest version, select [Check for ●...
- Page 3 Creating Data in CanvasWorkspace Use the Print to Cut function in CanvasWorkspace to create print data (containing registration marks) as well as cutting data. Transfer the cutting data to the cutting machine, and then use it to cut the printed material. Data cannot be edited after it has been transferred to the cutting machine.
- Page 4 Select the [Show Registration Mark] check box to add registration marks. Click (Image Tracing) to import an image saved on the computer, and then trace the image. For details on the Image Tracing function, refer to [Online Video Tutorials...] on the [Help] menu in CanvasWorkspace. Position the traced pattern and cutting lines within the red dotted line in the artboard.
- Page 5 Click [Export/Transfer FCM File] on the [File] menu. Use the desired method from the screen that appeared to transfer the cutting data to the cutting machine. For details on the transfer methods, refer to the Brother support website (http://s.brother/cfrab/). a Transferring using a USB flash drive Save the FCM file to a USB flash drive, and then transfer the file to the cutting machine.
- Page 6 Retrieving Alignment Data On the Machine and Cutting Using the material printed with the images and registration marks together with the data transferred to the machine, cut the material with the machine. For detailed instructions on using the cutting machine, refer to the Operation Manual supplied with it. ■...
- Page 7 Attach the material to the appropriate cutting mat, and then touch to load the mat into the machine. Attach the material to the mat so that the horizontal line of the registration mark is at the top. The machine will detect the registration marks and automatically correct the alignment of the cutting lines and the material. Touch in the preview screen to scan the material in order to check the position of the cutting lines.
- Page 8 If the machine stops operating correctly, check the following possible problems as well as the machine’s Operation Manual or the Brother support website (http://s.brother/cpoac/) before requesting service. If the problem persists, contact Brother Customer Service or a Brother authorized service center.


Need help?
Do you have a question about the ScanNCut DX Series and is the answer not in the manual?
Questions and answers