Ingenico iCT220 User Manual
Counter top payment terminal
Hide thumbs
Also See for iCT220:
- User manual (40 pages) ,
- Technical manual (36 pages) ,
- Quick start manual (27 pages)
Table of Contents
Advertisement
Quick Links
Terminal User Guide
1.
Introduction: .................................................................................. 1
Thank You .................................................................................................... 1
This User Guide ........................................................................................... 1
Security of Your Terminal ............................................................................. 1
Caring for Your Terminal .............................................................................. 2
Keeping Records .......................................................................................... 2
Paper Rolls ................................................................................................... 2
Helpdesk Information ................................................................................... 3
Supervisor Password ................................................................................... 3
How Do I ... .................................................................................................. 4
Quick Installation Checklist .......................................................................... 5
2.
Your Terminal ................................................................................ 7
Terminal Model............................................................................................. 7
Terminal Layout ........................................................................................... 7
Terminal Keypad .......................................................................................... 8
Function Keys............................................................................................... 8
Entering and Correcting Data....................................................................... 9
Terminal Display ........................................................................................ 10
Display Icons .............................................................................................. 10
Menu Screens ............................................................................................ 12
Paper Loading ............................................................................................ 13
Terminal Installation ................................................................................... 14
"Magic Cable" Installation ........................................................................... 16
Telephone Lines and Broadband ............................................................... 18
Inserting a Chip Card ................................................................................. 19
Swiping a Card ........................................................................................... 21
3.
Transactions ................................................................................ 22
Sales - Inserted Cards ............................................................................... 22
Sales - Swiped Cards ................................................................................. 24
Sales with Gratuity (Tip Mode) ................................................................... 25
Sales with Gratuity - Inserted Cards (On Ticket Method) .......................... 26
Sales with Gratuity - Inserted Cards (On Screen Method) ........................ 28
Sales with Gratuity - Swiped Cards ........................................................... 30
Sales with Cashback .................................................................................. 31
Split Bills ..................................................................................................... 32
Refunds ...................................................................................................... 33
Mailorder Transactions (Customer Not Present) ....................................... 35
Mailorder - CSC/AVS Results .................................................................... 35
Mailorder - Sales & Refunds ...................................................................... 36
Hotel Mode ................................................................................................. 39
Reversals ................................................................................................... 40
Duplicate Receipts ..................................................................................... 40
Cash Advance ............................................................................................ 41
Contents
i
Advertisement
Table of Contents

Related Manuals for Ingenico iCT220


Summary of Contents for Ingenico iCT220
-
Page 1: Table Of Contents
Terminal User Guide Contents Introduction: .................. 1 Thank You ....................1 This User Guide ................... 1 Security of Your Terminal ................1 Caring for Your Terminal ................2 Keeping Records ..................2 Paper Rolls ....................2 Helpdesk Information ................... 3 Supervisor Password ................... - Page 2 This User Guide (v3.1034) relates to terminal software APACS 40 97.11.01 Whilst every effort has been made to ensure that the content of this document is accurate, Ingenico will not accept responsibility for any loss that may be incurred as a result of any errors or inaccuracies. The product is varied to suit acquirer’s requirements and this document should be accepted as a guide only to the use of the product.
-
Page 3: Introduction
1. Introduction: Thank You Thank you for choosing an Ingenico Payment Terminal. Your terminal is the Ingenico iCT220 Counter Top Payment Terminal. Your terminal includes a variety of different functions and features to help you accept credit and debit card transactions in a speedy and efficient manner. -
Page 4: Caring For Your Terminal
Introduction Terminal User Guide Caring for Your Terminal You should take care not to spill liquids on any part of your terminal or any associated parts and equipment. You should clean the terminal with a soft clean cloth. The magnetic swipe and chip card readers should be cleaned regularly with a suitable cleaning card. -
Page 5: Helpdesk Information
Terminal User Guide Introduction Helpdesk Information Should you need to, details on how to contact the terminal Helpdesk can be found on the contact sticker found on the underside of your terminal. If appropriate, you may also find these details on the inside cover of this User Guide. asked your terminal’s... -
Page 6: How Do I
Introduction Terminal User Guide How Do I … To help you familiarise yourself with your terminal and to understand the basics, below is a list of frequently asked questions about the general operation of your terminal. … set up my terminal? ... -
Page 7: Quick Installation Checklist
Terminal User Guide Introduction … feed the paper through the terminal? Press and hold the clear key when the terminal is displaying the idle screen and the terminal will feed paper through the printer. … get my terminal polled? ... - Page 8 Introduction Terminal User Guide Familiarise yourself with the menu structure on your terminal. Your default supervisor password is 01483, you should change this from the default. Do an END OF DAY report from the REPORTS menu. This will ...
-
Page 9: Your Terminal
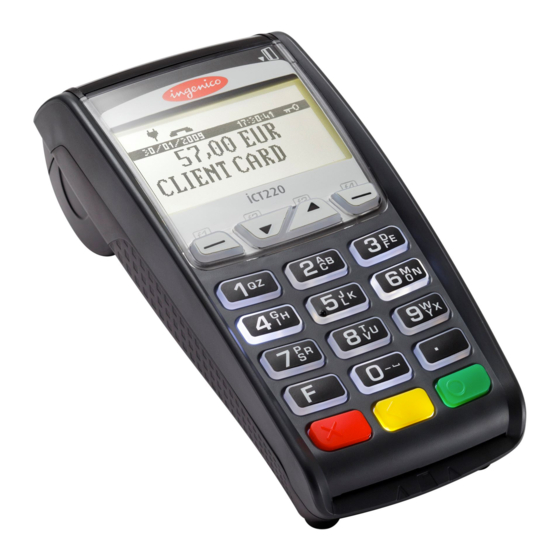
Your Terminal 2. Your Terminal Terminal Model The Ingenico iCT220 Counter Top Payment Terminal is a compact and ergonomically designed terminal capable of processing card transactions. It is a fixed point terminal that has an integrated “Magic Cable” which enables connection to a telephone line or Local Area Network (LAN). -
Page 10: Terminal Keypad
Your Terminal Terminal User Guide Terminal Keypad The Ingenico iCT220 key pad is laid out as below. Function Keys (F1, F2, F3, F4) Up and Down Keys Standard Data Entry Keys Menu Key Correction Keys Enter Key (Cancel, Clear) Function Keys... -
Page 11: Entering And Correcting Data
Terminal User Guide Your Terminal Entering and Correcting Data To enter numbers press the relevant keys. If you make a mistake you can correct this using the correction keys. Press the clear key once to delete one character at a time. Press the cancel key once to delete the entire line, pressing the cancel key again will cancel the transaction. -
Page 12: Terminal Display
Your Terminal Terminal User Guide Terminal Display The Ingenico iCT220 screen is laid out as below. Communication Status Icon Power Icon Terminal READY Date and Time Status Handset: 01 Handset Number During normal operation the top row (showing the power status icon, and the communication status icon) is always displayed on the screen. - Page 13 Terminal User Guide Your Terminal The available communication methods for your terminal are ETH and PSTN. The terminal is connected via the Ethernet cable to a Local Area Network (LAN). As the Ethernet connection is independent to when the terminal is communicating it will be visible on the display even when the inactive phone symbol is shown, it may also be shown in addition with another communication method if the terminal is actually...
-
Page 14: Menu Screens
Your Terminal Terminal User Guide Menu Screens When you press the menu key from the idle screen your terminal will enter the application menus. All the menu screens have the same layout. Menu Item 1 Menu Item 2 Menu Item 3 Menu Item 4 To choose Menu Item 1 you should press the F1 key, and so on. -
Page 15: Paper Loading
Terminal User Guide Your Terminal Paper Loading Your terminal is supplied with one paper roll already installed. When the paper roll is nearing the end a red line will appear on the paper, this indicates that the paper roll must be replaced. To replace the paper roll: 1. -
Page 16: Terminal Installation
Your Terminal Terminal User Guide You should only use approved paper rolls as supplied from your terminal supplier. Details on how to contact us in order to order supplies of paper rolls can be found on the contact sticker found on the underside of your terminal. If appropriate, you may also find these details on the inside cover of this User Guide. - Page 17 Terminal User Guide Your Terminal Connect one end of the Telephone Line Lead (3) to the socket marked TEL IN on the “Magic Cable” Unit (2), and connect the second end to the socket on the BT Converter (4). Lastly connect the UK Power Lead (6) into the Power Supply Unit (5), and plug this into the power socket on the “Magic Cable”...
-
Page 18: Magic Cable" Installation
Your Terminal Terminal User Guide Before powering on your terminal for the first time, ensure that the terminal and cables are assembled as per the image below. 1. Your terminal 2. “Magic Cable” (attached to terminal) with install kit (cable tie, and self-adhesive support) 3. - Page 19 Terminal User Guide Your Terminal The “Magic Cable” can be secured to the terminal’s work area in a number of ways so as to reduce stress on the terminal and cable’s connection. Examples of securing the “Magic Cable” are as illustrated: 1.
-
Page 20: Telephone Lines And Broadband
Your Terminal Terminal User Guide Telephone Lines and Broadband Your terminal can be used on a variety of telephone lines, however to use your terminal on some lines you may be required to change the telephone network (PSTN) setting in the terminal. -
Page 21: Inserting A Chip Card
Terminal User Guide Your Terminal Inserting a Chip Card Chip Cards should be inserted firmly into your terminal as illustrated with the chip facing up and into the card reader. If you see the prompt BAD READ, check the orientation of the card and try again. - Page 22 Your Terminal Terminal User Guide Chip Cards can hold the details for more than one payment application (for example Mastercard and Maestro). If the SELECT APPLICATION screen is displayed after the card has been inserted, the cardholder should select the payment application that they wish to use for the transaction.
-
Page 23: Swiping A Card
Terminal User Guide Your Terminal Swiping a Card With the magnetic stripe facing down and towards the screen as illustrated run the edge of the card along the bottom of the card swipe slot on the right of your terminal. You should swipe the card in one continuous movement and at an even speed. -
Page 24: Transactions
Transactions Terminal User Guide 3. Transactions Sales - Inserted Cards From the idle screen, insert the card READY into the card reader. Handset: 01 Enter the sale amount in pence (eg. Enter Sale 1234 for £12.34) and press the £0.00 enter key. - Page 25 Terminal User Guide Transactions If required check the signature: Signature OK? Press F1 for an invalid signature or Press F4 for a valid signature. The terminal will print the customer Printing copy to give to the customer for them to retain. The terminal will return to the idle screen.
-
Page 26: Sales - Swiped Cards
Transactions Terminal User Guide Sales - Swiped Cards From the idle screen, swipe the card READY through the card swipe. Handset: 01 Enter the sale amount in pence (eg. Enter Sale 1234 for £12.34) and press the £0.00 enter key. The terminal will dial out to the Please Wait acquirer for authorisation. -
Page 27: Sales With Gratuity (Tip Mode)
Terminal User Guide Transactions Sales with Gratuity (Tip Mode) You must ensure that this option is enabled on your acquirers Merchant Account. Contact your acquirer to ensure that this option is available to you. Your terminal can be enabled for Gratuity/Tip mode, therefore allowing the customer to add a tip to the final amount before completing the transaction. -
Page 28: Sales With Gratuity - Inserted Cards (On Ticket Method)
Transactions Terminal User Guide Sales with Gratuity - Inserted Cards (On Ticket Method) From the idle screen, insert the card READY into the card reader. Handset: 01 Enter Sale Enter the sale amount in pence (eg. 1234 for £12.34) and press the £0.00 enter key. - Page 29 Terminal User Guide Transactions AUTH CODE: nnnn transaction been authorised then an auth code will be displayed. The terminal will print the merchant Printing copy for you to retain. If a signature is needed the customer must sign. If required check the signature: Signature OK? Press F1 for an invalid signature or Press F4 for a valid signature.
-
Page 30: Sales With Gratuity - Inserted Cards (On Screen Method)
Transactions Terminal User Guide Sales with Gratuity - Inserted Cards (On Screen Method) From the idle screen, insert the card READY into the card reader. Handset: 01 Enter Sale Enter the sale amount in pence (eg. 1234 for £12.34) and press the £0.00 enter key. - Page 31 Terminal User Guide Transactions transaction been AUTH CODE: nnnn authorised then an auth code will be displayed. The terminal will print the merchant Printing copy for you to retain. If a signature is needed the customer must sign. Signature OK? If required check the signature: Press F1 for an invalid signature or Press F4 for a valid signature.
-
Page 32: Sales With Gratuity - Swiped Cards
Transactions Terminal User Guide Sales with Gratuity - Swiped Cards From the idle screen, swipe the card READY through the card swipe. Handset: 01 Enter Sale Enter the sale amount in pence (eg. 1234 for £12.34) and press the £0.00 enter key. -
Page 33: Sales With Cashback
Terminal User Guide Transactions Sales with Cashback You must ensure that this option is enabled on your acquirers Merchant Account. Contact your acquirer to ensure that this option is available to you; this option may not be available for all account types. Your terminal is not pre-configured to allow for Sales with Cashback. -
Page 34: Split Bills
Transactions Terminal User Guide Split Bills Your terminal is not pre-configured to allow for Split Bills. If you would like the Split Bill functionality enabled on your terminal please contact the terminal Helpdesk. The Split Bill functionality would commonly be used within the leisure industry in order to break down a bill associated with a table into amounts that can be paid by each person using differing payment methods. -
Page 35: Refunds
Terminal User Guide Transactions Refunds From the idle screen, press the READY menu key once. Handset: 01 Select the menu option REFUND by MAILORDER pressing the F2 key. REFUND CASH SALE Enter supervisor password Enter Password: followed by enter. ***** INSERT OR SWIPE Insert or swipe the customer’s card. - Page 36 Transactions Terminal User Guide The terminal will print the merchant Printing copy for you to retain. If a signature is needed the customer must sign. Check the signature: Signature OK? Press F1 for an invalid signature or Press F4 for a valid signature. The terminal will print the customer Printing copy to give to the customer for...
-
Page 37: Mailorder Transactions (Customer Not Present)
Terminal User Guide Transactions Mailorder Transactions (Customer Not Present) You must ensure that this option is enabled on your acquirers Merchant Account. Your terminal is pre-configured for mailorder (Customer Not Present) transactions. Mailorder transactions are performed without the customer or the card being present. -
Page 38: Mailorder - Sales & Refunds
Transactions Terminal User Guide Mailorder - Sales & Refunds From the idle screen, press the READY menu key once. Handset: 01 Select the menu option MAILORDER MAILORDER by pressing the F1 key. REFUND CASH SALE Choose the required transaction: MAILORDER Press F1 for REFUND or Press F4 for SALE. - Page 39 Terminal User Guide Transactions If you see this prompt enter the 3 Enter CSC: or 4 digit Card Security Code (CSC) and press the enter key. If you see this prompt enter the Postcode Nums: postcode numbers (eg. 27 for GU2 7YB) and press the enter key.
- Page 40 Transactions Terminal User Guide The terminal will print the merchant Printing copy for you to retain. Tear off the merchant copy and TEAR OFF TICKET AND RETAIN (ENTER) press the enter key. The terminal will print the customer Printing copy to give to the customer for them to retain.
-
Page 41: Hotel Mode
Terminal User Guide Transactions Hotel Mode You must ensure that this option is enabled on your acquirers Merchant Account. Contact your acquirer to ensure that this option is available to you. When a large value transaction is expected (typically in Hotel or Rental environments), a Pre-Authorisation can be made for the expected value, to check the customer’s card is valid and the customer has enough credit available for the transaction. -
Page 42: Reversals
Transactions Terminal User Guide Reversals If a mistake in a transaction is identified immediately after the transaction has been completed, then the transaction can be completely reversed by selecting the REVERSAL function within 30 seconds of the completion of the transaction. This function is particularly useful when the wrong transaction amount has been entered, and the mistake is only noticed on the customer copy. -
Page 43: Cash Advance
Terminal User Guide Transactions Cash Advance You must ensure that this option is enabled on your acquirers Merchant Account. Contact your acquirer to ensure that this option is available to you; this option may not be available for all account types. Your terminal is not pre-configured to allow for Cash Advance. -
Page 44: Authorisation Only
Transactions Terminal User Guide Authorisation Only You must ensure that this option is enabled on your acquirers Merchant Account. Contact your acquirer to ensure that this option is available to you. An Authorisation Only transaction gives an authorisation code for a specific amount against a customer’s card without the capture of the transaction details by the acquirer. -
Page 45: Forced Transactions
Terminal User Guide Transactions Forced Transactions The Forced Transaction function allows for the completion of a transaction following a referral or voice authorisation. It also provides the opportunity to capture the details of transactions authorised by means other than your terminal. For example, card transactions authorised using paper vouchers and calls to the authorisation centre during a power cut, or transactions previously authorised using the Authorisation Only function. -
Page 46: Declined Transactions
Transactions Terminal User Guide Declined Transactions The acquirer or the customer’s card issuer can decline to authorise any transaction. A declined response from the acquirer’s host system will display a message on your terminal in place of the usual AUTH CODE: nnnn message. - Page 47 Terminal User Guide Transactions Once you have dialled or made a note of the telephone number press the enter key to continue. Please be ready to quote your merchant number, the full card number and any referral message that was displayed (such as REFERRAL B or CODE 10 REFER).
-
Page 48: Transaction Receipts
Transaction Receipts Terminal User Guide 4. Transaction Receipts Merchant Copy - Signature Transactions Swiped Cards with Signature (Merchant Copy) Merchant Name Merchant Address 1 Merchant Address 2 Terminal ID Merchant ID M:12345678 Sequence Number TID:22160000 WAITER:02 Transaction TABLE:00000001 Referencing HANDSET:01 Card Issuer MAESTRO 6759 4046 0200 0000 14... - Page 49 Terminal User Guide Transaction Receipts Swiped Cards with Signature and Gratuity (Merchant Copy) Merchant Name Merchant Address 1 Merchant Address 2 Terminal ID Merchant ID M:12345678 Sequence Number TID:22160000 WAITER:02 Transaction TABLE:00000001 Referencing HANDSET:01 Card Issuer MAESTRO 6759 4046 0200 0000 14 Card Number EXP 12/12 Card Details...
- Page 50 Transaction Receipts Terminal User Guide Inserted Cards with Signature (Merchant Copy) Merchant Name Merchant Address 1 Merchant Address 2 Terminal ID M:12345678 Merchant ID TID:22160000 Sequence Number WAITER:02 Transaction TABLE:00000001 Referencing HANDSET:01 Card Issuer MAESTRO AID: A0000000041010 Card AID Card Label MAESTRO 6759 4046 0200 0000 14 Card Number...
- Page 51 Terminal User Guide Transaction Receipts Inserted Cards with Signature and Gratuity (Merchant Copy) Merchant Name Merchant Address 1 Merchant Address 2 Terminal ID M:12345678 Merchant ID TID:22160000 Sequence Number WAITER:02 Transaction TABLE:00000001 Referencing HANDSET:01 Card Issuer MAESTRO AID: A0000000041010 Card AID Card Label MAESTRO 6759 4046 0200 0000 14...
-
Page 52: Merchant Copy - Pin Transactions
Transaction Receipts Terminal User Guide Merchant Copy - PIN Transactions Inserted Cards with PIN (Merchant Copy) Merchant Name Merchant Address 1 Merchant Address 2 Terminal ID Merchant ID M:12345678 TID:22160000 Sequence Number WAITER:02 Transaction TABLE:00000001 Referencing HANDSET:01 Card Issuer MAESTRO AID: A0000000041010 Card AID Card Label... - Page 53 Terminal User Guide Transaction Receipts Inserted Cards with PIN and Gratuity (Merchant Copy) Merchant Name Merchant Address 1 Merchant Address 2 Terminal ID M:12345678 Merchant ID TID:22160000 Sequence Number WAITER:02 Transaction TABLE:00000001 Referencing HANDSET:01 Card Issuer MAESTRO AID: A0000000041010 Card AID Card Label MAESTRO 6759 4046 0200 0000 14...
-
Page 54: Customer Copy
Transaction Receipts Terminal User Guide Customer Copy Keyed Cards with Signature (Customer Copy) Merchant Name Merchant Address 1 Merchant Address 2 Terminal ID Merchant ID M:12345678 TID:22160000 S 10 Sequence Number WAITER:02 Transaction TABLE:00000001 Referencing HANDSET:01 Card Issuer MAESTRO **************0014 Card Number EXP 12/12 Card Details... - Page 55 Terminal User Guide Transaction Receipts Inserted Cards with PIN (Customer Copy) Merchant Name Merchant Address 1 Merchant Address 2 Terminal ID M:12345678 Merchant ID TID:22160000 S 11 Sequence Number WAITER:02 Transaction TABLE:00000001 Referencing HANDSET:01 Card Issuer MAESTRO AID: A0000000041010 Card AID Card Label MAESTRO **************0014...
-
Page 56: Declined And Void Receipts
Transaction Receipts Terminal User Guide Declined and Void Receipts If the transaction is declined by the acquirer or by an inserted Chip card, the terminal will print a declined receipt, as shown below. The text printed below the Date and Time is the response from message from the acquirer. -
Page 57: Transaction Referencing
Terminal User Guide Transaction Receipts If the Result Indication shows VOID then the transaction has been cancelled by the operator. If the transaction was cancelled by pressing the cancel key, then the message below the date / time will read CANCELLED. If the transaction was cancelled by the operator selecting NO to the signature check, then the text below the Date and Time will read SIGNATURE INVALID. -
Page 58: Reports
Reports Terminal User Guide 5. Reports Your terminal can produce a number of reports to aid in banking and transaction management. One touch End of Day procedure. END OF DAY A reconciliation report with the acquirers. BANKING A transaction total print without a reset. ... -
Page 59: End Of Day Report
Terminal User Guide Reports End of Day Report Your terminal is provided with an End of Day report that allows you to print both the Z Balance and the Banking reports from the one place. This simplifies your end of day procedure and ensures that you do the correct reports each day. -
Page 60: Banking Report
Reports Terminal User Guide Banking Report Performing a Banking report reconciles the transaction totals held in the terminal with the totals held by each acquirer. The terminal may need to contact some or all of the acquirers to complete this report. Transactions are listed by acquirer, and are also shown by card type under that acquirer. - Page 61 Terminal User Guide Reports CANNOT CONFIRM TOTALS is shown when the terminal cannot contact the acquirer to check the totals. The diagnostic code printed will indicate the reason for the communications failure. To perform a Banking report for ALL acquirers press the menu key twice, then choose REPORTS by pressing the F1 key.
- Page 62 Reports Terminal User Guide Example Banking report (Acquirer 1) BANKING Merchant Name Merchant Address 1 Merchant Address 2 Terminal ID TID:22160001 01/01/08 23:54 Print Date & Time HANDSET:01 --==++oooo++==-- Acquirer Result ACQUIRER 1 Acquirer Name TOTALS CONFIRMED TOTALS CONFIRMED The totals were agreed 01/01/08 23:54 for this acquirer Merchant ID...
- Page 63 Terminal User Guide Reports Example Banking report continued (Acquirer 2) --==++oooo++==-- Acquirer Result ACQUIRER 2 Acquirer Name TOTALS UNCONFIRMED TOTALS UNCONFIRMED The totals were not 01/01/08 23:55 checked for this acquirer Merchant ID M:87654321 Print Date & Time TID:22160001 Current session Number CURRENT SESSION: Current Session...
- Page 64 Reports Terminal User Guide Example Banking report continued (Acquirer 3) --==++oooo++==-- Acquirer Result ACQUIRER 3 Acquirer Name TOTALS NOT AGREED TOTALS NOT AGREED The terminal totals did not CALL ACQUIRER match the acquirers 01/01/08 23:56 records for this acquirer M:11223344 Merchant ID Print Date &...
-
Page 65: Balance Report
Terminal User Guide Reports X Balance Report The X Balance report is sometimes referred to as an End of Shift Balance report. This is because it allows you to print a total of all transactions performed since the last Z Balance report. -
Page 66: Z Balance Report
Reports Terminal User Guide Z Balance Report The Z Balance report is sometimes referred to as an End of Day Balance report. This is because it allows you to print a total of all transactions performed since the last Z Balance report. - Page 67 Terminal User Guide Reports Example Z Balance Report (Totals and Breakdown by Issuer) Z BALANCES Totals Reset Merchant Name Merchant Address 1 Merchant Address 2 Terminal ID TID:22160001 Print Date & Time 01/01/08 23:47 HANDSET:01 GRAND TOTALS Date of Last Since 31/12/07 23:50 Z Balance Done Sales...
- Page 68 Reports Terminal User Guide Example Z Balance Report continued (Breakdown by Waiter and Transaction Listing) --==++oooo++==-- BREAKDOWN BY WAITER Since 31/12/07 23:50 WAITER ID: Sales £562.68 Refunds £35.00 SUB-TOTAL £527.68 Includes Waiter Breakdown Tips £38.50 Breaks down all business Cashback £30.00 done since last Z Balance for each waiter or operator...
-
Page 69: Stored Report
Terminal User Guide Reports Stored Report A Stored Transaction report may be printed to show how many transactions are stored in the terminal, awaiting transmission to the host. Up to five transactions may be stored in the terminal per acquirer. A transaction may be stored after voice referral, or by using the Forced Transaction or Hotel Mode Completion functions. -
Page 70: Tms Report
Reports Terminal User Guide TMS Report Approximately once a month your terminal will call the Terminal Management System (TMS) to receive any updates to the software, details of new card schemes, and any changes to your configuration. This call will take place automatically, normally outside of standard trading hours. -
Page 71: Supervisor Functions
Terminal User Guide Supervisor Functions 6. Supervisor Functions Supervisor Password The Supervisor password is designed to limit access to the Supervisor functions (such as the Supervisor Menus, or Refund transactions) on the terminal to those who have access to the password. -
Page 72: Supervisor Password Change (Initial Transaction)
Supervisor Functions Terminal User Guide Supervisor Password Change (Initial Transaction) If you have not changed the Supervisor password before you process your first transaction the terminal will prompt you to change the password from the default during the transaction. During the transaction, you will be A New Password prompted that the password needs Must Be Selected... -
Page 73: Supervisor Menus
Terminal User Guide Supervisor Functions Supervisor Menus The Supervisor menus allow access to various management functions in your terminal. To be able to access the Supervisor menu, you must use the Supervisor password. To access the Supervisor menus press the menu key twice, then choose SUPERVISOR by pressing the F3 key. - Page 74 Supervisor Functions Terminal User Guide Second Supervisor Menu Screen (Press menu once) Allows the number of rings before the terminal answers an incoming call to be set. Can be set between 0 and 10. Do not use this RINGS feature unless instructed to do so by the terminal Helpdesk.
- Page 75 Terminal User Guide Supervisor Functions Fourth Supervisor Menu Screen (Press menu three times) Allows the date and time to be set. The date and time is automatically updated when a DATETIME successful TMS call is made. Allows the setting of the time taken after a BACKLIGHT key is pressed before the backlight turns off.
-
Page 76: Supervisor Sub-Menus
Supervisor Functions Terminal User Guide Supervisor Sub-menus There are two Supervisor sub-menus. They are the Password menu and the Config menu. They allow access to extended options within the Supervisor menus. To access the Password menu press the menu key twice, then choose SUPERVISOR by pressing the F3 key. - Page 77 Terminal User Guide Supervisor Functions To access the Config menu press the menu key twice, then choose SUPERVISOR by pressing the F3 key. You will be asked to type your current supervisor password, and confirm this by pressing the enter key, and choose CONFIG by pressing the F3 key.
-
Page 78: Troubleshooting
Supervisor Functions Terminal User Guide 7. Troubleshooting Frequently Asked Questions What do I do if the customer has forgotten their PIN code? If your acquirer allows it, you can perform a PIN Bypass to bypass the entry of the PIN code, by pressing the cancel key followed promptly by the menu key twice. - Page 79 Terminal User Guide Supervisor Functions Every transaction that I take is producing a referral, am I doing something incorrectly? You should check that the terminal is correctly plugged into the BT telephone socket and that the telephone line being used is not in use, and works.
- Page 80 Supervisor Functions Terminal User Guide What should I do if I have forgotten my Supervisor password? You should first try the default password of 01483, if this is not the password then please contact the terminal Helpdesk who will reset the password back to the default value.
- Page 81 Terminal User Guide Supervisor Functions Screen Messages During normal operation you may come across a number of screen messages. Some indicate an error, where as others offer information. Below is a list of some of the messages that you may see on your terminal. security password mismatched...
- Page 82 Supervisor Functions Terminal User Guide The card presented is of a type that is not supported, or is damaged and could not be INVALID CARD read, you should ask for another means of payment. The card presented is expired, you should ask for another means of payment.
-
Page 83: Diagnostic Codes
Terminal User Guide Supervisor Functions Diagnostic Codes You may see diagnostic (DIAG) codes at the bottom of transaction receipts and reports. Some indicate an error while others offer information. More than one diagnostic code may be printed. For example DIAG 828282 would indicate three communication failure attempts during a transaction. - Page 84 Supervisor Functions Terminal User Guide Offline or Forced Transaction. This is not an error and is for information only. Offline store is full. You should attempt an online transaction, if the problem persists check the phone line, and contact the terminal Helpdesk quoting the full diagnostic code.
-
Page 85: Menu Structure
Terminal User Guide Supervisor Functions Menu Structure MAILORDER REFUND SALE REFUND END OF DAY CASH BANKING X BALANCE SALE Z BALANCE(!) REFUND STORED CHEQUE REPORTS CASH SALE DELETE ACQ AUTH MAC RESET TMS RESET SUPERVISOR HANDSET ID CHANGE PWD PASSWORD REVERSAL PREAUTH CONFIG... -
Page 86: Notes
EN 60950-1 iCT220/250 EN 55022 A1/A2 iCT220/250 EN 55024 A1/A2 iCT220/250 GPRS EN 60950-1 iCT220/250 GPRS EN 301489-7 iCT220/250 GPRS EN 301511 iCT220/250 GPRS EN 50360 ... -
Page 87: Operating Environment
Terminal User Guide Notes Operating Environment Your terminal (Class II Equipment) has the following electrical supply characteristics: Power Supply: 100-240 V (AC) 50-60 Hz Power Adapter: UK three pin 3 A plug Power Consumption: 800 mA (maximum) Your Terminal is designed to be operated and stored at the following temperatures: Operating Temperature: +5˚C to +45˚C... - Page 88 Notes Terminal User Guide...
Need help?
Do you have a question about the iCT220 and is the answer not in the manual?
Questions and answers
What paper roll do i use for the ict220
The compatible paper roll for the Ingenico iCT220 is the Ingenico ICT220/ICT250 Thermal Paper Roll. Coreless rolls that are 50% longer are also available for this model.
This answer is automatically generated