Table of Contents
Advertisement
Quick Links
Advertisement
Table of Contents

Related Manuals for avertX HD420


Summary of Contents for avertX HD420
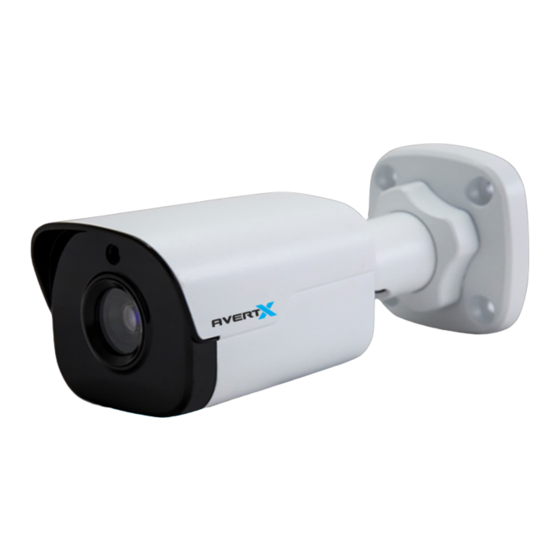
- Page 1 HD420 Night Vision HD Indoor/Outdoor IP Mini Bullet Camera User Manual...
-
Page 2: Important Safeguards
Software License improperly supported location. Improperly installed product Agreement. AVERTX shall not be liable for technical or editorial errors or may fall, causing serious injury to a child or adult, and damage omissions contained herein. - Page 3 This symbol on the product or on its packaging indicates that this observed, stop using the camera immediately and then contact product shall not be treated as household waste in accordance with AvertX Customer Support. Directive 2002/96/EC. Instead it shall be handed over to the applicable Handling collection point for the recycling of electrical and electronic equipment.
- Page 4 CAUTION 35156AA...
-
Page 5: Table Of Contents
Connections ........................................11 Weather Resistant Cable Connector ................................ 12 TWO: CONNECTING ............................................. 13 Bench test..........................................13 AvertX Camera Finder ..................................... 13 Finding IP Cameras....................................13 Accessing the Camera ..................................... 13 Changing the IP Address ..................................13 THREE: SETUP AND CONFIGURATION ..................................... 14 Installing the camera ...................................... - Page 6 Removing the Lens Cover ....................................16 Focusing the Camera Lens ..................................... 16 Cleaning the Lens Cover ....................................16 To clean the lens cover: ................................... 16 Connecting to the Camera ...................................... 17 Connecting in a Web Browser ..................................17 Default Username and Password ................................17 Administrator/User Privileges ..................................
- Page 7 Smart Illumination ..................................... 29 White Balance ......................................29 Defog ........................................30 OSD Settings ........................................31 Privacy Mask ........................................32 Alarm Configuration ........................................ 33 Configuring Motion Detection Alarm ................................33 Configuring Tampering Alarm ..................................35 Security ..........................................36 User Management ......................................36 Setting Secure Data Transmission ..................................
- Page 8 35156AA...
-
Page 9: Introduction
Dual Streaming providing real time streaming video with smooth image quality. The • Multi-Language Support HD420 offers dual streaming and can be used in a variety of installations including shops, stores, banks, factories and for building • Tampering Alarm surveillance. -
Page 10: One: Getting Started
Before proceeding, please check that the box contains the items listed here. If any item is missing or has defects, DO NOT install or operate the product and contact your dealer for assistance. HD420 Camera Self Tapping Plastic Anchors Mounting Screws... -
Page 11: Dimensions
Dimensions Connections The HD420 cameras use Power over Ethernet (PoE). The only connection on the camera is the RJ45 Ethernet dongle located on the rear of the camera. Connect one end of the Ethernet cable to the dongle, and connect the other end to the recorder, or to a PoE switch. -
Page 12: Weather Resistant Cable Connector
Weather Resistant Cable Connector To Install the weather resistant cable connector, follow these steps: Slide all pieces of the waterproof cable connector over the cable This camera features an IP66-rated weather resistant connector. For plug in this order: unprotected outdoor connections, screw the connector on the included •... -
Page 13: Two: Connecting
Once the camera is connected to the recorder, test all If you are not directly connecting to an AvertX HDIP recorder, you must functions (especially Auto Focus, Zoom, IR Night Vision) to ensure manually change the IP address. -
Page 14: Three: Setup And Configuration
Affix the camera base to the ceiling or wall with the included Note HD420 cameras are equipped with a seal inside the housing screws. When mounting on an unprotected wall, the cable notch to prevent moisture from entering. If you have any concerns should be positioned downward. -
Page 15: Considerations For Infrared (Ir) Lights
Mounting the camera directly to light colored or shiny soffits (white aluminum, for example) can reflect IR light back into the camera. Your HD420 camera is equipped with a reset button to return the camera to factory default settings, if necessary. To reset your camera, Reposition the lens so the IR lights aren’t pointed at the... -
Page 16: Removing The Lens Cover
Cleaning the Lens Cover The HD420 mini bullet camera is factory sealed and cannot be opened The Lens Cover of the HD420 is made of hardened polycarbonate. It is for access or service. Removing the lens cover or otherwise opening extremely durable, but can be damaged if cleaned improperly. -
Page 17: Connecting To The Camera
AvertX IP cameras are optimized for use with AvertX HDIP recorders, Connecting in a Web Browser but you can also connect to your AvertX IP cameras using third party software like VLC media player (http://www.videolan.org). Type the IP address of the camera in a web browser. -
Page 18: Preparation
PREPARATION After you have completed the installation in accordance with the quick guide, connect the camera to power to start it. After the camera is started, you can access the camera from a PC client installed with a web browser or the video management software. Check before login •... -
Page 19: Logging Into The Web Interface
LOGGING INTO THE WEB • To clear the Username and Password text boxes and the Save Password check box, click Reset. INTERFACE INTRODUCTION TO THE WEB The default static IP address of the camera is 192.168.0.250, and the INTERFACE default subnet mask is 255.255.255.0. DHCP is turned on by default. If a DHCP server is used in the network, the IP address of your camera may be assigned dynamically, and you need to use the correct IP By default the live view window is displayed when you are logged in to... - Page 20 • You can watch the live video after finishing the initial configuration. It is recommended that you change the password when you Please configure other parameters as needed. are logged in the first time. For details about how to change a password, see Security.
-
Page 21: Four: Configuring Settings
FOUR: • The configurations of DNS (Domain Name System) server are applicable when the device is accessed by domain name. CONFIGURING IPv4 SETTINGS DHCP The Dynamic Host Configuration Protocol (DHCP) is enabled by default when the camera is delivered. If a DHCP server is deployed in the network, the camera can automatically obtain an IP address from the NETWORK CONFIGURATION DHCP server. -
Page 22: Port
Port Select PPPoE from the IP Obtain Mode drop-down list. Enter the username and password provided by your internet Service Provider (ISP). Click Save. Click Setup > Network > Port. Configure relevant port numbers. Click Save. Note: If the entered HTTP port number has been occupied, a prompt message will be displayed as Port conflicts. -
Page 23: Ddns
DDNS DDNS (Dynamic Domain Name Service) is a service that allows a After the configuration of FTP, you will be able to upload snapshots from connection to an IP address using a hostname (URL) address instead of network cameras to a specified FTP server. a numeric IP address. -
Page 24: E-Mail
E-Mail Parameter Description Attach Image When enabled, the e-mail will contain 3 instant After the configuration of E-mail, when alarms are triggered, you will be snapshots as attachment according to the Capture able to send messages to the specified E-mail address. Interval. -
Page 25: Video Configuration
Configuring Capture VIDEO CONFIGURATION With the function of capture configured, when an alarm is triggered, the Video Configuration camera will automatically upload the captured snapshots to the FTP server or send snapshots the specified email address. You can set video parameters that your camera. You may also enable Click Setup >... -
Page 26: Image Configuration
IMAGE CONFIGURATION Contrast Set the degree of difference between the blackest pixel and the whitest pixel. Image Enhancement Note: You may move the sliders to adjust settings or enter values in the text boxes directly. Clicking Default will restore all the default image settings. -
Page 27: Exposure
Exposure 3D Noise Reduce the noise of images. The function Reduction may cause motion blur (or ghosting in some The default settings are used for common scenes. Keep the default applications). settings unless a particular scene is required. Click Setup > Image > Image and then click Exposure. Image Rotation Rotation of the image. - Page 28 Metering Control Set the way the camera measures the intensity of light. Parameter Description Center-Weighted Average Metering: Measure light mainly in the central part of images. Exposure Mode Select the correct exposure mode to achieve the desired exposure effect. Evaluative Metering: Measure light in the customized area of images.
-
Page 29: Smart Illumination
White Balance WDR Level After enabling the WDR function, you can improve the image by adjusting the WDR level. White balance is the process of offsetting unnatural color cast in images Note:Use level 7 or higher when there is a high under different color temperatures so as to output images that best suit contrast between the bright and dark areas of the human eyes. -
Page 30: Defog
Defog Use the defog function to adjust the clarity of images captured in fog or haze conditions. Click Setup > Image > Image and then click Advanced. Note: This function can be configured only when WDR is disabled. Enable the defog function and then select a level for the scene. Level 5 achieves the maximum defog effects, and level 1 achieves the minimum. -
Page 31: Osd Settings
OSD Settings You may right-click in the preview window and then choose to view in full screen mode or at an aspect ratio. You may also double-click the preview window to enter or exit full screen mode. On Screen Display (OSD) is the text displayed on the screen with video images and may include time and other customized contents. -
Page 32: Privacy Mask
Privacy Mask On certain occasions, you may need to set a mask area on the camera image to protect privacy, for example, the keyboard of an ATM machine. When PTZ changes its position or zooms, the Privacy Mask will be adjusted accordingly to protect the area all along. -
Page 33: Alarm Configuration
ALARM CONFIGURATION In the Detection Area area, click to add a new detection area. To delete a detection area, click You can schedule alarm reporting and set actions that can be triggered Click and drag the mouse to set a detection area. by other devices so that alarms and the triggered actions can be Set the detection sensitivity, object size, and history for the camera handled in time. - Page 34 Trigger E-mail With Trigger E-mail selected, the camera will automatically send snapshots to the specified E-mail address when an alarm is triggered. Note: Make sure you have completed E-Mail and Configuring Capture before using this function. Trigger Storage With Trigger Storage enabled, the camera automatically starts recording after an alarm is triggered.
-
Page 35: Configuring Tampering Alarm
Configuring Tampering Alarm Set actions to be triggered by tampering alarms and the plan. For detailed steps, see the descriptions of alarm-triggered actions in Configuring Motion Detection Alarm. Configure tampering alarm so that the camera reports a tampering alarm when the lens is blocked for a certain length of time. Click Save. -
Page 36: Security
Setting Secure Data Transmission SECURITY HTTPS User Management HTTPS allows secure connections between the IP Camera and web There are two types of users in the system: browser that protects camera settings or Username/Password info from • snooping. Administrator: referred to as “admin” in this manual. The default name of the administrator is admin, which cannot be To use HTTPS, you are required to install a self-signed certificate or a modified. -
Page 37: Apr Binding
APR Binding SYSTEM This function can protect the camera from ARP attacks. When the Setting the System Time camera visits an IP of another network segment via a gateway, it can communicate only with the MAC address binding to the gateway address in the same segment. -
Page 38: Viewing Device Status
Upgrading the Device You can view the current status of your camera. New versions of camera firmware is available periodically and can be found at http://www.avertx.com/product-downloads/. Note: Make sure the software upgrade file is available before starting the software upgrade. -
Page 39: Restarting The System
• To restore default configurations, click Default and then confirm the Ensure that the power supply is normal during upgrade. operation. The device will restart and restore the default The device will restart after the upgrade is completed. configurations. Restarting the System Click Setup >... -
Page 40: Five: Live View
FIVE: LIVE VIEW Live view means playing live video (real-time audio and video) received from a camera in a window through the Web interface. LIVE VIEW TOOLBAR Button Description Display in full screen mode. Play/stop live video. 35156AA... -
Page 41: Appendix Aglossary
APPENDIX A On Screen Display GLOSSARY Power over Ethernet PPPoE Point-to-Point Protocol over Ethernet Acronym Description Pan, Tilt, Zoom Address Resolution Protocol Region of Interest Constant Bit Rate SMTP Simple Mail Transfer Protocol Domain Name Service Secure Socket Layer DDNS Dynamic Domain Name Service Universal Network Passport DHCP... -
Page 42: Appendix B Faq
APPENDIX B FAQ What to do if no message prompts me to install ActiveX when I log in on a Windows 7 PC the first time Answer: Follow these steps to turn off UAC and then log in again: • Click the Start button, and then click Control Panel. -
Page 43: Appendix C: Specifications
Ethernet 48vDC ONVIF Compliance Profile S** CAMERA SPECIFICATIONS IP Rating IP66 Heater Model HD420 Operating Temperature -35° ~ 140°F (-37° ~ 60°C) Resolution 4MP (2592×1520) Cold Start Temperature -35° F (-37° C) Number of Video Streams 2 (High resolution stream for single... - Page 44 All rights reserved. No part of this publication may be reproduced by any means without written permission from AvertX. The information in this publication is believed to be accurate in all respects. However, AvertX cannot assume responsibility for any consequences resulting from the use thereof.
Need help?
Do you have a question about the HD420 and is the answer not in the manual?
Questions and answers