Table of Contents
Advertisement
Quick Links
Advertisement
Table of Contents

Subscribe to Our Youtube Channel
Related Manuals for avertX HD510


Summary of Contents for avertX HD510
-
Page 1: User Manual
HD510 High Definition Outdoor IP PTZ Dome Camera User Manual... - Page 2 AVERTX be liable for any direct, consequential, incidental, special, punitive, or other damages whatsoever (including without limitation, damages for loss of business profits, business interruption or loss of business information), even if AVERTX has been advised of the possibility of such damages or whether in an action, contract or tort, including negligence.
-
Page 3: Important Safeguards
IMPORTANT SAFEGUARDS Precautions Read Instructions Operating Read all of the safety and operating instructions before using Before using, make sure power supply and others are properly the product. connected. Retain Instructions While operating, if any abnormal condition or malfunction is Save these instructions for future reference. - Page 4 WARNING REGULATION DANGEROUS HIGH VOLTAGES ARE PRESENT INSIDE THE This device complies with Part 15 of the FCC Rules. Operation is ENCLOSURE. subject to the following two conditions: (1) this device may not cause harmful interference, and (2) this device must accept any interference DO NOT OPEN THE CABINET.
- Page 5 TABLE OF CONTENTS ........................................... 5 INTRODUCTION .............................................. 8 Overview ..........................................8 Camera Default Settings ....................................8 Product Features ....................................... 8 ONE: GETTING STARTED ..........................................9 Box Contents .......................................... 10 Camera Box Contents ..................................... 10 Wall Mount Accessory Box Contents ................................10 Camera Overview ........................................
-
Page 6: Table Of Contents
Connecting to the Camera ...................................... 23 Connecting in a Web Browser ..................................23 Live View ..........................................23 PTZ Camera Controls ......................................24 Home Position ......................................... 24 Command Protocol ......................................24 Pan and Tilt ........................................24 Zoom Controls ......................................... 25 Focusing the Camera ...................................... 25 Preset Positions List ...................................... - Page 7 Event Server ......................................36 Event Configuration ....................................36 Event List ......................................... 37 Manual Event ......................................38 System ..........................................39 User Account ......................................39 System Info ......................................39 Factory Default ......................................39 Firmware Upload ...................................... 39 Save and Reboot ..................................... 39 Logout ..........................................
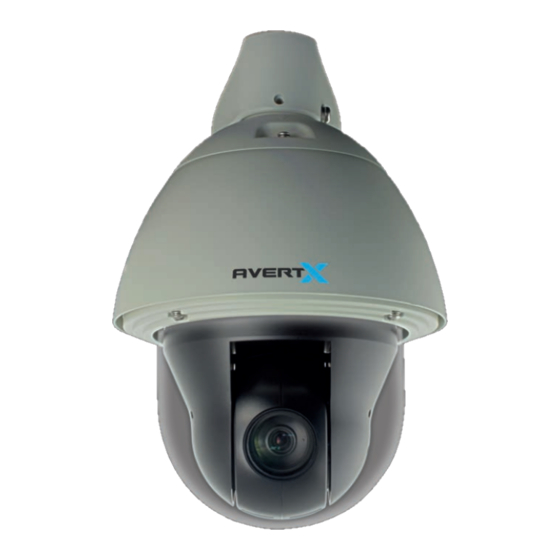
- Page 8 2MP 1080p Video 30x Optical Zoom Lens The HD510 PTZ Camera is capable of providing real time streaming Pan/Tilt/Zoom Control video with smooth image quality. The HD510 offers quad streaming and 360° Endless Rotation can be used in a variety of installations including shops, stores, home, banks, factories and for building surveillance.
- Page 9 Box Contents Camera Overview 33023AA...
- Page 10 Before proceeding, please check that the box contains the items listed here. If any item is missing or has defects, DO NOT install or operate the product and contact your dealer for assistance. Wall Mount HD510 PTZ Camera Safety Strap Cable Gland & Conduit Gland Software &...
- Page 11 Before installing or connecting the dome camera, please refer to this section and complete preparations for dome setup and all switch settings. Mounting Bracket Safety Strap Screw Height: 10.9” (including wall mount bracket) Camera Dome Cover Lens Width: 7.9” 33023AA...
- Page 12 Using the Camera Finder...
- Page 13 The IP Utility software is included on the software CD with your camera. The HD510 PTZ camera is DHCP compatible, meaning it can be assigned an IP address from a DHCP server automatically when connected to the network for the first time. This is ideal for setup that requires an indirect connection between the camera and recorder, usually for network security or installation considerations.
-
Page 14: Connecting To The Camera
Installing the Camera Connecting to the Camera Camera Settings... - Page 15 The HD510 PTZ camera can be mounted in a number of ways. Depending on the situation, you may need to install the mounting solution first before connecting the cables, or the cables may need to be connected before installing the mounting solution. Below are basic installation details for the standard supplied mounting solution.
- Page 16 Network Connection section. If running cables through the wall behind the wall bracket, drill a ½” If cables must be run outdoors, instead of within the wall, the hole in the wall, and then pull all cabling through the upper hole in ideal waterproof protection is running the cables through the wall bracket and connect the cables from the wall to the cables conduit.
- Page 17 Pull the cables through the conduit, and then push the conduit into the lower hole of the wall mount bracket. If running cables outdoors using a waterproof solution such as conduit, pull all cables through the upper hole in the wall bracket, and then back out the lower hole of the wall bracket.
- Page 18 Align the groove in the camera mount tube with the lock on the inside of the upper hole on the wall bracket. Twist the camera mount tube into the wall mount bracket until the camera locks into place. Using the set screw provided, screw the camera mount tube to the wall mount bracket.
- Page 19 Insert the Ethernet cable through the conduit. Then insert the conduit through the clamping nut. Two waterproof cable connection solutions are offered with the HD510 PTZ camera. If the cables run from the ceiling or wall into the camera, then the connection can be considered waterproof. If the camera is...
- Page 20 Attach the gland body to the Ethernet port of the camera. Connect the Ethernet cable to the Ethernet port of the camera. Insert the sealing rubber into the conduit gland body. Camera Ethernet connection Tightly attach the clamping nut to the conduit gland body. Arrange all unused camera cables and wrap them in waterproof tape.
- Page 21 13. Attach the gland body to the Ethernet port of the camera. For waterproof cable using the cable gland, you will need: Cable gland (included) Gland rubber ring (included) Exterior grade Ethernet cable (not included) Waterproof tape (not included) Disassemble the conduit gland.
- Page 22 14. Connect the Ethernet connector to the Ethernet port of the camera. Different applications and installation environments require 15. Insert the sealing rubber into the gland body. different types of waterproof methods that may not be covered in this manual. Check your installation environment and adapt a suitable waterproof mehod.
- Page 23 If it is necessary to reset the camera to the factory default settings, hold down the Reset button (see Camera Overview) for 30 seconds. This will return all settings, including network setup, to the factory default. The IP address of the camera will be reassigned by the router. Your camera includes a microSD card slot (compatible with cards up to 32GB), which can be used for emergency video backup.
-
Page 24: Live View
Live View: displays the live camera view Settings: displays camera configuration functions Type the IP address of the camera in a web browser. --OR-- Streams: show stream 1 or 2 in the live view Use the included IP Utility software and locate the camera on the IP Finder list, then double-click the camera to open the Viewer software in your web browser, or right-click and select Browse. -
Page 25: Home Position
Use the Pan Tilt controls to navigate the camera to the desired position Home Position and then click the Apply button to designate the camera’s current position as the Home Position. Command Protocol Pan & Tilt controls If the camera needs to be used with third party devices, the camera supports Serial Hex Command as a low level PT command set. - Page 26 To create more preset positions, repeat steps 1-4 as needed. To zoom continuously: Select a Speed, with higher numbers representing faster The Go-to-Preset icon will take you to the preset position speeds. once it has been designated. The Delete icon will delete Click and hold the Continuous Zooming buttons for zooming the preset position.
-
Page 27: Ptz Scan Function
The Scan function moves the camera from one predefined point to another by scanning the view horizontally without losing focus. Unlike preset tours, where the camera moves quickly and can focus independently depending on the preset position, scan keeps the entire view in focus and moves at a steady, consistent pace. -
Page 28: Host
Host – define the name of the camera and the preferred interface You can access the camera setup menu using an internet browser on language. your computer. The camera viewer software will install automatically the Date and Time – provides options for adjusting the time and date of the first time you connect to the camera. - Page 29 Host options include the Host Name, Language options, and the Camera Name that will be displayed to identify the channel. Click within the text box you wish to modify. Type the new desired name. Click Apply. SNTP/NTP Server – configure the settings by pulling date and time information from a reliable provider.
-
Page 30: Port Managing
Some settings may require a Save and Reboot after applying the changes in order to activate the changes on the camera. You will be prompted after applying a change if a Save and Reboot is needed. If you wish restrict or allow specific IP addresses from accessing the camera, you can use the IP address filter. - Page 31 SNMP Trap Usage: SNMP trap enables notification from devices. Notifications will be sent on cold start, warm start, and authentication IEEE 802.1X is an IEEE standard for port-based Network Access failure. Control. This requires network port devices to provide verification before being allowed access to a protected network, usually in the form of a username and password.
- Page 32 Universal PlugNPlay is a zero-configuration networking protocol that Network allows you to manage default protocols for your camera. These allows network devices to establish functional network connections for protocols can be enabled or disabled and in some instances, the data sharing and communication. UPnP is responsible for allowing protocol can be given a specific name for easy identification.
-
Page 33: Connection Type
DNS allows the setup of a Domain Name Service for the camera, which will connect to the DNS server when there is a situation requiring a domain name to send data to. The most common application for DNS is the ftp or e-mail server in the Event Handler section. You can establish both a primary and secondary DNS server address. -
Page 34: Camera Options
The default video and audio settings are sufficient in most installation settings. This section provides detail on streaming, video quality, and audio configuration if settings need to be adjusted. Video allows you to modify detailed features of the camera, including Compression, Motion Detection, Day/Night, Image, Exposure/White Balance, and OSD/Privacy Mask. - Page 35 This section allows for the configuration of day/night settings. The disabled. Up to three detection regions can be enabled, each with their AvertX HD510 has three Day/Night Modes: own location, size, and sensitivity. Auto: the camera wil automatically switch between day mode (color) and night mode (black and white) under certain exposure levels.
- Page 36 Choose a position for the OSD to appear. The AvertX HD510 PTZ camera supporst audio features. Type the desired text to appear as the OSD. Audio In: when enabled, incoming audio is activated. When disabled, incoming audio is turned off.
- Page 37 To configure a HTTP server: The AvertX HD510 has an Event Handler, or set of protocols that Enable the HTTP server and choose the proper authentication determine how to deal with IP devices and their response to situations, type.
- Page 38 Your AvertX HD510 camera can send video recording/ snapshots to Check the Active on check boxes for the desired week days the your chosen server upon event. If audio is enabled on the device, the event will be active.
- Page 39 Video Loss: this is available for video servers only. When analog video is lost it will trigger an event. Switch to Night Mode: when the camera changes between day and night modes, an event can be triggered. Device Boot or Reboot: an event can be triggered when the camera boots or reboots.
- Page 40 This information is for viewing purposes and may assist you with camera configuration or maintenance. It is recommended that you log out of your AvertX HD510 PTZ camera when you have finished all of the desired tasks. This will prevent...
- Page 41 33023AA...
- Page 42 Model HD510 PTZ 256 Preset positions, 10 Preset tours 1080p (2MP) Presets Resolution IP66 Alarm Inputs IP Rating Spectrum Vision Wide Dynamic Range Relay Outputs Wide Dynamic Range Pan: 0°-360° endless; Tilt: -20°-200° True Day/Night Tilt/rotation Day / Night 4.3~129 mm...
- Page 43 © 2014 AvertX All rights reserved. No part of this publication may be reproduced by any means without written permission from AvertX. The information in this publication is believed to be accurate in all respects. However, AvertX cannot assume responsibility for any consequences resulting from the use thereof. The information contained herein is subject to change without notice.
Need help?
Do you have a question about the HD510 and is the answer not in the manual?
Questions and answers