Table of Contents
Advertisement
Quick Links
Advertisement
Table of Contents

Related Manuals for avertX HIGH DEFINITION NETWORK DOME CAMERA


Summary of Contents for avertX HIGH DEFINITION NETWORK DOME CAMERA
- Page 1 HIGH DEFINITION NETWORK DOME CAMERA User Manual...
- Page 2 AVERTX be liable for any direct, consequential, incidental, special, punitive, or other damages whatsoever (including without limitation, damages for loss of business profits, business interruption or loss of business information), even if AVERTX has been advised of the possibility of such damages or whether in an action, contract or tort, including negligence.
-
Page 3: Important Safeguards
IMPORTANT SAFEGUARDS Precautions Read Instructions Operating Read all of the safety and operating instructions before using • Before using, make sure power supply and others are properly the product. connected. Retain Instructions • While operating, if any abnormal condition or malfunction is Save these instructions for future reference. - Page 4 REGULATION This device complies with Part 15 of the FCC Rules. Operation is subject to the following two conditions: (1) this device may not cause harmful interference, and (2) this device must accept any interference received, including interference that may cause undesired operation. This symbol on the product or on its packaging indicates that this product shall not be treated as household waste in accordance with Directive 2002/96/EC.
- Page 5 CAUTION...
-
Page 6: Table Of Contents
Dome Diagram ........................................ 10 Dimensions ........................................11 Connections ........................................11 TWO: CAMERA FINDER ..........................................12 AvertX IP Finder ........................................13 Finding IP Cameras ......................................13 Default Username and Password ................................13 Changing the Network Type .................................... 13 THREE: SETUP AND CONFIGURATION ....................................14 Connecting to the Camera ...................................... - Page 7 DDNS ........................................21 Mail........................................... 22 FTP .......................................... 22 Motion Detection ...................................... 23 Storage Management ....................................25 Recording ......................................... 25 Snapshot ........................................26 View Log File ......................................26 View User Information ....................................27 Factory Default ......................................27 Software Upgrade ....................................28 Maintenance ......................................
-
Page 8: Introduction
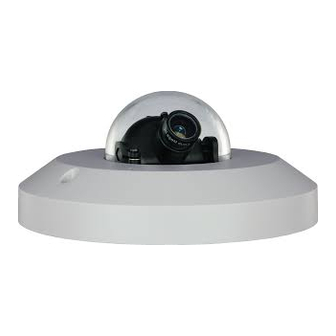
INTRODUCTION OVERVIEW The HD30 High Definition Network Dome Camera capable of providing real time streaming video with smooth image quality. The HD30 offers quad streaming and can be used in a variety of installations including shops, stores, banks, factories and for building surveillance. -
Page 9: One: Getting Started
ONE: GETTING STARTED Box Contents Camera Overview 31498AA... -
Page 10: Box Contents
BOX CONTENTS CAMERA OVERVIEW Before proceeding, please check that the box contains the items listed Before installing or connecting the dome camera, please refer to this here. If any item is missing or has defects, DO NOT install or operate section and complete preparations for dome setup and all switch the product and contact your dealer for assistance. -
Page 11: Dimensions
Dimensions Connections The HD30 uses Power over Ethernet (PoE) to power the camera. The only connection on the camera is the RJ45 Ethernet dongle located on the rear of the camera. Run the Ethernet cable through the Waterproof RJ45 Screw-On Plug. Then connect one end of the Ethernet cable to the RJ45 dongle, tightening the sealing nut of the Waterproof RJ45 Screw-On Plug completely. -
Page 12: Two: Camera Finder
TWO: CAMERA FINDER... -
Page 13: Avertx Ip Finder
Use the included IP Finder software to easily find your network cameras prevent unauthorized access. for initial setup. The AvertX IP Finder software is included on the CD with all AvertX IP devices. Username – Admin Password –... -
Page 14: Three: Setup And Configuration
THREE: SETUP AND CONFIGURATION Connecting to the Camera Viewer Software... -
Page 15: Connecting To The Camera
CONNECTING TO THE Lens Adjustment CAMERA The Viewer software will display an image from the camera on the Home tab. Adjust the camera’s focus to produce a clear image. Locate the camera on the IP Finder list. Double-click the camera to open the Viewer software in your web Remove the screws from the camera dome cover. -
Page 16: Connecting A Stream
AvertX IP cameras are optimized for use with AvertX HDIP recorders, There are some challenges with connecting to AvertX IP cameras over but you can also connect to your AvertX IP cameras using third party WAN (internet) connections because the camera streams video over software like VLC media player (http://www.videolan.org). -
Page 17: Viewer Software
VIEWER SOFTWARE Viewer Tabs Home – Monitor live video. To access the setup menu, you need to install the viewer software on System – Set the host name, system time, root password, and network your PC. The viewer software will install automatically the first time you connect to the camera. -
Page 18: Home
Home System Note The System tab is only accessible by the Administrator. System Screen Size Adjustment – Click the screen size buttons to adjust image display size x1/2 and full screen. Digital Zoom Control – In full screen mode, right-click to activate digital zoom and use the scroll wheel to zoom in/out. -
Page 19: Security
Security Add User The user name and password limited to 16 characters. There is a maximum of twenty user accounts Type the new User name and Password Select the appropriate check boxes to give the user Camera Control, Talk and Listen permissions. I/O access –... -
Page 20: Network
Click Save to confirm the new setting. When using static IP address to log in to the IP Camera, you can access it either through the AvertX IP Finder software or type the IP address directly in the Address bar of your internet browser. -
Page 21: Ddns
DDNS Advanced • RTSP port – The default RTSP port is 554; setting range: DDNS (Dynamic Domain Name Service) is a service that allows a 1024 ~65535. connection to an IP address using a hostname (URL) address instead of • MJPEG over HTTP port –... -
Page 22: Mail
Mail The camera can send an e-mail via Simple Mail Transfer Protocol The camera can send alarm message to a specific File Transfer (SMTP) when motion is detected. SMTP is a protocol for sending e-mail Protocol (FTP) site when motion is detected. You can assign alarm messages between servers. -
Page 23: Motion Detection
Motion Detection When motion detection is activated, the Motion pop-up window will open. Motion Detection allows the camera to detect motion and trigger alarms when the motion level in the detected area exceeds the determined sensitivity threshold value. When motion is detected, the signals will be displayed on the Motion window as shown below. - Page 24 Triggered Action File Name – Enter a file name in the box, ex. image.jpg. The uploaded image’s file name format can be set in this section. Please select the You can specify which actions the camera should take when motion is one that meets your requirements.
-
Page 25: Storage Management
Storage Management Recording The HD30 has an integrated microSD™ card that can be used to record The recording schedule allows you to set up scheduled recording to the video or images. The card slot is compatible with a microSD™ card up microSD™... -
Page 26: Snapshot
Snapshot View Log File Click View Log File to view the system log file. The content of the file The camera supports a JPEG snapshot function. You can specify a storage location for the snapshot images. The default location is: C:\. provides useful information about configuration and connections. -
Page 27: View User Information
View User Information Factory Default The Administrator can view each user’s login information and privileges Use the factory default page to reset the IP Camera to factory default on the View User Information page. settings if necessary. View User Login Information All users for the camera are listed under User information. -
Page 28: Software Upgrade
Software Upgrade Upgrading the Camera Viewer Software Note Make sure the new firmware file is available before starting a software upgrade. Do not change the file name, or the system will not be able to update to the new firmware. Click Browse and select the firmware file. -
Page 29: Maintenance
Maintenance Video and Audio Streaming Settings Export the current configuration of the camera, or import the configuration for a camera. On the Streaming tab, you can configure specific video resolution, video Note compression mode, video protocol and audio transmission mode. Do not import configuration files from different models of cameras. -
Page 30: Video Compression
Video Compression Video Rotate Type You can change the orientation of the video output if necessary. You can select an MJPEG/H.264 compression mode on the video compression page appropriate for your application. You can also select • Normal transmits the image as the camera sees it. to display compression information on the Home page. -
Page 31: Video Ocx Protocol
Video OCX Protocol Frame Rate Control On the Video OCX protocol page, you can select different protocols for Setting the camera to transmit fewer frames can save bandwidth. Use streaming media over the network. In the case of multicast networking, the Frame Rate Control to adjust the camera’s frame settings if you can select the Multicast mode. -
Page 32: Video Mask
Video Mask Camera You can use the video mask page to define a privacy mask to keep users from viewing parts of the image. Exposure The exposure is the amount of light received by the image sensor and is determined by the width of lens diaphragm opening (iris adjustment), the amount of exposure by the sensor (shutter speed) and other exposure parameters. -
Page 33: White Balance
White Balance Contrast A camera needs to find reference color temperature, which is a way of Correct the contrast of the entire image by adjusting the Contrast level, measuring the quality of a light source, for calculating all the other ranging from -6 ~ +19. -
Page 34: Four: Specifications
FOUR: SPECIFICATIONS... -
Page 35: Camera Specifications
CAMERA SPECIFICATIONS Operating Temperature 14˚F ~ 122˚F (-10˚C ~ 50˚C) Image Sensor 1 / 2.7” CMOS Heater IP Rating IP66 Power Consumption 3.5W Type / Format H.264 / MJPEG Rated Amperage 0.073A Wide Dynamic Range Digital Wide Dynamic Range Input Voltage PoE Only Minimum Illumination 0.6 Lux @ 50IRE;... - Page 36 © 2012 AvertX All rights reserved. No part of this publication may be reproduced by any means without written permission from AvertX. The information in this publication is believed to be accurate in all respects. However, AvertX cannot assume responsibility for any consequences resulting from the use thereof. The information contained herein is subject to change without notice.
Need help?
Do you have a question about the HIGH DEFINITION NETWORK DOME CAMERA and is the answer not in the manual?
Questions and answers