Table of Contents
Advertisement
Advertisement
Table of Contents

Subscribe to Our Youtube Channel
Related Manuals for DETEWE opencom 105


Summary of Contents for DETEWE opencom 105
- Page 1 OpenCom OpenCom 105, 107, 110, 120: Mounting and Commissioning User Guide...
- Page 2 Welcome to DeTeWe OpenCom 100 Product Family Thank you for choosing this DeTeWe product. Our product meets the This manual applies to the strictest requirements with regard to OpenCom 100 product family, to quality and design. which the OpenCom 105,...
-
Page 3: Table Of Contents
OpenCom 107 ....18 Mounting the OpenCom 110/ OpenCom 105 ....19 120 Rack InfoCom System OpenCom 110 . - Page 4 Configuration under Windows 48 OpenCom 100 in a LAN Connection on Serial Port (V.24) . . 49 with an IP-enabled Server Notes on Configuring the DNS Name Resolution ...67 Serial Port....50 Internet Access .
- Page 5 Call Queue Browser for OpenCTI Synchronising the PC Clock Introduction Activation of Queues ... 92 Address Queries using LDAP 108 Call Forwarding ....92 USB DECT Box on the Pickup .
-
Page 7: Features
OpenPhone 52, to an ISDN basic access using the DSS1 protocol. System access (point- DeTeWe RFP 21 base stations, ■ to-point) and multi-terminal access (point-to-multipoint) are both sup- DECT handsets (in an RFP 21 ■... - Page 8 Configuration and programming of equipment. The DSS1 protocol is im- the OpenCom 100 is performed by plemented. means of a special Web browser (known as the “Web console”), Packet data in the D channel which can be run on a connected PC. Some business applications, for in- stance POS terminals, cash registers The OpenCom 100 can also be con-...
- Page 9 OpenCom 100 (only national setting cess the Internet. These PCs can “Germany”). If Internet access is al- make full use of all the Internet and ready available from an Internet e-mail features of the OpenCom 100. service provider, this can be config- ured in the OpenCom 100.
- Page 10 documentation of the E-mail OpenCom 100. The OpenCom 100 has an integrated e-mail function that is able to use the POP3, APOP or IMAP4 protocols to check the Internet service pro- vider for incoming mail. A mail ac- count query can be configured for every member of staff (OpenCom 100 user).
- Page 11 functions and the call-queuing func- tion. You can also connect two OpenCom 100s. This cascading of telecom systems is a simple way to increase the number of terminals that can be connected. As your company’s requirements grow, the OpenCom 100 can be net- worked with other telecom systems.
-
Page 12: Factory Settings On Delivery
Factory Settings on Delivery The following basic settings and fea- quirements before putting it into tures are active on delivery. We rec- operation (see Configuration starting ommend that you configure the on page 45). OpenCom 100 to your individual re- Telephony Functions OpenCom 107/105 The S... -
Page 13: Authorisations
The four a/b ports are config- Analogue devices: The dialling ■ ■ ured for analogue devices with mode (pulse dialling or DTMF) is the call numbers 10 to 13. automatically detected. All cord-bound terminals con- ■ All OpenCom 100 nected ring when there are in- Communication Systems coming external calls. - Page 14 Announcements to system tele- Call forwarding on no reply is ex- ■ phones are possible. ecuted after 20 seconds. Door- way calls can be forwarded. Baby calls can be set up. ■ It is possible to transfer an exter- ■ If a call key is configured for a nal call to an external subscriber.
-
Page 15: Internet Functions
The door opener can be acti- Every user can create a personal ■ ■ vated from all terminals. Door- telephone book and edit entries way calls can be forwarded. in the central telephone book. Keypad dialling can be used. Every user can read out the ■... - Page 16 Gateway address: To generate the activation key for ■ 192.168.99.254 the IP package of the OpenCom 105, no TAD is required. Domain name: domain The serial number is all you need. ■ You have therefore not received a Domain name server: separate licence confirmation.
-
Page 17: Installation
One OpenPhone 21, 25 quick ■ user guide One OpenCom 100 communica- ■ tions system (OpenCom 107, One CD ■ OpenCom 105, OpenCom 110 or OpenCom 120) Two connection cable for the ■ ISDN S port One V.24 connection cable ■... -
Page 18: Safety Precautions
Safety Precautions CAUTION! The CE symbol on the product con- firms that it meets the technical guidelines on user safety and elec- tromagnetic compatibility valid at the time of approval. Static charges can damage the Please note: Installation and OpenCom 100. Make sure you dis- maintenance should only be per- charge yourself and your tools be- formed by specially trained person-... -
Page 19: Declarations Of Conformity
Declarations of Conformity The OpenCom 107, OpenCom 105, The Declaration of Conformity can OpenCom 110 and OpenCom 120 be viewed at the DeTeWe Web site at systems conform to the require- http://www.detewe.de. ments set down in the EU directive 99/5/EC. -
Page 20: Wall Mounting
Wall Mounting The OpenCom 100 is mounted on To fasten the screws at points B and the wall with three screws as shown C, remove the cover of the in this diagram: OpenCom 100 and insert the screws in the holes provided for this pur- pose. -
Page 21: Opencom 105
(S 4). S 4 can also be wired externally (as a master) when networking two OpenCom 105 OpenCom 100 communications systems in a Q.SIG trunk (also re- Four analogue a/b ports, de- fer to PBX Networking starting ■... -
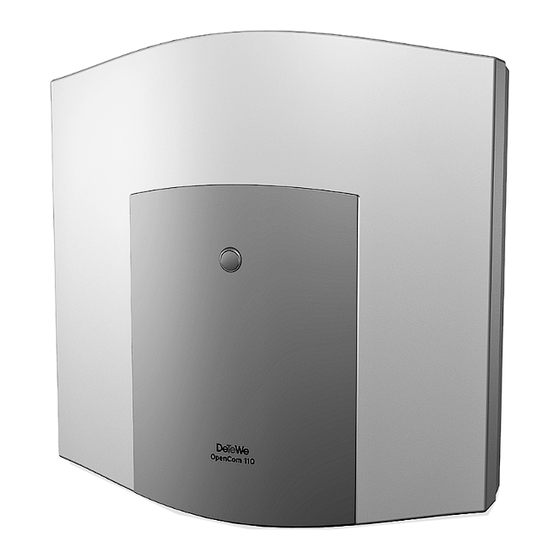
Page 22: Opencom 110
OpenCom 110 OpenCom 100 communications systems in a Q.SIG trunk (also re- Four analogue a/b ports, de- fer to PBX Networking starting ■ signed as pressure terminals (a/ on page 73). b1 to a/b4) Eight U ports, designed as ■ Two actor ports for connection pressure terminals (U 1 to... -
Page 23: Opencom 120
One PCM port for the connection ■ of two systems, designed as an RJ45 socket (PCM) Six switchable S ports, which ■ can be connected to either an internal or an external S bus. The internal port is designed as a pressure terminal, the external one as an RJ45 socket 18 U... -
Page 24: Positions Of The Ports
Position of ports on the OpenCom 107 Intercom/Relay Default setting Intercom/Door opener Actuator Sensor 1 + 2 Position of ports on the OpenCom 105 Sync Sensor Default setting Intercom/Door opener Intercom/Relay Actuator 1 + 2 Position of ports on the OpenCom 110... -
Page 25: Opencom 107
LAN 1 LAN 2 Intercom/Door opener Intercom/ Sync Sensor Default setting Relay 11/12 13/14 15/16 9/10 17/18 Actuator 1 + 2 Position of ports on the OpenCom 120 Port Assignment, Termination, Cable Lengths Ports In the case of the OpenCom 107/ 105, the S buses are terminated by Whether you use the switchable... -
Page 26: U Pn Ports
Ports OpenCom 110 OpenCom 120 Each of the U ports enable the connection of an RFP 21/23 DECT base station or an OpenPhone 61, 63 or 65 telephone using a twin-wire cable. The S bus is terminated at one end by the OpenCom 100;... -
Page 27: Actor/Sensor
LAN Port of the Ports starting on page 22 must be open in order to isolate the low frequency voltage from the supply The LAN port (OpenCom 120: LAN 1 (see also the following section enti- port) enables integration of the tled Actor/Sensor on page 25). -
Page 28: Pcm Port
OpenCom DSL & Uk Splitter TCP/IP & PPPoE NTBA Crosslinked twisted pair cable TCP/IP PPPoE Modem Connecting the OpenCom 100 to the network via ISDN and DSL Basic Setting Switch Connection of the DSL modem is via a crossover twisted-pair line. You can also use a switchable port on the Using the basic setting switch, it is hub, which is usually indicated by an... -
Page 29: Power Failure
In the event of a power failure, all On the multi-terminal access, the the contents in the memory (pro- OpenCom 105, the OpenCom 110 gram and user data) are saved with- and the OpenCom 120 include an out change. The internal clock con- emergency service. -
Page 30: Internal/External S Ports
Internal/External Ports Ports A system terminal can be connected The S ports to every U port by a twin-wire ca- ble. The OpenPhone 61, OpenPhone 2 and S 3 (OpenCom 107/105) 63 and OpenPhone 65 are cord- ■ bound system terminals. The Open- 3 and S 4 (OpenCom 110) Phones 63 and 65 can be cascaded... -
Page 31: A/B Ports
a/b Ports Modems The maximum transmission rate for The a/b ports a/b1 to a/b4 can be analogue modems is 33.6 kbit/s used for connecting analogue termi- (V.34+). nals. These can be for voice or data communication, and use DTMF or Music on Hold pulse dialling, e.g. - Page 32 Intercom System (for a/b) The “Doorline” intercom system ■ The intercom systems “DoorLine can be connected to any a/b T01/02” and “DoorLine T03/04” of port. However, you can use only the german Telekom’s division one “Doorline” with the T-Com can be connected via the OpenCom 100.
-
Page 33: Actor/Sensor Ports
Actor/Sensor Ports For the assignment of the ports, re- fer to the section Available Ports starting on page 18. The OpenCom 100 also functions to- gether with a Freehand Entry-Phone manufactured by Siedle or Behnke. PVG 402-0 a/b1 Amplifier Relay Actor2 Siedle Actor1... -
Page 34: Com Port
IP router for ac- cessing the Internet. The OpenCom 120 has a second LAN port for cascading your telecom sys- tem with another OpenCom 105, OpenCom 110 or OpenCom 120 (see PBX Cascading starting on page 73). Connectible Devices... -
Page 35: Accessories And Adapters
Accessories and Adapters Note: An extra plug-in power sup- The OpenPhone 63 and OpenPhone 65 system telephones ply is required to operate combina- have one or two slots on the rear for tions of equipment with a power con- various adapters and other accesso- sumption that exceeds the power ries. -
Page 36: Audio Adapter
Audio Adapter Weight: 70g Dimensions: 73 x 60 x 30 mm The audio adapter is an adapter ex- Power consumption: max. 260 mW tension with four different ports for (with relay active). external audio and signalling de- vices. Audio Adapter Pin Assignment Port Used for Socket... - Page 37 Electrical Data of Ports Port Connection Values Microphone, Electret microphone microphone of second handset, Typical sensitivity: 10 mV/Pa headset microphone Power feed: I < 300 µA at 1.5 V Ear cap, Typical impedance: 150 ± 30 ohms loudspeaker of second handset, Typical sensitivity: 94 dB/1 mW headset, headset loudspeaker (0 dB = 20 µPa)
-
Page 38: Approved Devices / Approved Accessories
GN-Netcom, Profile 3-in-1 (1866-00-04) Headset adapter cable: GN Netcom, QD cable (quick coupling), smooth, Mod 4 (8800-00-01) Second handset Siemens, L30351-F600-A366 Handset DeTeWe, OpenPhone 60 Microphone: Winfinity, 4511326 / H 282-18 Loudspeaker: Siemens, L30460-X1278-X Recording device: No recommendation Accessories and Adapters... -
Page 39: Device Combinations
Device Combinations These symbols are used in the fol- lowing tables: You can use the following power val- ues to calculate the power consump- This combination is possible. ● tion of combined equipment: Reduced tone ringing, open listen- ❍ ing and hands-free talking volume adapter: 195 mW possible. - Page 40 Basic Unit: OpenPhone 65 Add-ons Second Terminal Power Audio adapter U adapter Up to 3 keypad modules – – – – 1140 mW ● – – – 1470 mW ● ● – – 1730 mW ● – – OpenPhone 61 2335 mW ●...
- Page 41 Configurations with Plug-in Power Supplies The following table shows examples of equipment combinations operat- ing with additional power from a plug-in power supply. Basic Unit: OpenPhone 63 Add-ons: Second terminal Up to 3 Audio adapter OpenPhone 61 OpenPhone 63 OpenPhone 65 keypad adapter without...
-
Page 42: S 2M Connector Module
Connector Module Note: The maximum cable attenu- The S connector module allows you to operate an OpenCom 120 on ation between the OpenCom 120 and a primary rate access. This access the other system (NT or telephone ex- provides up to 30 voice channels. change) must not exceed 6 dB. - Page 43 LEDs slot (Underside of the module board) Removing the module cover 4. On the module board, remove the protective covers of the two Position of the LEDs on the slots (3) and (4). module 6. Replace the module cover. To do this, insert the locking hooks at the lower end of the cover into the recesses on the connection...
-
Page 44: Configuration
11. Pull out the mains plug of the PBX 1, S OpenCom 120 again and close the housing. Rx+ Rx- Tx+ Tx- 12. Reconnect the OpenCom 120 to the power supply. Rx+ Rx- Tx+ Tx- PBX 2, S Configuration (Pressure clamps) Example of the wiring of the S2M port The menu item S appears in the... -
Page 45: Mounting The Opencom 110
Mounting the OpenCom 110/ 120 Rack InfoCom System Safety Precautions Technical Data The system needs to be mounted in (only if different from the earthed cabinets or cases. Lines and OpenCom 110/120) cables connected to the system must only be laid inside buildings. Dimensions: –... -
Page 46: Pinning Of Rj 45 Jacks
CD-ROM. not switched on. Note: Note for the DeTeWe in- The internal S bus is terminated staller: Please download and install ■... -
Page 47: Configuration
Web console, which can be the Configurator, a special software run on any PC connected to the application integrated into the sys- OpenCom 100. The OpenCom 105 Web console Using the Web console, you can: access the OpenCom 100 tele- ■ phone book. -
Page 48: Brief Guide To Initial Configuration
Note: This chapter describes initial via the Ethernet port. A COM port can also be used. The TCP/IP network configuration of the OpenCom 100. protocol is used to set up a connec- For day-to-day operation you can in- tion via one of these ports. You can tegrate the OpenCom 100 into a LAN then open the Web console of the and start the Configurator from any... -
Page 49: System Requirements
Microsoft Windows 2000/XP or (RS-232, V.24) and a serial cable Microsoft Windows NT 4.0 oper- (SUBD9). For configuration of ating system the OpenCom 105, use the adapter cable supplied for con- Microsoft Internet Explorer ver- necting RS-232 to RJ-45. ■... -
Page 50: Configuration Under Windows
service PC (is included on the Software: network card driver ■ and TCP/IP protocol software For connection by network card you For connection on an S port you need: need: Hardware: network card with Hardware: (passive) ISDN card ■ ■ 10BaseT port and RJ-45 network cable (crossover twisted pairs or Software: ISDN card driver, RAS... -
Page 51: Connection On Serial Port (V.24)
Use the V.24 serial connector ca- dows 2000/XP you must log on as an ble supplied with the administrator. OpenCom 100 (for the OpenCom 105 use the adapter 1. Insert the system CD supplied cable for connecting RS-232 to along with the OpenCom 100. RJ-45). -
Page 52: Notes On Configuring The Serial Port
with Testing the Setup starting lowing section is only relevant for us- on page 52. ers of old Windows versions. Note: It is not possible to operate a Installing the RAS Network under network card and a remote data Windows 95 or Windows 98 transfer connection for the same net- work address range simultaneously. -
Page 53: Connection By Network Card
Note: If you have installed an oper- or DNS entries must be deacti- ating system update earlier (Service vated. Pack), install this again after installa- Note: Changes to the Gateway and tion of the RAS. the DNS configuration are made by DHCP. -
Page 54: Connection Via The S Port
“winipcfg” in the “Open” box. Con- follows: firm this with “OK”. Select the net- work adapter used for connection to – OpenCom 105: S 3 and S the OpenCom 100. The IP addresses assigned by the OpenCom 100 on es- –... -
Page 55: Configuration For Linux And Macos
If the PC has been operating in a net- municator, you select the command work or used for Internet access, it is “Edit > Settings” and then select the possible that access may be config- section “Extended > Proxies” under ured indirect via a proxy server. -
Page 56: Configuring The Opencom 100
Configuring the OpenCom 100 Preparing the Starting the Web Console Configuration 1. Start your Web browser. Enter Before starting with the configura- the OpenCom 100 IP address in tion, make sure you have the follow- the “Address” box: ing documents at hand: http://192.168.99.254/. - Page 57 OpenCom 105: log-on dialogue box 3. To commence configuration, you must first log on. For the initial configuration, enter your: - user name: “Administrator” - password: for the initial config- uration, leave this box blank. 4. Confirm this by clicking on OK.
-
Page 58: Loading The Online Help
OpenCom 105: dialogue box for initial access Loading the Online Help 5. The software opens a dialogue for initial access. Determine an administrator password and en- The online help can now be loaded ter it in this dialogue. in the Configurator: 6. -
Page 59: Finishing The Configuration
Preconfiguration data call from one of the entered MSNs is registered. Configuration of the OpenCom 100 can be prepared at your DeTeWe The customer service centre/author- Customer Service Centre or by an au- ised dealer can then log into the thorised DeTeWe dealer. -
Page 60: Codes For Ip Configuration
Use the following code digit proce- tion: Firmware menu in the Config- dure on a standard terminal or a sys- urator). tem telephone to activate internal remote maintenance access for the For security reasons, settings in the service centre/authorised dealer: Configurator, Net Configuration should only be edited on site to Remote configuration on (log-on... -
Page 61: Saving And Loading The Configuration
Loading SW Updates Set IP address H * 1 8 2 Z (system PIN) New versions of the system and ter- (www) (xxx) minal software can be loaded to the (yyy) (zzz) system. Set NET mask New software versions of the H * 1 8 3 Z (system PIN) OpenCom 100 are loaded from the... -
Page 62: Resetting The System Data
3. Press the basic settings switch. regularly, the best time being after every change. For details, refer to the – OpenCom 105: The basic set- chapter entitled Saving and Loading tings switch is a key switch. You the Configuration starting on page 59 press the basic settings switch and to the Web console online help. -
Page 63: Generating Your Own Moh Files
– OpenCom 105: Release the ba- If you have a Windows operating sic settings switch. system, you can use the “Sound Re- corder” program to generate your – OpenCom 110/120: Open the own MoH file. This program is usu- hook switch. -
Page 64: Configuration Examples
Configuration Examples OpenCom 100 in Computer Networks One of the outstanding features of company telephone book (if the the OpenCom 100 is the integration multi-company variant is acti- of telephony and computer net- vated). works. Connect the OpenCom 100 via a computer network (LAN) with In addition, the OpenCom 100 can suitably configured workstations, be used as an Internet access server. -
Page 65: Introduction To Tcp/Ip
Introduction to TCP/IP In a single LAN it is possible to use network mask, the connection is es- various protocols for the transmis- tablished via the default gateway. If sion of data. The connection be- a device knows several data routes tween a workstation computer and to different intermediate stations, the OpenCom 100 runs via the TCP/... -
Page 66: Opencom 100 In A Serverless Lan
OpenCom 100 in a Serverless LAN In a peer-to-peer network, the work- OpenCom (DNS) (DHCP, RAS, stations are connected to one an- int. DNS, Internet) other via network cables. In many networks, the cables run in the form of a star from a central hub. Such networks do not require special servers. -
Page 67: Dns Name Resolution
Install the TCP/IP network protocol workstations. When you want to see and a Web browser for every work- a Web page, you simply type the URL station which is to have access to the (uniform resource locator; Internet OpenCom 100 network features. address;... -
Page 68: Ras Access
RAS Access vironment. NetBIOS can use Net- BEUI, IPX/SPX or TCP/IP as the trans- You can establish a connection from port protocol. In the network an external computer with an ISDN environment, you can only access card to the OpenCom 100. The nec- files and printers on workstations us- essary TCP/IP settings are transmit- ing TCP/IP for NetBIOS. -
Page 69: Dns Name Resolution
DHCP for all workstations. On start- specific IP address. You will find de- ing, the OpenCom 100 requests TCP/ tails in the server documentation. IP settings via DHCP. If this request is responded to, the OpenCom 100 Internet Access uses the TCP/IP settings received. You can then use a workstation to access the OpenCom 100 Configura- You can also use the OpenCom 100... -
Page 70: Ras Access
count and the same password for OpenCom Server (DNS) (Internet) (DHCP, RAS, the network log-in, you have to en- int. DNS) ter this combination only once when dialling in. OpenCom Server (DNS) (RAS, Internet) (DHCP, Ext. PC 1 PC 2 int. -
Page 71: Lan-To-Lan Link
LAN-to-LAN Link You can use the OpenCom 100 to in- different IP address ranges (subnet- terlink two LANs via ISDN. To do this, works). For at least one of the you configure two OpenCom 100 OpenCom 100 systems, change the systems so that they can dial in to prescribed address range for the each other. -
Page 72: Useful Information On Internet Access
Useful Information on Internet Access Costs Using the Web The OpenCom 100 uses a router A Web browser not only enables you function to access the Internet, to use the OpenCom 100 Configura- which means that it automatically tor from every workstation but also establishes an Internet connection to obtain a wealth of information when required and terminates the... -
Page 73: E-Mail
E-mail One of the most important services Network address translation (NAT) is in the Internet is e-mail. E-mails are activated on accessing the Internet buffered in individual e-mail ac- (ISP). You require this feature in or- counts on a mail server. Mail servers der to translate internal IP addresses are operated by ISPs for example. - Page 74 The protocol will function with- ■ out TCP/UDP port numbers, e.g. ICMP or IGMP. The OpenCom 100 NAT has suitable processes for ensuring the functions of many important protocols af- fected by these rules. These are the protocols FTP (in “active” mode), Cu- SeeMe (“videoconferencing”), IRC (“chat”), ICMP errors (“traceroute”) and ICMP echo (“ping”).
-
Page 75: Pbx Networking
The two PBXs essentially function Master PBX Slave PBX OpenCom 120 OpenCom 105, OpenCom 110, OpenCom 120 Functionality of PBX Note: The OpenCom 107 is not Cascading equipped with a PCM port. For this reason, PBX cascading is not possible with this PBX. -
Page 76: Putting A Cascaded Pbx Into Operation
Note: There are two versions of the an older PBX as the slave system, you must first load system software for it OpenCom 105. If you select the ap- (version 3.0 or higher). propriate entry under Type, the corre- sponding module version will be dis- 2. -
Page 77: Notes
The master system then initial- The S ports of the slave system ■ ises the slave system. This may can also be used for trunk lines involve transfer of firmware (op- or for PBX networking (see PBX erating software) from the mas- Networking starting on ter system to the slave system. -
Page 78: Pbx Networking
PBX Networking In Release 3 of the system software, cases. For this purpose, assign the OpenCom 100 provides all the fea- preconfigured trunk groups Multi- tures necessary for PBX networking. terminal access or System access to You need PBX networking in the fol- the ports. - Page 79 Protocol: Q.SIG or DSS1 bly configured. If one PBX is the pro- The Q.SIG protocol, designed for tocol master for a layer, the other ISDN point-to-point connections, is PBX must be the protocol slave for the preferable choice as the trans- this same layer.
-
Page 80: Types Of Point-To-Point
L1 sync possible has been activated, Direct Connection then one of the ports is automati- This type of point-to-point connec- cally defined as the L1 clock source. tion joins the two systems directly to The OpenCom 100 will automatically each other using a crossover switch the clock source to another twisted-pair cable. -
Page 81: Configuration
Connection via an Active PBX 1 PBX 2 Public L1 slave L1 slave network Transmission System L2 slave L2 slave L3 master L3 slave L1 master For distances exceeding the range of L2 master a direct connection, an active trans- Point-to-point connection via a pub- mission system can increase the lic network... - Page 82 One S point-to-point connec- sary for this can be configured ■ tion to PBX 3 which is assigned with the route. to the “E” trunk group. The user does not get a busy sig- ■ Note: A line or a trunk group can- nal until the attempt to set up not be seized directly.
-
Page 83: Technical Details
Technical Details number dialled. The information needed for routing a call can be con- figured in a numbering table con- A different PBX number must be set taining up to 100 entries. You use for each OpenCom 100 in a PBX net- this table to assign telephone num- work. - Page 84 S ports can be set according call number at incoming internal to the following table. setting to “5” for this bundle in order to enable the route to be reseized. OpenCom 105 – – – OpenCom 110 – –...
-
Page 85: Licensing Information
OpenVoice. DeTeWe licence server (http://lizenz.detewe.de). The following information is for cus- The licensing confirmation for the tomers who have already obtained... -
Page 86: Team Functions
Team Functions Introduction With the team functions you can manage your telephone communi- Number of available call-keys cation tasks by assigning lines with separate call numbers to the keys of Telephone Number of keys different terminals. The terminal us- OpenPhone 61 One key with a dis- ers, or team members, can thus pick play, five keys with-... - Page 87 aging calls. For example, you can Direct call key: Only outgoing ■ configure call protection if you calls can be made with a direct do not want to be disturbed, or call key; they are signalled to all call diversion to another tele- terminals with the same number phone.
-
Page 88: Team Configuration
Team Configuration showing the status of the indi- vidual users. The attendant ter- minal sees the status of the us- You can create teams and program ers and can put calls through by call keys in the Configurator of the simply pressing the key. -
Page 89: Three-Member Team
addition, a private line is configured Calls for the other team member’s for both of the executive’s tele- call number are indicated by an opti- phones (trunk key TrK 12: private). cal signal on one’s own telephone (flashing trunk key LED). Call numbers 11 and 10 are both configured as a trunk key on the ex- The parallel telephone will indicate... -
Page 90: Unified Team
call keys programmed as trunk and Line Busy Indication team keys. If a line is busy, e.g. TrK 11 Johnson, the team keys 11 on Miller’s and Smith’s telephones will indicate this. Miller TrK 10: Miller TK 11: Johnson Call Signalling TK 12: Smith In this example, calls via the trunk keys are signalled acoustically. -
Page 91: Toggle Team
Line Seizure Each team member has one Call numbers 10, 11 and 12 are pro- OpenPhone 65 with all call keys pro- grammed as trunk keys on each grammed as trunk and team keys. team member’s telephone (TrK 10 to TrK 12. Miller 14:22 Mi.14.Feb.01... - Page 92 phone, e.g. TrK 10 and TrK 15 on Miller’s telephone as TK 10 and TK 15 on Johnson’s telephone. The as- sumption here is that most calls will go to the respective first call num- bers, and team members can thus help each other out by answering one another’s calls.
-
Page 93: Call Queue
Call Queue Introduction A queue can be activated for the tel- on the telephone, the total number ephone numbers of any type of tele- of entries are displayed. phone, i.e. for system, analogue, ISDN and DECT telephones. Calls in a queue are handled by the OpenCom 100 in the following order If a call number with a queue is busy, of priority: instant connection, sen-... -
Page 94: Activation Of Queues
Queues can be combined with the During the configuration of this type “forwarding,” “pickup” and “hunt of call forwarding, the contents of group” functions, for example, in or- the queue are not transferred to the der to configure an attendant termi- target terminal. -
Page 95: Examples Of Use
Examples of Use Attendant Terminal for an under User Manager: User Operator with Two groups. Activate “Call queue”, System Telephones “Call waiting protection” and “Call forwarding” for this group The operator switches all incoming and set the Dial out: External calls and can either work on the option appropriately. -
Page 96: Terminals
how many calls there are in the Configuration queue. Configure the system access or ■ If the operator wants to leave the access for multiple terminals un- workstation and take along the at- der PBX Configuration: Ports: tendant terminal, call forwarding to the OpenPhone 25/27 is activated by pressing a function key. - Page 97 Note: The last attendant terminal tors”. Allocate each user the telephone number of the trunk remaining in the hunt group should key of their system telephone. not sign off, so that incoming calls can always be signalled to at least Activate Call wait.
-
Page 98: Multi-Company Variant
Multi-Company Variant Communications systems are fre- Each available trunk group is ■ quently shared by several compa- uniquely assigned to a company nies. These companies want to so that incoming external calls jointly use the existing infrastructure can be transferred to the correct (e.g. -
Page 99: Configuring The Multi-Company Variant
Configuring the Multi-Company Variant The multi-company variant can be 5. In the case of outgoing external commissioned and configured by calls, the lines via which the the system administrator of the members of a company can OpenCom 100 without any major ef- make a call must be defined (see fort. -
Page 100: Companies
or in the PBX Configuration: The name of the default com- ■ Trunks menu. pany can be changed, but the default company itself cannot be deleted. Configuring and Managing Companies Assigning Users Up to five companies can be config- ured in the OpenCom 100. By de- For each user you must define the fault, one company with the name company to which they belong. -
Page 101: Assigning Trunk Groups
Assigning Trunk Groups Allocating Routing Codes Connections of the same type and in Routes are used for automatic and the same direction are arranged in a selective seizure of trunk groups or trunk group (e.g. S multi-terminal connections for external calls. It is connections). -
Page 102: Working With The Multi-Company Variant
A company exchange is set up in the PBX Configuration: System: Opera- tor menu. In this menu, you can specify an internal telephone number for each company and time group which then represents the ex- change for this company. Working with the Multi-Company Variant All the features of the OpenCom 100 The company telephone book is a... -
Page 103: Companies
phone books. This authorisation is useful if members of this group - e.g. the “Administrators” - service the entire system. Foreign telephone books can only be edited in the Con- figurator in the Phone Book menu. The number of entries in a company telephone book is unrestricted. -
Page 104: Configuring The Pc Software
Configuring the PC Software Further possibilities of use can be If your PC is suitably configured, implemented on a workstation PC the CD will start automatically. with the Windows operating system Otherwise select “Run” from the by installing drivers and programs. Start menu. - Page 105 Installing the TAPI Driver connection. In the “Connection name” box you can enter a de- 1. Call up the start mask from the scriptive name for the connec- system CD (see Configuring the tion. In the “CTI server” box you PC Software on page 102).
-
Page 106: Setting Up Net Capi
use the CTI application. Under 4. The number you entered is dis- Windows 2000/XP you select the played on the selected system item “Options” from the “Edit” telephone. Lift the receiver to menu. In the “Lines” tab you start dialling. then select the system tele- Note: If the “Phone Dialer”... -
Page 107: Using The Systray Display
1. Go to the Configurator, NET figurator, PBX Configuration: Configuration: Connections: Call Distribution menu). CAPI menu. Click on Change. 5. After installing the NET CAPI 2. Activate the Status check box. driver, you will find an extra icon Enter at least one unassigned, on the right side of the Windows internal number in the boxes Start bar. -
Page 108: Browser For Opencti
Installing the systray display 4. If you activate the Autostart check box, you will see the 1. Call up the start mask of the sys- systray display even after re- tem CD (see Configuring the PC starting your PC. Software on page 102). 5. -
Page 109: Synchronising The Pc Clock
After installing the browser, there is gram. To view this, click the top left a new menu entry in the Windows corner of the program window on start menu under Programs: the system menu icon or on the icon OpenCTI Browser. in the information area of the task bar. -
Page 110: Address Queries Using Ldap
service starts, the PC clock is SNTP with Windows XP synchronised with the time of Here you configure the SNTP server the OpenCom 100. by double-clicking on the time in the Start bar. Enter the OpenCom 100 as Please note: In a Windows do- the “server”... -
Page 111: Opencom 100
Note: Up-to-date information on figurator (menu PBX Configu- the USB DECT Box can be found at ration: Ports: DECT-PP) and as- http://www.detewe.de/. sign a telephone number for the data port. Installation and 5. Check the USB DECT Box in. Fur-... -
Page 112: The Opencom 100
Tip: We recommend that you cre- Box” manual. Do not enter the ate the Internet access indirectly via provider data, though. Instead, the RAS access of the OpenCom 100. use the internal number of the RAS access and the user name If you wish to use the USB Box to dial and password of the up an Internet provider directly, fol-... -
Page 113: Configuration Guide
Configuration Guide The Configuration Guide contains a Configuring LAN-to-LAN Set- ■ series of flowcharts that will help tings: This chart guides you you to plan the configuration of the through the configuration of the OpenCom 100 and guide you LAN-to-LAN settings. through the necessary settings step by step, focusing on the network set- Configuring E-Mail: This dia-... -
Page 114: Overview
Overview Ethernet network (LAN) exists? Cross-connected ethernet cable available? Connect the configuration PC to Connect the configuration PC to Connect the OpenCom 100 and the the OpenCom 100 COM port. the OpenCom 100 LAN port. configuration PC to the network Generate the Dialup Networking Enable DHCP. -
Page 115: Pbx Ports
PBX Ports Set the access type (multiterminal Define the access type access and/or system access). Set the external S interfaces and Define the external enter the telephone numbers interfaces assigned by your network provider. Do you have ISDN terminals Set the internal S interfaces Define the internal S that you wish to operate on... -
Page 116: Easy Access
Easy Access Do you have a computer network? Finished Assign a name to Host name the OpenCom 100. The OpenCom 100 Do you have a DHCP DHCP takes the settings from server in your network? your DHCP server Ask your network administrator for the Activate the OpenCom 100 OpenCom 100 address range for the RAS accesses. -
Page 117: Isp Settings
ISP Settings Do you want to configure Select a provider from Your own ISP a new Internet provider? the list “SYS Configuration: System: Select one of the Country” = “German”? default providers in “NET Configuration: Enter your provider's Connections: ISP”. T-Online dial-in data. -
Page 118: Ras Settings
RAS Settings Have you made the network settings for the OpenCom 100? NET Configuration: Configure the network settings Easy Access for the OpenCom 100. Configure the RAS access of the OpenCom 100. “NET Configuration: Connections: RAS” Status Activate the RAS access. Specify the telephone number for which Telephone number the RAS access should be configured. -
Page 119: Lan-To-Lan Settings
LAN-to-LAN Settings Have you made the network settings for the OpenCom 100? NET Configuration: Configure the network settings Easy Access for the OpenCom 100. Configure the LAN-LAN connection. “NET Configuration: Protocol Select between PPP and HDLC transparent. Connections: LAN-LAN” Telephone number local Enter the internal telephone number. -
Page 120: E-Mail Function
E-mail Function Have you made the network settings for the OpenCom 100? Configure the network settings NET Configuration: for the OpenCom 100. Easy Access Do you want to use e-mail Internet from the Internet? NET Configuration: Configure your Internet access. Connection: ISP Has an internal e-mail server been configured in your LAN? -
Page 121: E-Mail Access
E-mail Access Do you have access to a mail server Mail server in your network or in the Internet? Configure your network/ NET Configuration: Easy Access Internet access. or Configure ISP Do you have created mail account polls User accounts in the “User Manager: User accounts”? Set up user accounts in User Manager: User Accounts... -
Page 122: Frequently Asked Ques Tions
Frequently Asked Questions This chapter provides tips and infor- mation on how to deal with any mal- Power Good LED functions or faults you may experi- ence with the OpenCom 100. AC adapter Activity LED Please note: Repairs to the OpenCom 100 should only be carried LAN LEDs out by qualified personnel. -
Page 123: Telephony
It takes a short while for the rectly and is ready for operation. If OpenCom 100 to start up. After the the OpenCom 100 has not restarted restart, check whether the activity properly, reset the OpenCom 100 to LED flashes at a rate of 10s / 1s. This its original factory setting (refer to flash cycle indicates that the the chapter entitled Resetting the... - Page 124 bution (Configurator, PBX Configu- Question: It is not possible to con- ration: Call Distribution menu). figure Call Distribution: Outgoing for multi-terminal access. Question: One of the features (e.g. call diversion) on one of the You have configured multi-terminal telephones cannot be used even access and system access in parallel.
-
Page 125: Dect
DECT Question: The LED of the RFP 21/ Question: Another manufac- 23is flashing, but none of the DECT turer’s DECT device is not function- devices is functioning. ing. Make sure the terminal setting for Check whether the DECT device sup- the corresponding U port is set to ports the DECT GAP standard. - Page 126 Question: It is not possible to es- Question: The network connec- tablish a network connection with tion is functioning, but nothing is the OpenCom 100. displayed in the browser. Check whether the LEDs for the hub Enter the complete IP address of the and the PC’s network card are indi- OpenCom 100 along with the proto- cating a connection.
-
Page 127: Internet
fined for the ISP (NET Configura- You need a static address assign- tion: Connections: ISP menu). If ment for these PCs. Make the appro- several routers are configured for priate assignment entries in the your network in different segments, Configurator (NET Configuration: you can enter extra static routes in DHCP menu). - Page 128 rectly via the remote data transfer Net Configuration: Connec- network or indirectly via RAS access tions: RAS menu), on the OpenCom 100. For direct ac- cess you can directly dial any pro- your user group has been ■ vider. Indirect access uses the rout- granted RAS access rights (Con- ing function of the OpenCom 100, figurator, User Manager: User...
-
Page 129: Technical Specifications
Technical Specifications Mains power supply 230 V ~ 50 Hz Rated power OpenCom 105: OpenCom 110: OpenCom 120: 80 VA 80 VA 130 VA Safety class Euro ISDN external for basic OpenCom 105: OpenCom 110: OpenCom 120: access, DSS1 protocol —... - Page 130 Permissible temperatures +5°C to +40°C stationary, weatherproofed Dimensions (B x H x D) 396 x 390 x 100 mm Weight (only system) OpenCom 105: OpenCom 110: OpenCom 120: about 2.8 kg about 2.8 kg about 3.2 kg Contact load actor 1...
-
Page 131: Index
Index Network card setup 51 Preconfiguration 57 RAS service 50 a/b adapter 33 Remote configuration 57 Accessories 36 Resetting the system data 60 Actor Saving and loading the See Intercom system 30 configuration 59 Actor/sensor port 25 Serial port (V.24) 50 Adapter Starting the browser 52 Audio 34... - Page 132 Internet access 70 Costs 70 E-mail 71 DECT 7, 123 NAT 71 DHCP 62 Web 70 Direct call key 85 DNS 65, 67 DSL 25 DSL port 25 DSS1 77 LAN port 25 LCR 80 LDAP 108 Linux 53 Log-in procedure 106 E-mail 8 MacOS 53 Factory settings 10...
- Page 133 Pin assignment S0 ports 23 Audio adapter 34 S2M 77 ISDN socket 24 S2M Connector Module 40 Plug-in power supply 19 S2M-Anschlüsse 82 Point-to-point connections 78 Safety Port assignment Power failure 27 Actor/sensor port 25 Safety Precautions 16, 43 Analogue a/b ports 24 Saving and loading the DSL port 25 configuration 59...
- Page 134 Notes Index...
- Page 135 Configuration Example OpenCom 110 RFP 21 OpenPhone 63 U pn U pn RFP 21 U pn Analogue fax OpenPhone 21 ISDN telephone Configuration example: OpenCom 110 with connected terminals...
- Page 136 In the UK: DeTeWe Ltd 1 Frogmore Road, Hemel Hempstead, Herts, HP3 9TG WWW: http://www.detewe.co.uk/ Other countries: DeTeWe AG & Co. Zeughofstrasse 1, D-10997 Berlin, Subject to changes Germany As of 06.2004 WWW: http://www.detewe.de/...
Need help?
Do you have a question about the opencom 105 and is the answer not in the manual?
Questions and answers