Table of Contents
Advertisement
Quick Links
Advertisement
Table of Contents

Related Manuals for TRENDnet TEW-730APO


Summary of Contents for TRENDnet TEW-730APO
- Page 1 Cover Page TRENDnet User’s Guide...
-
Page 2: Table Of Contents
How to choose the type of security for your wireless network ........19 Bridge Table ......................... 33 Secure your wireless network ..................20 DHCP Clients ........................ 33 Wireless access control....................22 Thin AP ..................34 Advance Settings ................23 © Copyright 2015 TRENDnet. All Rights Reserved. - Page 3 Virtual AC + Thin AP ..............46 AP Management ......................46 System Setting ......................46 Advance Settings ................47 Setting time ......................... 47 Upgrade Firmware ....................... 48 Backup and restore your router configuration settings ..........48 © Copyright 2015 TRENDnet. All Rights Reserved.
-
Page 4: Product Overview
Access Control (controls compatible Thin AP devices), and Virtual AC + Thin AP modes. Fat AP mode supports a variety of installation scenarios with Access Point (AP), WDS Bridge, WDS Repeater, Client, and CPE + AP modes. The rugged IP55 rated TEW-730APO comes with a proprietary PoE injector and a pole mounting kit. -
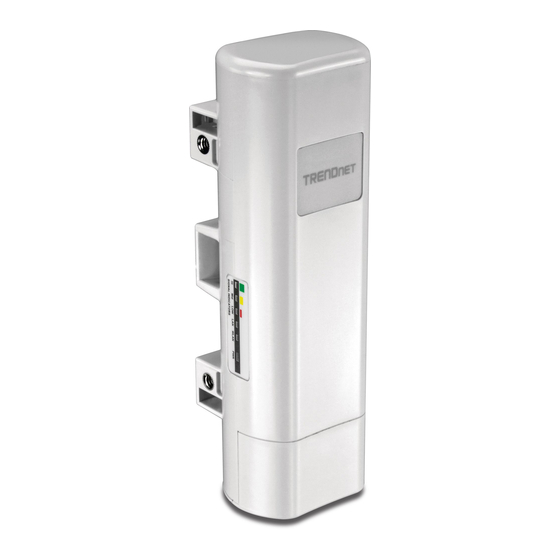
Page 5: Product Hardware Features
Ethernet port, remove the bottom cap. Reset button: Press and hold the reset button for 15seconds to reset the unit back the factory default settings. Note: To access the reset button, remove the bottom cap © Copyright 2015 TRENDnet. All Rights Reserved. - Page 6 PoE adapter to this port. Depending on the mode settings applied, the Ethernet port can function as the network WAN port or LAN port Reset button: Press and hold the reset button for 15seconds to reset the unit back the factory default settings. © Copyright 2015 TRENDnet. All Rights Reserved.
-
Page 7: Application Diagram
4. To connect additional wired computers or wired network devices to your network, see “Connect additional wired devices to your network” on page 11. 5. To set up wireless networking on your router, see “Wireless Networking and Security” on page 12. © Copyright 2015 TRENDnet. All Rights Reserved. -
Page 8: Wireless Performance Considerations
If you are still experiencing low or no signal consider repositioning the wireless devices or installing additional access points. The use of higher gain antennas may also provide 3. Slide the bottom cover back to the unit. the necessary coverage depending on the environment. © Copyright 2015 TRENDnet. All Rights Reserved. - Page 9 12. Once the configuration is saved. Click the Wireless button on the left side and then Basic Settings. 8. Enter the default user name and password and then click Login. Default System Password: admin © Copyright 2015 TRENDnet. All Rights Reserved.
-
Page 10: Connect Wireless Devices To Your Access Point
See the “Appendix” on page 53 for general information on connecting to a wireless network. © Copyright 2015 TRENDnet. All Rights Reserved. -
Page 11: Configuration
TRENDnet User’s Guide Configuration Device Modes The TEW-730APO access point supports different types of system modes and sub modes within the selected device mode. Please verify carefully on which mode you would like Access the management page the device to operate in to proper installation. -
Page 12: Fat Ap
FAT AP 7. Click the Wireless button on the left side and then Basic Settings. Below describes the configuration settings when the TEW-730APO System Mode is set 8. Select the mode you would like to apply Operation Mode pull down menu. -
Page 13: Ap Mode
2.4GHz frequency, it will allow the use of other 2.4GHz Disable Wireless LAN Interface: client devices (Wireless b/g/n) to connect and access at the same time. o Check/Off: turns off wireless networking on your router. © Copyright 2015 TRENDnet. All Rights Reserved. - Page 14 It differentiates your wireless network from others around you. Broadcast Network Name (SSID): o Enabled allows wireless devices to search and discover your wireless network name (also called SSID) broadcasted by your router. © Copyright 2015 TRENDnet. All Rights Reserved.
-
Page 15: Wireless Client Mode
Point can connect in the same transmission mode, you can improve performance slightly by choosing the appropriate mode. If you have some devices that use a different transmission mode, choose the appropriate mode. © Copyright 2015 TRENDnet. All Rights Reserved. -
Page 16: Bridge Mode
27). 2. Click on Wireless button and click on Basic Settings. 3. Select Wireless Client in the Operation Mode pull down menu and click Apply. 4. Click Site Survey button. © Copyright 2015 TRENDnet. All Rights Reserved. - Page 17 802.11b/g/n mixed mode (2.4GHz) - This wireless mode works in the 2.4GHz frequency range and will only allow the use of wireless g client devices to connect and access point, 54Mbps for wireless g and up to 300Mbps* for © Copyright 2015 TRENDnet. All Rights Reserved.
-
Page 18: Ap Repeater Mode
WDS Separation: Enable separates all configured WDS AP to communicate with each other. Disable Wireless LAN Interface: Remote AP: Enter the MAC address of the access point you want to WDS with. © Copyright 2015 TRENDnet. All Rights Reserved. -
Page 19: Router Mode
Frequency (Channel): To manually set the channel on which the router will Below describes the configuration settings when the TEW-730APO System Mode is set to Router. In this configuration the Ethernet port of the TEW-730APO can serve as the broadcast, uncheck Auto Channel, then click the drop-down list and select the... -
Page 20: Wireless Networking And Security
How to choose the type of security for your wireless network Setting up wireless security is very important. Leaving your wireless network open and unsecure could expose your entire network and personal files to outsiders. TRENDnet recommends reading through this entire section and setting up wireless security on your new router. -
Page 21: Secure Your Wireless Network
Secure your wireless network encryption but more robust. This encryption standard also supports the highest connection speeds. TRENDnet recommends setting your router to this encryption After you have determined which security type to use for your wireless network (see standard. If you find that one of your wireless network devices does not support “How to choose the security type for your wireless network”... - Page 22 Selecting WPA-PSK, WPA2-PSK, or WPA-PSK & WPA2-PSK (WPA2-PSK recommended): Character set 0-9 & A-F, a-f only Alphanumeric (a,b,C,?,*, /,1,2, etc.) 64-bit key length 10 characters 5 characters 128-bit key length 26 characters 13 characters © Copyright 2015 TRENDnet. All Rights Reserved.
-
Page 23: Wireless Access Control
RADIUS Settings section under System button on the left side. Access Control Mode: o Profile Selection: Select the wireless profile you would like to apply the access control rule. o Disable: Access control is disabled © Copyright 2015 TRENDnet. All Rights Reserved. -
Page 24: Advance Settings
1. Log into the management page (see “Access the management page” on page 9). using your new router IP address http://(new.router.ipaddress.here) to access the 2. Click on System, and click on Network Settings. management page. © Copyright 2015 TRENDnet. All Rights Reserved. -
Page 25: Configure Your Internet Connection
Note: If you are unsure which Internet connection type you are using, please contact your ISP (Internet Service Provider). Advance wireless settings This section outlines available management options under the Advance Settings of the Wireless button. © Copyright 2015 TRENDnet. All Rights Reserved. -
Page 26: Change Your Login Password
DTIM Interval: DTIM, which stands for Delivery Traffic Indication Message, is contained in the data packets. It is for enhancing the wireless transmission efficiency. The default is set to 1. Enter a value between 1 and 255. © Copyright 2015 TRENDnet. All Rights Reserved. -
Page 27: Port Filtering
Port: Enter the IP address or range of IP address to assign. 2. Click on Firewall Settings, and click on Port Forwarding. Click Apply to save settings. Comment: Enter any notes you would like to add to distinguish the rule. © Copyright 2015 TRENDnet. All Rights Reserved. -
Page 28: Open A Device On Your Network To The Internet
Your router includes the DMZ (demilitarized zone) feature that makes all the ports and services available on the WAN/Internet side of the router and forwards them to a single IP address (computer or network device) on your © Copyright 2015 TRENDnet. All Rights Reserved. -
Page 29: View Your Log
WAN/Internet side of the router Normal: Select this mode to activate Telnet, SNMP and FTP and forwards them to a single IP address (computer or network device) on your © Copyright 2015 TRENDnet. All Rights Reserved. -
Page 30: Upgrade Firmware
1. Log into the management page (see “Access the management page” on page 9). © Copyright 2015 TRENDnet. All Rights Reserved. -
Page 31: Backup And Restore Your Router Configuration Settings
3. Under Load Settings from file, click on Browse select your saved configuration file “Backup and restore your router configuration settings” on page 70. and click Upload. There are two methods that can be used to reset your router to factory defaults. © Copyright 2015 TRENDnet. All Rights Reserved. -
Page 32: Certificate Configuration Settings
Click “Import”. Firmware Version: Current firmware version of the access point. WAN Settings 1. Log into the management page (see “Access the management page” on page 9). © Copyright 2015 TRENDnet. All Rights Reserved. -
Page 33: Associated Information
MAC address of the selected device on the web you may see more details including device name, connection time, signal strength, noise floor, ACK timeout, link quality, IP Wireless Settings information, current data rate, current TX/RX packets. © Copyright 2015 TRENDnet. All Rights Reserved. -
Page 34: Statistics
“Set Interval” to save settings. “Stop” helps to stop the auto refresh of network flow statistics. Refresh: Click to refresh to view the current information ARP Table You may want to view the access point’s current ARP table. © Copyright 2015 TRENDnet. All Rights Reserved. -
Page 35: Thin Ap
This page displays thin access points connected in the network. Below describes the configuration settings when the TEW-730APO System Mode is set to Thin AP mode. In this mode the access point can only be configured with a device set 1. -
Page 36: Information
1. Log into the management page (see “Access the management page” on page 9). Default Password: admin 4. Click the System button on the left side and then System Settings. 2. Click on Thin AP and Basic Settings. © Copyright 2015 TRENDnet. All Rights Reserved. -
Page 37: System Setting
Gateway IP Address: Enter the gateway IP address o DNS1-2: Enter the DNS IP address to assign on the access point. DHCP Server Device Mode: Select the mode you would want the access point to operate on. © Copyright 2015 TRENDnet. All Rights Reserved. -
Page 38: Ap Management
Restart: Click this option to restart the selected device(s) 2. You can also click Enable NTP client update option to obtain date and time settings Rename: Click this option to rename the selected access point from a NTP server. © Copyright 2015 TRENDnet. All Rights Reserved. -
Page 39: Upgrade Firmware
3. Depending on your web browser settings, you may be prompted to save a file (specify the location) or the file may be downloaded automatically to the web browser settings default download folder. (Default Filename: config.bin) © Copyright 2015 TRENDnet. All Rights Reserved. -
Page 40: Reset To Factory Defaults
2. Click on Management, and click on Configuration File. Enable Remote Syslog Server: Check this option to enable DMZ IP Address: enter the IP address (e.g. 192.168.10.250) of the external log server to send © Copyright 2015 TRENDnet. All Rights Reserved. -
Page 41: View Your Log
You may also want to only see specific categories of logging. 1. Log into the management page (see “Access the management page” on page 9). 2. Click on Management, and click on System Log. Click Apply to save settings. Email Server © Copyright 2015 TRENDnet. All Rights Reserved. -
Page 42: Ping Tool
2. Click on Tools, and click on Ping. Click Apply to save settings. IP Address: Assigned IP address of the access controller Subnet Mask: Assigned subnet mask of the access controller © Copyright 2015 TRENDnet. All Rights Reserved. -
Page 43: Wireless Users
Uptime: Displays the time duration of when the access point has been running Tx: Display the transmit data rate of the access point Rx: Displays the receive data rate of the access point © Copyright 2015 TRENDnet. All Rights Reserved. -
Page 44: Secure Your Wireless Network
Enabled allows wireless devices to search and discover your wireless network 4. Select the wireless security on your wireless network from the Network name (also called SSID) broadcasted by your router. Authentication pull down menu. © Copyright 2015 TRENDnet. All Rights Reserved. - Page 45 This is the password or key that is used to connect your computer to this router wirelessly Selecting WPA, WPA2, or WPA & WPA2 with Radius: Data Encryption: Choose the key length 64-bit or 128-bit. © Copyright 2015 TRENDnet. All Rights Reserved.
-
Page 46: Wireless Access Control
IP: Enter the IP address of the RADIUS server. (e.g. 192.168.10.250) o Port: Enter the port your RADIUS server is configured to use for RADIUS authentication. Note: It is recommended to use port 1812. © Copyright 2015 TRENDnet. All Rights Reserved. -
Page 47: Virtual Ac + Thin Ap
5. Select Virtual AC + Thin AP in the Device Mode drop down menu and Select your Country/Region. Device Mode: Select the mode you would want the access point to operate on. © Copyright 2015 TRENDnet. All Rights Reserved. -
Page 48: Advance Settings
Subnet Mask: Enter the subnet mask of the access point o Gateway IP Address: Enter the gateway IP address o DNS1-2: Enter the DNS IP address to assign on the access point. © Copyright 2015 TRENDnet. All Rights Reserved. -
Page 49: Upgrade Firmware
2. Click on Management, and click on Firmware Upload. 2. Click on Management, and click on Configuration File. 3. Under Load Settings from file, click on Browse select your saved configuration file and click Upload. © Copyright 2015 TRENDnet. All Rights Reserved. -
Page 50: Reset To Factory Defaults
“Backup and restore your router configuration settings” on page 70. There are two methods that can be used to reset your router to factory defaults. © Copyright 2015 TRENDnet. All Rights Reserved. -
Page 51: Configure Your Log
Subject: Enter the subject of the log email SMTP server: Enter the SMTP server of IP address SMTP Authentication: Select to authenticate SMTP Username: Enter SMTP username Password: Enter the SMTP password © Copyright 2015 TRENDnet. All Rights Reserved. -
Page 52: View Your Log
IP Address: Assigned IP address of the access controller 2. Click on Tools, and click on Ping. Click Apply to save settings. Subnet Mask: Assigned subnet mask of the access controller © Copyright 2015 TRENDnet. All Rights Reserved. -
Page 53: Wireless Users
Uptime: Displays the time duration of when the access point has been running Tx: Display the transmit data rate of the access point Rx: Displays the receive data rate of the access point © Copyright 2015 TRENDnet. All Rights Reserved. -
Page 54: Configure Wireless Profile
4. Select the wireless security on your wireless network from the Network and is the name of your wireless network. It differentiates your wireless network Authentication pull down menu. from others around you. © Copyright 2015 TRENDnet. All Rights Reserved. - Page 55 This is the password or key that is used to connect your computer to this router wirelessly Selecting WPA, WPA2, or WPA & WPA2 with Radius: Data Encryption: Choose the key length 64-bit or 128-bit. © Copyright 2015 TRENDnet. All Rights Reserved.
-
Page 56: Wireless Access Control
Note: It is recommended to use port 1812. o Shared Secret: Enter the shared secret used to authorize your router Global-Key Update o Enable this option to set the cache period based on seconds © Copyright 2015 TRENDnet. All Rights Reserved. -
Page 57: Additional Hardware Installation
4. Position both wires inside the access hole and the edge of the case, slide the cover back into place 3. Align the access point to the pole and tighten up the clamp till the access point is secured on the pole. © Copyright 2015 TRENDnet. All Rights Reserved. -
Page 58: Troubleshooting
Click Internet Protocol (TCP/IP) and click Properties. d. Then click Obtain an IP address automatically and click OK. Note: If you are experiencing difficulties, please contact your computer or operating system manufacturer for assistance. © Copyright 2015 TRENDnet. All Rights Reserved. -
Page 59: Appendix
2. In the Network Preference window, next to "Show:” select Network Status. You'll see Ethernet and select the TCP/IP tab. your network status and your IP address settings displayed. In MAC OS 10.5/10.6, in the left column, select Ethernet. e. Configure TCP/IP to use DHCP. © Copyright 2015 TRENDnet. All Rights Reserved. - Page 60 3. You may be prompted to enter a security key in order to connect to the network. 4. Enter in the security key corresponding to the wireless network, and click Connect. © Copyright 2015 TRENDnet. All Rights Reserved.
- Page 61 Europe – EU Declaration of Conformity This equipment has been tested and found to comply with the limits for a Class B digital TRENDnet hereby declare that the product is in compliance with the essential requirements device, pursuant to Part 15 of the FCC Rules.
- Page 62 Cet équipement est conforme aux limites d'exposition aux rayonnements IC établies pour un environnement non contrôlé. Cet équipement doit être installé et utilisé avec un minimum de 20 cm de distance entre la source de rayonnement et votre corps. © Copyright 2015 TRENDnet. All Rights Reserved.
- Page 63 Download section limited to, duty, tax, and other fees. and look for the desired TRENDnet product to access to the GPL Code or LGPL Code. These codes are distributed WITHOUT WARRANTY and are subject to the copyrights of WARRANTIES EXCLUSIVE: IF THE TRENDNET PRODUCT DOES NOT OPERATE AS the developers.
Need help?
Do you have a question about the TEW-730APO and is the answer not in the manual?
Questions and answers