TRENDnet TEW-740APBO User Manual
10 dbi outdoor poe access point
Hide thumbs
Also See for TEW-740APBO:
- User manual (96 pages) ,
- Quick installation manual (22 pages) ,
- Quick start manual (4 pages)
Table of Contents
Advertisement
Advertisement
Table of Contents

Related Manuals for TRENDnet TEW-740APBO


Summary of Contents for TRENDnet TEW-740APBO
- Page 1 Cover Page TRENDnet User’s Guide...
-
Page 2: Table Of Contents
TEW-740APBO ....................... 6 SNMP Trap ......................32 TEW-740APBO2K ......................6 Backup and restore your AP configuration settings ............ 33 TEW-740APBO Setup & Installation ..........7 Backup configuration settings ................33 Note the WiFi MAC Addresses ..................7 Restore configuration settings ................33 TEW-740APBO #1 ...................... - Page 3 Configure the LAN DHCP Server ................ 59 DHCP Reservation/Static Lease................60 Appendix ..................82 Configure WAN connection settings for WISP ........... 61 Connect to your WISP (Wireless Internet Service Provider) ......61 DMZ (Demilitarized Zone) .................. 62 © Copyright 2017 TRENDnet. All Rights Reserved.
-
Page 4: Product Overview
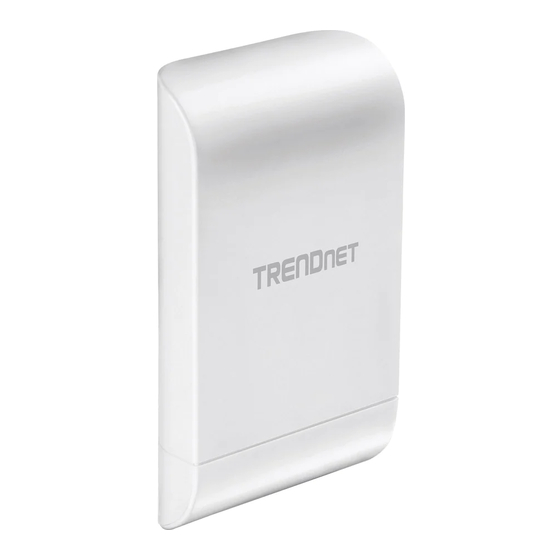
TRENDnet User’s Guide Features Product Overview TRENDnet’s 10 dBi Outdoor PoE Access Point, model TEW-740APBO, provides wireless N300 point-to-point connectivity. A variety of installation scenarios are facilitated with Access Point (AP), Wireless Distribution System (WDS), Client Bridge + AP, Wireless ISP (WISP) + AP, CPE + AP, and control AP (CAP) modes. -
Page 5: Product Hardware Features
Additionally environmental factors such as weather conditions, physical obstacles, and Bottom View (Closed) other considerations may affect performance. For optimal results, we recommended consulting a professional installer for site survey, safety precautions, and proper installation. © Copyright 2017 TRENDnet. All Rights Reserved. - Page 6 LAN1 port. LAN2 LED - When the LED is on, this indicates an active network connection to the LAN2 port. If the LED is off, there is no active network connection to the © Copyright 2017 TRENDnet. All Rights Reserved.
-
Page 7: Application Diagram
The example application displays two TEW-740APBO access points are configured in WDS point- to-point bridge mode and establishing a wireless link between each and other, allowing for network connectivity between two buildings over a point-to-point wireless link. -
Page 8: Primary Product Application
Additional TRENDnet TEW-740APBO H/W: v2.XR N300 directional wireless physical locations or buildings together through an encryption wireless connection. access point (For TEW-740APBO single unit only, TEW-740APBO2K model Although this product supports multiple wireless modes, the basic installation will only includes two preconfigured access points) -
Page 9: Model Differences
LAN Subnet Mask: 255.255.255.0 TEW-740APBO Mode: WDS Bridge Mode Single Unit Model WDS AES Encryption Key: <predefined> The single access point requires another TEW-740APBO H/W: v2.XR N300 additional User: admin access point to create a WDS point-to-point wireless link. Password: <predefined> Important Note:... -
Page 10: Tew-740Apbo Setup & Installation
WiFi MAC Address 00:11:22:33:44:00 00:11:22:33:44:11 Router Settings: Router/Default Gateway IP Address: 192.168.10.1 Subnet Mask: 255.255.255.0 In this installation procedure example, we will configure the TEW-740APBO access points will be configured with the following settings: TEW-740APBO #1 TEW-740APBO #2 IP Address 192.168.10.50 192.168.10.51... -
Page 11: Tew-740Apbo #1
2. Using a RJ-45 network cable, connect one end of the cable to the LAN (PoE) port and push the cable into the guide on the far left, then through the opening that was created in the previous step. © Copyright 2017 TRENDnet. All Rights Reserved. - Page 12 Note: For information on how to statically assign your IP address, see the Appendix section. 11. When prompted, login to the access point management page using the default user name and password settings. User Name: admin Password: admin © Copyright 2017 TRENDnet. All Rights Reserved.
- Page 13 Save & Reboot. When prompted to change the mode, click Yes and wait for the device to apply changes and reboot. Note: After the device reboots, you may need to login to the management page again. © Copyright 2017 TRENDnet. All Rights Reserved.
- Page 14 IP address setting and login. When configuring TEW- 740APBO #2, enter the IP address 192.168.10.51. 17. For the first entry in the VLAN List under the action column, click Network. © Copyright 2017 TRENDnet. All Rights Reserved.
- Page 15 21. Under WDS Client Setup, check the first entry and enter the WiFi MAC address of TEW-740APBO #2 00:11:22:33:44:11. Then click Save. In the menu located at the top, you will be prompted to reboot the device. Click the Reboot button and in the following page, click Reboot.
-
Page 16: Tew-740Apbo #2
TEW-740APBO #2 Passphrase. (8-63 alphanumeric characters) When configuring TEW-740APBO #2, repeat all steps in previous section same as TEW- Note: When configuring TEW-740APBO #2, the WDS passphrase must be the same 740APBO #1 and make sure to follow the noted differences below for steps 18, 20-21. -
Page 17: Confirm Connectivity
1. Leave your computer connected to TEW-740APBO #2 and keep the access point management page open. 2. Make sure both TEW-740APBO #1 and TEW-740APBO #2 access point are powered on and approximately 15 ft. (5 m) apart from one another with the front of access points directly facing each other. -
Page 18: Ground Wire And Pole Mount Installation
5. After the access points are properly mounted, you can connect the grounding wires to the proper ground points and RJ-45 cables from each access point PoE injector to your network. © Copyright 2017 TRENDnet. All Rights Reserved. -
Page 19: Completed Installation Reference
TEW-740APBO / TEW-740APBO2K TRENDnet User’s Guide Completed Installation Reference © Copyright 2017 TRENDnet. All Rights Reserved. -
Page 20: Tew-740Apbo2K Setup And Installation
When purchasing the access point bridge kit, mode TEW-740ABPO2K, by default, the TEW-740APBO access points are preconfigured to establish a point-to-point WDS bridge between each other using a unique predefined AES encryption key. For convenience, a unique predefined admin password has already been assigned to both access points. -
Page 21: Setup And Confirm Connectivity
3. Using a RJ-45 network cable, connect one end of the cable to the LAN (PoE) port and push the cable into the guide on the far left, then through the opening that was created in the previous step. © Copyright 2017 TRENDnet. All Rights Reserved. - Page 22 7. Confirm the device is powered on through the PWR LED indicator. 10. Connect the other end of the network cable to your computer’s Ethernet port. Note: Repeat steps 1-7 to power on and connect the second access point. © Copyright 2017 TRENDnet. All Rights Reserved.
- Page 23 Note: If the connectivity test fails, wait for about 1 minute and try again. Make sure there are no obstacles between two access points and that they are not too close together. © Copyright 2017 TRENDnet. All Rights Reserved.
-
Page 24: Ground Wire And Pole Mount Installation
5. After the access points are properly mounted, you can connect the grounding wires to the proper ground points and RJ-45 cables from each access point PoE injector to your network. © Copyright 2017 TRENDnet. All Rights Reserved. -
Page 25: Completed Installation Reference
TEW-740APBO / TEW-740APBO2K TRENDnet User’s Guide Completed Installation Reference © Copyright 2017 TRENDnet. All Rights Reserved. -
Page 26: Wireless Installation Tips
If you are still experiencing low or no signal consider repositioning the wireless devices or installing additional access points. The use of higher gain antennas may also provide the necessary coverage depending on the environment. Please note to use the wireless connection quality indicators during installation to determine the optimal positioning when mounting your access points. © Copyright 2017 TRENDnet. All Rights Reserved. -
Page 27: Application Modes
It can be deployed as a traditional fixed wireless access point. Example 2: Access Point + WDS Bridging It can be deployed as a traditional fixed wireless access point and establish WDS bridging to an upstream access point to expand a network. © Copyright 2017 TRENDnet. All Rights Reserved. -
Page 28: Wds Mode (Pure Wds)
This is the primary application mode for the TEW-740ABPO and TEW-740APBO2K. The built-in high gain directional antenna makes this access point an ideal solution for establishing a single WDS point-to-point wireless bridge or link between two physical locations that are a great distance from one another. Example 1: Point-to-Point Example 2 : Point-to-Multi-Point © Copyright 2017 TRENDnet. All Rights Reserved. -
Page 29: Client Bridge + Ap Mode
This In this mode, the access point wireless interface connects to the wireless Internet service provider (WISP) and acts as the Internet or WAN Interface. The wired interfaces LAN1 (PoE) and LAN2 operate as the LAN local interface with NAT and DHCP Server functions and wireless interface operates as the WAN Internet interface. © Copyright 2017 TRENDnet. All Rights Reserved. -
Page 30: Router Mode
APs at the same time, push out batch firmware upgrades from one convenient GUI interface. The CAP Mode AP can discover and manage any CAP mode compatible APs on any of interfaces including WDS bridged links. Note: Currently, the only TRENDnet TEW-740APBO (H/W: v2.XR) is CAP mode firmware/software compatible. -
Page 31: Access Your Access Point Management Page
2. TEW-740APBO Users: By default, the user name is admin and password is admin. TEW-740APBO2K Users: You can also find the wireless settings sticker included with the access points and on the device inside the access point enclosure. Enter your Username and Password, then click Login. -
Page 32: Ap Management Settings
SSH – This type of secured and encrypted management access is also through the CLI (Command Line Interface) through the AP IP address. The default port may also be changed. For additional security, the Host Key Footprint may also be changed by clicking Generate Key. © Copyright 2017 TRENDnet. All Rights Reserved. -
Page 33: Set The Device Date And Time
Manual – Allows you to manually set the device date and time. Date (Y/M/D) – Click drop-down lists to set the correct date manually. Year / Month / Day Time (H:M:S) – Click the drop-down lists to set the correct time manually. Hour:Minute:Second. © Copyright 2017 TRENDnet. All Rights Reserved. -
Page 34: Snmp Settings
2. Click System and click on SNMP. Review the settings and click Save to apply the changes. Active – Enable or disable SNMP version 2c. RO Community – Enter the read only community name. RW Community – Enter the ready/write community name. © Copyright 2017 TRENDnet. All Rights Reserved. -
Page 35: Snmp V3
RW Password – Enter the read/write password. IP 1 – Enter the IP address of the additional SNMP trap receiver. IP 1 – Enter the IP address of the additional SNMP trap receiver. © Copyright 2017 TRENDnet. All Rights Reserved. -
Page 36: Backup And Restore Your Ap Configuration Settings
5. Select the configuration file to restore and click Upload. (Default Filename: config.bin). If prompted, click Yes or OK. 2. Click Utility and click on Network Utility. 3. Click Reboot. 6. Wait for the device restore settings. © Copyright 2017 TRENDnet. All Rights Reserved. -
Page 37: Upgrade Your Ap Firmware
7. Select the firmware file to restore and click Upload. If prompted, click Yes or OK. problems associated with your TRENDnet device and date/version. To check if there is a firmware upgrade available for your device, please check your TRENDnet model and version using the link. -
Page 38: View System Information
MAC and IP address settings WiFi information. 1. Log into your access point management page (see “Access your access point management page” on page 28). 2. Click Status and click on Overview. © Copyright 2017 TRENDnet. All Rights Reserved. -
Page 39: View Currently Connected Wireless Client Devices
Radio – Displays the radio the wireless client device is connected. Since the 2. Click Status and click on Authentication Log. TEW-740APBO only has one radio (Radio 0), only Radio 0 will be shown for this model. MAC Address – Displays the wireless client device MAC address. -
Page 40: Configuring Additional Application Modes
3. For the first entry in the list VLAN #0, under the Action column, click Network. 2. Click System and click on Mode Setup. 3. Select Access Point (AP) Mode in the mode drop down list. Then click Save & Reboot. © Copyright 2017 TRENDnet. All Rights Reserved. -
Page 41: Configure Primary Wireless Network Settings
System > VLAN Setup > VLAN # > Access Point 1. Log into your access point management page (see “Access your access point management page” on page 28). 2. Click System and click on VLAN Setup. © Copyright 2017 TRENDnet. All Rights Reserved. -
Page 42: Mac Address Filter
4. In the Add MAC Address section, enter the first MAC address to allow or deny in the MAC address field in the following format (XX:XX:XX:XX:XX:XX). Click Add to add the MAC address to the MAC address list. Repeat to add additional MAC addresses. © Copyright 2017 TRENDnet. All Rights Reserved. -
Page 43: Dhcp Server
3. For the first entry in the list VLAN #0, under the Action column, click the arrow next to the Network button and select DHCP Server. Review the settings below and click Save when completing the changes. © Copyright 2017 TRENDnet. All Rights Reserved. -
Page 44: Dhcp Reservation/Static Lease
(ex. 00:11:22:AA:BB:CC). Repeat to add additional static IP leases. After the DHCP server settings have been configured and changes have been applied, dynamic DHCP client leases will appear in the DHCP Client List table. © Copyright 2017 TRENDnet. All Rights Reserved. -
Page 45: 802.11R/802.11K Fast Roaming
APs without a wireless controller. 1. Log into your access point management page (see “Access your access point management page” on page 28). 2. Click System and click on VLAN Setup. © Copyright 2017 TRENDnet. All Rights Reserved. -
Page 46: Additional Wireless Settings
Auto Channel – Enables your access point to automatically scan for which wireless channel to operate automatically. Please note for WDS bridging only, the wireless channel must match on both sides of the wireless WDS bridge link. © Copyright 2017 TRENDnet. All Rights Reserved. - Page 47 20/40MHz (Auto) –When 20/40MHz (Auto) is active, this mode is experiencing re-transmissions or poor performance the ACK Timeout could be capable of providing higher performance only if the wireless devices made longer to accommodate. support the channel bandwidth settings. Enabling 20/40MHz (Auto) © Copyright 2017 TRENDnet. All Rights Reserved.
-
Page 48: Advanced Wireless Settings
DTIM Interval: The DTIM interval is in the range of 1~255. The default is 1. DTIM is defined as Delivery Traffic Indication Message. It is used to notify the © Copyright 2017 TRENDnet. All Rights Reserved. -
Page 49: Wireless Wmm Qos Setup
1. Log into your access point management page (see “Access your access point management page” on page 28). 2. Click Wireless and click on WMM Setup. 3. Review the settings, click Save when finished. © Copyright 2017 TRENDnet. All Rights Reserved. - Page 50 When the no acknowledgment (No ACK) policy is used, the recipient does not acknowledge received packets during wireless packet exchange. This policy is suitable in the environment where communication quality is fine and interference © Copyright 2017 TRENDnet. All Rights Reserved.
-
Page 51: Wds (Wireless Distribution System)
Authentication – Specifies the type of security used for the WDS link. None or AES. Please note this is not the same as WPA/WPA2 and can only be used for WDS connections to this access, not standard wireless client devices. © Copyright 2017 TRENDnet. All Rights Reserved. - Page 52 WDS link. MAC Address – Displays the currently managed access point wireless MAC address or BSSID. WDS Status – Displays information about currently established wireless WDS links to the managed access point. © Copyright 2017 TRENDnet. All Rights Reserved.
-
Page 53: Authentication/Captive Portal
If using Local User, create your user accounts System > Authentication > VLAN # > Local Login URL – Enter the URL of the login page for users. User. Authentication Log – Enable or disable authentication logging. Session Log – Enable or disable session logging. © Copyright 2017 TRENDnet. All Rights Reserved. -
Page 54: Guest Authentication
2. Click System, click on Authentication, and in the first entry VLAN 0, in the Action column, and click on drop-down list and click Guest. Review the settings and click Save to apply the changes. © Copyright 2017 TRENDnet. All Rights Reserved. -
Page 55: Oauthentication 2.0
URL, User Info URL, and Revoke URL used for the provider. Walled URL – Enter in the URLs used for your walled garden with the providers and click Add to add them to the list. © Copyright 2017 TRENDnet. All Rights Reserved. -
Page 56: Pop3 Server
Email – To test the POP3 server settings, enter the email address used to test the settings. Password – to test the POP3 server settings, enter the along with the email account used to test the settings. © Copyright 2017 TRENDnet. All Rights Reserved. -
Page 57: Customize Page
AD Font Color – Enter the HTML color code for the ad font. Multiple Language – Enable or disable multiple languages on the built-in login page. To define additional languages, go to System > Authentication > VLAN # > Language. © Copyright 2017 TRENDnet. All Rights Reserved. -
Page 58: Multiple Language
The preview window will display the current built-in login page IP Address/Domain: Enter the IP address or domain/URL of the website to add to template. the walled garden. Full URL: Enter the full URL or website name. © Copyright 2017 TRENDnet. All Rights Reserved. -
Page 59: Privilege Address
Download Customize Page – Click download to back up the customized captive portal pages to your local drive. Upload Customize Page - Click Browse or Choose File to restore a previously backed up captive portal page. Click Upload to start the restore process. © Copyright 2017 TRENDnet. All Rights Reserved. -
Page 60: Client Bridge + Ap Mode
“Access your access point management page” on page 28). 2. Click System and click on Mode Setup. 3. Select Client Bridge + AP Mode in the mode drop down list. Then click Save & Reboot. © Copyright 2017 TRENDnet. All Rights Reserved. -
Page 61: Connect The Device To Your Wireless Network
WPA/WPA2 PassPhrase or WEP key in the field provided. Scroll to the bottom of the page and click Save when you have completed your settings and click Reboot in the top right menu to reboot the device and commit the changes. © Copyright 2017 TRENDnet. All Rights Reserved. -
Page 62: Wisp (Cpe) + Ap Mode
This should typically be the LAN IP of the device when using WISP (CPE) + AP mode. (ex. 192.168.10.100) DNS1 IP: Enter the IP address of the primary DNS server to distribute to DHCP client devices. © Copyright 2017 TRENDnet. All Rights Reserved. -
Page 63: Dhcp Reservation/Static Lease
MAC Address: Enter the MAC address of the client device to assign the permanent lease in the example format provided and click Add to add the static IP lease to the list. (ex. 00:11:22:AA:BB:CC). Repeat to add additional static IP leases. © Copyright 2017 TRENDnet. All Rights Reserved. -
Page 64: Configure Wan Connection Settings For Wisp
To connect to your WISP wireless network to establish Internet connectivity, click on Wireless and click on Station Setup. In the AP Station List, click on Site Survey to scan for your wireless network. © Copyright 2017 TRENDnet. All Rights Reserved. -
Page 65: Dmz (Demilitarized Zone)
Internet however, it is a very insecure technology and will open local area network to greater threats from Internet attacks. It is strongly recommended to use Virtual Server to allow access to your computers or network devices from the Internet. © Copyright 2017 TRENDnet. All Rights Reserved. -
Page 66: Ip Filter
1:65535) filter rule is active. Destination Address/Mask – Enter the destination IP address/Subnet Mask (CIDR). (ex. 10.10.10.30/32) Destination Port – Enter the destination port number to apply the filter. (ex. Port © Copyright 2017 TRENDnet. All Rights Reserved. -
Page 67: Virtual Server
DMZ forwards all ports instead of only specific ports used by an application. An applications only) example would be forwarding a port to an IP camera (TRENDnet IP cameras default to HTTP TCP port 80 for remote access web requests) on your network to be able to view it 1. -
Page 68: Time Policy / Schedule
Destination Port – Enter the destination port number. Mode: On Schedule: For the rule used, the schedule will be activated during the time period defined in the schedule and deactivated any time period outside of the defined schedule. © Copyright 2017 TRENDnet. All Rights Reserved. - Page 69 Days of Week – Tick the days to apply to the time policy. Start Time – Define the start time for the time policy. (24-hr format) End Time – Define the end time for the time policy. (24-hr format) © Copyright 2017 TRENDnet. All Rights Reserved.
-
Page 70: Router Mode
Gateway: Enter the default gateway IP address to distribute to DHCP client devices. This should typically be the LAN IP of the device when using WISP (CPE) + AP mode. (ex. 192.168.10.100) © Copyright 2017 TRENDnet. All Rights Reserved. - Page 71 DHCP client settings. After the DHCP server settings have been configured and changes have been applied, dynamic DHCP client leases will appear in the DHCP Client List table. © Copyright 2017 TRENDnet. All Rights Reserved.
-
Page 72: Dhcp Reservation/Static Lease
PPPoE but a different type of tunneling technology. Verify you have established wireless connectivity by attempting to communicate to the Internet. © Copyright 2017 TRENDnet. All Rights Reserved. -
Page 73: Dmz (Demilitarized Zone)
LAN IP address (computer or network device) on your network. The DMZ feature is an easy way of allowing access from the Internet however, it is a very insecure technology and will open local area network to greater threats from Internet attacks. © Copyright 2017 TRENDnet. All Rights Reserved. -
Page 74: Ip Filter
1:65535) filter rule is active. Destination Address/Mask – Enter the destination IP address/Subnet Mask (CIDR). (ex. 10.10.10.30/32) Destination Port – Enter the destination port number to apply the filter. (ex. Port © Copyright 2017 TRENDnet. All Rights Reserved. -
Page 75: Virtual Server
DMZ forwards all ports instead of only specific ports used by an application. An applications only) example would be forwarding a port to an IP camera (TRENDnet IP cameras default to HTTP TCP port 80 for remote access web requests) on your network to be able to view it 1. -
Page 76: Time Policy / Schedule
Destination Port – Enter the destination port number. Mode: On Schedule: For the rule used, the schedule will be activated during the time period defined in the schedule and deactivated any time period outside of the defined schedule. © Copyright 2017 TRENDnet. All Rights Reserved. - Page 77 In the Policy List, click Create New Policy. End Time – Define the end time for the time policy. (24-hr format) © Copyright 2017 TRENDnet. All Rights Reserved.
-
Page 78: Cap (Control Ap) Mode
APs on any of interfaces including WDS bridged links. Note: Currently, 3. Select CAP Mode in the mode drop down list. Then click Save & Reboot. the only TRENDnet TEW-740APBO (H/W: v2.XR) is CAP mode firmware/software compatible. The diagram below displays of a group of CAP mode firmware/software compatible APs either connected through the wired network interfaces or WDS link. -
Page 79: Scan And Import Cap Mode Compatible Aps
Default Password- Enter the default administrator password for the remote APs. By default, TRENDnet APs use default password: admin. If you are using the kit (TEW-740APBO2K H/W: v2.0R), the default password will be a unique predefined administrator password found on the device label or wireless settings sticker. -
Page 80: Modify And View Your Managed Ap List
Apply to apply the configuration to the seleted APs. You can change the management settings used to access the AP such as AP group assignment, IP address, administrator password. Click Save to apply the changes. © Copyright 2017 TRENDnet. All Rights Reserved. -
Page 81: Group Setup
Image – After the correct image URL has been provided, click View to view the the map. map. Image – After the correct image URL has been provided, click View to view the map. © Copyright 2017 TRENDnet. All Rights Reserved. -
Page 82: Authentication Profile
Authentication. You’ll be able to create the customized authentication settings for the newly created profile. After you created your customized authentication profile, the profile can be applied to multiple APs under AP Control > Batch Setup. © Copyright 2017 TRENDnet. All Rights Reserved. -
Page 83: Technical Specifications
802.1Q VLAN assignment per SSID Local/remote CLI based management (Telnet, SSH) Schedule radio on/off time policy SNMP v2c/v3 802.11r / 802.11k fast roaming SNMP Trap Access Control Upgrade firmware © Copyright 2017 TRENDnet. All Rights Reserved. - Page 84 802.11g: FCC/ETSI: FCC: 26 dBm (max.), ETSI: 10.5 dBm (max.), IC: 26 dBm performance. For optimal results, we recommended consulting a professional installer for site (max.)/- 74 dBm (typical) @ 54 Mbps survey, safety precautions, and proper installation. © Copyright 2017 TRENDnet. All Rights Reserved.
-
Page 85: Appendix
2. In the Network Preference window, next to "Show:", select Network Status. You'll see In MAC OS 10.5/10.6, in the left column, select Ethernet. your network status and your IP address settings displayed. e. Configure TCP/IP to use DHCP. © Copyright 2017 TRENDnet. All Rights Reserved. - Page 86 IP address. Click OK Windows XP/2000 a. Go into the Control Panel, double-click the Network Connections icon b. Right-click the Local Area Connection icon and the click Properties. c. Click Internet Protocol (TCP/IP) and click Properties. © Copyright 2017 TRENDnet. All Rights Reserved.
- Page 87 3. You may be prompted to enter a security key in order to connect to the network. 4. Enter in the security key corresponding to the wireless network, and click Connect. © Copyright 2017 TRENDnet. All Rights Reserved.
- Page 88 This equipment has been tested and found to comply with the limits for a Class B digital device, TRENDnet hereby declare that the product is in compliance with the essential requirements pursuant to Part 15 of the FCC Rules. These limits are designed to provide reasonable and other relevant provisions under our sole responsibility.
- Page 89 Hereby, TRENDnet, declares that this TEW-740APBO is in compliance with English the essential requirements and other relevant provisions of Directive TRENDnet izjavlja, da je ta TEW-740APBO v skladu z bistvenimi zahtevami Slovensko 2014/35/EU, 2014/30/EU, 2014/53/EU, and 2011/65/EU. in ostalimi relevantnimi določili direktive 2014/35/EU, 2014/30/EU, [Slovenian] 2014/53/EU, in 2011/65/EU.
- Page 90 Cet équipement est conforme aux limites d'exposition aux rayonnements IC établies pour un environnement non contrôlé. Cet équipement doit être installé et utilisé avec un minimum de 20 cm de distance entre la source de rayonnement et votre corps. © Copyright 2017 TRENDnet. All Rights Reserved.
- Page 91 An RMA number is required in order to initiate warranty service support the event that the RMA unit needs to be replaced, TRENDnet may replace it with a for all TRENDnet products. Products that are sent to TRENDnet for RMA service must refurbished product of the same or comparable model.
- Page 92 OF SUCH DAMAGES, AND LIMITS ITS LIABILITY TO REPAIR, REPLACEMENT, OR REFUND evidence of the original purchaser's date of purchase. Replacement products may be OF THE PURCHASE PRICE PAID, AT TRENDNET'S OPTION. THIS DISCLAIMER OF LIABILITY refurbished or contain refurbished materials. If TRENDnet, by its sole determination, is...
Need help?
Do you have a question about the TEW-740APBO and is the answer not in the manual?
Questions and answers