TRENDnet TEW-740APBO User Manual
Hide thumbs
Also See for TEW-740APBO:
- User manual (93 pages) ,
- Quick installation manual (22 pages) ,
- Quick start manual (4 pages)
Table of Contents
Advertisement
Quick Links
Advertisement
Table of Contents

Related Manuals for TRENDnet TEW-740APBO


Summary of Contents for TRENDnet TEW-740APBO
- Page 1 Cover Page TRENDnet User’s Guide...
-
Page 2: Table Of Contents
CPE + AP Mode (Router Client + Access Point) ............22 Repeater Mode ................46 AP Mode Configuration ..............23 External Network Connection ..................46 External Network Connection..................23 Network Requirement ..................46 Network Requirement ..................23 © Copyright 2016 TRENDnet. All Rights Reserved. - Page 3 Wireless General Setup ..................65 Wireless Advanced Setup .................. 66 Wireless WMM QoS Setup ................67 Site Survey ......................69 Create Wireless Profile ..................69 AP Setup ......................71 Wireless AP MAC Filter Setup ................73 © Copyright 2016 TRENDnet. All Rights Reserved.
-
Page 4: Product Overview
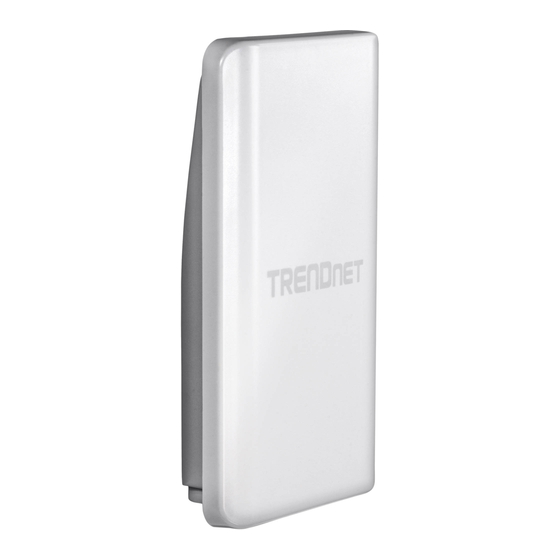
TRENDnet User’s Guide Features Product Overview TRENDnet’s 10dBi Wireless N300 Outdoor PoE Access Point., model TEW-740APBO, provides Wireless N300 building-to-building connectivity. A variety of installation scenarios are facilitated with Access Point (AP), Wireless Distribution System (WDS), Repeater, and CPE + AP modes. The IP67 rated housing comes with wall and pole mounting hardware. -
Page 5: Product Hardware Features
Additionally environmental factors such as weather conditions, physical obstacles, and other considerations may affect performance. For optimal results, we recommended consulting a professional installer for site survey, safety precautions, and proper installation. © Copyright 2016 TRENDnet. All Rights Reserved. - Page 6 WLAN Connection Quality Indicators – The connection quality indicators will turn on depending on the connection quality during installation. These indicators can help to assist with optimal placement and positioning during mounting/hardware installation. Good Connection Quality Better Connection Quality Best Connection Quality © Copyright 2016 TRENDnet. All Rights Reserved.
-
Page 7: Application Diagram
(ex. Earth driven rod, grounded electrical system, building frame, etc.) The example application displays two TEW-740APBO access points are configured in WDS point- to-point bridge mode and establishing a wireless link between each and other, allowing for network connectivity between two buildings over a point-to-point wireless link. -
Page 8: Setup & Installation
TEW-740ABPO #2 MAC1: AA:BB:CC:DD:EE:FF Network Router/Gateway IP Address/Netmask: 192.168.10.1 / 255.255.255.0 The following steps assume you are setting up and installation two TRENDnet TEW- Network Router/Gateway DHCP IP Pool: 192.168.10.101-192.168.10.199 740APBO access points in point to point configuration. -
Page 9: Tew-740Apbo #1 Configuration
4. The access point power LED will turn on to indicate the device is receiving power. 5. Assign a static IP address to your computer network adapter in the subnet of 192.168.10.x (ex. 192.168.10.10) and subnet mask of 255.255.255.0. © Copyright 2016 TRENDnet. All Rights Reserved. - Page 10 14. You can choose to change the ESSID (Wireless Network Name) settings but they must match on both access points to establish a point-to-point WDS configuration. For this example, we will leave as the default setting TRENDnet7400_2.4GHz. © Copyright 2016 TRENDnet. All Rights Reserved.
-
Page 11: Tew-740Apbo #2 Configuration
Then click Save to save the settings. 4. On the TEW-740APBO #1 configuration step 16, enter the MAC address of the 1 Note: It is strongly recommended to assign strong passphrase. We are only using the TEW-740ABPO (TEW-740APBO #1 MAC1: 00:11:22:33:44:55) noted earlier in this guide. -
Page 12: Verify Point-To-Point Configuration/Connectivity
Verify Point-to-Point Configuration/Connectivity 1. Make sure both access points (TEW-740APBO #1 and TEW-740APBO #2) powered on and positioned pointing toward each other. 2. With the static IP address still assigned from the setup guide, connect your computer to one of the access points via LAN port. -
Page 13: Grounding Wire Installation
3. Verify that you have the following parts as shown below: Cable Gland Seal Claw Sealing Nut 4. Insert one end of an Ethernet cable into the sealing nut. © Copyright 2016 TRENDnet. All Rights Reserved. - Page 14 5. Insert the Ethernet cable into the seal. 7. Insert the seal/rubber claw into the cable gland. 6. Insert the seal into the claw. 8. Connect the Ethernet cable to the LAN port on the bottom of the access point. © Copyright 2016 TRENDnet. All Rights Reserved.
- Page 15 TEW-740APBO TRENDnet User’s Guide 9. Fasten and tighten the plug to the housing of the access point. 10. Fasten and tighten the cap to the weather proof plug. © Copyright 2016 TRENDnet. All Rights Reserved.
-
Page 16: Mounting Hardware Installation
2. Slide the two provided pole mounting clamps around the pole. Place the mounting bracket at the desired height and position. 3. Secure the TEW-740APBO to the pole mounting bracket using mounting clamp screws. 4. Adjust the orientation of the access point as necessary. -
Page 17: Wall Mounting
1. Align the mounting bracket with the hole on the unit and secure it with the M6x8 screw and washer provided. 2. Position the provided mounting bracket to the desired location and wall mount with screws or fasteners using the four mounting bracket holes. © Copyright 2016 TRENDnet. All Rights Reserved. -
Page 18: Completed Point To Point Setup And Pole Mount Installation Example
TEW-740APBO TRENDnet User’s Guide Completed Point to Point Setup and Pole Mount Installation Example © Copyright 2016 TRENDnet. All Rights Reserved. -
Page 19: Installation Tips
If you are still experiencing low or no signal consider repositioning the wireless devices or installing additional access points. The use of higher gain antennas may also provide the necessary coverage depending on the environment. Please note to use the wireless connection quality indicators during installation to determine the optimal positioning when mounting your access points. © Copyright 2016 TRENDnet. All Rights Reserved. -
Page 20: Application Modes
Example 2: Access Point + WDS Bridging It can be deployed as a traditional fixed wireless access point and establish WDS bridging to an upstream access point to expand a network. Remote Remote Main Main © Copyright 2016 TRENDnet. All Rights Reserved. -
Page 21: Wds Mode (Pure Wds)
In this mode, it can support single or multiple WDS links and no wireless clients can associate with it. Example 1: Point-to-Point Main Example 3 : Multi-Point Repeating bridge Example 2 : Point-to-Multi-Point Inte Main Base WIFI WAN Station © Copyright 2016 TRENDnet. All Rights Reserved. -
Page 22: Client Bridge + Universal Repeater Mode
In this mode, the access point is a gateway with NAT and DHCP Server functions. The wireless and wired clients of access point are on the different subnet from Main Base Station and it accepts wireless connections from client devices. © Copyright 2016 TRENDnet. All Rights Reserved. -
Page 23: Configure Lan Ip
Mode: Check either “Static IP” or “Dynamic IP” button as desired to set up the system IP of LAN port. Primary: The IP address of the primary DNS server. Secondary: The IP address of the secondary DNS server. © Copyright 2016 TRENDnet. All Rights Reserved. - Page 24 Click Save button to save your changes. Click Reboot button to activate your changes. Remote Base Station LOOP Blocked by Spanning Tree Protocol Remote Base Station Remote Base Station Blocked by LOOP Spanning Tree Protocol Remote Base Station Base Station © Copyright 2016 TRENDnet. All Rights Reserved.
-
Page 25: Wireless Lan Network
The administrator can change the RTS threshold and fragmentation threshold settings When Band Mode select in 802.11a only mode, the HT(High Throughput) settings for the system. Please click on Wireless -> Advanced Setup and follow the below should be hidden immediately. setting. © Copyright 2016 TRENDnet. All Rights Reserved. - Page 26 performance of long distance radio link. If ACK Timeout is set too short, transmitter Short Preamble: By default, it’s “Enable”. To Disable is to use Long 128-bit © Copyright 2016 TRENDnet. All Rights Reserved.
-
Page 27: Wireless Wmm Qos Setup
WMM AP has the right to initiate transmissions on the AC_BK Background. throughput and is not time-sensitive is sent to this wireless network. queue (FTP data, for example). © Copyright 2016 TRENDnet. All Rights Reserved. - Page 28 WMM Parameters of Station: This affects traffic flowing from the client station to the access point. Aifsn: The Arbitration Inter-Frame Spacing Number specifies a wait time (in milliseconds) for data frames © Copyright 2016 TRENDnet. All Rights Reserved.
-
Page 29: Create Virtual Ap (Vap)
MAC Filter: Indicate a used MAC filter of the respective Virtual AP. Accounting Network Edit: Click Edit button to configure Virtual AP's settings, including security type and SSID 5 VLAN #5 MAC Filter. © Copyright 2016 TRENDnet. All Rights Reserved. -
Page 30: Virtual Ap Setup
VLAN Tag. This enables security of wireless applications by applying VLAN Tag. rekeying GTK, broadcast/multicast encryption keys, in seconds. Entering the time- Security Type: Select the desired security type from the drop-down list; the options length is required. © Copyright 2016 TRENDnet. All Rights Reserved. - Page 31 Pre-Authentication: By default, it's “Disable”. To Enable is use to speed up roaming before pre-authenticating IEEE 802.1X/EAP part of the full RSN authentication and key handshake before actually associating with a new AP. © Copyright 2016 TRENDnet. All Rights Reserved.
-
Page 32: Wireless Mac Filter Setup
Click Reboot button to activate your changes Security Type: Option is “Disable”, “WEP”, “TKIP”or “AES” from drop-down list. Needs the same type to build WDS links. Security type takes effect when WDS is © Copyright 2016 TRENDnet. All Rights Reserved. -
Page 33: System Status
IP Gateway: The gateway IP addresses and by default, it’s 192.168.2.1. Primary DNS: The primary DNS server in service. Operating Mode: The mode currently in service. Host Name: The name of the system. © Copyright 2016 TRENDnet. All Rights Reserved. -
Page 34: Associated Clients Status
VAP Information: Highlights key VAP information. VAP: Available VAP from Primary AP to VAP6. ESSID: Display name of ESSID for each VAP. Status : On/Off Security Type: Display chosen security type; WEP, WPA/WPA2-PSK, WPA/WPA2- © Copyright 2016 TRENDnet. All Rights Reserved. -
Page 35: Extra Information
ARP table. ARP associates each IP address to a unique hardware address dropped. (MAC) of a device. It is important to have a unique IP address as final destination to switch packets to. © Copyright 2016 TRENDnet. All Rights Reserved. -
Page 36: Event Log
Severity: Severity level that a specific event is associated such as “info”, “error”, “warning”, etc. Message: Description of the event. Click Refresh button to renew the log, or click Clear button to clear all the record. © Copyright 2016 TRENDnet. All Rights Reserved. -
Page 37: Wds Mode Configuration
IP of LAN port. Hostname : The Hostname of the LAN port DNS : Check either “No Default DNS Server” or “Specify DNS Server IP” button as desired to set up the system DNS. © Copyright 2016 TRENDnet. All Rights Reserved. -
Page 38: Wireless Network Expansion
The administrator can change the data transmission, channel and output power settings for the system. Please click on Wireless -> General Setup and follow the below setting. TxStream/Rx Stream: Select the amount of transmit (TX) and Receive (RX) streams. © Copyright 2016 TRENDnet. All Rights Reserved. -
Page 39: Wireless Advanced Setup
LAN. For a sender and receiver own right of the channel the additional overhead and throughput will go down. shorter slot time help manage shorter wait time to re-transmit from collision © Copyright 2016 TRENDnet. All Rights Reserved. -
Page 40: Wireless Wmm Qos Setup
Queues automatically provide minimum transmission delay for Voice, Video, multimedia, and mission critical applications, and rely on best-effort © Copyright 2016 TRENDnet. All Rights Reserved. - Page 41 Valid values for the "cwmax" are 1, 3, 7, 15, Txop : Transmission Opportunity is an interval of time when a WME AP has the 31, 63, 127, 255, 511, or 1024. The value for "cwmax" must be higher than the © Copyright 2016 TRENDnet. All Rights Reserved.
-
Page 42: Wds Setup
Device Information: Display the information of the system. Security Type: Option is “Disable”, “WEP”, “TKIP” or “AES” from drop-down list. Needs the same type to build WDS links. Security type takes effect when WDS is © Copyright 2016 TRENDnet. All Rights Reserved. -
Page 43: Extra Information
RIP or OSPF. Static routes to specific hosts, networks or default gateway are set up automatically according to the IP configuration of system's interfaces. When used as a L2 device, it could © Copyright 2016 TRENDnet. All Rights Reserved. -
Page 44: Event Log
Facility: It helps users to identify source of events such “System” or “User” Severity: Severity level that a specific event is associated such as “info”, “error”, “warning”, etc. Message: Description of the event. © Copyright 2016 TRENDnet. All Rights Reserved. -
Page 45: Wds Link Status
WDS are available. o MAC Address: Display MAC address of WDS peer. o RSSI: Indicate the signal strength of the respective WDS links. TX/RX SEQ: Transmit and receive sequence. TX/RX Bytes: Transmit and receive bytes © Copyright 2016 TRENDnet. All Rights Reserved. -
Page 46: Repeater Mode
DNS: Check either “No Default DNS Server” or “Specify DNS Server IP” button as desired to set up the system DNS. Configure LAN IP Primary: The IP address of the primary DNS server. Here are the instructions to setup the local IP Address and Netmask. © Copyright 2016 TRENDnet. All Rights Reserved. -
Page 47: Wireless Network Expansion
RF (ON/OFF) Schedule: Select an assigned schedule of when to have the access this is optional. point turn on. Select Always Run to have the access point always on. Domain: Enter the domain name for this network. © Copyright 2016 TRENDnet. All Rights Reserved. -
Page 48: Wireless Advanced Setup
ACK Timeout is adjustable due to the fact that distance between two radio links may vary in different deployment. ACK Timeout makes significant influence in performance of long distance radio link. If ACK Timeout is set too short, transmitter © Copyright 2016 TRENDnet. All Rights Reserved. - Page 49 Threshold value. By default, RTS is disabled in a normal environment supports non-jumbo frames. Short Preamble: By default, it’s “Enable”. To Disable is to use Long 128-bit © Copyright 2016 TRENDnet. All Rights Reserved.
-
Page 50: Wireless Wmm Qos Setup
AP. If you click Checkbox, it means that the Client is in charge. Minimum delay. Time-sensitive video data is AC_VI Video High AckPolicy: Acknowledgment Policy, WMM defines two ACK policies: Normal ACK automatically sent to this queue and No ACK. Click “Checkbox” indicates “No ACK” © Copyright 2016 TRENDnet. All Rights Reserved. -
Page 51: Site Survey
ESSID: Available Extend Service Set ID of surrounding Access Points. MAC Address: MAC addresses of surrounding Access Points. which the initial random backoff wait time is determined. CWmax : Maximum Contention Window. The value specified here in the © Copyright 2016 TRENDnet. All Rights Reserved. -
Page 52: Repeater Ap Setup
Disable: Data are unencrypted during transmission when this option is selected. Master Key Update Period: By default, it is 83499 seconds. This time interval for rekeying GTK, broadcast/multicast encryption keys, in seconds. Entering the time- length is required. © Copyright 2016 TRENDnet. All Rights Reserved. - Page 53 AP. Radius Server Settings: IP Address: Enter the IP address of the Authentication RADIUS server. Port: By default, it’s 1812. The port number used to communicate with RADIUS server. © Copyright 2016 TRENDnet. All Rights Reserved.
-
Page 54: Wireless Mac Filter Setup
Key Index: Key index is used to designate the WEP key during data transmission. o Cycle: Select to have access point cycle through different profiles. 4 different WEP keys can be entered at the same time, but only one is chosen. © Copyright 2016 TRENDnet. All Rights Reserved. - Page 55 64 characters. Accounting RADIUS Server: Enable to set Account RADIUS server. WEP 802.1X: When WEP 802.1x Authentication is enabled, please refer to the following Dynamic WEP and RADIUS settings to complete configuration. © Copyright 2016 TRENDnet. All Rights Reserved.
-
Page 56: Bandwidth Control
WPA-PSK protected access. Bandwidth Control SNMP v2c Enable: Check to enable SNMP v2c. Bandwidth control allows you to control the bandwidth going through the access point. © Copyright 2016 TRENDnet. All Rights Reserved. -
Page 57: Configure Time Policy
Out of Schedule: Select to have policy run outside of schedule. Time Schedule: Day of week: Select the days of the week to apply time policy Start From: Enter time policy start time © Copyright 2016 TRENDnet. All Rights Reserved. -
Page 58: System Status
Channel: Operating channel of the access point. ETH1/ETH2MAC: Ethernet MAC address of the access point. Current Tx Power: Transmit power of the access point. Wireless MAC: Wireless MAC address of the access point © Copyright 2016 TRENDnet. All Rights Reserved. -
Page 59: Dhcp Client
ARP table. ARP associates each IP address to a unique hardware address (MAC) of a device. It is important to have a unique IP address as final destination to switch packets to. © Copyright 2016 TRENDnet. All Rights Reserved. -
Page 60: Event Log
MAC addresses are seen from wired or wireless interfaces as well. When time runs out for a particular entry, it will be pruned from the table. In that situation, switching packet to that particular MAC address will be dropped. © Copyright 2016 TRENDnet. All Rights Reserved. -
Page 61: Remote Ap Status
NAT and DHCP Server functions. The wired and wireless clients connected to the access point are in different subnet from those connected to Main Base Station, and, in CPE+AP mode, it accepts wireless connections from wireless client devices. © Copyright 2016 TRENDnet. All Rights Reserved. -
Page 62: Configure Cpe Setup
Hostname : The Hostname of the WAN port PPTP: implementation of The Point-to-Point Tunneling Protocol (PPTP) mode enables the PPPoE : To create wireless PPPoE WAN connection to a PPPoE server in network. © Copyright 2016 TRENDnet. All Rights Reserved. -
Page 63: Configure Ddns Setup
40-bit key (standard) MPPE encryption schemes are supported. MPPE provides data security for the PPTP connection that is between the VPN client and the VPN server. Here are the instructions to setup the local IP Address and Netmask. © Copyright 2016 TRENDnet. All Rights Reserved. - Page 64 WINS IP: Enter IP address of the Windows Internet Name Service (WINS) server; this is optional. Primary: The IP address of the primary DNS server. Domain: Enter the domain name for this network. © Copyright 2016 TRENDnet. All Rights Reserved.
-
Page 65: Configure Static Ip Address
RF (ON/OFF) Schedule: Select an assigned schedule of when to have the access point turn on. Select Always Run to have the access point always on. When Band Mode select in 802.11a only mode, the HT(High Throughput) settings should be hidden immediately. © Copyright 2016 TRENDnet. All Rights Reserved. -
Page 66: Wireless Advanced Setup
ACK failed to arrive within specific time interval, also refer to as “ACK Timeout”. ACK Timeout is adjustable due to the fact that distance between two radio links may vary in different deployment. ACK Timeout makes significant influence in © Copyright 2016 TRENDnet. All Rights Reserved. -
Page 67: Wireless Wmm Qos Setup
Threshold value. By default, RTS is queue (FTP data, for example). disabled in a normal environment supports non-jumbo frames. © Copyright 2016 TRENDnet. All Rights Reserved. - Page 68 When the Normal ACK policy is used, the media being sent. Queues automatically provide minimum transmission delay for recipient acknowledges each received unicast packet. Voice, Video, multimedia, and mission critical applications, and rely on best-effort parameters for traditional IP data. © Copyright 2016 TRENDnet. All Rights Reserved.
-
Page 69: Site Survey
Please click on Wireless -> Site Survey. Below depicts an example for site survey. o Fix: Select to have access point fixed on one profile to repeat o Cycle: Select to have access point cycle through different profiles. General Configuration: © Copyright 2016 TRENDnet. All Rights Reserved. - Page 70 Key Index: Key index is used to designate the WEP key during data transmission. 4 different WEP keys can be entered at the same time, but only one is chosen. WEP Key #: Enter HEX or ASCII format WEP key value; the system supports up to © Copyright 2016 TRENDnet. All Rights Reserved.
-
Page 71: Ap Setup
64 characters. Accounting RADIUS Server: Enable to set Account RADIUS server. WEP 802.1X: When WEP 802.1x Authentication is enabled, please refer to the following Dynamic WEP and RADIUS settings to complete configuration. © Copyright 2016 TRENDnet. All Rights Reserved. - Page 72 WEP Auth Method: Enable the desire option among OPEN or SHARED Key Index: Key index is used to designate the WEP key during data transmission. © Copyright 2016 TRENDnet. All Rights Reserved.
-
Page 73: Wireless Ap Mac Filter Setup
Shared secret: A secret key used between system and RADIUS server. Supports 8 to 64 characters. Accounting RADIUS Server: Enable to set Account RADIUS server. WEP 802.1X: When WEP 802.1x Authentication is enabled, please refer to the © Copyright 2016 TRENDnet. All Rights Reserved. -
Page 74: Access Control
DMZ: By default, it’s “Disable”. Check Enable radial button to enable DMZ. IP Address: Enter IP address of DMZ host and only one DMZ host is supported. Click Save button to save your changes. Click Reboot button to activate your changes. © Copyright 2016 TRENDnet. All Rights Reserved. -
Page 75: Mac Filter Setup
Only Allow List MAC: The wireless clients in the MAC Filter List will be allowed to Protocol Type: Select appropriate sessions, TCP or UDP, from shared host via access to Access Point; All others will be denied. multiple private ports. © Copyright 2016 TRENDnet. All Rights Reserved. -
Page 76: Bandwidth Control
Status, WDS Link Status, Extra Information and Event Log. Mode: Select the bandwidth control mode to use through the access point. Upload: Enter the upload bandwidth speeds Download: Enter the download bandwidth speeds © Copyright 2016 TRENDnet. All Rights Reserved. -
Page 77: System Overview
Data Rate: Current wireless data rate of the access point. DHCP Client Display detailed information of the access point’s DHCP server. LAN Information: Display total received and transmitted statistics on the LAN © Copyright 2016 TRENDnet. All Rights Reserved. -
Page 78: Extra Information
ARP table. ARP associates each IP address to a unique hardware address (MAC) of a device. It is important to have a unique IP address as final destination to switch packets to. © Copyright 2016 TRENDnet. All Rights Reserved. -
Page 79: Event Log
When time runs out for a particular entry, it will be pruned from Remote AP status the table. In that situation, switching packet to that particular MAC address will be List the current status of the remote access point. dropped. © Copyright 2016 TRENDnet. All Rights Reserved. - Page 80 RSSI: Indicate the signal strength of the respective WDS links. o TX/RX SEQ: Transmit and receive sequence. o TX/RX Bytes: Transmit and receive bytes o Status: Display current association status of remote access point © Copyright 2016 TRENDnet. All Rights Reserved.
-
Page 81: System Management
Ping Watchdog Tool. The value of Startup Delay should be at least 60 seconds as the network interface and wireless connection initialization takes considerable amount of time if the device is rebooted. Default is 300 seconds. © Copyright 2016 TRENDnet. All Rights Reserved. -
Page 82: Configure System Time
SNMP v2c Enable: Check to enable SNMP v2c. System time can be configured via this page and manual setting or via a NTP server is supported. Please click on System -> Time Server and follow the below setting. © Copyright 2016 TRENDnet. All Rights Reserved. -
Page 83: Enable Upnp
Reset To Factory Default: Click Default button to reset back to the factory default settings and expect Successful loading message. Then, click Reboot button to activate. Community: Set a community string required by the remote host computer that © Copyright 2016 TRENDnet. All Rights Reserved. -
Page 84: Firmware Upgrade
MAX Hop: Specifies the maximum number of hops( max time-to-live value) The administrator can diagnose network connectivity via the PING and TRACEROUTE traceroute will probe. utility. Please click on Utilities -> Network Utility and follow the below setting © Copyright 2016 TRENDnet. All Rights Reserved. -
Page 85: Reboot
Click Reboot button to proceed and take around three minutes to complete. A reminder will be available for remaining time to complete. If power cycle is necessary, please wait till completion of the reboot process. © Copyright 2016 TRENDnet. All Rights Reserved. -
Page 86: Technical Specifications
Firewall (CPE Mode): NAT, Virtual Server, DMZ Host, PPTP/L2TP/IPsec VPN Ping test Passthrough Ping Watchdog Access Controls: MAC, IP Filter, Layer 2 Client Isolation, Per-SSID client limiting 802.1Q VLAN © Copyright 2016 TRENDnet. All Rights Reserved. - Page 87 Input: 100 – 220 V, 50 - 60 Hz, 0.6 A Output: 48v / 0.5A Consumption: 22 Watts Max. Operating Temperature -30 - 60° C (-22 - 140° F) © Copyright 2016 TRENDnet. All Rights Reserved.
-
Page 88: Appendix
2. In the Network Preference window, next to "Show:", select Network Status. You'll see In MAC OS 10.5/10.6, in the left column, select Ethernet. your network status and your IP address settings displayed. e. Configure TCP/IP to use DHCP. © Copyright 2016 TRENDnet. All Rights Reserved. - Page 89 IP address. Click OK Windows XP/2000 a. Go into the Control Panel, double-click the Network Connections icon b. Right-click the Local Area Connection icon and the click Properties. c. Click Internet Protocol (TCP/IP) and click Properties. © Copyright 2016 TRENDnet. All Rights Reserved.
- Page 90 3. You may be prompted to enter a security key in order to connect to the network. 4. Enter in the security key corresponding to the wireless network, and click Connect. © Copyright 2016 TRENDnet. All Rights Reserved.
- Page 91 This equipment has been tested and found to comply with the limits for a Class B digital device, TRENDnet hereby declare that the product is in compliance with the essential requirements pursuant to Part 15 of the FCC Rules. These limits are designed to provide reasonable and other relevant provisions under our sole responsibility.
- Page 92 2011/65/EU i 2006/95/WE. 2006/95/EC. TRENDnet declara que este TEW-740APBO está conforme com os Português Por medio de la presente TRENDnet declara que el TEW-740APBO cumple Español [Spanish] requisitos essenciais e outras disposições da Directiva 1999/5/CE, [Portuguese] con los requisitos esenciales y cualesquiera otras disposiciones aplicables o 2014/35/EU, 2014/30/EU, 2004/108/CE, 2011/65/EU e 2006/95/CE.
- Page 93 Cet équipement est conforme aux limites d'exposition aux rayonnements IC établies pour un environnement non contrôlé. Cet équipement doit être installé et utilisé avec un minimum de 20 cm de distance entre la source de rayonnement et votre corps. © Copyright 2016 TRENDnet. All Rights Reserved.
- Page 94 An RMA number is required in order to initiate warranty service support the event that the RMA unit needs to be replaced, TRENDnet may replace it with a for all TRENDnet products. Products that are sent to TRENDnet for RMA service must refurbished product of the same or comparable model.
- Page 95 OF SUCH DAMAGES, AND LIMITS ITS LIABILITY TO REPAIR, REPLACEMENT, OR REFUND evidence of the original purchaser's date of purchase. Replacement products may be OF THE PURCHASE PRICE PAID, AT TRENDNET'S OPTION. THIS DISCLAIMER OF LIABILITY refurbished or contain refurbished materials. If TRENDnet, by its sole determination, is...
Need help?
Do you have a question about the TEW-740APBO and is the answer not in the manual?
Questions and answers