TRENDnet TEW-750DAP User Manual
Hide thumbs
Also See for TEW-750DAP:
- User manual (69 pages) ,
- Quick installation manual (13 pages) ,
- Datasheet (3 pages)
Table of Contents
Advertisement
Quick Links
Advertisement
Table of Contents

Related Manuals for TRENDnet TEW-750DAP


Summary of Contents for TRENDnet TEW-750DAP
- Page 1 Cover Page TRENDnet User’s Guide TEW-750DAP User’s Guide...
-
Page 2: Table Of Contents
Wireless Security ................. 32 Wireless Security Mode – None ..............14 Wireless Security Mode – WEP ..............15 Technical Specifications ............. 33 Wireless Security Mode – WPA-Personal ..........15 Wireless Security Mode – WPA-Enterprise ..........16 © Copyright 2013 TRENDnet. All Rights Reserved. -
Page 3: Product Overview
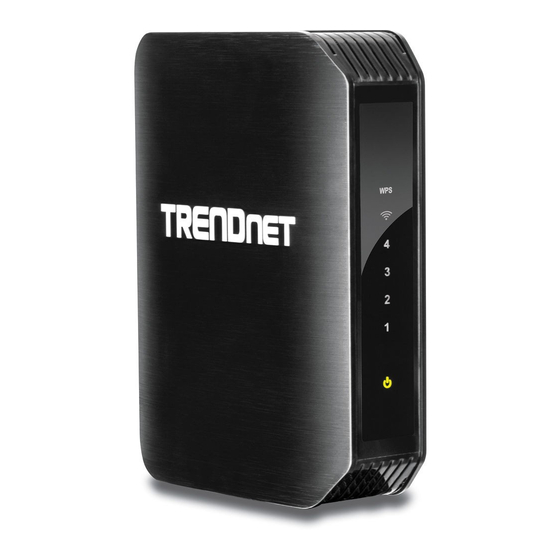
TRENDnet User’s Guide TEW750DAP Features Product Overview TRENDnet TEW-750DAP Dual Band Wireless AP produces the ultimate wireless experience with up to 300Mbps for the 802.11n wireless connection. • 4 x 10/100Mbps Auto-MDIX LAN ports • 1 x Wi-Fi Protected Setup (WPS) button •... -
Page 4: Product Hardware Features
Note: Use only the adapter that came with the AP. • ON/OFF Button – Press the button to power on and off. Reset Button WPS Button LAN Ports Power Port ON/OFF Button © Copyright 2013 TRENDnet. All Rights Reserved. -
Page 5: Installation
The LED will turn off automatically once WPS is completed. • Wireless LAN LED – This indicator lights on when the link is established. The indicator blinks when there is data transmission. © Copyright 2013 TRENDnet. All Rights Reserved. -
Page 6: Hardware Installation
It is highly recommended to change to a new password. Enter the new password in the Password and Verify Password field, and click Next. If the user does not change the password, the default password is admin. © Copyright 2013 TRENDnet. All Rights Reserved. -
Page 7: Main > Wizard
Default User Name: admin Default Password: admin 6. The main window appears. You can configure the AP by using the Setup Wizard or detail manual configuration. © Copyright 2013 TRENDnet. All Rights Reserved. -
Page 8: Main > Lan
When selecting Static IP, the user need to manually configure the AP’s network settings. When selecting Dynamic IP (DHCP), the AP will automatically obtain the network settings from an existing DHCP server on the network. © Copyright 2013 TRENDnet. All Rights Reserved. -
Page 9: Lan Connection Type - Static Ip
LAN. Add DHCP Reservation Enable: Tick the check box to enable the reservation. Computer Name: Enter the computer name or select from the drop-down menu and click <<. © Copyright 2013 TRENDnet. All Rights Reserved. -
Page 10: Main > Password
Verify Password: Re-type the administrator password. System Name Gateway Name: Enter a name for the AP. Click the Save Settings button to accept the changes made. Click the Don’t Save Settings button to discard the changes made. © Copyright 2013 TRENDnet. All Rights Reserved. -
Page 11: Main > Time
Click the Don’t Save Settings button to discard the changes made. Time and Date Configuration Time: Displays the current date and time of the AP Time Zone: Select your time zone from the drop-down menu. © Copyright 2013 TRENDnet. All Rights Reserved. -
Page 12: Main > Ipv6
Subnet Prefix Length: Enter the subnet prefix length. Default Gateway: Enter the default gateway IPv6 address. Primary DNS Server: Enter the primary IPv6 DNS server address. Secondary DNS Server: Enter the secondary IPv6 DNS server address. © Copyright 2013 TRENDnet. All Rights Reserved. -
Page 13: Ipv6 Connection Type - Auto-Configuration (Slaac/Dhcpv6)
Use the following IPv6 DNS Servers is selected. Secondary DNS Server: Enter the secondary IPv6 DNS server address. This field is only available when Use the following IPv6 DNS Servers is selected. © Copyright 2013 TRENDnet. All Rights Reserved. -
Page 14: Wireless Network Settings - 2.4Ghz Band
Wireless Network Name: Enter the wireless network name (SSID). This name will be available when wireless clients scan for available wireless networks. However, when Visibility Status is set to Invisible, this name will not be visible to wireless clients. © Copyright 2013 TRENDnet. All Rights Reserved. -
Page 15: Wireless Mode - Wds
Site Survey button to see the available AP in the area. Click the radio button to network. select the corresponding AP and Connect to have the AP’s MAC address in the field. Wireless Mode – WDS+AP When selecting WDS+AP in the Mode drop-down menu, the following section appears. © Copyright 2013 TRENDnet. All Rights Reserved. -
Page 16: Wireless Security Mode - Wep
Group Key Update Interval: Enter the group key update interval time in seconds. Pre-shared Key Pre-shared Key: Enter the WPA-Personal wireless Pre-Shared Key. This key must be configured on all the wireless clients for them to be able to connect to your wireless network. © Copyright 2013 TRENDnet. All Rights Reserved. -
Page 17: Wireless Security Mode - Wpa-Enterprise
(WPA or WPA2), WPA2 Only, and WPA Only. Cipher Type: Select the wireless cipher type here. Options to choose from are TKIP and AES, TKIP, and AES. Group Key Update Interval: Enter the group key update interval time in seconds. © Copyright 2013 TRENDnet. All Rights Reserved. -
Page 18: Wireless Network Settings - 5Ghz Band
802.11 Mode: Select which 802.11 wireless modes to use from the drop-down remote AP. menu. Options to choose from are 802.11a only, 802.11n only, and Mixed 802.11a and 802.11n. If you are not sure, select Mixed 802.11a and 802.11n. © Copyright 2013 TRENDnet. All Rights Reserved. -
Page 19: Wireless Security Mode - None
Group Key Update Interval: Enter the group key update interval time in WEP Key Length: Select the WEP Key Length value as 64 bit (10 hex digits) seconds. or 128 bit (26 hex digits). © Copyright 2013 TRENDnet. All Rights Reserved. -
Page 20: Wireless > Advanced
Enable: Tick the check box to enable the Wi-Fi Protected Setup (WPS) feature. Options to choose from are 100%, 50%, 25% and 12.5%. Wi-Fi Protected Setup: Displays the status of the WPS feature. © Copyright 2013 TRENDnet. All Rights Reserved. - Page 21 Click the Cancel button to discard the changes made and return to the main menu. Step 2: Connect your Wireless Device After selecting the Auto radio button in Step 1, the window will be available. Step 1: Select Configuration Method for your Wireless Network © Copyright 2013 TRENDnet. All Rights Reserved.
- Page 22 Click the Prev button to return to the previous step. Click the Cancel button to finish the setup and return to the main menu. Click the Wireless Status button to view information about wireless clients connected to the AP. © Copyright 2013 TRENDnet. All Rights Reserved.
-
Page 23: Status > Device Information
TEW750DAP After clicking the Wireless Status button, the following window appears. Status > Device Information This window displays the detail information about the AP. You can view General, Ethernet, and Wireless LAN information. © Copyright 2013 TRENDnet. All Rights Reserved. -
Page 24: Status > Log
Click the Save Settings button to accept the changes made. Click the Don’t Save Settings button to discard the changes made. Status > Statistic This window displays the LAN, and Wireless interface statistics for the AP. © Copyright 2013 TRENDnet. All Rights Reserved. -
Page 25: Status > Wireless
Click the Refresh Statistics button to refresh the information on this page. Click the Reset Statistics button to clear the information on the page. Status > IPv6 This window displays the detail IPv6 network information. © Copyright 2013 TRENDnet. All Rights Reserved. -
Page 26: Access > Mac Filters
ALLOW computers listed to access the network to enable this feature and only allow the computers, by MAC address, to access the network. Select Turn MAC Filtering ON and DENY computers listed to access the network to © Copyright 2013 TRENDnet. All Rights Reserved. -
Page 27: Access > Guest Zone
Enable Guest Zone: Tick the check box to enable the Guest Zone feature, and use the drop-down menu to select the time schedule or click the New Schedule button to create time schedules. © Copyright 2013 TRENDnet. All Rights Reserved. -
Page 28: Tools > Restart
AP and return the settings to the factory defaults. Reboot The Device: Click the Reboot the Device button to reboot the AP. All unsaved configurations will be discarded. © Copyright 2013 TRENDnet. All Rights Reserved. -
Page 29: Tools > Ping Test
The ping result will display in this section. Email Notification Enable Email Notification: Tick the check box to enable the email notification feature. Email Settings From Email Address: Enter the sender’s email address. © Copyright 2013 TRENDnet. All Rights Reserved. -
Page 30: Tools > Syslog
Click the Add button to add this schedule into the schedule rules list. Enable Logging to SysLog Server: Tick the box to send the AP logs to a SysLog Server. Click the Cancel button to discard the changes made. © Copyright 2013 TRENDnet. All Rights Reserved. -
Page 31: Networking Basics
Click the OK button twice to return to the Network Connections window. adapters. Statically Assign an IP address If you are not using a DHCP capable gateway/AP, or you need to assign a static IP address, please follow the steps below: © Copyright 2013 TRENDnet. All Rights Reserved. -
Page 32: Wireless Basics
There are two different types of like the freedom of mobility and it’s becoming so popular that more and more wireless networks Wireless Local Area Network (WLAN), and Wireless Personal Area Network (WPAN). © Copyright 2013 TRENDnet. All Rights Reserved. -
Page 33: Wireless Security
AP. network. • Ad-Hoc – Directly connecting to another computer, for peer-to-peer communication, using wireless network adapters on each computer, such as two or more wireless network Cardbus adapters. © Copyright 2013 TRENDnet. All Rights Reserved. -
Page 34: Technical Specifications
• For 15.247(2.4G) • Non-Operating: -20 C~65 C (-4 F~149 11 for 802.11b, 802.11g,802.11n(HT20) 7 for 802.11n(HT40) Humidity • For 15.247(5G) • Operating: 10%~90% non-condensing 5 for 802.11a,802.11n(HT20) • Non-Operating: 5%~95% non-condensing 2 for 802.11n(HT40) © Copyright 2012 TRENDnet. All Rights Reserved. - Page 35 Dimensions & Weight • 120 x 164 x 45 mm Reorient or relocate the receiving antenna. • 241.7 grams Increase the separation between the equipment and receiver. © Copyright 2012 TRENDnet. All Rights Reserved.
- Page 36 For operation within 5.15 ~ 5.25GHz frequency range, it is restricted to indoor environment. This device meets all the other requirements specified in Part 15E, Section 15.407 of the FCC Rules. © Copyright 2012 TRENDnet. All Rights Reserved.
- Page 37 Note: The country code selection is for non-US model only and is not available to all US model. Per FCC regulation, all WiFi product marketed in US must fixed to US operation channels only. © Copyright 2012 TRENDnet. All Rights Reserved.
Need help?
Do you have a question about the TEW-750DAP and is the answer not in the manual?
Questions and answers