Table of Contents
Advertisement
Advertisement
Table of Contents

Related Manuals for TRENDnet TEW-755AP


Summary of Contents for TRENDnet TEW-755AP
- Page 1 Cover Page TRENDnet User’s Guide...
-
Page 2: Table Of Contents
Wireless MAC filter ...................... 19 Restart access point ..................... 30 Client Bridge ................. 20 Upgrade your firmware ....................31 Basic ..........................20 Configure log ....................... 32 Scan for wireless networks ..................20 Test connectivity......................32 © Copyright 2015 TRENDnet. All Rights Reserved. - Page 3 Status > IPv6 Status ..................... 33 Software Controller utility ............. 34 Installation ........................34 Add and Delete Device ....................34 Device Settings ......................35 Upgrade Firmware ....................... 35 Load configuration ....................... 36 Troubleshooting ................37 Appendix ..................38 © Copyright 2015 TRENDnet. All Rights Reserved.
-
Page 4: Product Overview
TRENDnet User’s Guide Features Product Overview TRENDnet’s high performance N300 PoE Access Point, model TEW-755AP, supports Access Point (AP), Client, Wireless Distribution System (WDS) AP, WDS Bridge, WDS Station, and Repeater modes. It generates a 300 Mbps WiFi N network and features a Gigabit PoE port. The included Windows-based software controller manages multiple TEW-755APs and reduces WiFi management/troubleshooting time. -
Page 5: Product Hardware Features
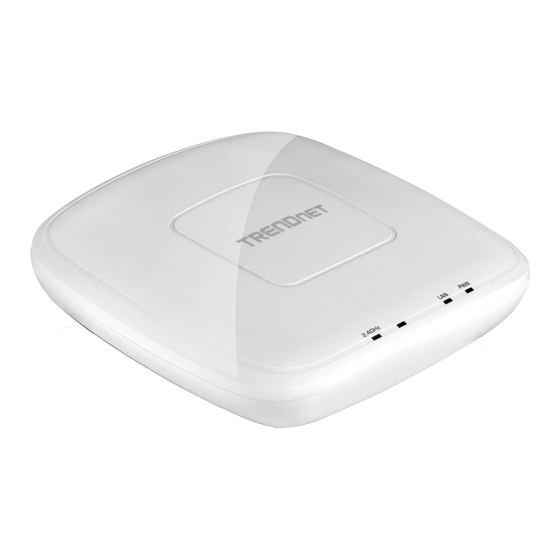
LAN: This LED indicator turns green when the access point LAN port is connected. The LED indicator blinks during data transmission PWR: This indicator turns green when the device is powered. © Copyright 2015 TRENDnet. All Rights Reserved. -
Page 6: Application Diagram
Power port: Connect the power adapter from your access point power port to an available power outlet. Reset button: Use a sharp tool to press and hold this button for 10 seconds to reset the access point. © Copyright 2015 TRENDnet. All Rights Reserved. -
Page 7: Connect Wireless Devices To Your Access Point
2. Place the mounting plate on the wall or ceiling where the device will be located and white labels located on the device. Use this information to connect to the TEW-755AP mark the location of the screw holes. Ensure that the device has enough clearance to access point. -
Page 8: Steps To Improve Wireless Connectivity
802.11n. If a wirelessly networked device uses an older standard, the performance of the entire wireless network may be slower. If you are still experiencing low or no signal consider repositioning the wireless devices or installing additional access points. © Copyright 2015 TRENDnet. All Rights Reserved. -
Page 9: Connect Wireless Devices To Your Access Point
2. Enter the default user name and password and then click Login. You can find your device's SSID and WiFi password on the white labels located on the device. Use this information to connect to the TEW-755AP access point. © Copyright 2015 TRENDnet. All Rights Reserved. - Page 10 For additional information on the utility please go to software controller section. 1. Insert the CD ROM included with the access point. 2. Click on Software controller to install the utility. 4. Select the access point you want to configure. © Copyright 2015 TRENDnet. All Rights Reserved.
-
Page 11: Wireless Networking And Security
How to choose the type of security for your wireless network Setting up wireless security is very important. Leaving your wireless network open and unsecure could expose your entire network and personal files to outsiders. TRENDnet recommends reading through this entire section and setting up wireless security on your new router. - Page 12 WPA2: This is the most secure wireless encryption available today, similar to WPA encryption but more robust. This encryption standard also supports the highest connection speeds. TRENDnet recommends setting your router to this encryption standard. If you find that one of your wireless network devices does not support WPA2 encryption, then set your router to either WPA or WPA-Auto encryption.
-
Page 13: Secure Your Wireless Network
HEX or ASCII: Select which WEP code type to assign Selecting WPA- Personal, WPA2- Personal, WPA2- Personal, or Mixed (WPA2-PSK recommended): In the Security Mode drop-down list, select WPA- Personal © Copyright 2015 TRENDnet. All Rights Reserved. - Page 14 Port: Enter the port your RADIUS server is configured to use for RADIUS authentication. Note: It is recommended to use port 1812 which is typical default RADIUS port. Shared Secret: Enter the shared secret used to authorize your router with your RADIUS server. © Copyright 2015 TRENDnet. All Rights Reserved.
-
Page 15: Connect Wireless Devices Using Wps
1. Log into your router management page (see “Access the management page” on page WPS Action 16). 2. Click on the Wireless 2.4GHz 3. Click on WPS to configure the selected wireless band’s WPS feature. Click Apply to save settings © Copyright 2015 TRENDnet. All Rights Reserved. -
Page 16: Advance Configuration
Note: You may need to initiate the WPS PIN on your wireless device first when using this method. Refer to your wireless device documentation for details on the Note: Your router management page URL/domain name http://TEW-755AP or IP operation of WPS. -
Page 17: Operating Modes
Make sure all of the settings of the wireless interface matches to your root or connecting wireless access points, same SSID, channel and wireless encryption settings. 3. Select the operating mode to apply on each wireless band. © Copyright 2015 TRENDnet. All Rights Reserved. -
Page 18: Access Point
B/G mixed: This mode only allows devices to connect to the router using older and slow 802.11b or 802.11g technology and it thereby reduces the router’s maximum speed to 54Mbps (typically not recommended). © Copyright 2015 TRENDnet. All Rights Reserved. -
Page 19: Wireless Profile
SSID: Enter the wireless network name (SSID) to assign to the selected wireless MAC: List of all MAC addresses profile Hide SSID: Select option to disable the wireless network name to broadcast Delete: Click to delete selected MAC address © Copyright 2015 TRENDnet. All Rights Reserved. -
Page 20: Client Bridge
Wireless 2.4GHz > Wireless Network This section outlines the available features to configure wireless 2.4GhH when Access Point mode is selected. 1. Log into your management page (see “Access the management page” on page 16). © Copyright 2015 TRENDnet. All Rights Reserved. -
Page 21: Wds
You will then need to select and enter the wireless security. 1. Log into your management page (see “Access the management page” on page 16). 2. Click on System and Operation Modes. 3. Select the WDS and click Apply. © Copyright 2015 TRENDnet. All Rights Reserved. -
Page 22: Wds Link
B only: This mode only allows devices to connect to the router using older and Security Mode: Select from the pull down menu the wireless security that is used slow 802.11b technology (typically not recommended). on the wireless network you would like to connect to. © Copyright 2015 TRENDnet. All Rights Reserved. -
Page 23: Wireless Profile
The goal is to select the Channel that is least used by neighboring wireless networks. SSID: Enter the wireless network name (SSID) to assign to the selected wireless profile Hide SSID: Select option to disable the wireless network name to broadcast © Copyright 2015 TRENDnet. All Rights Reserved. -
Page 24: Repeater
Wireless 2.4GHz > Wireless Network This section outlines the available features to configure wireless 2.4GHzwhen Access Point mode is selected. 1. Log into your management page (see “Access the management page” on page 16). © Copyright 2015 TRENDnet. All Rights Reserved. -
Page 25: Advanced Wireless Settings
802.11n MAC header. Normally this is less efficient than MSDU aggregation, but it may be more efficient in environments to maintain performance in noisy networks and to prevent hidden nodes from degrading the performance. © Copyright 2015 TRENDnet. All Rights Reserved. -
Page 26: Client Limit
Default Router IP Address: 192.168.10.100 / 255.255.255.0 1. Log into your management page (see “Access the management page” on page 16). Name: Enter desired schedule name. 2. Click on the System tab and click IP Settings. © Copyright 2015 TRENDnet. All Rights Reserved. -
Page 27: Configure Spanning Tree
1. Manually set the date and time of the access point by selecting from the pull down menus. Click Sync Time to synchronize with your computer’s current time. 3. Next to Time Zone, click the drop-down list to select your time zone. © Copyright 2015 TRENDnet. All Rights Reserved. -
Page 28: Manage Vlan
No VLAN Tag: Select this option to use no VLAN Tag 3. Review the settings and click Apply to save settings. Specified VLAN ID: Select this option and enter the assigned VLAN ID. © Copyright 2015 TRENDnet. All Rights Reserved. -
Page 29: Enable Cli
2.4GHz LED: Select On to leave wireless 2.4GHz LED on or Off option to turn off. Priv Protocol: Select the private protocol Priv Key: Enter the private key Engine ID: Enter the engine name © Copyright 2015 TRENDnet. All Rights Reserved. -
Page 30: Maintenance & Monitoring
1. Log into your management page (see “Access the management page” on page 16). There are two methods that can be used to restart your router. 2. Click on the Management tab and click Backup/Restore Settings. © Copyright 2015 TRENDnet. All Rights Reserved. -
Page 31: Upgrade Your Firmware
Maintenance > FW Upgrade TRENDnet may periodically release firmware upgrades that may add features or fix problems associated with your TRENDnet router model and version. To check if there is a firmware upgrade available for your device, please check your TRENDnet model and version using the link. -
Page 32: Configure Log
IP : Enter the IP address you would like to conduct the ping test Packet Length: Enter the packet size Number of Pings: Enter the amount of pings to conduct. Ping: Click to start ping test © Copyright 2015 TRENDnet. All Rights Reserved. -
Page 33: Check Connected Wireless Clients
Channel Width: Displays the applied channel width Frequency (Channel): Displays the current operating wireless channel Tx/Rx Packets: Displays the Transmit (Tx) and Receive (Rx) packet rate SSID List: Displays the multiple SSID settings. © Copyright 2015 TRENDnet. All Rights Reserved. -
Page 34: Software Controller Utility
2. To add a device to control select the “+” on the upper right corner 3. Enter the IP address of the device you would like to add to the controller and press © Copyright 2015 TRENDnet. All Rights Reserved. -
Page 35: Device Settings
3. Enter the IP address of the device you would like to add to the controller and press Upgrade Firmware 1. Run the utility Device Settings 2. Select the devices you want to conduct a firmware upgrade and click on FW upgrade button © Copyright 2015 TRENDnet. All Rights Reserved. -
Page 36: Load Configuration
2. Select the devices you want to conduct a firmware upgrade and click on FW upgrade button 3. Enter the login password of the devices and click Upgrade to start the firmware upgrade process. © Copyright 2015 TRENDnet. All Rights Reserved. -
Page 37: Troubleshooting
Note: If you are experiencing difficulties, please contact your computer or operating click on Wireless. system manufacturer for assistance. 5. Please see “Steps to improve wireless connectivity” on page 21 if you continue to have wireless connectivity problems. © Copyright 2015 TRENDnet. All Rights Reserved. -
Page 38: Appendix
2. In the Network Preference window, next to "Show:", select Network Status. You'll see select the TCP/IP tab. your network status and your IP address settings displayed. In MAC OS 10.5/10.6, in the left column, select Ethernet. e. Configure TCP/IP to use DHCP. © Copyright 2015 TRENDnet. All Rights Reserved. - Page 39 3. You may be prompted to enter a security key in order to connect to the network. 4. Enter in the security key corresponding to the wireless network, and click Connect. © Copyright 2015 TRENDnet. All Rights Reserved.
- Page 40 This equipment has been tested and found to comply with the limits for a Class B digital TRENDnet hereby declare that the product is in compliance with the essential requirements device, pursuant to Part 15 of the FCC Rules. These limits are designed to provide reasonable and other relevant provisions under our sole responsibility.
- Page 41 TEW-755AP TRENDnet User’s Guide bepalingen van richtlijn 1999/5/EG. TRENDnet tímto prohlašuje, že tento TEW-755AP je ve shodě se Česky [Czech] základními požadavky a dalšími příslušnými ustanoveními směrnice Hawnhekk, TRENDnet, jiddikjara li dan TEW-755AP jikkonforma mal- Malti [Maltese] 1999/5/ES. ħtiġijiet essenzjali u ma provvedimenti oħrajn relevanti li hemm fid- Dirrettiva 1999/5/EC.
- Page 42 Cet équipement est conforme aux limites d'exposition aux rayonnements IC établies pour un environnement non contrôlé. Cet équipement doit être installé et utilisé avec un minimum de 20 cm de distance entre la source de rayonnement et votre corps. © Copyright 2015 TRENDnet. All Rights Reserved.
- Page 43 Download section limited to, duty, tax, and other fees. and look for the desired TRENDnet product to access to the GPL Code or LGPL Code. These codes are distributed WITHOUT WARRANTY and are subject to the copyrights of WARRANTIES EXCLUSIVE: IF THE TRENDNET PRODUCT DOES NOT OPERATE AS the developers.
Need help?
Do you have a question about the TEW-755AP and is the answer not in the manual?
Questions and answers