Accu-Chek Mobile User Manual
Hide thumbs
Also See for Mobile:
- User manual (255 pages) ,
- Quick reference manual (2 pages) ,
- Quick start manual (2 pages)
Table of Contents
Advertisement
C
© 2015 Roche Diabetes Care
ACCU-CHEK, ACCU-CHEK MOBILE, ACCU-CHEK SMART PIX,
ACCU-CHEK 360° and FASTCLIX are trademarks of Roche.
COnTInUA, the COnTInUA logos and COnTInUA CERTIFIED are trademarks,
service marks, or certification marks of the Continua Health Alliance.
COnTInUA is a registered trademark in some, but not all countries in which
this product is distributed.
The USB-IF Logos are trademarks of Universal Serial Bus Implementers
Forum, Inc.
Roche Diabetes Care GmbH
M
Sandhofer Strasse 116
68305 Mannheim, Germany
www.accu-chek.com
User's Manual
and Quick Start Guide
Blood Glucose Monitoring System
W
IMPORTANT INFORMATION FOR PERFORMING A BLOOD GLUCOSE TEST
An incorrectly performed blood glucose test may lead to incorrect test results which can cause the wrong therapy recommendation to be made and thus produce serious
adverse health effects. Therefore,
follow
these instructions carefully to perform a blood glucose test correctly.
Do
Wash your hands with warm water and soap and
n
e
h
s c
a
w
_
e
d
n
e
a
H
rinse well. Dry your hands thoroughly with a clean
towel before obtaining blood.
1
Always use a small, fresh and well-formed blood
drop.
2
Touch the test area gently and steadily when applying
the blood drop. Apply the blood drop to the centre of
the test area.
3
IMMEDIATELY!
Apply the blood drop to the test area immediately
after you have obtained the blood drop. Remove your
finger from the test area when the beep tone sounds
4
and Test in progress is displayed. Note: You can only
hear the beep tones when they are turned on. See
Setting tones in the User's Manual.
Do not
Why
Do not perform a blood
An incorrectly performed blood
glucose test if your fingers
glucose test may lead to falsely
are unwashed, soiled or
elevated blood glucose results
sticky (for example, due to
and thereby delivery of an
food or drink residue).
inappropriately high insulin
amount. Falsely elevated test
results are caused by the
following:
• Fingers are unwashed, soiled
Do not perform a blood
or sticky.
glucose test with a smeared
• If the blood drop spreads on
or spread blood drop. Do not
the finger or if the blood drop
smear the blood drop on the
test area.
becomes smeared on the test
area, the risk of contamination
of the test area increases (for
example, due to food or drink
residue on the finger).
Do not press the test area
• The test area is pressed
against the finger.
and the finger together.
Avoid trembling or shaky
• Trembling or shaky
movements.
movements during the blood
1
glucose test.
• The blood glucose test is not
2
performed immediately or the
3
finger stays on the test area
4
for too long. Pay attention to
Do not wait before applying
DO NOT WAIT!
the beep tone. The beep tone
the blood drop to the test
5
helps you to obtain a reliable
area. Do not continue to hold
test result.
your finger on the test area
6
after the beep tone sounds
and Test in progress is
7
displayed.
W
The Accu-Chek Mobile
meter and Accu-Chek
FastClix finger pricker are
Quick Start Guide
intended for patient self-
monitoring by an
individual person only.
Start Here
They must not be used to
test blood glucose from
more than one person as
they do not incorporate any
features to guard against
cross-infection. The meter
and the finger pricker are
not to be shared between
1
family members or used by
healthcare professionals to
obtain blood or test blood
0
glucose from more than one
e
9
person.
2
This Quick Start Guide does
3
q
not replace the detailed
4
User's Manual for your
5
Accu-Chek Mobile blood
6
glucose monitoring system.
w
Be sure to comply with the
7
safety information in the
User's Manual and in the
8
package insert of the test
Release button (priming
Test area (at the tip of the
8
cassette.
and pricking)
cassette ready for a test)
Power and enter button
Lancet drum
9
Down/Up buttons
Slide button to release
0
the finger pricker
Window showing number
of available lancets
Slide button to open the
q
Lever for loading a new
cassette compartment
cover
lancet
Rotatable cap for setting
Tip cover
w
the penetration depth
Test cassette
e
Tip cover, closed (below
right: open)
Advertisement
Table of Contents

Subscribe to Our Youtube Channel
Related Manuals for Accu-Chek Mobile


Summary of Contents for Accu-Chek Mobile
- Page 1 ACCU-CHEK, ACCU-CHEK MOBILE, ACCU-CHEK SMART PIX, the blood drop. Apply the blood drop to the centre of safety information in the Avoid trembling or shaky ACCU-CHEK 360° and FASTCLIX are trademarks of Roche. the test area. • Trembling or shaky User’s Manual and in the movements.
- Page 2 3. Performing a blood glucose test Customer Support and Service Centre kim_manual_0090 Australia Before you perform a blood Accu-Chek Enquiry Line: 1800 251 816 glucose test: Observe the Pump Support: 1800 633 457 important instructions on www.accu-chek.com.au performing a blood glucose test.
- Page 3 User’s Manual Blood Glucose Monitoring System...
- Page 4 These instructions for use feature the following 3 symbols: This symbol indicates a possible risk of injury Keep the blood glucose monitoring system and or of damage to your own health or to the all its components away from children under the health of others.
-
Page 5: Intended Use
Accu-Chek FastClix finger pricker Finger pricker with adjustable penetration depth for obtaining capillary blood from the fingertip with Accu-Chek FastClix lancet drums and, when a special AST cap is used, also from alternative sites (AST = alternative site testing), such as the palm. -
Page 6: Table Of Contents
Contents Intended use � � � � � � � � � � � � � � � � � � � � � � � � � � � � � � � � � � � � � � � � � � � � � � � � � � � � � � � � � � � � � � � � 3 The major features �... -
Page 7: The Major Features
The major features • Test cassette instead of test strips • Text-supported operation 50 test areas on a continuous tape Meter takes you through all operation steps • Test • Menu-driven operation Test starts by opening the tip cover Menu-driven settings and functions • Measuring time • Reminder About 5 seconds for a test, depending on the... -
Page 8: About This User's Manual
About this User’s Manual Read this User’s Manual carefully and completely before testing blood glucose for the first time. If you have any questions, contact the customer support and service centre (see page 134). These instructions for use provide you with the information you need to operate and care for your meter and finger pricker, and for troubleshooting. -
Page 9: Getting To Know Your Meter And Finger Pricker
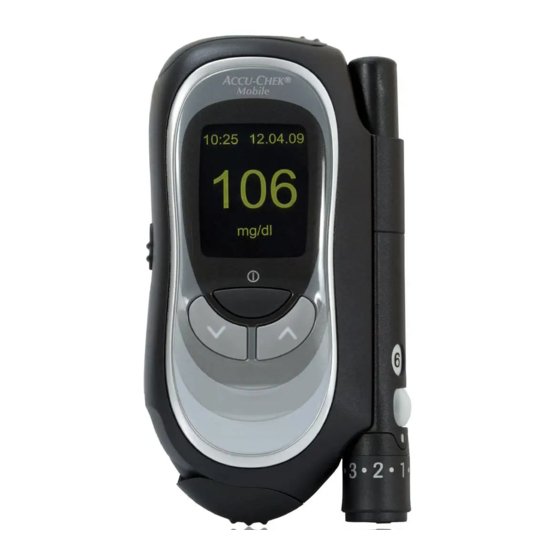
Getting to know your meter and finger pricker Getting to know your meter and finger pricker Overview of meter... - Page 10 Getting to know your meter and finger pricker Battery door (above right: open) USB port – interface to be used for data analysis on a computer (below left: open USB Batteries (see page 114 and page 130 for port) information on possible battery types) Type plate Display Slide button to release the finger pricker...
- Page 11 Getting to know your meter and finger pricker Using the buttons and menus This chapter tells you how to use the buttons to operate the meter and navigate through the menus, how the menus are structured and what the different symbols in them mean. Meter buttons Button Name...
- Page 12 Getting to know your meter and finger pricker Menu structure of the meter Menu symbol indicates that the function (for example, Reminders) is on. Title of a screen or menu (for example, Settings) symbol indicates that the function (for example, Tones) is off. The symbol means that there are more options listed above the first visible option.
- Page 13 Getting to know your meter and finger pricker Operation Turning the meter on Turning the meter off Opening the menu Select Select Pressing and holding the button (press and release the (press and release the (for approx. 2 seconds) button) selects the highlighted button) selects the highlighted Turn off command ( Time/Date option from the...
- Page 14 Getting to know your meter and finger pricker Returning to a higher-level menu Confirming settings or operations Cancelling settings or operations Back ) Cancel is highlighted. Confirm ( (press and release the is highlighted. button) opens the higher-level (press and release the (press and release the menu of the currently...
- Page 15 Getting to know your meter and finger pricker Navigating between input fields Changing numerical values Turning functions on or off Continue (press and release the A tick in front of an option Pressing the button means that the function is on. button) switches from month increases the numerical value.
-
Page 16: Steps Before Testing
Steps before testing Steps before testing Checking the unit of measurement Blood glucose results can be displayed in two different units of measurement (mg/dL or mmol/L). Consequently, there are two different versions of the same meter. Check that your meter displays the unit of measurement you are accustomed to. -
Page 17: Inserting The First Test Cassette
Steps before testing Inserting the first test cassette Before using your new meter for the first time, you must insert a test cassette. Insert the very first test cassette in the meter before you remove the protective strip from the batteries and start using the meter. - Page 18 kim_manual_0090 Steps before testing kim_manual_0270 Open the test cassette box at the Remove the test cassette from Open the tip cover. perforation. Take out the plastic the plastic container. container. kim_manual_0240 kim_manual_0240 kim_manual_0280 anual_0230 kim_manual_0260 Turn the meter over so that the Push the slide button for the Insert the test cassette in the back is facing upwards.
- Page 19 Steps before testing CLICK Close the cassette compartment Press the cassette compartment Close the tip cover. cover. cover closed. The cassette compartment cover must close with an audible CLICK.
-
Page 20: Validity Of The Test Cassette
Steps before testing Validity of the test cassette The validity of the test cassette depends on the use by period and the use by date. Use by period: The period in which the test cassette must be used up after the foil cover of the plastic container was opened. - Page 21 Steps before testing Setting the language The meter automatically prompts you to set the language the first time you turn it on. When you turn the meter on for the first time, the language selection menu is automatically displayed. You can either select the default language or replace it with a different language.
- Page 22 Steps before testing If there are irregularities in the checkerboard pattern, results might not be displayed correctly. In this case, contact the customer support and service centre (see page 134). Check if there are any The meter displays the number irregularities in the checkerboard of tests in the test cassette that pattern 1 (see Performing a...
-
Page 23: Preparing The Finger Pricker
• A used Accu-Chek FastClix lancet drum has a built-in locking mechanism. You cannot reinsert a lancet drum that has already been removed. Used lancet drums must not be reused. - Page 24 Preparing the finger pricker kim_manual_0390 You must not insert the lancet drum into the finger pricker and simultaneously press the release button or hold the finger pricker with the release button resting on a surface such as a table top. This could release a lancet and inadvertently cause injury.
-
Page 25: Setting The Penetration Depth
Preparing the finger pricker Setting the penetration depth You can set the penetration depth of the lancet to 11 different levels. The levels are divided into 6 half- settings and 5 whole settings (0.5–5.5, 0.5 is the lowest, 5.5 is the highest). Set the penetration depth suitable for you. -
Page 26: Loading A New Lancet
Preparing the finger pricker Loading a new lancet When you have inserted a new lancet drum, a new lancet is automatically ready for use. If you have already used the finger pricker to obtain blood, you will need a new lancet the next time you obtain blood. - Page 27 Preparing the finger pricker Replacing the lancet drum When you have used the sixth and last lancet, the number 1 appears in the window on the finger pricker. Replace the lancet drum with a new one. A used lancet drum has a built-in locking mechanism and cannot be reused. kim_manual_0480 kim_manual_0400 Used lancet drums can be disposed of in household waste if no other regulations apply locally.
- Page 28 Preparing the finger pricker kim_manual_0500 Undocking the finger pricker kim_manual_0490 Push the slide button for the Slide the finger pricker out in the finger pricker in the direction of direction of the arrow. the arrow as far as it will go. Hold the slide button in that position.
-
Page 29: Performing A Blood Glucose Test
Performing a blood glucose test Performing a blood glucose test Once you have inserted a lancet drum into the finger pricker and set the penetration depth, you can start to perform a blood glucose test. Important information for performing a blood glucose test Performing a blood glucose test incorrectly may lead to incorrect test results which can cause the wrong therapy recommendation to be made and thus produce serious adverse health effects. - Page 30 Performing a blood glucose test Wash your hands with warm water and soap and rinse well. Dry your hands thoroughly with a clean towel before obtaining blood. Always use a small, fresh and well-formed blood drop. Touch the test area gently and steadily when applying the blood drop.
- Page 31 Performing a blood glucose test Do not Do not perform a blood glucose An incorrectly performed blood test if your fingers are glucose test can lead to falsely unwashed, soiled or sticky elevated blood glucose results (for example, due to food or drink and thereby delivery of an residue).
- Page 32 Performing a blood glucose test Starting a blood glucose test There are 2 ways to start a blood glucose test: By opening the tip cover (A) or from the Main menu (B). A – Starting a blood glucose test by opening the tip cover: Open the tip cover.
- Page 33 Performing a blood glucose test Shortly after the test area has been advanced, the prompt Apply drop appears and a beep tone sounds again. You can also open the tip cover if the meter is already turned on. In this case, the meter then switches to Test.
- Page 34 Performing a blood glucose test After the prompt wash your hands 1, a new test area is advanced and the prompt Apply drop appears.
-
Page 35: Obtaining A Blood Drop
Performing a blood glucose test Obtaining a blood drop In general, you can obtain blood from any finger. Certain fingers can be unsuitable if, for example, a skin or fingernail infection is present. We recommend obtaining capillary blood from the sides of the fingertips as these areas are the least sensitive to pain. - Page 36 Performing a blood glucose test Applying the blood drop You can hold the meter in your hand or lay it down while you apply blood to the test area. Apply the blood drop to the Remove your finger from the test Testing is complete after centre of the test area.
- Page 37 Performing a blood glucose test Symbols associated with test results The following symbols can be displayed together with the test result: Symbol Meaning The batteries are almost out of power. The temperature during the test was outside the permitted range of +10 to +40 °C.
- Page 38 Performing a blood glucose test Symbols instead of test results The meter measures blood glucose values in the interval from 0.6 to 33.3 mmol/L. If the test result is outside this interval, one of the following symbols is displayed: Symbol Meaning The test result is lower than 0.6 mmol/L.
-
Page 39: Flagging Results
Performing a blood glucose test Flagging results You can flag results to describe certain events connected to this result or particular characteristics of the result. You can only flag a result while the result is still displayed after a test. Flagging a result Press . - Page 40 Performing a blood glucose test You have the choice of the following 4 flags: Symbol Meaning Before meal (apple symbol): For test results that you obtained from tests before meals. After meal (apple core symbol): For test results that you obtained from tests after meals. Other (asterisk symbol): You can define the meaning of this flag yourself.
- Page 41 Performing a blood glucose test You can add the following flags to a test result at the same time: • Other and Before meal • Other and After meal You cannot flag a test result with Before meal and After meal at the same time. You can change (add or remove) flags again as long as you are still in the Set flag menu.
- Page 42 Performing a blood glucose test Removing a flag again: to select the flag, for Press to delete the flag. example, Other. The flag is deleted. The symbol The symbol displayed to the right on the screen disappears 2. above the test result shows which flag has been selected 1.
-
Page 43: Setting A Reminder
Performing a blood glucose test Setting a reminder The Reminder option allows you to set a reminder from the Set flag menu straight after a test if you would like to check your blood glucose again later. The meter can give you a one-time reminder to perform a test in 1 hour, in 1.5 hours, in 2 hours or in 3 hours. - Page 44 • If the test result does not match how you feel, for example, it is unexpectedly high or low, perform a control test with Accu-Chek Mobile control solutions. Then repeat the blood glucose test. If the new blood glucose result still does not match how you feel, contact your healthcare professional.
- Page 45 Performing a blood glucose test Implausible results - possible sources of error If your meter repeatedly displays implausible test results or error messages, check the points listed below. Answer the questions in the following overview with yes or no. • If your answer to the question is no, make the respective corrections and repeat the blood glucose test.
- Page 46 Performing a blood glucose test Did you observe the storage conditions for the meter and test cassette? Did you pay attention to the sources of error stated in the test cassette package insert? Did you perform a control test after your meter was dropped while Apply drop was being displayed? If your meter has been dropped, this can also lead to implausible test results or error messages.
-
Page 47: Selecting Settings
Selecting settings Selecting settings Settings overview Menu Available options Language Different languages Volume 5 levels (Mute and 4 volume levels) Beep tones: Turn the beep tones on or off Reminders: Turn the beep tone for reminders on or off Tones Acoustic mode: Turn Acoustic mode on or off (see Acoustic mode page 89) Reminders 7 times of day –... - Page 48 Selecting settings The meter has several features which you can only use after making the appropriate settings. Most of these features are intended primarily to enable you to adapt the meter to your personal needs (for example, beep tones and acoustic reminders). However, blood glucose tests can be performed independently of the settings.
- Page 49 Selecting settings Setting the language You can choose a language from the list for the text appearing on the screen. In the Settings menu, use to select the desired Press . to select Language ( language. You have confirmed the language Press .
-
Page 50: Setting The Volume
Selecting settings Setting the volume You can set the volume for the beep tones to one of 5 different levels. The longer the bar on the screen, the louder the volume. At volume level 1 (Mute) no beep tone is audible. In the Settings menu, use to set the volume. -
Page 51: Setting Tones
Selecting settings Setting tones In the Tones menu you can turn the beep tones, the beep tone for reminders and the acoustic mode on or off. The different beep tone settings are as follows: Beep tones: If Beep tones is turned on, a beep tone sounds during a test, • when the meter advances a test area to the tip of the cassette, • when the prompt Apply drop is displayed and you can apply blood or control solution to the test area, • when the test begins and Test in progress is displayed,... - Page 52 Selecting settings Turning tones on and off You can turn the Beep tones, Reminders and Acoustic mode tones on and off. Procedure using the example of Beep tones: Note: • If you want to use reminders, you must turn on both Reminders and Beep tones.
-
Page 53: Setting Reminders
Selecting settings Setting reminders You can set up to 7 reminder times. If the meter is turned off, the Reminder message will be displayed daily at the time you have set. If you have turned on Reminders in the Tones menu, beep tones will also sound (see Turning tones on and off page 50). - Page 54 Selecting settings Setting a new reminder In the Settings menu, use to select New. to set the hour 1. to select Reminders. Press . Press . Press . to set the minutes 2. Press . Only for times in 12-hour time The meter shows you the set The meter returns to the Reminders menu.
- Page 55 Selecting settings Turning a reminder on or off A list of the reminders that have already been set appears on the screen. The menu option On is In the Settings menu, use to select Reminders. highlighted. Press to turn the reminder on Press .
- Page 56 Selecting settings Changing a reminder In the Settings menu, use to select Edit. to select the reminder to select Reminders. time you wish to change. Press . Press . Press . Set the new reminder time. The reminder time has now been changed.
- Page 57 Selecting settings Setting the time, date and time format The time and date are preset in the meter. If you want to use reminders or analyse your test results with a computer, for example, you should check the time and date and correct them if they deviate from the current time or date.
- Page 58 Selecting settings Only for times in 12-hour time The set time is displayed. format: Press . to select am or pm. You have confirmed the time set. Press .
- Page 59 Selecting settings Setting the date The sequence in which you set the day, month and year while setting the date depends on the time format you have set. Apart from the sequence, the procedure is the same in all cases. The following sequences are possible: Day.Month.Year Month/Day/Year...
- Page 60 Selecting settings In the Settings menu, use to set the day 1. to set the month 2. to select Time/Date. Press . Press . Press . to select Date. Press . When you confirm the last entry with Continue (step 4), if the date you have set does not exist (for example, 31 April), the meter returns to the first...
- Page 61 Selecting settings Setting the time format In the Settings menu, use The selected time format is to select the desired to select Time/Date. displayed. time format. Press . Press . Press . to select Time format. You have confirmed the selected time format.
-
Page 62: Setting The Target Range
Selecting settings Setting the target range You can enter your personal target range for blood glucose values (default setting: Off). Test results above this target range are flagged with the symbol . Test results below this target range are flagged with the symbol The target range comprises the blood glucose values which should be achieved if the therapy is optimal. - Page 63 Selecting settings to select Back. Press . The meter returns to the Settings menu. to set the lower limit Press . The set target range is displayed. Press . The target range is also turned to set the upper limit If you do not want to set a target to select Cancel range, use...
- Page 64 Selecting settings Changing a target range In the Settings menu, use to select Edit. Set the new target range. to select Target range. Press . The changed target range is displayed. Press . Press to confirm the set target range. The target range is also turned...
-
Page 65: Setting The Brightness
Selecting settings Setting the brightness You can set the brightness of the texts and symbols appearing on the screen to one of 3 different levels. The more bars filled on the screen, the brighter the screen. In the Settings menu, use to set the desired to select Brightness. -
Page 66: Using The Meter As A Diary
Using the meter as a diary Using the meter as a diary The meter can store up to 2,000 results with the time and date. The meter stores the following information: • all results, • all symbols displayed with the result, • all flags that were set. - Page 67 Using the meter as a diary A – Retrieving stored results via the My data menu: In the Main menu, use to select All results. The last saved result is select My data ( displayed. Press . Symbols saved together with the Press .
- Page 68 Using the meter as a diary C – Retrieving older results: If you press and hold the button, the results are Retrieve the stored results (see Press to go to the next oldest displayed in quick succession, page 65). result. starting with a slow speed and becoming faster.
-
Page 69: Retrieving Averages
Using the meter as a diary Retrieving averages The meter can calculate averages from the stored test results. Averages Time periods You can choose which test results are used for calculating the averages: • All results • Only test results that were flagged with Before meal • Only test results that were flagged with After meal When you have made this selection, you can choose the period of time in which the test results were obtained. - Page 70 Using the meter as a diary to select Averages. to select All results, In the Main menu, use select My data ( Before meal or After meal. Press . The My data menu is displayed. Press . to select the time period in which the test results were obtained: 7, 14, 30 or 90 days.
- Page 71 Using the meter as a diary Before/After meal Averages Before meal are marked with the symbol 1. Averages After meal are marked with the symbol • The meter calculates the average for a time period even when the stored test results cover a shorter period (for example, only 5 days).
-
Page 72: Analysing Test Results On The Pc
Analysing test results on the PC Analysing test results on the PC The meter has a built-in USB port (Universal Serial Bus) for transferring stored test results to an appropriately equipped computer (PC). USB port You need 1 USB cable to connect the meter to a PC. The USB cable must have the following connectors: • Micro B connector to establish a connection with the meter. - Page 73 • Data transfer transfers the test results to the PC. You can use special software products for diabetes management (for example, Accu-Chek 360° Diabetes Management System or Accu-Chek Smart Pix software) to display the data on a PC and analyse it (see Data transfer page 74). With this setting, the meter also supports data exchange between medical devices with the Continua Certified...
- Page 74 PHDC driver (PHDC = Personal Health Device Class) on your PC. Whether you need a PHDC driver depends on the diabetes management software used. Viewing a report (Accu-Chek Mobile report) with your Internet browser does not require any additional software.
- Page 75 Analysing test results on the PC Connecting the meter to the PC 2a and 2b 2a – With the meter off: The meter turns on. Depending on the selected default (see Defining the default page 71), the analysis of the test results is started with Data transfer or Reports.
- Page 76 • To analyse the data by means of Data transfer, you need additional software (for example, Accu-Chek 360° Diabetes Management System or Accu-Chek Smart Pix software). • If you do not want to transfer the test results after all, you can abort the transfer using the button.
- Page 77 Analysing test results on the PC Displaying reports Open the file manager of your Double click on the (ACCU-CHEK) operating system. drive icon to open it. Double click on the Start.html file The meter appears as a drive (USB storage device) in the file to open it.
- Page 78 Analysing test results on the PC Analysis with a meter already connected If you have already connected the meter to a PC with the USB cable but the meter is off, proceed as follows: to select PC analysis. to select Data transfer Turn the meter on with .
- Page 79 Analysing test results on the PC Reports Reports are used to easily and automatically analyse stored blood glucose results from your Accu-Chek Mobile meter. Overview The reports can be displayed on a PC using an Internet browser and can be printed by a printer. You do not need an Internet connection to display the reports.
- Page 80 Analysing test results on the PC User interface Accu-Chek Mobile report 27.04.2014 – 10.05.2014 Control elements: Display panes: Window of the Internet Legend for explanation of The test results are browser symbols represented in the unit mg/dL or mmol/L, depending on the...
- Page 81 Analysing test results on the PC Symbols Within the report charts, test results are plotted in the analysis by means of different symbols. The symbols and graphic elements in the charts have the following meaning: Symbol Meaning Test: Blood glucose value from a test Several tests: Blood glucose values from several tests Average: Average of the blood glucose values in the selected time period Target range for blood glucose values: Personal target range for blood glucose values...
- Page 82 Analysing test results on the PC Printing reports All the reports displayed on the screen can also be printed out together. Do not use the integrated print function of the browser to print the reports, instead use the Print reports ( ) button on the user interface.
- Page 83 Analysing test results on the PC Trend Report Trend Report 27.04.2014 – 10.05.2014 The Trend Report shows you the trend of blood glucose results over the selected time period. You will find the days and months on the horizontal x-axis and the blood glucose values on the vertical y-axis.
- Page 84 Analysing test results on the PC Standard Day Report Standard Day Report 27.04.2014 – 10.05.2014 The Standard Day Report makes it easier to recognise daily patterns. For this purpose, all the data is placed on a 24-hour grid. As a result, all tests performed at (approximately) the same time of day are shown at the same position on the time axis.
- Page 85 Analysing test results on the PC Standard Week Report Standard Week Report 27.04.2014 – 10.05.2014 The Standard Week Report makes it easier to recognise repeated patterns depending on the day of the week. For example, it may be possible to recognise changes in metabolic situation brought about by your lifestyle patterns.
- Page 86 Analysing test results on the PC List Report List Report 27.04.2014 – 10.05.2014 The List Report shows the test results sorted by date and time of the test. All blood glucose values are listed chronologically and with any additional information about events (see Flagging results page 37). The list contains the following columns: • Date and Time • Blood Glucose (mmol/L)
- Page 87 Analysing test results on the PC Statistics Below the chart of a report, you will find a statistical analysis of all plotted test results with the following information: • Number of tests • Average (mmol/L) • Standard deviation (mmol/L) The standard deviation is the variance of the analysed results. • Highest blood glucose value (mmol/L) • Lowest blood glucose value (mmol/L) • Average tests per day...
- Page 88 Analysing test results on the PC Analysing data in external applications If you want to analyse the test results using external software, you can save the data as a CSV file (CSV = Comma Separated Values). CSV files can be opened with a text editor or spreadsheet program, for example.
- Page 89 Analysing test results on the PC The CSV file contains the following information: • Serial number of the meter. • Download date, download time – date and time when the meter transferred the test results to the computer. • Date, time, result and unit of the results saved in the meter. • Flags added to the results, indicated by an X.
- Page 90 Error message Troubleshooting Check whether Reports is selected in the defaults for PC analysis (see Defining the default page 71). The ACCU-CHEK drive symbol with the Check whether your PC or operating system supports data transfer via USB. Start.html file does...
-
Page 91: Acoustic Mode
Acoustic mode Acoustic mode The procedure for turning the acoustic mode on is described in Setting tones (see page 49). When the acoustic mode is turned on, the meter guides you through the blood glucose test using beep tones and announces the test result as a series of beep tones. The meter also beeps when the batteries are almost empty, the test cassette is empty or an error message is displayed. -
Page 92: Beep Tone When Turning On
Acoustic mode There are two types of beep tones, differing in pitch. Warnings have a higher pitch (Tone 2, represented herein as ) than the other beep tones (Tone 1, represented herein as ). The following table shows which tone sounds for which event. Beep tones Tone 1: Tone 2:... - Page 93 Acoustic mode Test result announcement after a test In the acoustic mode, when a test result is displayed following a blood glucose test, the meter also announces it as a series of beeps. The test result is not announced as an entity, but is broken down into individual digits.
- Page 94 Acoustic mode mmol/L meters First the tens are announced, then the units followed by the decimal point and finally the tenths. There is a short pause between each group of beeps. The tens are always announced, even when the test result is below 10.
- Page 95 Acoustic mode If you directly retrieve stored test results using the button , you will first hear the power-on beep and immediately afterwards the test result: test result test result test result. If XX.X is displayed as the last (most recent) test result, the last test did not deliver a test result (see page 66).
-
Page 96: Checking The Meter
Always perform a control test using Accu-Chek Mobile control solutions: • After you have cleaned the inside of the tip of the cassette and tip cover, as well as the measuring optics and the front opening of the meter. -
Page 97: Preparing For A Control Test
Preparing for a control test For a control test, you need: • The meter with inserted test cassette • An unopened applicator with Accu-Chek Mobile control solution • A clean, dry paper towel. The solution in the applicators is intended for single use only. - Page 98 Checking the meter Apply the control solution to the Take the brush away from the Press . test area as soon as Test in centre of the test area at the tip The test ends after 5 seconds progress appears on the screen. of the cassette using the tip of and the meter displays the result.
- Page 99 Checking the meter to select Control test. to select the colour of The control result flagged as the text on the applicator label for Control test is displayed. Press . (see page 94). Press . Press .
- Page 100 Checking the meter The meter displays the upper The meter automatically checks whether the control result is within and lower limits of the the concentration range displayed. concentration range. The If the control result is within the concentration range displayed, concentration range displayed Control test OK is displayed.
-
Page 101: Possible Sources Of Error
Checking the meter Checking the concentration range yourself Accu-Chek Mobile Control ® mg/dL mmol/L 1 35–75 1,9–4,2 2 115–155 6,4–8,6 You can also check yourself whether the control result is within the right concentration range. To do this, compare the control result with the concentration table on the test cassette box. - Page 102 Checking the meter Source of error Did you perform the control test according to the User’s Manual? Did you wait for the application prompt to be displayed before applying control solution? Did you apply the control solution immediately after opening the applicator? Did you enter the correct colour in the Control test menu? Did you test within the correct temperature range (+10 to +40 °C)? Did you check the use by date for the control solution? Is the control solution still valid (use by date:...
-
Page 103: Tools Menu
Tools menu Tools menu On the one hand, the Tools menu offers you some extra means of checking the meter. On the other hand, you must also use this menu to prepare for cleaning the meter and changing a test cassette that has not been used up. - Page 104 Tools menu If there are irregularities in the Press . checkerboard pattern, test The meter returns to the Tools results might not be displayed menu. correctly. In this case, contact If you do not press , the meter the customer support and displays the display check for service centre (see page 134).
-
Page 105: Viewing The Number Of Available Tests
Tools menu Viewing the number of available tests With the meter off: Press and hold until the meter turns on (longer than 2 seconds). The number of available tests is displayed. The meter turns off again a short time later. Replacing the test cassette If you want to replace an empty test cassette or a test cassette that has expired, continue reading in the section Replacing the test cassette (see page 105). - Page 106 Tools menu Preparing test cassette replacement The preparatory steps for test cassette replacement are only necessary if you want to remove a partly used test cassette which still has unused test areas: In the Tools menu, use The meter now prompts you to select Change cass..
- Page 107 Tools menu Replacing the test cassette Test cassette empty/defective/expired Change cassette If the test cassette in the meter is empty or defective or has If you have prepared for the test cassette replacement via Change expired 3, the appropriate message appears after the display check cass.
- Page 108 Tools menu kim_manual_0270 Remove the old test cassette Take the new test cassette out of Insert the new test cassette in from the cassette compartment. the plastic container. the meter with the silver side facing upwards. Used test cassettes can be disposed of in household waste if no other regulations apply locally.
-
Page 109: Cleaning The Blood Glucose Monitoring System
Cleaning the blood glucose monitoring system Cleaning the blood glucose monitoring system Cleaning the meter The mode of operation of the meter with the test cassette means that the meter will not normally come into contact with blood or control solution. Regular cleaning is therefore not necessary. In the event of the meter becoming soiled through improper use, cleaning may become necessary. - Page 110 Cleaning the blood glucose monitoring system The inside You only need to clean the inside of the meter or the inside of the tip of the cassette when the message with the text Cassette dirty: Clean per user's manual (E-4) is displayed. The error message may be caused by dirt inside the tip of the cassette.
- Page 111 Cleaning the blood glucose monitoring system Cleaning If you notice that the area around the tip of the cassette is visibly soiled and you want to clean the meter, proceed as follows: In the Tools menu, use If you do not want to clean the The steps that follow are select Change cass..
- Page 112 Cleaning the blood glucose monitoring system kim_manual_0765 Make sure that no liquid enters the meter. Avoid scratching the measuring optics. kim_manual_0780 Check whether you can see any Carefully dab the measuring Leave the cassette compartment dirt inside the tip of the cassette. optics and the front opening of cover open and close the tip the meter with a slightly...
- Page 113 _manual_0795 Cleaning the blood glucose monitoring system Carefully dab the interior of the Open the tip cover again. Re-insert the test cassette in the tip cover with a slightly meter. dampened cotton swab. Remove the dirt that was left behind. Allow the meter to dry thoroughly.
- Page 114 Cleaning the blood glucose monitoring system Cleaning and disinfecting the finger pricker To prevent the transmission of infections, you must regularly clean and disinfect the finger pricker and cap: • at least once a week, • when there is blood on them, • always before someone else handles the finger pricker, for example, to assist you.
- Page 115 Cleaning the blood glucose monitoring system Preparation Remove the finger pricker from Remove the cap from the finger Remove the lancet drum from the meter. pricker. the finger pricker. Cleaning Slightly dampen a cloth with Wipe the finger pricker and the Dry the finger pricker and cap water.
-
Page 116: Changing The Batteries
Changing the batteries Changing the batteries The message Batteries low Replace batteries appears on the screen when the batteries are almost empty. It appears every time you turn the meter off if you have not yet changed the batteries. After the message appears for the first time, you can still perform about 50 tests. - Page 117 Changing the batteries When you use rechargeable batteries, note the following: • The number of tests that can be performed per battery charge is much smaller than with regular batteries. • When the prompt to change the batteries is displayed for the first time, considerably fewer than 50 tests can be performed;...
- Page 118 kim_manual_0910 Changing the batteries kim_manual_0900 Push the battery door in the Lift up the battery door. Turn the meter so that the direction of the arrow as far as it batteries fall downwards out of will go to open it. the battery compartment.
-
Page 119: Testing And Storage Conditions
Testing and storage conditions Testing and storage conditions Temperature Make sure that the following conditions are met so that the meter and finger pricker operate reliably and you obtain accurate test results: Storage Temperature Blood glucose monitoring system without batteries, without test -25 to +70 °C cassette Blood glucose monitoring system with batteries, without test cassette... - Page 120 Testing and storage conditions Tests cannot be performed at temperatures below +8 or above +42 °C. In this case, the E-8 message Temperature too low: Retest in a warmer location or Temperature too high: Retest in a cooler location appears (see Messages and problems page 128). Never try to artificially speed up a temperature change in your meter, for example, by placing it in the refrigerator or on a radiator.
-
Page 121: Light Conditions
Testing and storage conditions Light conditions Displayed text, numbers and symbols appear in yellow. Bright light shining on the display may make them difficult to read. Shield the meter if necessary, with your body, for example. Keep the meter away from very strong light sources (for example, direct sunlight). These may interfere with the proper functioning of the meter and lead to error messages. -
Page 122: Messages And Problems
Messages and problems Messages and problems Messages Validity Changing the battery Tip cover This message appears at the This message appears when the This prompt appears if you turn start of a test if the test cassette batteries are almost empty. It the meter off and the tip cover is is only valid for 10 more days. - Page 123 Messages and problems Settings Test area Reminder This message appears if you are This message appears if you If you have set reminders, this in the process of changing a close the tip cover once the message appears at the set time. setting (for example, the date) or meter has advanced a new test If you want to perform a test, use...
- Page 124 Messages and problems Temperature Do not use blood glucose results obtained despite this warning as a basis for making therapeutic decisions. These test results may be incorrect. Incorrect test results can cause the wrong therapy recommendation to be made and thus produce serious adverse health effects.
- Page 125 Messages and problems Problems Problem and possible causes Solution to the problem The meter will not turn on. The batteries are almost empty, empty or none Insert new batteries. are inserted. Remove the batteries and re-insert them as shown The batteries were inserted the wrong way. in the battery compartment.
-
Page 126: Error Messages
Messages and problems Error messages On the following pages you can find a description of all error messages and how to solve them. • If an error message appears, follow the instructions on the screen. • If error messages occur frequently, contact the customer support and service centre (see page 134). • If your meter has been dropped, this can also lead to implausible test results or error messages. - Page 127 Messages and problems Insert a test cassette suitable for There is no test cassette in the Your blood glucose value may be this meter type. meter. very low. Insert a new test cassette in the If a very low blood glucose value meter.
- Page 128 Messages and problems You have applied too little blood Remove the dirt inside the tip of to the test area. the cassette and, if necessary, carefully clean the measuring optics. You did not apply the blood to the Press if you want to go centre of the test area or applied directly to the Clean menu.
- Page 129 Messages and problems You... Move into the shade or shield the meter, for example, with your • have not washed your fingers or they are soiled or sticky. body. • applied a contaminated blood drop (for example, due to food or Repeat the test.
- Page 130 Messages and problems Do not apply blood or control If the error message reappears Move to a place where the solution to the test area until the after turning the meter on again: temperature is at least +10 °C prompt Apply drop is displayed. and wait for the temperature of Contact the customer support the meter to adjust to this...
-
Page 131: Discarding The Blood Glucose Monitoring System
Discarding the blood glucose monitoring system Discarding the blood glucose monitoring system During blood glucose testing, the meter may come into contact with blood. Used meters therefore carry a risk of infection. Discard your used meter, after removing the batteries, according to local regulations. The meter falls outside the scope of the European Directive 2012/19/EC (Directive on waste electrical and electronic equipment). -
Page 132: Technical Data
Catalogue no./serial See type plate on the back of the meter Determination of glucose in fresh capillary blood by reflectance photometry. When using different samples, refer to the package insert of the Accu-Chek Mobile test cassette. Test principle Your meter displays blood glucose values that refer to plasma although you always apply whole blood to the test area. - Page 133 Technical data Temperature During testing +10 to +40 °C Meter without batteries and without test cassette: -25 to +70 °C During storage Meter with batteries and without test cassette: -10 to +50 °C Meter with batteries and with test cassette: +2 to +30 °C Humidity During testing 15 to 85 % relative humidity...
- Page 134 EN ISO 15197. Declaration of conformity The Accu-Chek Mobile blood glucose meter conforms with the basic requirements and other relevant regulations of the European Directive 1999/5/EC on radio and telecommunications terminal equipment (R&TTE). The conformity declaration may be found at the following Internet address:...
-
Page 135: System Components
Accu-Chek FastClix lancet drums Use only these test cassettes when you perform Use only these lancet drums when you obtain blood glucose tests using the Accu-Chek Mobile blood with the Accu-Chek FastClix M1 finger meter. pricker. You can find the type designation on the side of the finger pricker. -
Page 136: Customer Support And Service Centre
Customer Support and Service Centre If you need advice on how to operate the Accu-Chek Mobile meter or the Accu-Chek FastClix finger pricker, if you seem to be obtaining implausible test results, or if you suspect that the meter, test cassette, finger pricker or lancet drum might be defective, contact the Customer Support and Service Centre. -
Page 137: Index
Index Index checking, meter 94 finger pricker cleaning cleaning and disinfecting 112 acoustic mode 49, 50 finger pricker 112 docking 26 after meal (flag) 38, 39 meter 107 obtaining blood with the ~ 33 apple core (symbol) 38 concentration range 98, 99 overview 8 connecting, to computer (PC) 73 undocking 26... - Page 138 Index memory 64, 131 memory, results 64 release button 8, 33 target range menu reminder 121 changing 62 description of menu structure changing 54 setting 60 deleting 54 symbols 35, 60 open 11 setting 41, 51, 52 turning on/off 61 meter turning on/off 53 technical data 130...
- Page 139 Index type plate 8, 14 unit of measurement (mg/dL, mmol/L) 14 up button 9 USB A connector 70 USB port 8, 70, 73 use by date control solution 100 use by period, test cassette 18, validity, test cassette 18, 124 displaying 102...
-
Page 140: Explanation Of Symbols
Explanation of symbols Explanation of symbols The following symbols may appear on the packaging, on the type plate of the meter and on the finger pricker. They have the following meanings: Consult instructions for use Caution, refer to safety-related notes in the instructions for use accompanying this product. - Page 141 Explanation of symbols Blood glucose meter: This product fulfils the requirements of the European Directive 1999/5/EC on radio and telecommunications terminal equipment (R&TTE). Blood glucose meter: This product fulfils the requirements of the European Directive 98/79/EC on in vitro diagnostic medical devices. Finger pricker and lancet drum: These products fulfil the requirements of the European Directive 93/42/EEC on medical devices.
-
Page 142: Appendix
Appendix Appendix Low blood glucose index or high blood glucose index These figures represent the frequency and the resulting risk of blood glucose values being too low or too high. Figures should be as low as possible. The following table provides an overview to assess the risk of blood glucose values being too low or too high: Risk Low blood glucose index... - Page 143 Appendix References Low Blood Glucose Index / High Blood Glucose Index Boris P. Kovatchev, Martin Straume, Daniel J. Cox, Leon S. Farhy (2001) “Risk analysis of blood glucose data: a quantitative approach to optimizing the control of insulin dependent diabetes.” Journal of Theoretical Medicine, 3: pp 1-10.
- Page 144 1.1 Roche Diagnostics GmbH, Sandhofer Strasse 116, 68305 Mannheim, Germany (“Roche”) grants to Licensee, a non-exclusive, perpetual and worldwide license to use the ACCU-CHEK 360° reports software, here in after referred to as SOFTWARE, upon the terms and conditions contained in this Software License Agreement.
- Page 145 Appendix Warranty 3.1 Roche warrants that the SOFTWARE licensed under this Software License Agreement will substantially provide the key functions described in its product specification in effect on the date of conclusion of this Software License Agreement and that the SOFTWARE will be free of defects for a period of one year from shipment.
- Page 146 Appendix 5.4 Should individual clauses of the Software License Agreement be ineffective, the effectiveness of the contract remains unaffected otherwise. Ineffective clauses shall be replaced by the legal regulation.
Need help?
Do you have a question about the Mobile and is the answer not in the manual?
Questions and answers
can the memory be erased on the mobile
The Accu-Chek Mobile's memory cannot be manually erased. The only way to remove readings is to wait 30 days, as the device only retains data for that period. However, if you have the Accu-Chek 360 Program and connect the device via USB, you may be able to reset the memory from a PC.
This answer is automatically generated