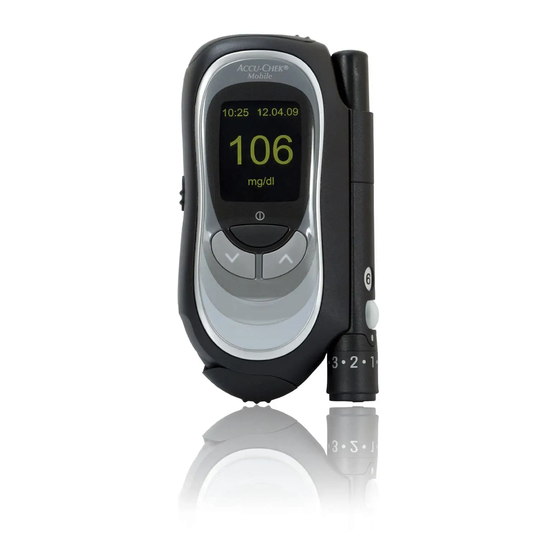
Accu-Chek Mobile User Manual
Blood glucose monitoring system
Hide thumbs
Also See for Mobile:
- User manual (146 pages) ,
- Quick reference manual (2 pages) ,
- Quick start manual (2 pages)
Table of Contents
Advertisement
BLOOD GLUCOSE MONITORING SYSTEM
C
User's Manual
©2010 Roche Diagnostics
ACCU-CHEK, ACCU-CHEK MOBILE and FASTCLIX
are trademarks of Roche.
Roche Diagnostics
201, Boulevard Armand-Frappier
Laval, Québec (CANADA) H7V 4A2
Accu-Chek Customer Care: 1-800-363-7949
www.accu-chek.ca
Roche Diagnostics GmbH
M
Sandhofer Strasse 116
68305 Mannheim, Germany
www.accu-chek.com
Advertisement
Table of Contents

Related Manuals for Accu-Chek Mobile


Summary of Contents for Accu-Chek Mobile
- Page 1 BLOOD GLUCOSE MONITORING SYSTEM User’s Manual ©2010 Roche Diagnostics ACCU-CHEK, ACCU-CHEK MOBILE and FASTCLIX are trademarks of Roche. Roche Diagnostics 201, Boulevard Armand-Frappier Laval, Québec (CANADA) H7V 4A2 Accu-Chek Customer Care: 1-800-363-7949 www.accu-chek.ca Roche Diagnostics GmbH Sandhofer Strasse 116 68305 Mannheim, Germany...
- Page 2 Keep the blood glucose monitoring system and all its components away from children under the age of 3. There is a risk of suffocation if small parts (e.g., covers, caps, or similar objects) are swallowed. Last update: 2010-12...
-
Page 3: Intended Use
Accu‑Chek Mobile blood glucose meter Accu‑Chek FastClix Mobile lancing device and AST Meter for quantitative determination of blood glucose values in fresh capillary blood using Accu-Chek Mobile Lancing device with adjustable penetration depth test cassettes. setting for obtaining capillary blood from a fingertip with Accu-Chek FastClix lancet drums and, when a Suitable for self-testing only. - Page 4 This user’s Manual features three symbols to draw pletely before testing blood glucose for the first time. If your attention to important information. Please read you have any questions, please contact Accu-Chek these notes with special care. Customer Care at 1-800-363-7949 or visit This symbol indicates a possible risk of injury accu-chek.ca (see Chapter 20).
- Page 5 About this user’s Manual Please note: We recommend that you start by getting to know all of All dates, times or results displayed in this user’s the features of your meter and lancing device (see Manual are intended only as examples. They display Chapter 1.1 and 1.2).
-
Page 6: Table Of Contents
Contents Contents Getting to know your meter and lancing device 1.1 overview of the meter ...........................14 1.2 overview of the lancing device ......................17 1.3 The blood glucose test in brief ......................18 1.4 The main features at a glance .......................20 1.5 description of menus and buttons ......................23 elements of the menus ........................24 button (on/off button / enter button) ..................26 button (down) ..........................28... - Page 7 Contents 2.3 Inserting the first test cassette ......................41 Validity of the test cassette ......................46 2.4 Removing the protective film from the display ..................48 2.5 Removing the protective strip from the batteries ...................48 2.6 Setting the language ..........................49 Testing blood glucose 3.1 Preparing the lancing device .........................55 Inserting a lancet drum ........................57 Setting the penetration depth ......................59...
- Page 8 Contents 3.3 evaluating results..........................93 Measuring range ..........................93 Implausible results – possible sources of error ................94 Adjust settings 4.1 Settings overview..........................95 4.2 opening the Settings menu ........................98 4.3 Setting the time and date, selecting the time format ................100 Setting the time ..........................101 Setting the date ..........................104 Selecting the time format ......................107 4.4 Setting tones ............................109...
- Page 9 Contents 4.7 Setting the volume ..........................135 4.8 Setting the brightness .........................137 4.9 Setting the language ...........................139 Correcting a wrongly set language....................141 Using the meter as a diary 5.1 Retrieving saved results ........................143 Via the Memory menu ........................144 Via the button (down) ......................145 Viewing all saved results ......................146 5.2 Retrieving averages ..........................148 5.3 Transferring results ..........................153...
- Page 10 Contents 6.3 Announcement of the result after a test ....................171 6.4 Announcement of saved test results ....................173 6.5 Announcements of warnings and error messages ................174 Checking the meter 7.1 Preparing for a control test ........................176 7.2 Performing a control test ........................177 Control test not oK –...
- Page 11 Contents 13 Viewing the number of available tests 14 Changing the batteries 15 Testing and storage conditions 15.1 Temperature and humidity ........................217 15.2 Light conditions ..........................219 15.3 Local sources of interference ......................219 16 Symbols, messages, problems and error messages 16.1 Symbols ..............................221 16.2 Messages ............................222 16.3 Problems ............................228 16.4 error messages ...........................230...
- Page 12 Contents 20 Accu‑Chek Customer Care 20.1 Advice and troubleshooting .........................242 20.2 Address ..............................242 21 Alphabetical index 22 Menu overview 23 Explanation of symbols...
-
Page 13: Getting To Know Your Meter And Lancing Device
Getting to know your meter and lancing device Getting to know your meter and lancing device This chapter introduces you to It then describes the meter what the menus look like the lancing device how the meter is turned on and off the blood glucose test how menus are opened the main features of the meter and lancing device... -
Page 14: Overview Of The Meter
Getting to know your meter and lancing device Overview of the meter... - Page 15 Getting to know your meter and lancing device Battery compartment cover (right: from above; far right: open) Infrared window (integrated interface for transfer- ring results to a computer, for example) Batteries [1.5 V, type AAA, alkaline-manganese or high energy batteries (2 batteries required)] Lancing device (docked) Tip cover (bottom right: open) Test area (at the tip of the cassette ready for a test)
- Page 16 Getting to know your meter and lancing device Release button for undocking the lancing device Type plate Release button for opening the cassette compart- ment cover Cassette compartment cover (bottom: open) Test cassette (in place in the meter)
-
Page 17: Overview Of The Lancing Device
Getting to know your meter and lancing device Overview of the lancing device Multifunction button (priming and lancing) Lancet changer - lever for rotating the lancet drum and loading a new lancet Lancet drum containing 6 lancets Numbers indicating depth setting Rotatable cap (rotating the cap on the device sets the penetration depth) Pin-hole opening for lancet... -
Page 18: The Blood Glucose Test In Brief
Getting to know your meter and lancing device The blood glucose test in brief open tip cover Prime lancing device obtain blood... - Page 19 Getting to know your meter and lancing device Apply blood Read result Close tip cover...
-
Page 20: The Main Features At A Glance
Getting to know your meter and lancing device The main features at a glance Test cassette instead of test strips Lancing device with lancet supply The test cassette contains a continuous tape on A drum containing 6 sterile lancets is placed in the which there are 50 test areas. - Page 21 Getting to know your meter and lancing device Blood volume checking Menu‑driven operation The meter checks whether you have applied suf- The settings and functions of the meter are sorted ficient blood before starting to test. by topic into different menus. You will find an over- view of the menus at the end of the user’s Manual.
- Page 22 Getting to know your meter and lancing device Flagging results Data transfer You can flag results with various symbols which The meter has an infrared window. This enables you indicate particular situations during the test. to transfer stored results to a computer. Memory The meter automatically saves up to 500 results with the time and date of the test and all other...
-
Page 23: Description Of Menus And Buttons
Getting to know your meter and lancing device Description of menus and buttons This chapter tells you how the menus are arranged, what the different symbols in them mean and how to use the buttons to navigate through the menus. you will find a complete overview of the menus at the end of the user’s Manual. -
Page 24: Elements Of The Menus
Getting to know your meter and lancing device Elements of the menus The following illustrations show the main elements that can appear in a menu. Title of the display or menu (not in all displays). Selected item, highlighted with a yellow bar. If you press the button, this item will be selected (command “Select”... - Page 25 Getting to know your meter and lancing device The symbol indicates that the function (here Tones) is activated. The symbol indicates that the function (here Target range ) is deactivated. The command displayed here will be executed if you press the button.
-
Page 26: Button (On/Off Button / Enter Button)
Getting to know your meter and lancing device button (On/Off button / Enter button) This button allows you press and hold the to turn the meter on or off ( button, see Chapter 1.6 and 1.7); as on/off button, this button is indicated in the user’s Manual by the symbol to execute the command displayed above the button (press and release the button);... - Page 27 Getting to know your meter and lancing device There are various commands, for example (see illustra- tions on left): Select selects the highlighted item. This will take you to a higher- or lower-level menu, for example, or open the display for entering a number. Continue takes you from hours to minutes.
-
Page 28: Button (Down)
Getting to know your meter and lancing device button (down) This button allows you to navigate down in a menu or list decrease to a smaller number. button (down) is indicated by the symbol the user’s Manual. -
Page 29: Button (Up)
Getting to know your meter and lancing device button (up) This button allows you to navigate up in a menu or list increase to a higher number. button (up) is indicated by the symbol the user’s Manual. -
Page 30: Turning On The Meter
Getting to know your meter and lancing device Turning on the meter With the meter off, press and hold the on/off button until the meter turns on (longer than 2 seconds). In the remainder of the user’s Manual, this instruction will appear in the following abbreviated form: 1 Turn on the meter with The meter first runs a display check in which a black... - Page 31 Getting to know your meter and lancing device The meter automatically exits the display check after about 2 seconds. After the display check, the meter first displays the number of tests still available on the test cassette and then opens the main menu.
-
Page 32: Turning Off The Meter
Getting to know your meter and lancing device Turning off the meter There are 2 different ways of turning off the meter: or via the Main menu. using the on/off button Using the On/Off button Press and hold the on/off button until the bar on the display is filled (at least 2 seconds). - Page 33 Getting to know your meter and lancing device Via the Main menu 1 open the Main menu. 2 use the button to go to the item Turn off. 3 Press the button (Select). The meter displays the number of available tests and then turns off.
-
Page 34: Opening Menus
Getting to know your meter and lancing device Opening menus The procedure for opening a menu is always the same. example: opening the Date menu 1 Turn on the meter with 2 Wait until the Main menu is displayed. 3 Press the button three times until the item Settings is highlighted by the yellow bar. - Page 35 Getting to know your meter and lancing device The Time/Date menu is highlighted. 5 Press the button (Select) to open the Time/Date menu. 6 use the button to select the item Date. 7 Press the button (Select) to set the date. The Date menu is now open.
- Page 36 Getting to know your meter and lancing device In this user’s Manual, the steps for opening the Date menu are summarized as follows: Turn on the meter with wait for the Main menu, ➔ to select Settings, ➔ press to open Settings, ➔...
-
Page 37: Entering Information
Getting to know your meter and lancing device Entering information Changing numbers Numbers highlighted by a yellow background can be changed. Press the button to decrease to a smaller number. If you press the button once, the number decreases by 1. -
Page 38: Activating Or Deactivating Functions
Getting to know your meter and lancing device Activating or deactivating functions Some functions, e.g. the beeper and flagging results you can recognize these functions by the fact that or a checkbox can only be activated or deactivated. there is either a checkmark front of them and the command above the but- ton is Off or On (if there is a different command this... -
Page 39: Initial Steps Before Testing
The package contents are listed on the box. If anything Check that the contents of the package are complete. is missing, please contact Accu-Chek Customer Care at 1-800-363-7949. You will find the address at the end of this user’s Manual. -
Page 40: Checking The Blood Glucose Unit
If the wrong unit is printed on the type plate, ask your pharmacist to change the meter or contact Accu-Chek Customer Care. using the wrong unit of meas- urement can cause you to misinterpret the re-... -
Page 41: Inserting The First Test Cassette
Initial steps before testing 2.3 Inserting the first test cassette If your meter is brand new and unused, it does not Insert the very first test cassette in the meter contain a test cassette. before you remove the protective strip from the batteries and start using the meter. Please read the test cassette package insert. - Page 42 Initial steps before testing 1 Place your finger on the corrugated area on the tip cover and push it in the direction of the arrow as far as it will go. you must feel the tip cover click into place. 2 Turn the meter over.
- Page 43 Initial steps before testing 3 Push the release button for the cassette compart- ment cover in the direction of the arrow. The cover springs open. 4 open the cassette compartment cover all the way. The cassette compartment cover is fully opened when it is at an angle of slightly more than ninety degrees –...
- Page 44 Initial steps before testing 5 Remove the cassette from the foil-sealed packaging. 6 Insert the cassette in the meter with the silver side facing upwards.
- Page 45 Initial steps before testing 7 Close the cassette compartment cover and press it closed. you must hear an audible CLICK. CLICK 8 Push the tip cover in the direction of the arrow as far as it will go. you must feel the tip cover click into place.
-
Page 46: Validity Of The Test Cassette
Initial steps before testing Validity of the test cassette When a test cassette is in the meter, the meter checks If either of the two dates – use-by period or expiry date – is exceeded, the validity of the cassette has expired. regularly when the cassette was inserted and calcu- lates the use-by period from this. - Page 47 Initial steps before testing If you start a test and the validity of the cassette is about to expire shortly or has already expired, the meter will inform you of this. The first notification appears 10 days before the validity of the cassette expires, then 5, 2 and 1 day(s) before expiry.
-
Page 48: Removing The Protective Film From The Display
Initial steps before testing 2.4 R emoving the protective film from the Removing the protective strip from the display batteries The meter’s display is protected by a protective film. The meter is supplied with batteries inserted. The battery contacts are covered with a protective strip to Peel this protective film off. -
Page 49: Setting The Language
Initial steps before testing Setting the language When you have inserted a test cassette and removed There are a total of 15 languages to choose from. the protective film from the display and the protective english uS strip from the batteries (see Chapter 2.3 to 2.5), you english uK Türkçe must set the language in which text will be displayed... - Page 50 Initial steps before testing 1 With the meter off, press and hold the on/off button until the meter turns on (longer than 2 seconds). When you turn on the meter for the first time, the language selection menu is automatically displayed. The default language is English US.
- Page 51 Initial steps before testing 2 Press the button repeatedly until the desired language is highlighted. 3 Then press the button below the display to select the highlighted language. The meter will then display the language you just selected. 4 Confirm this information by pressing the button (OK).
- Page 52 If there are irregularities in the checkerboard pattern, results might not be displayed correctly. In this case, ask your healthcare professional to change the meter or contact Accu-Chek Customer Care. The meter automatically exits the display check after about 2 seconds and then displays the number of tests still available on the test cassette.
- Page 53 Initial steps before testing Now you can choose what you want to do, e.g: perform a blood glucose test Press (Select). turn off the meter to select Turn off press ➔ make settings to select Settings press ➔ open Settings.
-
Page 54: Testing Blood Glucose
Testing blood glucose Testing blood glucose When you have inserted a test cassette, removed the To perform a blood glucose test, you only need: protective film from the display and the protective strip the meter with inserted test cassette from the batteries and set the language (see Chapter the lancing device with inserted lancet drum 2), you can perform blood glucose tests with the meter. -
Page 55: Preparing The Lancing Device
AST cap (AST stands for alternate site testing). AST cap If there is no AST cap in the pack, you can order one from Accu-Chek Customer Care. Make sure you also read the instructions for use that come with the AST cap before using blood from alter-... - Page 56 Testing blood glucose The lancing device is intended for personal only use the Accu-Chek FastClix Mobile lancing use only! device with Accu-Chek FastClix lancet drums. using any other lancets or lancet drums may It may only be used by one person for obtaining damage the lancing device or impair its func- blood.
-
Page 57: Inserting A Lancet Drum
Testing blood glucose Inserting a lancet drum To use the lancing device to obtain blood, you must first insert a lancet drum. 1 Take a new lancet drum. red line you can tell that a lancet drum has been used because it has a red line visible on the white portion. - Page 58 Testing blood glucose 3 Insert the new lancet drum – white end first – into the lancing device. The lancet drum is properly inserted when it slots into position with an audible CLICK. 4 Place the cap back on again. The cut-out section at the edge of the cap must fit over the correspondingly, shaped curvature with the pene- tration depth indicator (silver line).
-
Page 59: Setting The Penetration Depth
Testing blood glucose Setting the penetration depth you can set the penetration depth of the lancet to 1 of 11 possible settings (0.5–5.5). The silver line (depth setting indicator) on the lancing device indicates the current penetration depth setting. The higher the num- depth setting ber the deeper the penetration. -
Page 60: Loading A New Lancet
Testing blood glucose Loading a new lancet you do not need to load a new lancet if you just in- If you have already used the lancing device to obtain serted a new lancet drum. blood, you will need a new lancet the next time you obtain blood. -
Page 61: Replacing A Used Lancet Drum
Testing blood glucose Replacing a used lancet drum When you have used the sixth and last lancet, you need to replace the used lancet drum with a new one. 1 Remove the cap from the lancing device. 2 Grasp the lancet drum at the cut-outs on the lancing device. -
Page 62: Undocking And Docking The Lancing Device
Testing blood glucose Undocking and docking the lancing device If you wish to use the lancing device separately from the meter, detach it as follows: 1 Push the release button for the lancing device (on the back of the meter) in the direction of the arrow as far as it will go. - Page 63 1 Position the lancing device at the lower end of the recess with the multifunction button at the top and the writing “Accu-Chek FastClix Mobile” facing the meter. 2 Slide the lancing device along the side of the meter in the direction of the arrow until it slots into place with an audible CLICK.
-
Page 64: Performing A Blood Glucose Test
Testing blood glucose Performing a blood glucose test Notes When you have inserted a lancet drum into the lancing device and set the penetration depth, you can now Incorrect results may cause the wrong therapy start to perform a blood glucose test. recommendation to be made and thus produce There are two ways of starting a blood glucose test. - Page 65 Testing blood glucose centre of the cassette tip and Create a blood drop that is large enough and well- Apply the drop at the formed. do not apply the blood drop if it has spread. not at the edge. drop of blood that is well-formed drop of blood that has spread Apply blood at the centre do not apply blood at the edge...
-
Page 66: Starting A Blood Glucose Test By Opening The Tip Cover
Testing blood glucose Starting a blood glucose test by opening the tip cover 1 Place your finger on the corrugated area on the tip cover and push it in the direction of the arrow as far as it will go. After overcoming a slight resistance, the tip cover clicks into place. - Page 67 Testing blood glucose Then the meter will advance a test area to the tip of the cassette. Be careful not to touch the tape when doing this as this could damage it. Shortly after the test area has been advanced to the tip of the cassette, the prompt Apply blood will appear and a beep will sound again (if Beeper is turned on).
- Page 68 Testing blood glucose you can also open the tip cover if the meter is already The following are the exceptions: turned on. In this case, the meter then switches to Test. If you are in the Settings menu entering a number It advances a test area to the tip of the cassette and (e.g.
-
Page 69: Starting A Blood Glucose Test Via The Main Menu
Testing blood glucose Starting a blood glucose test via the Main menu If the meter is turned off: 1a Turn on the meter with 1b Wait for the Main menu. If the meter is already on: 1 Switch from the currently displayed menu to the Main menu. - Page 70 Testing blood glucose 4 Place your finger on the corrugated area on the tip cover and push it in the direction of the arrow as far as it will go. Be careful not to touch the tape when doing this as this could damage it.
-
Page 71: Obtaining A Blood Drop
Testing blood glucose Obtaining a blood drop use a new lancet each time you obtain blood. In general, all the fingers are suitable for obtaining This reduces the risk of infection and helps blood. Certain fingers can be unsuitable if, for example, a skin or fingernail infection is present. - Page 72 Testing blood glucose To obtain blood with the lancing device, you first need to prime it. do not prime the lancing device until you are ready to obtain blood. Storing the lancing device in this primed state can cause parts to become misshapen through tension, impairing its oper- ation.
- Page 73 Testing blood glucose The cap must be on the lancing device when you obtain blood. Without the cap, the lancet would penetrate too deeply and you would feel more pain than necessary. 2 Press the lancing device firmly against the chosen puncture site.
-
Page 74: Applying The Blood Drop To The Test Area
Testing blood glucose Applying the blood drop to the test area you can hold the meter in your hand or lay it down while you apply blood to the test area. do not hold the meter with the test area pointing do not hold the meter with upwards. - Page 75 Testing blood glucose 2 Take your finger away from the test area as soon as Test in progress and the hourglass symbol appear on the display. The test area has then absorbed enough blood and a beep sounds (if Beeper is turned on). The hourglass symbol indicates that the test is in progress.
-
Page 76: Turning Off The Meter
Testing blood glucose Turning off the meter Turning off via the tip cover Close the tip cover. The meter displays the number of available tests and then turns off. The result will be displayed for at least 15 seconds. If you close the tip cover before the end of this time, the result will continue to be displayed. - Page 77 Testing blood glucose Turning off using the On/Off button 1 Press and hold the on/off button until the bar on the display is filled (at least 2 seconds). Before the meter turns off, it prompts you to close the tip cover and then display the number of available tests for your information.
-
Page 78: Alternate Site Testing
AST cap is used by other people, or if healthcare professionals use this AST cap to The Accu-Chek FastClix Mobile AST cap is a special obtain blood from more than one person. This cap that is used in conjunction with the Accu-Chek... - Page 79 Accu-Chek FastClix Mobile AST cap cose values can change quickly in conjunction with the Accu-Chek FastClix after exercise Mobile lancing device.
- Page 80 Testing blood glucose Alternate Sites for Testing Palm of the hand below Preferred the thumb alternate Palm of the hand below sites the little finger Inside of the forearm upper arm outside of the forearm ...
- Page 81 Testing blood glucose Obtaining blood and testing blood glucose In the following description blood is obtained with the lancing device still attached to the meter. you can also detach the lancing device from the meter before using it to obtain blood. 1 Remove the black cap from the lancing device.
- Page 82 Testing blood glucose 3 Rotate the AST cap until the desired penetration depth is level with the indicator. To obtain a sufficiently large drop of blood from alternate sites, lancing must be deeper than on the fingertips. However, these sites are usually less painful.
- Page 83 Testing blood glucose only use the lancing device with the AST cap in place. Without the cap the lancet will penetrate too deeply and the puncture can be very painful and result in bruising or prolonged bleeding. 7 Press the multifunction button down as far as it will go.
- Page 84 Testing blood glucose 12 Take the AST cap and press it against the puncture site. The pin-hole opening on the AST cap must be in the same position on the skin as during punc- ture. This ensures that a proper drop of blood can form and prevents the AST cap from coming into contact with the blood.
- Page 85 Testing blood glucose 13 Pick up the meter again. 14 As soon as the drop of blood has formed, bring it towards the middle of the test area at the tip of the cassette. The tape should lightly touch the puncture site.
-
Page 86: Symbols Which Are Displayed Together With The Result
Testing blood glucose Symbols which are displayed together with the result The following symbols can be displayed together with you have turned on the target range. The the result: result is either below the lower limit or above the upper limit of the target range set. In place of a result: The result is lower than 0.6 mmol/l. -
Page 87: Flagging Results
Testing blood glucose Flagging results You can flag results to describe certain events con- The Set flag menu offers you a choice of 4 flags: nected to the result or particular characteristics of the Control test (bottle symbol ) is intended for control result. - Page 88 Testing blood glucose You can add the following flags together to a result: Reminder allows you to go directly from the Set flag menu after a test to set a reminder if you would like to General and Before meal check your blood glucose again later.
- Page 89 Testing blood glucose The following instructions start from the display of a result after a test. General, Before meal and After meal 1 Press (Set flag). This opens the Set flag menu. All flags are deactivated. A checkbox indicates that the flag is deactivated, a checkmark that it is activated.
- Page 90 Testing blood glucose 3 symbols can be displayed to the right of the result. If will a result is flagged with 4 symbols, the symbol not be displayed. example: If the temperature during a test was too high or too low and the test is outside the target range, the result will automatically be flagged with the symbols (see Chapter 16.2 and 4.6).
- Page 91 Testing blood glucose Leaving the Set flag menu: 1a Turn off the meter with 1b use to select Main menu and press (Select). 2 Close the tip cover.
- Page 92 Testing blood glucose Reminder 1 Press (Set flag). 2 use to select Reminder. 3 Press (Select). This opens the Reminders menu. You will find all the information about this menu in Chapter 4.5. Control test 1 Press (Set flag). 2 use to select Control test.
-
Page 93: Evaluating Results
0.6 to 33.3 mmol/l. healthcare professional. If the displayed result does not agree with the way you feel, perform a control test with an Accu-Chek Mobile control If the result is lower than solution (see Chapter 7). Then repeat the blood 0.6 mmol/l,... -
Page 94: Implausible Results - Possible Sources Of Error
If your meter has been dropped, that can also lead to did you apply the blood drop to the test area implausible results or error messages. In this case, you immediately after it had formed? should also call Accu-Chek Customer Care at 1-800- 363-7949. -
Page 95: Adjust Settings
Adjust settings Adjust settings Settings overview you can perform blood glucose tests without adjusting any of the settings on the meter. In this case, all the The meter has several features which you can only use settings are the default settings. after making the appropriate settings. - Page 96 Adjust settings Menu Setting Available options Default setting Time/date Time eastern Standard Time (eST) date Current date Time format hh:mm * dd.MM.yy ** hh:mm am/pm Month dd (format for time hh:mm day dd.MM. and date) hh:mm dd Month hh:mm am/pm MM/dd/yy hh:mm am/pm MM/dd...
- Page 97 Adjust settings Menu Setting Available options Default setting Tones Beeper on or off Reminders Beeper on or off Acoustic mode on or off Reminders 10 times – freely selectable daily reminders None and/or a one-time reminder after a specified length of time (1, 2 or 3 hours) Target range Lower and upper limit value / on or off None / off...
-
Page 98: Opening The Settings Menu
Adjust settings Opening the Settings menu Turn on the meter with wait for the Main menu, ➔ to select Settings, ➔ press to open Settings. ➔ The buttons you use to make or change the settings are described in Chapters 1.5 and 1.9. You will find a complete overview of the menus at the end of the user’s Manual. - Page 99 Adjust settings The following options are available in the Settings menu: Main menu: takes you to the Main menu Time/Date: set the time and date, select the time format Tones: turn the beeper, reminders and acoustic mode on or off Reminders: set the reminder times Target range:...
-
Page 100: Setting The Time And Date, Selecting The Time Format
Adjust settings Setting the time and date, selecting the time format The time and date are already set in the meter. If you All results are saved together with the time and date. want to use reminders or analyse your results with a If the time and date are not correctly set, the results computer, for example, you should check the time and cannot be analysed properly as a function of time. -
Page 101: Setting The Time
Adjust settings Setting the time Turn on the meter with wait for the Main menu, ➔ to select Settings, ➔ press to open Settings, ➔ to select Time/Date, ➔ press to open Time/Date, ➔ to select Time, ➔ press to open Time. ➔... - Page 102 Adjust settings 24-hour time format 12-hour time format 2 use to set the hour. 3 Press (Continue). The minutes are now highlighted. 4 use to set the minutes. 5 Press (OK or Continue).
- Page 103 Adjust settings 24-hour format 12-hour format only for times in 12-hour format: The suffix am or pm is highlighted. 5a use to select am or pm. 5b Press (OK). The meter will then display the time you just set. 6 Press (OK).
-
Page 104: Setting The Date
Adjust settings Setting the date The sequence in which you set the day, month and year while setting the date depends on the time format you have set. Apart from the sequence, the procedure is the same in all cases. The following sequences are possible: Month –... - Page 105 Adjust settings The following example describes the procedure for setting the date in the case of sequence (Month – day – year) The month is highlighted. 2 use to set the month. 3 Press (Continue). The day is now highlighted. 4 use to set the day.
- Page 106 Adjust settings The meter will then display the date you just set. The date will be displayed according to the time format you have set (see examples on left). 8 Press (OK). The meter returns to the Time/Date menu. If the date you have set does not exist (e.g.
-
Page 107: Selecting The Time Format
Adjust settings Selecting the time format Turn on the meter with wait for Main menu, ➔ to select Settings, ➔ press to open Settings, ➔ to select Time/Date, ➔ press to open Time/Date, ➔ to select Time format, ➔ press to open Time format. - Page 108 Adjust settings 2 use to select the desired time format. 3 Press (Select). The meter will then display the time format you just set. 4 Press (OK). The meter returns to the Time/Date menu.
-
Page 109: Setting Tones
Adjust settings Setting tones The following options are available in the Tones menu: Main menu: takes you to the Main menu Back: takes you to the Settings menu Beeper: turn the beeper on or off Reminders: turn the beep tone for reminders on or Acoustic mode: turn the acoustic mode on or off Beeper:... - Page 110 Adjust settings Reminders: Here you can set whether or not you want if unexpected and abnormal blood glucose val- reminders to be accompanied by beeps (see Chap- ues are obtained using the acoustic mode, the ter 4.5). If Reminders is turned on (default setting), the result must be checked by repeating the test beeps will sound.
-
Page 111: Turning The Beeper, Reminders And Acoustic Mode On And Off
Adjust settings Turning the beeper, reminders and acoustic mode on and off Beeper, Reminders and Acoustic mode can only be turned on and off. The procedure is always the same and is therefore only described here for Beeper. Turn on the meter with wait for Main menu, ➔... - Page 112 Adjust settings A checkmark means that the function is activated A checkbox means that it is deactivated 2 Press (On or Off) to turn the beeper on or off. The meter remains in the Tones menu. If you wish to use the acoustic mode, you must turn both Acoustic mode and Beeper on.
-
Page 113: Setting Reminders
Adjust settings Setting reminders you can set up to 10 reminder times. If the meter is turned off, “Reminder” and the time of the reminder will be displayed daily at the time you have set. If you have turned on Reminders in the Tones menu, beeps will also sound. - Page 114 Adjust settings The following options are available in the Reminders menu: Main menu: takes you to the main menu Back: takes you to the Settings menu New: set a new time for a daily reminder Edit: edit an existing reminder time (is only displayed if at least one time has been set) In 1 hour: set a one-time reminder in 1 hour...
-
Page 115: Setting A New Reminder
Adjust settings Setting a new reminder Turn on the meter with wait for Main menu, ➔ to select Settings, ➔ press to open Settings, ➔ to select Reminders. ➔ The checkbox to the left of Reminders means that no reminders have been set or that all reminders set have been turned off. - Page 116 Adjust settings 24-hour format 12-hour format The hours are highlighted. 3 use to set the hour. The first time you press the button, the time will go to 00:00 (24-hour format) or 01:00 am (12-hour format). 4 Press (Continue). The minutes are now highlighted. 5 use to set the minutes.
- Page 117 Adjust settings 24-hour format 12-hour format only for times in 12-hour format: The suffix am or pm is highlighted. 6a use to select am or pm. 6b Press (OK). The meter will then display the reminder time you just set. The reminder is also turned on. 7 Press (OK).
-
Page 118: Editing An Existing Reminder (Turn On/Off, Change, Delete)
Adjust settings Editing an existing reminder (turn on/off, change, delete) Turn on the meter with wait for the Main menu, ➔ to select Settings, ➔ press to open Settings, ➔ to select Reminders, ➔ press to open Reminders, ➔ to select Edit, ➔... - Page 119 Adjust settings you will then see the following options below the time: Turn off , to turn off a reminder that is turned on (the time remains unchanged), or Turn on to turn on a reminder that has been turned off. Change , to change the reminder time.
- Page 120 Adjust settings Turning a reminder on or off 1 use to select Turn on (Turn off). 2 Press (Select). The meter will then display the reminder time you just turned on or off. 3 Press (OK). The reminder is now turned on or off. The meter returns to the Edit reminders menu.
- Page 121 Adjust settings Changing a reminder 1 use to select Change. 2 Press (Select). 3 Set the new reminder time (see “Setting a new reminder” for how to do this). The meter will then display the reminder time you just changed. 4 Press (OK).
- Page 122 Adjust settings Deleting a reminder 1 use to select Delete. 2 Press (Select). The meter will then display the reminder time you just deleted. 3 Press (OK). The reminder time has now been deleted. The meter returns to the Edit reminders menu or to the Reminders menu if you have deleted the last reminder.
- Page 123 Adjust settings Cancel – Not editing a reminder If you do not want to edit a selected reminder after all, you can cancel the editing procedure as follows. 1 use to select Cancel. 2 Press (Select). The meter returns to the Edit reminders menu without changing the reminder.
-
Page 124: Setting A One-Time Reminder In 1 Hour, 2 Hours Or 3 Hours
Adjust settings Setting a one‑time reminder in 1 hour, 2 hours or 3 hours The meter can give you a one-time reminder to per- form a test in 1 hour, 2 hours or 3 hours. you do not need to set a time for this. These reminders can be useful if you wish to check a result you just obtained, for example. - Page 125 Adjust settings The meter displays that it will give you a reminder in 1 hour (or in 2 or 3 hours). 3 Press (OK). The meter returns to the Edit reminders menu. The one-time reminder will be displayed in the list of reminders in the same way as any other reminder, i.e.
-
Page 126: Deleting A One-Time Reminder
Adjust settings Deleting a one‑time reminder Turn on the meter with wait for the Main menu, ➔ to select Settings, ➔ press to open Settings, ➔ to select Reminders, ➔ press to open Reminders, ➔ to select Edit, ➔ press to open Edit. - Page 127 Adjust settings In the case of a one-time reminder, only the following options are displayed below the time: Delete , to delete this reminder Cancel , if you do not wish to delete this reminder unlike the daily reminders, you cannot turn one-time reminders on or off or change their time.
-
Page 128: Setting A Target Range
Adjust settings Setting a target range you can enter your personal target range for blood If you wish to use the lower limit of the target glucose values (default setting: off). Results above range as an indicator of a possible hypo, it is or below this target range will be flagged with the important to remember this: The indicator will symbol... -
Page 129: Setting A Target Range
Adjust settings Setting a target range Turn on the meter with wait for the Main menu, ➔ to select Settings, ➔ press to open Settings, ➔ to select Target range, ➔ press to open Target range. ➔ A checkbox indicates that the target range is turned off, a checkmark that it is turned on. - Page 130 Adjust settings 2 use to set the lower limit. The first time you press a button, the default setting of 3.9 mmol/l will be entered. 3 Press (Continue). The default setting of 7.8 mmol/l will be entered for the upper limit. 4 use to set the upper limit.
-
Page 131: Editing An Existing Target Range (Turn On/Off, Change)
Adjust settings Editing an existing target range (turn on/off, change) Turn on the meter with wait for the Main menu, ➔ to select Settings, ➔ press to open Settings, ➔ to select Target range, ➔ press to open Target range. ➔... - Page 132 Adjust settings Turning the target range on or off 1 use to select Turn off (Turn on). 2 Press (Select). The meter displays that the target range is now turned off (turned on). 3 Press (OK). The meter returns to the Settings menu.
- Page 133 Adjust settings Changing a target range 1 use to select Change. 2 Press (Select). 3 Set the new target range (see “Setting a target range” for how to do this). The meter will then display the target range you just changed.
- Page 134 Adjust settings Cancel – Not editing the target range If you do not want to change the target range after all, you can cancel the editing procedure as follows: 1 use to select Cancel. 2 Press (Select). The meter returns to the Settings menu without changing the target range.
-
Page 135: Setting The Volume
Adjust settings Setting the volume you can set the volume for the beeper to one of 5 different levels. Turn on the meter with wait for the Main menu, ➔ to select Settings, ➔ press to open Settings, ➔ to select Volume, ➔... - Page 136 Adjust settings The meter will then display the volume level you just set. 4 Press (OK). The meter returns to the Settings menu.
-
Page 137: Setting The Brightness
Adjust settings Setting the brightness you can set the brightness of the texts and symbols appearing on the display to one of 3 different levels. Turn on the meter with wait for the Main menu, ➔ to select Settings, ➔ press to open Settings, ➔... - Page 138 Adjust settings The meter will then display the brightness level you just set. 4 Press (OK). The meter returns to the Settings menu.
-
Page 139: Setting The Language
Adjust settings Setting the language you can choose from a total of 15 languages for the If you want to change this selection at a later date, you text appearing on the display. you will already have set can set any of the following languages: the language when you turned on the meter for the english uS first time. - Page 140 Adjust settings Turn on the meter with wait for the Main menu, ➔ to select Settings, ➔ press to open Settings, ➔ to select Language, ➔ press to open Language. ➔ The currently set language is highlighted. 2 use to select the desired language. 3 Press The meter will then display the language you just selected.
-
Page 141: Correcting A Wrongly Set Language
Adjust settings Correcting a wrongly set language If you have set the wrong language by mistake, you 3 Press 3 times. may not be able to read the menus any more. you can The “Settings” menu is now highlighted. still change the language with the help of the following instructions. -
Page 142: Using The Meter As A Diary
using the meter as a diary Using the meter as a diary The meter has a 500-value memory for saving results In addition to the result, the time and the date, your with the time and date. you do not need to save the meter also saves all other information that is relevant results manually since the meter saves them auto- to the test. -
Page 143: Retrieving Saved Results
using the meter as a diary Retrieving saved results There are two different ways of retrieving all saved button takes you directly to the saved results. results: In this case, the options offered in the Memory menu are not available. If you want to use all the options in via the Memory menu the Memory menu, you must open it from the main... -
Page 144: Via The Memory Menu
using the meter as a diary Via the Memory menu Viewing saved results via the Memory menu: Turn on the meter with wait for the Main menu, ➔ to select Memory, ➔ press to open Memory, ➔ to select All results, ➔... -
Page 145: Via The Button (Down)
using the meter as a diary Via the button (down) Viewing saved results using the button: With the meter off: Press and hold until the meter turns on (longer than 2 seconds). The last saved result will be displayed, as either Single value or List, depending which display format has been set. -
Page 146: Viewing All Saved Results
using the meter as a diary Viewing all saved results Irrespective of the procedure you use to view the saved results (via the Memory menu or using the button), you go to all saved results in the same way. Single value Viewing older results: 1 Press to go to the next older result. - Page 147 using the meter as a diary XX.X or X.X as the last result in the memory If the last (most recent) result in the memory is dis- played as xx.x or x.x with dashes instead of the time and date, the last test did not deliver any result. In this case, an error message was displayed during the last test or you did not apply blood (or control solution) after the prompt Apply blood was displayed.
-
Page 148: Retrieving Averages
using the meter as a diary Retrieving averages The meter can calculate averages from the saved The average will be calculated from all results corres- results. ponding to your choice. However, the following results will not be included in the calculation: you can choose which results are used for calculation of the averages. - Page 149 using the meter as a diary Turn on the meter with wait for the Main menu, ➔ to select Memory, ➔ press to open Memory, ➔ to select Averages, ➔ press to open Averages. ➔ The following options are available in the Averages menu: Main menu: takes you to the Main menu...
- Page 150 using the meter as a diary 2 use to select All results, Before meal or After meal. 3 Press (Select). 4 use to choose the period in which the results were obtained: 7, 14 or 30 days. Selecting the time period only determines which aver- age will be displayed first.
- Page 151 using the meter as a diary 6 Press to switch from the 7-day average to the 14-day average and then to the 30-day average. 7 Press to switch from the 30-day average back to the 14-day average and then to the 7-day aver- age.
- Page 152 using the meter as a diary The meter calculates the average for a time In the event that you changed the date or time, period even if the saved results cover a shorter then performed a test and afterwards re-set the period.
-
Page 153: Transferring Results
using the meter as a diary Transferring results The meter has an inbuilt IrdA (Infrared data Associa- There are two ways of transferring the results: tion) standard infrared window permitting wireless with special products from Roche diagnostics which transfer of the results to a suitably equipped computer, can also analyse results, PdA (handheld computer) or to special analysis sys- in the form of a table which you can then process... - Page 154 Memory menu need a more recent software version for your hardware In the Transfer data menu, you can choose how you or software product. In this case, contact Accu-Chek wish to transfer the results. Customer Care.
- Page 155 using the meter as a diary The following options are available in the Transfer data menu: Main menu: takes you to the Main menu (only if you opened the menu from the Memory menu) Back: takes you to the Memory menu (only if you opened the menu from the Memory menu) For analysis: transfer the results with hardware or...
-
Page 156: Starting The Transfer Using The And Buttons
using the meter as a diary Starting the transfer using the buttons With the meter off: Press and hold the buttons simultaneously until the meter turns on (longer than 2 seconds). After the display check and the number of available tests, the Transfer data menu is displayed. -
Page 157: Starting The Transfer Via The Memory Menu
using the meter as a diary Starting the transfer via the Memory menu Turn on the meter with wait for Main menu, ➔ to select Memory, ➔ press to open Memory, ➔ to select Transfer data, ➔ press to open Transfer data. ➔... -
Page 158: Transferring Results For Further Analysis
using the meter as a diary Transferring results for further analysis 1 Please read the instructions supplied with the software or hardware you are using. These will include instructions on how to transfer data. 2 Make the receiving end (software product or hard- ware) ready to transfer the results. - Page 159 using the meter as a diary 6 If necessary, start the transfer of the results at the receiving end (software product or hardware). during the transfer, you will be informed of the progress on the display. If you do not want to transfer the results after all, you can abort the transfer using the button (Cancel).
-
Page 160: Transferring Results As A Table
using the meter as a diary Transferring results as a table The meter can transfer the results to a computer The CSV file contains the following information: without any special hardware or software. The only Serial number: the serial number of the meter prerequisite is that the computer has an infrared win- Download Date (DD.MM.YYYY), Download Time dow according to the IrdA standard (Infrared data... - Page 161 using the meter as a diary CSV file opened in a text editor Serial number;download date;download Time 123456789;10.05.2009;09:18 date;Time;Result;unit;Temperature warning;Beyond target range;General;Before meal;After meal;Control test 10.05.2009;08:21;6.5;mmol/l; ; ; ; ; ; 09.05.2009;18:05;7.1;mmol/l; ; ; ; ; ; 09.05.2009;12:37;7.5;mmol/l; ;x; ; ; ; 09.05.2009;08:16;6.2;mmol/l; ; ; ;x; ; 08.05.2009;18:39;3.2;mmol/l;...
- Page 162 using the meter as a diary 1 Turn on the computer. 2 Position the meter 5–20 cm away from the infrared window of the computer. Point the two infrared windows towards one another. 5–20 cm 3 In the Transfer data menu: use to select Table to PC.
- Page 163 using the meter as a diary during the transfer, you will be informed of the progress on the display. If you do not want to transfer the results after all, you can abort the transfer using the button (Cancel). The meter returns to the Mem- ory menu (if you came from the Memory menu) or turns off (if you turned on the meter using the buttons).
-
Page 164: If The Transfer Is Unsuccessful
using the meter as a diary If the transfer is unsuccessful If the results are not transferred, the meter turns off Another device with an infrared source turned on or automatically after about 60 seconds. a strong light source is too close to one of the two infrared windows. -
Page 165: Setting The Display Format For Viewing Saved Results
using the meter as a diary Setting the display format for viewing saved results There are two different formats available for displaying the saved results (Memory menu – All results): Single value and List. display format Single value display format Single value (default setting): In this format, just one result is displayed on the dis- play. - Page 166 using the meter as a diary Turn on the meter with wait for the Main menu, ➔ to select Memory, ➔ press to open Memory, ➔ to select Display format, ➔ press to open Display format. ➔ 2 use to select the desired display format. 3 Press (Select).
- Page 167 using the meter as a diary The meter will then display the display format you just set. 5 Press (OK). The meter returns to the Memory menu. If no results have been saved, x will be displayed instead of the result and dashes instead of the time and date.
-
Page 168: Acoustic Mode
Cd from Accu-Chek Customer Care at 1-800-363-7949. The meter must be regularly checked by a sighted person for outwardly visible conta‑... - Page 169 Acoustic mode There are two types of beeps, differing in pitch. Warn- Tone 1: ings have a higher pitch (Tone 2, represented below Turning on Chapter 6.1 ) than the other beeps (Tone 1, represented below ). The following table shows which tone sounds Test area is advanced to the tip of Chapter 6.2 for which event.
-
Page 170: Beep Tone When Turning On
Acoustic mode Beep tone when turning on Beep tones during a test When the acoustic mode is turned on, you hear a beep After the power-on beep, you will hear the following ( ) when you turn the meter on. while you test This is irrespective of how you turn on the meter: a beep tone when the meter advances a test area to... -
Page 171: Announcement Of The Result After A Test
Acoustic mode Announcement of the result after a test In the acoustic mode, whenever the meter displays a Results which are lower than 0.6 mmol/l and are are announced acoustically as result following a blood glucose test, it also announces displayed as the result as a series of beeps. - Page 172 Acoustic mode First the tens are announced, then the units, then the decimal point and finally the tenths. There is a short pause between each group of beeps. The tens are always announced, even when the result is below 10. The tens in this case are represented by 1 long beep, signifying zero.
-
Page 173: Announcement Of Saved Test Results
Acoustic mode Announcement of saved test results only the last (most recent) of the saved test results is If xx.x or x.x is displayed as the last (most recent) announced acoustically. result, the last test did not deliver any result (see Chapter 5.1). -
Page 174: Announcements Of Warnings And Error Messages
Acoustic mode Announcements of warnings and error messages Warnings Error messages When the batteries will soon be empty or the test If error messages appear on the display (see Chapter cassette has been used up, the meter issues an acous- 16.4), these are announced by two short beeps sound- tic warning. -
Page 175: Checking The Meter
Always perform a control test using Accu-Chek Mobile control solution you have used (see Chapter 7.2). The control solutions:... -
Page 176: Preparing For A Control Test
Preparing for a control test For a control test you need: the meter with inserted test cassette, an unopened applicator of Accu-Chek Mobile control solution; the solution in each applicator is for one application only. A control test in its main steps is the same as a normal test except that you apply control solution to the test area instead of blood. -
Page 177: Performing A Control Test
Checking the meter Performing a control test Start as for a blood glucose test: either open the tip cover or select Test in the Main menu. The following description assumes that you start the test by opening the tip cover. 1 Place your finger on the corrugated area on the tip cover and push in the direction of the arrow as far as it will go. - Page 178 Checking the meter A beep will sound (if Beeper is turned on) and the display check will be displayed, followed by the num- ber of available tests. 2 Check that there are no irregularities in the checkerboard pattern. Then the meter advances a test area to the tip of the cassette.
- Page 179 Checking the meter 3 Twist the cap off the applicator. Be careful not to squeeze the applicator too hard while doing this so as to not lose any control solution. 4 Hold the applicator at a slight angle with the brush pointing downwards.
- Page 180 Checking the meter you can hold the meter in your hand or lay it down while you apply control solution to the test area. do not hold the meter with the test area pointing upwards. If you hold the meter with the test area pointing upwards, control solution could enter the meter and soil it.
- Page 181 Checking the meter The test area has then absorbed enough control solu- tion and a beep sounds (if Beeper is turned on). The hourglass symbol indicates that the test is in progress. Testing is complete after approximately 5 seconds and the result appears on the display.
- Page 182 Checking the meter 10 use to select Control test. 11 Press (Select). The meter then prompts you to enter the color of the applicator label. entering the correct color is important so that the meter can check whether the result is correct.
- Page 183 Checking the meter The meter displays the upper and lower limits of the concentration range. The concentration range dis- played depends on the color of control solution se- lected. 15 Press (Continue). The meter automatically checks whether the result is Values are only examples within the concentration range displayed.
- Page 184 Checking the meter The meter returns to the Main menu. 17 Turn off the meter with or via Turn off. 18 Close the tip cover. 19 dispose of the applicator in your household waste.
- Page 185 The result must be within the printed concentration range. Make sure you compare the result with the concentra- tion range that corresponds to the control solution you used (1 or 2). unit of Accu‑Chek Mobile Control ® measurement mmol/l 1,9–4,2 6,4–8,6 Values are only...
-
Page 186: Control Test Not Ok - Possible Sources Of Error
If you have taken all of these points into account and Control test not OK is still displayed, contact Accu-Chek Customer Care. If Control test not OK Repeat control test is displayed, it is no longer certain that the meter and test cassette are functioning properly. - Page 187 If your meter has been dropped, that can also lead to control test results which are not within the concentra- tion range displayed and for which Control test not OK is displayed. In this case, you should also call Accu-Chek Customer Care.
-
Page 188: Tools Menu
Tools menu Tools menu The Tools menu on the one hand offers you some extra means of checking the meter. on the other hand, you must also use this menu to prepare for cleaning the meter and changing a test cassette that has not been used up. -
Page 189: Performing A Display Check
Performing a display check Performing a display check If you wish to check whether the display is working properly, in addition to turning on the meter, you can also do this via the display check in the Tools menu. In this case, the display check is shown until you cancel it (for no longer than 1 minute). - Page 190 3 Check whether there are any irregularities in the checkerboard pattern. If there are irregularities in the checkerboard pattern, results might not be displayed correctly. In this case contact Accu-Chek Customer Care. 4 Press the button (Continue). The meter returns to the Tools menu.
-
Page 191: Viewing The Validity Of The Test Cassette
Viewing the validity of the test cassette 10 Viewing the validity of the test cassette To find out when the test cassette in the meter expires: Turn on the meter with wait for the Main menu, ➔ to select Tools, ➔... -
Page 192: Cleaning The Meter And Lancing Device
Cleaning the meter and lancing device Cleaning the meter and lancing device 11.1 Cleaning the meter The outside If the casing of the meter or the display is visibly soiled: The mode of operation of the meter with the test cas- sette means that the meter will not normally come into Wipe with a cloth lightly moistened with cold water or contact with blood or control solution. -
Page 193: The Inside
Cleaning the meter and lancing device 11 The inside To enable you to clean the inside of the meter, you you only need to clean the inside of the meter if: have to open Clean in the Tools menu and then remove the area around the tip of the cassette is visibly the test cassette (see next page). - Page 194 Cleaning the meter and lancing device Turn on the meter with wait for the Main menu, ➔ to select Tools, ➔ press to open Tools, ➔ to select Clean, ➔ press to open Clean. ➔ The meter now prompts you to open the tip cover. If you do not want to clean the meter now, press button (Cancel).
- Page 195 Cleaning the meter and lancing device 11 2 Place your finger on the corrugated area on the tip cover and push it in the direction of the arrow as far as it will go. The meter then prompts you to remove the test cas- sette.
- Page 196 Cleaning the meter and lancing device 4 Push the release button for the cassette compart- ment cover in the direction of the arrow. The cover springs open. 5 open the cassette compartment cover all the way. The cassette compartment cover is fully opened when it is at an angle of slightly more than ninety degrees –...
- Page 197 Cleaning the meter and lancing device 11 6 Remove the cassette from the cassette compart- ment. 7 Check whether you can see any fluff, crumbs, etc. inside the tip of the cassette. 8 If so, remove these carefully.
- Page 198 Cleaning the meter and lancing device If the measuring optics are visibly soiled, clean the inside of the meter as follows: 9 Carefully wipe the measuring optics and the front opening of the meter with a lightly moistened cloth or cotton swab. 10 Leave the cassette compartment cover open and close the tip cover.
- Page 199 Cleaning the meter and lancing device 11 11 Carefully wipe the interior of the tip cover with a lightly moistened cloth or cotton swab. Make sure that no liquid enters the meter. Avoid scratching the measuring optics. Scratches could interfere with tests. 12 Remove any fluff or lint that may remain.
- Page 200 Cleaning the meter and lancing device 14 open the tip cover again. The meter now turns on and displays error message e-2. The error message at this point is not relevant since you had to remove the cassette to clean the meter.
- Page 201 Cleaning the meter and lancing device 11 16 Close the cassette compartment cover and press it closed. you must hear an audible CLICK. CLICK 17 Close the tip cover.
-
Page 202: Cleaning The Lancing Device
Cleaning the meter and lancing device 11.2 Cleaning the lancing device To ensure proper functioning of your lancing device Allow the lancing device and cap time to dry thorough- and the used cap, you should clean them regularly and if there is any blood on them. If you want to clean the Never dip the lancing device in the cleaning lancing device, first detach it from the meter (see fluid. -
Page 203: Replacing The Test Cassette
Replacing the test cassette 12 Replacing the test cassette If you want to replace an empty test cassette or an If you want to remove a partly used test cassette which expired test cassette, please continue reading in Chap- still has unused test areas, you must first perform the ter 12.2. -
Page 204: Preparing Cassette Replacement
Replacing the test cassette 12.1 Preparing cassette replacement Turn on the meter with wait for the Main menu, ➔ to select Tools, ➔ press to open Tools, ➔ to select Change cass., ➔ press to open Change cass. ➔ The meter now prompts you to open the tip cover. If you do not want to change the cassette now, press the button (Cancel). -
Page 205: Replacing The Cassette
Replacing the test cassette 12 12.2 Replacing the cassette 1 Place your finger on the corrugated area on the tip cover and push it in the direction of the arrow as far as it will go. If you have prepared for the cassette replacement via Change cass. - Page 206 Replacing the test cassette 2 Turn the meter over. 3 Push the release button for the cassette compart- ment cover in the direction of the arrow. The cover springs open.
- Page 207 Replacing the test cassette 12 4 open the cassette compartment cover all the way. The cassette compartment cover is fully opened when it is at an angle of slightly more than ninety degrees – as shown in the illustration. 5 Remove the cassette from the cassette compart- ment.
- Page 208 Replacing the test cassette 6 Remove a new cassette from the foil-sealed packaging. 7 Insert the cassette in the meter with the silver side facing upwards.
- Page 209 Replacing the test cassette 12 8 Close the cassette compartment cover and press it closed. you must hear an audible CLICK. CLICK When you have closed the cassette compartment cover, the meter turns on again and runs the display check. 9 Press the button (Continue).
- Page 210 Replacing the test cassette The validity of the cassette is displayed. 10 Press the button (Continue). The meter displays the number of available tests. 11 Press the button (Continue). The meter opens the Main menu. 12 Close the tip cover. If the test cassette you removed still has unused tests and has not yet expired, you can reinsert the cassette into the meter at a later date.
-
Page 211: Viewing The Number Of Available Tests
Viewing the number of available tests 13 Viewing the number of available tests you can view the number of tests still available on the inserted cassette by one press of a button. With the meter off: Press and hold the button until the meter turns on (longer than 2 seconds). -
Page 212: Changing The Batteries
Changing the batteries Changing the batteries This message appears when the batteries are almost empty. It appears every time you turn the meter off until you change the batteries. The first time the mes- sage appears, you can still perform about 50 tests. However, we recommend that you replace the batteries as soon as possible. - Page 213 Changing the batteries 14 Results and settings remain saved in the meter while Never throw batteries into a fire. This is danger- you change the batteries or if you store the meter ous, because they may explode. without batteries. Please dispose of used batteries in an environ- The meter has an built-in back-up battery.
- Page 214 Changing the batteries 1 Push the battery compartment cover in the direc- tion of the arrow as far as it will go to unlock it. you will have to overcome a slight resistance. The cover is properly unlocked when it slides over this resistance with a CLICK.
- Page 215 Changing the batteries 14 3 Turn the meter so that the battery compartment faces downwards. The batteries fall out. 4 Insert two new batteries in the battery compart- ment. Pay attention to the symbols in the battery compartment. The corresponding end of the battery must be facing upwards.
- Page 216 Changing the batteries 5 Close the battery compartment cover again. 6 Push the battery compartment cover in the direc- tion of the arrow as far as it will go to lock it. It locks into place with a CLICK.
-
Page 217: Testing And Storage Conditions
Testing and storage conditions 15 Testing and storage conditions Make sure that the conditions listed on the following The temperature and humidity conditions under pages are met, so that the meter and lancing device which the meter can operate are +10 to 32 °C at work reliably and you obtain accurate results. - Page 218 Testing and storage conditions do not use blood glucose results obtained do not store the lancing device in a primed state and following these warnings as a basis for mak- do not store it for any length of time in a place where the temperature is very low or high, e.g.
-
Page 219: Light Conditions
Testing and storage conditions 15 15.2 Light conditions 15.3 Local sources of interference displayed text, numbers and symbols appear yellow. Strong electromagnetic fields may interfere with Bright light shining on the display may make them the proper operation of the meter. do not use difficult to read. - Page 220 Testing and storage conditions NOTICE: couraged to try to correct the interference by one or Changes or modifications made to this equipment not more of the following measures: expressly approved by Roche diagnostics GmbH, Reorient or relocate the receiving antenna. Germany may void the FCC authorization to operate Increase the separation between the equipment and this equipment.
-
Page 221: Symbols, Messages, Problems And Error Messages
Symbols, messages, problems and error messages 16 Symbols, messages, problems and error messages 16.1 Symbols In place of a result: The result is lower than 0.6 mmol/l. The meter presents most of the information as text. In may indicate that your blood glu- addition, results are displayed –... -
Page 222: Messages
Symbols, messages, problems and error messages 16.2 Messages Cassette empty: This message appears if you start a test and all test areas in the cassette have been used. Insert a new test cassette in the meter. Validity of the cassette: This message appears at the start of a test if the test cassette is only valid for 10 more days. - Page 223 Symbols, messages, problems and error messages 16 Batteries low: This message appears when the batter- ies are almost empty. It appears every time you turn the meter off until you change the batteries. The first time the message appears, you can still perform about 50 tests.
- Page 224 Symbols, messages, problems and error messages Tip cover open: This message appears if you are in the process of changing a setting (e.g. the date) or entering a new setting (e.g. a reminder) and open the tip cover. Close the tip cover again if you wish to continue with the setting.
- Page 225 Symbols, messages, problems and error messages 16 Tip cover closed: This message appears if you close the tip cover after the meter has advanced a test area. open the tip cover again if you wish to continue with the test. to select Do not test or Test.
- Page 226 Symbols, messages, problems and error messages Temperature too low / too high: This message ap- pears at the start of a test if the ambient temperature or the temperature of the meter is between +8 and +10 °C or between +40 and +42 °C. , to select whether you wish to Test or Quit.
- Page 227 Symbols, messages, problems and error messages 16 Reminder: If you have set reminders, this message appears at the set time. If you have also turned on Reminders in the Settings/Tones menu, beeps will also sound. To turn off the reminder: Press any button.
-
Page 228: Problems
Allow the meter time to dry slowly. you have inserted the batteries the wrong way The meter is defective. round. Contact Accu-Chek Customer Care at Remove the batteries and reinsert them as shown in 1-800-363-7949. the battery compartment. The ambient temperature is low and the batteries are almost empty. - Page 229 The meter has forgotten the time and date. The display is defective. you have changed the batteries or stored the meter Contact Accu-Chek Customer Care. without batteries and the built-in back-up battery is empty. The back-up battery normally ensures that the meter remembers the time and date even if no batte- ries are inserted.
-
Page 230: Error Messages
Press and hold the on/off button until the bar in the display is filled (at least 2 seconds). If error messages occur frequently, contact Accu-Chek The test cassette or the meter may be defective. Customer Care. Remove the cassette from the meter and reinsert it. - Page 231 The RFId sensor in the meter is defective. instructions given by your doctor. Repeat the test afterwards. Contact Accu-Chek Customer Care. A meter error occurred. The RFId chip on the cassette is damaged or mis- If the error message reappears after turning on the sing.
- Page 232 Symbols, messages, problems and error messages E‑4 Fluff, crumbs, etc. are inside the tip of the cassette. The test area has absorbed too little blood or control solution. Remove these. To do this, follow the instructions in Chapter 11.1. Repeat the test with a larger amount of blood or control solution.
- Page 233 Symbols, messages, problems and error messages 16 E‑6 during the test, bright light, e.g. sunlight, fell on the you applied blood or control solution to the test area meter and has interfered with the test. too soon, i.e. before the prompt Apply blood was dis- played.
- Page 234 (under +8 °C) or too high (above meter: +42 °C) for a test. Contact Accu-Chek Customer Care. Move to a place where the temperature is between +10 and +40 °C and wait for the temperature of the...
- Page 235 Symbols, messages, problems and error messages 16 E‑9 If the batteries are so low that no more tests can be performed, this message will appear. Then the meter turns off (after a maximum of 1 minute). Insert two new batteries.
-
Page 236: Disposing Of The Meter
disposing of the meter Disposing of the meter during blood glucose testing, the meter may come into Please dispose of the batteries in an environ- contact with blood. used meters therefore carry a risk mentally friendly way such as a collection depot. of infection. - Page 237 disposing of the meter 17 Removing the back‑up battery Apart from the two batteries in the battery compart- ment, there is also a third battery in the side of the battery compartment, the back-up battery. you must also remove this battery before disposing of the meter.
-
Page 238: Technical Data
Although you always apply whole blood to the test area, the blood glucose results displayed by your meter correspond to those in plasma. You will find information on how the system works, on the test principle and on refe- rence methods in the Accu-Chek Mobile test cassette package insert. Measuring range 0,6–33,3 mmol/l... - Page 239 Technical data 18 Temperature and humidity during testing +10 to +32 °C at 15 to 85 % relative humidity, including the following extreme conditions: +32 °C at 85 % relative humidity and +40 °C at 45 % relative humidity. during storage 15 to 93 % relative humidity Meter without batteries and without test cassette: -25 to +70 °C ”...
- Page 240 The Accu-Chek Mobile blood glucose monitoring system complies with the requirements of eN ISo 15197. Roche diagnostics hereby declares that the Accu-Chek Mobile blood glucose meter conforms with the basic re- quirements and other relevant regulations of the european directive 1999/5/eC. The conformity declaration may be...
-
Page 241: System Components
If you wish to use blood from alternate sites (such as control tests with the Accu-Chek Mobile meter and the palm, the ball of the thumb, forearm, upper arm, the Accu-Chek Mobile test cassettes. -
Page 242: Accu-Chek Customer Care
Accu-Chek Customer Care Accu‑Chek Customer Care 20.1 Advice and troubleshooting 20.2 Address If you need advice on how to operate the Accu-Chek Roche diagnostics Mobile meter or the Accu-Chek FastClix Mobile lancing 201, Boulevard Armand-Frappier device, if you seem to be obtaining implausible results, Laval, Québec (CANAdA) H7V 4A2... -
Page 243: Alphabetical Index
Alphabetical index 21 Alphabetical index battery compartment 14, 215 Accu-Chek Customer Care 242 beeper 109 acoustic mode 109, 110, 168 announcement of results via ~ 171 turning on, turning off 111 during testing 109 After meal (flag) 87, 89 turning off 111... - Page 244 Alphabetical index checking, meter 175 cleaning display check 30 lancing device 202 performing 189 meter 192 display format, saved results 143 concentration range 183 setting 165 concentration table 41, 185 disposal control solution 175 batteries 213, 236 disposing 184 meter 236 validity 187 test cassette 207 control test 87, 175...
- Page 245 Alphabetical index 21 lancing device general (flag) 87, 89 cleaning 202 docking 63 obtaining blood with the ~ 71 HI (display) 86, 93, 221 overview 17 hourglass (symbol) 75 priming 72 humidity 217, 239 undocking 62 light conditions 219 Lo (display) 86, 93, 221 infrared window 15, 153 intended use lancing device 3...
- Page 246 Alphabetical index meter meter components 14 checking 176 symbols 221, 252 cleaning 192 disposing 236 overview 14 penetration depth storing 217 indicator 17, 59 turning off 32 setting 59 after a test 76, 77 performance evaluation 240 turning on 30 problems 228 opening the memory 135 performing a test 64...
- Page 247 Alphabetical index 21 result sources of error averages 148 blood glucose test 94 flagging 87 control test 186 transferring 153 transferring results 164 retrieving results from memory 143 sources of interference electromagnetic 219 light 219 settings storage conditions 217 acoustic mode 109 symbols 221 beeper 109 during testing 86...
- Page 248 Alphabetical index test transferring results 153 performing 64 as table (CSV file) 160 sources of error 94 for analysis 158 test area 15 sources of error 164 test cassette 16 turning off, meter 32 changing 203 after a test 76, 77 disposing 207 turning on, meter 30 expiry date 46...
- Page 249 Alphabetical index 21...
-
Page 250: Menu Overview
Menu overview Menu overview Main menu Test Turn off Memory Settings Result Set flag All results Time/date Control test Color Averages Time General All results 7 days date Before meal Before meal 14 days Time format After meal After meal 30 days Reminder Reminders... - Page 251 Menu overview 22 Tones Reminders Target range Volume Turn on Beeper Turn off Reminders edit Change Brightness Turn on In 1 hour Cancel Acoustic mode Turn off In 2 hours Change Language In 3 hours delete Cancel Main menu Tools display check Validity Clean...
-
Page 252: Explanation Of Symbols
explanation of symbols Explanation of symbols on the packaging, on the back of the meter and on the lancing device, you may encounter the symbols shown below. They have the following meanings: Blood glucose meter: This product fulfils Consult instructions for use 0088 the requirements of the european direc- tive 98/79/eC on in vitro diagnostic med-... - Page 253 explanation of symbols 23 The explanation of any other symbols can be found in the instructions for use and inserts accompanying compon- ents within the packaging.
Need help?
Do you have a question about the Mobile and is the answer not in the manual?
Questions and answers