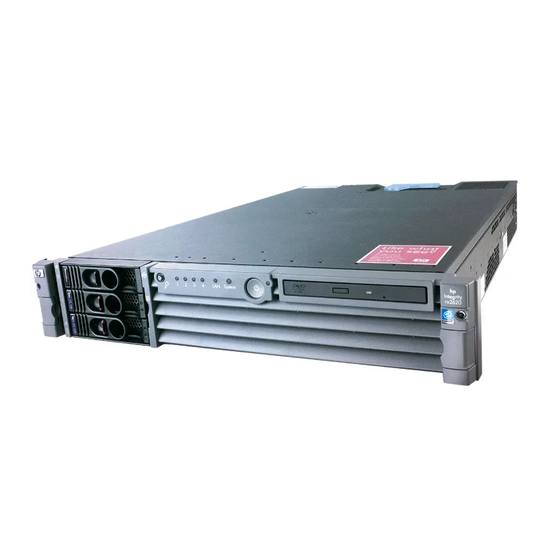
HP Integrity rx2620 User's & Service Manual
Hide thumbs
Also See for Integrity rx2620:
- User's & service manual (216 pages) ,
- Read me first (2 pages) ,
- Service manual (177 pages)

Related Manuals for HP Integrity rx2620


Summary of Contents for HP Integrity rx2620
- Page 1 HPE Integrity rx2620 Server User Service Guide Part Number: AD117-9003BR Published: November 2015 Edition: 5...
- Page 2 © Copyright 2006, 2015 Hewlett Packard Enterprise Development LP The information contained herein is subject to change without notice. The only warranties for Hewlett Packard Enterprise products and services are set forth in the express warranty statements accompanying such products and services. Nothing herein should be construed as constituting an additional warranty.
-
Page 3: Table Of Contents
Contents About This Document................9 Intended Audience......................9 New and Changed Information in This Edition..............9 Publishing History.......................9 HP-UX Release Name and Release Identifier..............9 Document Organization....................10 1 Introduction..................11 Server Overview.......................11 Server Dimensions......................11 Server Components......................12 Processor........................12 Memory........................12 PCI Riser........................12 Internal Core I/O......................12 External Core I/O......................13 Power Supply Unit.......................13... - Page 4 Powering Off the Server Using iLO................27 Powering Off the Server Manually................28 Powering On the Server....................28 Powering On the Server Using iLO................28 Powering On the Server Manually................28 4 Removing and Replacing Components..........29 ESD Information........................29 Required Tools........................29 Internal Component and Connector Locations..............29 Removing and Replacing System Top Metal Cover and Bezels........32 Rack-Mount System....................32 Accessing a Rack Mounted Server................32...
- Page 5 Replacing a PCI or Graphics Card.................63 Removing and Replacing the PCI Backplane..............64 Removing the PCI Backplane.................64 Replacing the PCI Backplane.................64 Removing and Replacing a Removable Media Drive..........65 Removing a Removable Media Drive..............65 Replacing a Removable Media Drive..............66 Removing and Replacing the MP Card...............66 Removing the MP Card..................67 Replacing the MP Card..................68 Removing and Replacing the MP Card Battery............68...
- Page 6 B Booting the Operating System............116 Operating Systems Supported on Integrity Servers............116 Configuring System Boot Options...................116 Booting and Shutting Down HP-UX................117 Adding HP-UX to the Boot Options List..............118 Adding an HP-UX Boot Option................118 Standard HP-UX Booting...................119 Single-User Mode HP-UX Booting................120 Booting HP-UX in Single-User Mode (EFI Shell)..........120 LVM Maintenance Mode HP-UX Booting..............121...
- Page 7 Windows Shutdown from the Command Line............129 Booting and Shutting Down Linux...................129 Adding Linux to the Boot Options List................129 Booting the Red Hat Enterprise Linux Operating System.........131 Booting Red Hat Enterprise Linux from the EFI Shell..........131 Booting the SuSE Linux Enterprise Server Operating System........132 Booting SuSE Linux Enterprise Server from the EFI Shell........132 Shutting Down Linux....................132 C Utilities....................134...
- Page 8 Syntax........................151 Parameters......................152 Operation......................152 sysmode........................152 Syntax........................152 Parameters......................152 Operation......................152 Specifying SCSI Parameters..................153 Using the SCSI Setup Utility..................153 Using the Boot Option Maintenance Menu..............157 Paths..........................158 Boot From File......................158 Add a Boot Option....................158 Edit Boot Entry......................159 Delete Boot Options.....................159 Change Boot Order....................160 Manage BootNext Setting..................160 Set AutoBoot TimeOut..................161 Select Active Console Output Devices..............161 Select Active Console Input Devices..............162...
-
Page 9: About This Document
AD117-9003BR November 2015 HP-UX Release Name and Release Identifier Each HP-UX 11i release has an associated release name and release identifier. Theuname(1) command with the -r option returns the release identifier. This table shows the releases available for HP-UX 11i. -
Page 10: Document Organization
This guide is divided into the following chapters. Chapter 1 Introduction Use this chapter to learn about the features and specifications of the Integrity rx2620 server. Chapter 2 Controls, Ports, and LEDs Use this chapter to learn about the locations of the external controls, ports, and LEDs on the server. -
Page 11: Introduction
1 Introduction The rx2620 server is a 2-socket server based on the Itanium® processor architecture. The server supports the following operating systems: Microsoft Windows®, HP-UX, Linux, and OpenVMS®. The server is available in either rack-mount or pedestal configurations. The server accommodates up to 12 DIMMs and internal peripherals including disks and a DVD. -
Page 12: Server Components
Table 3 Server Dimensions Dimensions Value Rack units Height 8.6 cm (3.4 in.) Width 48.3 cm (19.0 in.) Depth 67.9 cm (26.8 in.) Weight 17.5 kg (38.6 lb.) 22.2 kg (49.0 lb.) Minimum Maximum Server Components The server consists of the following components: Processor 1.4 GHz/12 MB L3 cache dual-core processor 1.6 GHz/18 MB L3 cache dual-core processor... -
Page 13: External Core I/O
External Core I/O One SCSI U320 68 pin connector Two 10/100/1000Base-T Ethernet LAN connectors for twisted-pair cable Four USB 2.0 ports Two general purpose or 9-pin serial ports, 16550 compatible Power Supply Unit 600 W output power Front-end block (the actual power supply case) that converts the line voltage into a high DC voltage. -
Page 14: Hard Drives
◦ Group actions through the Systems Insight Manager (HPE SIM) ◦ Directory-based authentication and authorization (LDAP) Hard Drives The server supports the following hard drives: 36 GB 15K hot-plug Ultra320 SCSI drive 73 GB 15K hot-plug Ultra320 SCSI drive 146 GB 10K hot-plug Ultra320 SCSI drive 300 GB 10K hot-plug Ultra320 SCSI drive The server holds up to three hard drives. -
Page 15: Processor Sockets
“Processor Bus” (page 15) “ZX1 I/O and Memory Controller” (page 15) “Memory” (page 15) “I/O Bus Interface” (page 17) “Processor Dependent Hardware Controller” (page 18) “Dual Serial Controller” (page 18) “Field Programmable Gate Array” (page 18) “Baseboard Management Controller” (page 19) “SCSI Controller”... -
Page 16: Memory Architecture
Mtransfers/s as data is clocked on both edges of the clock. The peak data bandwidth for this memory subsystem design is 8.5 Gb/s. Load DIMMs in quads with qualified modules. Memory is protected by data ECC, and the hardware implementation supports chip-spare. -
Page 17: Chip Spare Functionality
DIMMs are loaded in a group of four, known as a quad. All four DIMMs in a quad must be the same size. Table 4 summarizes the memory solutions. Table 4 Memory Array Capacities Mininum/Maximum Memory Single DIMM Size DDR SDRAM Count, Type, and Size Technology 1 GB / 3 GB... -
Page 18: Processor Dependent Hardware Controller
Processor Dependent Hardware Controller The PDH controller provides these features: 16-bit PDH bus with reserved address space for the following: ◦ Flash memory ◦ Nonvolatile memory ◦ Scratch RAM ◦ Real-time Clock ◦ UARTs ◦ External registers ◦ Firmware read/writable registers ◦... -
Page 19: Baseboard Management Controller
LPC bus interface to support BMC Decoding logic for PDH devices Baseboard Management Controller The baseboard management controller (BMC) supports the industry-standard Intelligent Platform Management Interface (IPMI) specification. This specification describes the management features that have been built into the system board. These features include: local and remote diagnostics, console support, configuration management, hardware management, and troubleshooting. -
Page 20: Usb Connectors
High speed 480 Mb/s capability Full speed 12 Mb/s Low speed 1.5 Mb/s USB keyboard and mouse support HP-UX support for HPE USB keyboard and mouse Data Pathing Information Table 5 shows data path information for the server. Table 5 Data Pathing... -
Page 21: Controls, Ports, And Leds
2 Controls, Ports, and LEDs This chapter describes the controls, ports, and LEDs on the front and rear panels of the server. Front Panel The control panel at the front of the server provides the controls and indicators commonly used for operation. For the location and description of the front panel controls and LEDs, see Figure Figure... -
Page 22: Hot-Plug Disk Drive Indicators
Chapter 5: “Troubleshooting” (page 83) for information provided by the system and diagnostic LEDs. Table 7 Power On/Off Button Button/Switch Description Power Button Controls the power supply (turns system power on or off) if power is available to the power supply. (Controls both power supplies if two are installed). If power is off but power is available to the power supplies, pressing the Power button: Momentarily (less than 5 seconds) turns on the power supplies and applies... -
Page 23: Power Supply Leds
Table 8 Hard Drive LED Definitions Activity Description Status LED Not used Not used in the server. Activity LED Flashing green Indicates disk drive activity. This LED is directly controlled by the drive and illuminates when a drive is accessed. Power Supply LEDs The server is typically delivered with a single power supply (PS 1). -
Page 24: Rear Panel
Rear Panel The server rear panel includes communication ports, I/O ports, AC power connectors, and the Locator LED/button. Additional LEDs located on the rear panel of the server signal the operational status of the LAN connector of the optional iLO MP. For the location and description of the ports and connectors, see Figure 11 Table... -
Page 25: Lan Gb A Connector
Some video cards are preinstalled in the system, while others are packaged separately and shipped with the system. If your system did not ship with a preinstalled graphics card, you must install the card and load the drivers. See the documentation included with your graphics card. Frequencies of 85Hz and higher provide flicker-free viewing. -
Page 26: Management Processor Lan Leds
Table 13 10/100/1000 base-T Ethernet Gb LAN B Connector LEDs Location Color Description Speed (upper left) Amber 1000 MHz with Ethernet protocol and twisted-pair wiring is enabled Green 100 MHz with Ethernet protocol and twisted-pair wiring is enabled No link 10 MHz with Ethernet protocol and twisted-pair wiring is enabled Link (upper right) -
Page 27: Powering Off And Powering On The Server
3 Powering Off and Powering On the Server This chapter provides information and procedures for powering off and powering on the server. Power States The server has three power states: Standby power Full power Plug the power cord into the appropriate receptacle on the rear of the chassis to achieve the standby power state;... -
Page 28: Powering Off The Server Manually
Powering Off the Server Manually To manually power off the server through iLO: Gracefully shut down the operating system. See Appendix B (page 116), or your operating system documentation. Press the Power button to power off the server. IMPORTANT: The main DC voltage is now removed from the server; however, AC voltage for standby power is still present in the server. -
Page 29: Removing And Replacing Components
4 Removing and Replacing Components This chapter describes the procedure for removing and replacing the different components in the server. ESD Information Follow the procedures listed below to ensure safe handling of components and to prevent harm to both you and the server: Use an anti-static wrist strap and a grounding mat, such as those included in the Electrically Conductive Field Service Grounding Kit (HPE 9300-1155). - Page 30 Figure 15 Internal Physical Layout Table 16 Component Locations 1 Power receptacles (PWR 1 right, PWR 2 left) 8 Hot-pluggable hard drives (up to 3) 2 Memory airflow guide 9 Hard disk lock 3 Processor airflow guide 10 System fans (fan 2 - memory, fan 3 - I/O cage) 4 System fans (fan 1A - right, fan 1B - left) 11 Intrusion switch 5 Slimline optical drive...
- Page 31 Figure 16 System Board Connectors and Slots Table 17 Connector Locations 1 External SCSI connector 9 PDH connectors 17 PCI backplane connector 2 SCSI connectors A and B 10 Power module power connector 18 Optical drive connector 3 CPU 0 slot 11 ZX1 memory and I/O controller 19 iLO hardware connector (under heat sink)
-
Page 32: Removing And Replacing System Top Metal Cover And Bezels
The server is designed to be rack mounted. The following procedure explains how to gain access to a server that is mounted in an approved rack. For rack installation instructions, review the HPE Integrity rx2620 Server Rack Installation Guide. WARNING! Ensure that all anti-tip features (front and rear anti-tip feet installed;... -
Page 33: Inserting The Server Into The Rack
Figure 17 Release the Rack Latches Slide the server out of the rack until the guide-rail release clips are visible. Inserting the Server into the Rack To insert the server into the rack, perform the following step: Press the rail clips on either side of the server inward and push the server into the rack until it stops. -
Page 34: Replacing The Top Metal Cover
Figure 18 Removing and Replacing the Top Metal Cover Lift the top metal cover off the server chassis. Replacing the Top Metal Cover CAUTION: Secure any wires or cables in your server so that they are not cut or interfere with the replacement of the top metal cover. Align the front edge of the top metal cover with the alignment mark on the optical drive bay. -
Page 35: Removing And Replacing The Front Bezel
Figure 20 Closing the Top Metal Cover Slide the server into the rack enclosure and connect the power cables. Removing and Replacing the Front Bezel You must remove the front bezel from the chassis to remove or replace the power supplies or the optical drive. -
Page 36: Removing And Replacing Hot-Swap And Hot-Plug Devices
Swing the bezel and push toward the front of the server until the bezel locks into place. Figure 22 Replacing the Front Bezel Removing and Replacing Hot-Swap and Hot-Plug Devices The server has hard drives that are hot-pluggable and power supplies and fans that are hot-swappable. - Page 37 Figure 23 Removing Fan 1A or Fan 1B Figure 24 Removing Fan 2...
-
Page 38: Replacing A Server Fan
Figure 25 Removing Fan 3 Replacing a Server Fan Remove the top metal cover (if necessary). See “Removing the Top Metal Cover” (page 33). Grasp the replacement fan module and insert it into its fan socket. CAUTION: If you are hot swapping a fan, replace the top metal cover within 30 minutes to prevent damage to the server components. -
Page 39: Replacing The Power Supply
Remove the front bezel from the server. See “Removing the Front Bezel” (page 35). Press the power supply retaining clip to unlatch the power supply release lever. Figure 26 Figure Figure 26 Releasing the Power Supply Retaining Clip Press the power supply release lever and pull the power supply out of the server. Figure 27 Removing the Power Supply Replacing the Power Supply To replace the power supply:... -
Page 40: Removing And Replacing An Internal Hard Drive
Figure 28 Replacing the Power Supply Verify that both power supply LEDs, visible through the front of the supply grid, are illuminated. Verify the power supply replacement by using the utilities identified in Appendix C (page 134). To verify power supply operation, use the iLO MP PS command. Replace the front bezel. - Page 41 Press down on the unlock lever to unlock the drive. See Figure NOTE: If the drive bay is not locked, the procedure for installing additional hard drives can be accomplished without removing the server from the rack and it is not necessary to remove the top cover. Completion of the procedure does not require locking the disk bay, replacing the top metal cover, or replacing the server in the rack.
-
Page 42: Replacing A Hard Drive
Figure 31 Removing the Disk Drive Replacing a Hard Drive To install or replace a hard drive: Insert the hard drive into the drive bay from which you removed the drive and push inward on the release lever until the drive no long slides forward. You must leave the release lever in the open position when you push the drive into the server. -
Page 43: Removing And Replacing Internal Components
Removing and Replacing Internal Components To upgrade, remove, or replace most server components, you must first shut down the server, and remove the top metal cover. WARNING! Do not remove the server covers without first powering the server off and unplugging the power cord from the outlet or power protection device unless you are replacing a hot-swappable fan. -
Page 44: Replacing The Memory Airflow Guide
Figure 33 Removing the Memory Airflow Guide Replacing the Memory Airflow Guide Align the guides on both sides of the airflow guide with the slots on the chassis. Insert the memory airflow guide in the slots. Replace the top metal cover and reconnect all of the power cables. Removing and Replacing the Processor Airflow Guide The following procedures show how to remove and replace the processor airflow guide. - Page 45 Figure 34 Removing the Processor Airflow Guide Disconnect the power cable connected to the guide from the system board. Remove the front portion of the airflow guide by doing the following: Remove server fans 1A and 1B. Rotate the clip clockwise to release the latch. See Figure 35 Figure Figure 35 Opening the Release Clip...
-
Page 46: Replacing The Processor Airflow Guide
Figure 36 Removing the Front Airflow Guide Replacing the Processor Airflow Guide Replace the front portion of the airflow guide: Align the release latch of the front half of the airflow guide over the release latch post and snap it in place. Connect power connector on the front portion of the guide to the connector on the system board. -
Page 47: Supported Dimm Sizes
combinations from 1 GB up to 32 GB. See Figure 37 for the DIMM slot locations on the system board. WARNING! Ensure that the server is powered off, and all power sources have been disconnected from the server before removing or replacing server memory. Voltages are present at various locations within the server when an AC power source is connected. -
Page 48: Removing Dimms
Figure 37 DIMM Slot Identification Removing DIMMs To remove DIMMs: Power off the server and disconnect all cables. See “Powering Off the Server” (page 27). Remove the top metal cover. See “Removing the Top Metal Cover” (page 33). Identify the DIMM to be removed and push the appropriate extraction levers found on either side of the DIMM slot outward to the open position. - Page 49 4A, 4B and 5A, 5B must be matched pairs of equal size NOTE: DIMMs match if they have the same Hewlett Packard Enterprise part number. The DIMMs are 184-pin, industry-standard, DDR266, CL2, registered ECC modules. Industry standard means the DIMMs meet specifications detailed in the JDEC Standard No.
-
Page 50: Removing And Replacing A Processor
Figure 38 Inserting DIMM into Slot Removing and Replacing a Processor This section provides information about removing and replacing a processor. The processors are located on the system board, which is accessible by removing the top metal cover. WARNING! Ensure that the server is powered off, and all power sources have been disconnected from the server before removing or replacing a processor. - Page 51 Figure 39 Processor Locations on Server Figure 40 Processor Location on System Board...
-
Page 52: Removing A Processor
Removing a Processor To remove a processor module: Power off the server and disconnect all cables. See “Powering Off the Server” (page 27). Remove the top metal cover. See “Removing and Replacing the Top Metal Cover” (page 33). Remove the processor airflow guide. See Figure Remove the IDE cable and power module cables from the processor airflow guide cable clips. - Page 53 Figure 42 Unscrewing the Captive Screws Slide the sequencing retainer plate toward the back of the server to open the hole in the edge of the heat sink for insertion of the special processor tool into the processor module locking mechanism. See Figure Figure 43 Slide Sequencing Retainer Plate CAUTION:...
-
Page 54: Replacing A Processor
Figure 44 Unlocking the Processor Module Locking Mechanism Lift the processor up and out of the chassis. Place the processor module into an anti-static container. Replacing a Processor CAUTION: Do not modify the settings of the DIP switches located on the system board. - Page 55 Figure 45 Unlocked ZIF Socket Lock CAUTION: The zero insertion force (ZIF) socket for the processor is locked and unlocked by half a turn of the 2.5 mm hex tool. A counterclockwise 180 degree rotation (1/2 turn) unlocks the socket. A clockwise 180 degree rotation locks the socket.
- Page 56 Figure 47 CPU Slot Alignment Holes Figure 48 Installing the Processor Module CAUTION: Do not press the processor module into the socket. When properly aligned, the processor pins seat into the ZIF socket. No additional pressure is required. Use the special processor tool shipped with the replacement processor module to lock the processor module in place on the system board.
- Page 57 Figure 49 Locking the Processor Module in Place Slide the sequencing retainer plate toward the rear of the server. Figure 50 Sliding the Sequencing Retainer Plate Install the four processor captive screws, and the two heat sink captive screws in the order shown here.
-
Page 58: Removing And Replacing The System Battery
Figure 51 Securing the Captive Screws Connect the processor module turbo fan power cable to the connector on the system board. 10. Connect the power pod cable to the power cable. Use the 8-pin to 6-pin adapter if necessary. 11. Install the processor airflow guide. See “Removing the Processor Airflow Guide”... -
Page 59: Replacing The System Battery
Figure 52 Removing the System Battery Replacing the System Battery Lift up on the battery holder retaining clip with a flat-head screwdriver and slide the battery into the holder. The positive (+) terminal of the battery faces up. CAUTION: Only lift the battery high enough to clear the holder. Excessive stress on the battery holder retaining clip can damage the clip. -
Page 60: Removing And Replacing Pci Card Cage
Removing and Replacing PCI Card Cage Accessory cards are installed in a removable PCI cage. This section explains how to access the PCI card cage, and how to remove and install accessory cards. WARNING! Ensure that the server is powered off, and all power sources have been disconnected from the server before removing or replacing a processor module. -
Page 61: Replacing The Pci Card Cage
Figure 54 Removing the PCI Cage Cover Unscrew the bulkhead screw that holds the accessory card in place. The PCI cards are now accessible for removal and replacement. Replacing the PCI Card Cage To install the PCI cage into the server: Install the PCI card cover onto the PCI cage. -
Page 62: Removing A Pci Card
The server has the following accessory card sockets: Four 64-bit, 133 MHz PCI-X card sockets WARNING! Ensure that the server is off, and all power sources have been disconnected from the server before removing or replacing a PCI card. Voltages are present at various locations within the server when an AC power source is connected. -
Page 63: Replacing A Pci Or Graphics Card
Figure 55 Installing a PCI Slot Cover Replacing a PCI or Graphics Card Power off the server and disconnect the power cable and all other cables from the back of the server (if necessary). See “Powering Off the Server” (page 27). -
Page 64: Removing And Replacing The Pci Backplane
Power on the server. See “Powering On the Server” (page 28). 10. Verify the installation of all PCI cards: Look at the LEDs of all PCI cards for proper operation. See accessory manuals. Run PERFVER from the Offline Diagnostics CD to ensure that all PCI cards are identified. -
Page 65: Removing And Replacing A Removable Media Drive
Figure 58 Replacing the PCI Backplane Replace any accessory and graphics cards. Connect server power, PCI, and LAN cables. Power on the server. See “Powering On the Server” (page 28). Verify the installation of the PCI backplane: Look at the LEDs of all PCI cards for proper operation. Run mapper from the Offline Diagnostics CD to ensure that all PCI cards are identified. -
Page 66: Replacing A Removable Media Drive
Remove the top metal cover. See “Removing and Replacing the Top Metal Cover” (page 33). Disconnect the IDE cable from the back of the drive. See Figure Grasp the front of the DVD drive and squeeze in on the locking tab to release the drive. -
Page 67: Removing The Mp Card
Removing the MP Card Record the network settings from your MP card before beginning this task. Power off the server, disconnect all power and external cables and remove the top metal cover. Unscrew the two internal mounting screws that connect the MP card to the internal chassis post. -
Page 68: Replacing The Mp Card
Figure 61 Replacing the MP Blank Push the MP blank against the inside of the chassis and Install the blank mounting screw on the external connector side of the server chassis. Replace the top metal cover and reconnect the power and external cables. Replacing the MP Card Record the network settings from your iLO MP before beginning this task. -
Page 69: Battery Notice
Battery Notice This product contains a Lithium battery. WARNING! Lithium batteries can explode if mishandled. Do not recharge, disassemble, or dispose of the battery in a fire. Failure to observe this warning might result in personal injury or damage to equipment. Replace only with the same or equivalent type recommended by the manufacturer. -
Page 70: Removing And Replacing The Led Status Panel
Perform all of the steps described in the procedure for “Removing and Replacing the MP Card” (page 66) Verify the battery replacement by using the utilities identified in Appendix C (page 134). To verify operation, use the iLO MP commands. Removing and Replacing the LED Status Panel The LED status panel card contains the server and diagnostic LEDs. -
Page 71: Removing And Replacing The System Board
Copy a valid UUID to the new status panel. Verify the display panel replacement by exercising all front panel controls and observing that the display panel LEDs are operating properly. Removing and Replacing the System Board CAUTION: Some server settings are saved to the LED status panel. If you are replacing both the LED status panel and the system board, you must replace them one at a time to avoid loss of server settings. - Page 72 Figure 64 Removing the System Board Mounting Screws Disconnect all cables that are connected to the system board. To help with reassembly, note which cables were connected to which port. NOTE: To access the three power cables near the PCI cage, you must lift up the connector bridge for the PCI cage fan.
-
Page 73: Replacing The System Board
Lift up the processor module side of the system board and slide it free of the PCI cage bay. See Figure Figure 66 Removing the System Board Replacing the System Board Remove the old system board. Grasp the new system board by its edges and carefully align it in the server: Angle the board to allow the PCI connector to slide into the PCI cage bay area. - Page 74 Slide the system board toward the rear of the server to secure the system board on its standoffs. See Figure 68 Figure Figure 68 Aligning the System Board PCI Connector Figure 69 Sliding the System Board into the Chassis Install the system board mounting screw. See Figure Connect all cables to their appropriate connectors on the system board.
- Page 75 Figure 70 Installing the Rear Panel Mounting Screws If the server has an iLO MP, install it now. See “Replacing the MP Card” (page 68). Replace the power connectors in their slots on the back of the server and install the power connector mounting screws.
-
Page 76: Removing And Replacing The Power Supply Interface Module
16. Use the sysset command to enter the product data: Shell> sysset prodname "server rx2620" 17. Use the syssetcommand to verify all values are set: Shell> sysset System Information: Manufacturer: hp Product Name: server rx2620 Product Number: AB332A Secondary Product Number is Identical Serial number: US51884101... - Page 77 Figure 72 Power Cables and Holding Clips Unscrew the PSI mounting screw and remove the PSI module from the server. Figure 73 Figure Figure 73 Removing the Mounting Screw...
-
Page 78: Replacing The Power Supply Interface Module
Figure 74 Removing the PSI Interface Module Replacing the Power Supply Interface Module Place the PSI module into the chassis by sliding the module retaining tab into the socket on the hard drive bay wall. See Figure Figure 75 Replacing the Power Supply Interface Module Install the PSI module mounting screw and secure the power cables behind the holding clips. -
Page 79: Removing And Replacing The Hard Drive Scsi Backplane
Figure 76 Securing the Power Supply Interface Module and Cables Replace the system board. Replace the power supply (or supplies). Replace the top metal cover, and reconnect all of the power and external cables. Verify the PSI replacement by using the utilities identified in Appendix C (page 134). - Page 80 Figure 77 Opening the Fan Power Bridge Remove any installed hard drives. Disconnect the SCSI cables and unscrew the backplane mounting screws. See Figure 78 Figure Figure 78 Disconnecting SCSI Cables...
- Page 81 Figure 79 Removing the Mounting Screws Remove the hard drive backplane by sliding it in the direction of the arrow and pulling it outward from its standoff posts. See Figure 80 Figure Figure 80 Removing the Backplane...
-
Page 82: Replacing The Hard Drive Scsi Backplane
Figure 81 Removing the Backplane from the Chassis Replacing the Hard Drive SCSI Backplane Insert the hard drive backplane into its four chassis standoffs and slide it to the left. This locks the hard drive backplane in place. Install the two backplane mounting screws and connect the two SCSI cables. Replace any removed hard drives. -
Page 83: Troubleshooting
5 Troubleshooting This chapter provides troubleshooting instructions for maintaining the server. Troubleshooting Tips CAUTION: Do not operate the server for more than 30 minutes with any cover (including disk drives) removed. Damage to server components can result due to improper cooling airflow. If you do not replace the top cover within 30 minutes, the server automatically shuts off. -
Page 84: The System Has Intermittent Failures
Examine the four diagnostic LEDs for specific warning or fault indications. The diagnostic LEDs present patterns that categorize the source of the warning or fault. This information is also presented in the SEL. NOTE: If MP hardware is installed, the diagnostic LEDs are monitored by iLO. The diagnostic LEDs on the control panel are disabled. -
Page 85: The Server Powers Off But Does Not Restart
Make sure that the server is turned on (the power-on light should be green and the fans should be on). Turn the server off, wait at least twenty seconds, then turn the server back on to see if the failure can be cleared. Make sure that all boards are installed properly and the processors are installed in the correct slot. -
Page 86: Troubleshooting And Fru Identification
Troubleshooting and FRU identification After you have determined the current server state, you must troubleshoot the server to determine what repair to make. Table 18 to assist you in repairing the server by matching the problem symptom with the appropriate troubleshooting step. Table 18 Troubleshooting FRUs Problem or Problem... -
Page 87: Verifying Hard Drive Operation
Each hard drive has an activity LED indicator on the front of the drive. See Figure NOTE: Only the Activity LED is used. The Status LED is not monitored by HP-UX. Figure 82 LED Apertures on Hard Drive Lightpipes on the disk drive transmit light to these apertures from LEDs on the inside rear of the hot-swap mass storage cage. -
Page 88: Identifying And Diagnosing Hardware Issues
Power off the server using the power switch and unplug the AC power cords and any cables. Disconnect the power distribution cable between the drive cage and the power distribution module and then reconnect it. Verify that the SCSI interface is correctly installed from SCSI A channel connector on the system board to the connector on the SCSI cage. -
Page 89: Ilo Mp Event Logs
Table 19 System LED States System LED State Solid green Running operating system Flashing green Booting or running code other than operating system (boot or diagnostic). Flashing yellow (1/sec.) Attention indication: Alerts of levels 3-5 detected in the optional iLO MP logs. - Page 90 F - Forward Progress B - Current Boot P - Previous Boot L - Live Events C - Clear All Logs Enter your choice or [Q] to Quit: Select e to review the server events. The Event Log Navigation menu displays: Enter menu item or [Ctrl-B] to Quit: e Log Name Entries...
-
Page 91: Systems Without An Ilo Management Processor
Select a, and a threshold filter number to filter events to the desired level. MP:SL (+,-,<CR>,D, F, L, J, H, K, T, A, U, ? for Help, Q or Ctrl-B to Quit) >a Alert Level Threshold Filter: : Major Forward Progress : Informational : Warning : Critical... -
Page 92: Diagnostic Leds
Diagnostic LEDs The server has four diagnostic LEDs. These diagnostic LEDs warn of impending or existing failures and enable you to take preventive or corrective action, such as making a server backup or replacing a component. These diagnostic LEDs are labeled 1, 2, 3, and 4. -
Page 93: Warnings
Problem Solution Flashing GREEN Mismatched View the SEL for additional yellow memory pairs information. Review the information on installing memory in the HPE Integrity rx2620 Installation Guide. Flashing GREEN GREEN Memory View the SEL for additional yellow thermal load information. - Page 94 Table 25 Fan Warnings System LED 1 LED 2 LED 3 LED 4 Problem Solution Flashing GREEN Fan 1A is not Replace the fan that is not yellow functioning functioning. properly Flashing GREEN Fan 1B is not Replace the fan that is not yellow functioning functioning.
-
Page 95: Faults
LED 2 LED 3 LED 4 Problem Solution Flashing GREEN Mismatched Review the information on memory installing memory in the HPE pairs Integrity rx2620 Installation Guide. Flashing GREEN Fatal Replace memory. memory error Flashing GREEN GREEN No memory Install memory. - Page 96 Table 33 System Board Faults (continued) System LED 1 LED 2 LED 3 LED 4 Problem Solution Packard Enterprise Support Engineer. Flashing GREEN View the SEL for additional undervoltage information. For further assistance, contact your Hewlett Packard Enterprise Support Engineer. Table 34 Fan Faults System LED 1...
-
Page 97: Command Line Interface
Table 36 BMC Faults (continued) System LED 1 LED 2 LED 3 LED 4 Problem Solution inventory device inaccessible Table 37 Temperature Faults System LED 1 LED 2 LED 3 LED 4 Problem Solution Flashing GREEN GREEN External air Make sure nothing is blocking temperature the server airflow and locate your too high... -
Page 98: Troubleshooting Example Using Cli
00C0 7 CPU0 Mem no DIMMs 000D0 Time 2003-10-31 22:29:06 00D0 - SFW FW error 00-0F:70:40 3F:-- 2003-10-31 22:29:06 00E0 7 CPU0 Halt boot 00037 DT 04 000000000000000F 00F0 7 CPU0 Halt boot 00037 Time 2003-10-31 22:29:06 Troubleshooting Example Using CLI This example uses the CLI and the SEL to display error message indicating that fan 2 (memory fan) has failed. -
Page 99: Lan Leds
Figure 84 STBY, F/W, and BMC LEDs Locations Table 39 details the LED states of the STBY, F/W, and BMC LEDs on the system board. Table 39 System Board LEDs Description STBY (power This green standby LED comes on as soon as the server power cord is plugged in. good) BMC (heartbeat) A few seconds after the server is plugged in this green LED starts flashing indicating... -
Page 100: Lan B Connector Leds
Table 40 Gb LAN A Connector LEDs LAN LED Location Color Description Not used None None 1000mb Second from top Amber Flashing amber: the 1000 Mbps with Ethernet protocol and twisted-pair wiring is enabled. Off: no link. 100mb Second from Green Flashing green: the 100 Mbps with Ethernet protocol bottom... -
Page 101: Diagnostics
Diagnostics A suite of offline and online support tools are available to enable you to troubleshoot server problems. In general, if the operating system (HP-UX) is running, do not shut it down. Use the online support tools. If the operating system cannot be booted, use the offline support tools to resolve the problem. -
Page 102: Offline Diagnostics And Exercisers
Table 43 Online Support Tools List Functional Area Information Verify Exercise Diagnose Expert System CPU/FPU Memory Graphics Core I/O LAN Disk/Arrays Tape Add-On Network I/O Cards Add-On Mass Storage I/O Cards Offline Diagnostics and Exercisers Offline Support Tool Availability Updates to the EFI service partition are available through the CD Installer option on the IPF Offline Diagnostics and Utilities CD. -
Page 103: General Diagnostic Tools
To ensure that tools are available to repair or recover from the fault. HP-UX Fault Management Proactive fault prediction and notification is provided on HP-UX by SysFaultMgmt WBEM indication providers, as well as by the Event Management Service (EMS). EMS and WBEM provide frameworks for monitoring and reporting events. -
Page 104: Recommended Cleaning Procedures
Recommended Cleaning Procedures Suggested cleaning procedures for the server are provided in the following table. Be sure to turn off power to the server when cleaning it. Table 46 details the components and procedures that need cleaning for the server. Table 46 Cleaning Component Time Frame... -
Page 105: Online Support
Determine the following Which firmware versions are in use? When did the problem start? Have recent changes been made to the server? Which operating system and version is in use? Online Support To contact Hewlett Packard Enterprise Customer Support online, refer to the Worldwide Limited Warranty and Technical Support Guide or visit us at http://www.hpe.com/ support/hpesc. -
Page 106: Support And Other Resources
Hewlett Packard Enterprise Support Center More Information on Access to Support Materials page: www.hpe.com/support/AccessToSupportMaterials IMPORTANT: Access to some updates might require product entitlement when accessed through the Hewlett Packard Enterprise Support Center. You must have an HP Passport set up with relevant entitlements. -
Page 107: Websites
Subscription Service/Support Alerts www.hpe.com/support/e-updates Software Depot www.hpe.com/support/softwaredepot Customer Self Repair www.hpe.com/support/selfrepair Insight Remote Support www.hpe.com/info/insightremotesupport/docs Serviceguard Solutions for HP-UX www.hpe.com/info/hpux-serviceguard-docs Single Point of Connectivity Knowledge (SPOCK) www.hpe.com/storage/spock Storage compatibility matrix Storage white papers and analyst reports www.hpe.com/storage/whitepapers Customer self repair Hewlett Packard Enterprise customer self repair (CSR) programs allow you to repair your product. -
Page 108: A Parts Information
A Parts Information This appendix provides server part information such as: Description Manufacturing part number Replacement part number Exchange part number Field Replaceable Parts View The items in this list and the corresponding item numbers are the field replaceable units (FRUs) for the server. See Figure 85 for an exploded view of the server. -
Page 109: Field Replaceable Parts List
Figure 86 Tower Parts Field Replaceable Parts List Use the item numbers listed in Table 47 with the part illustrations to identify the nomenclature of the part. Part numbers are found by using the part nomenclature... - Page 110 from this list to select the correct part from the HPE Partsurfer (http:// partsurfer.hpe.com). NOTE: Some part numbers shown in Table 47 have two entries. The second entry is for the Restriction of the Use of Certain Hazardous Substances (RoHS) compliant parts.
- Page 111 Table 47 Parts List (continued) Item Description Mfg. Part Number Part Number Part Number Replacement Exchange 36 GB, 15K RPM Ultra320 SCSI A9896A A9896-64001 A9896-69001 Hot-Plug Disk 36 GB, 15K RPM Ultra320 SCSI AB420A AB420-67001 AB420-69001 Hot-Plug Disk - (RoHS) 73 GB, 15K RPM Ultra320 SCSI A9897A A9897-64001...
- Page 112 Table 47 Parts List (continued) Item Description Mfg. Part Number Part Number Part Number Replacement Exchange Field Rack Kit, 19” wide AB376A Telco Style rack mounting kit A8716A Pedestal server mounting kit AB377A Deskside Pedestal A7231-04028 A7231-04028 Assembly - Deskside Front Panel A7231-04054 A7231-04054 Deskside top panel...
- Page 113 Table 47 Parts List (continued) Item Description Mfg. Part Number Part Number Part Number Replacement Exchange Single channel SCSI A7231-63024 A7231-63024 Dual channel SCSI A7231-63025 A7231-63025 Super 80 mm Fan A7231-63005 A7231-63005 Super 80 mm Fan - (RoHS) A7231-63030 A7231-63030 80 mm Fan A7231-63006 A7231-63006...
- Page 114 Table 47 Parts List (continued) Item Description Mfg. Part Number Part Number Part Number Replacement Exchange PCI-X 1-port FCA2404 2 Gb Fibre AB232A 313045-002 Channel Adapter PCI 10/100Base-T LAN Adapter A5230A B5509-66001 PCI 1000Base-T Gigabit Ethernet A6825A A6825-67101 Adapter 2-port 1000Base-SX HPUX A7011A A7011-67001 A7011-69001...
- Page 115 Table 47 Parts List (continued) Item Description Mfg. Part Number Part Number Part Number Replacement Exchange Monitor/Keyboard/Mouse Console (15” color monitor, AB300A keyboard and data cable 18.1” LCD Flat Panel Display P9021Y 19”/18” viewable color monitor P9009A (flat screen) 19”/18” viewable color monitor P9009W (flat screen) Europe...
-
Page 116: B Booting The Operating System
The following example includes boot options for OpenVMS, Microsoft Windows, HP-UX, and the EFI Shell. The final item in the EFI Boot Manager menu, the Boot Configuration menu, is not a boot option. The Boot Configuration menu allows server configuration through a maintenance menu. -
Page 117: Booting And Shutting Down Hp-Ux
Options, and Change Boot Order menu items (use this method if you must add an EFI Shell entry to the boot options list). Operating system utilities for managing the boot options list include the HP-UX setboot command and the OpenVMS @SYS$MANAGER:BOOT_OPTIONS.COM command. -
Page 118: Adding Hp-Ux To The Boot Options List
122). Adding HP-UX to the Boot Options List This section describes how to add an HP-UX entry to the server boot options list. You can add the \EFI\HPUX\HPUX.EFI loader to the boot options list from the EFI Shell or EFI Boot Configuration menu (or in some versions of EFI, the Boot Option Maintenance Menu). -
Page 119: Standard Hp-Ux Booting
To exit the iLO MP, enter X at the Main Menu. Procedure 2 Booting HP-UX (EFI Shell) From the EFI Shell environment, boot HP-UX on a device by first accessing the EFI System Partition (for example fs0:) for the root device, then entering HPUX to initiate the loader. -
Page 120: Single-User Mode Hp-Ux Booting
HPUX.EFI loader. To exit the loader (the HPUX> prompt) enter exit (this returns you to the EFI Shell). To boot the HP-UX operating system, do not enter anything during the 10-second period given for stopping at the HPUX.EFI loader. -
Page 121: Lvm Maintenance Mode Hp-Ux Booting
HP-UX Boot Loader for IA64 Revision 1.723 Press Any Key to interrupt Autoboot \efi\hpux\AUTO ==> boot vmunix Seconds left till autoboot - [User Types A Key to Stop the HP-UX Boot Process and Access the HPUX.EFI Loader ] Type help for help HPUX>... -
Page 122: Shutting Down Hp-Ux
To exit the iLO MP, enter X at the Main Menu. Shutting Down HP-UX To shut down HP-UX running on a system, use the shutdown command. You have the following options when shutting down HP-UX: To shut down and reboot an HP-UX system, use the shutdown -r command. -
Page 123: Booting And Shutting Down Openvms
Booting and Shutting Down OpenVMS This section has procedures for booting and shutting down OpenVMS on entry-class Integrity servers, and procedures for adding OpenVMS to the boot options list. To add an OpenVMS entry to the boot options list, see “Adding OpenVMS to the Boot Options List”... -
Page 124: Booting Openvms
Description. For example, bcfg boot add 1 \efi\vms\vms_loader.efi "HP OpenVMS"adds an OpenVMS item as the first entry in the boot options list. For details, see the help bcfg command. -
Page 125: Shutting Down Openvms
\efi\vms\vms_loader command to initiate the vms_loader.efi loader on the device you are accessing. fs5:> \efi\vms\vms_loader.efi HP OpenVMS Industry Standard 64 Operating System, Version XAV1-D2Y Copyright 1976-2005 Hewlett-Packard Development Company, L.P. %PKA0, Copyright (c) 1998 LSI Logic PKW V3.2.20 ROM 4.19... -
Page 126: Booting And Shutting Down Microsoft Windows
When will the system be rebooted [shortly via automatic reboot]: Shutdown options (enter as a comma-separated list): REBOOT_CHECK Check existence of basic system files SAVE_FEEDBACK Save AUTOGEN feedback information from this boot DISABLE_AUTOSTART Disable autostart queues POWER_OFF Request console to power-off the system Shutdown options [NONE]: %SHUTDOWN-I-OPERATOR, this terminal is now an operator s console %%%%%%%%%%%... -
Page 127: Booting The Microsoft Windows Operating System
Microsoft Windows boot options utility. fs0:\> msutil\nvrboot NVRBOOT: OS Boot Options Maintenance Tool [Version 5.2.3683] 1. SUSE SLES 10 2. HP-UX Primary Boot: 0/0/1/0/0.2.0 * 3. Windows Server 2003, Datacenter 4. EFI Shell [Built-in] * = Windows OS boot option (D)isplay (M)odify (C)opy E(x)port (I)mport (E)rase (P)ush (H)elp (Q)uit Select>... -
Page 128: Shutting Down Microsoft Windows
After Windows begins loading, wait for the Special Administration Console (SAC) to become available. The SAC interface provides a text-based administration tool that is available from the system console. For details see the SAC online help (enter ? at the SAC> prompt). -
Page 129: Windows Shutdown From The Command Line
Windows Shutdown from the Command Line From the Windows command line, issue the shutdown command to shut down the operating system. Log in to Windows running on the server that you want to shut down. For example, access the system console and use the Windows SAC interface to start a command prompt, from which you can issue Windows commands to shut down the server. - Page 130 You can add the \EFI\redhat\elilo.efi loader or the \efi\SuSE\elilo.efi loader to the boot options list from the EFI Shell or EFI Boot Configuration menu (or in some versions of EFI, the Boot Option Maintenance Menu). NOTE: On Integrity servers, the operating system installer automatically adds an entry to the boot options list.
-
Page 131: Booting The Red Hat Enterprise Linux Operating System
Booting the Red Hat Enterprise Linux Operating System You can boot the Red Hat Enterprise Linux operating system on Integrity servers using either of these methods: Choose a Red Hat Enterprise Linux entry from the EFI Boot Manager menu. To load the Red Hat Enterprise Linux operating system at the EFI Boot Manager menu, choose its entry from the list of boot options. -
Page 132: Booting The Suse Linux Enterprise Server Operating System
Booting the SuSE Linux Enterprise Server Operating System You can boot the SuSE Linux Enterprise Server 10 operating system on Integrity servers using either of these methods: Choose a SuSE Linux Enterprise Server entry from the EFI Boot Manager menu. To load the SuSE Linux Enterprise Server operating system at the EFI Boot Manager menu, choose its entry from the list of boot options. - Page 133 The Red Hat Enterprise Linux and SuSE Linux Enterprise Server shutdown command has the following options: Halts (powers off) after shutdown. Use the PC command at the iLO MP Command menu to manually power on or power off server hardware, as needed. Reboots after shutdown.
-
Page 134: C Utilities
C Utilities This appendix describes the utilities that are part of the server. These include the EFI Boot Manager, and Extensible Firmware Interface Pre-OS System Environment (EFI/POSSE). Extensible Firmware Interface Boot Manager EFI is an operating system and platform-independent boot and pre-boot interface. EFI resides between the operating system and platform firmware. -
Page 135: Efi Commands
application. EFI variables provides system firmware with a boot menu that points to all the operating systems, even multiple versions of the same operating systems. The EFI Boot Manager enables you to control the server’s booting environment. Depending on boot option configuration after the server is powered up, the Boot Manager presents you with different ways to bring up the system. - Page 136 Table 48 EFI Commands (continued) EFI Shell BCH Command Parameters Definition Command Command (PA-RISC) Equivalent (PA-RISC) reset RESET Reset the server (to allow reconfiguration of complex exit (at EFI Shell) MAin Return to the main menu MAin EFI Boot Manager PAth [PRI|HAA|ALT|CON|KEY|<path>] Display or modify a path...
-
Page 137: Efi/Posse Commands
Table 48 EFI Commands (continued) EFI Shell BCH Command Parameters Definition Command Command (PA-RISC) Equivalent (PA-RISC) info fw FwrVersion Display firmware version for PDC, ICM, and complex info io Display firmware version for PDC, ICM, and complex lanaddress LanAddress Display core LAN station address info mem Memory... -
Page 138: Operation
Operation If help is initiated with no parameters, it displays a list of shell command categories. To list all of the commands within a category, enter help <category>. If help is issued with the -b option, any output longer than one page pauses after each page displays. - Page 139 -- Displays version info Type "help" followed by command name for full documentation on that command. Type "help -a" to display a list of all commands. Example 4 help cpuconfig Command Shell> help cpuconfig Deconfigure or reconfigure cpus CPUCONFIG [module] | [threads] [on|off] module : Specifies which cpu module to configure threads : Use to display info or configure threads...
-
Page 140: Baud
fast_init Specifies device connection policy setting Specifies System Wake-On-LAN setting on|off Specifies to configure or deconfigure a feature or component Note: 1. If fast_init is enabled, firmware will connect only the minimum set of devices during boot. This feature might cause boot failure; disable this feature if failure occurs. -
Page 141: Boottest
Table 49 Communications Parameters (continued) Parameter Value STOP_BITS CONTROL_MASK boottest Interacts with the speedy boot variable allowing it to be set appropriately. Syntax boottest Displays status of all speedy boot bits boottest on Run all tests (for a normal boot time) boottest off Skip all tests (for a faster boot time) boottest [test]... -
Page 142: Cpuconfig
cpuconfig Displays the configured or deconfigured state of processors in the system and enables you to configure or reconfigure processors. Syntax cpuconfig <cpu> <on|off> Parameters <cpu> specify a processor <on|off> state to set the processor to Operation Issuing cpuconfig with no parameters displays the config/deconfig status of all processors. -
Page 143: Conconfig
Note: 1. If fast_init is enabled, firmware will connect only the minimum set of devices during boot. This feature might cause boot failure; disable this feature if failure occurs. 2. Any pending Wake-On-LAN request will not be cleared until reboot if the setting is changed to disabled. -
Page 144: Default
Serial Acpi(HWP0002,0)/Pci(1|1) Acpi(HWP0002,0)/Pci(4|0) Example 11 conconfig 2 primary Command To change primary operating system console Shell> conconfig 2 primary CONSOLE CONFIGURATION Index Status Type Device Path ----- ------ ---- ----------- Serial Acpi(PNP0501,0) Serial Acpi(HWP0002,0)/Pci(1|1) Acpi(HWP0002,0)/Pci(4|0) Example 12 conconfig 3 off Command To disable a console Shell>... -
Page 145: Syntax
Syntax errdump [cpe | cmc | init | la | clear] Parameters dumps the Machine Check Abort error log dumps the Corrected Platform Error log dumps the Corrected Machine Check log init dumps the Initialization log dumps the Logic Analyzer log clear erases all of the logs (mca, cpe, cmc, init, la) Operation... - Page 146 ---- ---- Active Memory : 1024 MB Installed Memory : 1024 MB I/O INFORMATION BOOTABLE DEVICES Order Media Type Path ----- ---------- --------------------------------------- CDROM Acpi(HWP0002,0)/Pci(2|0)/Ata(Primary,Master)/CDROM(Entry0) Vendor Device Slot Path ------ ------ ----------- 0x1033 0x0035 Acpi(HWP0002,0)/Pci(1|0) 0x1033 0x0035 Acpi(HWP0002,0)/Pci(1|1) 0x1033 0x00E0 Acpi(HWP0002,0)/Pci(1|2) 0x1095 0x0649...
- Page 147 ----------------- ---------------------------------------- *Mac(000E7F7E07FA) Acpi(HWP0002,100)/Pci(2|0)/Mac(000E7F7E07FA)) Mac(000E7F7E07FB) Acpi(HWP0002,100)/Pci(2|1)/Mac(000E7F7E07FB)) FIRMWARE INFORMATION Firmware Revision: 86.10 [4432] PAL_A: 7.31/5.37 PAL_B: 5.69 EFI Spec: 1.10 EFI Intel Drop: 14.62 EFI Build: 86.10 SAL Spec: 3.01 SAL_A: 2.00 SAL_B: 86.10 POSSE: 0.10 ACPI: 7.00 SMBIOS: 2.3.2a: BMC Revision: 3.42 IPMI: 1.00 Management Processor Revision: E.03.02 Updatable EFI Drivers:...
- Page 148 late_cpu Run this test platform Run this test chipset Run this test io_hw Run this test mem_init Run this test mem_test Run this test LAN Address Information: LAN Address Path ----------------- ---------------------------------------- *Mac(000E7F7E07FA) Acpi(HWP0002,100)/Pci(2|0)/Mac(000E7F7E07FA)) Mac(000E7F7E07FB) Acpi(HWP0002,100)/Pci(2|1)/Mac(000E7F7E07FB)) FIRMWARE INFORMATION Firmware Revision: 86.10 [4432] PAL_A: 7.31/5.37 PAL_B: 5.69 EFI Spec: 1.10...
- Page 149 ------ ------- -------- ------ ------ ------- ------------ 1.4 GHz 6 MB None 20/00 Active 1.4 GHz 6 MB None 20/00 Active CPU threads are turned on. This example has processor hyperthreading turned off: Shell> info cpu PROCESSOR MODULE INFORMATION # of Family/ Logical Cache...
-
Page 150: Lanaddress
0x1033 0x0035 Acpi(HWP0002,0)/Pci(1|1) 0x1033 0x00E0 Acpi(HWP0002,0)/Pci(1|2) 0x1095 0x0649 Acpi(HWP0002,0)/Pci(2|0) 0x1000 0x0030 Acpi(HWP0002,100)/Pci(1|0) 0x1000 0x0030 Acpi(HWP0002,100)/Pci(1|1) 0x8086 0x1079 Acpi(HWP0002,100)/Pci(2|0) 0x8086 0x1079 Acpi(HWP0002,100)/Pci(2|1) 0x1000 0x0021 Acpi(HWP0002,200)/Pci(1|0) 0x1077 0x2312 Acpi(HWP0002,300)/Pci(1|0) 0x1077 0x2312 Acpi(HWP0002,300)/Pci(1|1) 0x1000 0x000F Acpi(HWP0002,400)/Pci(1|0) 0x1000 0x000F Acpi(HWP0002,400)/Pci(1|1) 0x1000 0x0021 Acpi(HWP0002,600)/Pci(1|0) 0x103C 0x1290 Acpi(HWP0002,700)/Pci(1|0) 0x103C... -
Page 151: Syntax
Syntax: lanaddress Parameters none Example 19 lanaddress Command LAN Address Information: LAN Address Path ----------------- ---------------------------------------- Mac(00306E4C4F1A) Acpi(HWP0002,0)/Pci(3|0)/Mac(00306E4C4F1A)) *Mac(00306E4C0FF2) Acpi(HWP0002,100)/Pci(2|0)/Mac(00306E4C0FF2)) monarch Displays or modifies the ID of the bootstrap processor. The preferred monarch number is stored in NVM. Syntax monarch <cpu> Parameters <cpu>... -
Page 152: Parameters
Parameters <clear> clears the pdt Operation With no options specified, the command displays the PDT information for the server. The PDT is cleared and a reboot is required for memory reallocation and safe booting. Example 21 pdt Command Shell> pdt PDT Information for PD Last Clear time for PD: PDT has not been cleared... -
Page 153: Specifying Scsi Parameters
Shell> sysmode admin You are now in admin mode. Shell> sysmode service You are now in service mode. Shell> sysmode normal You are now in normal mode. Specifying SCSI Parameters The following SCSI parameters can be configured for the SCSI board: SCSI ID (SCSI initiator ID) Maximum data transfer rate (SCSI rate) Bus width... - Page 154 Ctrl[1D] LSI Logic Ultra320 SCSI Controller Ctrl[1E] Acpi(HWP0002,100)/Pci(2|0) Ctrl[57] Acpi(HWP0002,100)/Pci(2|0)/Mac(000E7F7E07FA) Ctrl[1F] Acpi(HWP0002,100)/Pci(2|1) Ctrl[58] Acpi(HWP0002,100)/Pci(2|1)/Mac(000E7F7E07FB) Ctrl[0D] Acpi(HWP0002,200) Ctrl[20] Acpi(HWP0002,200)/Pci(1|0) Ctrl[0E] Acpi(HWP0002,300) Ctrl[22] HP 2 Gb Dual Port PCI/PCI-X Fibre Channel Adapter ( Port Ctrl[23] HP 2 Gb Dual Port PCI/PCI-X Fibre Channel Adapter ( Port...
- Page 155 Ctrl[0F] Acpi(HWP0002,400) Ctrl[24] Acpi(HWP0002,400)/Pci(1|0) Ctrl[25] Acpi(HWP0002,400)/Pci(1|1) Ctrl[10] Acpi(HWP0002,600) Ctrl[26] Acpi(HWP0002,600)/Pci(1|0) Ctrl[11] Acpi(HWP0002,700) Ctrl[27] Acpi(HWP0002,700)/Pci(1|0) Ctrl[28] Acpi(HWP0002,700)/Pci(1|1) Ctrl[43] 16550 Serial UART Driver Ctrl[44] VT-100+ Serial Console Ctrl[3E] Primary Console Input Device Ctrl[3F] Primary Console Output Device Ctrl[3D] Primary Standard Error Device Ctrl[29] Acpi(HWP0002,700)/Pci(2|0) Ctrl[40] Acpi(PNP0501,0) Ctrl[41] 16550 Serial UART Driver...
- Page 156 cntrl_handle The handle of the controller for the channel with the SCSI ID you want to display or change For channel A of this SCSI interface, enter: Shell> drvcfg -s 45 18 The EFI SCSI Setup Utility starts and its main menu displays, showing a list of all the EFI capable SCSI interfaces in the system.
-
Page 157: Using The Boot Option Maintenance Menu
Display the SCSI parameters listed below for the channel of the SCSI interface and change the parameters if necessary, or restore the SCSI parameters to their default values. SCSI ID Maximum data transfer rate Bus width Whether the SCSI interface is bootable (driver support) Avoid bus resets (secondary cluster server) Restore defaults Use the arrow keys to navigate to the appropriate SCSI parameter. -
Page 158: Paths
Paths All devices in servers are represented by paths in the EFI Shell. To identify the correct slot or disk drive, use the following tables. Table 50 Server Sockets Socket Path 1 PCI Acpi(HWP0002,400)/pci(1|0) 2 PCI Acpi(HWP0002,300)/pci(1|0) 3 PCI Acpi(HWP0002,200)/pci(1|0) 4 PCI Acpi(HWP0002,600)/pci(1|0) Table 51 Server Drives... -
Page 159: Edit Boot Entry
This option displays the file systems that are on your system and lets you browse these file systems for applications or drivers that are executable. Executable files end with the .efi extension. You can also select remote boot (LAN) options that have been configured on your network. -
Page 160: Change Boot Order
If you remove a drive from the system, you must manually delete it from the boot options list. To delete an item from the list, use the arrow keys to highlight the item and press Enter. To remove all of the entries from the EFI Boot menu, select Delete All Boot Options. -
Page 161: Set Autoboot Timeout
VGA output. See your operating system documentation to determine how many consoles are supported with your server. Multiple consoles are not supported for HP-UX or Windows (use the Smart Setup CD to switch between COM A and iLO on Windows servers). -
Page 162: Select Active Console Input Devices
VGA output. See your operating system documentation to determine how many consoles are supported with your server. Multiple consoles are not supported for HP-UX or Windows (use the Smart Setup CD to switch between COM A and iLO on Windows systems). -
Page 163: Select Active Standard Error Devices
Table 53 Console Input Devices To select Choose Serial A/Serial 1 Acpi(PNP0501,0)/Uart(9600 N81)/VenMsg(Vt100+) iLO MP Serial Console Acpi(HWP0002,700)/Pci(1|1)/Uart(9600 N81)/VenMsg(Vt100+) iLO MP VGA Port Acpi(HWP0002,700)/Pci(2|0) Each option is identified with an EFI device path. Not all options are available, depending on the configuration of the server and the options purchased. Device paths can differ slightly on different product models. -
Page 164: Advanced System Information
Advanced System Information Displays information about server and component configuration. Set System Time Modifies the server time. Set System Date Modifies the server date. Set User Interface Changes the legacy boot manager user interface. Set System Wake-On LAN Enables or disables the server Wake-On_LAN settings. Set System Defaults Selects server default settings. -
Page 165: D Warranty And Regulatory Information
D Warranty and regulatory information For important safety, environmental, and regulatory information, see Safety and Compliance Information for Server, Storage, Power, Networking, and Rack Products, available at www.hpe.com/support/Safety-Compliance-EnterpriseProducts. Warranty information HPE ProLiant and x86 Servers and Options www.hpe.com/support/ProLiantServers-Warranties HPE Enterprise Servers www.hpe.com/support/EnterpriseServers-Warranties HPE Storage Products www.hpe.com/support/Storage-Warranties... -
Page 166: Turkey Rohs Material Content Declaration
Local representative information Kazakh: Russia: Belarus: Kazakhstan: Manufacturing date: The manufacturing date is defined by the serial number. CCSYWWZZZZ (serial number format for this product) Valid date formats include: YWW, where Y indicates the year counting from within each new decade, with 2000 as the starting point;... -
Page 167: Index
154 boot option diagnostic LEDs, 21 delete, 159 diagnostics, 101 boot options list, 116 dimensions of server, 11 adding HP-UX, 118 DIMMs adding Linux, 129 chip spare functionality, 17 adding OpenVMS, 123 installing, 48 adding Windows, 126 matched pairs, 48... - Page 168 EFI boot manager, 134 Ethernet LAN, 25, 26 EFI SCSI setup utility front control panel, 21 starting, 155 front panel, 21 EFI/POSSE, 137–152 hard drive, 22 EFI/POSSE commands, 137 LAN, 21 electronically erasable programmable read-only troubleshooting, 99 memory, 17 LAN A, 25 Ethernet card LAN LEDs, 25, 26 LAN B, 25 EuroAsian Economic Commission (EAC), 165...
- Page 169 11 removing and replacing, 38 service tools, 29 power supply interface module shutting down removing and replacing, 76 HP-UX, 122 power supply LEDs, 23 Linux, 132 power supply, removing and replacing, 38 OpenVMS, 125 Pre-OS System Environment see EFI/POSSE...
Need help?
Do you have a question about the Integrity rx2620 and is the answer not in the manual?
Questions and answers