Table of Contents
Advertisement
Quick Links
Advertisement
Table of Contents

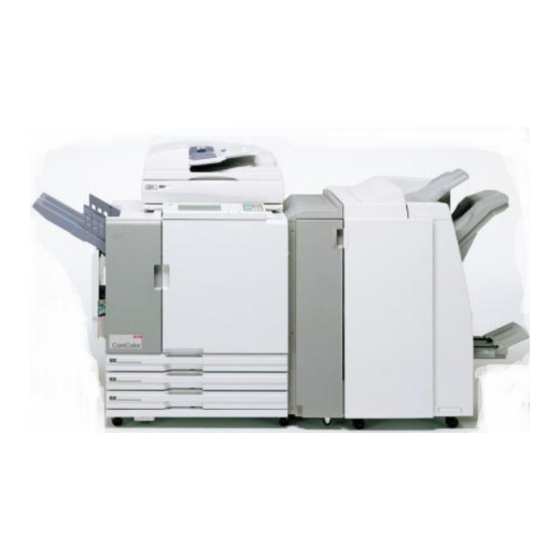
Related Manuals for Riso ComColor IS900C


Summary of Contents for Riso ComColor IS900C
- Page 1 ComColor queries and support Ver6.1 5 May 2011 RKC London Office...
- Page 2 Patlite Signal light connection (Patlite) IS900C LED condition during the IS900C is updated Patlite Signal light installation (Patlite) IS900C RISO management tool cannot search IS900C to set up IP address LDAP LDAP server authentication IS900C IS900C firmware upgrade (another procedure)
- Page 3 Index2 Control panel Screws for touch panel Image adjustment Direction of adjustment for paper feed angle Control panel Touch panel failure Image adjustment Target of margin adjustment by auto image adjustment Un-box/Re-box I03-1814 Image adjustment Recover physical head position to middle Un-box/Re-box Move to packing condition for the BP unit Image adjustment...
- Page 4 Send error history (REv data) Image problem Head cleaning point using cleaning liquid Remote Agent Data list of RISO Remote Agent (REv exchange tool) Image problem Image problem for Y direction Paper jam X02-1101 (Paper catch on the paper gate)
- Page 5 Index4 Electrical problem S98-0110-1 Electrical problem USB function unable Scanner U03-43xx (Scanner FB error) U04-4430 (Scanner AF error) Ink pan Rubber tube protection in the area with high Ozone level...
- Page 6 Function Scan to share folder (SMB) Scanner When you set up the share folder on the computer which is used fixed IP address, you can use SMB for data directory. 1, Create the share folder on the desktop of your computer or share server 2, Set up the data directory in the Admin mode Settings=>Scanner data directory=>Add IP address of the computer...
- Page 7 Function Scan to share folder (SMB UNC) Scanner When you set up the share folder on the computer which is used DHCP, you should use the SMB UNC for this function. 1, Create the share folder on the desktop of your computer or share server 2, Set up the data directory in the Admin mode Settings=>Scanner data directory=>Add ¥¥...
- Page 8 Function Create the share folder on the Mac OS10.5/10.6 Scanner 1. Create a folder 2. Click the “Sharing” in the System Preferences 3. Tick the File Sharing and then press “+” 5. Check the share users if Everyone is 6. Tick the SMB function and the included.
- Page 9 Function Set up Scan to folder function for Macintosh share folder Scanner IP address for the Mac Select [SMB] Computer name Share folder name Login name and Password...
- Page 10 Function Scan to PC Scanner 1,Press the Scanner button 4,Directory will be changed 2,Press the OK button 3,Select the Networked computer to computer name 5,After scanning, the scan data will be saved into the share folder soon If the scan direction setting is not correct, W60 error will be displayed.
- Page 11 Function Scan to e-mail Scanner Regarding the Scan to Mail setting, you need to ask customer’s network environment. Especially when the customer uses SMTP authentication on the mail server, it is better to ask them to set up. For this setting, you can normally confirm it from the mailer (Mail application) on the client computer.
- Page 12 Function Scanning image direction Scanner When you scan the custom size original etc, you need to specify the size by the “Scanning size” function in the function tab. If you change the “Image size”, scanning image might be incorrect. Scanning Original direction When “A4”...
- Page 13 Function Sort printing with FB scanning Scanner When you make some copies from the Flatbed with some pages original, you need to change the Collate function from “Auto” to “Sort”. If you don’t change this, machine will print soon after one page scanning without confirmation screen.
- Page 14 Function IC card activation IC card Specification ISO14443 TypeA TypeC (Mifare/Felica) Up to 300 users Set up procedure 1) Perform the key code by test mode 716/717/718 2) Press the Admin button, then the machine will request the Admin IC card 3) Set the Admin IC card on the reader and press the setting button 4) In the Login setting, you should change the copy mode and the scan mode to “Required”...
- Page 15 Function Cancel the IC card function IC card When you need to cancel the IC card function, if amount of the following test-modes turn to “0”, IC card function will disable. After re-enter the test-mode, the registered IC card information will return again without re-enter 716 to “0”...
- Page 16 Function Individual touch panel setting User setting When the IC card reader is installed, the machine can set up individual default screen for each IC card (each user) Before individual setting, you must switch the Login setting to “Required” in Admin mode If the Login setting is “Not required”, “Save as default”...
- Page 17 Function Save as default setting for all users User setting Log in as Admin Set up the functions as default setting Select the function tab Select the check setting button Press the Save as default button Then the default screen will save for all users When you want to save individually, IC card reader and Login setting are needed.
- Page 18 Function User setting data upload/download User setting Download the CSV file from RISO console as Admin mode (Write CSV file button) Change the extension code from .CSV to .TXT. Or you should open the file as “Note pad” by right click.
- Page 19 Function Retrieve the common touch panel setting for each IC card user User setting When IC card users are registered as login required, all IC card user can set up own screen setting individually. If the Admin has set up the recommend setting as default screen, all user can download this setting in each user screen.
- Page 20 Function Confirm the current counter for each user User setting When print limitation function is used, each user can find the own current counter. 1) Login as User 2) Press the meter reading button 3) You can see it in the Limit tab B/W print: 2000 Colour print: 500...
- Page 21 Function Forgot Admin password (Typing password) User setting If customer forgot the Admin password, basically you can change Admin password using following procedure. 1. Downgrade the firmware to Ver7.16. 2. Create the Admin backup using TM460 3. Delete the all users using TM504 and TM510 4.
- Page 22 If customer lost the Admin IC card, basically you can change Admin IC card using following procedure. When the firmware version is Ver10.16 or before 1. Retrieve the user setting CSV file via RISO Console 2. Change one of the user authority from “user” to “Admin” on the CSV file 3.
- Page 23 Function Copy from booklet original to booklet output Copy ComColor can make the booklet print from booklet paper original Paper original You should set the original on the AF with first page is right side and face up direction 1) Place the original on the AF 2) Set up Duplex to Duplex 3) Select the Function tab 4) Select the Booklet button...
- Page 24 Function Mix size copy Copy Original size and direction Paper direction is also same as original direction...
- Page 25 Function Mac address confirmation Network 3) Press the Admin mode button then 1) Open the RISO console and 2) Enter the User name as “Admin” it turn to black button, and the Admin select the Login button and press “OK”...
- Page 26 Function Folder function in the printer driver Printer driver If you use the folder function, you need to set it up in the Admin setting and “Environment tab” of the printer driver. After that you can select three kind of output “Print”, “Print and save to folder” or “Save to folder” Folder is ON Environment tab Register folder...
- Page 27 Function Booklet to booklet from the printer driver Printer driver When you print from the “booklet original” to the “booklet output”, you can set the driver with following steps. 1) Select “Short edge” 2) Select “Fold + Staple” in 3) Return the Imposition setting in the Duplex menu the Booklet binding menu to “OFF”...
- Page 28 Function Printer driver installation for Macintosh OS10.5/10.6 Printer driver After install the printer software from the CD to the Mac, you should set up the printer next. Open the System Preferences Add the printer IP address Normal IS900C etc Change from “Generic” to “Select Printer Software”...
- Page 29 Function Property settings for Macintosh printer driver Printer driver Depends on the customer’s Macintosh, detail setting screen for printer might be hidden Hidden condition Click When you select IS900C in the pull down menu, property settings button will appear. Open condition Pull down menu...
- Page 30 Function Printer driver (PPD) installation for Ubuntu10 Printer driver IS900C is NOT compatible with Ubuntu OS, but RISO PPD might work on Ubuntu with following installation To add the printer driver, open “System tab”-”Administration”-”Printing”-Add(+) Few minutes later Choose Driver screen Enter the IP address and press “Find”...
- Page 31 Function Signal light connection (Patlite) Patlite Compatible Signal light (Patlite) with ComColor Product code: [LES-402A-RYGB] http://gb.patlite.eu/ Required option PCB and spare parts S-2050 Option PCB 050-75057-000 IF Connector ; PATO-Light 050-75064-103 Bushing Plate ; SU 665-04064-108 Cord Bushing ; SR 6L-1 LED lighting condition Significance Example...
- Page 32 Function Signal light installation (Patlite) Patlite 1. Cut the harnesses 50cm from the pole end 6. Cut the left side cover If you change the pole to longer one, you must change it before 7. Fix the pole by two screws cutting the harness Cut the cover 2.
- Page 33 - The users who can use *Shared folder+ will be fixed as “All users”. - Only Administrator can login RISO console. - General user can not use scan job download from RISO console. - Only Administrator can change user’s passwords for RISO console.
- Page 34 Function LDAP setting up example 1 LDAP Step 1: Upgrade firmware to ver11.16 or later Step 2: Change the Test mode 784 to “1” Step 3: Change the Authentication servers setting in Admin mode to “ON” Step 4: Setting up the AD server details. Following settings is one of the example when Active directory is used as AD server on 2003 32bit server Setting items...
- Page 35 Function LDAP setting up example 2 LDAP D. ou=Admin Staff, dc=risodirect ,dc=co, dc=uk A. Realm name E. Scope of search C. sAMAccountName B. IC card No F. DNS homePhone pager mobile facsimileTelephone Number ipPhone info...
- Page 36 Explanation Count pattern 21 and Finisher Counter You can print out 21kind of counter and 8 kind of finisher counter by test mode 401 You can change the charge type by test mode 756, “2” is type B, “6” is type F Category Category Paper size...
- Page 37 Explanation Count up specification with copy mode Counter Type B (test mode 756 is 2) Color mode Original Copy count as… Note Depends on the color level and size of the image on the original Auto Color Normally Color Depends on the “Color/Black slice level in the Admin mode Monochrome Default setting at the installation Full color...
- Page 38 Explanation Print speed for each destination Print speed Auto-control Face down tray Face down offset tray stacking tray Multifunction finisher /Wide stacking tray Booklet Standard Offset Standard stack Standard stack Offset stack Standard stack Punch Staple Punch & Staple (Fold + stack stack Staple)
- Page 39 Explanation Ejection speed for facedown offset tray Print speed When the offset stacking tray is connected with CC9050, maximum ejection speed will be 120ppm. (A4R standard stacking) When you change the test mode 3729 to “1”, ejection speed will be faster. But paper alignment is not good.
- Page 40 Explanation Maximum Ink drop matrix Maximum ink drops Resolution Paper type Original image ComColor HC5500 Photo-based Plain Line-based Photo-based IJ paper Line-based Photo-based Matt coated Lone-based 300x300dpi Card-IJ Photo-based High-quality Line-based Photo-based Card stock (only for HC) Line-based Photo-based Envelope (only for HC) Line-based Photo-based Plain...
- Page 41 Explanation Remaining ink in the cartridge If the firmware version is old, when ink cartridge become to empty, the machine might indicate ink volume as still remain (30% etc) Firmware Ver5.34 or older Ink consumption for head cleaning is not calculated for ink volume indication Firmware Ver5.57 or later Ink consumption for head cleaning is also reflected for ink volume indication Current firmware calculation...
- Page 42 Explanation Difference of “Basic” and “School” at the set up wizard Usability End of the set up wizard, you have to select user category “Basic” or “School”. After the set up wizard, frequent functions of the copy mode will set up in the selections tab. Basic School Multi-up...
- Page 43 Explanation Recommend screen setting of Copy mode for School Usability When you set up the top screen of Copy mode as following, teacher basically can manage almost their jobs by only this screen. You need to log in as Admin to register them as default setting. Auto Auto Direct access:...
- Page 44 Explanation Security level Usability In the “Set up wizard”, you need to choose the security level. Difference of these levels are as follows. After the installation, you can change these settings in the Admin mode. Security level 1(Low) 2(Normal) 3(High) Folder function Additional copies Permitted...
- Page 45 Explanation Pause the print job Usability When you stop or pause the print job from the PC, you need to open the printer screen to do. You cannot stop it on the “Mode selection screen”. As for the copy job, you can pause it on the copy screen Cannot stop Can stop...
- Page 46 Explanation W70-247 Error code W70-0247-01 When you active the test mode, if there are some exclusion combination on the machine, for example A4 landscape paper and booklet. As for test mode 2428, when front cover is closed, the machine will display W70-0247-01. W70-0247-02 When the combination between the control card and the machine are not correct, this error will be displayed.
- Page 47 Explanation W70-0247-3 Error code If you open and close the front cover during the test mode, and then if you perform the test mode 2405 (BP unit move up) or TM2437 and TM2439 (maintenance unit action), W70-0247-3 will be displayed. Enter the test mode Open the front cover and close W70 occurs when perform TM2405...
- Page 48 Explanation Error history display on the panel Error code You can see the error history on the touch panel by test mode 630 Normally each errors are showed error No which is started from 1, 2 or 3. 1: Service error (S-) 2: Unit error (U-) 3: Jam error (X-)
- Page 49 Explanation Auto color level Colour Regarding the Auto colour, the slice level of colour and black is calculated from colour tone, saturation number of pixels of scanned data. Depends on the above condition, the machine will decide if this document is B/W or colour. Therefore when there are two paper originals which have same size colour mark, one of them is dark colour mark, the other one has clear colour mark, in this case, the machine might calculate the dark colour original is as B/W, second one might decide as colour original.
- Page 50 Explanation Combination between RGB and CMYK Colour You can change the Gamma settings in the printer driver. For example, Green level and Blue level will reflect to Cyan density. However when you reduce the Green level and Blue level, Red level will increase relatively.
- Page 51 Explanation Paper size and type setting Printer driver For HC5500, you usually set up the tray selection by test mode 5-8-17, “size” or “size and paper type”. For ComColor, there are not any setting for tray selection such as HC. When customer select “Any” as paper type on the driver, ComColor will select the tray depend on the only “size”.
-
Page 52: Auto Tray Selection
Explanation Auto tray selection Tray selection Basic concept (When same “size”, “direction” and “type” paper are loaded for all trays) 1) Tray priority: Standard>Tray3>Tray2>Tray1 2) When the all trays become to empty, the feed tray priority return to the standard tray 3) The feed tray is selected the same tray which is used for previous job until all trays become to empty Standard tray Tray3... - Page 53 Explanation Line smoothing Image Application GDI: Create 300x300 - 900x900 dpi data 300 - 900dpi 300 - 900dpi Printer Driver: Create 300x300dpi or 300x600dpi bitmap data 300dpi 600dpi 600dpi 300dpi Machine 300dpi Normal Line smoothing Normal Line smoothing When the line smoothing is used, GDI creates basically 900x900dpi bitmap data, but this resolution is different depends on the printer driver setting.
- Page 54 Maintenance W39-1154 (No destination for continuous output) Right side ejection If this error is displayed when you set up the paper eject destination to finisher side, you should check the connection condition for the wire harness of the paper ejection unit which is circled with red colour Paper ejection unit Panel side (Front side) Rear side...
- Page 55 Maintenance Side fence and side wing adjustment Right side ejection When you need to adjust “side fence width” and “side wing width” for thick paper etc, following test modes are available for these adjustment. Side wing width TM1856 (big amount is wider) When use this position, you need to press the “Jump wing control button”...
- Page 56 Maintenance X17-3140 / 3164 when print over 4 pages to Finisher Right side ejection You must use M4x6mm (short) screws for fixing the ejection motor When 8mm screws are used, the top of the screw might contact on the ejection gear. As a result, rotation of the ejection roller slows down, then remained tail of paper is caught by the paper gate of the ejection unit.
- Page 57 Maintenance Re-use the Auto stacking tray from HC5500 to ComColor Right side ejection When you re-use the Auto stacking tray from HC5500 to ComColor, you need to prepare following parts 050-21057-004 Wide stacking tray adaptor F 050-21058-000 Wide stacking tray adaptor R 050-21061-001 Magnet catcher bracket ;...
- Page 58 Maintenance Set up for IP address of IS900C IS900C When you install the printer driver, RISO management When you click the “Change button”, you tool also will be installed. After open the software, all can set up the IP address.
- Page 59 Maintenance LED condition during the IS900C is updated IS900C You can update the IS900C firmware as stand alone condition (not connect with ComColor) At first, insert the USB memory into the No1 port of the IS900C, then turn on the IS900C by the front SW You can update it in 11-12 minutes, finally IS900C will light with 2 LEDs Time (minute) Beep sound...
- Page 60 Maintenance RISO management tool cannot search IS900C to set up IP address IS900C When you set up IP address for IS900C at installation, you might be unable to do it with the RISO Management Tool application. If your laptop Wi-Fi function is ON during the searching IS900C, the application cannot recognize IS900C. You...
- Page 61 If the IS900C does not start firmware upgrade using USB key due to some reason, you can also upgrade it with following procedure. Open the RISO console and then click the upload arrow button in the Normal queue Normal queue Search the firmware on your PC and then press the “Upload jobs”...
- Page 62 Maintenance Screws for touch panel Control panel You must use rounded top screws for base plate of the touch panel. If you don’t use it, customer might scratch on back of their hand when they remove a jammed paper. Round top screw...
- Page 63 Maintenance Touch panel failure Control panel If some dust or some crisps etc come into the gap between the control panel cover and the touch panel, the touch panel might not work because these objects are pushing the touch panel. When you clean the touch panel, you need to be careful.
- Page 64 Maintenance I03-1814 Un-box/Re-box When the machine works under the temporary mode, I03-1814 will display until this mode has finished You can switch from this mode to normal mode by test mode 8400...
- Page 65 Maintenance Move to packing condition for the BP unit Un-box/Re-box When packing the machine, you need to fix the BP unit with special bracket. When the machine is turned off, the BP unit will go down to lower position. Before turning off the machine, if you change the test mode 2701 to “1”, the BP unit will stop at fixation position.
- Page 66 Maintenance User guide box for finisher machine Un-box/Re-box When the Multi finisher is installed, you can set up the “User guide box” at rear side of the finisher I/F unit which has two screw holes. I/F unit Scanner Finisher Main printer User guide box...
- Page 67 Maintenance Recommend setting for demo van Un-box/Re-box Test mode 2701 to “1” When the TM2701 is 1, the BP unit will stop at the packing position after turning off the machine. You can fix the bracket without lifting by the box driver Test mode 1878 Warming up time Basically ComColor can start printing when the head...
- Page 68 Maintenance Releasing the head carriage at the installation Un-box/Re-box If release of the head carriage is not correct at the installation, image problem paper jam might occur. Certain method Check point Remove two screws and push both to rear Screw driver Push Loose belt tension Push...
- Page 69 Maintenance S03-2011 (Right side of BP lift wire is loose) BP unit Solutions and check point Basically the gap between guide pulley Paper guide Touch and stopper is less than 6.5mm. Guide pulley (When maintenance unit is HP) If the gap is over 6.5mm, it means the unit doesn’t return to HP enough, you should check the wire harness 0 to 6.5mm...
- Page 70 Maintenance S03-2012/2015-1 to 8 BP unit Error code BP Gap Failure position Correct condition (SW) Rear left Rear right S03-2012-1 Standard paper Rear left Touch S03-2012-2 Standard paper Rear right Touch S03-2012-3 Standard paper Front left Touch S03-2012-4 Standard paper Front right Touch S03-2012-5...
- Page 71 Maintenance Check points for S03-2012/2015 BP unit 1) When paper guide of the BP unit might open, it might touch on the ejection unit when lift up. 4) You should check whether four metal actuators don’t bend. When they are free, the metal plate must touch on the white bracket 2) You should check whether gap adjuster White bracket...
- Page 72 Maintenance S03-2012/2015 (occasionally) BP unit Envelope Gap 0.8mm Adjust the SW gap as 0.8mm Test mode 2442 (envelope gap) Test mode 1870 to “1” Turn off the machine You can keep the BP position Card Gap After adjustment of envelope SW gap, you can perform TM 2441 (Card gap) to confirm the SW detection of Card gap.
- Page 73 Maintenance S03-2012/2015 (often) BP unit Envelope Gap Standard Gap Turn off the machine Lift up the BP by box driver upper position (standard gap) Move down the BP more 12mm Adjust the SW gap as 0.8mm 0.8mm Card Gap Envelope Gap Lift up again to upper 0.5mm Touch...
- Page 74 Maintenance Ground harness at the BP unit (Direction) BP unit Current ground harness arrangement is opposite “C” direction with the 200mm harness. If your arrangement is not correct or you use the short harness(150mm), this harness might cut down for long term durability generation generation 3rd generation...
- Page 75 Maintenance Front cover open error Front cover In case click feeling at catch holding is not enough when cover is closed Insert cutting stripper pad between the cover and the catch In case catch holding is proper but door open error occur easily Insert some washers between the cover and the actuator...
- Page 76 Maintenance Setting of test prints Test print Regarding the test print 1481 , you can set up some detail condition as follows. For another test print, depends on the tray setting and paper size, but basically the machine will feed paper from the standard tray even if paper size mis-match.
- Page 77 Maintenance Maintenance test prints Test print There are many kind of test print function in ComColor Name How to print Information Note Print System info Status button on the touch panel Firmware version/Option From the Console also available Print Sample image Status button on the touch panel Bird photo image From the Console also available...
- Page 78 Maintenance Set up wizard in Japanese Initialization Normally Japanese set up wizard will appear after replace the HDD or machine installation. If you perform the test mode 510 and re-booting, English set up wizard will be displayed. You can change the language in the second screen of the wizard, Attention! After perform the test mode 510, All Admin setting and Test mode 7xx settings will be cleared.
- Page 79 Maintenance Test mode 510 (Japanese characters) Initialization From the firmware 5.12, the test mode 510 is available. You should use this test mode after replace the HDD. According to this test mode, the machine will set up basic default setting depends on the model. Because brand-new HDD is compatible with all ComColor models (included Japanese models).
- Page 80 Maintenance Initialization for main printer Initialization ComColor has some test modes to clear settings. You must take care of these function before use them 504/510 1502 Admin setting (Network etc) Default Default User data (IC card, email address etc) Default Default Folder data (Saved data) Default...
- Page 81 Maintenance Test mode 504 (HDD initialization) Initialization When you perform the test mode 504, all Admin settings, all saved data and test mode 7xx settings will be cleared. After that you need to perform the test mode 510. Following No is the test modes that you should set up again. 707 If necessity When IC card function is used When Remote Agent function is used...
- Page 82 Maintenance Backup procedure for User setting and Admin setting Initialization ComColor Firmware Ver7.16 and later can backup the all Admin settings and the User settings include individual settings etc into the USB memory. Applicable backup data Admin settings (Network settings, email settings, scan to folder etc) User settings (User name, individual user settings etc) Backup files Create the backup data to the USB memory...
- Page 83 Maintenance Overview of image adjustment after head replacement Image adjustment When there are factory image parameters in the Engine PCB, TM640 is “0” TM640 is “0” TM640 is “1” Order Order Scanner Manual Scanner Manual 423 (3mm Gap) Angle adjustment (By viewing) 425 (3mm Gap) TM436 proof is useful to check 426 (3mm Gap)
- Page 84 Maintenance System figure of image adjustment data Image adjustment Engine PCB After scanning, update immediately TM440 (copy) Adjustment Back up data setting data Print TM441 (retrieve) TM1497 TM503 (Save as factory default) (Return to factory default) Attention If you perform the test mode 503, user Factory data and user setting are also cleared.
- Page 85 Maintenance Physical adjustment during the automatic image adjustment Image adjustment For the following adjustments, you need to adjust manually after scanning the test print Test Adjustment Scanning position Target Note mode 3-4 mm gap and open Less than ±1.0 Head angle “+”...
- Page 86 Maintenance Automatic image adjustment Image adjustment Test mode Adjustment Scanning position Recommend Qty of print Print timing (rough) No gap and close 1-2 prints Print timing (Fine) 3-4 mm gap and open 4-5 prints Overlap 3-4 mm gap and open 4-5 prints Head parameter Print density...
- Page 87 Maintenance Manual image adjustment Image adjustment Test mode Adjustment Step information Target Top and End margin 1mm bigger margin = +10 Top: 5mm, End: 0.5mm Side margin 1mm bigger margin = +10 Right/Left 0.5mm 1 dot to left ≒ +85points(each) X direction Amount will link with a dot Y direction...
- Page 88 Maintenance Adjustment procedure of print head angle Image adjustment 1) Place the Head jig 2) Set two screws at A1 and A2 loosely (about 70%) 3) Lock the lock plate 4) Tighten the A1 and A2 screws 5) Release the lock plate 6) Loosen B1 and B2 screws (70%) X adjuster 7) Turn the angle adjuster as necessary...
- Page 89 Maintenance Adjustment procedure of print head position (X) Image adjustment 1) Place the Head jig 2) Set two screws at A1 and A2 loosely (70%) 3) Lock the plate 4) Tighten the A1 and A2 screws 5) Release the lock plate 6) Loosen B1 and B2 screws (70%) X adjuster 7) Turn the X adjuster...
- Page 90 Maintenance Quick confirmation after head replacement Image adjustment Basically when you replace the print head perfectly, you don’t need image adjustment, only you should input the voltage and A/L type by test mode 442. You can judge with the following order whether image adjustment is needed or not. Test mode 404 1) Head position If gap is over 3 dots, you should adjust...
- Page 91 Maintenance Direction of adjustment for paper feed angle Image adjustment Test mode 421 When the plus amount shows after scanning, you need to adjust BP angle to left direction Test mode 422 When the plus amount shows after scanning, you need to spread the gap (move to left direction) BP angle...
- Page 92 Maintenance Target of margin adjustment by auto image adjustment Image adjustment 0.5mm Test mode 432 - Print direction 0.5mm Test mode 428 Test mode 428 + + 5.0mm - - Test mode 432 0.5mm...
- Page 93 Maintenance Recover physical head position to middle Image adjustment When replace the print head, if you forget to use the head jig, you will lost the head position completely. You can fix the print head on middle position roughly with following procedure. 1) Prepare two 2) Prepare the head jig with following position 3) Fix the head jig with the countersunk...
- Page 94 Maintenance X03 or X05 error during the print head adjustment Image adjustment During the head adjustment, if ribbon cables arrangement are not good, horizontal transfer sensor might make mis-detection due to reflection from ribbon cable. If you can see the ribbon cable from the square hole on the horizontal transfer unit, you should re-arrange this. As for normal printing, basically these cables are hidden by the metal cover.
- Page 95 Maintenance Envelope image margin Image adjustment Default settings are 90 for all sides (9mm margin), “+10” means 1mm more margin If you reduce the margin too much, the BP belt will have ink stain easily and then edge of the envelope will receive ink mark.
- Page 96 Maintenance S35-2069-2, 2070-2, 2071-2, 2072-2 Ink flow Caption error means, [Pressure ink tank ink sensor remained ON for more than a particular number of cycles, despite circulation] Basically ink level sensor of the pressure tank will repeat “On” and “Off” during the printing. If the tank has more ink due to some reason, this error occurs easily.
- Page 97 Maintenance S35-2069-2, 2070-2, 2071-2 2072-2, 2055 Ink tube failure Ink flow 2069-2: Pressurized tank ink sensor remained ON for more than a particular number of cycles despite circulation 2070-2: Pressurized tank ink sensor remained ON for more than a particular number of cycles, despite circulation 2071-2: Pressurized tank ink sensor remained ON for more than a particular number of cycles, despite circulation 2072-2: Pressurized tank ink sensor...
- Page 98 Maintenance Negative ink tank variation Ink flow generation generation generation generation CC9050 33350187,189,190,194~ CC9050 33350409~ CC9050 33350562~ Serial No CC7050 33360315~ CC7050 33360936~978,1185~ CC7050 33362421~ +Modification CC3050 33370208~ CC3050 33370573~ CC3050 33370603~ in Japan CC7010 33460129~ CC7010 33460161~163,176~ CC7010 33460176~ CC3010 33470160~ CC3010 33470424~433,461~ CC3010 33470534~...
- Page 99 Maintenance S35-2069-1, 2070-1, 2071-1, 2072-1, 2055 cartridge joint mechanism Ink flow 2069-1: Pressurized tank ink sensor was not activated even once as the printer detected no black ink three times 2070-1: Pressurized tank ink sensor was not activated even once as the printer detected no cyan ink three times 2071-1: Pressurized tank ink sensor was not activated even once as the printer detected no magenta ink three times 2072-1: Pressurized tank ink sensor...
- Page 100 Maintenance Ink drain down procedure for Old ink tower (For single tank replacement) Page1 Ink flow This procedure is example for cyan tank replacement, when you replace another colour tank, you need to adapt the colour 2. Open the bellows unit and disconnect the 3.
- Page 101 Maintenance Ink drain down procedure for Old ink tower (For single tank replacement) Page2 Ink flow 13. Open the front cover and remove ink 14. Turn on the machine with cover open condition cartridge 15. Perform the test mode 2483 (ink valve) with 20 times If you should drain ink for another colour, you...
- Page 102 Maintenance Ink drain down procedure for Old ink tower (For single tank replacement) Page3 Ink flow After the tank replacement 20. Turn on the machine with cover close condition 22. After about 10 minutes later, ink circulation 21. When pressure ink tank level goes up, you can will finish automatically remove three scissors...
- Page 103 Maintenance Ink drain down procedure for New ink tower (For single tank replacement) Page1 Ink flow This procedure is example for cyan tank replacement, when you replace another colour tank, you need to adapt the colour 2. Open the bellows unit and disconnect the 3.
- Page 104 Maintenance Ink drain down procedure for New ink tower (For single tank replacement) Page2 Ink flow 13. Clamp the right side of ink drain tube and 14. Insert the drain tube into the overflow pan 16. Open the front cover and remove ink then disconnect it from left pipe 15.
- Page 105 Maintenance Ink drain down procedure for New ink tower (For single tank replacement) Page3 Ink flow 23. If some ink overflow, you should drain down to waste ink tank 22. Put back the bellows unit to original position Overflow tank After the tank replacement 24.
- Page 106 Maintenance Ink drain down procedure for New ink tower (For four tanks modification) Page1 Ink flow 3. Ink will flow down slowly 4. Few minutes later, check whether pressure 1. Open the bellows unit and disconnect the 2. Disconnect the 4 drain tubes and then insert connecter them into the overflow pan (step by step) tanks are almost empty...
- Page 107 Maintenance Ink drain down procedure for New ink tower (For four tanks modification) Page2 Ink flow 13. Insert the tube into the overflow pan and 14. Repeat the No12 and No13 process for all 15. Open the front cover and remove all ink then remove the scissor colours cartridges...
- Page 108 Maintenance Ink drain down procedure for New ink tower (For four tanks modification) Page3 Ink flow 21. If you modify negative tanks from 3 23. If some ink overflow, you should drain down generation to 4 version, skip to the modification. 22.
- Page 109 Maintenance Adjustment test mode of Multi finisher Finisher For ComColor For HC 04733 763-213 04734 763-214 Adjustment procedure of ComColor multi finisher is same as HC one. 04735 763-215 (Folding position, staple position etc) 04743 763-223 04749 763-229 You can use the HC technical manual and the left side list 04749 763-229 04752...
- Page 110 Maintenance U17-3094, U17-3327 Finisher According to the technical manual, U17-3094: When the front cover is closed, the booklet drawer set sensor is deactivated. U17-3327: Booklet tray is operational at the machine is power ON, but becomes non-operational while in operation due to mechanical error. Basically you should check the locking condition of the booklet making unit.
- Page 111 Maintenance Useful test modes (Setting up) Test mode Test mode No Name Description 716/717/718 IC CARD activate You can enter each four digits KEY code USB port enable 0: Off 1: On IS900C enable 0: Off 1: On 728/5715 Scanner enable 0: Off 1: On (728) 0: On...
- Page 112 Maintenance Useful test modes (Maintenance) Test mode Test mode No Name Description 404/411 Maintenance print and NZL check Paper feed from standard tray REv information save You can save REv data into the USB memory Touch panel calibration 440/1497 Image adjustment parameter save 440: Copy to HDD 1497: Save as factory default 441/503 Image adjustment parameter retrieve...
-
Page 113: Network Setting
Maintenance Remote Agent setting Remote Agent Firmware Update the firmware to Ver97.18.3 :Test mode setting :Admin setting :If necessary REv setting to 1 to 1 Network setting Detail setting (press “Change”) IP address DNS address Connection Reboot Subnet mask Proxy server (If used) Gateway address RA setting to 10... - Page 114 Maintenance Confirmation and Troubleshooting for Remote Agent connection 1 Remote Agent Remote Agent settings W67 error TM412 Re-confirm all of settings No error Wait 5minutes Insert USB key Perform TM413 [YYYY/MM/DD HH:MM:SS, remoteagent.c, INFO, 637, <0000> successful completion] Open RA activation done the file [YYYY/MM/DD HH:MM:SS, remoteagent.c, ERROR, 771, <2500>...
- Page 115 Maintenance Confirmation and Troubleshooting for Remote Agent connection 2 Remote Agent Ping risoremoteagent.com No address feedback Ask IT person if DNS is correct Feedback 202.248.103.148 Set up Proxy address and port into the web browser Enter https://risoremoteagent.com Proxy login [TEST] is requirement displayed Required...
- Page 116 Maintenance Remote Agent transfer specification Remote Agent REv data in the machine (saved data) Transfer data to the server Order S / I S / I Trigger Firm Count Firm Count error error setting setting (sample) Turn on the machine Print renewed Designated time(TM742) or wake up...
- Page 117 Maintenance DNS for Remote Agent setting Remote Agent You can basically find the DNS address for the customer by using “Command prompt”. We recommend to ask it IT person for double check. 1. Input “ipconfig/all” 2. Press enter key 3. You can find basically two or more addresses at “DNS Servers”...
- Page 118 Maintenance Proxy for Remote Agent setting Remote Agent Normally you need to ask to IT person if proxy function is used in the network. Sometimes we can find the proxy setting on the web browser. However this setting might not be same as actual proxy setting. Tools - Internet options - Connections –...
- Page 119 Maintenance Send error history (REv data) Remote Agent When the machine is installed the Remote Agent function, the customer can send the REv data such as error history or counter data etc to Lyon server in the Admin mode.
- Page 120 Data list of RISO Remote Agent (REv exchange tool) Remote Agent You can see the contents of RISO Remote Agent by using REv file with following procedure 1) Activate the test modes 726, 721 and 722 to “1” 2) Insert the USB memory into the machine and perform TM407...
- Page 121 Maintenance X02-1101 (Paper catch on the paper gate) Paper Jam You can adjust height of the paper gate from the panel side and the rear side. When both of the height adjuster move to the standard tray direction, the paper gate will move up. When you adjust the rear adjuster, you need to lift up the Engine PCB.
- Page 122 Maintenance X02-1101/W56-1300/S98-0114/Z-folding Paper Jam X02-1101: The paper gate detects paper lifting or wavy condition during the paper feeding W56-1300: The paper size detected by the system does not match with transferred paper size When paper is jammed with Z-folding condition on the BP belt with above errors, BP belt rotation might not be smooth. Especially A3 paper has this symptom relatively.
- Page 123 Maintenance X04-1060 X05-1080 (Paper jam around upper transfer) Paper Jam When the rollers on the upper transfer are not gripping well, paper can remain on the unit or paper can become crumpled. Check points 1) Clean the drive rollers 2) Clean the shaft of the pressure rollers and inside of the brackets 3) Confirm whether the bracket of pressure roller are damaged Upper roller: Drive roller Lower roller: Pressure roller...
- Page 124 Maintenance X06-1062, X06-1081, X07-1082 (Paper jam around switch back) Paper Jam When the rollers on the upper transfer unit or switch back rollers are not gripping well, paper can become crumpled at switch back unit. This symptom mainly occurs while duplex printing. Check points 1) Clean the drive rollers 2) Clean the shaft of the pressure rollers and inside of the brackets...
- Page 125 Maintenance W24-1150 (Face down tray full) at installation Paper Jam When slightly thin paper is used (80g/m2 etc), ejection speed might not be enough depends on paper condition. You can change (speed up) the ejection speed by test mode 1855 Tail of paper is remained on the end wall Test mode 1855 0;...
- Page 126 Maintenance W24-1150 (Face down tray full) few months later after the installation Paper Jam Cause of the problem 1, Drive roller slips due to ink stain 2, Pressure roller does not rotate smoothly 3, Roller pressure is not enough Drive roller Clean the ink stain Ejection unit Add some Teflon tape...
- Page 127 Maintenance W24-1150/X28-1084 (Individual face down ejection speed adjustment) Paper Jam W24-1150: Face down paper receiving tray is full. X28-1084: Paper does not pass the FD paper ejection sensor in certain time When you need to adjust the face down ejection speed individually, following test modes are useful When you adjust speed separately between simplex and duplex Paper size...
- Page 128 Maintenance Dog ear Paper Jam If the printed paper is fold at somewhere, you should check the metal paper guide for vertical transfer unit at first. If it does not hang on correctly, paper pass gap is wider and then corner of the paper bends easily. * This metal paper guide is used when the right ejection unit is connected.
- Page 129 Maintenance Check points for dog ear problem Paper Jam Face down Face up Dog ear occurs after printing Single/face down Duplex/face down Single/face up Duplex/face up Check points Case1 Dog ear Dog ear Case2 Dog ear Dog ear 7,8,9 Case3 Dog ear Dog ear Dog ear...
- Page 130 Maintenance X14-1102 (Double feed) Paper Jam X14-1102-1: Double feed from the standard tray X14-1102-2 : Double feed from the tray 1 X14-1102-3 : Double feed from the tray 2 X14-1102-4 : Double feed from the tray 3 Step1 Step2 Step3 Change the pad and holder to wide type Adjust the pad angle from 4 to 3 Adjust the height 1step lower...
- Page 131 Maintenance X17-3140 (Paper jam in interface module) Paper Jam When the Finisher is connected, the side wings are in maximum position. If down curled paper feeds to the finisher, edge of the curled paper might catch on the static blush or the fence guide hole. You might need to remove the static blush and cover the hole by thin Teflon tape.
- Page 132 Maintenance X02-1058 (Paper bent at 6cm from the top edge) Paper Jam When X02-1058 occurs or paper have some bent, you need to confirm and adjust the paper slack condition. (Much bigger paper slack is one of the reason of paper Registration roller bent) In addition, ComColor uses the paper assist technology,...
- Page 133 Maintenance X01-1058, Paper tear, dog ear Paper Jam If top edge of paper does not reach to contact position of registration roller correctly, X01-1058 paper jam, paper tear or dog ear might occur. Basically paper touch on the guide roller first, then registration roller adjust paper skew at the contact position Registration roller Dog ear Contact position...
- Page 134 Maintenance Compatibility of transfer pressure rollers Paper Jam generation generation generation Pressure Roller 050-62068-088 050-62068-207 Support plate 050-64328-087 050-64328-281 Face down 050-62381-002 F Socket 050-64369-000 x2 050-62382-009 R Pressure Roller 050-55252-086 050-55252-108 Support plate 050-64328-087 050-64328-281 Switch back 050-64370-008 F Socket 050-64369-000 x2 050-64371-004 R...
- Page 135 Maintenance Compatibility of transfer motor (The vertical motor and the right ejection motor) Paper Jam Vertical transfer motor and right ejection motor are the same motor (compatible with each other). Currently this motor is belt transfer type, it is able to reduce mechanical noise. The old harness and the new harness are different, however harness colour is same.
- Page 136 Maintenance X03-1065 (Paper jam in the FU paper ejection unit) Paper Jam When X03-1065 error occurs, you should check the spring condition for right side paper ejection unit. (Come off or catch on something etc) If this spring is not proper, paper gate does not work correctly. Then finally paper will catch on the paper gate. Right side paper ejection unit Paper gate Spring...
- Page 137 Maintenance Upper limit position for standard feed tray (X14-1102-1 Double feed) Paper Jam If paper double feed occur often, you should check the upper limit position whether it has 2mm gap. Basically when upper limit gap is 2mm, the sensor Check point bracket is over about 1mm from the adjuster bracket.
- Page 138 Maintenance Replacement procedure for the upper limit actuators of multi tray Paper Jam When you replace the actuator of the multi tray, you don’t need to remove the paper feed unit. When you remove the three trays, you can remove the actuators from the underneath. Loosen the bracket screw (Don’t remove) If you remove it, it is difficult to put back You can remove actuators with shaft...
- Page 139 Maintenance S10-1031/1032/1033 Tray elevation motor lock Paper Jam When you find some S10-10XX errors in the error history, you should check following three points. S10-1031/1045 are for Tray1 S10-1032/1046 are for Tray2 S10-1033/1047 are for Tray3 1. Check whether customer does not load a lot of paper into the tray 2.
- Page 140 Maintenance Noise from the upper transfer unit Paper Jam If the upper transfer unit comes off slightly, machine might make gear noise. In order to reduce the gap, you can insert old stripper pad etc between the upper transfer unit and the stopper Upper transfer unit Stopper Insert...
- Page 141 Maintenance X12-1055 Gear slip Paper Jam X12-1055: Paper being transferred did not reach vertical paper feed sensor 3 in time, based on the transfer speed X12-1055-1: Paper comes from tray2, X12-1055-2: Paper comes from tray3 Totally 4 one-way clutch gears are used in the internal paper feed unit, when they slip, X12-1055 occurs. If X12-1055 still occurs after cleaning inside of the gear, rough up the roller shaft with course sand paper (80 grit) Rough up Clean inside...
- Page 142 Maintenance CCD off mode Image problem CCD unit (CIS) might not detect paper width when dark coloured paper is fed. If this detection is not correct, horizontal printing image will be shifted. When the following test modes are switched to “0”, CCD will be deactivated, print position will be decided from paper width of the tray.
- Page 143 Maintenance W68-0245/W73-1303/I08-0229 BP Belt stain detection Image problem W68-0245: BP belt stain detected I08-0229: BP belt maintenance alert Above error message might display even though BP belt is clean. After the cleaning for CCD and BP belt, you can switch off this function using TM1934 to 0 (default is 5) This test mode is available since Ver10.16 Clean the CCD unit and BP belt...
- Page 144 Maintenance Misty image at top of paper Image problem When you print a document with a small margin on the lead edge on a ComColor machine, you may find a misty image at the top of the paper. The new type BP belt will help to improve this condition, also you can reduce the power of the BP fans using test mode 1809, for example from 100 to 80.
- Page 145 Maintenance White line for Cyan head Image problem Step1 Load 330mm width paper on the standard tray (If you don’t have some, test mode 2477 is useful) without paper mode Extend the paper guides to maximum width position Perform the test mode 2472 (Cyan MD recovery mode) Print the NZL check pattern by test mode 411 to check the result If some white line still occurs, go to Step2 (Duck cleaner) Step2...
- Page 146 Maintenance Head cleaning point using cleaning liquid Image problem When you clean the print head using Duck cleaner, you need apply enough liquid on the head nozzle position. CC print head has a ink supply pipe between two nozzle lines, ink collection pipes are out side of nozzle lines. (You should aim well at the nozzle to get good result) Print Head Ink supply pipe...
- Page 147 Maintenance Image problem for Y direction Image problem The Y image position might be lost such as in following pictures very rarely. IP-PCB has a highest possibility of the cause of this problem. NZL check pattern In addition, following image problem also IP-PCB is a highest possibility part.
- Page 148 Maintenance Envelope print quality Image problem When TM1925 is set to "1", image quality for envelope mode is slightly better, however print speed will slow down about 20% to 30% depending on the envelope size. For the normal paper, print speed does not change. TM1925 is “0”...
- Page 149 Maintenance Ink drip down on the BP belt after head cleaning Image problem If ink drip down on the BP belt after head cleaning, head wipers on the maintenance unit might not touch on surface of the print head correctly Check points 1.
- Page 150 Maintenance PCBs compatibility Part No Part name Compatibility with another model/machine Brand-new spare part Second hand part ○All A3 colour/models are compatible. ○All A3 colour/models are compatible. 050-79664-008 HDR-PCB (A3) ○All A4 colour/models are compatible. ○All A4 colour/models are compatible. 050-79895-060 HDR-PCB (A4) ○All models are compatible.
- Page 151 Maintenance Swap second hand HDD or Engine PCB When you have second hand HDD or Engine PCB which is installed same version firmware as trouble machine, you can use it for repair. You need to swap them one by one. If you swap at the same time, S98-1411 error will occur. Second hand HDD Second hand PCB Engine PCB...
- Page 152 Maintenance Swap HDD or Engine PCB (Compatibility) Basically second hand Engine PCB and HDD are compatible with another machine when the firmware is 7.16 or later. Failure part Machine Status Firmware Replace part Availability Note Engine PCB At the installation 7.16 or later Brand-new TM451 is required...
- Page 153 Maintenance Matching between HDD, Engine PCB and Control card ComColor will check the matching between HDD, PCB and the control card every booting up Engine Less than Ver7.16 condition Serial No Serial No Serial No Copy Blank 12345678 Blank Model ID Model ID Model ID Compare...
- Page 154 Maintenance Firmware compatibility There are some generations for ComColor firmware, when you update it, you should make sure the compatibility, especially HDD replacement. HDD replacement Standard update SNALL:0.0.0, following version is SNPS version Following version is SNALL version Before 0.91.7 0.91.8 1.xx 2.18~5.34...
- Page 155 Maintenance S98-0022 (PMS and Engine PCB Communication error) When S98-0022 error occurs, you need to check all of connection from the mother board(control PCB) to option PCB. To discover cause of this symptom, you should take off the option PCB at first. Another connection: Connection on the IP PCB: You should check...
- Page 156 Maintenance S98-0022-3 S98-0018-2 Engine PCB has “Watch dog timer” device which checks the processing condition. If this device detects CPU hung-up etc, the Engine PCB will reset the processing automatically. Check points S98-0018-1 Hung-up due to system high load etc S98-0018-2 Hung-up due to unstable power supply to Engine PCB If Engine PCB resets CPU during the printing, signal...
- Page 157 Maintenance S99-0246 S94-19xx (Engine PCB replacement) When you replace the Engine PCB, you need to install the firmware. You might face S99-0246 or S94-19xx error after upgrade the firmware. Check Point 1 Check the flat cable connection When the connection is not correct, firmware data cannot transfer from PMS to the Engine PCB Flat cable Engine IP PCB...
- Page 158 Maintenance Efficient installation Installation Tick Tick Tick Tick Tick Tick Finisher/Face up Main printer Scanner Offset tray Option PCB IC card IS900C tray/Ejection unit Picking two harnesses Picking one harness and Put PCB and Build up front side of the machine and arranging arranging flat cable...
- Page 159 TM7780 Customer If customer uses coloured card RISO console Setup the IC card users Customer Upload this via RISO console by using CSV file Print out with IC card (Automatic print start) Customer Auto logout time 5min 1min Folder function...
- Page 160 Maintenance Come off white arm of the maintenance unit at the installation Installation Before turning on the machine at the installation, please check the position of the slider arm (White colour) If it is Slider arm positioned with the inner wall between the white arm. If it is not in the correct position, the maintenance unit will come out from the machine.
- Page 161 Maintenance S99-0006/0166, S98-0036 Electrical problem When lift up (open) the engine PCB, if you forget to remove the earth plate beforehand, the engine PCB could be damaged. If the caption error occur, you should check whether there are some damage or not on the PCB.
- Page 162 Maintenance Check points for wire harness for electrical problems Electrical problem If you have any unusual electrical problems example power cut off, S9x error etc, bellow positions It is a high possibility for this kind of trouble is due to cutting down or trapping of wire harness etc. Flat cable connection Harness of Two screws...
- Page 163 Maintenance Check points for Offset stacking tray installation Electrical problem When you install the Offset stacking tray, you should take care of harness arrangement Encoder Harness might hung on the bracket Harness might touch on the encoder If you have some tie wraps, we recommend to band with tie wraps...
- Page 164 3. If this symptom still occurs, you should replace the HDD Backup data might be crashed too, if this symptom occurs again after re-install the backup data, you should initialize HDD again, then you can set up user data using the CSV file via RISO console.
- Page 165 Maintenance S35-2060, S96-1207, S98-0100-3, S98-0101-3 Electrical problem Following error messages might be saved in the error history even though the touch panel did not display. Because if customer shut down the main power, system program will confuse the machine latest condition. S35-2060 Overflow sensor is activated S96-1207...
- Page 166 Maintenance S35-2057/2079/2081/2082/2083/2084 S36-2080 Electrical problem Some error messages and some error clear test modes have been added since recent new firmware. When you face this errors, you must check whether the machine does not overflow at first. Basically TM2711(Head replacement mode) is required after clear the error using the test modes. Test mode to Error codes Description from technical manual...
- Page 167 Maintenance S99-0152-06 Electrical problem S99-0152-6: When ComColor starts printing, the Engine detects time out error due to PMS does not send data commands continuously. When you face this error, we recommend to use an another computer to have a test. This problem comes from the specific computer for many cases.
- Page 168 Maintenance S98-0110-1 Electrical problem Check point 1 Check point 2 Check whether the flat cable from the controller Check whether the metal plate on the upper transfer does not touch on the vertical transfer motor unit touches on the sensor bracket correctly Check point 3 If the upper transfer unit come out slightly, machine can not remove static electricity correctly.
- Page 169 Maintenance USB function unable Electrical problem If USB port on the control panel does not work even though TM726 is ON, you should check the connector connection on the PMS PCB (Mother board) When the connection is not correct, -USB key LED does not flash -Firmware update screen does not come up USB connector (Brown colour)
- Page 170 Maintenance U03-43xx (Scanner FB error) U04-4430 (Scanner AF error) Scanner Regarding the HS4000 scanner errors, Following part has the highest possibility of cause for each error messages U03-4310, 4311, 4316 050-30048-000 ASY-CCD ; CCD UNIT Especially less than #33441376 scanner has high possiblity U03-4320, 4321, 4322 050-30901-403 PRINTED CIRCUIT BOARD;CS4-MAIN 050-30051-000 PRINTED CIRCUIT BOARD ;...
- Page 171 Maintenance Rubber tube protection in the area with high Ozone level Ink pan When the ConColor is located near the xerographic machine with high Ozone level, rubber material might receive damage quicker. 3. Insert tube cover and then push back rubber tube to original position 4.
Need help?
Do you have a question about the ComColor IS900C and is the answer not in the manual?
Questions and answers
How do I resolve error code S98-0110-1. Started coming up after I replaced three printheads on machine
To resolve error code S98-0110-1 on the Riso IS900C after replacing three printheads, follow these steps:
1. Check the flat cable from the controller to ensure it does not touch the vertical transfer motor.
2. Verify the metal plate on the upper transfer unit touches the sensor bracket correctly.
3. Check the position of the upper transfer unit. If it is slightly out, the machine cannot remove static electricity properly. Insert a stripper pad or spacer on the stopper to keep the transfer unit in the correct position.
This answer is automatically generated
@Mr. Anderson do you have a WhatsApp number ? I have the same problem