Centsys D5-Evo Installation Manual
Light-industrial sliding gate operator
Hide thumbs
Also See for D5-Evo:
- User manual (40 pages) ,
- Synchronisation diagram (2 pages) ,
- Installation manual (68 pages)
Table of Contents
Advertisement
Advertisement
Table of Contents

Related Manuals for Centsys D5-Evo


Summary of Contents for Centsys D5-Evo
- Page 1 D5-Evo installation manual LIGHT- INDUSTRIAL SLIDING GATE OPERATOR...
-
Page 2: Table Of Contents
17. Earthing for effective lightning protection page 35 18. Commissioning the system page 35 Setting the gate limits page 36 19. How to set up additional features on the D5-Evo controller page 37 20. Menu navigation map page 40 21. Controller features page 51 22. -
Page 3: Mechanical Setup
Mechanical setup These abbreviated instructions are for the experienced installer who needs a checklist to get a standard installation up and running in the minimum of time. Detailed installation features and functions are referred to later in this manual. Heed necessary site considerations page 11 Check cabling requirements page 14... -
Page 4: Electrical Setup
Electrical setup Connect all wiring page 28 Commissioning and handover Set gate end-of-travel limits page 35 Set additional features via the page 36 menus, if required Carry out professional page 64 handover to client page 2... -
Page 5: Important Safety Instructions
IMPORTANT Safety Instructions ATTENTION To ensure the safety of people, it is important that you read all the following instructions. Incorrect installation or incorrect use of the product could cause serious harm to people. The installer, being either professional or DIY, is the last person on the site who can ensure that the operator is safely installed, and that the whole system can be operated safely. - Page 6 CENTSYS Make sure that the earthing system is correctly constructed, and that all metal parts of the system are suitably earthed Safety devices must be fitted to the installation to guard against mechanical movement risks, such as crushing,...
-
Page 7: Declaration Of Conformity
1. Declaration of conformity Manufacturer: Centurion Systems (Pty) Ltd Unit 13 Production Park Intersection Newmarket Road & Epsom Avenue North Riding Gauteng South Africa Declares that the product: Product name: D5 Evo Conforms with the following specifications: Safety: SANS 60335-1:2007 IEC 60335-1:2006 Emissions: CISPR 22 CLASS B: Radiated emissions –... -
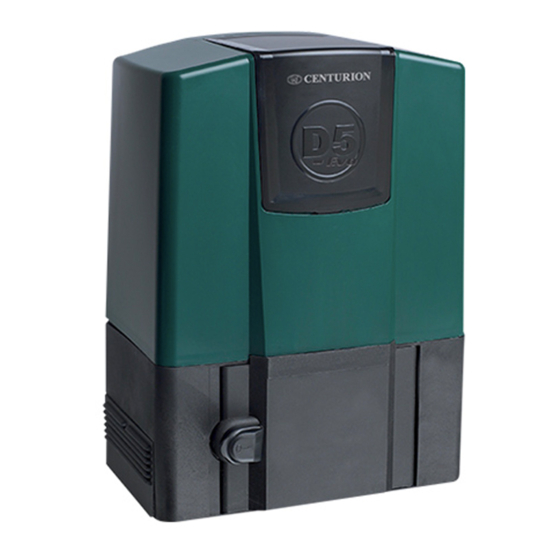
Page 8: General Description
The electronic controller utilizes the same proven surge protection philosophy that is used in all CENTSYS products. While this does not guarantee that the unit will not be damaged in the event of a lightning strike or power surge, it greatly reduces the likelihood of such damage occurring. -
Page 9: Specifications
3. Specifications Physical dimensions 250mm 150mm 40mm FIGURE 1 OVERALL DIMENSIONS Technical specifications Input voltage 220-240V AC ± 10%, 50Hz Motor voltage 12V DC Motor power supply Battery driven (standard capacity - 1 x 7Ah) Battery charger 2A @ 14.2V (charging voltage 13.76V) Current consumption (mains) 170mA Current consumption (motor at rated load) -
Page 10: Fuse Protection
150* full day 150* Collision sensing electronic Operating temperature range -15°C to +50°C Onboard receiver type CENTSYS code-hopping multichannel Receiver code storage capacity 500 transmitter buttons Receiver frequency 433MHz Mass of unit packed (standard kit, excl. 10kg rack and battery) Packing dimensions (standard kit, excl. -
Page 11: Product Identification
5. Product identification FIGURE 2 PRODUCT IDENTIFICATION D5-Evo controller Side covers Courtesy light fuse (3A F/B) Foundation plate 1 x 12V 7.2Ah battery Motor fuse (30A ATO) Gate mounted origin marker 10. SM2A charger Origin marker bracket 11. Manual release access door... -
Page 12: Required Tools And Equipment
6. Required tools and equipment Pull scale – 50kg Spanner – 17mm; 10mm Screwdriver – 3.5mm flat Allen key – 6mm; 4mm Crimping tool and pin lugs Side cutters Hacksaw Spirit level ... -
Page 13: Preparation Of Site
7. Preparation of site General considerations for the installation Always recommend the fitment of additional safety equipment such as safety edges and safety beams, for additional protection against entrapment or other mechanical risks Check that no pipes or electrical cables are in the way of the intended installation ... - Page 14 WARNING! Endstops are mandatory and must be fitted to prevent death or accidental injury should the gate overrun its limits Guide-rollers and anti-lift brackets Guide-rollers must ensure that the gate is held vertically For improved safety, fit additional support post to prevent gate from falling over if ...
- Page 15 Starting and running forces Test the starting force of the gate as per the diagram. Use a pull scale to determine the maximum amount of pull force required to get the gate moving Determine the running force of the gate by continuing to pull on the scale with just ...
-
Page 16: Cabling Requirements
8. Cabling requirements FIGURE 6. CABLING REQUIREMENTS Legend 1. 220-240V AC mains cable via double pole mains isolator switch (3 core LNE 1.5mm SWA) 2. Optional intercom cable from motor to dwelling (n1 + 6 core 0.5mm multi- stranded) 3. Optional intercom cable from motor to entry panel (n2 0.5mm multi-stranded) 4. -
Page 17: Lubrication
Do not attempt to run the operator without first filling the gearbox with The internal gearset of the D5-Evo is lubricated by means of an oil bath In order to prevent possible leakage during shipping, the unit is shipped with no oil ... -
Page 18: Operator Installation
10. Operator installation Locate operator position To ensure operator does not protrude into driveway, install base plate at least flush with the driveway entrance Determine a suitable position and vertical height for the operator by considering Figures 8, 9 and 10 It is typical to mount the rack above the pinion as shown in Figures 8A, 9A and 10A for ... - Page 19 RAZ rack Foundation Foundation plate 32 - 50 32 - 50 plate Flat bar welded to Raised foundation foundation plate and rail * Includes 3mm clearance required between rack and pinion FIGURE 9A RAZrack, above pinion FIGURE 9B RAZ rack, below pinion Nylon angle rack Foundation Foundation...
-
Page 20: Foundation Plate Installation
Foundation plate installation 1. The foundation plate can either be set into a concrete foundation, as in Figure 11 or bolted down onto an existing concrete plinth as in Figure 13. gearbox mounting bolts Option 1: Concrete foundation 2. Assemble foundation plate with anchor brackets as shown. -
Page 21: Secure Foundation Plate
M10 nut M10 washer M10 gearbox mounting bolts Option 2: Existing concrete plinth Use two M12 3. If bolting onto an existing concrete plated nuts as spacers plinth, place the foundation plate down in M10 x 95 the correct position and use the plate as expansion stud a template for marking the rawl bolt holes. - Page 22 Mount the gearbox 1. Fit the M10 nuts and washers to the mounting bolts as shown in Figure 15. 2. Adjust the nuts to be 7mm clear from the base to allow for later adjustment. washer Remember to fit the washers onto each nut before installing the gearbox.
-
Page 23: Mount The Rack
Mount the rack The rack must be securely Rack mounted to the side of the gate. It parallel must be parallel with the gate rail, to rail and there must be a 2 - 3mm gap between the teeth of the pinion Gate rail tooth FIGURE 18... - Page 24 3. Start with the gate either fully open or closed. 4. Place the one end of the first section of rack on the pinion. Let it mesh fully. 5. Level the other end and fix that end to the side of the gate. FIGURE 21 Refer to the sections that follow for instructions on how to fix the different types of rack.
- Page 25 Steel rack 1. Fix rack using the steel angle brackets provided. 2. Brackets must be spaced no more than 300mm apart. FIGURE 24 3. When joining different lengths of steel rack, a simple way of ensuring correct pitch spacing, is to clamp a small off-cut between the two pieces.
- Page 26 3. When fitting the RAZ rack it is easier to start on the right and work towards the left. 4. The RAZ rack simply clips together. Start on the right FIGURE 27A Fit additional fixing screw through the horizontal slots to secure the rack to the gate directly above the pinion when the gate is in the closed, pedestrian and open...
- Page 27 3. When joining two lengths together, simply butt each section firmly together to ensure the correct pitch. Butt firmly together FIGURE 29 Mount the origin marker 1. Close the gate completely. FIGURE 30 Isometric view A 2. Mount the origin marker to the rack a minimum of 500mm from the origin sensor.
- Page 28 Steel rack Bolt using fasteners provided 3. For steel rack mount the origin marker onto the rack using the bracket provided. 4. Weld the bracket to the rack. 5. Bolt the origin marker onto the bracket using the fasteners provided. Origin marker bracket Weld mounting...
-
Page 29: Apply Warning Decals
13. Note the orientation of the origin marker. 14. Manually slide the gate open until the origin marker is in line with the origin sensor. 15. Ensure distance between face of marker and front face of sensor is between 13 and 20mm. -
Page 30: Electrical Setup
11. Electrical setup 1. Always check that the circuit breaker in the electrical panel is in the OFF position, and that all high voltage circuits (more than 42.4V) are completely isolated from the mains supply before doing any work. 2. Ensure that all low voltage systems (less than 42.4V) are suitably protected from damage, by disconnecting all sources of power such as chargers and batteries before doing any work. -
Page 31: Wiring Diagram For Closing Safety Beam
12. Wiring diagram for closing safety beam Closing safety beam 12V/24V - 12V/24V + 12V/24V + 12V/24V - FIGURE 40 page 29... -
Page 32: Wiring Diagram For Opening Safety Beam
13. Wiring diagram for opening safety beam Opening safety beam 12V/24V - 12V/24V + 12V/24V + 12V/24V - FIGURE 41 page 30... -
Page 33: Wiring Diagram For External Radio Receiver And Loop Detector
14. Wiring diagram for external radio receiver and loop detector Loop and loop detector 12V+ External radio receiver 12V+ Remote control circuitry Refer to diagram only if external receiver is being used and not the onboard receiver, disable onboard receiver - Menu 11 FIGURE 42 page 31... -
Page 34: Wiring Diagram For Other Inputs
15. Wiring diagram for other inputs Holiday lockout keyswitch/keypad (normally- CLOSED) Intercom pushbutton (normally- OPEN) Pedestrian keyswitch/keypad (normally-OPEN) Pillar light pushbutton (normally-OPEN) Status FIGURE 43 page 32... -
Page 35: Mains Supply, Battery, Charger And Pillar Light Connections
16. Mains supply, battery, charger and pillar light connections Pillar Battery light leads connection Charger connection Figure 46 below Red/Black charger wires 220-240V Mains Charger FIGURE 44 Battery 220-240V Mains CP84 Charger Earth Auxiliary to light connection casing on charger FIGURE 45 FIGURE 46 SCHEMATIC OF BATTERY CONNECTION... -
Page 36: Earthing For Effective Lightning Protection
17. Earthing for effective lightning protection Spade connection Earth harness Optional 40kA To CP84 surge to CP84 to CP84 arrestor E N L 220-240V Mains Ring Earth spike (>1m copper rod hammered into the ground) FIGURE 47 page 34... -
Page 37: Commissioning The System
18. Commissioning the system Setting the gate limits 1. Disengage the manual release lever, ensuring that the origin marker is correctly fitted. Move the gate to the middle of travel and re-engage the manual release lever. FIGURE 48 2. a) If powering up the system ex-factory, it will request for the operating Profile* (operating standard) to be set. -
Page 38: How To Set Up Additional Features On The D5-Evo Controller
Section 21, Controller features When setting up the D5-Evo system via the LCD display, all the steps that have to be followed are clearly provided via the display. It is only necessary to note the following:... -
Page 39: Menu Navigation Map
20. Menu navigation map Setting limits 1.1. Setup wizard Safety 2.1.1. Opening collision force 2.1. Collision force 2.1.2. Closing collision force 2.2. Collision count 2.3. Alarm output 2.4. LCK input as ESTOP External gate indication status 2.5.1. Indicator output 2.5.2. Closed indication 2.5.3 Part close indication 2.5.4 Closing indication 2.5.5. - Page 40 Run profile 5.1. Positive close 5.1.1. Positive close mode status 5.1.2. Positive close mode force 5.2. Pre-open delay 5.3. Pre-close delay Opening speed 5.5. Closing speed 5.6. Ramp-up distance 5.7. Ramp-down distance 5.8. TRG stop distance 5.9. IRB stop distance 5.10.
- Page 41 ChronoGuard 9.1. Time and date 9.2.1. Add Time-period 9.2.1.1. Auto function 9.2. Time-periods 9.2.1.2. Time-bar 9.2.2. Delete Time-period 9.2.3. Edit review Time- periods 9.3.1.1. Auto function 9.3.1. Add exclusion 9.3. Exclusions 9.3.1.2. Time-bar function 9.3.2. Delete exclusion 9.3.3. Edit review 9.4.
-
Page 42: Controller Features
21. Controller features Menu 2 - Safety (collision force) Collision force If the gate is obstructed, the internal collision circuitry will activate. The response of the system to a collision will vary, depending on the profile (operating standard, e.g. ZA,) selected. Responses can vary from the gate stopping, to the gate reversing. - Page 43 Autoclose override It is possible for the user to temporarily turn off Autoclose when the Mode of Operation is Standard or Reversing. To activate Autoclose Override, the Trg input must be activated and maintained for a period longer than the time set for the Autoclose Override time.
- Page 44 Deadman Control Mode (DMC) A permanent trigger on FRX (NO) will cause the gate to open. Removing the trigger will cause the gate to stop A permanent trigger on Trg (NO) will cause the gate to close. Removing ...
- Page 45 Crawl distance Sets the final crawl distance in centimetres of travel of the gate when reaching an endpoint. This can be set from 10 centimetres to 10 metres in 1 centimetre steps. Torque limit Sets the maximum torque delivered by the motor. The maximum setting is a value of 15, while the minimum is four.
- Page 46 The time taken for the gate to open again after it has come to a stop is approximately three seconds Example: Autoclose override time set to five seconds: Total time to temporarily disable the PIRAC feature is approximately eight seconds (5s + 3s = 8 seconds) Autoclose override time set to off: Total time to temporarily disable the ...
- Page 47 Alarm output The system can be configured to operate one of the following outputs provided on the controller: Onboard buzzer – emits a continuous tone Pillar / Courtesy light contact (potential-free normally-open contact, fuse protected – 5A) Aux IO (this is an open collector drive, max current draw 3A, not fuse ...
- Page 48 ChronoGuard™ (patent pending) is a powerful feature which has been added to the new generation CENTSYS controllers. An integral Real Time Clock (RTC) is used to provide time-based functionality, including the automatic activation or time-barring of specific controller inputs, and the time-barring of specified...
- Page 49 CENTSYS code-hopping receiver. The RTC will keep time for a minimum of one hour without any power Time-periods A Time-period is defined by a start and end date and time. Up to one hundred Time-periods can be defined.
- Page 50 Time-barring of a CENTSYS code-hopping transmitter is specified at the time of coding the transmitter into the system. Once an RF input is defined as time-barred, any time-barred transmitter associated with that input will be time-barred during the relevant Time-period.
- Page 51 Menu 11 - Remote controls The controller is capable of learning up to 500 CENTSYS code-hopping remote control buttons. Each transmitter can have up to four buttons. It is possible to artificially increase the number of buttons of a multi- ...
- Page 52 Once enabled, the remote controls menu can only be accessed by pressing a valid transmitter button. Onboard receiver The onboard CENTSYS code-hopping receiver can be disabled in the unlikely event that it causes interference with an existing external receiver. page 50...
-
Page 53: Factory Defaults Schedule
22. Factory defaults schedule South African standard profile - ZA Parameter Description Unit Minimum Default Maximum Menu 1 - not applicable Menu 2 Opening collision force Level Closing collision force Level Collision count Collisions Alarm output B, CL, SC, XIO, LED LCK as ESTOP Yes or No Menu 3... - Page 54 Parameter Description Unit Minimum Default Maximum Menu 6 (continued) Ambush alarm On/Off Ambush time hh:mm 00h:01m 00h:01m 04h:00m Break-in alarm On/Off Alarm output B, CL, SC, XIO, LED Menu 7 PED opening 0.05m see note* PED Autoclose mm:ss 00m:00s 00m:05s 04m:25s PED pre-open delay mm:ss...
-
Page 55: Description Of Terminal Functions
23. Description of terminal functions 12V + Positive battery connection. Battery terminal normally indicated as + or red (right hand battery) 12V - Negative battery connection. Battery terminal normally indicated as - or black (left hand battery) Motor Motor output – connects to the thick blue motor wire Motor Motor output –... - Page 56 Pedestrian opening input. (A normally-open potential-free input). Momentarily connecting this input to Com will cause the gate to open to the pedestrian open position. For more information refer to the pedestrian feature in Section 21. Trigger input. (A normally-open potential-free input.) Momentarily connecting this input to Com will cause the gate to open, close or stop, depending on the operating mode selected.
- Page 57 Safe Common Used for switching the power supply to the safety beams. If automatic beam testing is required, the negative power supply connection of the beam transmitter only must be wired to this point. In addition, the beam test circuit must be switched on via Menu 6. See Section 21.
-
Page 58: Diagnostics
24. Diagnostics Diagnostic LEDs The D5-Evo controller has a series of diagnostic LEDs which indicate the state of the inputs. Normally-open inputs are indicated by a red LED, and normally-closed inputs by a green LED. An illuminated red LED indicates that the signal is present (e.g. intercom button pressed), while a non-illuminated green LED indicates that the signal is absent (e.g. -
Page 59: Lcd Display
LCD display The LCD display shows useful information regarding the status of the system. 1. Battery icon Indicates the state of charge of the battery. Four solid bars = full capacity Two solid bars = 50% capacity No solid bars, with the icon flashing = battery empty ... -
Page 60: Buzzer Feedback
Buzzer feedback A warning buzzer will sound (where applicable) as per the table below: Gate User can Number Fault Inhibitor Priority continues correct of beeps type name to operate error Continuous tone Break-in alarm Alarm for 30 seconds Continuous tone Ambush alarm Alarm until IRBs are cleared... -
Page 61: Fault-Finders Guide
25. Fault-finders guide Problem Possible faults Fuse is blown – Check 30A ATO fuse, and replace if necessary Lck (Holiday lockout) input activated. Green Lck light should be on IRBC/IRBO (IR beams) inputs activated IRBC - gate will not close once open; IRBO - gate will ... - Page 62 Problem Possible faults Besides a faulty controller, which will be considered last, the only components that could cause this symptom are a missing origin, or and most unlikely, a faulty DOSS sensor However, initially before the gate overrides its limits, if the ...
- Page 63 Check that the mains power is turned on (measure 220V AC on the mains connector) Check that the red LED on the side of the charger is lit Check the charger’s supply fuse (D5-Evo charger – 3A) Check that the white battery charger connector is making proper contact ...
- Page 64 Charger might be faulty. Disconnect the battery, and measure the voltage on the battery leads. It must be between 13.6V and 13.8V, if not replace the charger Battery might be old, and might have to be replaced. If in doubt test as follows: ...
-
Page 65: Manual Operation
26. Manual operation Disengage gearbox/drive 1. Use key to open access door to manual override. Do not remove the thumbwheel. Removal of the thumbwheel may result in water entering the gearbox and the warrantee will be void. Insert the key and open FIGURE 55 2. -
Page 66: Installation Handover
27. Installation handover Once the installation has been successfully completed and tested, it is important for the installer to explain the operation and safety requirements of the system. NEVER ASSUME THE USER KNOWS HOW TO SAFELY OPERATE AN AUTOMATED GATE! Even if the user has used one before, it does not mean he knows how to SAFELY operate it. - Page 67 Head Office: +27 11 699 2400 Technical Support: +27 11 699 2481 from 07h00 to 18h00 (GMT+2 0.07.B.0029 www.centsys.com.au...
Need help?
Do you have a question about the D5-Evo and is the answer not in the manual?
Questions and answers
Hi. How many remote controls can I program to use a D5 ÉVO? I nedd to set it up to a condominium with 50 users
The Centsys D5-Evo controller can learn up to 500 CENTSYS code-hopping remote control buttons. Each transmitter can have up to four buttons.
This answer is automatically generated
IRBO FAILURE ON SCREEN AND CONTINUE TO BIP solution please
The solution for IRBO (Infrared Beam Obstruction) failure on the Centsys D5-Evo screen is to ensure that the circuit for the affected safety input is normally closed. If infrared beams are fitted and then removed, you must replace the circuit with a wire link to maintain the normally closed circuit. This will allow the system to operate correctly.
This answer is automatically generated