Oki MB451wMFP User Manual
All-in-one printer
Hide thumbs
Also See for MB451wMFP:
- User manual (128 pages) ,
- Wireless setup manual (4 pages) ,
- Safety information manual (40 pages)
Table of Contents
Advertisement
Quick Links
Download this manual
See also:
Setup Manual
Advertisement
Table of Contents

Related Manuals for Oki MB451wMFP


Summary of Contents for Oki MB451wMFP
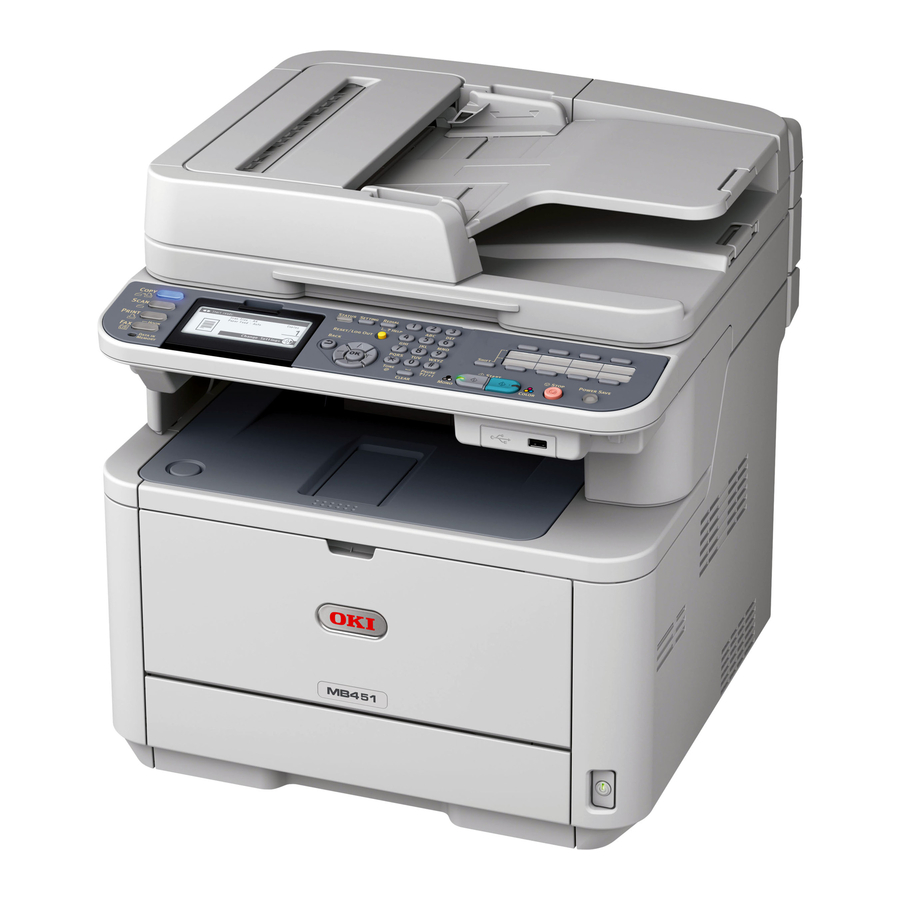
- Page 1 User's Manual Basic This manual supports the following models: MB441, MB451, MB451w, MB461, MB471, MB471w, MB491 ES4161 MFP, ES4191 MFP This manual contains cautions on how to use this product safely. Before you use this product, please make sure that you read this manual.
-
Page 2: Preface
All rights are reserved by Oki Data Corporation. Unauthorized copying, transferring, translating, or related actions are prohibited. You must obtain written permission from Oki Data Corporation before doing any of the above. © 2011 Oki Data Corporation OKI is a registered trademark of Oki Electric Industry Company, Ltd. -
Page 3: Emergency First Aid
Seek medical attention. Spillages should be treated with cold water and soap to help reduce risk of staining skin or clothing. ANUFACTURER Oki Data Corporation, 4-11-22 Shibaura, Minato-ku, Tokyo 108-8551, Japan For all sales, support and general enquiries contact your local distributor. -
Page 4: For Your Safety
For Your Safety Read the User's Manual (this manual) for your safety before using the product. Cautions related to safety Indicates additional information which, if ignored or not followed, may result in personal injury WARNING or death. Indicates additional information which, if ignored, may result in personal injury. CAUTION General cautions WARNING... - Page 5 CAUTION Do not come closer to the paper's exit area when Do not touch a damaged liquid-crystal display. the power is turned on while printing. If liquid (liquid crystal) leaked from the liquid- Doing so may result in personal injury. crystal display gets into the eyes or mouth, flush with large amount of water.
-
Page 6: Table Of Contents
Table of Contents Preface ..........2 Emergency first aid . - Page 7 Table of Contents Settings for each dialing type ......... . 43 Setup of Date/Time .
- Page 8 Table of Contents Configuring Fax Settings ........88 Changing Scan Size (Scan Size) .
- Page 9 Table of Contents Setup to use the WSD Scan........106 Installation procedure .
- Page 10 Table of Contents Clearing Paper Jams ..........131 Error Messages .
-
Page 11: Manual Composition
Manual Composition The following manual is attached to this product. Quick Start Guide The Quick Start guide describes the initial setup for each function. The basic operation of each function is also described. User's Manual (Basic) ---- This document In order to understand this machine, the basic operation is described. - Page 12 Legends used in this manual This document contains the following legends. PostScript3 Emulation→ PSE, POSTSCRIPT3 Emulation, POSTSCRIPT3 EMULATION ® ® Microsoft Windows 7 64-bit Edition operating system→ Windows 7 (64bit version) ® ® Microsoft Windows Vista 64-bit Edition operating system→ Windows Vista (64bit version) ®...
-
Page 13: Setup
1. Setup In this chapter, the basic setup and operations of this machine are described. Overview of Machine This section describes the overview of the machine. AC cord Contents of the Package Telephone connector cover The Telephone Connector Cover is installed on the Check that you have everything shown below. -
Page 14: Available Options
Overview of Machine Available Options Installation Requirements The following options are available for your Installation Environment machine: Second tray unit (tray 2) Your machine must be installed in the following environment: Reference For details on how to install the options, refer to "Installing Options"... -
Page 15: Names Of Components
Overview of Machine Installation Space Names of Components Install your machine on a flat surface that is wide enough to accommodate the machine. Allow for enough room around your machine according to the images below. Top view (193cm) 20cm (83cm) 50cm Name... - Page 16 Overview of Machine Internal part of the connector cover Name Name USB interface connection Fuser unit SD memory card slot (for MB491/ES4191 MFP Starter toner cartridge only) Image drum Network interface connection LED head Power Switch LINE TEL Name Faceup stacker AC power socket Air vents...
-
Page 17: Installing Your Machine
Installing Your Machine Installing Your Machine This section explains how to unpack your machine and how to turn it on and off. Remove the protection tapes (2) at the Unpacking Your Machine top and sides of your machine to take out cushioning materials (3). - Page 18 Installing Your Machine Open the document glass cover. Press the top cover open button (8) and open the top cover. Remove the protection tapes (6). Open the ADF and remove packing tapes. Lift the image drum from printer. Close the document glass cover. Now, you can open or close the scanner.
-
Page 19: Turning On And Off Your Machine
Installing Your Machine Reinstall the image drum in the Note printer:lower it into place in the printer If the power supply is unstable, use a voltage regulator. locating the pegs (1) at each end into The maximum power consumption of this machine is their slots in the sides of the printer 950W. -
Page 20: Turning On Your Machine
Installing Your Machine Turning On Your Machine Hold down the power switch for about a second. Plug the AC cable into the AC power socket of your machine. The message [Shutdown in progress. Please wait. The machine turns off Plug the AC cable into the electric socket. automatically.] appears in the operator panel, and power switch indicator blinks Check that no documents are on the document... -
Page 21: Auto Power Off
Installing Your Machine POWER SAVE The < > key lights up while in the mode. Memo When your machine receives a print job from a computer or other devices, it automatically returns to the standby mode. Auto Power Off When your machine is not used for a certain period of time, the power turns off automatically. -
Page 22: Installing Options
Installing Options Installing Options This section explains how to install options on your machine. The following options are available: Second tray unit (MB461, MB471, MB471w, MB491, ES4161 MFP, ES4191 MFP only) Note Be sure to hold down the power switch for about a second to turn off the power and unplug the AC cable and Ethernet or USB cable before installing options. - Page 23 Installing Options Printer Driver Configuration For Windows PS Driver Click [Start] > [Devices and Printers]. Note Right-click the [OKI MB491(PS)] icon You must be logged in as an administrator to complete this and then select [Printer properties]. procedure. (If you have installed multiple printer ...
- Page 24 Installing Options If the optional tray is already mounted, click [Second Tray], and then click [OK]. For Mac OS X PCL/PS Driver (Mac OS X 10.4.0 to 10.4.11) Memo The following procedure uses Mac OS X 10.4.11 as an example.
-
Page 25: Operator Panel
Operator Panel Operator Panel This section explains the names and functions of components on the operator panel and how to enter text. Name Function Display screen Displays operating instructions and the status of the machine. Main function keys Switches functions. The selected key lights up in blue. <COPY>... -
Page 26: Default Screen
Operator Panel Name Function <LEFT> key Returns to the previous screen. Shifts the highlighted selection to the left while an item is selected or characters are entered. <RIGHT> key Proceeds to the next screen. Shifts the highlighted selection to the right while an item is selected or characters are entered. -
Page 27: Entering Text
Operator Panel Entering Text Using the Ten-key Pad You can also use the ten-key pad to enter alphanumeric characters and symbols in the Press to select the character entry screen. you want, and then press You can enter the numbers labeled on each key, as well as the other characters by pressing the keys repeatedly. - Page 28 Operator Panel Using the QWERTY Keyboard Deleting the Entered Text (MB471, MB471w, MB491, ES4191 MFP) You can delete text in the text field in the following ways. You can also use the QWERTY keyboard to enter alphanumeric characters and symbols in the ...
-
Page 29: Loading Paper And Documents
Loading Paper and Documents Loading Paper and Documents This section explains the specifications for paper and documents, and how to load them. Paper Supported Paper Types For high-quality printing and to avoid printing problems, be sure to use the supported paper types. Please use digital photo print paper. - Page 30 Loading Paper and Documents Paper Type Paper Size mm (inch) Paper Weight Envelope Monarch 98.4 x 190.5 Envelopes should be 88 g/m (24lb) (3.875 x 7.5) paper, and flap parts of envelopes should be folded Com-9 98.4 x 225.4 (3.875 x 8.875) Com-10 104.8 x 241.3 (4.125 x 9.5)
-
Page 31: Paper Recommendations
Loading Paper and Documents Paper Recommendations Storing Paper Your MFP will handle a variety of print media, Store paper under the following conditions to including a range of paper weights and sizes. maintain quality: This section provides general advice on choice of ... -
Page 32: Loading Paper
Loading Paper and Documents Loading Paper Your machine has two built-in trays (tray 1 and the MP tray) (MB441, MB461 and ES4161 MFP is Manual Feeder) and an optional tray (tray 2). The Optional tray (Tray2) is only available on MB461, MB471, MB471w, MB491, ES4161 MFP, and ES4191 MP. - Page 33 Loading Paper and Documents Supported paper Tray Paper capacity Paper weight size MP Tray A4 100 sheets Light (MB451/ A5 (when paper weight is 60 to 63 g/m (16 to 17 lb) MB451w/ B5 80 g/m ...
- Page 34 Loading Paper and Documents Loading Paper on the MP Tray Flex paper back and forth, and then fan (MB451/MB451w/MB471/ it. Straighten the edges of the paper stack on a level surface. MB471w/MB491/ES4191 MFP) The following procedure explains how to load paper in the MP tray.
- Page 35 Loading Paper and Documents Loading Paper in the Manual Insert the paper with the print side face Feeder (MB441/MB461/ES4161 up until its edge touches the paper feed entrance. MFP) The following procedure explains how to load Note paper in the Manual Feeder. ...
- Page 36 Loading Paper and Documents Configuring the Tray Settings Registering Custom Sizes After you load paper in tray 1, tray 2 (optional), To load custom size paper, you need to register or the MP tray, you need to register the loaded the width and length of the paper before printing.
-
Page 37: Paper Output
Loading Paper and Documents Enter the desired value using the ten-key Using the Faceup Stacker pad and then press Delivers paper with the print side face up. Press the to move to the next box. Note The faceup stacker is not available in duplex printing. Pull the faceup stacker on the rear side of the machine and open it toward you. -
Page 38: Scannable Area
Loading Paper and Documents Scannable Area Loading Documents on the ADF Load your documents face up on the ADF. The text or images on the shaded area shown If your documents are portrait, load them with the below are not scanned. top edge of the documents in first. - Page 39 Loading Paper and Documents If your document is landscape, align its right edge to the upper-left corner of the glass. Close the document glass cover gently. Reference Set [Document Direction] according to the direction of your document to get the output you want. The factory default is [Portrait].
-
Page 40: Basic Settings For Faxing (For Mb451, Mb451W, Mb471, Mb471W, Mb491, Es4191 Mfp Only)
Basic Settings for Faxing (for MB451, MB451w, MB471, MB471w, MB491, ES4191 MFP only) Basic Settings for Faxing (for MB451, MB451w, MB471, MB471w, MB491, ES4191 MFP only) This section explains basic settings for faxing. Be sure to configure the following settings before you transmit faxes. Repeat step a until all characters Setting for Country Code required are entered. -
Page 41: Connecting A Telephone Line
Basic Settings for Faxing (for MB451, MB451w, MB471, MB471w, MB491, ES4191 MFP only) Connecting to the Public Line Connecting a Telephone Line (Connecting for Fax and Telephone) Depending on your environment, a method to connect the telephone line is different. Based on Plug one end of the [Telephone cable] the following figures, connect the line for your into the [LINE connection] of your... -
Page 42: Other Cases
Basic Settings for Faxing (for MB451, MB451w, MB471, MB471w, MB491, ES4191 MFP only) Connecting to IP Telephone - Picking up the telephone receiver when sending or receiving a fax may interrupt pictures or cause communication error to occur. Plug the [Telephone cable] connected to the IP - The fax transfer function is not able to work from the telephone into the [LINE connection] of your external telephone. -
Page 43: Settings For Each Dialing Type
Basic Settings for Faxing (for MB451, MB451w, MB471, MB471w, MB491, ES4191 MFP only) Connecting PBX, Home Telephone or Connecting as an Internal Telephone Business Phone Plug the [Telephone cable] connected to a control device including PBX, etc. into the [LINE Plug the [Telephone cable] connected to the connection] of your machine. -
Page 44: Setup Of Date/Time
Basic Settings for Faxing (for MB451, MB451w, MB471, MB471w, MB491, ES4191 MFP only) When the setup menu screen is displayed, Press the until the top screen is displayed. press to complete the setup. Setup of Date/Time Setup of Date/Time of your region. Reference ... -
Page 45: Pbx Connecting
Basic Settings for Faxing (for MB451, MB451w, MB471, MB471w, MB491, ES4191 MFP only) When the setup menu screen is displayed, Specifying Reception Mode press to complete the setup. The optimal reception mode differs depending on the environment for your machine. Refer to the following description. -
Page 46: Connecting To A Computer
Connecting to a Computer Connecting to a Computer This section explains how to connect your machine to a computer and install a printer and fax driver. Connecting method You can select either of the following connection methods: "Network Connection" P. 47 ... -
Page 47: Network Connection
Connecting to a Computer Connecting using wireless LAN Network Connection (MB451w, MB471w only) Perform the following procedure to connect your machine to a computer via network. Configuring automatically using push-button method Connecting using wired LAN Use the WPS (push button) function to set the wireless LAN. -
Page 48: Pin Method
Connecting to a Computer Press the to select [Wireless Memo Setting], and then press the Start the WPS push button for wireless AP after clicking [Yes] in the confirmation screen. Alternatively, if WPS push button for wireless AP is started first, start the WPS push button on this equipment. - Page 49 Connecting to a Computer switching to the screen in step 6. If the SSID is not set, a warning screen is displayed. Enter the SSID name (within 1-32 characters) of the wireless AP that you want to connect to. After entering the SSID, move the cursor to the [Done] field and press Memo ...
- Page 50 Connecting to a Computer Note Memo There is not setting for the WEP KEY index. The WEP After entering the KEY, the key is displayed as "*" KEY index communications with the wireless AP as 1. symbols for security reasons. b) Enter the same KEY as the WEP KEY set In the confirmation screen, check the for the wireless AP that you want to...
-
Page 51: For Windows
Connecting to a Computer Press the to select [Network Setup], Log in as the administrator. and then press the Press the to select [Network Menu], and then press the Press the to select [Wireless Setting], and then press the Press the to select [Network Setup], and then press the Press the... - Page 52 Connecting to a Computer If setting the IP address manually, check Memo that [Manual] is selected, and press If configuring a small network consisting of only your machine and a computer, set IP addresses as shown below (according to RFC1918). For the computer IP address : 192.168.0.1~254...
- Page 53 Connecting to a Computer Select the checkbox for the printer driver Next, install the printer and fax driver into the and fax driver you wish to install, and click computer. the Install bunch button. Note To complete this procedure, you must be logged in as an Memo administrator.
-
Page 54: Installing A Printer Driver
Connecting to a Computer Installing a Printer Driver (For Mac OS X) To complete the network connection with a Mac operating system, install a printer driver on the computer and set your machine as a network printer. Select the protocol for your network connection from the following: ... - Page 55 Connecting to a Computer Next, install the driver in the computer. Select the name of your machine and then check that [OKI MB491(PS)] is Insert the "Software DVD-ROM" into the displayed in [Print Using]. computer. Double-click the [OKI] icon on the desktop.
- Page 56 Connecting to a Computer Using EtherTalk Select [Network Port Configurations] (For Mac OS X 10.4.0 to 10.4.11) from [Show], and then check that [Built-in Ethernet] is selected. When connecting to the network with EtherTalk, it is necessary to enable EtherTalk in the machine.
- Page 57 Connecting to a Computer Click [Add]. Click [OK]. Remove "Software DVD-ROM" from the computer. The installation is complete. Using Bonjour (For Mac OS X 10.5 to 10.7) Then, install the driver in the computer and set If the [You have no printers available] dialog the machine as a network printer.
- Page 58 Connecting to a Computer Click [Default]. Note If [OKI MB491(PS)] or [OKI MB491(PCL)] is not correctly displayed in [Kind], click [-] to remove your machine from [Print & Fax] and then Redo the procedure from step 8 to 12. Close [Print &...
-
Page 59: Usb Connection
Connecting to a Computer Double-click [Driver] folder > [PS] or Check that the name of your machine is [PCL] folder [Installer for Mac OSX]. displayed in [Printer List], and then close the window. Enter the administrator password, and then click [OK]. Follow the instructions displayed on the screen to complete the installation. - Page 60 Connecting to a Computer Installing a Printer and Fax Driver Hold down the power switch for about a second to turn on the power and the (For Windows) computer. Reference Note "Turning Off Your Machine" P. 20 You must be logged in as an administrator to complete this procedure.
- Page 61 Connecting to a Computer Select the checkbox of the printer driver, Click the [Exit] button. fax driver or both you want to install, and Remove "Software DVD-ROM" from the click the Install bunch button. computer. The installation is complete. Memo ...
- Page 62 Connecting to a Computer Click [+]. Close [Print & Scan](Mac OS X 10.5 and 10.6:[Print & Fax]). Remove "Software DVD-ROM" from the computer. The installation is complete. For Mac OS X 10.4.0 to 10.4.11 Memo The procedure below uses Mac OS X 10.4.11 as an example.
- Page 63 Connecting to a Computer Select the name of your machine whose [Connection] is [USB], and then check that [OKI MB491(PS)] or [OKI MB491(PCL)] is displayed in [Print Using]. Click [Add]. Check that the name of your machine is displayed in [Printer List], and then close the window.
-
Page 64: Configuring The Network Settings
Configuring the Network Settings Configuring the Network Settings This section describes the setup required for using Scan To E-mail, Scan To Network PC, Scan To Fax Server, Internet Fax functions. The above functions enable you to send scanned data to a computer via the network connection. To use them, you need to set up your machine and the computer to which you want to send scanned data. -
Page 65: Checking The Common Setup Information
Configuring the Network Settings Checking the Common Setup Setting Up Scan To E-mail and Information Internet Fax Check the common setup information for Scan To The Scan To E-mail, Scan To Fax Server and E-mail, Scan To Network PC, Scan To Fax Server Internet Fax functions enable you to send and Internet Fax, and fill in the corresponding scanned images as an attached file of an e-mail... -
Page 66: Setting E-Mail Address For Machine
Configuring the Network Settings Setting the E-mail Address for Your On the [General] tab, enter the contents Machine of [Name] and [E-mail address] in B-9 and B-10 of the Setup Information Form. When sending data scanned from the machine by e-mail, the e-mail address for the machine is necessary.According to the following procedure, set the e-mail address of the machine and enter... -
Page 67: Setting Up Scan To Network Pc
Configuring the Network Settings Select [Enter] and then press When the setup menu screen is displayed, press Press the and then enter the information in B-1. Select [Enter] and then press Press the and then select a protocol for receiving e-mail for the machine, and The setup for Scan To E-mail, Scan To Fax Server then press and Internet Fax is complete. - Page 68 Configuring the Network Settings Select [See the name of this Memo computer] under [System]. If the computer name is over 16 characters, for Mac OS X 10.4.11 enter the first 15 characters in C-1. For Mac OS X Enter the name in [Computer name] in 10.5-10.6, select the network service you are using from C-1 of the Setup Information Form.
- Page 69 Configuring the Network Settings Enter the information in C-2 in the text Select the [Sharing] tab and then click box. [Share]. Select the user account created in step 5 from the drop down box, and then click Ensure that [Standard user] is [Add].
- Page 70 Configuring the Network Settings Click [Add]. Select [Limited] and click [Create Account]. Enter the value in C-2 in the entry field and then click [OK]. Click the icon of the user account created in step 5. Select [Create a password]. Enter the value of C-3 in [Type a new Select the user added in step 13 and password] and [Type the new...
- Page 71 Configuring the Network Settings Click [If you understand the security Click [Add]. risks but want to share files without running the wizard, click here.]. Enter the value in C-2 in the entry field and click [OK]. If the screen below appears, select [Share this folder] and click [Permissions].
- Page 72 Configuring the Network Settings For Windows Server 2003 Select [Share this folder] and then click [Permissions]. Memo The items here may differ depending on the edition you are using. Click [Start] > [Administrative Tools] > [Computer Management]. In the right window, double-click [System Tools] >...
- Page 73 Configuring the Network Settings For Mac OS X 10.5 to 10.7 Check that an account is added to [Other Users] (for Mac OS X 10.5 and From the Apple menu, select [System 10.6: [Other Accounts]) with the name Preferences]. of C-2, and close [Users &...
- Page 74 Configuring the Network Settings For Mac OS X 10.4.0 to 10.4.11 Select the account created in step 8 and click [Select]. Memo The following procedure uses Mac OS X 10.4.11 as an example. Depending on an OS, the description may be different.
- Page 75 Configuring the Network Settings Check that an account is added to Close [Sharing]. [Other Accounts] with the name of C-2, Proceed to "Creating a Profile for Scan To Network PC". and close [Accounts]. Creating a Profile for Scan To Network PC Register the information on the Information form on the computer as a profile.
-
Page 76: Managing Profiles
Configuring the Network Settings Modifying a Profile Enter the information in C-2. Note Press the <SETTING> key on the If domain management is performed, enter "C-2@domain name". operator panel. When carrying out domain management, if you cannot Press the to select [Profile] and then connect even after entering "C-2@Domainname", delete "@Domainname". -
Page 77: Printing Configuration
Printing Configuration Printing Configuration This section explains how to print the Configuration on which you can check the detailed information of your machine, such as the settings and status of your machine. Printing Procedure Press the <SETTING> key on the operator panel. -
Page 78: Copying
2. Copying This chapter explains the basic operation and settings for your machine's copy function. Basic Operation This section explains how to start and cancel copy jobs. Starting a Copy Job Canceling a Copy Job in Progress Press the <COPY> key on the operator panel to open the copy standby screen. -
Page 79: Configuring Copy Settings
Configuring Copy Settings Configuring Copy Settings You can change the copy settings to alter the output to suit your needs. Each setting can be configured from the [Change Settings] menu on the copy standby screen. Perform the following procedures at step 3 of "Starting a Copy Job"... -
Page 80: Changing Image Orientation Of Document (Direction)
Configuring Copy Settings Using [Auto] When the pop-up message is displayed, press the to select [Start] and By selecting [Auto], the zoom ratio is then press automatically determined according to the selected scan size and paper tray. Note You can use [Auto] only when copying on A4, A5, A6, B5 letter, legal 13/13.5/14, and executive paper. -
Page 81: Enabling Continuous Scan Mode (Continuous Scan)
Configuring Copy Settings Press the until the start screen is Press the to enter the [Change displayed. Settings] menu. Note Press the to select [Continue Scan] When [Paper Feed] is set to [Auto], some values cannot and then press be selected. -
Page 82: Making Duplex Copies (Duplex Copy)
Configuring Copy Settings Press the to select the desired value Making Duplex Copies (Duplex and then press Copy) Settable Values for Printing Method: You can copy 1-sided (simplex) and 2-sided OFF (Simplex)* (duplex) documents on to one side (simplex) or Simplex document →... -
Page 83: Adjusting The Background Removal
Configuring Copy Settings Press the to select [Image Settings] Press the to select the desired and then press value and then press Press the to select [Document Type] Settable Values: and then press Press the to select a document type *indicates the factory default. -
Page 84: Resetting Copy Settings
Configuring Copy Settings Resetting Copy Settings Auto Reset All settings you configured for your copy job return to their default values if no operation is made for a set period of time. The auto reset time is set to 3 minutes as the factory default setting. -
Page 85: Faxing (For Mb451, Mb451W, Mb471, Mb471W, Mb491, Es4191 Mfp Only)
3. Faxing (for MB451, MB451w, MB471, MB471w, MB491, ES4191 MFP only) This chapter explains basic settings and operations for faxing, scanning to fax server and Internet faxing and operations on managing the phone book. Basic Procedure for Faxing This section explains basic operations for transmitting faxes. You need to configure the initial settings before using the fax function. -
Page 86: Specifying A Destination
Basic Procedure for Faxing Enter "Pause" and "#" by pressing <#> on the Specifying a Destination ten-key pad. When you press <#>, you toggle between "P" and "#". You can specify a destination in the following six Pause ways: Pauses a few seconds when dialing. -
Page 87: Deleting Specified Destinations
Basic Procedure for Faxing Using Transmission and Reception Deleting Specified Destinations History Select the specified destination on the You can select a destination from the 50 most fax start screen by pressing and then recent transmissions or receptions. press Press the to select [Tx History] or [Rx History] and then press Press the... -
Page 88: Configuring Fax Settings
Configuring Fax Settings Configuring Fax Settings You can configure the fax settings to alter the output to suit your needs. Each setting can be configured from the [Fax Functions] menu on the fax start screen. Perform the following procedures at step 6 of "Sending a Fax"... -
Page 89: Checking And Canceling Fax Transmission
Checking and Canceling Fax Transmission Checking and Canceling Fax Transmission This section explains how to check or cancel fax jobs. Checking Transmission and Canceling Fax Transmission Reception History You can cancel a job that is being transmitted as long as the message indicating the job has been You can check transmission and reception history completed has not appeared. -
Page 90: Machine Behavior In Fax Reception
Machine Behavior in Fax Reception Machine Behavior in Fax Reception This section explains how your machine behaves when receiving and printing faxes. Reception Behavior Memo If you often receive calls, it is recommended that you activate [Tel Priority Mode]. For more detailed The machine behavior differs depending on the information on [Tel Priority Mode], please refer to User's specified reception mode. - Page 91 Machine Behavior in Fax Reception When using two numbers with distinct rings(DRD) This mode is programmed for the fax to answer only on a distinctive ring. You can have a signal phone line to have two numbers with distinct rings, one for regular phone calls and one for fax. If the phone line is in use, and there is an incoming fax, the sender will receive a busy signal.
-
Page 92: Printing Received Faxes
Machine Behavior in Fax Reception When Unable to Print Received Printing Received Faxes Faxes The machine automatically prints out the received When the machine cannot print received faxes fax. You can specify the paper tray to use. due to a lack of paper or paper jams, it stores the received fax data temporarily in memory. -
Page 93: Phone Book
Phone Book Phone Book This section explains how to register fax numbers in the phone book, and how to edit or delete registered numbers. In the phone book, you can set frequently used numbers to speed dial and also create groups of numbers to which you can broadcast faxes. -
Page 94: Deleting
Phone Book Press the to select a group number Repeat steps 4 to 11 in "Registering and and then press Editing" P. The fax number is automatically entered. You do not have to enter it manually. Deleting Press the <SETTING> key on the Check that [Register] is selected and operator panel. -
Page 95: One-Touch Key Pad
Phone Book Importing Addresses from a File. Press the to select [Delete] and then press Select from which device to import, from [Registered Device Table]. Press the to select [Yes] and Select the [User Setting] tab. then press Click on [Speed Dial Manager]. Memo ... -
Page 96: Basic Procedure For Scan To Fax Server
Basic Procedure for Scan To Fax Server Basic Procedure for Scan To Fax Server This section explains basic operations for data transmission to the fax server. The FaxServer function allows you to transmit fax data as a file attached to an e-mail. A document is scanned and converted to a TIFF file. -
Page 97: Deleting The Specified Destination
Basic Procedure for Scan To Fax Server The box is checked. You can select multiple entries. When you have selected all the destinations, press the Check that [Complete] is selected, and then press Direct Input This is the same as the fax function. Using the Tx History You can select a destination from the recently called 50 recipients listed on the transmission... -
Page 98: Basic Procedure For Internet Faxing
Basic Procedure for Internet Faxing Basic Procedure for Internet Faxing This section explains basic operations for transmitting Internet faxes. The Internet fax function allows you to transmit fax data as a file attached to an e-mail. A document is scanned and converted to a TIFF file. -
Page 99: Specifying A Destination
Basic Procedure for Internet Faxing Using the Transmission History Specifying a Destination You can select a destination from transmission You can specify a destination in the following five histories. ways: Using the address book Note Using a group ... -
Page 100: Checking, Deleting, And Changing Destinations
Basic Procedure for Internet Faxing Using LDAP Search Check that [Search Method] is selected and press You can search for a destination that is on the Select either [OR] or [AND] and press LDAP server. You can select either [Simple Search] or Press , select [User name], and then [Advanced Search] for the method of... -
Page 101: Canceling Transmission
Basic Procedure for Internet Faxing Check that [Close the list] is selected Press the to select the destination you and then press want to change and then press The check box is selected. You can select multiple Deleting a Destination addresses. -
Page 102: Scanning
4. Scanning This chapter explains the basic operation and settings for your machine's scanning functions. Installing Scanner Drivers (TWAIN/WIA/ICA Driver) This section explains the procedure to install the scanner driver. Before using scan function, install the scanner driver. You can install TWAIN driver and WIA (Windows only) driver at the same time. Install the TWAIN driver and ICA driver (dedicate to the Mac OS X) separately. -
Page 103: For Mac Os X
Installing Scanner Drivers (TWAIN/WIA/ICA Driver) Check the checkbox of [Network Enter the host name, IP address and port scanner] and click [Next]. number and then click [Configure]. Click [Next]. Select [IP Address] or [Search MFP] check box to enter the address of the machine and then click [Next]. - Page 104 Installing Scanner Drivers (TWAIN/WIA/ICA Driver) Click [Continue]. Click [Install]. To change the installation location of the driver, click [Change Install Location]. Click [Continue]. Enter the administrator name and password, and click [OK]. Click [Continue Installation]. Check the display and click [Continue] if Click [Restart].
-
Page 105: Using Actkey Software
Installing Scanner Drivers (TWAIN/WIA/ICA Driver) Using ActKey Software Using the ActKey, you can start a scan job in specified settings with a click a button. Memo ActKey does not support Mac OS X. Using WSD Scanning, Actkey does not work. ... -
Page 106: Setup To Use The Wsd Scan
Setup to use the WSD Scan Setup to use the WSD Scan The following explains how to set up the PC to use the WSD Scan function. In order to use the WDS Scan function, install this device on the PC. WSD Scan can be used from Scan To Local PC and Scan To Remote PC via Network. -
Page 107: Scanning Methods
Scanning Methods Scanning Methods This section explains the basic operation of the scan function. In scan mode, you can use five scan functions, scan to e-mail, scan to USB memory, scan to network computer, scan to local computer and PC scan. - Page 108 Scanning Methods When you have selected all the When you have selected all the destinations, press the destinations, press the Check that [Complete] is selected and Check that [Complete] is selected and then press then press Press the to return to start screen. Press the to return to start screen.
-
Page 109: Scan To Network Pc
Scanning Methods Scan to Network PC Scan to USB Memory You can send a scanned document to a server on You can save the scanned document in a USB the network. memory. The document is scanned and converted to a PDF, JPEG, TIFF, or XPS file. -
Page 110: Scan To Local Pc
Scanning Methods Press the to select [Local PC] and Scan to Local PC then press You can save the scanned data into your local computer. If the Network TWAIN setting is set to [Disable], proceed to step 6. When you press the , the scan OLOR job starts and the ActKey utility and the TWAIN... -
Page 111: Scan To Remote Pc
Scanning Methods Press the to select [Select An Scan to Remote PC Application] and then press This function launches the Scanner driver from a Press the to select where to send the utility installed on a PC (ActKey, PaperPort, Image, Adobe Photoshop CS3, etc.) and starts scanned document and then press scanning. - Page 112 Scanning Methods Simple Scan Mode - If you select [OKI MB4x1_ES41x1_MPS42x USB], proceed to step 10. - If you select [OKI MB4x1_ES41x1_MPS42x For Windows Network] and the network scan is the second or more scanning, proceed to step 10. Press the <SCAN>...
- Page 113 Scanning Methods For Mac OS X Secure Scan Mode (For USB Connection) Press the <SCAN> key on the operator panel. For Windows Place your document with text face up in the ADF or face down on the document Press the <SCAN>...
-
Page 114: Canceling The Current Scan Job
Scanning Methods Click a scan button. Scanning starts. Select [Quit Photoshop] from [Photoshop]. WSD Scan (For Network Connection) For Windows Press the <SCAN> key on the Operation Panel. Place the original on the automatic document feeder or on the scanner glass. Press the to select [Remote PC] and then press... -
Page 115: Registering Address Book
Registering Address Book Registering Address Book This section explains how to register and delete the address book and group list. You can register e-mails to the address book and create groups for broadcasting messages. The Address Book and the Group List can be used to specify the destination in Scan to e-mail and Internet fax functions. -
Page 116: Group List
Registering Address Book Press the to select [E-mail Group] Group List and then press You can create up to 20 groups of e-mail addresses. Press the to select a group number Registering and Editing and then press Press the to select [Delete] and then Reference press ... -
Page 117: Registering Network Scan Destinations
Registering Network Scan Destinations Registering Network Scan Destinations This section explains how to register a PC connected to the Network. You can register locations on a network to which you can scan documents. Memo You can also register network-connected PCs with ActKey in Network Configuration. You can register or delete network- connected PCs with Network Configuration;... -
Page 118: Using As A Printer
5. Using as a Printer This chapter describes how to print documents from a computer or USB memory. Printing from a Computer This section explains how to print from a computer. Memo This section uses Wordpad in Windows and TextEdit in Mac OS X as examples. The display and procedure may differ according to the operating system, the applications, and the version of the printer driver you are using. - Page 119 Printing from a Computer For Mac OS X PS Printer Driver Select the [Paper/Quality] tab. Select a tray from [Paper Source]. From the [File] menu, select [Page Setup]. Select the printer you want to use from [Format For]. Click [Advanced]. Select a paper size from [Paper Size] Click [Paper Size] and select a paper and then click [OK].
-
Page 120: Canceling A Print Job
Printing from a Computer Click [Print]. Click [Print]. Memo For Mac OS X PCL Printer Driver For general use, [Printer Setting] suffices for a paper weight. When you select [Printer Setting], the paper weight setting configured on the equipment setting menu From the [File] menu, select [Page Setup]. -
Page 121: Printing From Usb Memory
Printing From USB Memory Printing From USB Memory This section explains how to print from the USB memory. Inserting the USB memory into the machine, you can print documents stored in it directly. Note Not all USB memory products are guaranteed to work. (USB memory with security functions is not supported.) ... -
Page 122: Configuring Print Settings
Printing From USB Memory Doing Duplex Printing (Duplex) Remove the USB memory from the port after a message is displayed indicating that it is OK to remove the USB memory. You can make 1-sided (simplex) or 2-sided (duplex) printouts. Configuring Print Settings Note ... -
Page 123: Canceling A Print Job
Printing From USB Memory Press the to select [Fit] and then press Press the to select [ON] for matching the paper size or [OFF] for not resizing the page size and then press Press the to return to the start screen. Canceling a Print Job You can cancel a print job from the USB memory by pressing the <STOP>... -
Page 124: User Authentication And Access Control
6. User Authentication and Access Control This chapter explains the user authentication and access control functions. About User Authentication and Access Control The user authentication and access control functions allow you to limit the functions available to each user. If the access control is enabled, the user authentication is required before using the machine. If the authentication succeeds, only functions specified in advanced can be used. -
Page 125: Authentication By Pin
Authentication by PIN Authentication by PIN This section explains how to enable the access control using the authentication by PIN and how to operate when the access control is enabled. Registering a PIN Operation When PIN Authentication Is Enabled Before enabling the user authentication and access control, be sure to register a PIN for each user. - Page 126 Authentication by PIN Enter the user name in [User Name] Press the on the confirmation and the PIN in [Job Account ID]. screen to select [Yes] and then press Memo After a certain period of time, the machine automatically logs out users.
- Page 127 Authentication by PIN Click [Save]. Click [Start] and select [Devices and Printers]. If a message is displayed asking you to Right-click the OKI MB491 icon and input the user password, enter the password and click [OK]. select [Printer properties] > [OKI MB491(*)].
-
Page 128: Authentication By User Name And Password
Authentication by User Name and Password Authentication by User Name and Password This section explains how to enable the access control using the authentication by the user name and password and how to operate when the access control is enabled. Press the until the message of "Access Registering User Name and... - Page 129 Authentication by User Name and Password Enter the user name in [Username] and Press the on the confirmation the password in [Password]. screen to select [Yes] and then press Clicking [Use Windows Login] automatically enters your login name on Windows. Memo ...
-
Page 130: Faxing From A Computer
Authentication by User Name and Password Faxing From a Computer (For Windows Only) Memo This procedure uses NotePad as an example. The procedures and menus may differ depending on the OS you use. Open the file you want to fax. From the [File] menu, select [Print]. -
Page 131: Troubleshooting
7. Troubleshooting This chapter provides solutions to the problems you may encounter while operating your machine. Paper Jams This section explains how to clear paper jams. Reference For details on the location of each component of the machine, refer to "Cleaning Your Machine"... - Page 132 Paper Jams Carefully lift out the image drum, complete Insert rear projections , located close with the toner cartridge. Be careful not to to both handles of the transcription unit, touch or scratch the green drum surface. into both mounting holes of the printer. Remove the Image Drum as described in Secure the transcription unit to the step 3, then, remove the Duplex unit (1)
- Page 133 Paper Jams Error Code 380, 381, 382, 389 If neither the top or bottom end of paper (Paper feed jam) is visible, move the jammed paper in the arrow direction as shown. Hold the top end of paper with your hands and Remove any documents from the carefully pull out the paper.
- Page 134 Paper Jams Steps (A)1 and (A)2, pull out the paper by following Steps (B). (A)1 (A)2 Close the top cover. (B)1 (B)2 Close the scanner unit. Error Code 390 (Paper feed jam (Multipurpose tray)) Remove any documents from the document tray. ...
- Page 135 Paper Jams Error Code 391, 392 (Paper feed jam) If neither the top or bottom end of paper is visible, move the jammed paper in the arrow direction as shown. Hold the top Error Code 391 indicates an error in Tray1 and end of paper by your hands and carefully Error Code 392 indicates a paper jam in Tray2.
- Page 136 Paper Jams Document Jam Hold the jammed document by the top edge, and gently pull it out. When you can see the document In the Duplex Paper Path Open the ADF cover, and pull the document out upward. If the edge of the document can been seen under the paper guide (1), lift the paper guide and then pull out the document.
-
Page 137: Error Messages
Error Messages Error Messages This section explains the causes and remedies for the error messages displayed on the display screen and the function of the <STATUS> key. Error Messages Displayed on the Screen Memo In the following lists: - "%COLOR%"... - Page 138 Error Messages Error <Status> Message Cause/Remedy code %COLOR% Toner cartridge not Blinks The toner cartridge of the indicated color is not installed. : %ERRCODE% properly installed. Reinstall it properly. 613 : K Please see Help for details. %COLOR% Toner cartridge not installed. Lights up The toner cartridge of the indicated color is not properly installed.
- Page 139 Error Messages Error <Status> Message Cause/Remedy code Disk Use Failed %FS_ERR% Blinks A disk operation error has occurred. Please see Help for details. to Close Please check data. Lights up Failure to write message data to be uploaded. Message Data Write Error : %CODE%. Contact your dealer.
- Page 140 Error Messages Error <Status> Message Cause/Remedy code Power OFF/ON Blinks An error has occurred in the device. %ERRCODE%: Error %FATALSTRING1% Turn the machine off and then on again. If the same error occurs, turn the machine off and then on again. If the error is not resolved, or the same error occurs again, contact your dealer.
- Page 141 Error Messages Error <Status> Message Cause/Remedy code Paper Size Error Blinks Paper of an improper size is being used. Please open the scanner unit and the top Check the paper in the tray or check for Multiple- cover feed. Open and close the cover to perform and check paper size.
- Page 142 Error Messages Error <Status> Message Cause/Remedy code Communication Error Blinks Fax transmission and reception have been canceled due to errors. to close Telephone Lights up The telephone is being used. Wait for the call on the telephone lines to end. Please see Help for details.
- Page 143 Error Messages Error <Status> Message Cause/Remedy code Writing Failed Blinks Writing to the USB memory has failed. Remove the write-protection of the connected USB memory. Please see Help for details. to close USB Memory disconnected. Blinks USB memory is not connected to the machine and the machine cannot store data.
- Page 144 Error Messages Error <Status> Message Cause/Remedy code Getting target IP failed. Blinks The machine could not get IP address from DHCP Please check DHCP Settings. server. Check the network configuration, cable connection and status, and the server status. Please see Help for details. Please check DNS settings.
- Page 145 Error Messages Error <Status> Message Cause/Remedy code Please change File Name. Blinks A file name was not authorized by the server. Change the file name. If using an FTP server to save data with Scan Please see Help for details. to Network PC, there are some machines that cannot be connected correctly due to to close...
- Page 146 Error Messages Error Messages for Printing Error <Status> Message Cause/Remedy code Offline Mode Lights up The machine is off line and cannot start a print job. Press the <PRINT> key on the operator panel and then select [Online/Offline] on the print menu screen.
- Page 147 Error Messages Error <Status> Message Cause/Remedy code Received invalid data. Lights up The machine deleted an expired secure Job. Please see Help for details. to close Please install paper on MP Tray. : 490 Blinks The MP tray is empty. Please set paper (%MEDIA_SIZE%) Load the indicated size paper.
-
Page 148: Checking The Machine's Status From The
Error Messages Checking the Machine's Status From the <STATUS> Key From the <STATUS> key on the operator panel, you can check the status of your machine. Checking the Trouble Status The <STATUS> key blinks or lights up when any trouble is occurring in your machine. Press it to check the trouble status.Key -
Page 149: Other Issues
Other Issues Other Issues This section explains the issues you may encounter while operating your machine and how to solve them. Unable to Print from a Computer Memo If the following information does not solve the trouble, contact your dealer. ... -
Page 150: Network Connection Problems
Other Issues Cause Remedy Reference The Job Type of "Secure Print", "Store to For Windows PCL Driver Advanced HDD" and "Encrypted Secure Print" are 1.Click [Start] > [Devices and Printers]. unselectable on the MB491. 2.Right-click the [OKI MB491(PCL)] icon and select [Printer properties]. -
Page 151: Unable To Install A Printer Driver Successfully
Other Issues Cause Remedy Reference All pages are not printed. If you are using the WSD port, change it to the standard TCP/IP port. USB Connection Problems Common to Windows and Mac OS X Cause Remedy Reference Unsupported USB cable is being used. Use a USB2.0 cable. -
Page 152: Restrictions On Each Os
Other Issues Cause Remedy Reference Only the first printer driver is installed 8. On the [Devices and Printers], right-click the icon even if multiple printer drivers are of the second or later driver and select [Printer selected to install. properties] ( [OKI MB491(*)] when multiple driv- ers are installed). - Page 153 Other Issues Restrictions on Windows Server 2003 Service Pack 1 and Windows XP Service Pack 2 Restrictions on Windows Firewall On Windows Server 2003 Service Pack 1 and Windows XP Service Pack 2, the Windows firewall functionality is enhanced. The following restrictions may apply to printer drivers and utilities. Memo ...
- Page 154 Other Issues Item Symptom Cause/Remedy Web Driver Unable to access the machine from a remote Click [start] and then select [Operator Installer computer. panel] > [Security Center] > [Windows Firewall]. Select the [Exception] tab and click [Add Port]. Add the port number of the web site on which Driver Installer is installed.
-
Page 155: Copying Issues
Other Issues Copying Issues Memo If the following information does not solve your trouble, contact your dealer. Unable to Copy Symptom Point to check Remedy Reference Unable to copy. Is the machine turned on? Hold down the power switch for P.20 about a second to turn on the power. - Page 156 Other Issues Symptom Point to check Remedy Reference Unable to copy. Is the Continuous Scan mode on? Select [Scan completed] on the P.81 display screen. Is the machine off line? Press the <PRINT> key on the operator panel, and then select [On-Line/Off-Line].
-
Page 157: Faxing Issues
Other Issues Faxing Issues Memo If the following information does not solve the trouble, contact your dealer. Unable to Send a Fax Symptom Point to check Remedy Reference Unable to send a fax. Did you perform the correct Check the appropriate procedure P.85 procedure? and try again. -
Page 158: Scanning Issues
Other Issues Unable to Send or Receive a Fax Symptom Point to check Remedy Reference Unable to send or Is the telephone cable connected Check the connection of the P.41 receive a fax. properly? telephone cable. Did you install an IP phone on the Press the <SETTING>... -
Page 159: Image Quality Issues
Other Issues Symptom Point to check Remedy Reference Transmission and Not connected to a wireless access Check that the wireless access reception of e-mail point. point power is switched on. not possible. Check the wireless access point settings, and then try the manual settings or automatic settings. - Page 160 Other Issues Symptom Point to check Remedy Reference Printed images are light. The toner cartridge is not installed Install the toner cartridge properly. P.168 properly. The toner is low. Replace the toner cartridge. P.168 The paper is moist. Use paper stored under proper P.31 temperature and humidity conditions.
- Page 161 Other Issues Symptom Point to check Remedy Reference Toner comes off when it The settings of media type and Press the <SETTING> key and P.36 is rubbed. width are incorrect. select [Paper Setup] > the paper tray you are using, and then select the proper values for [Media Type] and [Media Weight].
-
Page 162: Feeding Issues
Other Issues Symptom Point to check Remedy Reference The printed image is The document is loaded Load the document properly. P.38 skewed. improperly. An unsuitable document is loaded Load a suitable document in the P.38 in the ADF. ADF. Foreign materials may be present Clean the ADF document glass. -
Page 163: Machine Issues
Other Issues Symptom Point to check Remedy Reference Paper does not feed into The setting of [Paper Feeding Check the paper tray and select the machine. Source] on the printer driver is the correct tray in [Paper not correctly specified. Feeding Source] on the printer driver. - Page 164 Other Issues Symptom Point to check Remedy Reference The machine does not An error is displayed on the panel. Check the error code and follow P.137 start printing. the on-screen instructions. The Ethernet or USB cable is Plug in the Ethernet or USB cable P.47 unplugged.
- Page 165 Other Issues Symptom Point to check Remedy Reference A print job has stopped As a result of processing print jobs Wait for a while. in the middle of the continuously, the fuser unit has When the fuser unit gets cooler, printing process.
-
Page 166: When The Power Goes Out
Other Issues When the Power Goes Out Machine Behavior When the power goes out, the machine behaves in the following way: Machine's Status Behavior During a call You can continue talking. During transmitting a fax The communication stops. When the electricity supply is restored, ... -
Page 167: Maintenance
Note Use only genuine Oki Data consumable items to ensure optimum quality. Service for problems caused by the use of consumable items other than genuine OKI consumables is not covered under the warranty or in the maintenance contract. -
Page 168: Replacing Toner Cartridges
Replacing Consumable Items Unpack the new toner cartridge. Replacing Toner Cartridges Hold the toner cartridge and gently shake it several times. Model Type Place the toner cartridge horizontally and partially remove the tape from it. MB451/ Starter toner cartridge Hold the toner cartridge with the tape face ... - Page 169 Replacing Consumable Items Procedure for Replacement Note The image drum (the green tube) is very delicate. Handle it carefully. Do not expose the image drum to direct sunlight or very bright interior light (approximately more than 1500lux). Even under the normal interior light, do not leave it for more than 5 minutes.
- Page 170 Replacing Consumable Items Replacing the Image Drum Note Always use a new image drum. An image drum that has (MB441, MB451, MB451w only) been attached or used on another printer cannot be used. Align both guide posts of the image drum with ...
- Page 171 Replacing Consumable Items Open the top cover and remove the used Align both guide posts of the image drum with their guide grooves on the printer, and gently image drum. set the image drum into the printer. Remove the image drum upward slowly. If the image drum is removed, the toner cartridge is also removed.
-
Page 172: Cleaning Your Machine
Cleaning Your Machine Cleaning Your Machine This section explains how to clean each part of your machine. moistened with neutral detergent, and then wipe it again Cleaning the Surface of the with a soft cloth lightly moistened with water. Machine Cleaning Document Feeding Rollers in the ADF... -
Page 173: Cleaning Paper Feed Rollers
Cleaning Your Machine For MP Tray (MB451, MB451w, Cleaning Paper Feed Rollers MB471, MB471w, MB491, ES4191 MFP only) Clean the paper feed rollers if paper jams occur frequently. Open the MP tray. For Tray 1 and Tray 2 Memo The following images use tray 1 as an example, but the same procedure applies to tray 2. -
Page 174: Cleaning Led Heads
Cleaning Your Machine Lightly wipe the lenses (2) of the LED Cleaning LED Heads heads with soft tissue paper. Clean the LED heads if vertical white lines appear, images are fading vertically, or the periphery of letters is smudged in the printouts. Dirt on the LED heads may also cause paper jams. -
Page 175: Moving Your Machine
Moving Your Machine Moving Your Machine This section explains how to move or transport your machine. Press the top cover open button (1) and Moving Your Machine open the top cover. Hold down the power switch for about a second to turn on the power. - Page 176 Moving Your Machine Protect your machine with packing materials. Lift your machine and put it in a box. Note Use the packing materials attached to your machine when purchased. Remove the vinyl tape to secure the image drum and toner cartridges after transporting or when reinstalling.
-
Page 177: Appendix
9. Appendix This chapter explains the specifications of your machine and information on consumables and optional components. Specifications (MB461/MB471/MB471w/MB491/ ES4161 MFP/ES4191 MFP) MFP Model Model Number MB461/ES4161 MFP N22205A, N22205B MB471 N22206A, N22206B MB471w N22207A, N22207B MB491/ES4191 MFP N22208A, N22208B ... - Page 178 Specifications (MB461/MB471/MB471w/MB491/ES4161 MFP/ES4191 MFP) MB461/ MB491/ MB471 MB471w ES4161 MFP ES4191 MFP Interface USB 2.0 (Hi-Speed), Ethernet 10BASE-T/ USB 2.0 (Hi-Speed), USB 2.0 (Hi-Speed), 100BASE-TX Ethernet 10BASE-T/ Ethernet 10BASE-T/ 100BASE-TX, 100BASE-TX IEEE820.11 b/g/n Wireless LAN Display Graphics panel 84.1(W) x 33.6(H) mm, 320 x 128 dots Supported OS ...
- Page 179 Specifications (MB461/MB471/MB471w/MB491/ES4161 MFP/ES4191 MFP) PC Fax Specifications MB461/ MB491/ MB471 MB471w ES4161 MFP ES4191 MFP Interface USB 2.0 (Hi-Speed), USB 2.0 (Hi-Speed), USB 2.0 (Hi-Speed), Ethernet 10BASE-T/ Ethernet 10BASE-T/ Ethernet 10BASE-T/ 100BASE-TX 100BASE-TX, 100BASE-TX IEEE820.11 b/g/n Wireless LAN Supported OS Windows 7, Windows Vista, Windows Server 2008 R2, Windows Server 2008, Windows XP, Windows Server 2003 ...
- Page 180 Specifications (MB461/MB471/MB471w/MB491/ES4161 MFP/ES4191 MFP) MB461/ MB491/ MB471 MB471w ES4161 MFP ES4191 MFP Supported mail Microsoft Office Outlook 2000, Microsoft Outlook Express 5.0/6.0, Windows Mail application (Windows Vista), Windows Live Mail, Mail (MAC built-in application), Lotus Notes/Domino Scan To Network PC Specifications MB461/ MB491/ MB471...
- Page 181 Specifications (MB461/MB471/MB471w/MB491/ES4161 MFP/ES4191 MFP) MB461/ MB491/ MB471 MB471w ES4161 MFP ES4191 MFP Print speed (A4) 600 x 600 dpi, 1200 x 1200 dpi, 600 x 600 dpi 1200 x 1200 dpi, 600 x 1200 dpi Simplex: Approx.33 ppm 600 x 600 dpi Simplex: Duplex: Approx.17 ppm...
- Page 182 Specifications (MB461/MB471/MB471w/MB491/ES4161 MFP/ES4191 MFP) MB461/ MB491/ MB471 MB471w ES4161 MFP ES4191 MFP Paper loading Tray 1 Tray 1 Tray 1 capacity 250 sheets of 250 sheets of Standard paper /80 g/m 250 sheets of Standard paper /80 total thickness 25mm or lower.
- Page 183 Specifications (MB461/MB471/MB471w/MB491/ES4161 MFP/ES4191 MFP) Network Specifications MB461/ MB491/ MB471 MB471w ES4161 MFP ES4191 MFP Interface Ethernet 10BASE-T/100BASE-TX Ethernet 10BASE-T/ Ethernet 10BASE-T/ 100BASE-TX, 100BASE-TX IEEE820.11 b/g/n Wireless LAN Protocol TCP/IPv4, TCP/IPv6, NetBEUI, NetBIOS TCP/IPv4, TCP/IPv6, TCP/IPv4, TCP/IPv6, over TCP, EtherTalk, NetWare, LPR, NetBEUI, NetBIOS NetBEUI, NetBIOS Port9100, IPP, FTP, HTTP, TELNET, SMTP,...
-
Page 184: Specifications (Mb441/Mb451/Mb451W)
Specifications (MB441/MB451/MB451w) Specifications (MB441/MB451/MB451w) MFP Model Model Number MB441 N22205B MB451 N22206B MB451w N22207B General Specifications MB441 MB451 MB451w Printer controller PowerPC405 , 330 MHz Scanner controller ARM9 max 266 MHz Memory Resident Printer controller 256 MB ... - Page 185 Specifications (MB441/MB451/MB451w) Copier Specifications MB441 MB451 MB451w Document , B5 , A5 , A4 , letter , legal 13/13.5/14, executive size Document , B5 , A5 , A4 , letter , executive glass First copy Mono 10 seconds or less (ADF, 10 seconds or less (ADF, 10 seconds or less (ADF, Time...
- Page 186 Specifications (MB441/MB451/MB451w) Scanner Specifications MB441 MB451 MB451w Scanner type Document Glass with ADF function Image sensor Color CIS Light source Document 60 to 105 g/m (16 to 28 lb) thickness Document 20 mm glass ADF document 50 sheets (80 g/m capacity Scanning 105 x 148 - 215.9 x 355.6 mm (4.13 x 5.8 - 8.5 x 14 inches)
- Page 187 Specifications (MB441/MB451/MB451w) Scan To Local PC Specifications MB441 MB451 MB451w Communication Windows TWAIN, WIA protocol Mac OS X TWAIN, ICA File format PDF, TIFF, JPEG, BMP, PCX, GIF, TGA, PNG, WMF, EMF Printing Specifications MB441 MB451 MB451w Printing method Dry electrophotographic recording method with LED (Light-emitting diode) Emulation T PCL6 (PCLXL), PCL5e...
- Page 188 Specifications (MB441/MB451/MB451w) MB441 MB451 MB451w Output method Face down Paper output capacity Face down 150 sheets (less than 80 g/m Print guaranteed area 6.35 mm or more from the paper edge (not applicable to special media such as envelopes) Print precision Print beginning:±...
- Page 189 Specifications (MB441/MB451/MB451w) MB441 MB451 MB451w Supported browsers Microsoft IE 6.0 or later, Safari 2.0 or later, Firefox 3.0 or later Wireless LAN Specifications MB441 MB451 MB451w Wireless LAN adapter OkiLAN520w Wireless LAN IEEE 802.11b/g/n standard conformity (2.4GHz) Transfer rate 11n technology: Max150Mbps IEEE802.11g: Max54Mbps...
-
Page 190: Fcc Statement
Specifications (MB441/MB451/MB451w) Regulatory wireless LAN statements -FCC Statement -Notice to users in Canada -Europe-CE Declaration of conformity. FCC statement FCC WARNING Changes or modifications not expressly approved by the party responsible for compliance could void the user’s authority to operate the equipment. Note: This equipment has been tested and found to comply with the limits for a Class B digital device, pursuant to part 15 of the FCC Rules. - Page 191 Specifications (MB441/MB451/MB451w) Europe - CE Declaration of Conformity This equipment complies with the essential requirements of the European Union directive 1999/5/EC. The telecommunications functionality of this product may be used in the following EU and EFTA countries: Austria, Belgium, Bulgaria, Cyprus, Czech Republic, Denmark, Estonia, Finland, France, Germany, Greece, Hungary, Iceland, Ireland, Italy, Latvia, Liechtenstein, Lithuania, Luxembourg, Malta, Netherlands, Norway, Poland, Portugal, Romania, Slovak Republic, Slovenia, Spain, Sweden, Switzerland, Turkey and United Kingdom.
- Page 192 Specifications (MB441/MB451/MB451w) Use Wireless Communications This page explains the radio wave used by OkiLAN520w. OkiLAN520w operates at 2.4GHz. No radio license is required to use OkiLAN520w. Take note of the following points. Do not use OkiLAN520w near the following equipments or places. The following equipment may use the same band.
-
Page 193: Basic Steps In Windows
Basic steps in Windows Basic steps in Windows These are the steps for displaying the driver setting window from [Printer] / [Printer and FAX] folder for Windows OS used for examples in this manual other than Windows 7. Memo The steps for Windows Server 2008 R2 are the same as for Windows 7. ... -
Page 194: Index
Index Symbols Copy Settings ....79 Copying ......78 -(Hyphen) ..... 86 Group Dial ....94 Country Code ....40 *(Asterisk) ....86 Group List CS Tuner .......42 ..86, 99, 107, 116 #(Hash Symbol) .... 86 Custom Size ....36 HELP Key (for MB441/MB461/ Access Control ..... - Page 195 Index MP Tray Speed Dial ....86, 93 ..33, 34, 79, 92, 122 SSID ......49 QWERTY Keyboard ... 26, 28 Standard Paper ..... 29 START (COLOR) Key Network Configuration ..... 25, 107, 109, ......102 Receiving Calls ....90 ..
-
Page 196: Oki Contact Details
Oki contact details OkicontactName. Oki Systems Oki Systems (Iberica), S.A.U OKI Europe Ltd. (Russia) (UK) Limited C/Teide, 3 Office 702, Bldg 1 OkicontactAddress.550 Dundee Road San Sebastian de los Reyes Zagorodnoye shosse Slough Trading Estate 28703, Madrid 117152, Moscow Slough Tel:+34 91 3431620 Tel: +74 095 258 6065 Berkshire... - Page 197 Lingkaran Syed Pura 59200, Sos. Bucuresti-Ploiesti Nr. 135. Email: LASatisfaction@okidata.com Kuala Lumpur, Malaysia Bucharest 1 Oki Data de Mexico, S.A. de C.V. Romania Tel: (60) 3 2287 1177 Mariano Escobedo #748, Piso 8 Fax: (60) 3 2287 1166 Tel: +40 21 303 3138 Col.
- Page 198 Oki Data Corporation 4-11-22 Shibaura, Minato-ku,Tokyo 108-8551, Japan www.okiprintingsolutions.com 44917102EE Rev3...