Thermador PRD48JDSGU Use And Care Manual
Pro grand steam range
Hide thumbs
Also See for PRD48JDSGU:
- Use and care manual (100 pages) ,
- Installation manual (97 pages) ,
- Installation instructions manual (87 pages)
Table of Contents
Advertisement
Advertisement
Table of Contents

Related Manuals for Thermador PRD48JDSGU


Summary of Contents for Thermador PRD48JDSGU
- Page 1 Welcome ® To Your Thermador ® Pro Grand Steam Range The Ultimate Culinary Center™...
-
Page 3: Table Of Contents
Using The Convection Oven....33 THERMADOR® Support ......93 Extended Cooking Functions . -
Page 5: Steam Range, The Ultimate Culinary Center
Pay special attention to the Important Safety Instructions located at the beginning of the manual. Your Thermador product is ready and waiting to be used for your next gourmet creation! Our products are handcrafted with the highest quality authentic materials to ensure years of reliable service. -
Page 6: About This Manual
About This Manual This manual contains several sections: The “Safety” section describes important safety precautions. Please read this section before using your new appliance. “Using the Cooktop”, “Using the Conventional Oven”, “Using the Steam Oven”, and “Using the Warming Drawer” sections describe how to operate the appliance and how to ensure a long life for your appliance. -
Page 7: Safety
Safety Important Safety Instructions READ AND SAVE THESE INSTRUCTIONS Please Read and Follow WARNING: WARNING: Tip over hazard! A child or adult can tip the range over and be killed. Verify that the anti- If the information in this manual is not tip bracket is securely installed. -
Page 8: Electrical Rating
Flush Island Trim has been supplied with the range. A the National Electrical Code and/or applicable local codes THERMADOR® Lowback or Highshelf must be purchased and ordinances. separately and utilized when there is less than a 12"... -
Page 9: Safety Practices To Avoid Personal Injury
Safety Practices to Avoid Personal Injury When properly cared for, your new THERMADOR ® CAUTION: PROFESSIONAL range has been designed to be a safe, reliable appliance. However, use extreme care when using Items of interest to children should not be... - Page 10 Smother flames from food fires, other than grease fires, with baking soda. NEVER use water on cooking fires. WARNING: Whenever possible, DO NOT operate the ventilation NEVER use this appliance as a space heater system during a cooktop fire. However, DO NOT reach to heat or warm the room.
- Page 11 Only certain types of glass, heatproof glass-ceramic, GREASE IS FLAMMABLE. Let hot grease cool before ceramic, earthenware, or other glazed cookware are attempting to handle it. Avoid letting grease deposits collect. Clean after each use. suitable for cooking on the range STAR® burners. This type of cookware may break with sudden temperature changes.
- Page 12 3. Operating the unit according to the instructions in this manual. The use of accessory attachments not recommended by THERMADOR® may cause injuries. DO NOT store or use corrosive chemicals, vapors, flammables or nonfood products in or near this appliance. It...
- Page 13 The door will no longer close properly if the door gasket is heavily soiled. The face of adjacent furnishings could become damaged. Always keep the door gasket clean and contact a THERMADOR® Service Technician to replace if necessary. English 9...
- Page 14 English 10...
-
Page 15: Getting Started With Your Range
Getting Started with Your Range... -
Page 17: Introduction
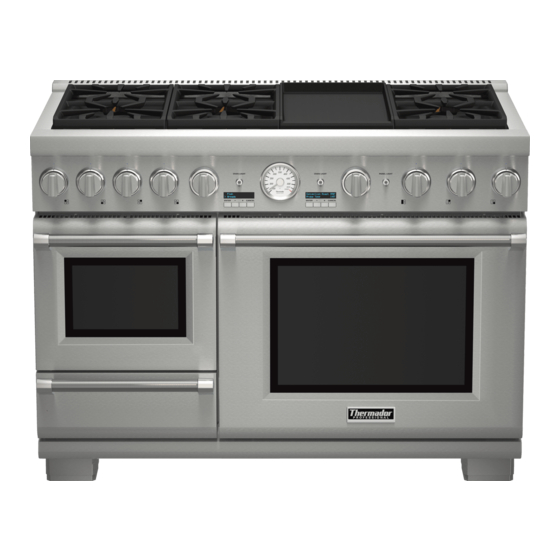
Introduction THERMADOR PROFESSIONAL® ranges are freestanding units available in a number of configurations. This PRO GRAND® dual-fuel range features a cooktop with six gas STAR® burners and an electric griddle, a professional size, self-cleaning, electric convection oven with broil capability, a steam oven, and a warming drawer. The drawings that follow introduce you to the components of your new range. - Page 18 1. Oven Interior Lights (2) 2. Broil Element 3. Oven Temperature Sensor 4. Temperature Probe Outlet 5. Rack Guides 6. THERMADOR® Full Access™ Gliding Oven Rack (3 included, 1 shown) 7. Bake Element (hidden) 8. Convection Fan Cover Figure 3: Main Oven Interior Steam Oven Interior 1.
-
Page 19: Before You Begin
Using Your Range for the First Time Check that you have these items: Table 1: Range Accessories and Parts DESCRIPTION Quantity THERMADOR® Full Access™ Gliding Oven Racks, Main Oven Two-Piece Broil Pan Temperature Probe Wire Rack, Steam Oven Perforated Cooking Pan, Full-Size, Steam Oven... - Page 20 Figure 5: Large Oven Rack Positions over the safety stops and pull the rack from the oven. 5. THERMADOR® Full Access™ Gliding oven racks are standard on all models. Each gliding oven rack can be pulled out and pushed back into the oven with minimal effort —...
- Page 21 2. Turn on kitchen ventilation (or if vent hood is a The THERMADOR PROFESSIONAL® occasionally has a recirculation type, open a window). Run the Self-Clean smell or smoke when first used. These smells or smoke cycle. comes from the burning off of manufacturing residues and is typical of any new oven regardless of manufacturer.
- Page 22 English 18...
-
Page 23: Using The Cooktop
Using the Cooktop... -
Page 25: Using The Star® Burners
Using the STAR® Burners ® Sealed STAR Burners Control Knobs A pair of control knobs is located on the control panel, directly in front of the pair of gas STAR® burners they control — with one gas STAR® burner positioned in front of the other on the rangetop. - Page 26 BTU Output for Standard STAR® Burners Operation of the ExtraLow® STAR® Burner • XLO®, the very lowest setting, is achieved by cycling • XHI is equivalent to 22,000 BTU / HR (18,000 BTU / the flame ON for approximately 7 seconds and OFF for HR using propane) on right front burner.
- Page 27 ® STAR Burner Cap Placement Checking Burner Cap Placement The STAR® burner caps must be properly placed on the • Check each STAR® burner to make sure there is no STAR® burner bases for the cooktop to function properly. If gap between the STAR®...
-
Page 28: Power Failure
Electronic Single Point Ignition Automatic Re-Ignition If any one or more STAR® burners blow out, the electronic igniter automatically activates to re-light the flame. DO NOT touch the STAR® burners when the igniters are active. IMPORTANT: • For proper combustion, DO NOT use the cooktop without the burner grates in place. -
Page 29: Flame Height
Flame Height flame color; this indicates the burning of airborne impurities and will disappear with use. • The correct flame height depends on 1) size and • With propane (LP) gas, slight yellow tips on the material of pan being used; 2) food being cooked; and primary cone are normal. -
Page 30: Cookware Recommendations
Cookware Recommendations • NEVER let a pan boil dry. This can damage your pan and the cooking surface. WARNING: • Professional quality pans with metal handles are To avoid risk of serious injury, damage to recommended because plastic handles can melt or appliance or cookware, please observe the blister if the flame extends up the side of the pan. -
Page 31: Specialty Cookware
Specialty Cookware • Woks — Either flat-based or round-bottom woks with the accessory ring can be used on all models. Round bottom woks must be used with a support ring. The porcelain-coated cast iron wok support ring must be purchased separately. •... -
Page 32: Surface Star® Burner Cooking Guide
® Surface STAR Burner Cooking Guide Use the following chart guide. The settings you use will vary depending on the pans selected and the starting temperature of the food. On the chart, the “Finish Setting” has been separated for the Standard and ExtraLow® STAR® burners. There may or may not be a change between the two STAR®... - Page 33 Finish Setting Finish Setting ExtraLow® Food Start Setting Standard STAR® Burners (XLO®) STAR® Burners Quick Frying: MED HI – preheat skillet MED HI – fry quickly Same as for Standard Breakfast Steaks STAR® Burners Frying: Chicken MED HI – heat oil, then SIM –...
-
Page 34: Using The Electric Griddle
Finish Setting Finish Setting ExtraLow® Food Start Setting Standard STAR® Burners (XLO®) STAR® Burners In Pouch HI – bring water and pouch SIM to MED – cook Same as for Standard to a boil according to package STAR® Burners directions Saute HI –... -
Page 35: Griddle Cooking Guide
Griddle Cooking Guide Control Knob L I G L I G FOOD SETTING 325°F – 350°F Eggs (160°C – 180°C) 375°F – 400°F Bacon, Breakfast Sausage (190°C – 200°C) 350°F – 375°F Toasted Sandwiches (180°C – 190°C) 375°F – 400°F Boneless Chicken Breasts (190°C –... - Page 36 Griddle Grease Tray Cooking on the Griddle 1. Turn the knob to the appropriate cooking temperature to preheat the griddle. 2. Preheat until the griddle light goes off. Grease Tray Grease Tray Grease Tray Add butter, margarine, oil or shortening if desired. Figure 27: Grease Tray Clean the tray after every use.
-
Page 37: Using The Convection Oven
Using the Convection Oven... -
Page 39: Extended Cooking Functions
Extended Cooking Functions Oven Controls Programming the Meat Probe Using the meat probe allows you more control over how your foods are cooked by automatically disabling the specified cooking mode when a dish's desired temperature, > Kitchen Timer defined by the cook, has been reached. Settings 1. - Page 40 Probe Care and Use Using the Offset Feature The Offset feature allows cooks to further fine-tune their • To avoid damaging your probe, DO NOT pull on the cooking parameters to their own personal optimal settings cable when trying to remove it from a dish. by allowing them to adjust the temperature offset of the •...
-
Page 41: Oven Functions
Oven Functions Tips for Bake Mode Preheating the Oven Most cooking times in recipes are worked out for a preheated oven and require that the oven already be at a certain temperature before cooking starts. Refer to your recipe for preheating recommendations Preheating time depends on the temperature setting and the number of racks in the oven. -
Page 42: Setting Bake & Convection Bake, Roast & Convection Roast
Setting Bake & Convection Bake, Roast & Convection Roast Steam Oven Steam Oven Steam Oven Electric Oven Electric Oven Electric Oven Selector Selector Selector Selector Selector Selector OVEN LIGHT OVEN LIGHT PANEL LIGHT BROIL CLEAN > Kitchen Timer electronic control >... -
Page 43: Convection Baking
Roasting Recommendations MEAT AND POULTRY IN OVEN RACK COOK TIME END TEMP COVERED PAN TEMPERATURE LEVEL Beef: Pot roast, 3 – 4 pounds 350°F (180°C) 40 – 60 minutes per pound 170°F (80°C) Beef brisket 350°F (180°C) 50 – 60 minutes per pound 170°F (80°C) Beef chuck 350°F (180°C) - Page 44 Converting Conventional Baking to Rack Positions (see Figure 30 on Page 37) Convection Baking — One-Rack Baking • When baking on one rack, best results are obtained in To convert most recipes for baked items (cookies, cakes, the bake mode (See “One-Rack Baking” on page 37.) pies, etc.);...
-
Page 45: Convection Baking Guide
Convection Baking Guide CONTROL TEMPERATURE TOTAL SUGGESTED FOOD SIZE SETTING COOKING TIME Cookies 12" x 15" Cookie Sheet 375°F (190°C) 8 – 12 minutes Layer Cakes 8" or 9" Round 350°F (180°C) 25 – 35 minutes Sheet Cakes 9" x 13" Pan 350°F (180°C) 30 –... -
Page 46: Other Uses Of Bake
Other Uses Of Bake WARNING: Slow Cooking and Low Temperature Uses of the Oven FOOD SAFETY — The United States Department of Agriculture advises: DO NOT In addition to providing perfect temperatures for baking and hold foods at temperatures between 40°F – roasting, the oven can be used at low temperatures to keep 140°F (4°C –... -
Page 47: Broil/Convection Broil
6. The door should be closed throughout the broil cycle. Rack Positions • Your THERMADOR PROFESSIONAL® Range Before turning on the oven, place the rack in the desired comes with a large two-piece broiler pan. The position. After preheating the broiler, center the broil pan slotted grid allows drippings to flow into the lower under the broil element (see Figure 30 on Page 37). -
Page 48: Broiling And Roasting Guide
Broiling and Roasting Guide All meats are placed on the broiler pan included with the range. CONTROL SPECIAL RACK OVEN APPROXIMATE FOOD ITEM TEMPERATURE INSTRUCTIONS NUMBER MODE COOKING TIME SETTING AND TIPS BEEF Broil or Broil or Broil until no Ground Beef 15 –... -
Page 49: Using The Steam Oven
Using the Steam Convection Oven... -
Page 51: Extended Cooking Functions
Extended Cooking Functions Steam Oven Modes Controls and Display Screen The steam oven in your new THERMADOR® range offers Steam Oven Temperature Control Knob steam, convection, and modes that combine steam and convection. Using EasyCook‘s automatic programming, you can prepare dishes ranging from steamed vegetables to pot roast to bread. - Page 52 Mode Selector Ring and Temperature Control Knob Using the Mode Selector Ring, you can select eight oven functions. The Mode Selector Ring turns in either direction from OFF, which is in the vertical position. Steam Oven Setting Function of Each Setting Turns oven ON and OFF EASYCOOK Sets automatic programming...
- Page 53 The following additional accessories can be purchased in retail purchased through customer service for use in this steam appliance stores where THERMADOR® products are sold: oven. These accessories are designed specifically for your steam oven. You may use other ovenware appropriate for...
- Page 54 Before each use of the steam oven: 1. Fill the water tank with cold water up to the MAX mark. 2. Close the tank lid until it clearly snaps into place. 3. Slide the tank all the way to the back of the slot. After each use of the steam oven: Empty the water tank after each use.
- Page 55 Before Using the Oven for the First For more information on these initial settings, see “Steam Oven Settings”, page 54. Descale and steam clean are part Time of your routine care of the steam oven. They are described in detail in the “Care and Maintenance” section of this Set the Water Hardness Level manual, starting on page 79 1.
-
Page 56: Operating Your Steam Oven
Operating Your Steam Oven Using seven of the eight modes available in your steam If you select the minimum cooking time of “0:00”, and keep oven requires similar steps. Using EASYCOOK is pressing the “–” button, the display will not roll back to somewhat different and is described separately starting “23:55”. - Page 57 Temperature Setting for Each Cooking Mode Different modes have different possible minimum and maximum temperatures. The following table describes the limits on setting the temperature ranges for each mode (except for EASYCOOK, described in a later section): Second Line of SELECT Cooking Minimum...
- Page 58 To continue cooking, press CANCEL again. If the oven was Steam Oven Settings in preheat, heating will resume and the preheating bars will show on the display. If the oven was past preheat, then Several oven features can be adjusted by selecting the “Cook Timer”...
- Page 59 Kitchen Timer (“Egg Timer”) hardness of your tap water. Enter WATER HARDNESS and set it to this value using the “+/–” buttons for the number scale. If you move or if your water source changes, you will To set the kitchen timer (“egg timer”): need to reset the water hardness value.
-
Page 60: Easycook Automatic Programming
EasyCook Automatic Programming Introduction to EasyCook 4. Use the “+/–” buttons to scroll forward and back through the sub-group choices under that food grouping. Automatic programming makes it easy to prepare food. 5. Select the sub-group you want and press ENTER. The Your steam oven’s EasyCook mode automatically sets the meat grouping has a second level of choice: For oven to cook 27 different foods. - Page 61 Starting Cooking At the End of an EasyCook Program When the cook timer reaches 0:00, the EasyCook program In EASYCOOK programs, the rack location, baking pan will end. The display will beep to signal the end of the type, and cooking times have been pre-selected for the cooking time.
-
Page 62: Easycook Program Charts
EasyCook Program Charts This section covers all of the programs available for automatic programming. Read the instructions before using a program to prepare the food. Duration Duration Duration Default Min. Max. Accessories and Food Default at Min. at Max. Weight Weight Weight Rack Levels... - Page 63 Duration Duration Duration Default Min. Max. Accessories and Food Default at Min. at Max. Weight Weight Weight Rack Levels Weight Weight Weight Poultry Weigh individual pieces of chicken. Enter the weight of the heaviest piece. DO NOT place pieces of chicken on top of one another in the ovenware.
-
Page 64: Getting The Most Out Of Your Steam Oven
Getting the Most Out of Your Steam Oven Cooking Tables and Tips Cooking Times and Quantities When steaming, the cooking times are based on the size of These tables contain a selection of dishes that can be the piece, not on the entire quantity of food. The appliance easily prepared in the steam convection oven. - Page 65 Vegetables Place vegetables in the perforated cooking pan and place pan at rack level 3. Place the baking pan underneath it at rack level 1. The baking pan will catch any drippings. Food Size Accessories Oven Mode Temperature Cooking Time Artichokes Whole Perforated +...
- Page 66 Side Dishes and Legumes Add the appropriate amount of water or liquid. Example: 1:1.5 = for every 1/2 cup. Ratio/ Food Accessories Oven Mode Temperature Cooking Time Information Boiled potatoes Medium size Perforated Steam 210˚F (100˚C) 35 – 45 min. (unpeeled) (level 3) + baking pan...
- Page 67 Amount/ Food Accessories Oven Mode Temperature Cooking Time Weight Chicken breast per 0.33 lbs. Perforated Steam 210˚F (100˚C) 15 – 25 min. (0.15 kg) (level 3) + baking pan (level 1) Chicken pieces per 2.65 lbs. Wire rack + Combination 360 –...
- Page 68 Amount/ Food Accessories Oven Mode Temperature Cooking Time Weight Pork Bone-in without rind 3.5 lbs. Wire rack + Combination 320 – 360˚F 50 – 70 min. (1.5 kg) baking pan (160 – 180˚C) (level 2) Bone-in with rind 3.5 lbs. Wire rack + Steam/ 210˚F (100˚C)/...
-
Page 69: Roasting Tips
Amount/ Food Accessories Oven Mode Temperature Cooking Time Weight Trout, whole per 0.5 lbs. Perforated Steam 175 – 195˚F 12 – 15 min. (0.2 kg) (level 3) + (80 – 90˚C) baking pan (level 1) Cod, filet per 0.33 lbs. Perforated Steam 175 –... - Page 70 Slow Cooking Meat Slow cooking is ideal for cooking all tender cuts of meat that will be cooked medium rare. The meat stays very moist and is tender. Place the baking pan in the combination oven and preheat the oven using Slow Cook mode. Sear the meat well on all sides on the cooktop.
- Page 71 Food Accessories Oven Mode Temperature Cooking Time Yogurt Portion-sized jars + Steam 105˚F (40˚C) 300 – 360 min. wire rack Apple compote Baking pan Steam 210˚F (100˚C) 10 – 15 min. Pear compote Baking pan Steam 210˚F (100˚C) 10 – 15 min. Cherry compote Baking pan Steam...
- Page 72 Food Accessories Oven Mode Temperature Cooking Time Strudel, sweet Baking pan (level 2) Combination 320 – 360˚F 40 – 60 min. (160 – 180˚C) Onion tart Baking pan (level 2) Combination 340 – 360˚F 30 – 40 min. (170 – 180˚C) Bread, Bread Rolls White bread, 1.7 lbs.
-
Page 73: Baking Tips
Baking Tips If using your own recipe. Look at cakes or baked goods in the table that are similar to your recipe. This will help to determine if the cake is About 10 minutes before the end of baking time according to your cooked through. - Page 74 Defrosting Freeze the food as flat as possible and in appropriate portions at -0˚F (-18˚C). Do not freeze oversized portions. Defrosted food does not keep as long and spoils more quickly than fresh food. Defrost the food in the freezer bag on a plate or in the perforated cooking pan.
- Page 75 Food Accessories Oven Mode Temperature Cooking Time Yeast dough Perforated (level 3) + Steam 210˚F (100˚C) 30 – 45 min. cooking pan (level 1) Sourdough Perforated (level 3) + Steam 210˚F (100˚C) 40 – 50 min. cooking pan (level 1) Juice Extraction Before extracting juice from berries, place the berries in a bowl and add sugar.
- Page 76 Food Accessories Oven Mode Temperature Cooking Time Frozen fish fillets Baking pan + wire Combination 360 – 390˚F 35 – 50 min. rack (level 2) (180 – 200˚C) Salmon fillets Perforated (level 3) + Steam 175 – 210˚F 20 – 25 min. cooking pan (level 1) (80 –...
-
Page 77: Using The Warming Drawer
Using the Warming Drawer... -
Page 79: Warming Drawer
Warming Drawer Turning the Warming Drawer ON The warming drawer will keep hot, cooked foods at serving temperature. Always start with hot food. DO NOT use the warming drawer to heat cold food other than crisping The warming drawer will operate at three different crackers, chips, and dry cereal or warming dishes or plates. -
Page 80: Crisping Stale Items
Crisping Stale Items Place food in low-sided dishes or pans. 1. Press “LOW”. 2. Preheat for 5 minutes, then place dish in drawer. 3. Check crispness after 45 minutes. Continue crisping if needed. Turning the Warming Drawer OFF Pushing the “OFF” button will turn off the warming element. The warming drawer will automatically shut off after 12 hours. -
Page 81: Care And Maintenance
Care and Maintenance... -
Page 83: Self-Cleaning The Main Oven
Care and Maintenance Self-Cleaning the Main Oven cleaned. When the oven is cold, it is easily removed using a damp paper towel, sponge, or cloth. WARNING: Wipe off any smoke residue that remains on the front frame with Formula 409® or Fantastik® cleaners. If stain remains, •... -
Page 84: Cleaning The Cooktop And The Range Exterior
Cleaning the Cooktop and the To Set Self-Clean 1. Remove oven racks. Range Exterior 2. Ensure oven door is shut. 3. Select SELF CLEAN using the Mode Selector Ring, When Cleaning This Range: which surrounds the Temperature Selector Knob. 1. Use the mildest cleaning procedure that will do the job 4. -
Page 85: Cleaning Recommendations
Cleaning Recommendations SUGGESTED IMPORTANT PART/MATERIAL CLEANERS REMINDERS Brass STAR® Burner Base and Cast Iron Cap • Hot sudsy water; rinse and dry thoroughly. • DO NOT scratch or gouge • Mild Abrasive Cleansers: Bon-ami®, the port openings of Cameo® Aluminum and Stainless STAR®... - Page 86 SUGGESTED IMPORTANT PART/MATERIAL CLEANERS REMINDERS Grates/Porcelain Enamel on Cast Iron • Nonabrasive cleaners: Hot water • The grates are heavy; use and detergent, Fantastik®, Formula care when lifting. Place on 409®. Rinse and dry immediately. a protected surface. • Mild abrasive cleaners: Bon-ami® •...
- Page 87 SUGGESTED IMPORTANT PART/MATERIAL CLEANERS REMINDERS Warming Drawer interior/Polished • Use dish detergent. Wash, rinse • None stainless steel well, and dry. For hard water spots or scale, use white vinegar. Apply with a sponge or cloth, rinse, and dry. • Heat discoloration/corrosion: Clean with Bar Keeper‘s Friend®...
- Page 88 PART/MATERIAL CLEANING PRODUCTS/DIRECTIONS Broil Pan Grid/Bottom To loosen cooked on food, sprinkle empty hot grid and/or bottom with powdered laundry detergent or squirt with liquid detergent and cover with Porcelain Enamel wetpaper towels. Allow to stand. Hot sudsy water. • Wash, rinse thoroughly and dry.
- Page 89 PART/MATERIAL CLEANING PRODUCTS/DIRECTIONS Oven Racks and Rack Guides Hot sudsy water. Nickel Plated • Wash, rinse thoroughly, and dry. Note: Cleaners: Soft Scrub®. The rack guides are removable, for • Apply with a damp sponge or cloth according to manufacturer’s cleaning using this procedure (see directions.
-
Page 90: Do-It-Yourself Maintenance
Replace only with a recommended light bulb designed for could cause an injury. appliance oven use. DO NOT USE a standard household light bulb in any oven. Call THERMADOR® Customer Care • The light socket is live when the door is Center at 1-800-735-4328 or your nearest THERMADOR®... - Page 91 Power Failure In the event of a power failure, only the non ExtraLow® burners (see page 21 for burner layout) can be lit manually. It is necessary to light each standard STAR® burner individually. If the range's cooktop is being used when the power failure occurs, turn all of the STAR®...
-
Page 92: Steam Oven Cleaning And Maintenance
Steam Oven Cleaning and Maintenance Important: At the end of the cleaning phase (about 30 minutes), the countdown will be suspended and a buzzer will sound. The Never use abrasives to clean the steam oven. display will show CLEAN DISH on the first line and PRESS ENTER BUTTON on the second line. -
Page 93: Cleaning The Rack Rail Frames
(BSH part number 573828; obtain from your display will show 2ND RINSE on the first line. The retailer or order from http://www.thermador-eshop.com), countdown will resume again. mix 32 oz. (1 quart or 0.95 liter) of water with a packet of 2. -
Page 94: Before Calling For Service
Before Calling For Service Before calling for service, check the following to avoid unnecessary service charges. Be sure to check these items first: OVEN LIGHT OVEN LIGHT OVEN LIGHT OVEN LIGHT OVEN LIGHT OVEN LIGHT PANEL LIGHT PANEL LIGHT PANEL LIGHT BROIL BROIL BROIL... -
Page 95: Statement Of Limited Product Warranty
Product and are not transferable. THERMADOR® would still pay for labor and parts and ship the parts to the nearest authorized service provider, but you Please make sure to return your registration card; while not... - Page 96 God. PUNITIVE DAMAGES, LOSSES, OR EXPENSES, INCLUDING WITHOUT LIMITATION TIME AWAY FROM In no event shall THERMADOR® have any liability or WORK, HOTELS AND/OR RESTAURANT MEALS, responsibility whatsoever for damage to surrounding REMODELLING EXPENSES IN EXCESS OF DIRECT...
-
Page 97: Thermador® Support
THERMADOR® appliance needs service. Our service team is ready to assist you. www.thermador.com/support 800-735-4328 5551 McFadden Avenue, Huntington Beach, CA 92649 • 1-800-735-4328 • www.thermador.com 9000669884 • Rev A • 5U03SH • 7/11 © 2011 BSH Home Appliances Corporation...