
Related Manuals for Thermador PROFESSIONAL PRO GRAND PRD48JDSGU/11


Summary of Contents for Thermador PROFESSIONAL PRO GRAND PRD48JDSGU/11
- Page 1 Welcome ® ® To Your THERMADOR PRO GRAND Steam Range ® The Ultimate Culinary Center...
- Page 3 ® ® THERMADOR PROFESSIONAL PRO GRAND Steam Ranges Models: PRD48JDSGC PRD48JDSGU PRD48NCSGC PRD48NCSGU PRD48NLSGC PRD48NLSGU Table of Contents ................2...
-
Page 4: Table Of Contents
Note: This alerts you to important information and/or tips. CAUTION This indicates that minor or moderate injuries may occur as a result of non-observance of this warning. ® This THERMADOR appliance is made by BSH Home Appliances Corporation 1901 Main Street, Suite 600 Irvine, CA 92614... -
Page 5: Welcome
Congratulations on your recent THERMADOR purchase! Whether you are a dedicated chef or simply a connoisseur of the art of cooking, owning a THERMADOR kitchen is the ultimate expression of personal style, good taste, and an appreciation for the complete culinary experience. -
Page 6: Safety
When installing against a combustible surface, a Low Back securely installed. Ensure the anti-tip guard is required. A THERMADOR Low Back guard must bracket is engaged when the range is be purchased separately. Before using the range, ensure moved. - Page 7 FOR PERSONAL SAFETY, THIS APPLIANCE MUST BE determine if additional requirements and/or standards apply CONNECTED TO A PROPERLY GROUNDED AND to specific installations. POLARIZED ELECTRICAL POWER SUPPLY. When properly cared for, your new THERMADOR ® PROFESSIONAL range has been designed to be a safe, WARNING reliable appliance.
- Page 8 IMPORTANT SAFETY INSTRUCTIONS READ AND SAVE THESE INSTRUCTIONS ® In the event a STAR burner goes out and gas escapes, DO NOT hang articles from any part of the appliance or open a window or a door. DO NOT attempt to use the range place anything against the ovens.
- Page 9 IMPORTANT SAFETY INSTRUCTIONS READ AND SAVE THESE INSTRUCTIONS ® Use only dry potholders; moist or damp potholders on hot Areas adjacent to the STAR burners may become hot surfaces may cause burns from steam. DO NOT use a towel enough to cause burns. or other bulky cloth in place of potholders.
- Page 10 IMPORTANT SAFETY INSTRUCTIONS READ AND SAVE THESE INSTRUCTIONS Bakeware, such as large casserole pans, cookie sheets, Place oven racks in desired position while ovens are cool. If etc., should NEVER be used on the cooktop. a rack must be moved while the ovens are hot, DO NOT let the potholders contact the broiler element.
- Page 11 Always place ovenware on the rack or The use of accessory attachments not recommended by in the perforated cooking pan. ® THERMADOR may cause injuries. Ovenware must be heat and steam resistant. Silicone baking pans are not suitable for STEAM/CONVEC mode.
- Page 12 The door will no longer close properly if the door gasket is heavily soiled. The face of adjacent furnishings could become damaged. Always keep the door gasket clean and contact a THERMADOR Service Technician to replace if necessary. The oven cavity is made of high quality stainless steel.
-
Page 13: Getting Started With Your Range
Getting Started with Your Range... -
Page 15: Description
Description Parts Identification Control Panel Identification Standard Knob Griddle Knob Grill Knob Main Oven ExtraLow ® Knob POWERBOOST ® Temp Selector Knob BROIL CLEAN electronic control Steam Oven Oven Temperature Gauge Main Oven Steam Oven Oven Light Temp Selector Mode Selector Mode Selector Switch MODES:... -
Page 16: Range Identification
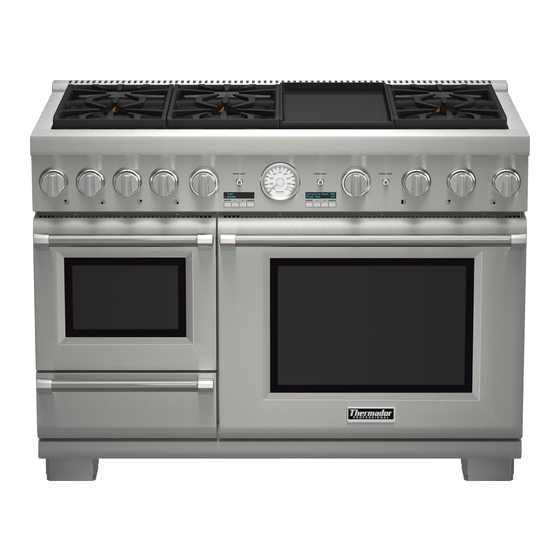
Range Identification Model shown is 48" with 4 burners and Electric Griddle and Electric Grill (models will vary) WARNING: To ensure proper ventilation of the stove, do NOT remove the legs of the stove. 1. Flush Island Trim (included) or Low Backguard (ordered separately) 2. - Page 17 Main Oven Interior 1. Oven Interior Light 2. Broil Element 3. Oven Temperature Sensor 4. Temperature Probe Outlet 5. Rack Guide ® 6. Full Access Gliding Oven Rack (3 included, 1 shown) 7. Bake Element (hidden) 8. Convection Fan Cover Figure 2: Main Oven Interior Identification Steam Oven Interior 9.
-
Page 18: Before You Begin
Before You Begin Getting Started ® Placing Full Access Racks in the Oven 1. Hold the rack on a slight angle. Place the safety hooks IMPORTANT under the front of the rack guides. All oven knobs and selectors must be set to OFF before powering up the range. - Page 19 ® The THERMADOR PROFESSIONAL range occasionally ALWAYS REMOVE BEFORE SELF CLEAN has a smell or smoke when first used. These smells or smoke come from the burning off of manufacturing residues and is typical of any new oven regardless of manufacturer.
- Page 20 Before You Begin English 18...
-
Page 21: Using The Cooktop
Using the Cooktop... - Page 23 Using the Cooktop Sealed STAR Burners Checking Burner Cap Placement ® • Check each burner to make sure there is no gap between the burner cap and burner base. See Burner Cap Placement Figure 9: Correct and Incorrect Burner Cap Placement to see examples of correct and incorrect placements of Each cap has a letter (B, D, or F) cast in the underside of the burner cap.
- Page 24 Control Knobs ® Operation of the ExtraLow Burner • XLO, the very lowest setting, is achieved by cycling the The control knobs for two sealed gas burners, one in front flame ON for approximately 7 seconds and OFF for 53 and one in the rear, are located directly in front of and seconds of each minute.
- Page 25 Automatic Re-Ignition Flame Height • The correct flame height depends on 1) size and ® Each STAR burner has its own electronic igniter that material of pan being used; 2) food being cooked; and sparks when the burner is turned on. Each burner should 3) amount of liquid in the pan.
-
Page 26: Cookware Recommendations
Cookware Recommendations • Do not let plastic, paper or cloth come in contact with a hot burner grate. They may melt or catch fire. • Never let a pan boil dry. This can damage your pan and WARNING the cooking surface. To avoid risk of serious injury, damage to appliance or •... -
Page 27: Specialty Cookware
Specialty Cookware Standard Size Pressure Canner • 8 to 22 quarts (7.6 to 20.9 liters), with an 8'' to 11'' base (203–279 mm) and a 6½'' to 12'' depth (165–305 mm). Woks Canning Tips • Either flat-based or round-bottom woks with the accessory ring can be used on all models. -
Page 28: Surface Burner Cooking Recommendations
Surface Burner Cooking Recommendations FINISH SETTING FINISH SETTING XLO ® FOOD START SETTING STANDARD BURNERS BURNERS BEVERAGES MED – heat milk, cover SIM – finish heating XLO – keep warm, cover* Cocoa BREADS MED – preheat skillet SIM to MED – cook Same as for Standard Burners French Toast, Pancakes, Grilled... - Page 29 FINISH SETTING FINISH SETTING XLO ® FOOD START SETTING STANDARD BURNERS BURNERS Poaching: Chicken, MED HI – Cover, bring To finish cooking whole or pieces, Fish liquids to a boil Simmering: Stewed HI – cover, bring liquid to a XLO – to simmer slowly Chicken, Corned Beef, boil XLO –...
-
Page 30: Using The Electric Griddle
Using the Electric Griddle Preparing the Griddle If the range is equipped with an electric griddle, check the (available on some models) griddle frame adjustment by pouring two tablespoons of water on the back of the griddle plate. The water should slowly roll into the grease tray. -
Page 31: Griddle Cooking Recommendations
Griddle Grease Tray Cooking on the Griddle 1. Turn the knob to the appropriate cooking temperature to preheat the griddle. 2. Preheat until the griddle light goes off. 3. Add butter, margarine, oil or shortening if desired. Griddle Cooking Recommendations FOOD * SETTING 325°F –... - Page 32 Instructions for Seasoning the Griddle Seasoning Griddle Plate Seasoning is a process by which a layer of animal fat or vegetable oil is applied and baked into the cookware. The seasoning layer provides a non-stick surface for cooking. If the griddle plate seems to lose its non-stick abilities over time, the following instructions should help regain the 1.
-
Page 33: Using The Electric Grill
Using the Electric Grill 1. Rotate heating elements (6) up and remove the briquette basket (3) stored inside the grill housing (1). (available on some models) 2. Place the drip tray (2) in the bottom of the grill housing (1). (Drip tray is packaged in the large cardboard box that was on top of the range.) Align the embosses of Description the drip tray (2) with the depressions on the bottom of... - Page 34 IMPORTANT: 2. Press and turn the knob to the desired temperature setting. • If flames appear while grilling, turn off heat and • The grill is electronically controlled with power remove the food. Use caution to avoid any settings LOW through HIGH. There are no fixed potential injury while removing food.
-
Page 35: Grill Cooking Recommendations
Grill Cooking Recommendations IMPORTANT: • GRILL SHOULD NOT BE OPERATED WITHOUT PROPER VENTILATION. • Foods with excessive fat or grease should not be prepared on an indoor grill. Grilling foods with high fat content (certain types of ground beef, sausage, etc) increases the chances of smoke and flames. COOK TIME FOOD* SETTING**... - Page 36 Using the Electric Grill English 34...
-
Page 37: Using The Convection Oven
Using the Convection Oven... -
Page 39: Oven Operation
Using the Oven Oven Operation Secondary Oven Baking (48'' models only) Level BAKE Mode -- Best used for most baked items. Rack Positions for Main Oven -- When additional height is needed. Rack level positions in the oven are numbered like an -- Pies are best baked on rack level #2 to make elevator. -
Page 40: Oven Setting Controls
Pan Placement To set the timer: • Allow at least 1" (25.4 mm) of space between the pans 1. Press ENTER. and the oven walls so heat can circulate around each 2. Use the “+” and “-” buttons to select either KITCHEN pan. -
Page 41: Meat Probe
• As the oven cools down, the temperature • The probe function is only available for Bake, gauge will reduce, to reflect the cooling oven Convection Bake, and Roast modes. temperature. • Probe is not available when Cook Timer has been 4. -
Page 42: Fine Tuning The Oven
Fine Tuning the Oven 4. The display will prompt the user to set BAKE and TEMP. The OFFSET feature allows the cook to further fine-tune 5. When the timer reaches “0:00”, the cooking mode will their cooking parameters to their own personal optimal be finished and the display will beep. -
Page 43: Convection Baking
Convection Baking Convection Baking Time can be saved by baking an entire batch of cookies at the same time. The cookies will bake evenly and be done Cooking with Convection all at once. The baking time may be shorter due to the There are many advantages to cooking with convection. - Page 44 Condensation Three Rack Convection Baking It is normal for a certain amount of moisture to evaporate Levels CONVEC BAKE Mode from the food during any cooking process. The amount #1, #3, & #5 -- When several sheets of cookies are to be depends on the moisture content of the food.
-
Page 45: Dehydrating Foods With Convection Bake
Dehydrating Foods with Convection Bake Use the Convection Bake to dry and preserve fruits and vegetables. Tips: • Drying times vary depending on the moisture and sugar content of the food, the size of the pieces, the amount being dried and the humidity in the air. •... -
Page 46: Convection Baking Recommendations
Convection Baking Recommendations CAUTION TEMPERATURE Plastic containers or plastic wrap can melt if in direct FOOD SETTING contact with the oven walls or oven bottom. Cookies 375°F (190°C) WARNING Layer Cakes 350°F (180°C) Sheet Cakes 350°F (180°C) Food Safety Concern Food Poisoning Possible — DO NOT use the Warming Mode for cooking food. -
Page 47: Other Uses Of Bake
Other Uses Of Bake Broil and Convection Broil Slow Cooking And Low Temperature Uses Tips for Broil Of The Oven Preheating the Broiler In addition to providing perfect temperatures for baking and It is recommended that you preheat the broil element roasting, the oven can be used at low temperatures to keep before starting to cook. -
Page 48: Broiling And Roasting Recommendations
5. The door should be closed throughout the broil * Dual Fuel models only cycle. ® • Your THERMADOR PROFESSIONAL range comes with a large two-piece broiler pan. The slotted grid allows drippings to flow into the lower pan, away from the intense heat of the broil element, minimizing spattering, smoking, and the chance of a grease fire. -
Page 49: Using The Steam Oven
Using the Steam Convection Oven... -
Page 51: Extended Cooking Functions
Extended Cooking Functions Steam Oven Modes Controls and Display Screen ® The steam oven in your new THERMADOR range offers steam, convection, and modes that combine steam and convection. Using Easy Cook’s automatic programming, you can prepare dishes ranging from steamed vegetables to pot roast to bread. - Page 52 Mode Selector Ring and Temperature Oven Interior and Accessories Control Knob The oven has four rack levels. The rack levels are Using the Mode Selector Ring, you can select eight oven numbered bottom to top as shown in the figure below. functions.
- Page 53 Use for support during baking. pan. Additional Accessories Perforated cooking pan The following additional accessories can be purchased in full-size (CS2XLPH) retail appliance stores where THERMADOR products are 1 '' deep sold: Ideal for steaming fish or large quantities of ORDER vegetables, extracting...
- Page 54 Water Tank Use & Care The water tank is on the right side of the steam oven. It holds 1.4 quarts (1.3 L) of water. The water tank is not dishwasher safe. Water level sensor warnings: The water tank must have enough water to generate the steam needed for the cooking mode and time you are using. As the water is converted to steam, the tank level will drop during cooking.
- Page 55 Empty the water tank after each use. Unless you use softened water, you will need to descale your steam oven at regular intervals (see “Descale” in the 1. Keep the water tank level while slowly pulling it out of “Care and Maintenance” section on page 79). the appliance to ensure that no remaining water drips down and out through the vent.
- Page 56 Use the “+/–” buttons to scroll through the settings list, DESCALE: Your steam oven will need to be descaled (or pressing ENTER for the one you wish to adjust. decalcified) at regular intervals to remove the calcium and magnesium deposits from the water heated to make steam. COUNTRY CODE: Instead of manually changing weight or Once the water hardness is set, the steam oven display will temperature units, you can go to COUNTRY CODE and...
-
Page 57: Operating Your Steam Oven
Operating Your Steam Oven Using seven of the eight modes available in your steam Note: Temperature control is not possible with DEFROST, oven requires similar steps. Using Easy Cook is somewhat PROOF, and STEAM, which have preselected cooking different and is described separately starting temperatures. - Page 58 Temperature Setting for Each Cooking Mode Different modes have different possible minimum and maximum temperatures. The following table describes the limits on setting the temperature ranges for each mode (except for Easy Cook, described in a later section): MODE MIN. TEMP. MAX TEMP.
- Page 59 Kitchen Timer Changing the Cooking Time during Operation 1. Press CANCEL. The kitchen timer on the steam oven is only available when — The display will show CANCEL STEAM? for the steam oven is set to OFF. example. 2. Press ENTER to cancel the mode. To set the kitchen timer: —...
-
Page 60: Easy Cook Automatic Programming
Easy Cook Automatic Programming ® Introduction to Easy Cook 5. Select the sub-group you want and press ENTER. ® Setting the Weight Automatic programming makes it easy to prepare food. Your steam oven’s Easy Cook mode automatically sets the The display will now show “Enter Weight” on the first line oven to cook 27 different foods. - Page 61 At the End of an Easy Cook Program 10. Press ENTER and the oven will begin preheating. ® — The preheat bars, 1 bar up to 4, will display on the When the cook timer reaches 0:00, the Easy Cook program first line and the current oven temperature on the will end.
-
Page 62: Easy Cook Program Charts
® Easy Cook Program Charts This section covers all of the programs available for automatic programming. Read the instructions before using a program to prepare the food. DEFAULT MIN. MAX. FOOD ACCESSORIES AND RACK LEVELS WEIGHT WEIGHT WEIGHT VEGETABLES Wait until after cooking to season vegetables, including potatoes. Cauliflower florets 1.1 lbs. - Page 63 DEFAULT MIN. MAX. FOOD ACCESSORIES AND RACK LEVELS WEIGHT WEIGHT WEIGHT PORK Cut the rind from the center outward before cooking. The shoulder cut is the best cut for a pork roast with crust. Pork Roast 2.2 lbs. 1.8 lbs. 4.2 lbs.
-
Page 64: Getting The Most Out Of Your Steam Oven
Getting the Most Out of Your Cooking Times and Quantities Steam Oven When steaming, the cooking times are based on the size of the piece, not on the entire quantity of food. The appliance can steam up to 14 lbs. (6.4 kg) of food. Cooking Tables and Tips Note the sizes of pieces listed in the tables. - Page 65 Steam Oven Cooking Recommendations Vegetables Place vegetables in the perforated cooking pan and place pan at rack level 3. Place the baking pan underneath it at rack level 1. The baking pan will catch any drippings. FOOD SIZE ACCESSORIES OVEN MODE TEMPERATURE COOKING TIME Artichokes...
- Page 66 Side Dishes and Legumes Add the appropriate amount of water or liquid. Example: 1:1.5 = for every 1/2 cup. FOOD RATIO ACCESSORIES OVEN MODE TEMPERATURE COOKING TIME Potatoes (unpeeled) Medium size Perforated (level 3) + STEAM 210 F (100 C) 35 –...
- Page 67 COOKING FOOD WEIGHT ACCESSORIES OVEN MODE TEMPERATURE TIME BEEF Pot-roasted beef* 3.5 lbs. Wire rack + baking pan REHEAT 300 F (150 C) 100 – 140 min. (1.5 kg) (level 2) Filet of beef, medium* 2 lbs. (1 kg) Wire rack + baking pan REHEAT 350 F (177 C) 20 –...
- Page 68 COOKING FOOD WEIGHT ACCESSORIES OVEN MODE TEMPERATURE TIME Clams, oysters 0.33 lbs. Baking pan (level 2) STEAM 210 F (100 C) 10 – 15 min. (0.15 kg) Haddock, perch filet per 0.5 lbs. Perforated (level 3) + STEAM 175 F (80 C) 10 –...
- Page 69 Desserts, Compotes Compote: Weigh out the fruit, add approximately 1/3 of water and add sugar and spices to taste. Rice pudding: Weigh out the rice and add 2.5 times as much milk. Add the rice and milk no higher than 1 inch up the side of the accessory.
- Page 70 FOOD ACCESSORIES OVEN MODE TEMPERATURE COOKING TIME SHEET CAKES Yeast cake Baking pan (level 2) STEAM CONVEC 300 F (150 C) 35 – 45 min. TRUE CONVEC 35 – 45 min. Swiss roll Baking pan (level 2) TRUE CONVEC 375 F (175 C) 10 –...
- Page 71 Reheating Foods FOOD ACCESSORIES OVEN MODE TEMPERATURE COOKING TIME Dinner plate Wire rack (level 2) REHEAT 250 F (120 C) 12 – 18 min. Vegetables Baking pan (level 3) REHEAT 210 F (100 C) 12 – 15 min. Noodles, potatoes, rice Baking pan (level 3) REHEAT 210 F (100 C)
- Page 72 Proofing Dough The dough rises much faster using this mode than at room temperature. You can choose any rack level for the rack or carefully place the rack on the oven bottom. Place the dough-rising bowl on the rack. DO NOT cover the dough. FOOD WEIGHT ACCESSORIES...
- Page 73 FOOD ACCESSORIES OVEN MODE TEMPERATURE COOKING TIME Whole fish Perforated (level 3) + Baking pan STEAM 210 F (100 C) 20 – 25 min. (level 1) Frozen fish fillets Baking pan + wire rack (level 2) STEAM CONVEC 350 F (177 C) 35 –...
- Page 74 Steam Oven Functions English 72...
-
Page 75: Using The Warming Drawer
Using the Warming Drawer... -
Page 77: Warming Drawer
Warming Drawer IMPORTANT: When a warming mode is selected, the blue indicator light for that mode illuminates. Use ONLY heat-safe dishes in the warming drawer. Preheating the Warming Drawer The warming drawer will keep hot, cooked foods at serving temperature. Always start with hot food. DO NOT use the Preheat the warming drawer when keeping food warm. - Page 78 Warming Drawer Recommendations CAUTION To maintain food safety, DO NOT leave food in the oven FOOD/COOKWARE LEVEL for more than one hour before or after cooking. HIGH Bacon WARNING Beef: rare, medium and well done DO NOT use aluminum foil or protective liners to line any Bread: hard rolls, soft rolls, coffee cakes, part of the warming drawer, especially the oven bottom.
-
Page 79: Care And Maintenance
Care and Maintenance... -
Page 81: Self-Cleaning The Main Oven
Care and Maintenance Self-Cleaning the Main Oven Wipe off any smoke residue that remains on the front frame ® with Fantastik . If stain remains, use a mild liquid cleanser. The amount of smoke stain is directly related to the amount WARNING of food soil left in the oven at the time of self-cleaning. -
Page 82: Steam Oven Cleaning And Maintenance
Steam Oven Cleaning and To Set Self-Clean Maintenance 1. Remove oven racks. 2. Ensure oven door is shut. 3. Select SELF CLEAN using the Mode Selector Ring, IMPORTANT: which surrounds the Temperature Selector Knob. Never use abrasives to clean the steam oven. 4. -
Page 83: Descaling The Steam Oven
1. Using only the descaling powder recommended for this dish. Thoroughly rinse out the cleaning sponge. oven (BSH part number 00573828; obtain from your retailer or order from http://www.thermador-eshop.com), Second Rinse Cycle (cycle 3) mix 32 oz. (1 quart or 0.95 liter) of water with a packet of 12. - Page 84 8. After 20 seconds, a beep will signal the end of the first Installing the Rack Rail Frames rinsing cycle. Hang the back and front parts of the frame and then push it — The display will show CLEAN DISH on the first line back until it locks into place.
-
Page 85: Cleaning Recommendations
Stainless Steel and Aluminum Cleaner ® Kleen King Stainless Steel Liquid Cleaner THERMADOR Stainless Steel Conditioner (00576697) to protect the finish from staining and pitting; enhances appearance. For hard water spots use household vinegar. • For heat discoloration; rinse and dry immediately: ®... - Page 86 PART/MATERIAL CLEANING NOTES Grates • The grates are heavy; use care when lifting. Place on a protected surface. DO NOT clean grates in a self-cleaning oven. Porcelain Enamel on Cast Iron • The rough texture of the grate can sometimes remove aluminum deposits from the bottom of pans and fill in areas between the high spots on the surface of the grate.
- Page 87 7) Reassemble clean, dry briquettes back into the grill before using the grill again. • New ceramic briquettes can be purchased from the THERMADOR eShop (order number PABRICKBKN). See the back cover for support information. Caution: Ceramic briquettes must be replaced when they begin to turn black.
- Page 88 • Suggested cleaners; rinse and dry immediately: Brushed stainless steel Hot water and detergent ® Fantastik THERMADOR Stainless Steel Conditioner (00576697) For hard water spots use household vinegar. ® ® Warming Drawer Control Pad • Clean with hot soapy water or apply Fantastik...
- Page 89 PART/MATERIAL CLEANING NOTES Door(s) • Use care to keep cleaners and water away from the door vents. If water or cleaners spill into the vents, water may streak the glass inside. Door Handle and Stainless Steel Seal • Spray on cleaner and blot dry with a cloth. DO NOT rub. Do not move, remove or damage mesh.
-
Page 90: Do-It-Yourself Maintenance
Replace only with a recommended light bulb designed for appliance oven use. DO NOT USE a standard household light bulb in any oven. Call THERMADOR Customer Care Center at 800-735-4328 or your nearest THERMADOR dealer to determine the proper replacement bulb for your range. - Page 91 To Replace the Steam Oven Light Bulb 6. Screw the glass cover with seals back on. 7. Reconnect the appliance to power and reset the clock. Heat-resistant 120V / 25 Watt halogen bulbs with seals can be purchased through retail stores or customer service. Never operate the appliance without the glass cover or When purchasing through customer service provide the seals.
-
Page 92: Before Calling For Service
The data rating label shows the model and serial number of 2. Register your product online at www.thermador.com. your range. It is located in the gap created by the right side 3. Call us at THERMADOR customer service at of the oven cavity and the range side panel. 1-800-735-4328. - Page 93 Troubleshooting SYMPTOM POSSIBLE CAUSE REMEDY Intermittent igniter sparking • Ceramic igniter is wet or dirty. • Carefully dry or clean igniter. • Burner ports are clogged. • Clean ports on burner cap with a wire, a needle or straightened paper clip. More than four clicks of •...
-
Page 94: Statement Of Limited Product Warranty
Repair/Replace as Your Exclusive Corporation (BSH) in this Statement of Limited Product Remedy ® Warranty applies only to the THERMADOR appliance sold to you, the first using purchaser, provided that the During this warranty period, BSH or one of its authorized... - Page 95 Warranty Exclusions TO THE EXTENT ALLOWED BY LAW, THIS WARRANTY SETS OUT YOUR EXCLUSIVE REMEDIES WITH The warranty coverage described herein excludes all RESPECT TO PRODUCT, WHETHER THE CLAIM defects or damage that are not the direct fault of BSH, ARISES IN CONTRACT OR TORT (INCLUDING STRICT including without limitation, one or more of the following: LIABILITY, OR NEGLIGENCE) OR OTHERWISE.
- Page 96 Statement of Limited Product Warranty English 94...
- Page 97 Statement of Limited Product Warranty English 95...
- Page 98 Our service team is ready to assist you. Marcone 800-287-1627 USA: Reliable Parts 800-663-6060 800-735-4328 www.thermador.com/support Canada: 800-735-4328 www.thermador.ca 1901 Main Street, Suite 600, Irvine, CA 92614 • 800-735-4328 • www.thermador.com 9001107010 • 5U073L • Rev. A • BSH Home Appliances Corporation • 05/15...