Sign In
Upload
Manuals
Brands
Yaesu Manuals
Transceiver
FTM-200DR
Yaesu FTM-200DR Manuals
Manuals and User Guides for Yaesu FTM-200DR. We have
7
Yaesu FTM-200DR manuals available for free PDF download: Operating Manual, Instruction Manual, Advance Manual
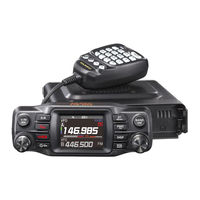
Yaesu FTM-200DR Advance Manual (67 pages)
DUAL BAND DIGITAL TRANSCEIVER
Brand:
Yaesu
| Category:
Transceiver
| Size: 8.91 MB
Table of Contents
Table of Contents
2
Digital Personal ID (DP-ID) Feature
6
About the Digital Personal ID (DP-ID) Feature
6
Registering the DP-ID to a DR-2X Digital Repeater
6
DR-2X Remote Control Feature
6
Registering the DP-ID of Other Stations
6
Deleting a Registered DP-ID
8
Communicating with Specified Stations in the Analog FM Mode
9
Selecting the Squelch Type in the Analog FM Mode
9
Tone Squelch Feature
10
Setting CTCSS Tone Frequency
10
Searching for the CTCSS Tone Transmitted by the Other Station
10
Digital Code Squelch (DCS) Feature
11
Setting the DCS CODE
11
Searching for the DCS Code Used by the Other Station
11
New Two-Tone CTCSS Pager Function
12
Using the Pager Function
12
Setting the Code for this Station
12
Receiving "Pager Code" Calls from a Remote Station (Standby Operation)
13
Notification of a Call from a Remote Station by the Bell Function
13
Convenient Memory Function
14
Programmable Memory Channel Scan (PMS)
14
Registering to the Programmable Memory Channels
14
Performing Programmable Memory Channel Scan
14
Receiving Weather Broadcast Channels
15
Assigning the "WX" Function to a Programmable Key on the Microphone
15
Recalling the Weather Channels
15
Listening with Weather Alert
15
DTMF Operation
16
Registering the DTMF Memory
16
Setting the Auto Dialer Function
16
Transmitting DTMF Code Automatically Using DTMF Memory
16
Manually Transmitting the DTMF Code
16
Using the GPS Function
17
Positioning Using GPS
17
Smart Navigation Function
18
Real-Time Navigation Function
18
Backtrack Function
18
Saving GPS Information (GPS Log Function)
20
Checking Tracks on Your PC
20
GPS Screen Information and Operation
21
Measuring the Altitude
22
Functions Used as Needed
23
Timer / Clock Function
23
Using the Lap Timer
23
Using the Countdown Timer
24
Using the Voice Guide Unit FVS-2
25
Mounting the Voice Guide Unit "FVS-2
25
Using the Voice Memory
26
Setting the Voice Memory Operation
26
Recording the Receive Audio
27
Replaying the Recorded Audio
27
Selecting the Track
27
Erasing the Recorded Audio
27
Voice Announcement of the Operating Frequency
28
Setting the Announce Function Operation
28
Voice Announcement of the Operating Frequency
29
Copying the Radio Data to Another Transceiver
30
Connecting an External Device
31
Connecting to a Computer
31
Transmitting GPS Location Information
32
Updating the Transceiver Firmware
32
Using the Transceiver for Packet Communications
33
Setup Menu
36
Setup Menu Operation
36
Tables of Setup Menu Operations
37
Setup Menu Operations
46
Display
46
Frequency Input
46
Lcd Brightness
46
Frequency Color
46
Band Scope
46
Location Info
46
Compass
47
Display Mode
47
Tx Power
47
Ams Tx Mode
47
MIC Gain
48
Vox
48
Auto Dialer
48
Tot
48
Digital Vw
48
Fm Bandwidth
49
Rx Mode
49
Memory
49
Home
49
Memory List
49
Memory List Mode
49
Pmg Clear
49
Config
50
Beep
50
Band Skip
50
Rpt Ars
50
Rpt Shift
50
Rpt Shift Freq
50
Rpt Reverse
51
MIC Program Key
51
Date&Time Adjust
51
Date&Time Format
51
Time Zone
51
Step
52
Clock Type
52
Unit
52
Apo
52
Gps Datum
52
Gps Device
53
Gps Log
53
Audio
53
Recording
53
Rec/Stop
53
Signaling
53
Dtmf
53
Dtmf Memory
54
Sql Type
54
Tone Sql Freq / Dcs Code
54
Sql Expansion
54
Pager Code
54
Pr Frequency
54
Bell Ringer
54
Wx Alert
55
Scan
55
Dual Rcv Mode
55
Dual Rx Interval
55
Priority Revert
55
Scan Resume
56
Digital
56
Digital Popup
56
Location Service
56
Standby Beep
56
Wires-X
57
Data
57
Com Port
57
Data Band
58
Data Speed
59
Data Sql
59
Aprs
59
Sd Card
60
104 Backup
60
105 Memory Info
60
106 Format
60
107 Bluetooth
61
108 Voice Memory
61
109 Fvs Rec
61
110 Track Select
61
111 Play
61
112 Stop
61
113 Clear
61
114 Voice Guide
61
115 Usb Camera
61
Clone
62
Reset
62
118 Callsign
62
119 Memory Ch Reset
62
120 Aprs Reset
62
121 Config Set
63
122 Config Recall
63
123 Software Version
63
124 Factory Reset
63
Appendix
64
The Folder Configuration of the Micro-SD Card
64
Maintenance
65
Care and Maintenance
65
Replacing the Fuse
65
Troubleshooting
66
There Is no Power
66
There Is no Sound
66
There Is no Transmission
66
The Keys or Knobs Do Not Operate
66
Advertisement
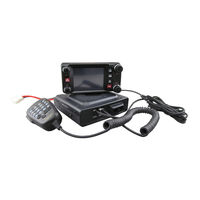
Yaesu FTM-200DR Operating Manual (82 pages)
C4FM/FM 144/430MHz DUAL BAND TRANSCEIVER
Brand:
Yaesu
| Category:
Transceiver
| Size: 23.22 MB
Table of Contents
Table of Contents
2
Introduction
3
Quick Guide
4
Supplied Accessories and Options
5
Supplied Accessories
5
Available Options
5
Basic Operation
6
Turning the Transceiver on
6
Adjusting the Volume
7
Adjusting the Squelch Level
7
Selecting a Frequency Band
7
Tuning to a Frequency
8
Changing the Operation Band
9
Transmitting
9
Locking the Keys and DIAL Knob
9
Useful Functions
10
CFL: Custom Function List
10
Pmg-Sr
11
Group Activity Monitor)
11
Band Scope
12
Memory Auto Grouping (MAG) Function
12
VFO Band Skip Function
12
Memory Channel VFO Copy
12
Setup Menu List
13
Name and Function of each Component
14
Panel (Front)
14
Panel (Left and Right Side)
16
Panel (Rear)
16
Main Body (Front)
17
Main Body (Rear)
17
Microphone (SSM-85D)
18
Display
20
Descriptions of Main Screens
22
Safety Precautions ( be Sure to Read )
25
Installing the Radio
27
About the Antenna
27
Connection of Antenna and Power Cables
27
Installing the Transceiver
28
Connecting the Front Panel to the Main Body
28
Using a Micro SD Memory Card
29
Functions to Use as Needed
30
Selecting the Communication Mode
30
Fixing the Communication Mode
31
Changing the Transmit Power Level
31
Setting the Skip Band
32
Changing the Frequency Step
32
Change the Frequency Display Color of the Operation Band
32
Custom Function List
33
Use the Function List
33
Registration to the Function List
34
Cancel Registration in the Function List
34
Using the Convenient Digital C4FM Features
35
About the Digital Group ID (DG-ID) Feature
35
Repeater Operation
38
Using the Memory
39
Writing to Memory
39
Recall Memory (There Are Three Ways)
40
Recall Only Memories in the same Frequency Band
42
Using the Memory Auto Grouping (MAG) Function
42
Edit Memory
43
Recalling the Home Channels
44
Changing the Home Channel Frequency
45
Split Memory
45
Pmg-Sr
47
Memory Group) Activity Monitor
47
Register the Frequency to PMG
47
Call up the PMG Screen
47
Switch between Auto Mode and Manual Mode
48
Auto Mode
48
Operation of Auto Mode
48
Manual Mode
49
Operation of Manual Mode
49
Unregister the Channel (Frequency) Registered in PMG
49
Scanning Function
50
VFO Scan / Memory Scan
50
Setting the Receive Operation When Scanning Stops
50
Skip Memory Channels
51
Programmable Memory Scan (PMS)
51
Convenience Features
52
Bluetooth ® Operation
52
Installing the Bluetooth ® Unit "BU-4
52
Pairing the Bluetooth ® Headset
53
Activate Transmit by Pressing the Button on the Bluetooth
54
Headset (When the VOX Function Is OFF)
54
Hands-Free VOX Operation with a Bluetooth ® Headset
54
VOX Operation
55
Setting VOX Function
55
Set the VOX (Voice Operated Transmit) Delay Time
56
Bluetooth ® Battery Save Function
56
Connect with Another Bluetooth ® Headset
57
Bluetooth ® Received Audio Output
58
Band Scope
59
Dual Receive Function
60
Priority Scan
60
A-B Dual Receive
60
Using the Voice Recorder
61
Recording the Receive Audio
61
Setting the Recording Function
62
Playback the Recorded Audio
63
Taking a Picture (Snapshot Function)
64
Taking Pictures
65
Viewing the Saved Image
65
Deleting Saved Images
66
Edit the Tag (Display Name) of the Saved Image
66
GPS Function
66
WIRES-X Function
66
APRS Function
66
Digital Personal ID (DP-ID) Feature
67
Tone Squelch Feature
67
Digital Code Squelch (DCS) Feature
67
New PAGER (EPCS) Feature
67
Using Setup Menu
68
Tables of Setup Menu Operations
69
Restoring to Defaults (Reset)
77
All Reset
77
Memory Channels Reset
77
APRS Reset
77
Text Input Screen
78
Specifications
79
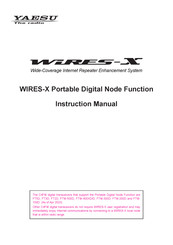
Yaesu FTM-200DR Instruction Manual (78 pages)
Portable Digital Node Function
Brand:
Yaesu
| Category:
Transceiver
| Size: 15.4 MB
Table of Contents
Preparation Procedure
2
Table of Contents
3
About this Manual
3
Introduction
4
What Is WIRES-X
4
What Is WIRES-X Portable Digital Node Function
4
System Requirements (Operating Environment)
7
Preparation
8
User Registration (Acquire an ID Number)
8
Install Latest WIRES-X Software to the PC
10
Install the USB Driver for the PC Connection Cable
11
Update the Firmware of the Transceiver
12
Connect the Transceiver and the PC
13
Communicating Only with C4FM Digital Mode (Portable Digital Node Mode)
13
Communicating with Digital or Analog FM Mode (Portable HRI Mode)
14
Initial Setting (Setting Is Required Only Once at the Beginning)
16
Start the Transceiver
16
Starting the WIRES-X Software
17
Communication Port Setting
17
Authenticate (Activate) the WIRES-X Server
18
Transceiver Settings (Access Point Only)
19
Basic Operation
21
Using the Portable Digital Node Mode
21
Connecting the Transceiver and the PC
21
Starting the WIRES-X Software
21
Starting the Transceiver in Special Mode
21
Setting the Transceiver (Access Point Only)
23
Start Operation of Portable Node
31
Connecting to a Node or a Room on the Internet
43
Communicating with Other Station
57
Disconnecting from the Node or Room
58
Closing the WIRES-X Software
58
Using the Portable HRI Mode
61
Connecting the Transceiver and the PC
61
Starting the WIRES-X Software
61
Starting the Transceiver in Special Mode
61
Connecting a Node or a Room by Operating the WIRES-X Software on the PC
62
Communicating with Other Station
63
Disconnecting from the Node or Room
64
Closing the WIRES-X Software
64
Operating the Transceiver in Portable HRI Mode
65
WIRES-X Software Main Screen
67
Functions to Use as Necessary
70
Audio Volume Adjustment of PC (Portable HRI Mode Only)
70
Adjusting Audio Level in the Access Point (Portable HRI Mode)
70
Adjusting Audio Level in the Direct Operation (Portable HRI Mode)
72
FT5D/FT3D/FT2D Direct Operation Dedicated Function
76
Bookmarking Frequently Connected Nodes or Rooms
77
Bookmarking Nodes or Rooms
77
Advertisement
Yaesu FTM-200DR Instruction Manual (66 pages)
Portable Digital Node Function
Brand:
Yaesu
| Category:
Transceiver
| Size: 13.83 MB
Table of Contents
Preparation Procedure
2
Table of Contents
3
Introduction
4
What Is WIRES-X
4
What Is WIRES-X Portable Digital Node Function
4
System Requirements (Operating Environment)
7
Preparation
8
User Registration (Acquire an ID Number)
8
Install Latest WIRES-X Software to the PC
9
Install the USB Driver for the PC Connection Cable
11
Update the Firmware of the Transceiver
11
Connect the Transceiver and the PC
13
Communicating Only with C4FM Digital Mode (Portable Digital Node Mode)
13
Communicating with Digital or Analog FM Mode (Portable HRI Mode)
14
Initial Setting (Setting Is Required Only Once at the Beginning)
16
Start the Transceiver
16
Starting the WIRES-X Software
17
Communication Port Setting
17
Authenticate (Activate) the WIRES-X Server
18
Transceiver Settings (Access Point Only)
19
Basic Operation
21
Using the Portable Digital Node Mode
21
Connecting the Transceiver and the PC
21
Starting the WIRES-X Software
21
Starting the Transceiver in Special Mode
21
Setting the Transceiver (Access Point Only)
22
Start Operation of Portable Node
28
Connecting to a Node or a Room on the Internet
37
Communicating with Other Station
47
Disconnecting from the Node or Room
47
Closing the WIRES-X Software
47
Using the Portable HRI Mode
50
Connecting the Transceiver and the PC
50
Starting the WIRES-X Software
50
Starting the Transceiver in Special Mode
50
Connecting a Node or a Room by Operating the WIRES-X Software on the PC
51
Communicating with Other Station
51
Disconnecting from the Node or Room
52
Closing the WIRES-X Software
52
Operating the Transceiver in Portable HRI Mode
53
WIRES-X Software Main Screen
55
Functions to Use as Necessary
58
Audio Volume Adjustment of PC (Portable HRI Mode Only)
58
Adjusting Audio Level in the Access Point (Portable HRI Mode)
58
Adjusting Audio Level in the Direct Operation (Portable HRI Mode)
60
FT5D/FT3D/FT2D Direct Operation Dedicated Function
64
Bookmarking Frequently Connected Nodes or Rooms
65
Bookmarking Nodes or Rooms
65
Yaesu FTM-200DR Instruction Manual (57 pages)
C4FM/FM 144/430MHZ DUAL BAND DIGITAL TRANSCEIVER
Brand:
Yaesu
| Category:
Transceiver
| Size: 8.06 MB
Table of Contents
Table of Contents
2
APRS ® Initial Settings
3
Initial Setting Process for APRS Operations
3
When Operating APRS Using the GPS Function
4
When Operating APRS Without Using the GPS Function
4
Setting Your Own Station Callsign
5
Setting the APRS Modem
5
Setting the APRS Baud Rate
6
Setting the APRS Operating Frequency
6
Other Initial Settings
6
Changing the Symbol of Your Station
6
Deciding the Operating Band
7
Receiving APRS ® Beacons
9
Receiving Beacons
9
Description of the APRS STATION LIST Screen and Operations
10
APRS Reception Pop-Up Setting
21
Display to Notify Reception of the same Beacon or Message
21
Audio Notification of a Beacon or Message Received APRS RINGER Function
22
Displaying RAW Packet Data
23
Deleting a Beacon Station from the List
23
Transmitting APRS ® Beacons
24
Transmitting an APRS Beacon Manually
24
Transmitting an APRS Beacon Automatically
24
Setting the Smartbeaconing
25
Registering Status Text
25
Selecting a Position Comment
26
Setting the Digipeater Route
27
Setting the Address of the Digipeater Route
28
APRS ® Message Screen and Operating Instructions
29
Description of the APRS MESSAGE LIST Screen and Operations
29
Checking Messages
29
Description of the APRS MESSAGE LIST Detail Screen and Operations
30
Message Edit Screen and Description of Operations
31
Receiving Messages
32
Filter Setting for Messages Received
32
Deleting a Message from the List
33
Transmitting APRS ® Messages
34
Creating and Sending Messages
34
APRS Setup Menu List
38
APRS Setup Menu Function List
42
Yaesu FTM-200DR Instruction Manual (32 pages)
C4FM/FM 144/430MHz DUAL BAND DIGITAL TRANSCEIVER
Brand:
Yaesu
| Category:
Transceiver
| Size: 4.03 MB
Table of Contents
Table of Contents
2
What Is WIRES-X
3
Terminology
4
Connecting to a Distant Station Using WIRES-X
7
Finding a Local Node
7
Connecting in Digital Mode
8
Connecting to a WIRES-X Digital Node
8
Connecting to a Node or Room on the Internet
10
Communicating with Others
12
Release the WIRES-X Connection
13
Useful Functions in Digital Mode
13
Using Preset Channels
13
Connecting to Registered Nodes or Rooms
14
Confirming the Location of the Local Node and the Partner Station
16
Operate the B Band
16
Connecting to Analog Nodes
17
Connecting to Nodes or Rooms on the Internet
17
Communicating with Others
17
Disconnecting from the Node or Room
17
Using WIRES-X Digital Node News Function
18
Viewing Messages
18
Viewing Text Data in Local Nodes
18
Viewing Text Data on the WIRES-X Server (INT NEWS)
19
Viewing Text Data in Nodes or Rooms on the Internet
21
Importing Images
21
Importing Images from Local Nodes
21
Importing Images from the WIRES-X Server (INT NEWS)
21
Importing Data from Nodes or Rooms on the Internet
22
Viewing Imported Data Later
22
Deleting Imported Data
23
Deleting a File
23
Listening to Audio Messages
23
Listening to Emergency Information in the Local Node
23
Listening to Routine Messages in Local Nodes
24
Listening to Routine Messages on the WIRES-X Server (INT NEWS)
24
Listening to Emergency Information in Nodes or Rooms on the Internet
24
Listening to Routine Messages in Nodes or Rooms on the Internet
25
Transmitting Messages and Images
25
Creating and Transmitting Messages to Local Nodes
25
Transmitting Saved Messages or Images to Local Nodes
26
Creating and Transmitting Messages to Nodes or Rooms on the Internet
26
Transmitting Saved Messages or Images to Nodes or Rooms on the Internet
27
Transmitting Audio Messages
27
Transmitting Emergency Information to Local Nodes
27
Transmitting Routine Voice Messages to Local Nodes
28
Transmitting Emergency Information to Nodes or Rooms on the Internet
28
Transmitting Routine Messages to Nodes or Rooms on the Internet
28
WIRES-X Setup Menus
29
WIRES-X Setting Mode List
29
Using the WIRES-X Setup Menu
29
Setting the Operating Frequencies for Repeaters/Wires-X
29
Setting the Item Order on the Node & Room Lists
29
Editing Category Names
29
Deleting the Registered Nodes and Rooms
30
The DG-ID Feature to Access the WIRES-X Node Station
30
Using the FTM-200DR/DE Transceiver as a Node Station
31
Yaesu FTM-200DR Instruction Manual (17 pages)
C4FM/FM 144/430MHz DUAL BAND DIGITAL TRANSCEIVER
Brand:
Yaesu
| Category:
Transceiver
| Size: 0.67 MB
Table of Contents
Table of Contents
2
What Is the GM Function
3
GM Operation
4
Display the APL (Automatic Position Locating) Screen
5
Confirm the Location of a Group Member Station in Real Time
6
Display the Position of the Member Station on the Compass Screen
6
Registering the Location Information of a Partner Station
7
Checking Received Messages and Images
8
Sending Massages or Images
10
Creating and Sending a New Message
10
Using Standard Messages
11
Registering a Standard Message
12
Replying to the Sender of the Checked Message or Image Data
13
Forwarding the Checked Message or Image Data
13
Sending Your Snapshot Images
14
GM Set Mode List
15
GM Set Mode Function List
15
Advertisement
Related Products
Yaesu FTM-200DE
Yaesu FTM-400DR
Yaesu FTM-350AR
Yaesu FTM-3200DR
Yaesu FTM-7250DR
Yaesu FTM-7250DE
Yaesu FTM-400XDR
Yaesu FTM-300DR
Yaesu FTM-300DE
Yaesu FTM-6000E
Yaesu Categories
Transceiver
Radio
Receiver
Two-Way Radio
Repeater
More Yaesu Manuals
Login
Sign In
OR
Sign in with Facebook
Sign in with Google
Upload manual
Upload from disk
Upload from URL