Sign In
Upload
Manuals
Brands
Thermo Scientific Manuals
Measuring Instruments
XL2
Thermo Scientific XL2 Manuals
Manuals and User Guides for Thermo Scientific XL2. We have
1
Thermo Scientific XL2 manual available for free PDF download: User Manual
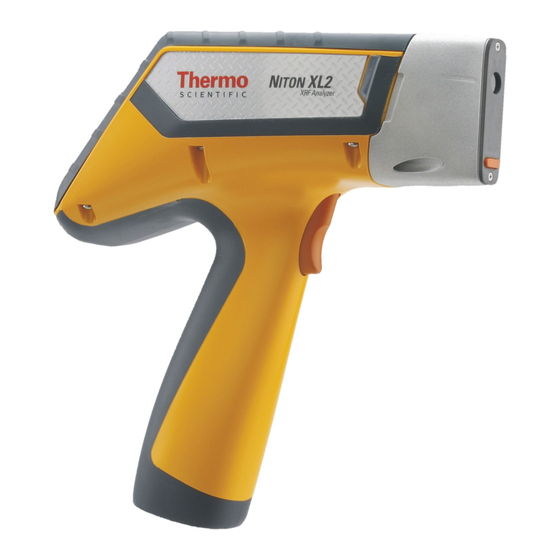
Thermo Scientific XL2 User Manual (203 pages)
Brand:
Thermo Scientific
| Category:
Measuring Instruments
| Size: 2.8 MB
Table of Contents
Table of Contents
5
Chapter 0 Contact Us
7
Contact Us
7
Chapter 1 Manual Overview
9
Figures
9
Physical Buttons
10
Other Hardware
10
Example Physical Buttons
10
Example Other Hardware
10
Warnings, Cautions, and Notes
9
Chapter 2 Using Your Analyzer
11
Safely and Effectively Using Your Analyzer
11
Radiation and General Safety
11
Radiation Protection Basics
11
Exposure to Radiation
12
Time
12
Distance
12
Shielding
12
Typical Radiation Doses Received
14
Annual Occupational Dose Limits for Radiation Workers
14
Monitoring Your Radiation Exposure
15
Pregnancy and Radiation Exposure
15
How to Use the Niton XL2 Analyzer Safely
16
Primary Beam
16
The Shutter-Open Indicator Lights
17
Secondary (Scattered) Beam
17
The X-Ray Beam Indicator Lights
17
Handle and Use with Respect
18
Follow a Radiation Protection Program
18
Take Proper Care of Your Niton XL2
18
Safe Handling of Samples
18
Small Samples
19
Irregularly Shaped Samples
19
Light Materials (such as Plastics)
19
Niton XL2 Radiation Profile
20
Radiation Meter Information
20
Background Radiation Level
20
Niton XL2 Radiation Profile - Scatter Measurements - Mrem/Hr
20
In Beam Measurements - Dose Rates in Rem/Hr
22
In Beam Measurements - Dose Rates in Msv/Hr
22
Niton XL2 GOLDD Radiation Profile
23
Niton XL2 GOLDD Radiation Profile - in Beam Measurements - Rem/Hr
24
Niton XL2 GOLDD Radiation Profile - in Beam Measurements - Msv/Hr
24
Primary and Secondary Dose Locations (Not to Scale)
25
Primary Radiation
26
Secondary Radiation
26
Deep and Shallow Dose
26
Proper and Improper Operation
27
Storage and Transportation
27
Lost or Stolen Instrument
27
Minor Damage
27
Major Damage
28
Emergency Response Information
29
Chapter 3 How to Analyze
31
How to Analyze
31
Element Ranges and Lists
32
General Analysis
32
Preparatory Tasks
32
The Element Range Screen
32
Setting Element Ranges
34
System Check Menu Path
34
General Testing Protocol
35
Instrument Qc
35
Undersized or Non-Contact Samples
35
Taking a Sample Analysis
37
Chapter 4 Basic Operation
37
Analysis Modes
45
General Metals Mode
45
Electronic Metals Mode
46
Precious Metals Mode
46
Plastics Mode
46
Soils Mode
46
Mining Ta/Hf Mode
47
Testall Mode
47
Testall Geo Mode
47
Using General Metals Mode
47
Using Electronic Metals Mode
48
Using Precious Metals Mode
48
Using Plastics Mode
50
Using Soils Mode
50
Using Mining Cu/Zn Mode
51
Using Mining Ta/Hf Mode
52
Using Testall Mode
52
Using Testall Geo Mode
52
Metal Sample Prep
55
Sample Analysis Preparation
55
Chapter 5 Common Operations
55
Surface Oxidation
56
Comparative Test Results with and Without Grinding
57
Painted Surfaces
57
Red Paint
57
White Paint
57
Clean and Greased Sample Metal Analysis
58
Oil, Grease & Cutting Oils
58
Prepped and Unprepped Painted Metal Analysis
58
Anodized, Plated and Galvanized Surfaces
59
Cordless Right Angle Drill
59
Example of Right Angle Drill
60
Sanding Disc
61
Attaching the Sanding Disc 1
62
Attaching the Sanding Disc 2
62
Cordless Angle Grinder
63
Cordless Angle Grinder Kit
63
Rubber Backing Pad and Nut
64
Assembling the Grinder
65
Sanding Discs
65
Diamond Sanding Paper
66
Safety Rules
66
Silicon Carbide
66
Zirconia Alumina
66
Cleaning Your Equipment
68
Preparing Bulk Soil Samples
68
Soil Sample Prep
68
Coning and Quartering
69
Placing the Sample in an XRF Sample Cup
69
Sample Preparation
69
Fill Cup
70
Place Film
70
Secure Film
70
Tamp Sample
70
Cap Cup
71
Label Cup
71
Place Filter
71
Stuff Cup
71
Preparing Liquids and Sludge
72
Preparing Mining Samples
72
Specimen Preparation - Fused Glass Disk
72
First Beep
73
Second Beep
73
Setting up Beep Times
73
Specimen Preparation - Pressed Powder Briquette Preparation
73
Beep on Grade Match
74
Display Options
74
Sorting the Custom Element Display
74
Third Beep
74
Detection Option
75
Max Measure Time
75
Minumum Test Time
75
Report Settings
75
Rohs Option
75
Virtual Keyboard
76
Clear
77
Del
77
Left
77
Right
77
Backspace
78
Cancel
78
Enter
78
Changing Precision (Sigma Value)
79
Confidence Intervals
79
Setting Display Units
79
Adjusting the Sigma Values
80
Selecting the Sigma Value
80
Adjusting the Element Range
81
Setting the Date and Time
82
The Date & Time Screen
83
Changing the Month
84
Month Drop down Menu
84
Changing the Year
85
Changing the Date
86
Selecting the Date
86
Changing the Hour and Minute
87
Exiting Without Saving
88
Saving Your Changes
88
Calibrating the Touch Screen
89
Initiating Touch Screen Calibration
89
Touch Screen Calibration Crosses
90
The View Data Menu Path
91
Viewing Data
91
Chapter 6 Data Management
91
Complete Listing of Elements
92
Scrolling down through the Complete Listing of Elements
92
Sorting Elements
92
Composition Sorts
93
Element Sorts
93
Error Sorts
93
Standard, High-To-Low, and Low-To-High Composition Sorts
93
Element, Composition, and Error Sorts
94
Spectrum Graph
94
How to Use Spectraview
95
Spectraview
95
Viewing the Information in Spectraview Mode
95
Viewing the Spectrum
95
Delineating the Area of Interest
96
Fitting the Spectrum
96
Area of Interest Fit to the Display
97
Multiple Ranges
97
Spectraview Navigation
97
The View Fingerprints Menu Path
98
Viewing Fingerprints
98
Erasing Data
99
The View Fingerprints Screen
99
The Erase All Data Confirmation Screen
100
The Erase All Data Menu Path
100
The Erase Readings Menu Path
101
The Erase Readings Screen
101
The Erase Readings Confirmation Screen
102
The Erase Fingerprints Menu Path
103
The Erase Fingerprints Screen
103
Managing Libraries
104
The Erase Fingerprints Confirmation Screen
104
The Manage Libraries Menu Path
104
The Library Editor
105
Viewing the Libraries
105
Add Button
106
Alloy Name Button
106
Del Button
106
Using the Library Editor
106
Close Button
107
Confirmation Screen
107
Save Button
107
The Element Specification Screen
107
Element to be Edited
108
Library Name
108
Minimum Percentage
108
The Element Specification Scree
108
Maximum Percentage
109
The Minimum Editor
109
Cancel Button
110
OK Button
110
The Maximum Editor
110
Installing the Windows 7 USB Driver
111
Chapter 7 Connectivity
111
Using Your Analyzer with Your PC
117
The Bluetooth Setup Menu Path
117
Search Button
118
BT Information Screen
118
Connecting from Your Analyzer to Your PC
119
Bluetooth Searching
119
Connecting Via Bluetooth
119
Connect Button
120
GPS Button
120
Reset Button
121
Config Button
121
Bluetooth GPS Data Screen
121
Changing the Bluetooth Device Type
122
Using a USB Cable to Connect Your Analyzer
122
Bluetooth Config Screen
122
Changing Bluetooth Device Type
122
Standard USB Connector
123
Mini USB Connector
123
Downloading Data
124
Standard Download
124
The Download Button
124
The Test Button
125
Connection Success Window
125
The Connect Button
125
Current Reading List
126
Selecting Readings
126
Using Check Boxes
127
The Browse Button
127
Error Messages While Downloading
129
The Progress Bar
129
Live Download (Automatic Save)
130
Live Download Icon
130
Changing the Filename for Live Download
131
Simultaneous Save as CSV File
131
File Dialog Box
131
Controlling Your Analyzer from Your PC
133
Start Measurement
133
Stop Measurement
133
The Ndtr Toolbar
133
Configure Connection Settings
134
Connection Settings Dialog Box
134
Selecting the Com Port
134
Live Download from Ndtr
135
Niton XL2 Virtual Interface
135
Operating Your Analyzer Remotely
135
Dest Folder
136
Save the Reading to CSV File as Well Checkbox
136
Selected File
136
Learning More, Service, and Support
137
Replacing the Measurement Window
137
Removing the Old Window
138
Polyethylene Window P/N 187-1555
138
Prolene Window PN 187-1454
139
Measurement Window Replaced
139
Tips and Troubleshooting
140
The Specs Screen
140
The Specs Screen Menu Path
140
The Specifications Screen
141
Instrument Specific Serial Number
141
Model Number
141
Date and Time
141
Fpga
142
Factory QC
142
Energy Cal
142
Battery
142
Diagnostics
143
The Diagnostics Screen
143
Error Messages
145
Registration and Licensing FAQ
146
What Is the Max Ma, Max Kvp, and Max Power?
146
What Is the Accelerator Voltage or Mev?
146
What Is the Radioisotope?
146
Storing and Transporting Your Niton XL2 Analyzer
147
What Is the Analyzer Serial Number?
147
What Is the Tube Serial Number?
147
How Often Do I Need to Perform Leak Tests on the Niton XL2?
147
The Niton Carrying Case
148
The Range Menu Path (Main)
151
Chapter 8 Advanced Settings
151
Selecting the Mode
152
The Element Checkboxes
153
The Range Element Lists
154
The Range Time Fields
155
The Range Time Editor
156
Avg Forward
157
Tools Menu Options
157
Avg Back (Alt)
158
Example Averaging Screens
158
Activating and Deactivating the Live Spectrum
159
Spectrum:on/Spectrum:off
159
The Virtual Numeric Keypad
159
Example Analysis Screen Showing Live Spectrum
160
Print (Alt)
160
Set Pass/Fail
160
Add/Remove (Toggle)
161
Set Pass/Fail Screen
161
Searching for Reference Alloys
162
Setting the Reference Alloys for Pass or Fail
162
The Pass Fail Setup Screen
162
Using the Search Function
162
Metals Pass and Fail Screens
163
Search Results
163
Uhow Pass/Fail Mode Works
163
Enable/Disable al
164
How to Apply Thickness Correction
164
Switch Library (Main)
164
Thickness Correction
164
How to Enable and Adjust Thickness Correction for Plastics Analysis
165
When to Use Thickness Correction
166
Wire Insulation Cut into Strands
166
Correct Way to Measure Heat Shrink Tubing
167
Incorrect Way to Measure Heat Shrink Tubing
167
PVC Wire Insulation with Conductor Removed
167
Action Level
168
Coatings Method
168
Enable/Disable Paint
168
Print Data
168
Passwords and User Privileges
169
Selecting File
169
Selecting Help
169
Creating the Security Key
170
Security Key
170
User Account Creation Screen
171
User Creation Dialog Box
171
Creating a User
172
Unchecking Safety
173
User Is Created
173
Selecting Upload
174
Successful Installation Message
176
Creating a New NDF File
177
Creating New User-Defined Fields
177
NDF Files: User Data Structuring
177
NDF File Work Area
178
Selecting New Mode
178
Selecting Mode
179
Working Within a Mode
179
Adding a New Field
180
Mode Pop-Up Menu
180
Making Fields Required
181
Clearing Data for New Readings
182
Field Status Window - Default
182
Making Fields Incremental
182
Editing the Field Name
183
Field Status Window - Options Enabled
183
Toggling the Required Option
184
Copying the Current Field
185
Pasting a Copied Field
185
Creating a New Entry
186
Editing the New Entry
186
New Entry in the Construction Window
186
Deleting Fields and Entries
187
Sorting Entries
187
Uploading the NDF File
187
Testing the Upload Connection
188
Safety Settings
189
Safety Settings Menu Path
189
Start/Stop Setup
191
The Start/Stop Settings Menu Path
191
Easy Trigger
192
Max Time Field
192
Proximity Start
192
Remote Trigger
192
Methods of Operation
194
Camera
196
How to Use the Camera
196
Setting up the Camera View and Image Saving
198
The Camera Menu Path
198
Chapter 8 Service
199
Warranty
199
Accessories, Spares and Consumables - Exclusions
200
Advertisement
Advertisement
Related Products
Thermo Scientific NITON XL3t 500
Thermo Scientific Phenom XL G2 Desktop SEM
Thermo Scientific Sorvall Legend X1R
Thermo Scientific Sorvall X4 Pro
Thermo Scientific Sorvall X4R Pro-MD
Thermo Scientific XBF40D-MD
Thermo Scientific BIOLiner Multifuge X3
Thermo Scientific 1064Defender
Thermo Scientific 117080-00
Thermo Scientific 20 GENESYS
Thermo Scientific Categories
Laboratory Equipment
Measuring Instruments
Accessories
Freezer
Refrigerator
More Thermo Scientific Manuals
Login
Sign In
OR
Sign in with Facebook
Sign in with Google
Upload manual
Upload from disk
Upload from URL