Sign In
Upload
Manuals
Brands
Ricoh Manuals
Printer
Pro C5300S
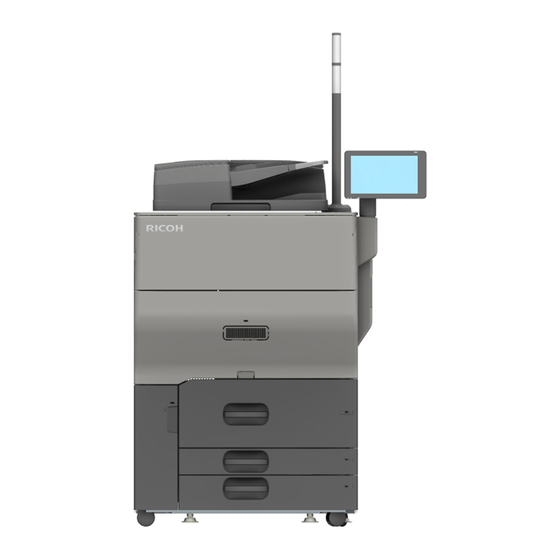
Ricoh Pro C5300S Manuals
Manuals and User Guides for Ricoh Pro C5300S. We have
2
Ricoh Pro C5300S manuals available for free PDF download: Operator's Manual, Operating Instructions Manual
Ricoh Pro C5300S Operator's Manual (548 pages)
Brand:
Ricoh
| Category:
Printer
| Size: 27.88 MB
Table of Contents
How to Read the Manuals
3
Symbols Used in the Manuals
3
Notes
3
Table of Contents
4
Getting Started
17
Abbreviated Names of Options
17
Classic Applications
20
Turning on and off the Power
21
Turning on the Main Power
21
Turning off the Main Power
22
Energy Saving Mode
22
Guide to Names and Functions of Components
25
Front and Left View
25
Front and Right View
26
Rear and Left View
28
Guide to Functions of the Attention Light
28
Machine Options
30
Guide to Functions of the Machine's External Options
30
Guide to Functions of the Machine's Internal Options
37
Special Notes When Using External Options
39
Precautions for Using the Finisher
39
Removing Prints from Finisher Sr5090/Booklet Finisher SR5100 During Printing
40
Removing Prints from Finisher Sr5110/Booklet Finisher SR5120 During Printing or When in Standby State
40
When Using the Z-Fold Function
42
When Using the Letter Fold-Out Function
45
When Ejecting Thin Paper to Finisher Sr5110/Booklet Finisher SR5120
46
When Ejecting Carbonless Paper Weighing 63 G/M or Less to Finisher Sr5110/Booklet Finisher SR5120
47
When Ejecting Banner Sheets to Finisher Sr5110/Booklet Finisher SR5120
48
When Ejecting a Large Number of Booklets to the Booklet Tray of Booklet Finisher SR5120
48
When Using the Staple Function of Finisher Sr5110/Booklet Finisher SR5120 on Thin Coated Paper Weighing 80 G/M2 or Less
49
When Using the High Capacity Stacker
51
When Ejecting Thick Paper or Envelopes to the Upper Tray of the High Capacity Stacker
55
Precautions Taking Booklets from the Trimmer
56
Functions Requiring Optional Configurations
57
Copy Function
57
Facsimile Functions
58
Printer Function
59
Scanner Function
60
Interface
61
Others
61
Names and Functions of the Control Panel
62
Touch Panel/Interface
62
LED Indicators
63
How to Use the Home Screen
65
Intuitive Screen Operation Using Fingertips
67
How to Use the Machine Status Screen
70
How to Use the "Settings
71
How to Use the Copy (Classic) Screen
74
Switching Screen Patterns
76
[Connect Copy] Screen
76
How to Use the Fax (Classic) Screen
78
Switching Screen Patterns
80
How to Use the Scan (Classic) Screen
82
Switching Screen Patterns
84
How to Use the Printer (Classic) Screen
85
Switching Screen Patterns
86
Logging in from the Control Panel
88
Logging in by Entering the User Name and Password
89
Logging in Using an IC Card
90
Logging in Using a Mobile Device
90
Authenticating Using the User Code
92
Changing the Login Password
92
Copy
95
Basic Procedure
95
Auto Reduce / Enlarge
97
Duplex Copying
99
Specifying the Original and Copy Orientation
101
Combined Copying
103
One-Sided Combine
105
Two-Sided Combine
107
Copying Onto Envelopes
109
Copying Onto Envelopes from the Bypass Tray
109
Copying Onto Envelopes from the Paper Tray or the Wide LCT
110
Sort
111
Fax
115
Basic Procedure for Fax Transmissions (Memory Transmission)
115
Sending Originals Using the Exposure Glass
117
Registering Fax Numbers in the Address Book
119
Registering a Fax Number and Send Conditions
119
Changing/Deleting the Registered Data such as Fax Number
120
Displaying Confirmation of Transmission
122
Viewing the Fax Transmission Result
123
Printing the Fax Transmission Result
123
Sending the Fax Transmission Result
124
Printing the Fax Transmission Result and Sending It by E-Mail
124
Communication Result Report (Memory Transmission)
125
Immediate TX Result Report (Immediate Transmission)
125
Communication Failure Report
125
Print
127
Installing the Printer Driver by Using Device Software Manager Installer
127
Installing Device Software Manager from the CD-ROM
127
Installing Device Software Manager from the Downloaded File
130
Installing the Printer Driver for Network Connection (Windows)
133
Installing the PCL 6 Printer Driver from the CD-ROM
133
Installing the Postscript 3 Printer Driver from the CD-ROM
136
Installing the PCL 6/Postscript 3 Printer Driver from the Downloaded File
138
Installing the Printer Driver for Windows
139
If the Machine Cannot be Found
140
Installing the Printer Driver for Network Connection (Macos)
144
Installing the PPD File
144
Registering the Machine in [Print & Scan] or [Printers & Scanners]
145
Specifying the Option Settings
148
Basic Procedure for Printing Documents
150
Printing a Document in Windows
150
Printing a Document in Macos
152
Printing on both Sides of Paper
155
Specifying 2-Sided Print (Windows)
155
Specifying 2-Sided Print (Macos)
155
Combining and Printing Multiple Pages on a Single Sheet of Paper
157
Specifying the Combine 2 Originals Function (Windows)
157
Specifying the Combine 2 Originals Function (Macos)
157
Printing on Envelopes
159
Scan
161
Basic Procedure for Sending Scan Files by E-Mail
161
Procedure for Sending Files to the Shared Folder Registered in the Address Book
165
Procedure for Specifying Scan Settings
167
Original Type
167
Resolution
168
Scan Size
169
Edit
173
Specifying the File Type and File Name
175
Specifying the File Type
175
Specifying the File Name
177
Document Server
181
Storing Documents in Document Server
181
Printing Documents in Document Server
183
Printing a Document with the Settings Specified When Scanned
183
Changing the Print Settings to Print a Document
184
Specifying a Page to Print
185
Web Image Monitor
187
Using Web Image Monitor
187
What You Can Do on the Web Image Monitor
188
Web Image Monitor Screen
190
Specifying Web Image Monitor Help
190
Paper Specifications and Adding Paper
193
Placing an Original on the Exposure Glass
193
Placing an Original in the Auto Document Feeder (ADF)
195
Loading Paper into the Paper Tray
199
Fanning the Paper
200
Loading Paper into Tray 1
202
Loading Paper into the A3/11 × 17 Tray Unit
204
Loading Paper into Trays 2 and 3
205
Loading Tab Stock into Trays 2 and 3
208
Loading Paper into the Bypass Tray
209
Loading Tab Stock into the Bypass Tray
212
Loading Paper into the Multi Bypass Banner Sheet Tray
212
Loading Paper into the Banner Sheet Guide Tray
215
Loading Paper into the Multi Bypass Tray (Tray A)
216
Loading Tab Stock into the Multi Bypass Tray (Tray A)
218
Loading Paper into the Large Capacity Tray (LCT)
219
Loading Paper into the Wide LCT
220
Loading Tab Stock into the Wide LCT
224
Loading Paper with a Vertical Size of 100.0 MM to 139.2 MM in Wide LCT
225
Loading B5 Vertical or Larger Paper in Wide LCT
227
Loading Paper into the Two-Tray Wide LCT
230
Loading Tab Stock into the Two-Tray Wide LCT
235
Attaching the Small Tab End Fence to the Two-Tray Wide LCT
236
Loading Paper into the Interposer
237
Loading Paper into the Twin Interposer
239
Specifying the Paper Size that Is Not Automatically Detected
240
Specifying a Custom Size Paper
241
Recommended Paper Sizes and Types
243
Tray 1
243
Tray 1 (A3/11 × 17 Tray Unit)
243
Trays 2 and 3
244
Bypass Tray
247
Large Capacity Tray
252
Extension Unit (for LCT)
252
Wide LCT
253
Two-Tray Wide LCT (Tray T1/T2)
258
Multi Bypass Tray (Tray A)
266
Interposer
269
Twin Interposer
270
Notes on Special Paper
273
Paper Thickness for each Paper Weight
274
Unusable Paper
275
Paper Storage
276
Saving Printouts
276
Thick Paper Orientation and Recommended Status
278
Envelope Orientation and Recommended Status
279
Using the Copy Function
280
Using the Printer Function
281
Loading Orientation-Fixed Paper or Two-Sided Paper
283
Copying Onto Letterhead Paper
283
Printing Onto Letterhead Paper Using the Printer Driver
284
Recommended Original Size and Weight
286
Sizes Detectable with Auto Paper Select
288
Paper Settings
291
Registering Custom Paper
291
Overview of Paper Settings
291
How to Use the [Edit Custom Paper] Screen
294
How to Use the [Import from Master Library] Screen
295
Registering a Custom Paper
296
Registering a Custom Paper with the Media Identification Unit
301
Modifying a Custom Paper
307
Custom Paper Settings
308
Adjusting the Image Position of the Either Side of the Paper
311
Searching for a Paper by Specifying the Conditions
313
Printing the Parameters of Custom Paper Settings
314
Deleting a Custom Paper
315
Backing up and Restoring Custom Paper Profiles
316
Changing Tray Paper Settings
318
Specifying a Custom Paper
318
Manually Specifying a Paper's Size and Type
319
Feed Speed Auto Adjustment
319
10. Adjustment Settings for Operators
321
How to Use the [Adjustment Settings for Operators] Screen
321
Opening and Closing Adjustment Settings for Operators
322
Features of the Displayed Items and Setting Operations
322
Printing with Adjusted Settings
324
02: Machine: Image Quality
326
0209: Photoconductor Special Mode
326
0210: Smooth Fusing Belt
326
0211: Fusing Ability by Feed Speed
326
0214: Fusing Belt Smoothing Setting: Uneven Gloss
327
03: Machine: Paper Feed/ Output
328
0303: Criteria for Paper Weight
328
0308: Connection Unit: Registration Gate Home Position
329
05: Machine: Maintenance
330
0509: Execute Developer Refreshing
330
0511: Temperature / Humidity Outside the Machine
330
0512: Back up / Restore Custom Paper Data
330
0513: Switch Print Screen
331
07: Finishing: Finisher
332
0701: Punch Position: with Feed
332
0702: Punch Position: Across Feed
332
0703: Staple Position
333
0704: Staple Position for Booklet
334
0705: Folding Position for Booklet
335
0706: Folding Speed for Booklet
338
0801: Staple Position: Across Feed 1
339
0802: Staple Position: Across Feed 2
340
0803: Staple Position: with Feed
341
0813: Punch Position: Across Feed
342
0814: Punch Position: with Feed
343
0825: Staple Position for Booklet
344
0826: Folding Position for Booklet
345
0828: Set Number of Folds for Booklet
347
0838: Accuracy Priority for Stapling
347
0839: Accuracy Priority for Booklet
347
0840: Staple Tray: Rib Installed Mode to Strengthen Paper
348
09: Finishing: Fold
349
0901: Z-Fold Position 1
349
0902: Z-Fold Position 2
349
0903: Half Fold Position: 1 Sheet Fold
350
0904: Half Fold Position: Multi-Sheet Fold
351
0905: Letter Fold-Out Position 1: 1 Sheet Fold
352
0906: Letter Fold-Out Position 1: Multi-Sheet Fold
353
0907: Letter Fold-Out Position 2: 1 Sheet Fold
354
0908: Letter Fold-Out Position 2: Multi-Sheet Fold
355
0909: Letter Fold-In Position 1: 1 Sheet Fold
356
0910: Letter Fold-In Position 1: Multi-Sheet Fold
357
0911: Letter Fold-In Position 2: 1 Sheet Fold
357
0912: Letter Fold-In Position 2: Multi-Sheet Fold
358
0913: Double Parallel Fold Position 1
359
0914: Double Parallel Fold Position 2
360
0915: Gate Fold Position 1
361
0916: Gate Fold Position 2
361
0917: Gate Fold Position 3
362
10: Finishing: Stacker
363
1004: Maximum Stack Quantity in Stacker Tray
363
21: Finishing: Interposer
364
2102: Interposer: Fan Setting
364
2103: Interposer: Fan Level
364
11. Troubleshooting
365
Alert Sounds
365
Checking the Indicators, Icons, and Messages on the Control Panel
367
When an Icon Is Displayed with a Message
367
When the [Check Status] Indicator Is Lit or Flashing
369
When the Machine Cannot be Operated
371
When the Machine Does Not Respond Correctly to an Operation on the Control Panel
371
When the Machine Does Not Respond Correctly to an Operation from a Computer
374
When a Message Appears and the Machine Cannot be Operated
376
When a Message Appears While Using the Copy Function
379
When a Message Appears While Using Document Server
381
When a Message Appears While Using the Fax Function
383
Messages that Appear When the Machine Cannot Connect to the Network
385
When a Message Appears While Using the Printer Function
394
Messages that Appear Without Error Codes
394
Messages that Appear with Error Codes
407
When a Message Appears While Using the Scanner Function
411
Messages that Appear on the Control Panel
411
When Documents Cannot be Scanned Properly
419
When Documents Cannot be Scanned Because the Memory Is Full
419
When Data Transmission Fails
420
When Data Cannot be Sent Because a Currently Used File Is Selected
420
When Data Cannot be Sent Because There Are too Many Documents or Pages
421
When the WSD Scanner Function Cannot be Used
421
When Stored Files Cannot be Accessed
422
When Stored Files Cannot be Edited
423
When You Cannot Send Scan Files Using WSD
423
Messages that Appear on the Computer
423
When Other Messages Appear
430
Messages that Appear When Machine Login Fails
432
Messages that Appear When Logging in to the Machine Using an IC Card Fails
440
Messages that Appear When the LDAP Server Is Unavailable
441
Messages that Appear When There Is a Problem with the Certificate
442
Messages that Appear When an Application Site Cannot be Used
443
Precautions When Removing Jammed Paper
445
This Machine
445
Finisher Sr5110/Booklet Finisher SR5120
447
Wide LCT
449
Interposer
450
Twin Interposer
451
Finisher Bridge Unit
452
When Paper or an Original Is Jammed
453
If Paper Jams Occur Frequently
456
Removing Jammed Banner Sheets
459
If the Trailing Edge of the Banner Sheet Is on the Bypass Tray
459
If the Leading Edge of the Banner Sheet Is over the Finisher Tray
461
When a Staple Is Jammed
462
Finisher SR5090
462
Booklet Finisher SR5100
463
Booklet Finisher SR5100 (Saddle Stitch)
464
Finisher SR5110
465
Booklet Finisher SR5120
466
Booklet Finisher SR5120 (Saddle Stitch)
467
When the Hole Punch Receptacle Is Full
468
Removing Staple Waste
469
Removing Waste Paper
470
When a Deviation in Color Registration Appears
471
When Printed Colors Appear Differently
472
12. Specifications for the Machine
475
Model-Specific Information
475
List of Specifications for Standard Functions
476
Specifications for the Main Unit
476
Specifications for the Document Server
485
Specifications for Printer
486
Specifications for Scanner
488
Specifications for Auto Document Feeder
492
List of Specifications for External Options
493
Specifications for Finisher SR5090
493
Specifications for Booklet Finisher SR5100
497
Specifications for Finisher SR5110
501
Specifications for Booklet Finisher SR5120
506
Specifications for Copy Tray
513
Specifications for Punch Unit (Finisher SR5090, Booklet Finisher SR5100)
514
Specifications for Punch Unit (Finisher SR5110, Booklet Finisher SR5120)
515
Specifications for Interposer
516
Specifications for Twin Interposer
516
Specifications for Folding Unit
517
Specifications for Output Jogger
518
Specifications for Large Capacity Tray (LCT)
519
Specifications for Wide Large Capacity Tray
519
Specifications for Two-Tray Wide Large Capacity Tray
520
Specifications for Multi Bypass Tray (Tray A)
521
Specifications for Two-Tray Wide LCT Connection Unit
521
Specifications for Decurler Unit
522
Specifications for Buffer Pass Unit
523
Specifications for Trimmer
524
Specifications for High Capacity Stacker
525
Specifications for Finisher Bridge Unit
527
List of Specifications for Internal Options
528
Specifications for Facsimile
528
Specifications for IEEE 1284 Interface Board
533
Specifications for Wireless LAN Board
533
The Setting Values of the Transmission Function
535
Send Email
535
Send to Folder
536
Broadcast Transmission
537
13. Legal and Contact Information
539
Environmental Regulations
539
ENERGY STAR Program
539
Energy Saving Functions
539
(Mainly North America)
539
User Information on Electrical and Electronic Equipment
541
(Mainly Europe)
541
Note for the Battery And/Or Accumulator Symbol (for EU Countries Only)
542
Environmental Advice for Users
542
(Mainly Europe)
542
Notes to Users in the State of California (Notes to Users in USA)
543
Trademarks
544
Advertisement
Ricoh Pro C5300S Operating Instructions Manual (140 pages)
Brand:
Ricoh
| Category:
All in One Printer
| Size: 28.83 MB
Table of Contents
Table of Contents
3
1 Notes on What to Do before Using the Machine
7
How to Search for Information on Using the Product and Troubleshooting
7
Manuals for this Machine
7
Searching the Manual for Information on Troubleshooting
8
Using Help and FAQ to Solve Problems
9
Notes on Marks
9
Turning on and off the Power
10
Touch Panel/Attention Light
11
Operating the Screen
12
Confirming the Counter
13
Warning Indicator
13
2 Loading Paper
15
Fanning the Paper
15
Loading Paper into the Paper Tray
17
Loading Paper into Tray 1
17
Loading Paper into Trays 2 and 3
18
Loading Paper into the Bypass Tray
22
Notes on Loading Coated Paper
24
Recommended Paper Sizes and Types
24
3 Printing on Special and Thick Paper with Optimal Settings
33
Setup / Applying Machine Settings
33
Overview of Paper Settings
35
Why Paper Settings Are Required
35
Relationships between Functions
37
Printing Using Master Library
38
Configuring Paper from the Master Library
38
If the Brand of Paper in Use Is Not in the Master Library
39
Printing Using Custom Paper
39
Paper Weight Conversion Table
41
Printing on Envelopes
46
How to Measure the Size and Load an Envelope in the Bypass Tray
46
Tray Paper Settings on the Machine When Loading Envelopes from the Bypass Tray
47
Editing Custom Paper Settings
47
Printing Using Custom Paper
48
If Creases Appear When Printing an Envelope
50
Custom Paper Management
52
Deleting Registered Custom Paper
52
Backing up and Restoring Custom Paper Profiles
52
4 Printing on Special and Thick Paper with Essential Basic Settings
55
Configuring Paper Settings Manually for Printing
55
Printing with Manual Paper Settings
56
5 Using Advanced Functions
59
Copy
59
Copying in Color
60
Copying with Size Enlargement/Reduction According to the Paper Size
61
Copying Multiple Originals of Varying Sizes
61
Stapling/Punching
62
Duplex/Combine/ Magazine
62
Storing Documents on the Document Server
63
Other Available Operations
64
Fax
65
Sending Faxes (Memory Transmission)
65
Preventing a Fax Transmission to the Wrong Destination
66
Available Operations When Sending Faxes
66
Receiving Faxes
67
Available Operations When Receiving Faxes
67
Registering, Editing and Deleting Address Book Data
69
Registering Destinations in the Address Book
69
Editing/Deleting Data Registered in the Address Book
71
Backing up the Address Book
71
Scan
73
Scan (Storing Files on the Machine)
73
Scan (Sending to the Folder)
73
Procedure for Specifying Scan Settings
74
Scanning Originals Containing 1- and 2-Sided Sheets
75
Specifying the File Type
75
Embedding Text Information in Scanned Data
76
Previewing the Image before Sending It
77
Registering Scan-To-Folder Destinations
78
Manual Registration
78
Printer
81
Print (Windows)
81
Printing from a Computer
81
Print (Macos)
89
Managing Files with the Document Server
94
Storing Documents in Document Server
94
Printing Documents in Document Server
95
Erasing Documents from Document Server
95
Configuring/Managing the Machine Via a Web Browser (Web Image Monitor)
96
Launch the Web Image Monitor
96
Downloading and Managing Document Server Files
96
What You Can Do on the Web Image Monitor
97
6 Replacing Consumables / Waste Toner Bottle
99
Replacing the Toner
99
Replacing the Waste Toner Bottle
100
Replenishing the Staples
100
Removing Chad and Paper Debris Produced by Punching / Stapling / Paper Cutting
101
7 Troubleshooting
103
Original/Copy Paper Jam
103
Density Fluctuation, Streaks and Background Staining
105
Image Density
105
Background Stain, White Spots, Density Fluctuation and Faint Blacks (Developer Refreshing)
106
Streaks Appear after Changing the Paper Size (Smooth Fusing Belt)
106
Adjusting Stapling and Folding Positions
108
Streaks on Printed Images
110
Streaks on Copies and Scans
110
Adjusting Color by Auto Color Calibration
112
Aligning Front and Back Images in Duplex Printing
113
Manual Adjustment
113
Auto Adjustment and Quick Auto Adjustment
114
Stacking Error or Delivery Error of Thin/Thick Paper When Using the Copy Tray (Copy Tray Type M42)
116
Adjusting the Copy Tray Angle
116
Returning the Copy Tray to Its Original Angle
118
Frequently Asked Questions (FAQ)
120
If a Service Call (SC) Appears
126
8 Installing the Printer Driver
127
Installing the Printer Driver by Using Device Software Manager Installer
127
Installing the Downloaded Driver (Windows)
130
Installing the Downloaded Driver (Macos)
132
Advertisement
Related Products
Ricoh Pro C5100S
Ricoh Pro C5110S
Ricoh Pro C5200s
Ricoh Pro C5210s
Ricoh Pro C5200 Series
Ricoh Pro C5310S
Ricoh Pro C9200
Ricoh Pro C9210
Ricoh Pro C9500
Ricoh Pro C9500H
Ricoh Categories
All in One Printer
Printer
Digital Camera
Copier
Printer Accessories
More Ricoh Manuals
Login
Sign In
OR
Sign in with Facebook
Sign in with Google
Upload manual
Upload from disk
Upload from URL