Sign In
Upload
Manuals
Brands
JVC Manuals
DVR
VR-N900U
JVC VR-N900U Manuals
Manuals and User Guides for JVC VR-N900U. We have
7
JVC VR-N900U manuals available for free PDF download: Instructions Manual, Startup Manual, Manual
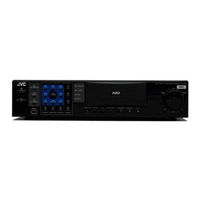
JVC VR-N900U Instructions Manual (168 pages)
JVC Network Video Recorder Instruction Manual
Brand:
JVC
| Category:
DVR
| Size: 23 MB
Table of Contents
Important Safeguards
2
Safety Precautions
4
Getting Started
10
Features
10
How to Read this Manual
10
Getting Started
12
Export Restrictions
15
Liability Limitations
15
Table of Contents
16
Contents
16
Precautions for Proper Use of this Product
18
Maintenance
19
Software Installation
19
Part Names and Functions (VR-N1600U/E)
20
Part Names and Functions
22
Rear Panel
22
Front Panel
24
Part Names and Functions (VR-N900U)
24
Rear Panel Terminals
28
Camera Control Terminal (VR-N900U)
29
Differences When Operating VR-N1600U/E and VR-N900U
29
Mounting to a Rack
29
During Initial Startup
30
Operation Lock
30
Selecting a Language
31
Preparation
34
System Connection Example
34
Clock Display
35
Performance Meter
35
Character Input and Mouse Pointer
36
Entering Characters Using a Mouse
36
Controlling Mouse Pointer from the Front Panel (Without Connecting a Mouse (Sold Separately))
36
Changing Monitor Resolution
37
Precautions When Changing Settings
37
Precautions When Changing Display Settings
37
Basic Operation
38
Switching the Power On/Off
38
Switching Operation On/Off
38
Login
39
Basic Operation
40
Opening the Main Menu
40
NVR Viewer
41
Viewing Live Images Via Front Panel Control
42
Displaying the [Live] Screen
42
Select a View
42
Select a Camera
42
Operating the Camera
43
Viewing Live Images Via Mouse Control
44
Displaying the [Live] Screen
44
Select a View
44
Select a Camera
44
Viewing Images Using the PTZ Features
45
Control Section
45
Using Preset Positions
46
Other Useful Functions
46
Playing Back Recorded Images Via Front Panel Control
48
Select a View
48
Searching Recorded Image Using a Specific Date/Time
48
Playing, Skipping and Stopping Recorded Images
49
Adjusting the Playback Speed (Jog/Shuttle Playback)
49
Playing Back Recorded Images Via Mouse Control
50
Select a View
51
Searching Recorded Image Using [Time Navigation]
51
Searching Recorded Image Using the Timeline Browser
52
Searching Recorded Image Using Sequence
52
Searching Recorded Image from the Alert List
53
Smart Search
53
[Browse] Screen
53
Playing, Skipping and Stopping Recorded Images
54
Browse Button
54
[Time] Slider
54
Listening to Audio Sound
55
Writing Images/Audio Sound to Cds, Dvds and Other Media (Export)
55
Deleting Temporary Files (Operation on the Unit)
58
Deleting Data from a CD-RW (Operation on the Unit)
58
Writing Data to a USB Memory Device (Operation on the Unit)
58
Operation from a Surveillance Computer
59
Printing Recorded Images (Operation from a Surveillance Computer)
59
Recording Camera Images
60
Recording Modes
60
Recording Operation During Power Failure
60
Selecting the Recording Control Mode
61
Selecting the Manual Recording Mode
61
Scheduler Setting
61
Specifying Image Recording Settings
63
Settings
64
Setting Picture Quality
66
Specifying Audio Recording Settings
67
Renaming Cameras and Assigning Camera Numbers
68
Screen Setup
68
Screen Display (Groups and Views)
68
Creating Groups and Views
69
Adding Cameras to a View
71
Adjusting Camera Settings
71
Using Your Views on Different Computers
72
Adding a Carousel
72
Adding Hot Spots (Enlarged Images)
74
Using the [Html Page]
75
Using Still Images (GIF/JPEG Files, Etc.)
75
Adding Matrix Content
75
Applications
76
Main Menu List
76
List of Menu Screens
76
Unit Setting 1
77
Average File Size
79
Unit Setting 2
80
OS Setting
81
Network Adapter
81
Image Server Setting
84
Auto Detect Setting
88
Camera Record Setting
91
Optional Installation
93
Adding Cameras
94
Analog Cameras (VR-N900U)
94
Adding an Analog Camera (VR-N900U)
94
Editing Device Settings
95
PTZ Camera Settings (COM1/COM2)
96
Defining a Preset PTZ Position
98
Stopping the Recording Server
98
Display the [PTZ Preset Positions for Device Name] Window
98
Defining a Preset Position
100
Moving to Preset Positions by Events
100
Auto PTZ Patrolling
101
Camera Input/Output Port and Events
103
I/O Settings
103
Input/Output Terminal on Rear Panel
105
Specifying a VMD Event
105
Specifying Timer Events
105
Specifying an Output
106
[Advanced] Screen
106
Configuring Event Buttons
107
Specifying Generic Events
108
Notification Settings
109
Event Notification Settings
110
Specifying an Output Port
110
Camera Output Settings
111
Motion Settings
112
General Settings
114
E-Mail Settings
115
Archiving
116
Precautions When Changing NAS Archive Settings
117
Precautions When Changing Archive Settings
117
Database Settings
118
Flash Memory Utility
119
Auto Detect Settings
121
Specifying IP Lease
121
Language Setting
123
Select a Language
123
HDD Utility
124
Restoring Default Settings
125
Distribution Settings (Details)
126
User Administration
126
Master/Slave Settings
128
Connecting to a Computer
129
Installation Complete
132
Logging out
134
Audio Transmission Application Control (VR-N1600U/E)
135
Audio Transmission
135
Event Audio Settings (VR-N1600U/E)
137
Audio Copying
138
Setting Screen
138
Setting Copy
139
Password
139
Communication Settings
140
HDD Meter
141
Displaying the HDD Meter
141
Setting SNMP
142
Others
144
Compatible Equipment
144
Compatible Network Cameras
144
Connecting a UPS
144
External Hard Disk Drives
144
Connecting the External Hard Disk Drive
144
Nas
145
Special Key Operations
146
Combining a Button with the [FUNCTION] Button
146
Pressing a Button for Two Seconds or Longer
146
Recording Before/After Occurrence of Event or Motion
147
PTZ Camera Control
147
Display and Saving of Maintenance Information
149
Export Viewer
150
Customizing Joystick Settings
152
Configuring NAS
153
Recording Time Schedule (VR-N1600U/E)
154
Default Value List
158
Troubleshooting
164
Specifications
165
Vr-N1600U/E
165
Vr-N900U
166
Advertisement
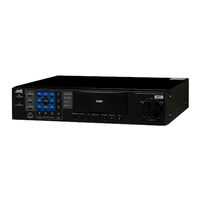
JVC VR-N900U Instructions Manual (162 pages)
JVC Network Video Recorder Instruction Manual
Brand:
JVC
| Category:
DVR
| Size: 20 MB
Table of Contents
Important Safeguards
2
Safety Precautions
4
Getting Started
10
Features
10
Getting Started
12
Export Restrictions
15
Liability Limitations
15
Contents
16
Table of Contents
16
Handling Precautions
18
Precautions for Proper Use of this Product
18
Maintenance
19
Software Installation
19
Part Names and Functions (VR-N1600U/E)
20
Part Names and Functions
22
Rear Panel
22
Front Panel
24
Part Names and Functions (VR-N900U)
24
Rear Panel Terminals
28
Camera Control Terminal (VR-N900U)
29
Differences When Operating VR-N1600U/E and VR-N900U
29
Mounting to a Rack
29
During Initial Startup
30
Operation Lock
30
Selecting a Language
31
Preparation
34
System Connection Example
34
Clock Display
35
Performance Meter
35
Character Input and Mouse Pointer
36
Entering Characters Using a Mouse
36
Controlling Mouse Pointer from the Front Panel (Without Connecting a Mouse (Sold Separately))
36
Changing Monitor Resolution
37
Precautions When Changing Settings
37
Basic Operation
38
Switching the Power On/Off
38
Switching Operation On/Off
38
Login
39
Opening the Main Menu
40
Select an Item
40
NVR Viewer
41
Viewing Live Images Via Front Panel Control
42
Displaying the [Live] Screen
42
Select a View
42
Select a Camera
42
Operating the Camera
43
Viewing Live Images Via Mouse Control
44
Displaying the [Live] Screen
44
Select a View
44
Select a Camera
44
Viewing Images Using the PTZ Features
45
Control Section
45
Using Preset Positions
46
Other Useful Functions
46
Playing Back Recorded Images Via Front Panel Control
48
Select a View
48
Searching Recorded Image Using a Specific Date/Time
48
Playing, Skipping and Stopping Recorded Images
49
Adjusting the Playback Speed (Jog/Shuttle Playback)
49
Playing Back Recorded Images Via Mouse Control
50
Select a View
51
Searching Recorded Image Using [Time Navigation]
51
Searching Recorded Image Using the Timeline Browser
52
Searching Recorded Image Using Sequence
52
Searching Recorded Image from the Alert List
53
Smart Search
53
Playing, Skipping and Stopping Recorded Images
54
Browse Button
54
[Time] Slider
54
Listening to Audio Sound
55
Writing Images/Audio Sound to Cds, Dvds and Other Media (Export)
55
Deleting Temporary Files (Operation on the Unit)
58
Deleting Data from a CD-RW (Operation on the Unit)
58
Writing Data to a USB Memory Device (Operation on the Unit)
58
Operation from a Surveillance Computer
58
Printing Recorded Images (Operation from a Surveillance Computer)
59
Recording Camera Images
60
Recording Modes
60
Recording Operation During Power Failure
60
Selecting the Recording Control Mode
61
Selecting the Manual Recording Mode
61
Scheduler Setting
61
Display Bar
63
Specifying Image Recording Settings
63
Settings
64
Setting Picture Quality
66
Specifying Audio Recording Settings
67
Renaming Cameras and Assigning Camera Numbers
68
Screen Setup
68
Screen Display (Groups and Views)
68
Creating Groups and Views
69
Adding Cameras to a View
71
Adjusting Camera Settings
71
Using Your Views on Different Computers
72
Adding a Carousel
72
Adding Hot Spots (Enlarged Images)
74
Using the [Html Page]
75
Using Still Images (GIF/JPEG Files, Etc.)
75
Adding Matrix Content
75
Applications
76
Main Menu List
76
List of Menu Screens
76
Unit Setting
77
Average File Size
79
OS Setting
80
Network Adapter
81
Image Server Setting
84
Auto Detect Setting
88
Camera Record Setting
92
Adding Cameras
94
Analog Cameras (VR-N900U)
94
Adding an Analog Camera (VR-N900U)
94
Editing Device Settings
95
PTZ Camera Settings (COM1/COM2)
96
Defining a Preset PTZ Position
98
Stopping the Recording Server
98
Display the [PTZ Preset Positions for Device Name] Window
98
Defining a Preset Position
100
Moving to Preset Positions by Events
100
Auto PTZ Patrolling
101
Camera Input/Output Port and Events
103
I/O Settings
103
Input/Output Terminal on Rear Panel
105
Specifying a VMD Event
105
Specifying Timer Events
105
Specifying an Output
106
[Advanced] Screen
106
Configuring Event Buttons
107
Specifying Generic Events
108
Notification Settings
109
Event Notification Settings
110
Specifying an Output Port
110
Camera Output Settings
111
Motion Settings
112
General Settings
114
E Mail Settings
115
Archiving
116
Precautions When Changing NAS Archive Settings
117
Precautions When Changing Archive Settings
117
Database Settings
118
Flash Memory Utility
119
Auto Detect Settings
121
Specifying IP Lease
121
Language Setting
123
Select a Language
123
HDD Utility
124
Restoring Default Settings
125
Distribution Settings (Details)
126
User Administration
126
Connecting to a Computer
128
System Requirements
128
Computer Network Settings
128
Connecting to a Computer
132
Audio Transmission Application Control (VR-N1600U/E)
134
Audio Transmission
134
Event Audio Settings (VR-N1600U/E)
136
Audio Copying
137
Setting Screen
137
Setting Copy
138
Password
138
Communication Settings
139
Others
140
Compatible Equipment
140
Compatible Network Cameras
140
Connecting a UPS
140
External Hard Disk Drives
140
Connecting the External Hard Disk Drive
140
Nas
141
Special Key Operations
142
Combining a Button with the [FUNCTION] Button
142
Pressing a Button for Two Seconds or Longer
142
Recording Before/After Occurrence of Event or Motion
143
PTZ Camera Control
143
Display and Saving of Maintenance Information
145
Export Viewer
146
Customizing Joystick Settings
148
Configuring NAS
149
Recording Time Schedule (VR-N1600U/E)
150
Default Value List
154
Troubleshooting
158
Specifications
160
Vr-N1600U/E
160
Vr-N900U
161
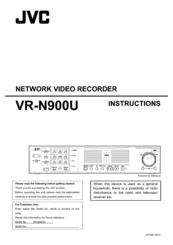
JVC VR-N900U Instructions Manual (82 pages)
JVC Network Video Recorder Instructions
Brand:
JVC
| Category:
Network Hardware
| Size: 12 MB
Table of Contents
Introduction
2
Table of Contents
3
Introduction
4
Preparation
5
System Connection Example
5
Alphabet Input and Mouse Pointer
6
Entering Characters with the Software Keyboard
6
(Using a Mouse)
6
Operating the Mouse Pointer from the Front Panel for Character Entry (Without Using a Mouse)
6
Clock Display
7
About Performance Meter
7
Changing Monitor Resolution
7
Setting/Canceling Operation Lock
7
Setting Operation Lock
7
Canceling Operation Lock
7
Basic Operation
8
Switching the Power On/Off
8
Switching the Power on
8
Switching the Power off
8
Switching Operation On/Off by Pressing the Button
8
On the Front Panel
8
Switching Operation on
8
Switching Operation off
8
Switching Operation On/Off by the Rear Input/Output Terminals
9
Switching Operation on
9
Switching Operation off
9
Login
9
Opening the Main Menu
10
Main Menu Contents
11
Using the VR-N900 Viewer
11
Viewing Live Images
12
Display the [Live Viewing] Window
12
Selecting a View
12
Selecting a Camera
12
Using the PTZ Feature
13
Basic Operation
14
Using Preset Positions
14
Other Useful Functions
14
Playing Back Recorded Images
16
Selecting a View
17
Searching for a Recorded Image
17
Playing Back, Skipping and Stopping Recorded Images
18
Play Buttons
19
Browse Buttons
19
Adjusting the Playback Speed (Jog/Shuttle Playback)
20
Using Sequences
20
Displaying the Alerts List
20
Audio
21
Smart Search
21
Exporting Images and Audio
22
Printing the Recorded Images
24
Recording Camera Images
24
Recording Modes
24
Operations in Case of Power Failure
25
Selecting the Record Control Mode
25
Selecting the Manual Recording Mode
26
Specifying Recording Settings in Recording Control
26
Mode
26
Specifying a Scheduler
26
Camera Administration
28
Setting the Image Quality
29
Screen Setup
30
About Groups and Views
30
Creating Groups and Views
30
Adding Cameras to a View
32
Adding Hot Spots (Enlarged Images)
32
Adding Carousels
33
Adding Matrix Content
34
Using Static Images (GIF Files, JPEG Files, Etc.)
34
Using HTML Pages
35
Adjusting Camera Settings
35
Using Your Views on Different Computers
36
Customizing Joystick Setup
37
Applications
38
Camera Record Setting Window
38
Display the [Camera Record Setting] Window
38
Adding Cameras
40
[Edit Device Settings] Window
41
[Camera Settings for Device Name] Window
42
Defining a PTZ Preset Position
43
Pausing the Recording Server
43
Display the [PTZ Preset Positions] Window
43
Defining a Preset Position
44
PTZ Preset Positions on Events
45
Auto PTZ Patrolling
45
Camera Input/Output Port and Events
47
I/O Setup
47
Configuring Event Buttons
50
Specifying Generic Events
51
Event Notification Settings
52
Specifying an Output Port
53
Output Settings for Cameras
53
Motion Detection Settings
54
You Can Configure the Camera's Motion Detection
54
Defining Exclusion Regions
54
Other Settings
55
General Settings
55
Email Settings
56
Database Settings
56
Archiving
57
Unit Setting
58
OS Setting
59
Flash Memory Utility
60
Auto Detect Setting
62
HDD Utility
63
Language Setting
64
Image Server Setting
64
Connecting to a Computer
67
System Requirements
67
Computer Network Settings
68
Installing the VR-N900 Viewer on Your Computer
69
Log in to the VR-N900 Viewer
71
Playing Back Recorded Images
72
Using the VR-N900 Viewer
72
Log out and Exit the VR-N900 Viewer
72
Others
73
Compatible Equipment
73
Compatible Network Cameras
73
Connecting a UPS
73
External Hard Disk Drives
74
Recording Time Schedule
75
Default (Initial) Value List
77
Troubleshooting
81
Advertisement
JVC VR-N900U Instructions Manual (36 pages)
External HDD Unit
Brand:
JVC
| Category:
Storage
| Size: 1 MB
Table of Contents
English
6
Important Safeguards
2
Safety Precautions
4
Information for Users on Disposal of Old Equipment
5
Table of Contents
6
Main Features
6
Getting Started
6
Precautions
7
Hard Disk Drive
7
Part Names and Functions
8
Front View
8
Rear View
8
Preparation
9
Attaching to the Rack
9
Connecting the Digital Video Recorder
9
Others
10
Specifications
10
Consumable Parts
10
Deutsch
12
Vorsichtshinweise
13
Bezeichnungen und Funktionen der Teile
14
Anschließen des Digitalen Videorekorders
15
Befestigung am Rack
15
Vorbereitung
15
Sonstiges
16
Technische Daten
16
Français
18
Pour Commencer
18
Principales Caractéristiques
18
Précautions
19
Disque Dur
19
Nomenclature et Fonctions
20
Vue de Face
20
Connexion de L'enregistreur VIDéo Numérique
21
Fixation à un Bâti
21
Préparation
21
Caractéristiques Techniques
22
Principales Funciones
24
Unidad de Disco Duro
25
Nombres y Funciones de Los Componentes
26
Vista Frontal
26
Vista Trasera
26
Especificaciones
28
Divers
22
Italiano
30
Caratteristiche Principali
30
Guida Introduttiva
30
Video
31
Precauzioni
31
Nome E Funzione Delle Parti
32
Lato Anteriore
32
Lato Posteriore
32
Preparazione
33
Montaggio in Rack
33
Collegamento del Registratore Video Digitale
33
Altro
34
Specifiche Tecniche
34
Materiali DI Consumo
34
JVC VR-N900U Startup Manual (28 pages)
Brand:
JVC
| Category:
DVR
| Size: 9 MB
Table of Contents
Safety Precautions
4
Getting Started
10
Table of Contents
10
Contents
10
Features
11
Precautions for Proper Use of this Product
11
Software Installation
13
Part Names and Functions
14
Rear Panel
16
Mounting to a Rack
18
Rear Panel Terminals
18
Preparation
19
System Connection Example
19
During Initial Startup
20
Basic Operation
23
Viewing Live Images Via Front Panel Control
23
Displaying the [Live] Screen
23
Select a View
23
Select a Camera
23
Operating the Camera
24
Playing Back Recorded Images Via Front Panel Control
25
Select a View
25
Searching Recorded Image Using a Specific Date/Time
25
Playing, Skipping and Stopping Recorded Images
26
Adjusting the Playback Speed (Jog/Shuttle Playback)
26
Others
27
Specifications
27
JVC VR-N900U Startup Manual (28 pages)
Brand:
JVC
| Category:
Network Hardware
| Size: 2 MB
Table of Contents
Important Safeguards
2
Safety Precautions
4
Getting Started
10
Table of Contents
10
Contents
10
Main Features
10
Precautions
11
Copyrights
12
Part Names and Functions
13
Rear Panel
16
Preparation
19
Installing the VR-N900U to EIA Rack
19
System Connection Example
19
Initial Setup
20
Basic Operation
23
Viewing Live Images
23
Viewing Recorded Images
25
Others
26
Troubleshooting
26
Specifications
27
JVC VR-N900U Manual (4 pages)
Performance Meter
Brand:
JVC
| Category:
Measuring Instruments
| Size: 0 MB
Advertisement
Related Products
JVC VR-N100U
JVC VR-609U - 9 Channel Digital Video Recorder
JVC VR-616U - 16 Channel Digital Video Recorder
JVC VR-716
JVC VR-509E
JVC VR 601
JVC VR-616
JVC VR-609E
JVC VR-616E
JVC VR-609U
JVC Categories
Car Receiver
Camcorder
TV
VCR
Stereo System
More JVC Manuals
Login
Sign In
OR
Sign in with Facebook
Sign in with Google
Upload manual
Upload from disk
Upload from URL