Sign In
Upload
Manuals
Brands
Husqvarna Manuals
Motorcycle
FE 350 2015
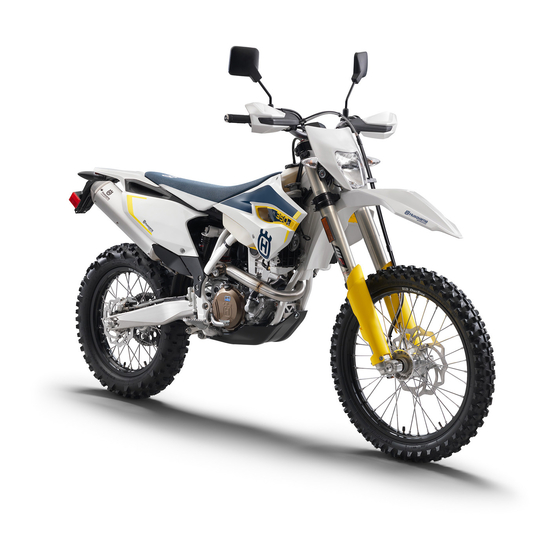
Husqvarna FE 350 2015 Manuals
Manuals and User Guides for Husqvarna FE 350 2015. We have
1
Husqvarna FE 350 2015 manual available for free PDF download: Repair Manual
Husqvarna FE 350 2015 Repair Manual (308 pages)
Brand:
Husqvarna
| Category:
Motorcycle
| Size: 80.84 MB
Table of Contents
Table of Contents
4
Removing the Air Filter Box Cover
6
Installing the Air Filter Box Cover
6
Removing the Air Filter
6
Installing the Air Filter
6
Checking the Transmission
6
Means of Representation
8
Symbols Used
8
Formats Used
8
Consumers
8
Safety Advice
9
Repair Manual
9
Degrees of Risk and Symbols
9
Work Rules
9
Important Notes
10
Manufacturer and Implied Warranty
10
Operating and Auxiliary Substances
10
Spare Parts, Accessories
10
Figures
10
Serial Numbers
11
Chassis Number
11
Type Label
11
Key Number (FE EU/AU, FE 350 S US)
11
Engine Number
12
Fork Part Number
12
Shock Absorber Article Number
12
Motorcycle
13
Raising the Motorcycle with a Lift Stand
13
Removing the Motorcycle from the Lift Stand
13
Starting
13
Starting the Motorcycle for a Check
14
Fork, Triple Clamp
15
Adjusting the Compression Damping of the 9.9 Fork
15
Adjusting the Rebound Damping of the Fork
15
Bleeding the Fork Legs
15
Cleaning the Dust Boots of the Fork Legs
16
Loosening the Fork Protector
16
Positioning the Fork Protector
17
Removing the Fork Legs
17
Installing the Fork Legs
17
Removing the Fork Protector
18
Installing the Fork Protector
19
Performing a Fork Service
19
Disassembling the Fork Legs
19
Removing the Spring
21
Disassembling the Cartridge
22
Disassembling the Piston Rod
23
Disassembling the Hydrostop Unit
24
Disassembling the Seal Ring Retainer
25
Checking the Fork Legs
25
Assembling the Seal Ring Retainer
26
Assembling the Hydrostop Unit
27
Assembling the Piston Rod
27
Assembling the Cartridge
29
Assembling the Fork Legs
30
Lubricating the Steering Head Bearing
33
Removing the Lower Triple Clamp
34
Installing the Lower Triple Clamp
35
Checking the Play of the Steering Head 10.5 Bearing
37
Changing the Steering Head Bearing
37
Adjusting the Play of the Steering Head Bearing
38
Handlebar,Controls
40
Handlebar Position
40
Adjusting the Handlebar Position
40
Adjusting the Basic Position of the Clutch Lever
40
Checking the Routing of the Throttle Cable
41
Checking the Play in the Throttle Cable
41
Adjusting the Play in the Throttle Cable
42
Frame
43
Removing the Engine Guard
43
Installing the Engine Guard
43
Checking the Frame
43
Shock Absorber, Swingarm
44
Adjusting the High-Speed Compression Damping of the Shock Absorber
44
Adjusting the Low-Speed Compression Damping of the Shock Absorber
44
Adjusting the Rebound Damping of the Shock Absorber
45
Measuring Rear Wheel Sag Unloaded
45
Checking the Static Sag of the Shock Absorber
45
Checking the Riding Sag of the Shock Absorber
46
Adjusting the Spring Preload of the Shock Absorber
46
Adjusting the Riding Sag
47
Removing the Shock Absorber
48
Installing the Shock Absorber
48
Checking the Shock Absorber Linkage
48
Servicing the Shock Absorber
50
Removing the Spring
51
Disassembling the Damper
51
Disassembling the Piston Rod
52
Disassembling the Seal Ring Retainer
53
Changing the Pilot Bushing
54
Checking the Damper
55
Removing the Heim Joint
55
Installing the Heim Joint
56
Assembling the Seal Ring Retainer
57
Assembling the Piston Rod
58
Assembling the Damper
59
Bleeding and Filling the Damper
61
Filling the Damper with Nitrogen
63
Installing the Spring
64
Checking the Swingarm
65
Removing the Swingarm
65
Installing the Swingarm
66
Changing the Swingarm Bearing
67
Exhaust
70
Removing the Manifold
70
Installing the Manifold
71
Removing the Main Silencer
73
Installing the Main Silencer
73
Changing the Glass Fiber Yarn Filling in the Main Silencer
73
Spark Arrestor, Cleaning
75
Air Filter
76
Cleaning the Air Filter and Air Filter Box
77
Sealing the Air Filter Box
77
Fuel Tank, Seat, Trim
78
Opening Filler Cap
78
Closing Filler Cap
78
Removing the Right Side Cover
78
Installing the Right Side Cover
79
Removing the Seat
79
Mounting the Seat
79
Removing the Fuel Tank
79
Installing the Fuel Tank
81
Changing the Fuel Screen
82
Changing the Fuel Filter
82
Changing the Fuel Pump
84
Checking the Fuel Pressure
86
Removing the Activated Charcoal Filter (FE 350S US)
87
Installing the Activated Charcoal Filter (FE 350S US)
88
Mask, Fender
89
Removing the Front Fender
89
Installing the Front Fender
89
Removing the Headlight Mask with the Headlight
90
Installing the Headlight Mask with the 17.4 Headlight
91
Wheels
93
Checking the Tire Air Pressure
93
Checking the Tire Condition
93
Checking the Brake Discs
94
Checking Spoke Tension
94
Checking the Rim Run-Out
95
Front Wheel
95
Removing the Front Wheel
95
Installing the Front Wheel
96
Removing the Front Brake Disc
96
Installing the Front Brake Disc
97
Changing the Front Wheel Bearing
97
Rear Wheel
98
Removing the Rear Wheel
98
Installing the Rear Wheel
99
Removing the Rear Brake Disc
100
Installing the Rear Brake Disc
100
Checking the Chain Tension
100
Adjusting the Chain Tension
101
Checking the Chain, Rear Sprocket, Motor Sprocket, and Chain Guide
101
Checking for Chain Dirt Accumulation
103
Cleaning the Chain
103
Changing the Drivetrain Kit
104
Changing the Rear Wheel Bearing
105
Wiring Harness, Battery
108
Changing the Main Fuse
108
Changing the Fuses of Individual Power
108
Checking the Starter Relay
110
Removing the Battery
110
Installing the Battery
111
Recharging the Battery
111
Checking the Charging Voltage
112
Checking the Quiescent Current
112
Brake System
113
Checking the Front Brake Linings
113
Changing the Front Brake Linings
113
Checking Free Travel of Hand Brake Lever
115
(Fe Eu/Au, Fe 350S Us)
115
Brake Lever (FE 350 US)
116
Checking the Front Brake Fluid Level
116
Adding Front Brake Fluid
117
Changing the Front Brake Fluid
118
Checking the Rear Brake Linings
120
Changing the Rear Brake Linings
121
Checking the Free Travel of Foot Brake Lever
122
Adjusting the Basic Position of the Foot Brake Lever
123
Checking the Rear Brake Fluid Level
123
Adding Rear Brake Fluid
124
Changing the Rear Brake Fluid
125
Lighting System, Instruments
127
Setting the Speedometer
127
Setting the Kilometers or Miles
128
Setting the Clock
128
Setting the Wheel Circumference
128
Setting the Service Display
129
Checking the Headlight Setting
129
Adjusting the Headlight Range
130
Engine
131
Removing the Engine
131
Installing the Engine
135
Engine Disassembly
139
Preparations
139
Removing the Clutch Push Rod
140
Removing the Spacer
140
Draining the Engine Oil
140
Removing the Oil Filter
140
Removing the Spark Plug
141
Removing the Valve Cover
141
Removing the Alternator Cover
141
Removing the Torque Limiter
142
Positioning the Engine at Ignition Top Dead Center
142
Removing the Timing Chain Tensioner
142
Removing the Camshaft
143
Removing the Cylinder Head
143
Removing the Piston
144
Removing the Starter Drive
144
Removing the Suction Pump
145
Removing the Water Pump Wheel
146
Removing the Clutch Cover
147
Removing the Clutch Discs
147
Removing the Clutch Basket
148
Removing the Shift Shaft
148
Removing the Shift Drum Locating Unit
149
Removing the Locking Lever
149
Removing the Force Pump
149
Removing the Primary Gear
150
Removing the Timing Chain
150
Removing the Spacer
150
Removing the Left Section of the Engine Case
151
Removing the Shift Rails
151
Removing the Shift Drum
152
Removing the Shift Forks
152
Removing the Transmission Shafts
152
Removing the Crankshaft
152
Working on Individual Parts
153
Work on the Right Section of the Engine Case
153
Work on the Left Section of the Engine Case
154
Work on the Clutch Cover
155
Checking the Oil Pressure Regulator Valve
157
Checking the Lubrication System
157
Removing the Crankshaft Bearing Inner Race
158
Installing the Crankshaft Bearing Inner Race
158
Changing the Connecting Rod, Conrod Bearing and Crank Pin
158
Checking the Crankshaft Run-Out at the Bearing Pin
160
Measuring the Crankshaft End Play
160
Removing the Drive Wheel of the Balancer Shaft
160
Installing the Drive Wheel of the Balancer Shaft
161
Cylinder - Nikasil Coating
161
Checking/Measuring the Cylinder
161
Checking/Measuring the Piston
162
Measuring the Piston/Cylinder Mounting
162
Clearance
162
Checking the Piston Ring End Gap
163
Changing the Camshaft Bearing
163
Checking the Camshafts
164
Checking the Pivot Points of the Camshafts
164
Removing the Valves
165
Checking the Valves
166
Checking the Valve Springs
166
Checking the Valve Spring Seat
166
Checking the Cam Levers
166
Checking the Cylinder Head
167
Installing the Valves
167
Checking the Freewheel
168
Removing the Freewheel
168
Installing the Freewheel
169
Checking the Electric Starter Drive
170
Checking the Timing Assembly
171
Preparing the Timing Chain Tensioner for Installation
171
Checking the Clutch
172
Checking the Shift Mechanism
173
Preassembling the Shift Shaft
174
Disassembling the Main Shaft
175
Disassembling the Countershaft
175
Assembling the Main Shaft
177
Assembling the Countershaft
178
Engine Assembly
179
Installing the Crankshaft
179
Installing the Transmission Shafts
179
Installing the Shift Forks
180
Installing the Shift Drum
180
Installing the Shift Rails
180
Installing the Left Engine Case
181
Installing the Spacer
181
Installing the Timing Chain
181
Installing the Primary Gear
182
Installing the Force Pump
182
Installing the Suction Pump
183
Installing the Locking Lever
184
Installing the Shift Drum Locating Unit
184
Installing the Shift Shaft
184
Installing the Clutch Basket
184
Installing the Clutch Discs
185
Installing the Clutch Cover
186
Installing the Water Pump Cover
187
Installing the Starter Drive
187
Installing the Piston
189
Installing the Cylinder Head
190
Installing the Camshafts
191
Checking the Valve Timing
191
Adjusting the Valve Timing
192
Installing the Timing Chain Tensioner
193
Checking the Valve Clearance
194
Adjusting the Valve Clearance
194
Installing the Torque Limiter
195
Installing the Alternator Cover
195
Installing the Valve Cover
195
Installing the Spark Plug
196
Installing the Oil Filter
196
Installing the Oil Screen
196
Installing the Spacer
197
Installing the Clutch Push Rod
197
Removing the Engine from the Engine
197
Assembly Stand
197
Clutch
198
Checking/Correcting the Fluid Level of the Hydraulic Clutch
198
Changing the Hydraulic Clutch Fluid
199
Water Pump, Cooling System
201
Cooling System
201
Checking the Antifreeze and Coolant Level
201
Checking the Coolant Level
202
Draining the Coolant
202
Refilling Coolant
203
Lubrication System
204
Oil Circuit
204
Checking the Engine Oil Level
204
Changing the Engine Oil and Oil Filter, Cleaning the Oil Screen
205
Adding Engine Oil
207
Checking the Engine Oil Pressure
207
Ignition System
209
Ignition Coil - Checking the Secondary
209
Winding
209
Checking the Spark Plug Connector
209
Alternator - Checking the Stator Winding
209
Removing the Stator and Ignition Pulse Generator
210
Installing the Stator and Ignition Pulse Generator
211
Electric Starter
212
Checking the Starter Motor
212
Throttle Valve Body
213
Adjusting the Idle Speed
213
Executing the Initialization Run
213
Technical Data
214
Engine
214
Tolerance, Engine Wear Limits
214
Engine Tightening Torques
215
Capacities
216
Engine Oil
216
Coolant
216
Fuel
216
Chassis
217
Electrical System
217
Tires
218
Fork
218
Shock Absorber
218
Chassis Tightening Torques
219
Cleaning, Care
221
Cleaning the Motorcycle
221
Checks and Maintenance Steps for Winter Operation
222
Storage
223
Preparing for Use after Storage
223
Service Schedule
224
Service Work as Additional Order
225
Fe Eu)
226
Wiring Diagram
227
Fe Eu)
228
Fe Eu)
230
Fe Eu)
232
Fe Eu)
234
Fe Eu)
236
Fe Eu)
238
Fe Eu)
240
Fe Au)
242
Fe Au)
244
Fe Au)
246
Fe Au)
248
Fe Au)
250
Fe Au)
252
Fe Au)
254
Fe Au)
256
Fe 350 Us)
258
Fe 350 Us)
260
Fe 350 Us)
262
Fe 350 Us)
264
Fe 350 Us)
266
Fe 350 Us)
268
Fe 350S Us)
270
Fe 350S Us)
272
Fe 350S Us)
274
Fe 350S Us)
278
Fe 350S Us)
280
Fe 350S
282
Fe 350S Us)
282
Fe 350S Us)
284
Substances
286
Auxiliary Substances
288
Special Tools
290
Standards
302
Index
303
Advertisement
Advertisement
Related Products
Husqvarna FE 350 2016
Husqvarna FE 350 2014
Husqvarna FE 350 2023
Husqvarna FE 350 USA
Husqvarna FE 350 EU
Husqvarna 2014 FE 350
Husqvarna FE 350s 2021
Husqvarna FE 350s US 2022
Husqvarna FE 350 EU 2016
Husqvarna FE 350 AU 2016
Husqvarna Categories
Lawn Mower
Trimmer
Chainsaw
Motorcycle
Saw
More Husqvarna Manuals
Login
Sign In
OR
Sign in with Facebook
Sign in with Google
Upload manual
Upload from disk
Upload from URL