Sign In
Upload
Manuals
Brands
Huawei Manuals
Network Router
Quidway NetEngine40E
Huawei Quidway NetEngine40E Manuals
Manuals and User Guides for Huawei Quidway NetEngine40E. We have
6
Huawei Quidway NetEngine40E manuals available for free PDF download: Configuration Manual - Reliability, Configuration Manual, Hardware Description, Manual
Huawei Quidway NetEngine40E Configuration Manual (1301 pages)
Universal Service Router, IP Routing
Brand:
Huawei
| Category:
Network Router
| Size: 13.8 MB
Table of Contents
About this Document
3
Intended Audience
3
Command Conventions
4
Table of Contents
6
Table of Contents
7
Table of Contents
8
Table of Contents
9
Table of Contents
10
Table of Contents
11
Table of Contents
12
Table of Contents
13
Table of Contents
14
Table of Contents
15
Table of Contents
16
Table of Contents
17
Table of Contents
18
Table of Contents
19
Table of Contents
20
Table of Contents
21
Table of Contents
22
Table of Contents
23
Table of Contents
24
Table of Contents
25
IP Routing Basic Configuration
26
Routing Management
28
Displaying of the Routing Management Module
29
Configuring Ipv4 Multi-Topology
30
Creating an Ipv4 Topology Instance
31
Binding an Interface to an Ipv4 Topology Instance
32
Checking the Configurations
33
Configuring Ipv6 Multi-Topology
34
Creating an Ipv6 Topology Instance
35
Binding an Interface to an Ipv6 Topology Instance
36
Configuring Public Network IP FRR
37
Configuring a Route-Policy
38
Enabling Public Network IP FRR
39
40
Checking the Configurations
40
Before You Start
41
Enabling Public Network Ipv6 FRR
42
43
Checking the Configurations
43
Configuring VRRP for Direct Routes
44
Configuring a VRRP Backup Group
45
Associating an Interface with a VRRP Backup Group
46
47
Checking the Configurations
47
Configuring an Ipv4 Direct Route to Respond to L3VE Interface Status Changes after a Delay
48
Configuring an Ipv6 Direct Route to Respond to L3VE Interface Status Changes after a Delay
51
Configuring the Association between the Ipv4 Direct Route and PW Status
53
Configuring the Association between the Ipv6 Direct Route and PW Status
56
Configuring the Association between the Ipv4 Direct Routes and Ipsec Instance Status
58
1.12 Configuring a Device to Deactivate the Ipv4 Network Segment Route that Corresponds to an L3VE Sub-Interface
60
1.13 Configuring a Device to Deactivate the Ipv6 Network Segment Route that Corresponds to an L3VE Sub-Interface
63
Configuring Aggs to Load-Balance RNC-To-CSG Traffic
67
Configuring the Advertisement of Ipv4 ARP Vlink Direct Routes on the Public Network
71
Enabling the Advertisement of Ipv4 ARP Vlink Direct Routes
72
73
Checking the Configurations
73
Configuring the Advertisement of Ipv6 NDP Vlink Direct Routes on the Public Network
74
Enabling the Advertisement of Ipv6 NDP Vlink Direct Routes
75
76
Checking the Configurations
76
Maintaining the Route Management Module
77
Configuring Thresholds for the Number of Ipv6 Route Prefixes
78
Configuring a Limit on the Number of Ipv4 Public Route Prefixes
79
Configuring a Limit on the Number of Ipv6 Public Route Prefixes
80
Configuration Example
82
Configuration Procedure
83
Example for Configuring Public Network Ipv6 FRR
85
Example for Configuring VRRP for Direct Routes
90
Example for Importing Ipv4 ARP Vlink Direct Routes to BGP
97
Example for Importing Ipv6 NDP Vlink Direct Routes to BGP4
104
IP Static Route Configuration
114
Introduction
116
Default Route
117
Configuring an Ipv4 Static Route
118
Configuring an Ipv4 Static Route on the Public Network
119
Optional) Setting the Default Preference for Ipv4 Static Routes
120
Optional) Configuring Permanent Advertisement of Ipv4 Static Routes
121
122
Checking the Configurations
122
123
Before You Start
123
Optional) Setting the Default Preference for Ipv6 Static Routes
124
125
Checking the Configurations
125
126
Configuring an Ipv4 Static Route
126
Configuring a BFD Session
127
Binding a Static Route to a BFD Session
128
Configuring BFD for Ipv6 Static Routes on the Public Network
129
Configuring an Ipv6 Static Route
130
131
Binding a Static Route to a BFD Session
131
132
Checking the Configurations
132
133
Before You Start
133
Configuring an ICMP Type NQA Test Instance
134
Binding an Ipv4 Static Route to an NQA Test Instance
135
136
Checking the Configurations
136
Configuring NQA for Ipv6 Static Routes
137
Configuring an ICMP NQA Test Instance
138
Associating a Ipv6 Static Route with an NQA Test Instance
140
141
Checking the Configurations
141
Configuring Ipv4 Static Routes to Inherit the Costs of Iterated Routes
142
Configuring Ipv6 Static Routes to Inherit the Costs of Iterated Routes
144
Configuration Examples
146
Example for Configuring Ipv4 Static Routes
147
Example for Configuring Ipv6 Static Routes
150
Example for Configuring BFD for Ipv4 Static Routes
153
Example for Configuring BFD for Ipv6 Static Routes
156
Example for Configuring NQA for Ipv4 Static Routes
160
Example for Configuring NQA for Ipv6 Static Routes
167
Example for Configuring Permanent Advertisement of Ipv4 Static Routes
173
RIP Configuration
180
182
Introduction
182
RIP Features Supported by the NE80E/40E
183
Enabling RIP
184
Enabling RIP on the Specified Network Segment
185
186
Checking the Configurations
186
Configuring RIP Route Attributes
189
Configuring RIP Preference
191
Setting the Maximum Number of Equal-Cost Routes
192
Configuring RIP to Import External Routes
193
Controlling the Advertising of RIP Routing Information
194
Configuring RIP to Advertise Default Routes
195
Configuring RIP to Filter the Routes to be Sent
197
199
Checking the Configurations
199
Disabling an Interface from Receiving RIP Update Packets
200
Configuring RIP to Filter the Received Routes
201
203
Checking the Configurations
203
Configuring RIP-2 Features
204
Configuring RIP-2 Route Summarization
205
Configuring Packet Authentication of RIP-2
206
213
Checking the Configurations
213
Optimizing a RIP Network
214
Configuring RIP Timers
215
Setting the Interval for Sending Packets and the Maximum Number of the Sent Packets
216
Enabling Replay-Protect Function
217
Configuring RIP to Check the Validity of Update Packets
218
Configuring RIP Neighbors
219
Configuring the RIP GTSM Functions
220
Configuring RIP GR
221
Enabling RIP GR
222
Configuring BFD for RIP
223
Configuring Static BFD for RIP
226
Configuring the Network Management Function in RIP
229
230
Checking the Configurations
230
231
Configuration Examples
231
Example for Configuring RIP to Import External Routes
234
Example for Configuring One-Arm Static BFD for RIP
238
Example for Configuring BFD for RIP
244
Ripng Configuration
250
252
Introduction
252
Ripng Features Supported by the NE80E/40E
253
Enabling Ripng and Entering the Ripng View
254
255
Checking the Configurations
255
Configuring Ripng Route Attributes
257
Configuring the Ripng Preference
258
Configuring the Maximum Number of Equal-Cost Routes
259
260
Checking the Configurations
260
Configuring Ripng Route Summarization
261
Controlling the Advertising of Ripng Routing Information
262
Configuring Ripng to Advertise the Default Routes
263
Configuring Ripng to Filter the Routes to be Sent
264
266
Checking the Configurations
266
Controlling the Receiving of Ripng Routing Information
267
Disabling Receiving of Ripng Packets on an Interface
268
Configuring Ripng to Filter the Received Routes
269
271
Checking the Configurations
271
Optimizing a Ripng Network
272
Configuring Ripng Timers
273
Configuring Split Horizon and Poison Reverse
274
275
Checking the Configurations
275
276
Before You Start
276
Configuring Ipsec Authentication on a Ripng Interface
277
278
Configuration Examples
278
Example for Configuring Ripng to Filter the Received Routes
279
OSPF Configuration
283
285
Introduction
285
Ospf Network Types
287
OSPF Features Supported by the NE80E/40E
288
Configuring Basic OSPF Functions
293
Enabling OSPF
294
Optional) Creating OSPF Virtual Links
296
Optional) Configuring a Route Selection Rule on the Router
297
Optional) Restricting the Flooding of LSA Update Packets
298
Optional) Configuring the Maximum Number of Packet Retransmission Attempts
299
Optional) Setting an Interval at Which an LSA Packet Is Retransmitted to the Neighboring Router
300
301
Checking the Configurations
301
Configuring OSPF on the NBMA or P2MP Network
302
Default Configuration
303
Configuring Network Types for OSPF Interfaces
304
Configuring NBMA Network Attributes
305
Configuring P2MP Network Attributes
306
309
Checking the Configurations
309
Configuring an OSPF Route Selection Rule
310
Setting the Interface Cost
311
Configuring Equal-Cost Routes
312
Configuring a Stub Router
313
Suppressing an Interface from Receiving and Sending OSPF Packets
314
Configuring an OSPF Interface to Automatically Adjust the Link Cost
315
316
Checking the Configurations
316
317
Before You Start
317
Configuring OSPF to Import a Default Route
320
Configuring Route Summarization
322
Configuring OSPF to Filter Routes Received by OSPF
323
Configuring the Router to Filter Lsas to be Sent
325
Optional) Configuring OSPF to Filter Lsas in an Area
328
Optional) Enabling the Mesh-Group Function
332
Setting the Maximum Number of External Lsas in the LSDB
333
Configuring an OSPF Dynamic Hostname
334
Configuring an OSPF Stub Area
336
Configuring an NSSA
338
Configuring Local MT
341
Configuring BFD for OSPF
343
Configuring BFD for OSPF in a Specified Process
344
Configuring BFD for OSPF on a Specified Interface
346
348
Checking the Configurations
348
Configuring OSPF IP FRR
349
Enabling OSPF IP FRR
350
Optional) Binding OSPF IP FRR and BFD
351
Optional) Disabling OSPF IP FRR on an Interface
352
353
Checking the Configurations
353
Enabling OSPF GR
354
Optional) Configuring the GR Session Parameters on the Restarter
355
357
Checking the Configurations
357
Improving Security of an OSPF Network
358
Configuring the OSPF GTSM Functions
359
Configuring the Authentication Mode
360
362
Checking the Configurations
362
Configuring the Network Management Function of OSPF
363
Configuring OSPF Trap
364
365
Checking the Configurations
365
Clearing OSPF
366
Example for Configuring OSPF Virtual Links
372
Example for Configuring DR Election of OSPF
375
Example for Configuring OSPF Load Balancing
380
Device Interface
381
Example for Configuring an OSPF Stub Area
385
Example for Configuring an OSPF NSSA
389
Example for Configuring Local OSPF MT
395
Advertisement
Huawei Quidway NetEngine40E Configuration Manual - Reliability (1432 pages)
Brand:
Huawei
| Category:
Network Router
| Size: 13.66 MB
Table of Contents
About this Document
3
Intended Audience
3
Command Conventions
4
Table of Contents
6
1 Reliability Overview
18
Introduction
19
Overview of Reliability Technologies
19
Indices of Reliability
19
Levels of Reliability Requirements
20
Principles for High-Reliablity IP Networking
20
Reliability Technologies for IP Networks
21
Failure Detection for IP Networks
21
Protection Switching for IP Networks
21
Reliability Technologies Supported by the NE80E/40E
22
FRR (Fast Reroute)
22
OAM (Operation Administration & Maintenance)
24
Vrrp
24
Bfd
25
Networking of Reliability over an IP Network
25
Failures on Intermediate Nodes or on the Link between Pes - LDP FRR/TE FRR
25
Link Failure During Transmission
26
Failure on the Remote PE - VPN FRR
28
Failure of Downlink Interface on the PE - IP FRR
29
2 Interface Backup Configuration
31
Introduction of Interface Backup
32
Interface Backup Overview
32
Characteristics of the Interface Backup Supported by the NE80E/40E
33
Configuring the Active/Standby Interface Backup
34
Before You Start
34
Configuring a Standby Interface
35
Configuring the Active/Standby Switchover Delay
36
Checking the Configurations
36
Configuring the Load Balancing Interface Backup
37
Before You Start
37
Configuring a Standby Interface
38
Configuring the Percentage Thresholds for Load Balancing
39
Optional) Configuring the Bandwidth and Flow Check Interval for the Active Interface
39
Checking the Configurations
40
Maintaining the Interface Backup
41
Monitoring Working Status of the Interface Backup
41
Configuration Examples
41
Example for Configuring the Active/Standby Mode of Multiple Interfaces
42
Example for Configuring Load Balancing on Multiple Standby Interfaces
45
3 APS Configuration
50
APS Overview
51
APS Features Supported by the NE80E/40E
53
Configuring Single-Device APS
56
Before You Start
56
Specifying a Working Interface and a Protect Interface for an APS Group
57
Configuring a Working Mode for an APS Group
59
Adding Interfaces of an APS Group to a Trunk Interface
61
Checking the Configurations
62
Configuring E-APS
62
Before You Start
62
Specifying a Working Interface and a Protect Interface for an APS Group
64
Configuring a Working Mode for an APS Group
66
Optional) Binding an APS Group to a BFD Session
68
Optional) E-APS Negotiation and Authentication Parameters
69
Adding Interfaces of an APS Group to a Trunk Interface
71
Checking the Configurations
72
Maintaining APS
72
Configure a Command-Triggered Switching Mode for an APS Group
73
Configuration Examples
74
Example for Configuring TDM on the CPOS Interfaces Configured with APS
74
Example for Configuring APS on a CPOS-Trunk
81
Example for Associating PW Redundancy with E-APS Working in 1:1 Mode
85
Example for Associating Dual Bypass Pws with E-APS 1+1
98
Example for Configuring Dual-System APS in the Scenario of Forwarding IP Packets Using PPP
114
4 VRRP Configuration
123
VRRP Overview
125
Introduction
125
VRRP Features that the NE80E/40E Supports
129
Configuring Basic Functions of a VRRP Ipv4 Backup Group
133
Before You Start
133
Creating a VRRP Backup Group
135
Configuring VRRP Priorities on Interfaces in a VRRP Backup Group
136
Optional) Configuring VRRP Packet Attributes
137
Optional) Configuring VRRP Time Parameters
141
Optional) Configuring Smooth VRRP Switching
142
Optional) Enabling the Ping to a Virtual IP Address
143
Optional) Configuring the Backup Device to Forward Traffic
144
Checking the Configurations
145
Configuring an Mvrrp Ipv4 Backup Group
146
Before You Start
146
Creating an Mvrrp Backup Group
148
Configuring an Mvrrp Backup Group Binding
149
Optional) Configuring the BFD Sampling Function to Implement a Rapid Master/Backup VRRP Switchover
151
Checking the Configurations
154
Configuring VRRP Ipv4 Association
155
Before You Start
155
Associating a VRRP Ipv4 Backup Group with a VRRP-Disabled Interface
156
Associating a VRRP Ipv4 Backup Group with a BFD Session
157
Associating an Ipv4 VRRP Backup Group with EFM
159
Associating a VRRP Backup Group with Routes
161
Checking the Configurations
163
Configuring the Rapid VRRP Switchback Function
163
Configuring a Fast VRRP Backup Group
165
Configuring a Unicast VRRP Backup Group
169
Configuring Basic Functions of a VRRP Ipv6 Backup Group
171
Before You Start
171
Configuring a VRRP Ipv6 Backup Group
173
Configuring VRRP Priorities on Interfaces in a VRRP Ipv6 Backup Group
174
Optional) Configuring VRRP Ipv6 Advertisement Packet Attributes
175
Optional) Configuring VRRP Ipv6 Time Parameters
176
Optional) Configuring Smooth VRRP Ipv6 Switching
179
Optional) Enabling the Ping to a Virtual IP Address
180
Optional) Configuring the Backup Device to Forward Traffic
180
Checking the Configurations
182
Configuring an Mvrrp Ipv6 Backup Group
182
Before You Start
183
Creating an Mvrrp Ipv6 Backup Group
184
Binding a Service VRRP Ipv6 Backup Group to an Mvrrp Ipv6 Backup Group
185
Checking the Configurations
186
Configuring VRRP Ipv6 Association
187
Before You Start
187
Associating a VRRP Ipv6 Backup Group with a VRRP-Disabled Interface
188
Associating a VRRP Ipv6 Backup Group with a BFD Session
189
Checking the Configurations
191
Configuring ARP Update Triggered by Changes in the Outbound Interfaces of the VRRP Virtual MAC Address
192
Maintaining VRRP
193
Clearing VRRP Statistics
193
Monitoring VRRP Status
193
Configuration Examples
194
Example for Configuring a VRRP Backup Group
194
Example for Configuring VRRP Backup Groups Working in Load Balancing Mode
199
Example for Connecting VRRP Backup Groups to L3Vpns
207
Example for Configuring a VRRP Backup Group on VLANIF Interfaces
241
Example for Configuring an Mvrrp Backup Group to Ignore the Interface down Event
248
Example for Implementing a Rapid VRRP Switchover Using BFD Sampling
270
Example for Associating a VRRP Backup Group with a BFD Session
290
Example for Associating a VRRP Backup Group with an EFM Session
296
Example for Associating a VRRP Backup Group with a Route
302
Example for Configuring a VRRP Ipv6 Backup Group
309
Example for Configuring VRRP Ipv6 Backup Groups Working in Load Balancing Mode
314
Example for Configuring VRRP Ipv6 Association
319
Huawei Quidway NetEngine40E Configuration Manual - Reliability (761 pages)
Brand:
Huawei
| Category:
Network Router
| Size: 7.4 MB
Table of Contents
About this Document
3
Intended Audience
3
Table of Contents
6
1 Reliability Overview
18
Introduction
19
Overview of Reliability Technologies
19
Indices of Reliability
19
Levels of Reliability Requirements
20
Principles for High-Reliablity IP Networking
20
Reliability Technologies for IP Networks
21
Failure Detection for IP Networks
21
Protection Switching for IP Networks
21
Reliability Technologies Supported by the NE80E/40E
22
FRR (Fast Reroute)
22
OAM (Operation Administration & Maintenance)
24
VRRP (Virtual Router Redundancy Protocol)
24
BFD (Bidirectional Forwarding Detection)
25
Networking of Reliability over an IP Network
25
Failures on Intermediate Nodes or on the Link between Pes - LDP FRR/TE FRR
25
Link Failure During Transmission
26
Failure on the Remote PE - VPN FRR
28
Failure of Downlink Interface on the PE - IP FRR
29
2 Interface Backup Configuration
30
Introduction of Interface Backup
31
Interface Backup Overview
31
Characteristics of the Interface Backup Supported by the NE80E/40E
32
Configuring the Active/Standby Interface Backup
33
Establishing the Configuration Task
33
Configuring a Standby Interface
34
Configuring the Active/Standby Switchover Delay
35
Checking the Configuration
35
Configuring the Load Balancing Interface Backup
36
Establishing the Configuration Task
36
Configuring a Standby Interface
37
Configuring the Percentage Thresholds for Load Balancing
38
Optional) Configuring the Bandwidth and Flow Check Interval for the Active Interface
38
Checking the Configuration
39
Maintaining the Interface Backup
40
Monitoring Working Status of the Interface Backup
40
Configuration Examples
40
Example for Configuring the Active/Standby Mode of Multiple Interfaces
40
Example for Configuring Load Balancing on Multiple Standby Interfaces
44
3 APS Configuration
48
APS Overview
49
APS Features Supported by the NE80E/40E
51
Configuring Single-Device APS
52
Establishing the Configuration Task
52
Configuring a Working Interface in an APS Group
52
Configuring a Protection Interface in an APS Group
53
Optional) Configuring a Working Mode for an APS Group
54
Optional) Configuring a Switching Mode for an APS Group
55
Optional) Setting the WTR Time for an APS Group
56
Adding Members of an APS Group to a Trunk
56
Checking the Configuration
57
Configuring E-APS
58
Establishing the Configuration Task
58
Configuring a Working Interface in an APS Group
59
Configuring a Protection Interface in an APS Group
60
Configuring a Working Mode for an APS Group
61
Optional) Configuring a Switching Mode for an APS Group
62
Optional) Setting the Interval for Sending APS Negotiation Messages and the Hold Time of an APS Connection
62
Optional) Configuring the Authentication String for a PGP Message
63
Optional) Setting the WTR Time for an APS Group
64
Adding Members of an APS Group to a Trunk
65
Checking the Configuration
65
Configuration Examples
66
Example for Configuring TDM on the CPOS Interfaces Configured with APS
66
Example for Configuring APS on a CPOS-Trunk
73
Example for Associating PW Redundancy with E-APS Working in 1:1 Mode
76
Configuration File
84
4 VRRP Configuration
90
VRRP Introduction
92
VRRP Overview
92
VRRP Features Supported by the NE80E/40E
92
Configuring the VRRP Backup Group
96
Establishing the Configuration Task
96
Creating a Backup Group and Configuring a Virtual IP Address
97
Configuring Priorities for Interfaces Where a Backup Group Is Created
99
Checking the Configuration
101
Configuring VRRP to Track the Status of an Interface
102
Establishing the Configuration Task
102
Configuring VRRP to Track the Status of an Interface
103
Checking the Configuration
105
Configuring a Fast VRRP Switchover (in Common Mode)
106
Establishing the Configuration Task
106
Tracking the BFD Session Status
107
Tracking the BFD Session Status
110
Tracking the Status of the SPU Group
112
Checking the Configuration
113
Configuring VRRP Fast Switchover (Using BFD Sampling)
114
Establishing the Configuration Task
114
Binding the Service VRRP Backup Group to the Mvrrp Backup Group
116
Configuring an Mvrrp Backup Group to Track the BFD Session Status
117
Setting the Threshold for VRRP Fast Switchover
118
Enabling the Association between the Mvrrp Backup Group Status and the Route
119
Checking the Configuration
120
Configuring Ignorance of the down of an Interface Where the Mvrrp Backup Group Is Configured
121
Establishing the Configuration Task
121
Configuring the Mvrrp Backup Group
123
Binding the Service VRRP Backup Group to the Mvrrp Backup Group
124
Configuring an Mvrrp Backup Group to Track the BFD Session Status
124
Setting the Threshold for VRRP Fast Switchover
126
Enabling the Association between the Mvrrp Backup Group Status and the Route
126
Checking the Configuration
127
Configuring VRRP Applications in VLANIF
128
Establishing the Configuration Task
128
Configuring VRRP on VLANIF
129
Optional) Configuring the Sending Mode of VRRP Packets in Super-VLAN
129
Checking the Configuration
130
Configuring VRRP Security
131
Establishing the Configuration Task
131
Configuring the Authentication Mode of VRRP Packets
132
Checking the Configuration
133
Configuring VRRP Smooth Switching
133
Establishing the Configuration Task
133
Configuring VRRP Smooth Switching
134
Checking the Configuration
135
Adjusting and Optimizing VRRP
136
Establishing the Configuration Task
136
Configuring the Interval for Sending VRRP Advertising Messages
137
Configuring the Preemption Delay Time of Backup Group Router S
138
Enabling the Reachability Test of the Virtual IP Address
140
Disabling a Router from Checking Number of Hops in VRRP Packets
140
Configuring the Timeout Time of Sending Gratuitous ARP Packets by the Master Router
141
Checking the Configuration
142
Configuring Mvrrp Backup Groups
143
Establishing the Configuration Task
143
Configuring Mvrrp Backup Group
145
Optional) Configuring Member VRRP Backup Groups and Binding Them to the Mvrrp Backup Group
146
Optional) Binding Member Interface and Management Backup Group
147
Optional) Binding the PW to the Mvrrp Backup Group through VPLS
148
Checking the Configuration
148
Configuring VRRP Version Upgrade
149
Establishing the Configuration Task
150
Configuring Vrrpv3
150
Checking the Configuration
151
Maintaining VRRP
151
Monitoring the VRRP Running
151
Configuration Examples
152
Example for Configuring VRRP in Master/Backup Mode
152
Example for Configuring VRRP in Load Balancing Mode
156
Example for Configuring the Multi-Instance VRRP
160
Example for Configuring VRRP Fast Switchover
166
Example for Configuring VRRP Fast Switchover (Using One-Arm Echo Function)
170
Example for Configuring VRRP Fast Switchover (Using BFD Sampling)
177
Example for Configuring Ignorance of the down of an Interface Where the Mvrrp Backup Group Is Configured
196
Example for Configuring VRRP on VLANIF Interfaces
216
Example for Configuring VRRP on Sub-Interfaces for Qinq VLAN Tag Termination to Reduce the Number of Gratuitous ARP Packets to be Sent
223
Example for Configuring VRRP for Ipv6 on Sub-Interfaces for Qinq VLAN Tag Termination to Reduce the Number of ND Packets to be Sent
231
Example for Configuring a VRRP6 Backup Group in Master/Backup Mode
239
Example for Configuring VRRP6 Backup Groups in Load Balancing Mode
244
Advertisement
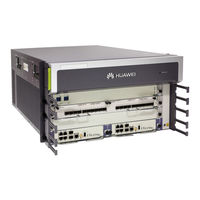
Huawei Quidway NetEngine40E Hardware Description (770 pages)
Brand:
Huawei
| Category:
Network Router
| Size: 18.01 MB
Table of Contents
About this Document
3
Table of Contents
5
1 Product Overview
15
Overview
15
2 NE40E-X16 Chassis Overview
16
Overview
16
System Overview
16
System Architecture
17
System Features
18
Components of the NE40E-X16
19
Slot Layout on the NE40E-X16
20
System Configuration
21
Power Supply System
21
Architecture of the Power Supply System
21
Distributed Architecture of the System
22
DC Power Supply System
22
AC Power Supply System
25
Heat Dissipation System
27
System Air Channel
27
Air Intake Vent
28
Fan Module
28
Air Filter
29
Fan Speed Adjustment
30
Switching Network
31
Introduction to the Switching Network
31
Switch Fabric Unit B
32
40Gbps Switch Fabric Unit B
34
Control Plane
35
Introduction to the Control Plane
35
Main Processing Unit B4
36
Physical Specifications
41
Chassis Specifications
41
Board Specifications
42
3 NE40E-X8 Chassis Overview
53
Overview
53
System Overview
53
System Architecture
54
System Features
55
Components of the NE40E-X8
56
Slot Layout on the NE40E-X8
57
System Configuration
58
Power Supply System
59
Architecture of the Power Supply System
59
Distributed Architecture of the System
59
DC Power Supply System
60
AC Power Supply System
62
Heat Dissipation System
65
System Air Channel
65
Air Intake Vent
65
Fan Module
65
Air Filter
67
Fan Speed Adjustment
67
Switching Network
68
Introduction to the Switching Network
68
200Gbps Switch Fabric Unit C(SFUI-200-C)
69
100Gbps Switch Fabric Unit D(SFUI-100-D)
71
40Gbps Switch Fabric Unit C
72
Control Plane
73
Introduction to the Control Plane
73
Switch and Route Processing Unit A7
74
Switch and Route Processing Unit A5
79
Switch and Route Processing Unit A4
84
Physical Specifications
89
Chassis Specification
89
Board Specifications
91
4 NE40E-X3 Chassis Overview
101
Overview
101
System Overview
101
System Features
102
Components of the NE40E-X3
103
Slot Layout on the NE40E-X3
104
System Configuration
105
Power Supply System
106
Architecture of the Power Supply System
106
Diagram of the Power Supply System
106
DC Power Supply System
106
AC Power Supply System
108
Heat Dissipation System
111
System Air Channel
111
Air Intake Vent
112
Fan Module
112
Air Filter
113
Fan Speed Adjustment
114
Control Plane
114
Introduction to the Control Plane
114
Main Processing Unit D2(CR5D0MPUD170)
115
Physical Specifications
119
Chassis Specifications
119
Board Specifications
120
5 NE40E-8 Chassis Overview
128
Overview
128
Device Structure
129
System Configuration
131
Power Supply
132
DC Power Supply Module
132
AC Power Supply Module
135
Heat Dissipation System
138
Appearance of the Fan Module
139
Front Panel
139
Air Filter
140
Functions of the FCB
141
Technical Parameters
141
Sfu(Cr52-Sfud)
142
Overview
142
Features and Functions
143
Panel
143
Technical Specifications
144
Sru
144
Overview
144
Features and Functions
145
Panel
146
Interface Attributes
150
Technical Specifications
152
Physical Specifications
153
Chassis Specifications
153
Board Specifications
154
Huawei Quidway NetEngine40E Configuration Manual (341 pages)
Brand:
Huawei
| Category:
Network Router
| Size: 3.01 MB
Table of Contents
About this Document
3
Intended Audience
3
Command Conventions
4
Table of Contents
6
1 Logging in to the System for the First Time
16
Introduction to Log in to the Device for the First Time
17
Logging in to the Device through the Console Port
17
Establishing the Configuration Task
17
Establishing the Physical Connection
18
Logging in to the Router
18
Logging in to the Router that Supports the Plug-And-Play Function
20
151 CLI Overview
22
CLI Introduction
23
Command Line Interface
23
Command Levels
23
Command Line Views
26
Online Help
27
Full Help
27
Partial Help
28
Error Messages of the Command Line Interface
28
CLI Features
29
Editing
29
Displaying
29
Regular Expressions
30
Previously-Used Commands
33
Batch Command Execution
34
Shortcut Keys
35
Classifying Shortcut Keys
35
Defining Shortcut Keys
37
Use of Shortcut Keys
37
Configuration Examples
38
Example for Running Commands in Batches
38
Example for Using Tab
39
Example for Using Shortcut Keys
40
Example for Copying Commands Using Shortcut Keys
40
3 Basic Configuration
42
Configuring the Basic System Environment
43
Establishing the Configuration Task
43
Switching the Language Mode
43
Configuring the Equipment Name
44
Setting the System Clock
44
Configuring a Header
45
Configuring Command Levels
46
Configuring the Undo Command to Match in the Previous View Automatically
47
Displaying System Status Messages
48
Displaying System Configuration
48
Displaying System Status
49
Collecting System Diagnostic Information
49
4 Configuring User Interface
50
User Interface Overview
51
Configuring the Console User Interface
53
Establishing the Configuration Task
53
Setting Physical Attributes of Console User Interface
53
Setting Terminal Attributes of Console User Interface
55
Configuring User Priority of Console User Interface
56
Configuring the User Authentication Mode of the Console User Interface
56
Checking the Configuration
58
Configuring the AUX User Interface
59
Establishing the Configuration Task
59
Setting Physical Attributes of AUX User Interface
59
Setting Terminal Attributes of AUX User Interface
61
Setting User Priority of AUX User Interface
62
Setting Modem Attributes of AUX User Interface
62
Optional) Configuring Auto-Execute Commands of AUX User Interface
63
Setting User Authentication Mode of AUX User Interface
64
Checking the Configuration
65
Configuring VTY User Interface
66
Establishing the Configuration Task
66
Configuring Maximum VTY User Interfaces
67
Optional)Setting Limit on Incoming and Outgoing Calls of VTY User Interfaces
68
Setting Terminal Attributes of the VTY User Interface
68
Setting User Priority of VTY User Interface
69
Setting User Authentication Mode of the VTY User Interface
70
Optional) Configuring NMS Users to Log in through VTY User Interfaces
71
Checking the Configuration
73
Configuration Examples
74
Example for Configuring Console User Interface
74
Example for Configuring AUX User Interface
76
Example for Configuring VTY User Interface
78
5 Configuring User Login
80
Overview of User Login
82
Logging in to the Devices through the Console Port
82
Establishing the Configuration Task
83
Configuring Console User Interface
83
Logging in to the Router through a Console Port
83
Checking the Configuration
84
Logging in to the Devices through the AUX Port
85
Establishing the Configuration Task
85
Configuring AUX User Interface
86
Logging in to the Routerthrough an AUX Port
86
Checking the Configuration
89
Logging in to the Devices by Using Telnet
90
Establishing the Configuration Task
90
Configuring VTY User Interface
91
Optional) Configuring Local Telnet Users
92
Enabling the Telnet Service
92
Optional) Configuring Listening Port Number for Telnet Server
93
Logging in to the Router by Using Telnet
94
Checking the Configuration
95
Logging in to the Devices by Using Stelnet
96
Establishing the Configuration Task
96
Configuring VTY User Interface
97
Configuring SSH for the VTY User Interface
97
Configuring an SSH User and Specifying Stelnet as One of Service Types
98
Enabling the Stelnet Server Function
101
Optional) Configuring the Stelnet Server Parameters
101
Server Operation
102
Logging in to the Router by Using Stelnet
103
Checking the Configuration
104
Common Operations after Login
105
Establishing the Configuration Task
105
Switching User Levels
105
Locking User Interfaces
106
Sending Messages to Other User Interfaces
107
Displaying Logged-In Users
107
Clearing Logged-In Users
108
Configuring Configuration Locking
108
Configuration Examples
109
Example for Configuring User Login through a Console Port
109
Example for Logging in through the AUX Port
112
Example for Configuring User Login by Using Telnet
113
Example for Configuring User Login by Using Stelnet
116
Huawei Quidway NetEngine40E Manual (10 pages)
Brand:
Huawei
| Category:
Wireless Router
| Size: 0.79 MB
Table of Contents
Related Tools
3
Related Materials
3
Operation Procedure
4
Circuit Breaker Maintenance
8
Advertisement
Related Products
Huawei Quidway NetEngine80E
Huawei NetEngine5000E
Huawei Quidway NetEngine80
Huawei NE05E
Huawei NE05E-SF
Huawei NE08E-S6
Huawei NE08E-S6E
Huawei NE20E-S16
Huawei NE20E-S8A
Huawei NE20E-S16A
Huawei Categories
Cell Phone
Network Router
Wireless Router
Modem
Network Hardware
More Huawei Manuals
Login
Sign In
OR
Sign in with Facebook
Sign in with Google
Upload manual
Upload from disk
Upload from URL