Sign In
Upload
Manuals
Brands
Brother Manuals
All in One Printer
DCP-J752DW
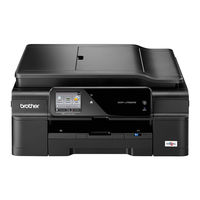
Brother DCP-J752DW Manuals
Manuals and User Guides for Brother DCP-J752DW. We have
7
Brother DCP-J752DW manuals available for free PDF download: Service Manual, Basic User's Manual, Advanced User's Manual, Quick Setup Manual, Product Safety Manual, Air Print Manual
Brother DCP-J752DW Service Manual (329 pages)
Brand:
Brother
| Category:
Printer
| Size: 19.67 MB
Table of Contents
4
Table of Contents
11
Regulation
15
Safety Information
21
Chapter 1 Specifications
21
General
21
Media Specification
22
Paper Handling
23
LCD Panel
23
Memory
24
Interface
25
Others
26
Fax
26
Printer
27
Copy
28
Scanner
28
Software
29
Network
29
Wired
29
Wireless
30
Supplies/Options
30
Service Information
31
Paper
33
10.2 Printable Area
34
Chapter 2 Troubleshooting
34
Introduction
34
Precautions
35
Initial Check
36
Overview
36
Cross-Section Drawings
36
Document Scanning
36
Printer Part
37
Document Feeding/Recording Paper Feeding
37
Document Feeding
37
Recording Paper Feeding Path
38
Function of each Sensor/Roller
39
Block Diagram
40
Components
41
Error Indication
41
Error Codes
42
Error
45
Error Messages
48
Communications Error
52
Troubleshooting
52
Error Cause and Solutions
57
No Black Ink Cartridge Loaded
57
Detected by the Ink Cartridge Detection Sensor
57
No Yellow Ink Cartridge Loaded
57
No Cyan Ink Cartridge Loaded
57
No Magenta Ink Cartridge Loaded
57
Unable to Communicate with the Ink Cartridge IC Chip. (on the Main Unit Side)
58
The Ink Cartridge Cover Sensor Detected an Opened Cover
59
The Carriage Does Not Move
59
Detected by the CR Encoder Sensor
60
The Carriage Cannot Return to Its Home Position
60
Detected by the CR Encoder Sensor
61
Head Capping Cannot be Done
61
Abnormal Stopping of the Head/Carriage Unit
62
Abnormal Stopping of the Head/Carriage Unit Caused by a Recording Paper Jam When Ink Is Not Discharging
62
Abnormal Stopping of the Head/Carriage Unit 3B
63
Caused by Factors Other than Recording Paper Jams such as Encoder Stains When
63
Abnormal Stopping of the Head/Carriage Unit Caused by Recording Paper Jam When Ink Is Discharging
64
A Problem Occurred in the Carriage Motor, Paper Feed Motor, and ASF Motor
65
Carriage Motor Cannot Stop
65
Casing Internal Thermistor Problem
65
When the Power was Turned On, the Casing Internal Thermistor Detected a Temperature of -20 Degrees Centigrade or Lower, or 80 Degrees Centigrade or
66
Head Voltage Does Not Turn off
66
Head Thermistor Problem
66
When the Power was Turned On, the Head Thermistor Detected a Temperature of
67
The Head Driver IC Detected an Abnormal Temperature During Operation or Stand-By
68
Head Voltage Does Not Rise
68
Head Voltage Drops Quickly
69
Cannot Detect the Home Position of the Purge Cam
69
Abnormal Stopping of the Purge Cam
69
The Maintenance Unit Pump Abnormally Stopped During Exhaust/Intake
69
Overcurrent Protection was Activated in the Driver IC During Purge Cam Operation
69
Overcurrent Protection was Activated in the Driver IC During Maintenance Unit Pump Operation
70
The ASF Encoder Sensor Cannot Detect the Rotation of the ASF Motor
70
Overcurrent Protection was Activated in the Driver IC of the ASF Motor
70
ASF Motor Cannot Stop
71
Head Capping Does Not Work Normally
71
Head Uncapping Does Not Work Normally
71
The Cap Cam Abnormally Stopped During Capping
71
The Cap Cam Abnormally Stopped During Uncapping
71
Overcurrent Protection was Activated in the Driver IC During Capping
72
Head Property Information Not Input
72
Recording Paper Size Error (During Fax/List Printing)
73
The Registration Sensor and Paper Width Sensor Detected a Recording Paper
74
Recording Paper Jam
74
The Paper Width Sensor Could Not Detect the Leading Edge of Recording Papers
75
Recording Paper Jam
75
The Paper Width Sensor Could Not Detect the Home Position Specified on the Paper Feed Roller
76
The PF Encoder Sensor Cannot Detect the Rotation of the Paper Feed Motor
76
Overcurrent Protection was Activated in the Driver IC During Paper Feed Motor Operation
79
A1 the Document Scanner Sensor Detected that the Document Scanner Unit Is Open
79
The Document Scanning Position Sensor Detected that the Document Has a Length of 90 CM or Longer
80
During Document Scanning, the Document Detection Sensor Detected that the
81
A7 the CIS Unit Type Is Different from the CIS Type Input Value
81
Matching of Color Parameter Failed
81
CIS Positioning Problem (Home Position Cannot be Found)
82
Black Level Value Abnormal During Scanning
82
Modem Communication Failed
82
Modem Does Not Start Normally Even after Resetting the Modem
82
Wired LAN MAC Address Not Registered
83
E6 an Error Occurred in the E2PROM of the Main PCB
83
NFC PCB Initialization Failed
84
Touch Panel Initialization Failed
84
F0 Flash File System Error
84
ROM Data Acquisition Error
85
Recording Paper Feeding Problems
85
Recording Paper Is Not Fed from Paper Tray
86
The Disc Tray Is Not Fed
86
Two or more Sheets of Paper Fed at a Time
87
Recording Paper Feeding at an Angle
87
Recording Paper Is Wrinkling
88
Recording Paper Jam
90
Disc Tray Jam
91
Cannot Perform Duplex Printing
92
Print-Image Problems
92
Defective Images
93
Troubleshooting by Print-Image Defect
104
Software-Related Problems
104
Cannot Print Data
105
Network Problems
105
Cannot Print through a Network Connection
106
Control Panel Problems
106
No Display on the LCD
106
LED Does Not Light up
106
The Control Panel Does Not Work
106
Touch Panel Inoperative
107
Document Feeding Problems
107
Document Cannot be Fed
107
Document Double Feeding
108
Document Jam
110
Wrinkles on Documents
110
Document Size Not Correctly Detected
111
Scanned-Image Problems
111
Defective Images
115
Fax Problems
115
Fax Sending Cannot be Performed
115
Cannot Receive Fax
115
A Communications Error Occurs
116
4.10 Other Problems
116
4.10.1 the Machine Cannot be Powered on
116
Memory Card/Pictbridge Does Not Function (no Response)
116
4.10.3 Memory Card/Pictbridge Data Cannot be Read
117
4.10.4 Internal Memory Errors
117
4.10.5 Security Function Lock Related Problems
118
Chapter 3 Disassembly and Assembly
118
Precautions before Proceeding
120
Packing
121
Screw Catalogue
122
Screw Torque List
123
Lubrication
125
Overview of Gears
126
Routing of Harnesses and Ink Supply Tubes
137
Disassembly Flow
138
Disassembly Procedure
138
Preparations
142
Jam Clear Cover
143
The Head/Carriage Unit, CR Timing Belt, and Leveler Roller ASSY
157
Document Scanner Unit, ADF Unit (Models with ADF), and Document Cover ASSY (Models Without ADF)
161
CIS Unit and CIS Flat Cable
166
Component on the ADF Unit (for ADF Models Only)
174
Front Plate and Control Panel ASSY
176
Upper Cover and Ink Cartridge Cover
178
Document Scanner Sensor
178
9.10 Inner Media Module Cover and NFC PCB
179
9.11 Wireless LAN PCB ASSY
180
Main PCB
182
Mj Pcb Assy
183
Power Supply PCB ASSY
186
Carriage PCB ASSY
188
Ink Refill ASSY
190
Ink Absorber Box and Ink Absorber Felt (for the Ink Refill ASSY)
192
Engine Unit, Flushing Box, and Ink Absorber Felt (for the Maintenance Unit)
197
Maintenance Unit
199
9.20 Components on the Engine Unit
208
Ink Cartridge Cover Sensor ASSY
209
Base Pad on Paper Tray ASSY
211
Chapter 4 Adjustments and Updating of Settings, Required after Parts Replacement
211
If You Replace the Main Pcb Assy
212
Customize Destinations (Maintenance Mode 74)
212
Automatically Set the CIS Type (Maintenance Mode 59)
212
Install the Firmware (Maintenance Mode 28)
214
EEPROM Parameter Initialization (Maintenance Mode 01)
214
Restore Head Calibration Data (Maintenance Mode 68)
214
Set the Serial Number (Maintenance Mode 80)
216
Update the Head Property Data (Maintenance Mode 68)
217
Restore Machine Information (Maintenance Mode 46)
217
Adjust the Touch Panel (Maintenance Mode 78)
217
Acquire Black and White Level Data (Maintenance Mode 55)
217
Adjustment of Ruled Lines (Maintenance Mode 65)
217
Update the Paper Feeding Correction Values (Maintenance Mode 58)
217
Margin Adjustment in Borderless Printing (Maintenance Mode 66)
218
Creating of Head Calibration Data and Writing It into Flash ROM (Maintenance Mode 02)
218
1.16 Check Scanning and Printing
221
If You Replace the Head/Carriage Unit
222
Update the Head Property Data (Maintenance Mode 68)
222
Supply Head Ink (Maintenance Mode 76)
222
Check Head Nozzles (Maintenance Mode 09)
223
Adjust the Head/Carriage Unit Inclination
226
Adjustment of Ruled Lines (Maintenance Mode 65)
226
Update the Paper Feeding Correction Values (Maintenance Mode 58)
226
Margin Adjustment in Borderless Printing (Maintenance Mode 66)
226
Write Head Calibration Data (Maintenance Mode 02)
226
Check Printing
227
Obtain Machine Information (Instruction to the End User)
228
If You Replace the Document Scanner Unit or Cis Unit
228
Set the CIS Type (Maintenance Mode 59)
228
Acquire Black and White Level Data (Maintenance Mode 55)
228
Check Scanning
229
If You Replace the Control Panel Assy
229
Adjust the Touch Panel (Maintenance Mode 78)
229
Operational Check of the LCD (Maintenance Mode 12)
229
Check the Operation of the Control Panel Keys (Maintenance Mode 13)
230
If You Replace the Ink Absorber Box or Flushing Box
230
Reset Purge and Flushing Counts (Maintenance Mode 80)
231
If You Replace the Engine Unit, Recording Paper Feeding Related Parts or Maintenance Unit
232
Check Head Nozzles (Maintenance Mode 09)
232
Adjustment of Ruled Lines (Maintenance Mode 65)
232
Update the Paper Feeding Correction Values (Maintenance Mode 58)
232
Margin Adjustment in Borderless Printing (Maintenance Mode 66)
232
Check Printing
233
Chapter 5 Service Functions
233
Maintenance Mode
233
Entry to the Maintenance Mode
233
1.1.1 How to Enter the Maintenance Mode Exclusive to Service Personnel
235
1.1.2 How to Enter the End User-Accessible Maintenance Mode
237
List of Maintenance-Mode Functions
238
Detailed Description of Maintenance-Mode Functions
238
EEPROM Parameter Initialization (Maintenance Mode 01, 91)
238
Maintenance Mode
238
EEPROM Parameter Initialization
239
Creating of Head Calibration Data and Writing It into Flash ROM (Maintenance Mode 02)
239
Creating of Head Calibration Data and Writing It into Flash ROM
242
Printout of Scanning Compensation White/Black Level Data (Maintenance Mode 05)
242
Printout of Scanning Compensation White/Black Level Data
245
ADF Performance Test (Maintenance Mode 08)
245
Printout of Test Pattern (Maintenance Mode 09)
245
ADF Performance Test
247
Worker Switch (WSW) Setting and Printout (Maintenance Modes 10, 11)
251
Check LCD Operation (Maintenance Mode 12)
253
Operational Check of Keys on Control Panel (Maintenance Mode 13)
253
Operational Check of Keys on Control Panel
255
EEPROM Dump and Log Information Saving (Maintenance Mode 17)
256
Updating of Firmware Using an External Memory (Maintenance Mode 28)
256
Updating of Firmware Using an External Memory
257
Sensor Operational Check (Maintenance Mode 32)
257
Sensor Operational Check
258
Printout of Dial Log (Maintenance Mode 37)
258
Printout of Dial Log
259
Backup of Machine Information (Maintenance Mode 46)
259
Backup of Machine Information
261
Setting of Country/Language (Maintenance Mode 52)
261
Setting of Country/Language
262
Transfer of Received FAX Data And/Or Equipment's Log (Maintenance Mode 53)
262
Transfer of Received FAX Data And/Or Equipment's Log
264
Fine Adjustment of Scanning Position (Maintenance Mode 54)
264
Fine Adjustment of Scanning Position
265
Acquisition of White/Black Level Data and CIS Scanner Area Setting (Maintenance Mode 55)
265
Acquisition of White/Black Level Data and CIS Scanner Area Setting
266
Cartridge IC Communication Check (Maintenance Mode 57)
266
Cartridge IC Communication Check
267
Updating of Paper Feeding Correction Value (Maintenance Mode 58)
267
Updating of Paper Feeding Correction Value
273
Checking of CIS Travel and Specifying of CIS Type (Maintenance Mode 59)
273
Checking of CIS Travel and Specifying of CIS Type
274
Printout of PRN/JPEG Files in Memory Card (Maintenance Mode 61)
274
Printout of PRN/JPEG Files in Memory Card
275
Move of the Head/Carriage Unit to the Adjustment Position, and Check of the Pressure Roller Release Operation (Maintenance Mode 63)
275
Move of the Head/Carriage Unit to the Adjustment Position, and Check of the Pressure Roller Release Operation
276
Adjustment of the Vertical Print Lines/Ruled Lines (Maintenance Mode 65)
276
Adjustment of the Vertical Print Lines/Ruled Lines
280
Margin Adjustment in Borderless Printing (Maintenance Mode 66)
280
Margin Adjustment in Borderless Printing
285
Updating of Head Property Data and Backup/Restoration of Head Calibration Data (Maintenance Mode 68)
285
Updating of Head Property Data and Backup/Restoration of Head Calibration Data
287
Traveling Speed Check of Head/Carriage Unit (Maintenance Mode 69)
287
Traveling Speed Check of Head/Carriage Unit
288
Customize Code Destinations (Maintenance Mode 74)
291
Move of the Head/Carriage Unit to the Center (Maintenance Mode 75)
292
Purge Operation (Maintenance Mode 76)
292
Purge Operation
295
Print of the Maintenance Information (Maintenance Mode 77)
295
Print of the Maintenance Information
297
Adjust the Touch Panel (Maintenance Mode 78)
298
Display of the Equipment's Log (Maintenance Mode 80)
301
Equipment Error Code Indication (Maintenance Mode 82)
301
Output of Transmission Log to the Telephone Line (Maintenance Mode 87)
301
Equipment Error Code Indication
301
Output of Transmission Log to the Telephone Line
302
Assurance Mode Switch Setting (AMS) (Maintenance Mode 88)
310
Other Service Functions
310
Displaying the Firmware Version
310
Moving the Head/Carriage Unit
311
Retrieving the Equipment Log Information
312
Chapter 6 Circuit Diagrams and Wiring Diagrams
317
Chapter 7 Periodical Maintenance
317
Periodical Replacement Parts
318
Appendix 1 Serial Numbering System
320
Appendix 2 Deletion of User Setting Information
320
A2.1 Deletion of User Setting Information
322
Appendix 3 Installing the Maintenance Printer Driver
Advertisement
Brother DCP-J752DW Basic User's Manual (124 pages)
Brand:
Brother
| Category:
All in One Printer
| Size: 14.62 MB
Table of Contents
4
Table of Contents
9
1 General Information
9
Using the Documentation
9
Symbols and Conventions Used in the Documentation
10
Accessing Brother Utilities (Windows ® 8)
10
Accessing the Advanced User's Guide and Software and Network User's Guide
10
Viewing User's Guides
12
How to Access Guides for Advanced Features
13
Accessing Brother Support (Windows ® )
13
Accessing Brother Support (Macintosh)
14
Control Panel Overview
16
(67.5 MM) Touchscreen LCD
18
Basic Operations
18
Changing the Keyboard Setting
19
Shortcut Settings
19
Adding Copy Shortcuts
19
Adding Scan Shortcuts
20
Adding Web Connect Shortcuts
21
Changing Shortcuts
22
Editing Shortcut Names
22
Deleting Shortcuts
22
Recalling Shortcuts
23
Volume Settings
23
Beep Volume
23
Touchscreen LCD
23
Setting the Backlight Brightness
24
2 Loading Paper
24
Loading Paper and Other Print Media
27
Loading Envelopes
29
Loading Photo Paper
31
Unprintable Area
32
Paper Settings
32
Paper Type
32
Paper Size
32
Acceptable Paper and Other Print Media
33
Recommended Print Media
33
Handling and Using Print Media
34
Choosing the Right Print Media
36
3 Loading Documents
36
How to Load Documents
36
Using the ADF (DCP-J752DW)
37
Using the Scanner Glass
38
Unscannable Area
39
4 Making Copies
39
How to Copy
39
Stop Copying
40
Copy Options
40
Paper Type
40
Paper Size
41
5 Printing Photos From a Memory Card or USB Flash Drive
41
Photocapture Center™ Operations (PHOTO Mode)
41
Using a Memory Card or USB Flash Drive
42
Getting Started
44
Print Images
44
View Photos
45
Photocapture Center™ Print Settings
45
How to Scan to a Memory Card or USB Flash Drive
47
6 How to Print From a Computer
47
Printing a Document
48
7 How to Scan to a Computer
48
Before Scanning
49
Scanning a Document As a PDF File Using Controlcenter4 (Windows ® )
52
How to Change the Machine's SCAN Mode Settings for PDF Scanning
54
How to Scan a Document As a PDF File Using the Touchscreen
55
A Routine Maintenance
55
Replacing the Ink Cartridges
58
Cleaning and Checking the Machine
58
Cleaning the Scanner Glass
59
Cleaning the Print Head
59
Checking the Print Quality
60
Checking the Print Alignment
61
Setting the Date and Time
62
Troubleshooting
62
Identifying Your Problem
63
Error and Maintenance Messages
71
Error Animations Display
71
Document Jam (DCP-J752DW)
72
Printer Jam or Paper Jam
78
If You Are Having Difficulty with Your Machine
80
Print Quality Difficulties
81
Paper Handling Difficulties
82
Copying Difficulties
83
Scanning Difficulties
83
Photocapture Center™ Difficulties
84
Network Difficulties
85
Machine Information
85
Checking the Serial Number
85
Checking the Firmware Version
85
Reset Functions
85
How to Reset the Machine
86
C Settings and Features Tables
86
Using the Settings Tables
87
Settings Tables
93
Features Tables
100
Print Settings
107
Entering Text
107
Inserting Spaces
107
Making Corrections
108
D Specifications
108
General
110
Print Media
111
Copy
112
Photocapture Center
113
Pictbridge (DCP-J752DW)
114
Scanner
115
Printer
116
Interfaces
117
Network
118
Computer Requirements
119
Consumable Items
120
Index
Brother DCP-J752DW Advanced User's Manual (92 pages)
Brand:
Brother
| Category:
All in One Printer
| Size: 13.24 MB
Table of Contents
3
Table of Contents
7
General Setup
7
Important Note
7
Memory Storage
7
Automatic Daylight Saving Time (MFC Models)
8
Sleep Mode
8
Auto Power Off (DCP Models)
9
Touchscreen LCD
9
Changing the Touchscreen Language (Depending On Your Model)
9
Setting the DIM Timer for the Backlight
10
Security Features (MFC Models)
10
TX Lock (MFC-J650DW)
10
Setting and Changing the TX Lock Password
11
Turning TX Lock On/Off
12
Memory Security (MFC-J870DW)
12
Setting and Changing the Memory Security Password
13
Turning Memory Security On/Off
14
Sending a Fax (MFC Models)
14
Additional Sending Options
14
Sending Faxes Using Multiple Settings
14
Stop Faxing
15
Contrast
15
Changing Fax Resolution
16
Setting Your Changes As a New Default
17
Restoring Fax Options to the Factory Default
17
Saving Fax Options As a Shortcut
18
Additional Sending Operations
18
Sending a Fax Manually
19
Sending a Fax at the End of a Conversation
19
Dual Access (Monochrome Only)
19
Broadcasting (Monochrome Only)
21
Real Time Transmission
22
Overseas Mode
22
Delayed Faxing (Monochrome Only)
23
Delayed Batch Transmission (Monochrome Only)
23
Checking and Cancelling Waiting Jobs
24
Polling Overview
24
Polled Transmit (Monochrome Only)
26
Receiving a Fax (MFC Models)
26
Memory Receive (Monochrome Only)
26
Fax Forwarding
26
Fax Storage
27
Printing a Fax From the Memory
27
Pc-Fax Receive (Windows ® )
28
Turning Off Memory Receive Operations
29
Changing Memory Receive Operations
30
Remote Retrieval
30
Setting a Remote Access Code
30
Using Your Remote Access Code
31
Remote Fax Commands
32
Retrieving Fax Messages
32
Changing Your Fax Forwarding Number
33
Additional Receiving Operations
33
Out of Paper Reception
33
Printing a Reduced Incoming Fax
33
Receiving a Fax at the End of a Conversation
34
Polling Overview
34
Polling Receive
35
Sequential Polling
37
Dialling and Storing Numbers (MFC Models)
37
Voice Operations
37
BT Call Sign (U.K. Only)
38
Additional Dialling Operations
38
Combining Address Book Numbers
39
Additional Ways to Store Numbers
39
Storing Address Book Numbers From the Outgoing Call History
39
Storing Address Book Numbers From the Caller ID History
40
Setting Up Groups for Broadcasting
42
Printing Reports
42
Fax Reports (MFC Models)
42
Transmission Verification Report
42
Fax Journal (Activity Report)
43
Reports
43
How to Print a Report
44
Making Copies
44
Copy Options
44
Stop Copying
44
Improving Copy Speed and Quality
45
Enlarging or Reducing Copies
46
Making N in 1 Copies or a Poster
48
In 1 ID Copy
48
Sorting Copies
49
Adjusting Density
50
Ink Save Mode (MFC-J870DW)
51
Thin Paper Copy (MFC-J870DW)
51
Book Copy (MFC-J870DW)
52
Watermark Copy (MFC-J870DW)
53
Remove Background Colour
53
2-Sided Copying
55
Setting Your Changes As a New Default
55
Restoring All Settings to the Factory Default
56
Saving Copy Options As a Shortcut
57
Printing Photos From a Memory Card or USB Flash Drive
57
Photocapture Center™ Operations
57
Memory Cards, USB Flash Drives and Folder Structures
58
Movie Printing
58
Print Images
58
Print Index (Thumbnails)
59
Printing Photos
59
Enhance Photos (MFC-J870DW)
61
ID Photo Print
62
Slide Show
63
DPOF Printing
64
Photocapture Center™ Print Settings
64
Print Quality
64
Paper Options
66
Auto Correct (MFC-J870DW)
66
Adjusting Brightness, Contrast and Colour
67
Colour Enhancement
68
Cropping
69
Borderless Printing
69
Date Print
70
Setting Your Changes As a New Default
70
Restoring All Settings to the Factory Default
71
Scan to a Memory Card or USB Flash Drive
71
Auto Crop (MFC-J870DW)
72
How to Set a New Default
73
How to Reset to the Factory Default
73
Saving Scan Options As a Shortcut
74
Printing Photos From a Camera (DCP-J752DW, MFC-J650DW and MFC-J870DW)
74
Printing Photos Directly From a Pictbridge Camera
74
Pictbridge Requirements
74
Setting Your Digital Camera
75
Printing Images
76
DPOF Printing
76
Printing Photos Directly From a Digital Camera (Without Pictbridge)
77
Printing Images
78
A Routine Maintenance
78
Cleaning and Checking the Machine
78
Cleaning the Outside of the Machine
79
Cleaning the Machine's Printer Platen
80
Cleaning the Paper Feed Rollers
81
Cleaning the Paper Pick-Up Rollers
82
Checking the Ink Volume
82
Packing and Shipping the Machine
85
B Glossary
89
Index
Advertisement
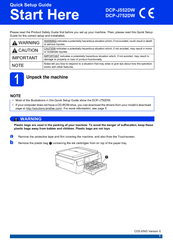
Brother DCP-J752DW Quick Setup Manual (31 pages)
Brand:
Brother
| Category:
All in One Printer
| Size: 5.4 MB
Table of Contents
2
Choose Your Language
2
Connect the Power Cord
2
Install the Ink Cartridges
6
Check the Print Quality
6
Set the Date and Time
7
Choose Your Connection Type
9
Connect the Usb Cable
11
For Macintosh USB Interface Users
14
For Wireless Network Users
14
Before You Begin
18
For Macintosh Users
19
For Windows Users
20
Troubleshooting
20
Wireless LAN Report
22
Wireless Network
27
Install Optional Applications
28
For Network Users
28
Reset the Network Settings to Factory Default
28
Entering Text for Wireless Settings
29
Other Information
29
How to Open a PDF File in Adobe ® Reader ® (Windows ® 8)
29
Brother Creativecenter
30
Replacement Consumables
30
Ink Cartridge
Brother DCP-J752DW Quick Setup Manual (23 pages)
Printers
Brand:
Brother
| Category:
All in One Printer
| Size: 2.61 MB
Table of Contents
1
Unpack the Machine
2
Connect the Power Cord
2
Install the Ink Cartridges
2
Choose Your Language
2
Important Note
4
Check the Print Quality
4
Set the Date and Time
5
Choose Your Connection Type
6
Before You Install
6
Connect the Usb Cable
9
For Macintosh USB Interface Users
11
For Wireless Network Users
11
Before You Begin
14
For Macintosh Users
15
For Windows Users
16
Wireless Network
19
Install Optional Applications
20
For Network Users
20
Reset the Network Settings to Factory Default
20
Entering Text for Wireless Settings
21
Other Information
21
How to Open a PDF File in Adobe ® Reader ® (Windows ® 8)
21
Brother Creativecenter
Brother DCP-J752DW Air Print Manual (12 pages)
Brand:
Brother
| Category:
All in One Printer
| Size: 0.44 MB
Table of Contents
3
Table of Contents
4
1 Introduction
4
Overview
5
Hardware Requirements
5
Supported Operating Systems
5
Network Settings
8
2 Printing
8
Printing From Ipad, Iphone and Ipod Touch
9
Printing Using OS X V10.7 or Later
10
Troubleshooting
10
If You Are Having Difficulty with Your Machine
11
Disabling/Enabling Airprint Using Web Based Management (Web Browser)
Brother DCP-J752DW Product Safety Manual (16 pages)
Brand:
Brother
| Category:
Laser printer
| Size: 1.43 MB
Table of Contents
2
Symbols and Conventions Used in the Documentation
3
Compilation and Publication Notice
4
General Precautions
9
Servicing the Machine
14
Open Source Licensing Remarks
14
Copyright and License
Share and save
Advertisement
Related Products
Brother DCP-J715W
Brother DCPJ715CW
Brother DCP-J785DW
Brother DCP-J315W
Brother DCP-J925DW
Brother DCP-J100
Brother DCP-J4110DW
Brother DCP-J4120DW
Brother DCP-J562DW
Brother DCP-J552DW
Brother Categories
Sewing Machine
All in One Printer
Printer
Label Maker
Fax Machine
More Brother Manuals
Login
Sign In
OR
Sign in with Facebook
Sign in with Google
Upload manual
Upload from disk
Upload from URL