Sign In
Upload
Download
Table of Contents
Contents
Add to my manuals
Delete from my manuals
Share
URL of this page:
HTML Link:
Bookmark this page
Add
Manual will be automatically added to "My Manuals"
Print this page
×
Bookmark added
×
Added to my manuals
Manuals
Brands
JAI Manuals
Security Camera
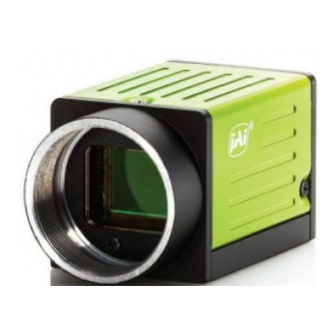
GO-5000M-USB
User manual
JAI GO-5000M-USB User Manual
5m digital progressive scan monochrome and color camera
Hide thumbs
1
2
3
4
Table Of Contents
5
6
7
8
9
10
11
12
13
14
15
16
17
18
19
20
21
22
23
24
25
26
27
28
29
30
31
32
33
34
35
36
37
38
39
40
41
42
43
44
45
46
47
48
49
50
51
52
53
54
55
56
57
58
59
60
61
62
63
64
65
66
67
68
69
70
page
of
70
Go
/
70
Contents
Table of Contents
Bookmarks
Table of Contents
Table of Contents
Before Using this Camera
General
Camera Composition
Main Features
Locations and Functions
Rear Panel
Installation and Preparation
Lens Used
Computer to be Used
JAI SDK and Control Tool Software
Cables to be Used
AC Adapter/Trigger
Camera Default Settings
Input and Output
USB 3.0 Interface Specifications
Connectors and Pin Assignment
Output Connector for Digital Video Output (USB 3.0 Micro B Connector)
Hirose 6-Pin Connector
Digital IN/OUT Interface
Line Selector
Line Source
Line Mode
Line Inverter
Line Status
Line Format
Gpio
Basic Block Diagram
IN and out Matrix Table
6.4 Optical Interface
Recommended External Input Circuit Diagram for Customer
Recommended External Output Circuit Diagram for Customer
Characteristics of Optical Interface
Opt in Filter Selector Function
Pulse Generator
Clock Pre-Scaler
Pulse Generator Selector
Pulse Generator Length
Pulse Generator Start Point
Pulse Generator End Point
Pulse Generator Repeat Count
Pulse Generator Clear Activation
Pulse Generator Clear Sync Mode
Pulse Generator Clear Source
Pulse Generator Inverter
Pulse Generator Setting Parameters
Sensor Layout, Output Format and Timing
Sensor Layout
Monochrome Sensor
Bayer Color Sensor
Camera Output Format
Pixel Format
GO-5000M-USB Pixel Type
GVSP_PIX_MONO8 8-Bit Output
Gvsp_Pix_Mono10_Packed 10-Bit Output
GVSP_PIX_MONO10 16-Bit Output
Gvsp_Pix_Mono12Packed 12-Bit Output
GVSP_PIX_MONO12 16-Bit Output
GO-5000C-USB Pixel Type
GVSP_PIX_BAYGR8 8-Bit Output
Gvsp_Pix_Baygr10_Packed 10-Bit Output
7.3.3.3 GVSP_PIX_BAYERGR10 16-Bit Output
Gvsp_Pix_Baygr12_Packed 12-Bit Output
16-Bit Output
Pixelsize
Output Timing
Horizontal Timing
7.4.2 Vertical Timing
ROI (Region of Interest) Setting
Digital Output Bit Allocation
Operating Modes
Acquisition Control
Acquisition Mode
Single Frame Operation
Multi Frame Operation
Continuous
Acquisitionstart
Acquisitionstop
Acquisition Frame Rate
Calculation of the Maximum Frame Rate
Exposure Settings
Exposure Mode
Exposure Time
Exposure Auto
Trigger Control
Trigger Selector
Trigger Mode
Trigger Source
Trigger Activation
Trigger Overlap
Normal Continuous Operation (Timed Exposure Mode/Trigger Mode OFF)
Timed Mode
Trigger Width Mode
RCT Mode
RCT Mode Together with ALC Function
RCT Mode Timing after the Trigger Is Input
Video Send Mode
Sequence ROI Trigger
Trigger Sequence Mode Basic Timing
Sequence Index Table (Default)
Descriptions of Index Table Parameters
Multi ROI Function
Multi ROI Setting Parameters
Delayed Readout Function
Operation and Function Matrix
Other Functions
Black Level Control
Black Level Selector
Black Level
Gain Control
Gain Selector
Gain
Gain Raw
Gain Auto
Balance White Auto
Lut
LUT Mode
LUT Selector
LUT Index
LUT Value
Gamma
Linear and Dark Compression
Shading Correction
Shading Correction Mode
Shading Mode
Perform Shading Calibration
Blemish Compensation
Alc
HDR (High Dynamic Range) (GO-5000M-USB Only)
Camera Setting
Camera Control Tool
External Appearance and Dimensions
Specifications
Spectral Response
Specifications Table
Appendix
Precautions
Typical Sensor Characteristics
Caution When Mounting a Lens on the Camera
Caution When Mounting the Camera
Exportation
References
Manual Change History
User's Record
Advertisement
Quick Links
Download this manual
User Manual
GO-5000M-USB
GO-5000C-USB
5M Digital Progressive Scan
Monochrome and Color Camera
Document Version: 1.1
GO-5000-USB_Ver.1.1_Dec2014
1057E-1408
Table of
Contents
Previous
Page
Next
Page
1
2
3
4
5
Advertisement
Table of Contents
Need help?
Do you have a question about the GO-5000M-USB and is the answer not in the manual?
Ask a question
Questions and answers
Related Manuals for JAI GO-5000M-USB
Security Camera JAI GO-5000M-PGE User Manual
5m digital progressive scan monochrome and color camera (69 pages)
Security Camera JAI GigE Vision User Manual
Digital monochrome/color rm/tm/rmc/tmc ge camera (24 pages)
Security Camera JAI GO-5000C-USB User Manual
5m digital progressive scan monochrome and color camera (70 pages)
Security Camera JAI GO-2401M-PGE User Manual
2.35m digital progressive scan monochrome and color camera (66 pages)
Security Camera JAI GO-2400M-PGE User Manual
2.35m digital progressive scan monochrome and color camera (67 pages)
Security Camera JAI GO-5100M-USB User Manual
5.1m digital progressive scan monochrome and color camera (62 pages)
Security Camera JAI GO-5100C-USB User Manual
5.1m digital progressive scan monochrome and color camera (62 pages)
Security Camera JAI GOX-5105M-5GE User Manual
Cmos digital progressive scan monochrome and color camera with gige interface (178 pages)
Security Camera JAI GO-5100M-PGE-1 User Manual
(107 pages)
Security Camera JAI AD-081GE User Manual
Digital 2ccd progressive scan hdr / high frame rate camera (82 pages)
Security Camera JAI CV-M77 Operation Manual
Progressive scan camera (28 pages)
Security Camera JAI CV-M91 Operation Manual
3 ccd rgb color camera (28 pages)
Security Camera JAI RM-4200CL User Manual
Digital monochrome/color progressive scan, interline-transfer ge camera (60 pages)
Security Camera JAI CV-S3200 Operation Manual
Dsp color ccd cameras (16 pages)
Security Camera JAI CV-M50IR Operation Manual
Industrial monochrome ccd camera (24 pages)
Security Camera JAI Pulnix TS-2030EN Series User Manual
Progressive scan cameras (68 pages)
This manual is also suitable for:
Go-5000c-usb
Table of Contents
Print
Rename the bookmark
Delete bookmark?
Delete from my manuals?
Login
Sign In
OR
Sign in with Facebook
Sign in with Google
Upload manual
Upload from disk
Upload from URL


Need help?
Do you have a question about the GO-5000M-USB and is the answer not in the manual?
Questions and answers