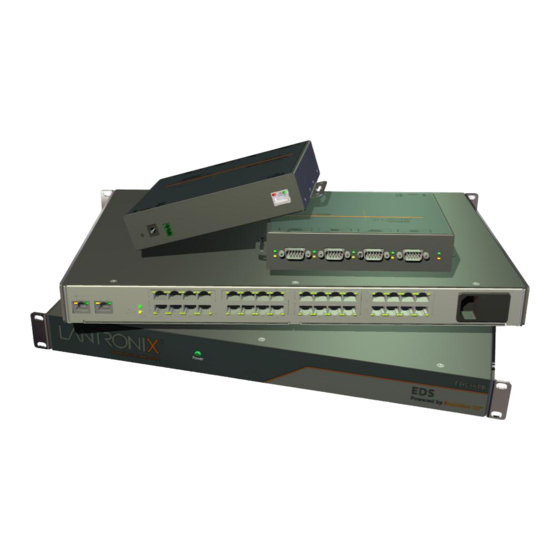
Lantronix Data Center-Grade Evolution Device Server EDS32PR User Manual
Eds device servers
Hide thumbs
Also See for Data Center-Grade Evolution Device Server EDS32PR:
- User manual (175 pages) ,
- Reference manual (68 pages) ,
- Quick start manual (16 pages)

Related Manuals for Lantronix Data Center-Grade Evolution Device Server EDS32PR


Summary of Contents for Lantronix Data Center-Grade Evolution Device Server EDS32PR
-
Page 1: User Guide
EDS Device Servers User Guide EDS4100 EDS8PR EDS16PR EDS32PR Part Number 900-433 Revision E January 2007... -
Page 2: Copyright And Trademark
Copyright & Trademark © 2006, 2007 Lantronix. All rights reserved. No part of the contents of this book may be transmitted or reproduced in any form or by any means without the written permission of Lantronix. Printed in the United States of America. -
Page 3: Table Of Contents
Contents 1: Preface Purpose and Audience_______________________________________________ 10 Summary of Chapters _______________________________________________ 10 Additional Documentation ____________________________________________ 11 2: Introduction EDS4100 Overview _________________________________________________ 12 Features ______________________________________________________________ 13 EDS8PR, EDS16PR and EDS32PR Overview ____________________________ 13 Features ______________________________________________________________ 14 Evolution OS™ ____________________________________________________ 14 Web-Based Configuration and Troubleshooting _______________________________ 15 Command-Line Interface (CLI)_____________________________________________ 15 SNMP Management _____________________________________________________ 15 XML-Based Architecture and Device Control__________________________________ 15... - Page 4 Finding a Suitable Location _______________________________________________ 23 Connecting the EDS4100_________________________________________________ 23 4: Installation: EDS8PR, EDS16PR and EDS32PR Package Contents __________________________________________________ 25 User-Supplied Items ________________________________________________ 25 Identifying Hardware Components______________________________________ 26 Serial Ports____________________________________________________________ 27 Ethernet Port __________________________________________________________ 27 LEDs_________________________________________________________________ 27 Reset Button___________________________________________________________ 28 Physically Installing the EDS8/16/32PR__________________________________ 28 Finding a Suitable Location _______________________________________________ 28 Connecting the EDS8/16/32PR ____________________________________________ 28...
- Page 5 Tunnel – Connect Mode Page _____________________________________________ 59 Tunnel – Disconnect Mode Page ___________________________________________ 62 Tunnel – Packing Mode Page _____________________________________________ 64 Tunnel – Modem Emulation Page __________________________________________ 65 Tunnel – AES Keys Page_________________________________________________ 67 8: Services Settings DNS Page ________________________________________________________ 70 SNMP Page _______________________________________________________ 71 FTP Page_________________________________________________________ 72 TFTP Page________________________________________________________ 74...
- Page 6 Query Port Page __________________________________________________ 109 11: Advanced Settings Email Pages______________________________________________________ 111 Email Statistics Page ___________________________________________________ 111 Email Configuration Page _______________________________________________ 112 CLI Pages _______________________________________________________ 114 Command Line Interface Statistics Page ____________________________________ 114 Command Line Interface Configuration Page ________________________________ 115 XML Pages ______________________________________________________ 117 XML Configuration Record: Export System Configuration Page __________________ 117 XML Status Record: Export System Status __________________________________ 119 XML: Import System Configuration Page____________________________________ 120...
- Page 7 Accept Mode _________________________________________________________ 146 Disconnect Mode ______________________________________________________ 146 Packing Mode_________________________________________________________ 147 Modem Emulation _________________________________________________ 147 Command Mode_______________________________________________________ 148 D: Technical Support E: Lantronix Cables and Adapters F: Compliance Lithium Battery Notice ______________________________________________ 153 Installationsanweisungen____________________________________________ 153 Rackmontage _________________________________________________________ 153 EDS Device Servers User Guide...
- Page 8 Figure 4-2. Back View of the EDS16PR ... 26 Figure 4-3. RJ45 Serial Port ... 27 Figure 4-4. Example of EDS16PR Connections ... 29 Figure 5-1. Lantronix DeviceInstaller ... 30 Figure 5-2. EDS4100 Properties... 31 Figure 6-1. Prompt for User Name and Password... 34 Figure 6-2.
- Page 9 Contents Figure 8-5. Syslog Page ... 75 Figure 8-6. HTTP Statistics Page ... 76 Figure 8-7. HTTP Configuration Page ... 77 Figure 8-8. HTTP Authentication Page ... 80 Figure 8-9. HTTP RSS Page ... 82 Figure 9-1. SSH Server: Host Keys Page... 85 Figure 9-2.
-
Page 10: 1: Preface
1: Preface Purpose and Audience This guide describes how to install, configure, use, and update the EDS4100 4-Port, EDS8PR 8-Port, EDS16PR 16-Port, and EDS32PR 32-Port Device Servers. It is for users who will use the EDS to network-enable their serial devices. Summary of Chapters The remaining chapters in this guide include: Chapter... -
Page 11: Additional Documentation
B: Technical Specifications C: Networking and Security D: Technical Support F: Compliance G:Warranty Additional Documentation The following guide is available on the product CD or the Lantronix Web site: www.lantronix.com. Document EDS Device Server Quick Start Guide EDS Device Server... -
Page 12: 2: Introduction
2: Introduction This chapter introduces the Lantronix EDS family of device servers. It provides an overview of the products, lists their key features, and describes the applications for which they are suited. EDS device servers contain all the components necessary to deliver full network connectivity to virtually any kind of serial device, a reliable TCP/IP protocol stack, and a variety of remote management capabilities. -
Page 13: Features
Supports the IEEE 802.3af standard for Power-over-Ethernet (PoE) 8 MB Flash memory 32 MB Random Access Memory (RAM) Based on Lantronix’s Evolution OS™ Supports secure data encryption by means of AES, SSH, or SSL sessions Supports three convenient configuration methods (Web, command line, and... -
Page 14: Features
Supports secure data encryption by means of AES, SSH, or SSL sessions Supports three convenient configuration methods (Web, command line, and XML) Evolution OS™ EDS device servers incorporate Lantronix’s Evolution OS™. Key features of the Evolution OS™ include: Built-in Web server for configuration and troubleshooting from Web-based browsers... -
Page 15: Web-Based Configuration And Troubleshooting
2: Introduction Web-Based Configuration and Troubleshooting Built upon popular Internet-based standards, the EDS enables users to configure, manage, and troubleshoot efficiently through a simplified browser-based interface that can be accessed anytime from anywhere. All configuration and troubleshooting options are launched from a well-organized, multi-page interface. Users can access all functionality via a Web browser, allowing them flexibility and remote access. -
Page 16: Troubleshooting Capabilities
Moreover, the EDS can not be used to bring down other devices on the network. The EDS can be used with Lantronix’s Secure Com Port Redirector (SCPR) to encrypt COM port-based communications between PCs and virtually any electronic device. -
Page 17: Applications
Applications EDS device servers deliver simple, reliable, and cost-effective network connectivity for all your serial devices and address the growing need to connect individual devices to the network over industry-standard Ethernet connections. The EDS is ideal for a variety of applications, including: Building automation/security Industrial automation... -
Page 18: Retail Automation/Point-Of-Sale
2: Introduction medical staff members to easily monitor and control equipment over the network, whether it is located at the point of care, in a laboratory, or somewhere else in the building, all resulting in improved quality of service and reduced operational costs. Retail Automation/Point-of-Sale Having the right solution in the store to manage deliveries, track orders, and keep pricing current are all improvements that the EDS can offer to make retail operations more... -
Page 19: 3: Installation: Eds4100
3: Installation: EDS4100 This chapter describes how to install the EDS4100 device server. Package Contents Your EDS4100 package includes the following items: One EDS4100 device server One RJ45-to-DB9Fnull modem cable One product CD that includes this User Guide, the Command Reference, and the Quick Start guide. -
Page 20: Identifying Hardware Components
Identifying Hardware Components Figure 3-1 shows the hardware components on the front of the EDS4100. Figure 3-2 shows the hardware components on the back of the EDS4100. The bottom of the EDS4100 (not shown) has a product information label. This label contains the following information: Bar code Serial number... -
Page 21: Serial Ports
Serial Ports The front of the EDS4100 has four male DB9 serial ports. These ports allow you to connect up to four standard serial devices: All four serial ports support RS-232 devices. See Figure 3-3 for pin assignments. Serial ports 1 and 3 also support RS-422 and RS-485 serial devices. Figure 3-4 for pin assignments. -
Page 22: Ethernet Port
Ethernet Port The back panel of the EDS4100 provides an RJ45 Ethernet port. This port can connect to an Ethernet (10 Mbps) or Fast Ethernet (100 Mbps) network. The Speed LED on the back of the EDS4100 shows the connection of the attached Ethernet network. The EDS4100 can be configured to operate at a fixed Ethernet speed and duplex mode (half- or full-duplex) or auto-negotiate the connection to the Ethernet network. -
Page 23: Reset Button
Reset Button The reset button is on the back of the EDS4100, to the left of the power connector. Pressing this button reboots the EDS4100 and terminates all data activity occurring on the serial and Ethernet ports. Physically Installing the EDS4100 Finding a Suitable Location Place the EDS4100 on a flat horizontal or vertical surface. -
Page 24: Figure 3-7. Example Of Eds4100 Connections
Terminal block connector: Attach the power source to the terminal block connector on the back of the EDS4100. The terminal block connector supports a power range of 42 VDC to 56 VDC. The EDS4100 powers up automatically. After power-up, the self-test begins and Evolution OS™... -
Page 25: 4: Installation: Eds8Pr, Eds16Pr And Eds32Pr
EDS8/16/32PR package. To connect the EDS8/16/32PR serial port to a DCE device, you need a straight-through (modem) cable. For a list of the Lantronix cables and adapters you can use with the EDS8/16/32PR, see E: Lantronix Cables and An available connection to your Ethernet network and an Ethernet cable. -
Page 26: Identifying Hardware Components
Identifying Hardware Components Figure 3-1 shows the hardware components on the front of the EDS16PR. Figure 3-2 shows the hardware components on the back of the EDS16PR. The bottom of the EDS8/16/32PR has a product information label. This label contains the following information: Bar code Serial number... -
Page 27: Serial Ports
Product ID (name) Product description Hardware address (also referred to as Ethernet or MAC address) Agency certifications Serial Ports The EDS8PR has 8 serial ports, the EDS16PR has 16 serial ports, and the EDS32PR has 32 serial ports. All serial ports are configured as DTE and support baud rates up to 230,400 baud. -
Page 28: Reset Button
On = EDS is connected to a 100 Mbps Fast Ethernet network. Off = EDS is connected to a 10 Mbps Ethernet network. Blink = EDS is sending data to or receiving data from the Ethernet network. E: Lantronix Cables and Adapters. -
Page 29: Figure 4-4. Example Of Eds16Pr Connections
4: Installation: EDS8PR, EDS16PR and EDS32PR Figure 4-4. Example of EDS16PR Connections EDS Device Servers User Guide... -
Page 30: 5: Getting Started
1. From the Windows Start menu, click Start Programs, Lantronix DeviceInstaller DeviceInstaller. 2. Click the EDS folder. The list of Lantronix EDS devices available displays. 3. Expand the list by clicking the + symbol next to the icon for the desired EDS model. -
Page 31: Viewing Eds Properties
Viewing EDS Properties To view the EDS’s properties, in the right window, click the Device Details tab. The current properties for the EDS display. Figure 5-2 lists the EDS properties and whether they are user configurable or read only. The properties of the other EDS models are similar except for the number of ports. -
Page 32: Configuration Methods
EDS serial port. This means the terminal or computer must be in the same location as the EDS. For more information, see the EDS Command Reference on the product CD or the Lantronix web site (www.lantronix.com). EDS Device Servers User Guide Description Displays True if the EDS automatically receives an IP address (e.g., from DHCP). -
Page 33: Configuring From The Xml Interface
EDS device servers. For more information, see the EDS Command Reference on the product CD or the Lantronix web site (www.lantronix.com). EDS Device Servers User Guide... -
Page 34: 6: Configuration Using The Web Manager
6: Configuration Using the Web Manager This chapter describes how to configure the EDS using the Web Manager, Lantronix’s browser-based configuration tool. The unit’s configuration is stored in nonvolatile memory and retained without power. All changes take effect immediately, unless otherwise noted. -
Page 35: Figure 6-2. Web Manager Device Status Page
6: Configuration Using the Web Manager Note: The factory-default user name is admin and the factory-default password is PASS. After you log in to the Web Manager, we recommend you use the FTP page to change the default FTP password (see page 72), the HTTP Authentication Page to change the HTTP authentication password (see page 79), and the Command Line Interface Configuration Page to change the CLI password (see page 115). -
Page 36: Navigating Through The Web Manager
Navigating Through the Web Manager The Web Manager provides an intuitive point-and-click interface. A menu bar at the left side of each page provides links you can click to navigate from one page to another. Some pages are read-only, while others let you change configuration settings. Note: There may be times when you must reboot the EDS for the new configuration settings to take effect. - Page 37 Page Description XML configuration records. Filesystem Displays filesystem statistics and lets you browse the filesystem to create a file or directory, upload files using HTTP, copy a file, move a file, or perform TFTP actions. Protocol Lets you perform lower level network stack-specific activities. Stack IP Address Lets you specify all the IP addresses and subnets that are...
-
Page 38: Figure 6-3. Web Manager Menu Structure (1 Of 4)
6: Configuration Using the Web Manager Figure 6-3. Web Manager Menu Structure (1 of 4) (continued on next page) EDS Device Servers User Guide... -
Page 39: Figure 6-4. Web Manager Menu Structure (2 Of 4)
6: Configuration Using the Web Manager Figure 6-4. Web Manager Menu Structure (2 of 4) (continued on next page) EDS Device Servers User Guide... -
Page 40: Figure 6-5. Web Manager Menu Structure (3 Of 4)
6: Configuration Using the Web Manager Figure 6-5. Web Manager Menu Structure (3 of 4) (continued on next page) EDS Device Servers User Guide... -
Page 41: Figure 6-6. Web Manager Menu Structure (4 Of 4)
6: Configuration Using the Web Manager Figure 6-6. Web Manager Menu Structure (4 of 4) EDS Device Servers User Guide... -
Page 42: Understanding The Web Manager Pages
The information area shows information or instructions associated with the page. The footer displays at the bottom of the page. It contains copyright information and a link to the Lantronix home page. EDS Device Servers User Guide 6: Configuration Using the Web Manager... -
Page 43: Device Status Page
6: Configuration Using the Web Manager Device Status Page The Device Status page is the first page that displays when you log into the Web Manager. It also displays when you click the Status link in the menu bar. This read-only page shows the EDS product information, network settings, line settings, and tunneling settings. -
Page 44: 7: Network, Serial Line, And Tunnel Settings
7: Network, Serial Line, and Tunnel Settings Network Configuration Page Clicking the Network link in the menu bar displays the Network Configuration page. Here you can change the following EDS network configuration settings: BOOTP and DHCP client IP address, network mask, and gateway MAC address Hostname and domain DHCP client ID... -
Page 45: Figure 7-1. Network Configuration
7: Network, Serial Line, and Tunnel Settings Figure 7-1. Network Configuration EDS Device Servers User Guide... - Page 46 The bottom part of this page shows the current configuration. The After Reboot column in the Current Configuration section of this page shows the settings that will take effect the next time the EDS reboots. Changes to the following settings require the EDS to be rebooted before the new settings take effect: BOOTP Client DHCP Client...
-
Page 47: Line Settings Pages
Network Configuration Page Settings Network Mask Gateway MAC Address Hostname Domain DHCP Client ID Ethernet Link Line Settings Pages The Line Settings page displays the status and statistics for each of the serial lines (ports). This page also lets you change the character format and command mode settings for the serial lines. -
Page 48: Line - Statistics Page
7: Network, Serial Line, and Tunnel Settings Line – Statistics Page The Line – Statistics page displays when you click Line in the menu bar. It also displays when you click Statistics at the top of one of the other Line Settings pages. This read- only page shows the status and statistics for the serial line selected at the top of this page. -
Page 49: Line - Configuration Page
Line - Configuration Page If you click Configuration at the top of one of the Line Settings pages, the Line – Configuration page displays. This page shows the configuration settings for the serial line selected at the top of the page and lets you change the settings for that serial line. Line –... - Page 50 Line – Configuration Page Settings Parity Data Bits Stop Bits Flow Control Xon char Xoff char EDS Device Servers User Guide Description Select the parity used by the currently selected serial line. Choices are: None (default) Even Select the number of data bits used by the currently selected serial line.
-
Page 51: Line - Command Mode Page
7: Network, Serial Line, and Tunnel Settings Line – Command Mode Page If you click Command Mode at the top of one of the Line Settings pages, the Line – Command Mode page displays. This page shows the command mode settings for the serial line selected at the top of the page and lets you change the settings for that serial line. -
Page 52: Tunnel Pages
Line – Command Mode Page Settings Mode Wait Time Serial String Echo Serial String Signon Message Tunnel Pages The Tunnel pages let you view and configure settings for tunnels. (For more information, Tunneling on page 144.) To select a tunnel: EDS4100: Click Tunnel 1, Tunnel 2, Tunnel 3, or Tunnel 4 at the top of the page. -
Page 53: Tunnel - Serial Settings Page
7: Network, Serial Line, and Tunnel Settings Figure 7-5. Tunnel - Statistics Page Tunnel – Serial Settings Page If you click Serial Settings at the top of one of the Tunnel pages, the Tunnel – Serial Settings page displays. This page shows the settings for the tunnel selected at the top of the page and lets you change the settings. -
Page 54: Figure 7-6. Tunnel - Serial Settings Page
Under Current Configuration, Buffer Size has a Reset link that lets you reset the buffer size value shown. If you click this link, a message tells you that you will have to reboot the EDS. Click OK to proceed or Cancel to cancel the operation. Tunnel –... -
Page 55: Tunnel - Start/Stop Characters Page
7: Network, Serial Line, and Tunnel Settings Tunnel – Start/Stop Characters Page If you click Start/Stop Chars at the top of one of the Tunnel pages, the Tunnel – Start/Stop Chars page displays. This page shows the start and stop characters used for the tunnel selected at the top of the page and lets you change the settings for that tunnel. -
Page 56: Tunnel - Accept Mode Page
Tunnel – Start/Stop Chars Page Settings Start Character Stop Character Echo Start Character Echo Stop Character Tunnel – Accept Mode Page Accept Mode determines how the EDS “listens” for an incoming connection. If you click Accept Mode at the top of one of the Tunnel pages, the Tunnel – Accept Mode page displays. -
Page 57: Figure 7-8. Tunnel - Accept Mode Page
7: Network, Serial Line, and Tunnel Settings Figure 7-8. Tunnel – Accept Mode Page EDS Device Servers User Guide... - Page 58 AES such as the Secure Com Port Redirector. Secure Com Port Redirector is on the CD that came with your EDS or on the Lantronix Web Site (www.lantronix.com). Select whether the serial line is flushed when a connection is made.
-
Page 59: Tunnel - Connect Mode Page
Tunnel – Accept Mode Page Settings Email on Connect Email on Disconnect Password Prompt for Password Tunnel – Connect Mode Page Connect Mode determines how the EDS initiates a connection to a remote host or device. If you click Connect Mode at the top of one of the Tunnel pages, the Tunnel – Connect Mode page displays. -
Page 60: Figure 7-9. Connect Mode Page
7: Network, Serial Line, and Tunnel Settings Figure 7-9. Connect Mode Page EDS Device Servers User Guide... - Page 61 Tunnel – Connect Mode Page Settings Mode Remote Address Remote Port Local Port Protocol Reconnect Timer Flush Serial Data SSH Username EDS Device Servers User Guide Tunnel – Connect Mode Page Description Select the method to be used to start a connection to a remote host or device.
-
Page 62: Tunnel - Disconnect Mode Page
Tunnel – Connect Mode Page Settings Block Serial Data Block Network Data TCP Keep Alive Email on Connect Email on Disconnect Tunnel – Disconnect Mode Page If you click Disconnect Mode at the top of one of the Tunnel pages, the Tunnel – Disconnect Mode page displays. -
Page 63: Figure 7-10. Tunnel - Disconnect Mode Page
Tunnel – Disconnect Mode Page Settings Mode Timeout Flush Serial Data EDS Device Servers User Guide Figure 7-10. Tunnel – Disconnect Mode Page Tunnel – Disconnect Mode Page Description Select the method used to disconnect an active tunnel connection. Choices are: Disabled = an active connection is never disconnected. -
Page 64: Tunnel - Packing Mode Page
7: Network, Serial Line, and Tunnel Settings Tunnel – Packing Mode Page When tunneling, data can be packed (queued) and sent in large chunks on the network instead of being sent immediately after being read on the serial line. If you click Packing Mode at the top of one of the Tunnel pages, the Tunnel –... -
Page 65: Tunnel - Modem Emulation Page
Tunnel – Packing Mode Page Settings Mode Timeout Threshold Send Character Trailing Character Tunnel – Modem Emulation Page A tunnel in connect mode can be initiated using modem commands incoming from the serial line. If you click Modem Emulation at the top of one of the Tunnel pages, the Tunnel –... - Page 66 7: Network, Serial Line, and Tunnel Settings Tunnel – Modem Emulation Page EDS Device Servers User Guide...
-
Page 67: Tunnel - Aes Keys Page
Tunnel – Modem Emulation Page Settings Echo Pluses Echo Commands Verbose Response Codes Response Codes Error Unknown Commands Connect String Tunnel – AES Keys Page Four Advanced Encryption Standard (AES) Encryption Keys are used for tunneling. Connect mode and Accept mode contain their own sets of keys. One key is used for encrypting outgoing data and another key is used for decrypting incoming data. -
Page 68: Figure 7-12. Tunnel - Aes Keys Page
7: Network, Serial Line, and Tunnel Settings Note: Tunneling using AES encryption uses a non-standard protocol and shared keys, making it not very secure. The EDS also supports SSH as an alternative method of secure tunneling. SSH tunneling has the advantage of not using shared keys. - Page 69 Tunnel – AES Keys Page Settings Accept Mode AES Keys: Encrypt Key Accept Mode AES Keys: Decrypt Connect Mode AES Keys: Encrypt Key Connect Mode AES Keys: Decrypt Key EDS Device Servers User Guide Tunnel – AES Keys Page Description Enter the AES encrypt key for Accept mode.
-
Page 70: 8: Services Settings
8: Services Settings DNS Page Clicking the DNS link in the menu bar displays the DNS page. This page displays configuration settings for the domain name system (DNS) and lets you change them as necessary. The DNS page also shows any contents in the DNS cache. When a DNS name is resolved using a forward lookup, the results are stored in the DNS cache temporarily. -
Page 71: Snmp Page
DNS Page Settings Primary Server Secondary Server SNMP Page Clicking the SNMP link in the menu bar displays the SNMP page. This page is used to configure the Simple Network Management Protocol (SNMP) agent. Using this page, you can configure the SNMP service to send a trap when it receives a request for information that contains an incorrect community name and does not match an accepted system name for the service. -
Page 72: Ftp Page
SNMP Page Settings SNMP Agent Read Community Write Community System Contact System Name System Description System Location Enable Traps Primary TrapDest IP Secondary TrapDest IP FTP Page Clicking the FTP link in the menu bar displays the FTP page. This page displays the current File Transfer Protocol (FTP) connection status and various statistics about the FTP server. -
Page 73: Figure 8-3. Ftp Page
FTP Page Settings FTP Server FTP Username FTP Password EDS Device Servers User Guide Figure 8-3. FTP Page FTP Page Description Select whether the FTP server is enabled. Choices are: On = FTP server is enabled. (default) Off = FTP server is disabled. Enter the username required to gain FTP access. -
Page 74: Tftp Page
TFTP Page Clicking the TFTP link in the menu bar displays the TFTP page. This page displays the status and various statistics about the Trivial File Transfer Protocol (TFTP) server. TFTP Page Settings TFTP Server Allow TFTP File Creation EDS Device Servers User Guide Figure 8-4. -
Page 75: Syslog Page
Syslog Page Clicking the Syslog link in the menu bar displays the Syslog page. This page shows the current configuration, status, and statistics for the syslog. Here you can configure the syslog destination and the severity of the events to log. Syslog Page Settings Host... -
Page 76: Http Pages
Syslog Page Settings Severity to Log HTTP Pages Clicking the HTTP link in the menu bar displays the HTTP Statistics page. This page has four links at the top for viewing statistics and for viewing and changing configuration, authentication, and RSS settings. HTTP Statistics Page The HTTP Statistics page displays when you click HTTP in the menu bar. -
Page 77: Http Configuration Page
8: Services Settings HTTP Configuration Page If you click Configuration at the top of one of the HTTP pages, the HTTP Configuration page displays. Here you can change HTTP configuration settings. Under Current Configuration, Logs has View and Clear links that let you view or clear the log. - Page 78 HTTP Configuration Page Settings HTTP Server HTTP Port HTTPS Port Max Timeout Max Bytes Logging Max Log Entries EDS Device Servers User Guide HTTP Configuration Page Description Select whether the HTTP server is enabled. Choices are: On = HTTP server is enabled. (default) Off = HTTP server is disabled.
-
Page 79: Http Authentication Page
HTTP Configuration Page Settings Log Format HTTP Authentication Page HTTP Authentication allows you to require usernames and passwords to access specific web pages or directories on the EDS's built-in web server. For example, to add web pages to the EDS to control or monitor of a device attached to a port on the EDS, you can specify the user and password that can access that web page. -
Page 80: Figure 8-8. Http Authentication
3. On the HTTP Authentication page of the EDS Web Manager, add: A URI of port1control A Realm of Monitor An AuthType of Digest A Username and Password 4. Click the Submit button. The EDS creates a username and password to allow the user to access all web pages located in the directory port1control in the EDS file system. - Page 81 HTTP Authentication Page Settings Realm AuthType Username Password EDS Device Servers User Guide HTTP Authentication Page Description Enter the Uniform Resource Identifier (URI) of the resource that will participate in the authentication process. Default is /. Enter the domain, or realm, used for HTTP operations. Default is <config>.
-
Page 82: Http Rss Page
8: Services Settings HTTP RSS Page If you click RSS at the top of one of the HTTP pages, the HTTP RSS page displays. Here you can specify RDF Site Summary (RSS) information. RSS is a way of feeding online content to Web users. - Page 83 HTTP RSS Page Settings RSS Feed Persistent Max Entries EDS Device Servers User Guide HTTP RSS Page Description Select whether an RSS feed is enabled or disabled. An RSS syndication feed is served by the HTTP server. This feed contains up-to-date information about configuration changes that occur on the EDS.
-
Page 84: 9: Security Settings
9: Security Settings SSH Pages Clicking the SSH link in the menu bar displays the SSH Server: Host Keys page. This page has four links at the top for viewing and changing SSH server host keys, SSH server authorized keys, SSH client known hosts, and SSH client users. Note: For more information, see SSH Server: Host Keys Page... -
Page 85: Figure 9-1. Ssh Server: Host Keys
9: Security Settings Figure 9-1. SSH Server: Host Keys Page EDS Device Servers User Guide... -
Page 86: Ssh Client: Known Hosts Page
SSH Server: Host Keys Page Settings Upload Keys Private Key Public Key Key Type Create New Keys Key Type Bit Size SSH Client: Known Hosts Page If you click SSH Client: Known Hosts at the top of one of the SSH pages, the SSH Client: Known Hosts page displays. -
Page 87: Figure 9-2. Ssh Client: Known Hosts
SSH Client: Known Hosts Page Settings Server Public RSA Key Public DSA Key EDS Device Servers User Guide Figure 9-2. SSH Client: Known Hosts Page SSH Client: Known Hosts Page Description Enter the name or IP address of a known host. If you entered a server name, the name should match the name of the server used as the Remote Address in Connect mode tunneling. -
Page 88: Figure 9-3. Ssh Server: Authorized Users
9: Security Settings SSH Server: Authorized Users Page If you click SSH Server: Authorized Users at the top of one of the SSH pages, the SSH Server: Authorized Users page displays. Here you can change SSH server settings for authorized users. SSH Server Authorized Users are accounts on the EDS that can be used to log into the EDS via SSH. -
Page 89: Ssh Client: Users Page
SSH Server: Authorized Users Page Settings Username Password Public RSA Key Public DSA Key SSH Client: Users Page If you click SSH Client: Users at the top of one of the SSH pages, the SSH Client: Users page displays. Here you can change SSH client settings for users. SSH client known hosts are used by all applications that play the role of an SSH client, specifically tunneling in Connect mode. -
Page 90: Figure 9-4. Ssh Client: Users
9: Security Settings Figure 9-4. SSH Client: Users Page EDS Device Servers User Guide... - Page 91 SSH Client: Users Page Settings Username Password Remote Command Private Key Public Key Key Type Create New Keys Username Key Type Bit Size EDS Device Servers User Guide SSH Client: Users Page Description Enter the name that the EDS uses to connect to the SSH client user.
-
Page 92: Ssl Page
9: Security Settings SSL Page Clicking the SSL link in the menu bar displays the SSL page. Here you can upload an existing SSL certificate or create a new self-signed one. Note: For more information about SSL, see on page 141. An SSL certificate must be configured for the HTTP server to listen on the HTTPS port. -
Page 93: Figure 9-5. Ssl
9: Security Settings Figure 9-5. SSL Page EDS Device Servers User Guide... - Page 94 SSL Page Settings Upload Certificate New Certificate New Private Key Create New Self- Signed Certificate Country (2 Letter Code) State/Province Locality (City) Organization Organization Unit Common Name Expires Bit Size EDS Device Servers User Guide SSL Page Description Enter the path and name of the existing certificate you want to upload, or use the Browse button to select the certificate.
-
Page 95: 10: Maintenance And Diagnostics Settings
10: Maintenance and Diagnostics Settings Filesystem Pages Clicking the Filesystem link in the menu bar displays the Filesystem Statistics page. This page has two links at the top for viewing filesystem statistics and browsing and manipulating the entire filesystem. Filesystem Statistics Page The Filesystem Statistics page displays when you click Filesystem in the menu bar. -
Page 96: Filesystem Browser Page
Filesystem Browser Page If you click Browse at the top of a Filesystem page, the Filesystem Browser page displays. Here you can browse and manipulate the entire filesystem. For example, you can: Browse the filesystem. Create files and directories. Upload files via HTTP. Copy and move files. -
Page 97: File System
Filesystem Browser Page Settings Create File Directory Upload File Copy File Source Destination Move Source Destination TFTP Action Mode Local File Remote File Host Port EDS Device Servers User Guide Filesystem Browser Page Description Enter the name of the file you want to create, and then click Create. -
Page 98: Diagnostics Pages
10: Maintenance and Diagnostics Settings Diagnostics Pages The EDS has several tools for performing diagnostics. To view these diagnostic tools, click the Diagnostics link in the menu bar to display the Diagnostics: Hardware page. The available diagnostic tools appear at the top of the page. Diagnostics: Hardware Page The Diagnostics: Hardware page displays when you click Diagnostics in the menu bar. -
Page 99: Figure 10-3. Mib-Ii Network Statistics
MIB-II Network Statistics Page Clicking MIB-II Stats from one of the Diagnostics pages displays the MIB-II Network Statistics page. This page displays the various SNMP-served Management Information Bases (MIBs) available on the EDS. Information about these MIBs can be found in the following Request for Comments (RFCs): RFC 1213, Original MIB-II definitions RFC 2011, Updated definitions for IP and ICMP... -
Page 100: Ip Sockets Page
10: Maintenance and Diagnostics Settings IP Sockets Page Clicking IP Sockets from one of the Diagnostics pages displays the IP Sockets page. This read-only page lists all the network sockets on the EDS that are currently open. Figure 10-4 IP Sockets Page EDS Device Servers User Guide... -
Page 101: Diagnostics: Ping Page
Diagnostics: Ping Page Diagnostics: Ping Page Settings Host Count Timeout EDS Device Servers User Guide Figure 10-5 Diagnostics: Ping Page Diagnostics: Ping Page Description Enter the IP address you want the EDS to ping. Enter the number of ping packets that the EDS should try to send to the Host. -
Page 102: Diagnostics: Traceroute Page
Diagnostics: Traceroute Page Clicking Traceroute from one of the Diagnostics pages displays the Diagnostics: Traceroute page. Here you can trace a packet from the EDS to an Internet host, showing how many hops the packet requires to reach the host and how long each hop takes. If you visit a Web site whose pages appear slowly, you can use traceroute to determine where the longest delays are occurring. -
Page 103: Figure 10-7 Diagnostics: Dns Lookup
Diagnostics: DNS Lookup Page Clicking DNS Lookup from one of the Diagnostics pages displays the Diagnostics: DNS Lookup page. Here you can specify a DNS Hostname for a forward lookup or an IP address for a reverse lookup. You can also perform a lookup for a Mail (MX) record by prefixing a DNS Hostname with a '@'. -
Page 104: Diagnostics: Memory Page
10: Maintenance and Diagnostics Settings Diagnostics: Memory Page Clicking Memory from one of the Diagnostics pages displays the Diagnostics: Memory. This read-only page shows the total memory and available memory (in bytes), along with the number of fragments, allocated blocks, and memory status. The Diagnostics: Memory page also shows the current amount of available memory. -
Page 105: Diagnostics: Buffer Pool
10: Maintenance and Diagnostics Settings Diagnostics: Buffer Pool Clicking Buffer Pools from one of the diagnostics page displays a read-only screen that shows the current usage of the private buffer pools. Private buffer pools are used in various parts of the system to ensure deterministic memory management, thus eliminating any contention for memory from the generic heap space. -
Page 106: Diagnostics: Processes Page
Diagnostics: Processes Page Clicking Processes from one of the diagnostics page displays a read-only screen that lists all processes running on the EDS. The CPU % column displays the percentage of total CPU cycles a process used in the last two seconds. The Stacks column displays the total stack space available to the process and the maximum amount of the stack space the process used since it was started. -
Page 107: System Page
Below the process chart is a CPU Load Graph that shows the CPU load over the last five minutes. The EDS generates the graph using the Scalable Vector Graphics (SVG) modularized XML language and updates every two seconds. The information area contains a link for viewing the raw SVG XML. -
Page 108: Figure 10-11. System
10: Maintenance and Diagnostics Settings Figure 10-11. System Page EDS Device Servers User Guide... -
Page 109: Query Port Page
Enter the short name and long name for the EDS. Default short name is EDS and default long name is Lantronix EDS. Lets you specify the system time zone, date, and time. After changing any of these settings, click the Submit button next to the... -
Page 110: Figure 10-12. Query Port
Query Port Page Settings Query Port Server EDS Device Servers User Guide Figure 10-12. Query Port Page Query Port Page Description Select whether the query port server is enabled or disabled. Choices are: On = query port server is enabled. (default) Off = query port server is disabled. -
Page 111: 11: Advanced Settings
11: Advanced Settings Email Pages Clicking the Email link in the menu bar displays the Email Statistics page. This page has links at the top for displaying the email configuration and for sending an email. You can configure the email subsystem for delivering email notifications and send an email. Email Statistics Page The Email Statistics page displays when you click Email in the menu bar. -
Page 112: Email Configuration Page
11: Advanced Settings Figure 11-1. Email Statistics Page Email Configuration Page If you click Configuration at the top of one of the Email pages, the Email Configuration page displays. Here you can change email configuration settings. From the Select Email drop-down list at the top of the page, select the email whose configuration you want to view. -
Page 113: Figure 11-2. Email Configuration
11: Advanced Settings Figure 11-2. Email Configuration Page EDS Device Servers User Guide... -
Page 114: Cli Pages
Email Configuration Page Settings To (Required) From (Required) Reply –To Subject File Overriding Domain Server Port Local Port or Random Priority To test your configuration, you can send an email immediately by clicking Send Email at the top of the page. CLI Pages Clicking the CLI link in the menu bar displays the Command Line Interface Statistics page. -
Page 115: Command Line Interface Configuration Page
11: Advanced Settings Figure 11-3. Command Line Interface Statistics Page Command Line Interface Configuration Page If you click Configuration at the top of the Command Line Interface Statistics page, the Command Line Interface Configuration page displays. Here you can change CLI configuration settings. -
Page 116: Figure 11-4. Command Line Interface Configuration
Figure 11-4. Command Line Interface Configuration Page Command Line Interface Configuration Page Settings Telnet Access Telnet Port SSH Access SSH Port Password EDS Device Servers User Guide Command Line Interface Configuration Page Description Select whether Telnet access is enabled. Choices are: On = Telnet access is enabled. -
Page 117: Xml Pages
Command Line Interface Configuration Page Settings Enable Password Quit connect line XML Pages The EDS can be configured using an XML configuration record. Clicking the XML link in the menu bar displays the XML page. This page has three links at the top for exporting an XML configuration record, exporting an XML status record, and importing an XML configuration record. -
Page 118: Figure 11-5. Xml Configuration Record: Export System Configuration
11: Advanced Settings Figure 11-5. XML Configuration Record: Export System Configuration Page EDS Device Servers User Guide... -
Page 119: Figure 11-6. Xml Status Record: Export System Status
Configuration Record: Export System Configuration Page XML Configuration Record: Export System Configuration Page Settings Export XCR data to browser Export XCR data to the filesystem Groups to Export XML Status Record: Export System Status If you click XML Status Record at the top of an XML page, the XML Status Record: Export System Status page displays. -
Page 120: Xml: Import System Configuration Page
XML Status Record: Export System Status Page XML Status Record: Export System Status Page Settings Export XSR data to browser Export XSR data to the filesystem Groups to Export XML: Import System Configuration Page If you click Import XML Configuration Record at the top of an XML page, the XML: Import System Configuration page displays. -
Page 121: Figure 11-7. Xml: Import System Configuration
11: Advanced Settings Figure 11-7. XML: Import System Configuration Page EDS Device Servers User Guide... -
Page 122: Protocol Stack Page
XML: Import System Configuration Page Settings Import entire external XCR file Import XCR file from filesystem Groups and Instances to Import Whole Groups to Import Protocol Stack Page Clicking the Protocol Stack link in the menu bar displays the Protocol Stack page. Here you can configure lower level network stack-specific configuration settings. -
Page 123: Figure 11-8. Protocol Stack
11: Advanced Settings Figure 11-8. Protocol Stack Page EDS Device Servers User Guide... -
Page 124: Ip Address Filter Page
Protocol Stack Page Settings Send RSTs ICMP ARP Cache IP Address MAC Address IP Address Filter Page Clicking the IP Address Filter link in the menu bar displays the IP Address Filter page. Here you can specify the IP addresses and subnets allowed to send data to the EDS. All packets sent from IP addresses not on this list are ignored and discarded. -
Page 125: Figure 11-9. Ip Address Filter
IP Address Filter Page Settings IP Address Network Mask EDS Device Servers User Guide Figure 11-9. IP Address Filter Page IP Address Filter Page Description Enter the IP address that is allowed to send packets to the EDS. If using DHCP with BOOTP, enter the IP address of the DHCP/BOOTP server. -
Page 126: 12: Updating Firmware
Lantronix periodically releases updates to the firmware to fix problems or provide feature upgrades. Obtaining Firmware Obtain the most up-to-date firmware and release notes for the EDS from the Lantronix Web site (http://www.lantronix.com/support/downloads.html) or by using anonymous FTP (ftp://ftp.lantronix.com/). Upgrading Using DeviceInstaller Loading New Firmware 1. -
Page 127: Updating Firmware
Updating Firmware 1. Open DeviceInstaller. (See 2. Open the EDS folder in the left Window pane. 3. Select the EDS that you would like to upgrade. 4. Click the Web Configuration tab and click Go. 5. Enter the User name and Password. The default user name is admin with a default password of PASS (all caps). -
Page 128: A: Factory Default Configuration
A: Factory Default Configuration This appendix lists the EDS factory-default configuration. The types of settings are in alphabetical order. Network Configuration Settings Network Configuration Parameters BOOTP Client DHCP Client IP Address Network Mask Gateway MAC Address Hostname Domain DHCP Client ID Ethernet Serial Port Line Settings Serial Port Line... -
Page 129: Tunnel Settings
Serial Port Line Parameters Flow Control Xon char Xoff char Command Mode Use Serial String Echo Serial String Wait Time (milliseconds) Serial String (text or binary) Signon Message Tunnel Settings Serial Settings Serial Parameters Buffer Size Read Timeout (milliseconds) Wait for Read Timeout Start/Stop Characters Start/Stop Character Parameters... -
Page 130: Accept Mode
Accept Mode Accept Mode Parameters Accept Mode Local Port Protocol Flush Serial Data Block Serial Data Block Network Data TCP Keep Alives Email on Connect Email on Disconnect Password Prompt for Password Connect Mode Connect Mode Parameters Connect Mode Remote Address Remote Port Local Port Protocol... -
Page 131: Disconnect Mode
Connect Mode Parameters Email on Connect Email on Disconnect Disconnect Mode Disconnect Mode Parameters Mode Timeout Flush Serial Data Packing Mode Packing Mode Parameters Mode Timeout Threshold Send Character Trailing Character Modem Emulation Modem Emulation Parameters Echo Pluses Echo Command Verbose Response Codes Response Codes Error Unknown Commands... -
Page 132: Aes Keys
EDS Device Servers User Guide AES Key Settings None None None None DNS Settings None None SNMP Settings Running Public Private None EDSxxxx (xxxx = 4100, 8PR, 16PR, 32PR) (xxxx = 4100, 8PR, 16PR, 32PR) Lantronix EDSxxxx None None None... -
Page 133: Ftp Settings
FTP Settings FTP Parameters FTP Server Username Password TFTP Settings TFTP Parameters TFTP Server Allow TFTP File Creation Syslog Settings Syslog Parameters Syslog Status Host Local Port Remote Port Severity to Log EDS Device Servers User Guide FTP Settings admin PASS TFTP Settings Disabled... -
Page 134: Http Settings
HTTP Settings Configuration HTTP Configuration Parameters HTTP Server HTTP Port HTTPS Port Max Timeout Max Bytes Logging Max Log Entries Log Format Authentication HTTP Authentication Parameters Realm AuthType Username Password HTTP RSS Parameters RSS Feed Persistent Max Entries EDS Device Servers User Guide HTTP Settings 10 seconds 40960... -
Page 135: Cli Settings
CLI Settings Telnet CLI Telnet Parameters Telnet Access Telnet Port SSH Access SSH Port Password Enable Password Quit Connect Line Email Settings Email Parameters From Reply –To Subject File Overriding Domain Server Port Local Port or Random Priority EDS Device Servers User Guide CLI Telnet Settings Enabled Enabled... -
Page 136: Query Port Settings
Network Mask EDS Device Servers User Guide Query Port Settings Diagnostic Ping Settings 5 seconds System Settings EDSxxxx (xxxx = 4100, 16PR, or 32PR) Lantronix EDSxxxx (xxxx 4100, 16PR, or 32PR) GMT +0.00 (GMT) None None IP Address Settings None None... -
Page 137: B: Technical Specifications
B: Technical Specifications EDS4100 Category Flash EEPROM Firmware Serial Interface Serial Line Formats Modem Control Flow Control Power Input Network Interface Compliance EDS Device Servers User Guide EDS4100 Technical Specifications EDS4100 Specifications ® Intel XScale IXP420 Network Processor running at 266MHz 32k Instruction Cache 32k Data Cache 8 MBytes Flash... - Page 138 Category Dimensions Weight Temperature Relative Humidity Case Protocols Supported Management Security Internal Web Server System Software LEDs EMC Standards Safety Standards Product Label Markings EDS Device Servers User Guide EDS4100 Specifications (cont'd) Height: 12.7 cm (5.0 in) Width: Without mounting brackets 17.65 cm (6.95 in) Width: With mounting brackets 20.14 cm (7.93 in) Depth: 3.81 cm (1.5 in) .86 Kg (1.9 lb)
-
Page 139: Eds8/16/32Pr
EDS8/16/32PR Category Flash EEPROM Firmware Serial Interface Serial Line Formats Modem Control Flow Control Power Input Network Interface Compliance Dimensions (LxWxH) Weight Temperature Relative Humidity EDS Device Servers User Guide EDS8/16/32PR Technical Specifications EDS8/16/32PR Specifications ® Intel XScale IXP420 Network Processor running at 266MHz 32k Instruction Cache 32k Data Cache 8 MBytes Flash... - Page 140 Category Case Protocols Supported Management Security Internal Web Server System Software LEDs EMC Standards Safety Standards Product Label Markings EDS Device Servers User Guide EDS8/16/32PR Specifications (cont'd) Metal enclosure with removable rack mounts ARP, UDP/IP, TCP/IP, Telnet, ICMP, SNMP, DHCP, BOOTP, TFTP, Auto IP, SMTP, FTP, DNS, Traceroute, and HTTP Internal web server, SNMP v2C (MIB-II, RS232MIB), Serial login, Telnet login, XML...
-
Page 141: C: Networking And Security
C: Networking and Security This chapter describes the following networking and security concepts as they relate to the EDS: SSL ⎯ described below. SSH ⎯ see page Serial tunneling ⎯ see page This chapter concludes with a description of modem emulation (page 147). Secure Sockets Layer (SSL) is an open-standard security protocol that provides privacy through encryption, server authentication, and message integrity. -
Page 142: How Ssl Works
How SSL Works SSL uses cryptography to deliver authentication and privacy to message transmission over the Internet. SSL permits the communication of client/server applications without eavesdropping and message tampering. SSL runs on layers between application protocols (HTTP, SMTP, etc.) and the TCP transport protocol. -
Page 143: Ssh
Certificate provides the receiver with a way to encode a reply. Digital Certificates come in 40-bit and 128-bit versions. There are two principal ways that a Digital Certificate can be obtained. It can be bought from a certificate vendor or a user can "self-sign" his or her own certificate. With the latter method, a user can use various tools, both open source and proprietary, to sign his or her own Digital Certificate, saving the time and expense of going through a certificate vendor. -
Page 144: Tunneling
C: Networking and Security Tunneling Tunneling provides a way to create a connection between two serial devices across an untrusted network so the devices can share data. The sharing of information is achieved through a direct connection (or “serial tunnel”) between the two devices that encapsulates, authenticates, and encrypts the serial data into TCP packets and sends them across the Ethernet network. -
Page 145: Tunneling And The Eds
Tunneling and the EDS Each EDS serial port supports two concurrent tunneling connections, Connect mode and Accept mode. These connections operate independently of the other EDS serial ports. In Connect mode, the EDS actively makes a connection. The receiving node on the network must listen for the Connect mode’s connection. -
Page 146: Accept Mode
Connect Mode has six variations: Disabled (no connection) Enabled (always makes a connection) Active if it sees any character from the serial port (makes a connection upon receiving any character) Active if it sees a specific (configurable) character from the serial port Modem emulation (controlled by modem commands) Modem control asserted (makes a connection when the modem central signal on the serial line becomes active) -
Page 147: Packing Mode
To clear out data from the serial buffers upon disconnecting, configure the EDS to flush serial data (see Packing Mode Packing mode takes data from the serial port, groups it together, and sends it out to nodes on the network. The groupings may be configured by size or by time intervals. The following settings are configurable for Packing mode: Enable or disable Packing mode Packing mode timeout. -
Page 148: Command Mode
Command Mode The Modem Emulation’s Command mode supports the standard AT command set. For a list of available commands from the serial or telnet login, enter AT?. Use ATDT, ATD, and ATDP to establish a connection: ATDT<Address Info> ATDP<Address Info> ATEn ATS0 = n ATQn... - Page 149 (Since the remote port was not specified in the ATDT command, the remote port defined under Connect mode is used.) Entering ATDT 28.150 causes the EDS to assume the first two octets in the IP address and connects to the remote IP address 192.168.28.150, port 10001. Entering ATDT 150 causes the EDS to assume the first three octets and connects to the remote IP address 192.168.16.150, port 10001.
-
Page 150: D: Technical Support
When you report a problem, please provide the following information: Your name, and your company name, address, and phone number Lantronix model number Lantronix serial number Software version (on the first screen shown when you Telnet to port 23) -
Page 151: E: Lantronix Cables And Adapters
E: Lantronix Cables and Adapters Lantronix P/N Description 500-103 6’ RJ45-to DB9F 200.2062 Cable Ethernet CAT5; RJ45, 2 m (6.6 ft) 200.2063 Cable Ethernet CAT5; RJ45, 5 m (16.4 ft) 200.2064 Cable Ethernet CAT5; RJ45, 10 m (32.8 ft) 200.2065 Cable Ethernet CAT5;... -
Page 152: F: Compliance
F: Compliance (according to ISO/IEC Guide 22 and EN 45014) Manufacturer’s Name & Address: Lantronix 15353 Barranca Parkway, Irvine, CA 92618 USA Declares that the following product: Product Name Model: EDS4100 4 Port Device Server, EDS16PR 16 Port Device Server, and EDS32PR 32 Port Device Server... -
Page 153: Lithium Battery Notice
Lithium Battery Notice CAUTION: DANGER OF EXPLOSION IF BATTERY IS INCORRECTLY REPLACED. REPLACE ONLY WITH THE SAME OR EQUIVALENT TYPE RECOMMENDED BY THE MANUFACTURER. DISCARD USED BATTERIES ACCORDING TO THE MANUFACTURER'S INSTRUCTIONS. ACHTUNG: WIRD BEIM BATTERIEWECHSEL EINE FALSCHE BATTERIE EINGESETZT, BESTEHT EXPLOSIONSGEFAHR. SETZEN SIE NUR EINE BATTERIE DES GLEICHEN ODER EINES ENTSPRECHENDEN, VOM HERSTELLER EMPFOHLENEN TYPS EIN. -
Page 154: Input Supply
compromised. The maximum temperature for the equipment in this environment is 50°C. Consideration should be given to the maximum rated ambient. 2. Installation should be such that a hazardous stability condition is not achieved due to uneven loading. Input Supply Check nameplate ratings to assure there is no overloading of supply circuits that have an effect on overcurrent protection and supply wiring. -
Page 155: G: Warranty
Lantronix, freight prepaid. Upon verification of warranty, Lantronix will -- at its option -- repair or replace the product and return it to the customer freight prepaid. If the product is not under warranty, the customer may have Lantronix repair the unit on a fee basis or return it. -
Page 156: Index
Index Accept mode, 146 Settings, 56 Accessing Web Manager, 34 AES key settings, 67 Applications, 17 Authentication settings, 79 Authorized users,SSH server, 88 Browsing the filesystem, 96 Buffer pool diagnostics, 105 Certificate, self-signed, 92 CLI pages, 114 Configuration, 115 Statistics, 114 Client users SSH server, 89 Command mode, 51, 148... - Page 157 Factory default configuration, 128 Features, 13 Files Copying, 96 Creating, 96 Moving, 96 Transferring to/fron a TFTP server, 96 Uploading via HTTP, 96 Filesystem pages, 95 Browser, 96 Firmware Loading new, 107 Obtaining, 126 Updating, 107 FTP page, 72 Hardware diagnostics, 98 Host key settings, SSH server, 84 HTTP pages, 76 Authentication, 79...
- Page 158 Accept mode, 56 AES keys, 67 Connect mode, 59 Disconnect mode, 62 Modem emulation, 65 Packing mode, 64 Serial settings, 53 Start and stop characters, 55 Statistics, 52 Tunneling Accept mode, 146 Connect mode, 145 Disconnect mode, 146 Overview, 144 Packing mode, 147 Updating firmware, 107 Uploading a file to the filesystem, 96...
Need help?
Do you have a question about the Data Center-Grade Evolution Device Server EDS32PR and is the answer not in the manual?
Questions and answers