
Subscribe to Our Youtube Channel
Related Manuals for Yaesu WIRES-X HRI-200


Summary of Contents for Yaesu WIRES-X HRI-200
- Page 1 Wide-Coverage Internet Repeater Enhancement System WIRES-X Connection Kit HRI-200 Instruction Manual...
-
Page 2: Table Of Contents
Introduction Contents Introduction ......................3 Useful Functions ....................54 What is WIRES-X? ....................3 Using the news function ..................54 How WIRES-X works ..................4 What is the news function? ................54 Opening a WIRES-X node station ..............5 Organizing your news station ............... 55 Establishing a WIRES-X node station ............ -
Page 3: Introduction
Introduction What is WIRES-X? WIRES (Wide-coverage Internet Repeater Enhancement System) is an Internet communication system which expands the range of amateur radio communication. WIRES-X uses local nodes (stations connected to the Internet via PCs) as access points to relay communications of conventional amateur radio stations. -
Page 4: How Wires-X Works
The mobile or fixed station receiving on the channel of the connected destination node station, receives the data For details on how to use WIRES-X with a mobile or a fixed station, refer to the YAESU product (FTM-400DR/DE, FT1DR/DE) WIRES-X Edition Instruction... -
Page 5: Opening A Wires-X Node Station
Perform the following procedures. ● Register the node with the WIRES-X server (apply to obtain an ID number) Register the WIRES-X node with YAESU. Once registration is completed, you will be issued an ID number from YAESU. For details, refer to page 9. -
Page 6: About Wires-X Connection Kit
Before use The WIRES-X software can be used only by the purchaser under the end-user license agreement. Specifications, functions, contents and information of this manual are subject to change without notice. WIRES™ is a trademark of YAESU MUSEN. Microsoft , Windows... - Page 7 This may result in injury, electric shock or equipment failure. Please contact Yaesu Technical Support or the retail store where you purchased the device as this may result in fire, electric If smoke or an unusual odor comes from the device, turn off shock or equipment failure.
-
Page 8: Package Contents
Introduction About WIRES-X Connection Kit Package contents Please confirm that the package contains the following items. If any items are missing, please contact your dealer. • HRI-200 unit • USB cable (type A - type B) • Mini-DIN 10 pin to 10 pin data cable CT-174 •... -
Page 9: Preparation
It takes 2-3 business days for registration to be processed. Caution If YAESU MUSEN management judges, in the future, that technological advancements or regulatory changes make it unfeasible for YAESU to continue hosting the WIRES server, it may be necessary to discontinue the management of the WIRES server. -
Page 10: Connecting Devices
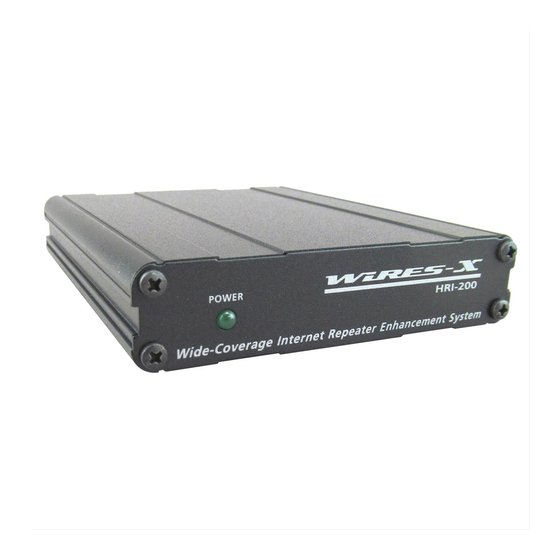
Preparation Connecting Devices HRI-200 interface box Front panel POWER indicator Lights green when the power is on. Rear panel MONITOR jack Connecting an earphone or speaker plug allows monitoring the sound transmitted by the node. RADIO 2 jack (Only for C4FM digital operation) Connect the plug of a 10 pin to 10 pin Mini-DIN cable. -
Page 11: Connecting Hri-200 To A Pc
Preparation Connecting Devices Connecting HRI-200 to a PC LAN cable (sold separately) To the Internet Type B plug HRI-200 (rear panel) USB cable Type A (supplied with plug HRI-200) When the HRI-200 is connected to the PC properly, the HRI-200 will turn on automatically when the PC is turned on. When using a router to connect the PC to the Internet, refer to the instruction manual supplied with the router for information about attaching the PC to the router, and the router to the Internet using LAN cables. -
Page 12: Connecting Hri-200 To Transceivers
• When using a YAESU FTM-400DR/DE transceiver as a node, turn on the transceiver while pressing [D/X] and [GM] keys. This sets the transceiver to the connection-only mode, and menu settings including the port rate setting will not be required. [HRI-200] will appear on the FTM-400DR/DE screen. -
Page 13: Installing Wires-X Software
Preparation Installing WIRES-X Software Installing a USB device driver for HRI-200 Start up the PC, then use an administrator authorized user account to log in When another application opens, close it before going to the next step. Browse the supplied CD-R to find and execute the “Install.exe” file The “WIRES-X installer”... - Page 14 Preparation Installing WIRES-X Software Confirm the destination where the WIRES-X software will install and click [Next] The “Ready to install WIRES-X” window will appear. If you put a check-mark in the “Enable WIRES-X Auto Start.” check box, the WIRES-X software will run automatically when Windows starts.
-
Page 15: Preparing An Internet Environment
Preparation Preparing an Internet Environment Since the protocol UDP (user datagram protocol) is used for WIRES-X communications via the Internet, some menu settings are required depending on the Internet connection method. Setting the PC and the router Why is the setting required? ●... - Page 16 Preparation Preparing an Internet Environment Click [Local Area Connection] Depending on the OS or connection environment, “Ethernet” may appear. The “Local Area Connection Status” dialog box will appear. Click [Details] The “Network Connection Details” dialog box will appear. Write down the “IPv4 Address” and “IPv4 Subnet Mask” values The “IPv4 Address”...
-
Page 17: Changing The Ip Address
Preparation Preparing an Internet Environment ● Changing the IP address In the “Local Area Connection Status” dialog box, click [Properties] The “Local Area Connection Properties” dialog box will appear. Select “Internet Protocol Version 4 (TCP/IPv4)”, then click [Properties] The Internet protocol property setting dialog box will appear. Select “Use the following IP address”... -
Page 18: Preparing An Internet Environment
Preparation Preparing an Internet Environment In case you cannot open ports using the WIRES-X software on the router with the UPnP function, open ports from the router setup screen. ● When using a router without the UPnP function In advance, in the “NAT” or “Port mapping” setting on the router, set the address in “Setting an IP address on the PC” (page 15) as the LAN address and register the following 6 ports: 46100, 46110, 46112, 46114, 46120 and 46122 (UDP ports) For the detailed procedure, refer to the instruction manual supplied with your device. -
Page 19: Taking Security Measures
Preparation Preparing an Internet Environment When the port registration is complete, the communication status will be checked again. When checking completes, the “OK” or “NG” will appear on the right side of each port name. When “OK” appears for each port, click [Close] The “WIRES ID Activation”... -
Page 20: How To Use
How to Use Basic Operations Starting the WIRES-X software On the Windows PC desktop, double-click the [Wires-X] icon The software can also be started by clicking the Windows Start button, then [Wires-X]. Setting the Internet access security When the WIRES-X software starts up, the Internet security alert window, as shown on the right, may appear;... - Page 21 How to Use Basic Operations Here, comments can be entered and other node settings can be configured. For details, refer to “Basic setting” (page 25). Click [OK] The “Settings” window will close and the WIRES-X software main screen will appear. When the software is accessed the second time, and thereafter, the “WIRES ID Activation”...
-
Page 22: Wires-X Software Main Screen
How to Use Basic Operations WIRES-X software main screen Mainly the node and room lists on the Internet appear on the left, and your node status and operating status appear on the right. Menu bar Status indicators User monitoring window Group window Log window Active node... -
Page 23: Setting The Wires-X Node Information
How to Use Basic Operations Setting the WIRES-X node information When using the WIRES-X software for the first time, set the basic information and configuration of the node using the WIRES-X software. Cautions z If your transceiver supports the HRI-200 mode (FTM-400DR/DE), the settings will automatically be reflected into the transceiver. z If your transceiver does not support HRI-200 mode (connecting with a 10 pin to 6 pin cable), the settings will not be reflected into the transceiver. - Page 24 How to Use Basic Operations Operation mode Select one of the following (4) WIRES-X modes in accordance with your transceiver configuration. The default setting is Analog. • Digital ........Operates only the voice channel with one digital transceiver • Digital DW ........Operates the voice channel and preset search channel by dual-watching with one transceiver Dual Watch Timing setting: The interval time to switch monitoring between the voice channel and preset search channel can be set from 1 second to 15 seconds in 1 second increments.
-
Page 25: Basic Setting
How to Use Basic Operations Basic setting Next, set the WIRES-X node user information. ● Basic operating information Confirm the user information of your node and specify supplementary information. From the “File” menu, click “Settings” The “Settings” window will appear. Click “Personal settings”... - Page 26 How to Use Basic Operations On the “WIRES ID information” screen of the “Settings” window, click [User ID change] to display the “User ID Change” window. Serial No ........Your HRI-200 serial number (unchangeable) DTMF ID ........Access code of your node for the analog station (unchangeable) User ID ........Access code of your node for the digital station The ID can be changed using up to 10 characters.
-
Page 27: Volume Adjustment
How to Use Basic Operations Latitude/Longitude ......Location information of your node Enter values based on the location information of world geodetic system (WGS-84). [Read GPS data] ......When using a transceiver compatible with the HRI-200 control mode and the GPS satellite information is acquirable, the GPS location information can be read from the transceiver. - Page 28 How to Use Basic Operations ● When using a conventional FM analog transceiver (FTM-350, etc.) From the “View” menu, click “Audio adjustment” The “Audio adjustment” window will appear. From the “Settings” menu, click “Preset Volume” - “conventional transceiver” Click [Close] The setting will be stored and the proper sound volume will be set.
-
Page 29: Connecting Using Wires-X
How to Use Basic Operations Connecting using WIRES-X Connecting to a node on the Internet Connect to another node from your node PC. From the active node window, select a node you want to connect to Move the cursor to the selected node, then right-click on it The command list will appear. -
Page 30: Notes On The Node Operation
How to Use Basic Operations Room information display area Node ID display area Transmission node information display area (Room information display area) ......Displays the room User ID, DTMF ID and the number of activities (the number of nodes connecting to the room) [Refresh] ...............Click to update the active room window list on the main screen. -
Page 31: Useful Functions
How to Use Basic Operations Useful functions ● Bookmarking frequently connected nodes and rooms On the node PC, IDs of frequently connected nodes and rooms can be bookmarked. From the “View” menu, click “Bookmark-Info” The “Bookmark-information” window will appear. In the “Bookmark” area, click [Add] The “Input ID”... -
Page 32: Closing The Wires-X Software
How to Use Basic Operations ● Checking the status of the bookmarked nodes and rooms From the “View” menu, click “Group window” - “Bookmark list” “Bookmark list” is selected in the default setting. If the bookmarked connection destinations are active, they will be listed in the group window. -
Page 33: Advanced Operations
How to Use Advanced Operations Using preset search channel What is preset search channel? The mobile station or fixed station uses a preset channel when searching for a WIRES-X node. You can quickly find a local node by registering (presetting) the channel frequency to the mobile station transceiver. You can also find the nearest local node even when connecting from a mobile or fixed station at a place different from your usual location, by using the preset search channel. -
Page 34: Setting The Preset Search Channel
How to Use Advanced Operations Setting the preset search channel The local node operation method is selected by setting the operation mode of the WIRES-X software (See page 23). ● Operating with 1 transceiver Select “Digital DW”. This permits setting the “Dual Watch Timing” and “Preset Search CH”. ●... -
Page 35: Opening A Room
How to Use Advanced Operations Opening a room What is a room (Round QSO Room)? This refers to community space on the WIRES system to which multiple nodes and stations can connect simultaneously. Operators from multiple stations can freely engage in conversation, just like in a face-to-face meeting or party. There are open rooms that are accessible to all members and closed rooms that only allow registered stations to connect. -
Page 36: Setting The Room
How to Use Advanced Operations Setting the room The various room parameters may be set as desired. ● Setting basic information From the “File” menu, click “Settings” The “Settings” window will appear. Click “Round QSO room settings” The “Round QSO room settings” screen will appear on the “Settings” window. Input or select the necessary items Click [OK] Saves the settings and closes the “Settings”... - Page 37 How to Use Advanced Operations ● Procedure for organizing a room Click [Setup] in the “Round QSO room settings” screen on the “Settings” window The “Room Open” window will appear. Input or select the necessary items Click [Room Activation] The changed information is sent to the WIRES-X server. Click [OK] Will save the settings and the “Settings”...
-
Page 38: Quitting The Running Of A Room
How to Use Advanced Operations News setting The following 3 options are selectable for setting how the digital stations and other nodes can utilize the news station function of the room. Tips • The default setting is upload /download. • For details, refer to “Using the news function” (page 54). •... -
Page 39: Important Room Operating Considerations
• The quality of the Internet connection, the number of connected nodes, and strain on the computer may cause the audio quality to degrade and the WIRES-X software to be unstable. • Please understand that YAESU assumes no responsibility for any interference experienced between users. Convenient functions The WIRES-X software enables users to configure room operation in a variety of functions. - Page 40 How to Use Advanced Operations <Open Room> Reject list (List) ..........List of nodes/stations blocked from connecting [Add Reject Info] ......Clicking here displays a dialog box where you specify the nodes/stations to be listed. Place the mouse cursor over a node/station in the active list of the main screen and right-click. You can quickly add information by selecting “MyRoom Reject”...
- Page 41 How to Use Advanced Operations ● Checking nodes connected to your room From the “View” menu, click “Group window” Click “MyRoom access list” In the group window of the main screen, the nodes connected to your room will appear. Place the mouse cursor over a node and right-click The command list will appear.
-
Page 42: Using The Gm Function
To operate a node in the GM mode, a C4FM digital transceiver compatible with the HRI-200 mode is required. As of June 2014, transceivers which can be used as a node operating in the GM mode are YAESU C4FM digital transceivers FTM- 400DR and FTM-400DE. - Page 43 How to Use Advanced Operations In the “Operation mode” area, select “Digital” Click [OK] The “GM (Group Monitor) Guide” window will appear again. Click [Node Operation] The “User ID Change” window will appear. You can also display the window by clicking “Settings” from the “File” menu to display the “WIRES ID information”...
- Page 44 How to Use Advanced Operations In the “GM Group” area, enter the name of the GM Group you want to connect with in the “Room ID” box The information will be imported from the WIRES-X server automatically, and the DTMF ID and Room name will appear. Enter a desired name in the “Group Name”...
-
Page 45: Opening And Organizing A Gm Room On Your Station
How to Use Advanced Operations ● Disabling the connection to a GM room From the “Connect” menu, remove the check-mark from “GM Auto connect” The connection to the GM room will be disabled. Insert a check-mark again to reconnect to the previously connected GM room. - Page 46 How to Use Advanced Operations Put a check-mark in the “Room Active” checkbox In the “Style” area, select “GM” Click [Room Activation] The WIRES-X server information will be updated. Click [OK] The “GM (Group Monitor) Guide” window will appear again. Click [My Room Information] The “MyRoom information”...
-
Page 47: Quitting The Gm Operation
How to Use Advanced Operations Click [Mobile User list] The “Mobile User list” window will appear. You can also display the window by clicking “Mobile User list” from the “View” menu. Select the mobile station you want to add as a group member Click [MyRoom member] The mobile station will be added to the list. -
Page 48: Operating The Wires-X Software Remotely
The dedicated software can be downloaded from the WIRES-X website. Connect the PC for remote-control operations to the Internet, then start up the PC Access the WIRES-X website: https://www.yaesu.com/jp/en/wires-x/contact/owner.php Click “Download WIRES-X Remote Control software” Follow the on-screen instructions to download the remote monitor software Caution WiRES-II Remote Monitor Software “WIRESMON.exe”... -
Page 49: Before Starting Remote-Control Operations
How to Use Advanced Operations Before starting remote-control operations Since the WIRES-X software does not to accept remote-control operations by default, the setting must be changed before remote- control operations can begin. Also, the Internet environment of the node station must be setup in advance to accept remote-control operations. ●... - Page 50 How to Use Advanced Operations ● Setting the dedicated plug-in To use the web monitoring function, load the dedicated plug-in into the WIRES-X software in advance. From the “Tool” menu, click “Plugin set” The “WIRES plugin menu” window will appear. Click [Add Module] The window prompting you to select the plug-in file will appear.
-
Page 51: Operating The Wires-X Software Remotely
How to Use Advanced Operations Confirm the password and the port number. In the “Access password” box, the password registered in “Configuring the WIRES-X software setting” is inserted automatically. Click [OK] Operating the WIRES-X software remotely Turn on the node device Start the WIRES-X software Start up the Windows PC designated for remote-control operations Run the remote monitor software “WIRESMON-X.exe”... -
Page 52: Adjusting Analog Sound
How to Use Advanced Operations Adjusting analog sound Input/output sound volume on the node can be adjusted to an appropriate level with the “Preset Volume” setting. Fine adjustment can also be made according to your preference. This adjustment is available only while operating in analog mode. The volume of voice communications between digital nodes and sound data played for the news function cannot be adjusted. - Page 53 How to Use Advanced Operations In the “Volume” area, click [◄] or [►] of “MIC LEVEL” In the “Audio” area, the top of the waveform will move up/down. When adjusting, make sure that the wave amplitude stays within the dotted lines. You can also adjust by dragging the slider in the bar.
-
Page 54: Useful Functions
Text messages, images or audio data can be shared. In the event of an emergency, audio messages can be transmitted to Group Members. The WIRES-X server also has its own news station where you can read digital data (INT NEWS) provided by YAESU. Internet connection... -
Page 55: Organizing Your News Station
How to Use Useful Functions Organizing your news station You can register/delete local news data from the node PC, and also store backup copies of news station data. ● Checking the news data of your station From the main screen of the WIRES-X software, Click [News] on the bottom right side of the screen The “News list”... - Page 56 How to Use Useful Functions Tips • From the “View select” area in the “News list” window, you can select and sort the data types to be displayed in the list. • By clicking the column title (such as “Date/Time”, “Type” or “From”) in the list display area, you can change the sort order of the list. ●...
- Page 57 How to Use Useful Functions Select the file, and then click [Open] The “News Entry” window will appear again, and the specified file path will appear. You can specify images with resolution of 320 x 240 or less, 40 kB or less in JPEG format.
- Page 58 How to Use Useful Functions Click [Set] The data will be stored on “Local News”. The registered data will be added to the list display area in the “News list” window. Up to 5,000 news data files can be registered with your node and room in total. ●...
- Page 59 How to Use Useful Functions From the “File” menu in the “News list” window, select “Renumber” This is not selectable when the largest control number is not over 50,000. The dialog box will appear prompting you to restart the WIRES-X software. Click [OK] The WIRES-X software will close.
-
Page 60: Viewing News Data Of A Node Or Room On The Internet
How to Use Useful Functions Viewing news data of a node or room on the Internet You can view or listen to the news messages from the node or room on the Internet that is being accessed by a digital station through your node. -
Page 61: Viewing The News Data Of The Wires-X Server
Useful Functions Viewing the news data of the WIRES-X server From the local node PC, you can also view or listen to YAESU news server data. Click [News] on the bottom right side of the WIRES-X software main screen of the WIRES-X software The “News List”... -
Page 62: Displaying A Qsl Card Image
How to Use Useful Functions Displaying a QSL card image When connecting to a node/room on the Internet, the “View QSL” pop-up window will appear. This window allows you to confirm the ID and call sign of the connected destination, text information set on the connected destination, and the date/time of connection. -
Page 63: Transmitting The Qsl Card Image Of Your Station
How to Use Useful Functions ● Displaying the QSL card image of a room From the “File” menu, click “Settings” The “Settings” window will appear. Click “Personal settings” - “Round QSO room settings” On the “Settings” window, the “Round QSO room settings” screen will appear. Put a check-mark in the “QSL exchange”... - Page 64 How to Use Useful Functions The QSL card image file must meet the following conditions. • Format: bitmap (.bmp) • Resolution: 320 x 240 ● Transmitting the QSL card image of your room In the “Settings” window, display the “Round QSO room settings” screen Click […] on the bottom right side of “QSL exchange”...
-
Page 65: Wires-X Software
WIRES-X Software Main Screen The WIRES-X software main screen is divided into two parts, the left side displays information of nodes and rooms on the Internet, and the right side displays your node information, in real time. Active list The left side of the screen is divided into three windows that show lists of active WIRES-X groups, nodes and rooms. Group window Active node window Active room window... - Page 66 WIRES-X Software Main Screen ■ Active node window Active nodes are listed in the window. Each item in the list indicates the following information: ● Icons Icons appear on the left side of each column to indicate the operating mode and connection status of the node. Digital node, idling Digital node, connecting to another node or room Analog node, idling...
- Page 67 WIRES-X Software Main Screen Connect ........Right-click and select a node, then select this command to initiate the connection to the selected node. You may not be able to connect to the selected node in some cases, such as when the other nod is connecting to another node.
- Page 68 WIRES-X Software Main Screen By clicking the item name on the top of the list, the list can be sorted. When “+” appears, items are sorted in ascending order, and when “-“ appears, items are sorted in descending order. ● Short-cut command Placing the mouse cursor inside the window and right-clicking, displays the command list of frequently used functions, without returning to the main menu.
-
Page 69: Status Indicators
WIRES-X Software Main Screen When “MyRoom access list” is displayed, the following unique commands will appear: Remove ..Move the cursor over a node to release its connection. The same operation can be performed from the “Room-Info” (page 92) under the “View” menu. -
Page 70: User Monitoring Window
WIRES-X Software Main Screen ● Receiving status The signal receiving status of the node and the repeating status of the received signal are shown. During digital operation (DW), or when using two transceivers; one for the voice channel and the other for the preset search channel, two identical icons will appear. -
Page 71: Log Window
WIRES-X Software Main Screen User ..........Displays the call sign of the sender (digital station) and the information destination (signal type). “DN”, “VW” or “DW” will appear as the signal type. When repeating audio without analog conversion, “-Direct” will appear, followed by the signal type for a downlink station. -
Page 72: Function Window
WIRES-X Software Main Screen Using the chat function, you can send a text message to a node or room you are currently connecting to. When connected to a room, the text message is sent to all the nodes connecting to that room. This does not function when not connected to a node or room. ●... -
Page 73: Main Menu
WIRES-X Software Main Menu The WIRES-X software has 5 menus which allow you to access a variety of functions. Menu bar “File” menu Exporting/importing the settings The setting information of WIRES-X can be saved in a file and the saved file can be imported and set all at once. This is useful when changing the node PC to a new one. -
Page 74: Initializing The Settings And Updating The User Information
Refer to “Getting the WIRES-X server certificate” (page 20) to configure the node settings again Follow the procedure above for recertification when a change occurs in the user information (such as the location) registered with the WIRES-X server. Go to the WIRES-X website (https://www.yaesu.com/jp/en/wires-x/index.php) to apply to change the user information. -
Page 75: Settings For The Transceiver
WIRES-X Software Main Menu Settings for the transceiver Configure the settings such as the usage of the node transceiver and operating frequency. From the “File” menu, select “Transceiver” The “Transceiver” window will appear. If needed, change the settings or enter values Click [Apply] The settings will be saved. -
Page 76: Updating The Active Lists
WIRES-X Software Main Menu Voice CH Allows you to set the voice channel operating information. Modulation ........Displays “Digital” or “Analog” depending on the “Operation mode” setting. Frequency ........Enter the frequency in units of MHz. SQL code ........Enter the SQL information. The selectable value differs depending on the “Modulation” setting. <For an analog operation>... -
Page 77: Node Information Settings
WIRES-X Software Main Menu Node information settings Allows you to set a variety of information from basic information such as your node ID to detailed information such as transmitting/ receiving operations. Select “Settings” from the “File” menu to display the “Settings” window. - Page 78 WIRES-X Software Main Menu ● HRI-200 setup CH.1 Allows you to set the analog circuit operations of CH1 (voice channel). Normally, changes are not required for the default values. Cautions • When operating a HRI-200 control mode compatible transceiver (such as FTM-400DR), to ensure proper operation, be sure not to change the default settings.
- Page 79 WIRES-X Software Main Menu RX Filter ........Inserting a check-mark passes received sound into the filter circuit. Normally, keep this function unchecked (default setting). Caution Communications between digital stations are not affected by this setting. Audio Mute SW (SQL) ....Inserting a check-mark synchronizes the ON/OFF switch of the received audio input circuit with the SQL jack signal.
- Page 80 WIRES-X Software Main Menu ● Call settings Round QSO Room connection ....Set the operation when receiving a connection request to a room on the Internet. ON (with a check-mark) ..Allows the connection to a room when requested (default setting). OFF (without a check-mark) ...
- Page 81 WIRES-X Software Main Menu set it back to ON, go to the “Call settings” screen of the WIRES-X software or use the #55555 command.) • Disconnect detection ... 30 seconds (If the disconnection state continues for 30 seconds or longer, connection is initiated to the connection destination.) •...
- Page 82 WIRES-X Software Main Menu Announcement Cautions • The announcement output function is activated only for a analog operation. This function is not available for a digital operation. • The same announcement will not be transmitted again for about 20 seconds. Connect request message ..Set whether or not to inform when receiving a connection request from another node while connecting to a node/room on the Internet.
- Page 83 WIRES-X Software Main Menu ● Sound settings This menu appears only during an analog operation. Connect response Select the response sound when accepting a connection request or connecting to another node or room. Select the ID audio format transmitted periodically. <Universal>...
- Page 84 WIRES-X Software Main Menu <ID> Interval time ........The ID transmission interval can be set from every 5 minutes to every 60 minutes in 1 minute increments. Caution At the node operating frequency, be careful not to interfere other stations when setting and operating your station.
- Page 85 WIRES-X Software Main Menu ● Digital ID settings This menu appears only during a digital operation. Voice CH Configure the digital ID transmission setting for the voice channel. Preset Search CH Configure the digital ID transmission setting for the preset search channel. <Universal>...
- Page 86 WIRES-X Software Main Menu ● Make list file Group window From this tab, configure the settings to output the list in the group window as a file. The content output from this tab will be affected by the display setting in the group window. Active ID From this tab, configure the settings to output the list in the active node window as a file.
- Page 87 WIRES-X Software Main Menu HTML/XML Header .....Enter information (such as HTML tags or style sheet information for XML) you want to add to the beginning of your output data. Example: To call an xsl style sheet for XML <?xml version="1.0" encoding="Shift_JIS"?> <?xml-stylesheet type="text/xsl"...
-
Page 88: Finishing The Wires-X Software
WIRES-X Software Main Menu ● Log file settings Node log-file save .......Inserting a check-mark (ON) saves the whole node operation history. Click […] on the right to display the “Save as” window. News log-file save ......Inserting a check-mark (ON) saves access history to the news function. Click […] on the right to display the “Save as”... -
Page 89: View" Menu
WIRES-X Software Main Menu “View” menu Fonts used in the active lists Fonts used in the group window, active node window and active room window lists can be selected. ● Changing the font From the “View” menu, select “Font” - “Select” The “Font”... -
Page 90: Displaying The Operating Instructions
WIRES-X Software Main Menu ● Resetting the font settings From the “View” menu, select “Font” - “Reset” The confirmation dialog box will appear. Menu bar Click [OK] Restart the WIRES-X software Information in the active lists will appear in the default font. Displaying the operating instructions Display the status bar to the bottom of the main screen to display the operating instructions. -
Page 91: Changing The Content Displayed In The Group Window
WIRES-X Software Main Menu Changing the content displayed in the group window The information displayed in the group window on the upper left side of the main screen can be changed. From the “View” menu, select “Group window”, then one of the options: “Bookmark list”, “Connecting Node list”... -
Page 92: Checking The List Of Nodes Connecting To Your Room
WIRES-X Software Main Menu Reject list (List) ..........List of digital stations (mobile/fixed) and nodes/rooms blocked from connecting [Add] ...........Clicking here adds an entry to the list. [Delete] ........Clicking here deletes the selected entry from the list. <GM node> GM Room The values set in the “GM Room list”... -
Page 93: Changing The Content Displayed In The Log Window
WIRES-X Software Main Menu Changing the content displayed in the log window The information displayed in the log window on the right center of the main screen can be changed. From the “View” menu, select “Log”, then one of the options: “Node”, “Room”... -
Page 94: Managing The News Data Of Your Station
WIRES-X Software Main Menu Managing the news data of your station You can register or delete digital data (news) published to digital stations (mobile/fixed) and nodes connecting to your node/room. You can also confirm the data content. From the “View” menu, select “News” to display the “News list” window. -
Page 95: Connect" Menu
WIRES-X Software Main Menu <Open room> [MyRoom reject] ......Clicking here blocks the selected station from connecting to your room. The blocked stations can be confirmed in the “MyRoom information” window displayed by selecting “Room-Info” from the “View” menu. <Closed room> [MyRoom member] .....Clicking here adds the selected station to the member list of your room. -
Page 96: Severing The Connection
WIRES-X Software Main Menu Severing the connection From the “Connect” menu, select “Disconnect” to sever the connection from a node/room on the Internet. Caution This item is available only while connecting to a node/room on the Internet. Connecting to a GM room automatically From the “Connect”... -
Page 97: Tool" Menu
WIRES-X Software Main Menu “Tool” menu Confirming the Internet connection This menu allows you to confirm the Internet port status used for communications with the WIRES-X server. From the “Tool” menu, select “Port check” to display the “Port check” window. For details, refer to “Opening the router ports” (page 17). -
Page 98: Help" Menu
WIRES-X Software Main Menu In the “Plugin modules” field, select a tool you do not use anymore Click [Delete Module] From the “Plugin modules” field, the selected tool name will disappear. Click [OK] “Help” menu Displaying the online help From the “Help” menu, select “Help Topics” to display the “WIRES-X server online help”... -
Page 99: Short-Cut For The Wires-X Website
WIRES-X Software Main Menu Short-cut for the WIRES-X website From the “Help” menu, select “WIRES Web Site” to open your web browser and the WIRES-X website (https://www.yaesu.com/jp/en/ wires-x/index.php) will open. WIRES-X software information The WIRES-X software component information can be confirmed. -
Page 100: Uninstalling The Wires-X Software
WIRES-X Software Uninstalling the WIRES-X Software If “Enable WIRES-X Auto Start.” was selected when installing the WIRES-X software, right-click the WIRES-X icon displayed on the Windows task bar, then select “Quit” not to reboot the software automatically. Close the WIRES-X software View the supplied CD-R and run the “Install.exe.”... - Page 101 WIRES-X Software Uninstalling the WIRES-X Software Select “Close the applications and attempt to restart them” Click [OK] Uninstallation will be initiated. Tips • To confirm or change the uninstallation setting, click [Back]. • To finish the wizard, click [Cancel]. When uninstallation completes, the “Completed the WIRES-X Setup Wizard”...
-
Page 102: Appendix
Depending on your router, there may be a restriction on the number of ports that can be opened. If you are using WIRES-X and WiRES-II on the same PC, please use a router that can open 13 ports. Caution If you desire to use WIRES-X and WiRES-II at the same time, YAESU recommends using a dual-PC setup with the corresponding dedicated software installed on each PC. -
Page 103: Dtmf Commad List
Appendix DTMF Commad List The following table shows the DTMF commands supported by WIRES-X and operations of the WIRES-X software when receiving these commands. A communication using DTMF is available only when setting the transceiver for an analog operation. Command Function WIRES-X software operation when receiving the command #55555... -
Page 104: Specifications Of Hri-200
USB Type B (USB) : USB 2.0 (Full Speed), bus-powered Inquiries Please direct your inquires to our WIRES website (https://www.yaesu.com/jp/en/wires-x/contact/owner.php). Click “Contact us” located on the lower-left side of the webpage Enter the necessary fields Click “Proceed to the confirmation screen”... -
Page 105: Fcc
Connect the equipment into an outlet on a circuit different from that to which the receiver is connected. Consult the dealer or an experienced radio/TV technician for help. Changes or modifications to this device not expressly approved by YAESU MUSEN could void the user’s authori- zation to operate this device. - Page 106 Appendix Declaration of Conformity We, Yaesu UK Ltd. declare under our sole responsibility that the following equipment complies with the essential requirements of the Directive 1999/5/EC and Directive 2011/65/EU. Type of Equipment: Repeater System I/F Box Brand Name: YAESU Model Number:...
- Page 107 All rights reserved. No portion of this manual may be reproduced without the permission of YAESU MUSEN CO., LTD. ©2014 Yaesu Musen Co., Ltd. 1407-A0...
Need help?
Do you have a question about the WIRES-X HRI-200 and is the answer not in the manual?
Questions and answers