Table of Contents
Advertisement
Quick Links
Advertisement
Table of Contents

Related Manuals for TRENDnet TV-IP342PI


Summary of Contents for TRENDnet TV-IP342PI
- Page 1 Cover Page TRENDnet User’s Guide...
-
Page 2: Table Of Contents
NETWORK ........................14 AUDIO/VIDEO SETTING ....................25 EVENT CONFIGURATION ....................29 How to Switch the Cable Access Port ............ 35 How to Access the IP camera via IP Installer ......... 37 Troubleshooting .................. 38 © Copyright 2014 TRENDnet. All Rights Reserved. -
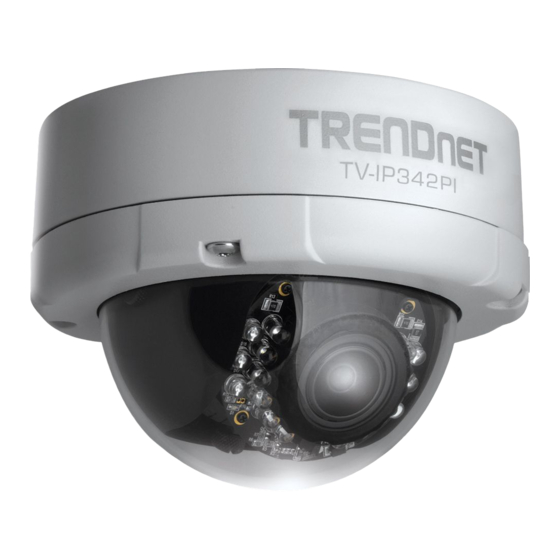
Page 3: Product Overview
15 m (50 feet) night vision, an IP66 weather rating, tamper detection, and 3x manual optical zoom for installation flexibility. Record full 1080p HD video (1920 x 1080) at 30 fps in a space saving H.264 compression format. Manage up to 32 TRENDnet cameras with included complimentary software and mobile apps. -
Page 4: Product Hardware Features
Create up to 3 motion detection windows with separate sensitivity settings and event triggers IR Lens Privacy Masks Create up to three privacy masks to conceal sensitive areas IR Lens: IR lens for the camera. Weatherproof Housing: Housing is rated with IP66. © Copyright 2014 TRENDnet. All Rights Reserved. -
Page 5: Installation
BNC Video Out: Connect a CRT monitor or handheld monitor. GPIO Port: Connect external device. Please refer to I/O setting paragraph. It's also used for IP camera reset. Please refer to Factory Default paragraph. © Copyright 2014 TRENDnet. All Rights Reserved. - Page 6 You can also seal the connector hole with silicone after installation. d. Turn and loosen the control stick, shift right and left to adjust the vari-focal lens until the image becomes clear, then turn and tighten the stick to fix it. © Copyright 2014 TRENDnet. All Rights Reserved.
-
Page 7: Camera Installation
5. Connect a network cable to the camera’s network port and then to your router. If you are using PoE, please ensure the cable is connected to a PoE switch or PoE 3. Write down the MAC ID of the camera. injector. © Copyright 2014 TRENDnet. All Rights Reserved. - Page 8 Please ensure that the IP address of the camera and the computer must the same Network, you will need to identify the camera by the MAC ID. Click Next. within the same network. Click Next. © Copyright 2014 TRENDnet. All Rights Reserved.
- Page 9 11. Click the hyperlink to access to the camera’s web page or click Next. It is recommended that you access the IP camera now if it was using a DHCP connection. © Copyright 2014 TRENDnet. All Rights Reserved.
-
Page 10: Configuration
Streaming Profile: Use the drop down menu to select Streaming 1 & Streaming 2 video. (If the streaming 2 setting is closed on “AUDIO/VIDEO SETTING >> Video”, this option will not appear) © Copyright 2014 TRENDnet. All Rights Reserved. - Page 11 Full Screen: Full-screen mode. Zoom: Enable zoom-in and zoom-out functions. Select “Enable digital zoom” option first within the pop-up dialogue box and then drag and drop the bar to adjust the zoom factors. © Copyright 2014 TRENDnet. All Rights Reserved.
-
Page 12: Configuring The Camera Setting
LED Indicator: Turn the LED light on or off by click the ON/OFF button. Language: There are 5 languages options. When changing the language, it will prompt dialogue box for confirmation. Click "Yes" to proceed. © Copyright 2014 TRENDnet. All Rights Reserved. - Page 13 PC at every moment automatically. Every time when you want to synchronize the IP camera time with PC time again, please select this option and click "Apply". Manual: Type in the date and time, and click "Apply". © Copyright 2014 TRENDnet. All Rights Reserved.
- Page 14 The guest user can only view the live view video and is not allowed to do Factory Reset: Click Reset to reset all the settings back to factory default value any configuration. Configuration: © Copyright 2014 TRENDnet. All Rights Reserved.
-
Page 15: Network
Manually setup the IPv6 address: You can set up IPv6 manually by enter IP Address, Gateway, and DNS. DHCPv6: If you have a DHCPv6 server, enable this option to assign the IPv6 from server. The assigned IP address will be displayed © Copyright 2014 TRENDnet. All Rights Reserved. - Page 16 Network >> Network Setting >> RTSP Setting authentication is set to Digest. Network >> Network Setting >> UPnP RTSP Server: Enable it, then you can access camera and get image via RTSP protocol. © Copyright 2014 TRENDnet. All Rights Reserved.
- Page 17 TTL means the life time of packet. The larger the value is, the more users can This function enable Safari browser's bookmark to link to this IP camera. The Bonjour receive the packet. name is the name that display in the bookmark. Please note the Bonjour function on © Copyright 2014 TRENDnet. All Rights Reserved.
- Page 18 The Https protocol has certificate verifying mechanism. When the user access a website via Https, the browser will check the certificate of that domain and verify its trustiness and secure. Certificate generation process: © Copyright 2014 TRENDnet. All Rights Reserved.
- Page 19 The term "Community name" in SNMPv1 and SNMPv2c can be roughly regarded as key. The person who has the community name has the authority to read or edit the information of IP camera via SNMP. © Copyright 2014 TRENDnet. All Rights Reserved.
- Page 20 "community name" in v1&v2c) but the password in order to access the IP but failed. (Due to incorrect password or community) camera. Please set security name, authentication type, authentication password, encryption type, encryption password of write and read respectively. The security © Copyright 2014 TRENDnet. All Rights Reserved.
- Page 21 If you prefer to distribute more bandwidth when using the web browser to watch the live video, please adjust the Management Stream instead of Live Stream. © Copyright 2014 TRENDnet. All Rights Reserved.
- Page 22 LAN segment. Please check what version of the authenticator and authentication server support. This camera supports EAP-TLS method. Please enter ID, password issued by the CA, then upload related certificates. © Copyright 2014 TRENDnet. All Rights Reserved.
- Page 23 (if need). If setting up IP schedule update too frequently, the IP may be blocked. In general, we suggest set schedule update to once a day (1440 minutes). After click "Apply" the setting. © Copyright 2014 TRENDnet. All Rights Reserved.
- Page 24 Bcc Mail: Enter the mail address of the blind carbon copy receiver. Mail Port: Assign the SMTP port in the text box. The default SMPT port is 25. For the free mail service, please enter the correct port number from the service provider. © Copyright 2014 TRENDnet. All Rights Reserved.
- Page 25 FTP server is often considered to be dangerous and should be blocked. In PASV mode, the problem is solved: The FTP server waits for the data transmission connection built by the user. Make sure that the server supports the mode you select. © Copyright 2014 TRENDnet. All Rights Reserved.
-
Page 26: Audio/Video Setting
TV-IP342PI TRENDnet User’s Guide Audio/Video Setting >> Image Setting AUDIO/VIDEO SETTING © Copyright 2014 TRENDnet. All Rights Reserved. - Page 27 "Light Sensor Mode", the image will be turned to black and white at night in order to keep clear. To set light sensor mode, appoint a lux standard of switching D/N here. Current lux value is provided for reference. Under "Times Mode" the switch © Copyright 2014 TRENDnet. All Rights Reserved.
- Page 28 Internet transmitting speed if the file gets too large. Video Frame Rate: The video refreshing rate per second. The max value is affected by the input resolution you choose. Video Format: H.264 or M-JPEG. © Copyright 2014 TRENDnet. All Rights Reserved.
- Page 29 Video Frame Rate: The video refreshing rate per second. The max value is affected by the input resolution you choose. © Copyright 2014 TRENDnet. All Rights Reserved.
-
Page 30: Event Configuration
Click "Mic" check box to receive sound from IP Camera and click “Speaker” to talk to IP camera side. Please ensure both IP camera and the computer sides have the microphone and speaker installed to have this function work properly. © Copyright 2014 TRENDnet. All Rights Reserved. - Page 31 JPEG picture files, and the successive picture files cover a period of time Subject: This subject will appear as the subject when sending the motion detected according to the value you set in Record Time Setting. video or snapshot to email. © Copyright 2014 TRENDnet. All Rights Reserved.
- Page 32 Detection Level: Selects the decibels value (for the camera to trigger sound detection). Enter the target IP address and interval. The camera will base on the interval time to check the target IP address. If PIN failed 4 times, the camera itself will reboot. © Copyright 2014 TRENDnet. All Rights Reserved.
- Page 33 Enabled / Disabled Event Configuration >> GPIO Setting Destination: Select between sending the record to Samba or saving it into the SD card Record Time: Select the video length (seconds) © Copyright 2014 TRENDnet. All Rights Reserved.
- Page 34 I/O is enabled. That is, for example, the 11th hour of Monday has not been colored in the schedule table, then no action will be triggered even the camera detects input signal during 11:00~12:00 on Monday. © Copyright 2014 TRENDnet. All Rights Reserved.
- Page 35 "OFF". Time Switch mode: Click "Pulse", the camera will trigger the external output devise for several seconds. The duration length is according to the "interval" setting in Output Setting. © Copyright 2014 TRENDnet. All Rights Reserved.
-
Page 36: How To Switch The Cable Access Port
6. Twist the water proof nuts and careful remove all cables out form the bottom of the housing. 3. Remove the 1 cable from PCB board. 7. Insert the cable into the side of the housing 4. Remove the 2 and 4 cable from PCB board. © Copyright 2014 TRENDnet. All Rights Reserved. - Page 37 11. Put the sun shield back on. 9. Then plug in the 2 and 3 cables back to PCB board. 12. Secure the dome cover to the camera. 10. Close the water proof nuts and meter cover. © Copyright 2014 TRENDnet. All Rights Reserved.
-
Page 38: How To Access The Ip Camera Via Ip Installer
Search : Search the IP Camera within the Network Access Camera: access the selected camera’s web page. Change : change the selected camera’s IP address via Static IP or DHCP. © Copyright 2014 TRENDnet. All Rights Reserved. -
Page 39: Troubleshooting
If the window does not appear automatically, click Start, click Run and type D:\autorun.exe where “D” in “D:\autorun.exe” is the letter assigned to your CD-ROM Drive, and then press the ENTER key on your keyboard. © Copyright 2014 TRENDnet. All Rights Reserved. - Page 40 Run the install camera wizard from the CD-ROM to login to the camera. Delete the file named "np_hoem_x.dll" from search result. Search for the additional ActiveX or plug-in files listed below and delete them to completely uninstall the ActiveX control or plug-in from your computer. © Copyright 2014 TRENDnet. All Rights Reserved.
-
Page 41: Limited Warranty
TRENDnet products. Products that are each license. sent to TRENDnet for RMA service must have the RMA number marked on the outside of return V1.0R /5.21.2014 packages and sent to TRENDnet prepaid, insured and packaged appropriately for safe shipment.
Need help?
Do you have a question about the TV-IP342PI and is the answer not in the manual?
Questions and answers