Table of Contents
Advertisement
Quick Links
Advertisement
Table of Contents

Related Manuals for TRENDnet TV-IP343PI


Summary of Contents for TRENDnet TV-IP343PI
- Page 1 Cover Page TRENDnet User’s Guide...
-
Page 2: Table Of Contents
Viewing Camera Basic Function ..................7 Configuring the Camera Setting ..................9 SYSTEM ...........................10 NETWORK ........................12 AUDIO/VIDEO SETTING ....................23 EVENT CONFIGURATION ....................28 Logout..........................33 How to Access the IP camera via IP Installer ......... 34 Troubleshooting .................. 35 © Copyright 2014 TRENDnet. All Rights Reserved. -
Page 3: Product Overview
Features Product Overview The Outdoor 2MP Full HD PoE Day/Night Network Camera, model TV-IP343PI, offers 25 meters ( 82 ft.) night vision, an IP66 weather rating, tamper detection, and 3.5x manual optical zoom for installation flexibility. Record full 1080p HD video (1920 x 1080) at 30 fps in a space saving H.264 compression format. -
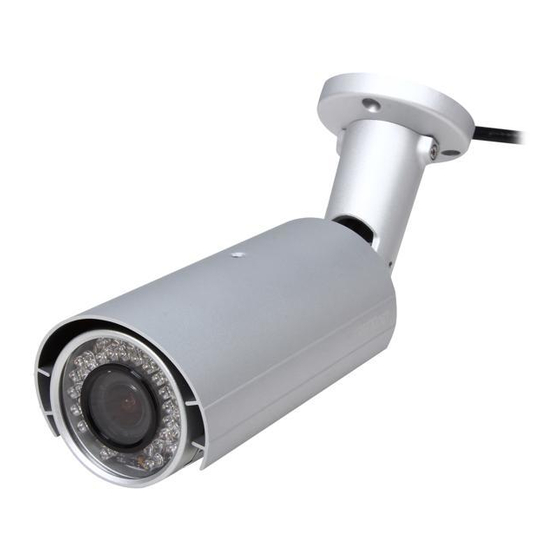
Page 4: Product Hardware Features
IR Lens Shield: It is used to protect the camera for the inclement weather. IR Lens: IR lens for the camera. Camera Stand: the mounting stand to hold the camera. © Copyright 2014 TRENDnet. All Rights Reserved. -
Page 5: Installation
GPIO Port: Connect external device. Please refer to I/O setting paragraph. It's also used for IP camera reset. Please refer to Factory Default paragraph. Speaker Out: Connects an external audio device (such as the active speaker) to deliver sound via the camera. © Copyright 2014 TRENDnet. All Rights Reserved. -
Page 6: Camera Installation
2. Write down the MAC ID of the camera. SD Card Slot After installed a Micro SD Card, please ensure the cover was screw tightly to protect water soaking. © Copyright 2014 TRENDnet. All Rights Reserved. - Page 7 4. Connect a network cable to the camera’s network port and then to your router. If you are using PoE, please ensure the cable is connected to a PoE switch or PoE injector. © Copyright 2014 TRENDnet. All Rights Reserved.
- Page 8 Next. It is within the same network. Click Next. recommended that you access the IP camera now if it was using a DHCP connection. © Copyright 2014 TRENDnet. All Rights Reserved.
-
Page 9: Configuration
Note: if you are initially access to the camera, you will be prompted to install a new plug-in for the camera. Permission request depends on the Internet security settings of your computer. Click Allow and Install to process. © Copyright 2014 TRENDnet. All Rights Reserved. - Page 10 "mute" in the live page. video. (If the streaming 2 setting is closed on “AUDIO/VIDEO SETTING >> Video”, Full Screen: Full-screen mode. this option will not appear) © Copyright 2014 TRENDnet. All Rights Reserved.
-
Page 11: Configuring The Camera Setting
The Web Configuration contains the settings that are required for the camera in the left menu bar, including System, Network, Audio/Video Setting, Event Setting and Logout. To return to the live screen, please click the button. © Copyright 2014 TRENDnet. All Rights Reserved. -
Page 12: System
LED Indicator: Turn the LED light on or off by click the ON/OFF button. Language: There are 5 languages options. When changing the language, it will prompt dialogue box for confirmation. Click "Yes" to proceed. © Copyright 2014 TRENDnet. All Rights Reserved. - Page 13 "Apply". camera. The guest user can only view the live view video and is not allowed to do Manual: Type in the date and time, and click "Apply". any configuration. © Copyright 2014 TRENDnet. All Rights Reserved.
-
Page 14: Network
“Upgrade” to proceed. Please do not disconnect power or Network cable during firmware upgrading. System Reboot: Click Reboot to reboot the IP camera. Factory Reset: Click Reset to reset all the settings back to factory default value © Copyright 2014 TRENDnet. All Rights Reserved. - Page 15 Manually setup the IPv6 address: You can set up IPv6 manually by enter IP Address, Gateway, and DNS. DHCPv6: If you have a DHCPv6 server, enable this option to assign the IPv6 from server. The assigned IP address will be displayed © Copyright 2014 TRENDnet. All Rights Reserved.
- Page 16 Network >> Network Setting >> RTSP Setting Multicast is a bandwidth conservation technology. This function allows several users to share the same packet sent from IP camera. To use Multicast, appoint IP Address and © Copyright 2014 TRENDnet. All Rights Reserved.
- Page 17 Https to Http. The Https protocol has certificate verifying mechanism. When the user access a website via Https, the browser will check the certificate of that domain and verify its trustiness and secure. © Copyright 2014 TRENDnet. All Rights Reserved.
- Page 18 After finishing installation, you can click “Content” to call out and check the certificate content. 3. After you generate a certificate request, if you choose to turn it to the trusted third- party to verify, please click “Content” and copy all the request content. © Copyright 2014 TRENDnet. All Rights Reserved.
- Page 19 The security key. The person who has the community name has the authority to read or edit the information of IP camera via SNMP. © Copyright 2014 TRENDnet. All Rights Reserved.
- Page 20 Network Disconnected: The network connection was broken down. (The camera will send trap messages after the network being connected again) V3 Authentication Failed: A SNMPv3 user account tries to get authentication but failed. (Due to incorrect password or community) © Copyright 2014 TRENDnet. All Rights Reserved.
- Page 21 Management Stream instead of Live Stream. Please check what version of the authenticator and authentication server support. This camera supports EAP-TLS method. Please enter ID, password issued by the CA, then upload related certificates. © Copyright 2014 TRENDnet. All Rights Reserved.
- Page 22 (if need). If setting up IP schedule update too frequently, the IP may be blocked. In general, we suggest set schedule update to once a day (1440 minutes). After click "Apply" the setting. © Copyright 2014 TRENDnet. All Rights Reserved.
- Page 23 Update Failed, the name is already registered: The user name has already been used. Please change it. Update Failed, please check your internet connection: Network connection failed. Update Failed, please check the account information you provided: The server, user name, and password may be wrong. © Copyright 2014 TRENDnet. All Rights Reserved.
- Page 24 Mail Port: Assign the SMTP port in the text box. The default SMPT port is 25. data transmission connection built by the user. Make sure that the server supports the mode you select. For the free mail service, please enter the correct port number from the service provider. © Copyright 2014 TRENDnet. All Rights Reserved.
-
Page 25: Audio/Video Setting
Click Apply to save the setting, then use Test button to test the server connection. A message box will tell you “OK!” if it works, and a test file will be created in the location. © Copyright 2014 TRENDnet. All Rights Reserved. - Page 26 "Light Sensor Mode", the image will be turned to black and white at night in order to keep clear. To set light sensor mode, appoint a lux standard of switching D/N here. Current lux value is provided for reference. Under "Times Mode" the switch © Copyright 2014 TRENDnet. All Rights Reserved.
- Page 27 1/10000 ~ 1/50 1/60 1/10000 ~ 1/60 1/100 1/10000 ~ 1/100 1/125 1/10000 ~ 1/125 1/250 1/10000 ~ 1/250 1/500 1/10000 ~ 1/500 1/1000 1/10000 ~ 1/1000 * Sense-up options: 1/30, 1/15, 1/10, 1/5 © Copyright 2014 TRENDnet. All Rights Reserved.
- Page 28 The image may become broken or lagged when affected by the input resolution you choose. your bandwidth is not enough for the data quantity you selected. Video Format: H.264 or M-JPEG. © Copyright 2014 TRENDnet. All Rights Reserved.
- Page 29 Video Bitrate: You can choose 32kbps ~1Mbps. The higher the value is, the higher the image quality is. Video Frame Rate: The video refreshing rate per second. The max value is affected by the input resolution you choose. © Copyright 2014 TRENDnet. All Rights Reserved.
-
Page 30: Event Configuration
Interval: Each motion triggered in defined interval time. If you select "10 sec" here, once the motion is detected and action is triggered, the next motion will be trigger after 10 seconds. . © Copyright 2014 TRENDnet. All Rights Reserved. - Page 31 Record Time Setting. Event Configuration >> Motion Detection >> Record Time Setting When an event occurs, the IP camera can record a video clip or take snapshot, and then © Copyright 2014 TRENDnet. All Rights Reserved.
- Page 32 When Record is enabled: Enabled / Disabled Destination: Select between sending the record to Samba or saving it into the SD card Record Time: Select the video length (seconds) © Copyright 2014 TRENDnet. All Rights Reserved.
- Page 33 If it's triggered by external input alarm, the triggering time is according to input "interval" setting. It triggers the external devise and lasts for 10 seconds if you select "10" in interval setting. You can turn © Copyright 2014 TRENDnet. All Rights Reserved.
- Page 34 "OFF". Time Switch mode: Click "Pulse", the camera will trigger the external output devise for several seconds. The duration length is according to the "interval" setting in Output Setting. © Copyright 2014 TRENDnet. All Rights Reserved.
-
Page 35: Logout
It will remain in the same session. If camera in the idle time for 3 minutes, yesterday to 5 pm today. The rest of recorded files will be deleted. it will automatic logout the session. © Copyright 2014 TRENDnet. All Rights Reserved. -
Page 36: How To Access The Ip Camera Via Ip Installer
Change : change the selected camera’s IP address via Static IP or DHCP. If Static is selected, you have to manual type in the IP address, Subnet Mask, Default gateway, DNS 1, DNS 2 and Http Port and IP camera’s password. © Copyright 2014 TRENDnet. All Rights Reserved. -
Page 37: Troubleshooting
192.168.10.x. Since letter assigned to your CD-ROM Drive, and then press the ENTER key on your the default IP address of the TV-IP343PI is 192.168.10.30, do not assign a keyboard . - Page 38 Run the Install Camera wizard from the CD-ROM to login to the camera. Search for the additional ActiveX or plug-in files listed below and delete them to completely uninstall the ActiveX control or plug-in from your computer. © Copyright 2014 TRENDnet. All Rights Reserved.
-
Page 39: Limited Warranty
Please sent to TRENDnet for RMA service must have the RMA number marked on the outside of return http://www.gnu.org/licenses/gpl.txt http://www.gnu.org/licenses/lgpl.txt for specific terms of packages and sent to TRENDnet prepaid, insured and packaged appropriately for safe shipment.
Need help?
Do you have a question about the TV-IP343PI and is the answer not in the manual?
Questions and answers