Table of Contents
Advertisement
Quick Links
Advertisement
Table of Contents

Related Manuals for TRENDnet TV-IP345PI


Summary of Contents for TRENDnet TV-IP345PI
-
Page 2: Table Of Contents
Cabling ........................7 Waterproof cap .......................7 Setup Your Camera with Camera Utility ........... 7 Access your Camera with the Web Browser ........ 9 Logging‐in to the Camera for the First Time (Windows) .........9 Logging‐in to the Camera for the First Time (OS X) .......... 11 Live View ....................... 14 Playback ........................ 15 Picture ........................ 17 Configuration .................. 1 8 System ........................ 18 System Settings ........................ 18 Maintenance.......................... 20 Security ............................ 22 User Management ........................ 24 Network ........................ 25 © Copyright 2019 TRENDnet. All Rights Reserved. 2 ... -
Page 3: Product Overview
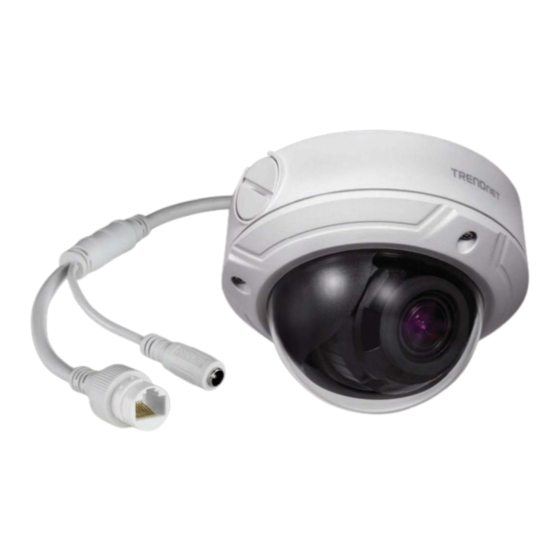
Smart IR dynamically adjusts the Infrared (IR) LEDs by lowering the IR intensity when objects are near, and increasing IR intensity when objects are Features farther away TRENDnet’s Indoor/Outdoor 4MP H.265 Motorized Varifocal PoE IR Dome Enhanced IR Technology Network Camera, model TV‐IP345PI, provides day and night surveillance with a night vision range of up to 30 meters (98 ft.). A built‐in 2.8 – 12mm ... -
Page 4: Package Contents
Create custom tamper detection zones to send an email notification when the camera view has been obstructed Wide Dynamic Range (WDR) Drilling Template Mounting Screws Adjustable 120dB WDR setting improves image quality and focus when a camera is exposed to high contrast lighting environments by enhancing the dark areas of the image to make them more visible Recording Flexibility Network Cable Define custom schedules using continuous (24/7) and event‐based recording Waterproof Accessories modes ONVIF Compliant ONVIF Profile S If any package content is missing or damaged, please contact the retail store, online retailer, or reseller/distributor from which the product was purchased. Complimentary Software © Copyright 2019 TRENDnet. All Rights Reserved. 4 ... -
Page 5: Warnings
• Do not place the camera in extremely hot, cold temperatures (the operating temperature should be between ‐10°C to 60°C), dusty or damp environment, and do not expose it to high electromagnetic radiation. • To avoid heat accumulation, good ventilation is required for a proper operating environment. • Keep out of water and any liquid. • While shipping, the camera should be packed in its original packing. © Copyright 2019 TRENDnet. All Rights Reserved. 5 ... -
Page 6: Plan For Installation Location
However, rain may affect the picture quality, especially at night, water may reflect the light from the infra‐red illumination and degrade picture quality. • Temperature: TV‐IP345PI works within a specified temperature range. Areas with severe temperatures should be avoided when installing the camera. It’s recommended that you use an enclosure with a heater and blower if you plan on using this camera outside of the specified temperature range. © Copyright 2019 TRENDnet. All Rights Reserved. 6 ... -
Page 7: Hardware Installation
It’s recommended that the wiring the cable in your home or office by a professional. If you already have the cable deployed, make sure the cable and 2. Extract the downloaded file and double click on the camera utility file the connectors meet the category 5 Ethernet cable standards. At least 2 pairs to install of twisted lines are required for power and data. Poor cable quality may cause unexpected problems. Testing your cable or running a new cable is suggested for new camera installation. Waterproof cap The camera itself is IP66 grade water and dust proof. There is a set of network cable water proof caps that comes with the package as well. Run your cable going through the accessories, and then crimp the cable with an RJ45 module. Plug in the network cable and then tighten the waterproof cap to prevent water running into camera through the cable. 3. Last, click Next to finish the installation. © Copyright 2019 TRENDnet. All Rights Reserved. 7 ... - Page 8 TRENDnet User’s Guide TV‐IP345PI 4. This will also require you to Install WinPcap program if you don’t have 6. After the computer has restarted, double click on the Camera Utility icon this installed before, please follow the on screen Instructions to to launch the program. Install It. 7. Find the camera you would like to access and configure then double click on the IP address. 5. Restart the computer after the Installation. 8. Continue to the next section Access your Camera with the Web Browser for detail configurations of the camera. © Copyright 2019 TRENDnet. All Rights Reserved. 8 ...
-
Page 9: Access Your Camera With The Web Browser
(For Internet Explorer and Safari only) Google and Firefox Logging‐in to the Camera for the First Time (Windows) users, skip to step 9. 1. Find the camera from the Utility and double click on the IP address to open the browser. 2. Activate the admin User Account by entering your desired password, and 4. Download the plug‐in to your computer and then and close your browser. then click OK. Launch the plug‐in installation to install the plug‐in. © Copyright 2019 TRENDnet. All Rights Reserved. 9 ... - Page 10 TRENDnet User’s Guide TV‐IP345PI 5. Permission request may show up depends on the Internet security 7. Click Finish to finish the installation. settings on your computer. Click Yes or Run anyway to install the plug‐ in. 8. Open the browser and login again, enter the user name admin and new password again to start secured session. 6. Click Next to install the plug‐in. © Copyright 2019 TRENDnet. All Rights Reserved. 10 ...
-
Page 11: Logging-In To The Camera For The First Time (Os X)
9. Refresh the browser and the Live View page will show up and begin Logging‐in to the Camera for the First Time (OS X) streaming video. 1. Open the web browser on your computer. In the address bar, enter the default IP address of the camera 192.168.10.30. If the camera is connected to a router/network, please use the Windows Camera Utility to find the exact IP address. 2. Activate the admin User Account by entering your desired password, and then click OK. © Copyright 2019 TRENDnet. All Rights Reserved. 11 ... - Page 12 3. The camera management page will detect if you installed the camera 5. Go to the Finder and navigate to the Download folder. Command‐Click webcomponent plug‐in or not. Click the link to download the plug‐in from the WebComponents.pkg and then click Open. (If you are install the plug‐ the camera. in from the CD when you don’t have internet connection, just browse to /Mac folder and double click the WebComponents.pkg file.) Note: Internet connection is required to download the plug‐in. If you do not have Internet access, you can find the plug‐in on the CD comes with the package under /Mac folder. 6. Click Open with Installer to start installation. 4. Quit your browser completely by command‐Click on the browser icon and then click Quit before installing the plug‐in. © Copyright 2019 TRENDnet. All Rights Reserved. 12 ...
- Page 13 TRENDnet User’s Guide TV‐IP345PI 7. Click Continue to install the plug‐in. 9. Use the default location and click Install. 10. Enter your password and click Install Software 8. Select a destination to install the plug‐in. Then click Continue. © Copyright 2019 TRENDnet. All Rights Reserved. 13 ...
-
Page 14: Live View
12. Click Close to exit the installation. The camera has two video streams: H.264 and MJPEG. Switch to view the Video Stream different video streams by clicking this icon Start/Stop All Click to start/stop all live views Snapshot Click this icon to take a video snapshot Click once to start recording. Click it Recording again to stop recording. The status bar © Copyright 2019 TRENDnet. All Rights Reserved. 14 ... -
Page 15: Playback
Double click the picture or click this Search for video recordings button to view in full screen mode. Click the date selection, and then choose a date as the date range of searching. Full Screen Mode Double click again or press escape key Click Search to start searching. on your keyboard to exit full screen mode Expand Control Panel The icon expands the control panel Zoom in / out Zoom in and out of the image Focus near / far Focus the image © Copyright 2019 TRENDnet. All Rights Reserved. 15 ... - Page 16 Click this button to stop playback. Click this button increase playback speed*. Click this button decrease playback speed*. Click and drag the time line to move your time manually. Click to playback video frame by frame. Click again for the next frame� Click this button to zoom in the scale Click this button to zoom out of the scale * Note: There are 5 steps of playback speed you can choose from: 1/4, 1/2, 1, 2, and 4 times of original speed. Click this button to specify a specific time of the day. then click to confirm selection and then click X to close this dialog box. © Copyright 2019 TRENDnet. All Rights Reserved. 16 ...
-
Page 17: Picture
Click this button to full‐screen the playback Select the type of event that triggered the snapshots. Choose the Start Time and End Time. Then, click Search Where can I find saved files? to find the snapshot list. Check the time of the snapshot, Videos and snapshots captured from Playback will be saved to your computer and then select the snapshots you want to download, then click Download. Where can I find saved files? Videos and snapshots captured from Playback will be saved to your computer © Copyright 2019 TRENDnet. All Rights Reserved. 17 ... -
Page 18: Configuration
OSD, On Screen Display, camera name is referring to this Channels setting as well. Number of HDDs Number of HDDs added to this camera Number of Alarm Number of Alarm Inputs Input Number of Alarm Number of Alarm output Output Names Device Name: Name of the camera. The camera name setup here can be discovered by other network camera © Copyright 2019 TRENDnet. All Rights Reserved. 18 ... - Page 19 (e.g. pool.ntp.org) Interval: The time interval that the TV‐IP345PI will synchronize the time with NTP server. Default: 1440 minutes (24 hours) Click Save to save the changes Manual Time Sync Device Time: The system time of this camera. Set Time: Click the calendar icon and manually select the date. Check the Sync. with computer time to copy the time from your computer. © Copyright 2019 TRENDnet. All Rights Reserved. 19 ...
-
Page 20: Maintenance
Status: Shows the status in firmware upgrade. TRENDnet may periodically release firmware upgrades that might add features or fix problems associated with your camera. To find out if there is a firmware upgrade available for your device, please check your TRENDnet model and version using the link. http://www.trendnet.com/downloads/ 1. If a firmware upgrade is available, download the firmware to your computer. 2. Unzip the file to a folder on your computer. ... - Page 21 TRENDnet User’s Guide TV‐IP345PI Log System Service The log of the camera will be saved on the network storage. You can search This section allows you to enable/disable IR light control. the relevant records and save to your local computer. Search for logs Click the type of log and then the Start Time and End Time. Click Search to start searching. Click First Page , Prev Page , Next Page , and Last Page to show the logs. Click Save Log to save the logs to your computer. © Copyright 2019 TRENDnet. All Rights Reserved. 21 ...
-
Page 22: Security
Authentication Configure the parameters, including Authentication, Anonymous Visit, IP Address Filter, and Security Service from security interface. Enter the Authentication interface: Configuration > System > Security > Authentication. 2. Check the checkbox of Enable IP Address Filter. 3. Select the type of IP Address Filter in the drop‐down list, Forbidden and Allowed are selectable. 4. Set the IP Address Filter list. Add an IP Address Set up authentication method for RTSP authentication and WEB Steps: authentication. (1) Click the Add to add an IP. Caution: (2) Input the IP Adreess. Digest is the recommended authentication method for better data security. You must be aware of the risk if you adopt basic as the authentication method. Click Save to save the settings. (3) Click the OK to finish adding. © Copyright 2019 TRENDnet. All Rights Reserved. 22 ... - Page 23 1. Enter the security service configuration interface: Configuration > System > Security > Security Service. (3) Click the OK to finish modifying. Delete an IP Address or IP Addresses. Select the IP address(es) and click Delete. 5. Click Save to save the settings. 2. Check the checkbox of Enable Illegal Login Lock. Illegal Login Lock: it is used to limit the user login attempts. Login attempt from the IP address is rejected if admin user performs 7 failed user name/password attempts (5 times for the operator/user). Note: If the IP address is rejected, you can try to login the device after 30 minutes. © Copyright 2019 TRENDnet. All Rights Reserved. 23 ...
-
Page 24: User Management
You can see the current users who are visiting the device through this User Management You can setup up to 16 user accounts to access the camera’s video stream interface. User information, such as user name, level, IP address, and with a web browser or real time video stream (RTSP). Only one administrator operation time, is displayed in the User List. account can be setup to configure the TV‐IP345PI and cannot be deleted. Click Refresh to refresh the list. User Accounts Add: Click Add button to add one user account Modify: To change a user’s name and password, highlight the user by clicking on it. Then, click Modify button. You can change the user’s name and password. You can also change the administrator’s password here. But, the administrator’s name is fixed, you cannot change that. Click OK to save the changes. © Copyright 2019 TRENDnet. All Rights Reserved. 24 ... -
Page 25: Network
TRENDnet User’s Guide TV‐IP345PI Network Basic Settings Configure the basic network settings, including the NIC Type, IPv4 or IPv6 You can configure the parameters, including TCP/IP, DDNS, PPPoE, Port, and Address, IPv4 or IPv6 Subnet Mask, IPv4 or IPv6 Default Gateway, MTU NAT, etc., by following the instructions in this section. settings and Multicast Address. (Optional) Check the checkbox of Enable Multicast Discovery, and then TCP/IP Setup your basic IPv4 and IPv6 network settings on this page. the online network camera can be automatically detected by client software via private multicast protocol in the LAN. Configure the DNS server. Input the preferred DNS server, and alternate DNS server. Click Save to save the above settings . Notes: The valid value range of MTU is 1280 to 1500. The Multicast sends a stream to the multicast group address and allows multiple clients to acquire the stream at the same time by requesting a copy from the multicast group address. Before utilizing this function, you have to enable the Multicast function of your router. A reboot is required for the settings to take effect. © Copyright 2019 TRENDnet. All Rights Reserved. 25 ... - Page 26 TRENDnet User’s Guide TV‐IP345PI DDNS If your camera is set to use PPPoE as its default network connection, you can use the Dynamic DNS (DDNS) for network access. Before you start: Registration on the DDNS server is required before configuring the DDNS settings of the camera. Steps: 1. Check the Enable DDNS checkbox to enable this feature. 2. Select DDNS Type. Two DDNS types are selectable: DynDNS and NO‐IP. DynDNS or NO‐IP: Steps: (1) Enter Server Address of DynDNS or NO‐IP (e.g. members.dyndns.org). (2) In the Domain text field, enter the domain name obtained from the DynDNS website. (3) Enter the User Name and Password registered on the DynDNS website. (4) Click Save to save the settings. © Copyright 2019 TRENDnet. All Rights Reserved. 26 ...
- Page 27 RTSP or HTTPS services. Check the Enable PPPoE checkbox to enable this feature. Enter User Name, Password, and Confirm password for PPPoE access. Note: The User Name and Password should be assigned by your ISP. Set the ports of the camera. For your privacy and to better protect your system against security risks, HTTP Port: The default port number is 80, and it can be changed to any we strongly recommend the use of strong passwords for all functions and port No. which is not occupied. network devices. The password should be something of your own choosing (using a minimum of 8 characters, including at least three of RTSP Port: The default port number is 554 and it can be changed to any the following categories: upper case letters, lower case letters, numbers port No. ranges from 1 to 65535. and special characters) in order to increase the security of your product. HTTPS Port: The default port number is 443, and it can be changed to Proper configuration of all passwords and other security settings is the any port No. which is not occupied. responsibility of the installer and/or end‐user. © Copyright 2019 TRENDnet. All Rights Reserved. 27 ...
- Page 28 Check the checkbox to enable the UPnP™ function. Note: Universal Plug and Play (UPnP™) is a networking architecture that provides compatibility among networking equipment, software and other hardware Only when the UPnP™ function is enabled, ports of the camera are devices. The UPnP protocol allows devices to connect seamlessly and to active. simplify the implementation of networks in the home and corporate Choose a friendly name for the camera, or you can use the default environments. name. © Copyright 2019 TRENDnet. All Rights Reserved. 28 ...
-
Page 29: Advanced Settings
Before setting the SNMP, please download the SNMP software and manage to receive the camera information via SNMP port. By setting the Trap Address, the camera can send the alarm event and exception messages to the surveillance center. Note: The SNMP version you select should be the same as that of the SNMP software. And you also need to use the different version according to the security level you required. SNMP v1 provides no © Copyright 2019 TRENDnet. All Rights Reserved. 29 ... - Page 30 TRENDnet User’s Guide TV‐IP345PI FTP You can configure the FTP server related information to enable the uploading of the captured pictures to the FTP server. The captured pictures can be triggered by events or a timing snapshot task. Input the FTP address and port. Configure the FTP settings; and the user name and password are required for the FTP server login. For your privacy and to better protect your system against security © Copyright 2019 TRENDnet. All Rights Reserved. 30 ...
- Page 31 Picture Filing Interval: For better picture management, you can set the picture filing interval from 1 day to 30 days. Pictures captured in the same time interval will be saved in one folder named after the beginning date and ending date of the time interval. Picture Name: Set the naming rule for captured picture files. You can choose Default in the drop‐down list to use the default rule, that is, IP address_channel number_capture time_event type.jpg © Copyright 2019 TRENDnet. All Rights Reserved. 31 ...
- Page 32 TRENDnet User’s Guide TV‐IP345PI Email Configure the following settings: Sender: The name of the email sender. Sender’s Address: The email address of the sender. SMTP Server: IP address or host name (e.g., smtp.263xmail.com) of the SMTP Server. SMTP Port: The SMTP port. The default TCP/IP port for SMTP is 25 (not secured). And the SSL SMTP port is 465. Email Encryption: None, SSL, and TLS are selectable. When you select SSL or TLS and disable STARTTLS, e‐mails will be sent after encrypted by SSL or TLS. The SMTP port should be set as 465 for this encryption method. When you select SSL or TLS and enable STARTTLS, emails will be sent after encrypted by STARTTLS, and the SMTP port should be set as 25. Note: If you want to use STARTTLS, make sure that the protocol is supported by your e‐mail server. If you check the Enable STARTTLS checkbox when the protocol is not supported by your e‐mail sever, your e‐mail will not be encrypted. Attached Image: Check the checkbox of Attached Image if you want to send emails with attached alarm images. Interval: The interval refers to the time between two actions of sending attached pictures. © Copyright 2019 TRENDnet. All Rights Reserved. 32 ...
- Page 33 For your privacy and to better protect your system against security risks, we strongly recommend the use of strong passwords for all functions and network devices. The password should be something of your own choosing (using a minimum of 8 characters, including at least three of the following categories: upper case letters, lower case letters, numbers and special characters) in order to increase the security of your product. Proper configuration of all passwords and other security settings is the responsibility of the installer and/or end‐user. Check the checkbox of Enable to enable the function. The Receiver table: Select the receiver to which the email is sent. Up to Create the self‐signed certificate or authorized certificate. 3 receivers can be configured. Create the self‐signed certificate Receiver: The name of the user to be notified. (1) Select Create Self‐signed Certificate as the Installation Method. Receiver’s Address: The email address of user to be notified. (2) Click Create button to enter the creation interface. (3) Enter the country, host name/IP, validity and other information. (4) Click OK to save the settings. Note: If you already had a certificate installed, the Create Self‐signed Certificate is grayed out. © Copyright 2019 TRENDnet. All Rights Reserved. 33 ...
- Page 34 (3) Download the certificate request and submit it to the trusted value is used in the IP header to indicate the priority of the data. certificate authority for signature. (4) After receiving the signed valid certificate, import the certificate to Click Save to save the settings. the device. Note: A reboot is required for the settings to take effect. There will be the certificate information after your successfully creating and installing the certificate. 1X Click the Save button to save the settings. Setup 802.1X for remote authentication service. QoS QoS (Quality of Service) can help solve the network delay and network congestion by configuring the priority of data sending. Click Save to save the changes © Copyright 2019 TRENDnet. All Rights Reserved. 34 ...
- Page 35 The password should be something of your own choosing (using a minimum of 8 characters, including at least three of the following categories: upper case letters, lower case letters, numbers Check the Enable ONVIF checkbox to enable the function. and special characters) in order to increase the security of your product. Add ONVIF users. Up to 32 users are allowed. Proper configuration of all passwords and other security settings is the Set the user name and password, and confirm the password. You can set responsibility of the installer and/or end‐user. the user as media user, operator, and administrator. Check the Enable IEEE 802.1X checkbox to enable the feature. Note: ONVIF user account is different from the camera user account. You Configure the 802.1X settings, including Protocol, EAPOL version, User have set ONVIF user account independently. Name, Password and Confirm. Note: The EAPOL version must be identical with that of the router or the Save the settings. switch. Note: User settings of ONVIF are cleared when you restore the camera. Enter the user name and password to access the server. Click Save to finish the settings. Note: A reboot is required for the settings to take effect. © Copyright 2019 TRENDnet. All Rights Reserved. 35 ...
-
Page 36: Video/Audio
Frame Rate: Select the Stream Type. Set the frame rate. The frame rate is to describe the frequency at which Supported stream types are listed in the drop‐down list. the video stream is updated and it is measured by frames per second (fps). A higher frame rate is advantageous when there is movement in the video Notes: stream, as it maintains image quality throughout. • For some models, the Third Stream is not enabled by default. Go to Max. Bitrate: System > Maintenance > System Service> Software to enable the Set the max. bitrate from 32 to 16384 Kbps. The higher value corresponds function is required. to the higher video quality, but the better bandwidth is required. • The main stream is usually for recording and live view with good © Copyright 2019 TRENDnet. All Rights Reserved. 36 ... - Page 37 H.265+ available. H.265+ is an the value of the set maximum bitrate. improved compression coding technology based on H.265. By Profile: enabling H.265+, users can estimate the HDD consumption by its When you select H.264 or H.265 as video encoding, you can set the profile. maximum average bitrate. Compared to H.265, H.265+ reduces Selectable profiles vary according to camera models. © Copyright 2019 TRENDnet. All Rights Reserved. 37 ...
- Page 38 Scalable Video Coding is an extension of the H.264/AVC and H.265 quality of the ROI whereas the background information is less focused. standard. Select OFF/ON to disable/enable the SVC function. Select Auto and the device will automatically extract frames from the original video Note: ROI function varies according to different camera models. when the network bandwidth is insufficient. Smoothing: It refers to the smoothness of the stream. The higher value of the smoothing is, the better fluency of the stream will be, though, the video quality may not be so satisfactory. The lower value of the smoothing is, the higher quality of the stream will be, though it may appear not fluent. Click Save to save the settings. Note: The video parameters vary according to different camera models. Refer to the actual display page for camera functions. © Copyright 2019 TRENDnet. All Rights Reserved. 38 ...
-
Page 39: Image
(6) Click Save the save the settings of ROI settings for chosen fixed region. (7) Repeat steps (1) to (6) to setup other fixed regions. Set Dynamic Region for ROI. (1) Check the checkbox to enable Face Tracking. Note: To enable face tracking function, the face detection function Image Adjustment should be supported and enabled. Brightness describes bright of the image, which ranges from 1 to 100. Contrast describes the contrast of the image, which ranges from 1 to 100. (2) Select the ROI level. Saturation describes the colorfulness of the image color, which ranges Click Save to save the settings. from 1 to 100. Note: ROI level means the image quality enhancing level. The larger the value Sharpness describes the edge contrast of the image, which ranges from is, the better the image quality would be. 1 to 100. © Copyright 2019 TRENDnet. All Rights Reserved. 39 ... - Page 40 White balance is the white rendition function of the camera used to adjust the color temperature according to the environment. Image Enhancement Digital Noise Reduction: DNR reduces the noise in the video stream. OFF, Day: the camera stays at day mode. Normal and Expert are selectable. Set the DNR level from 0 to 100 in Night: the camera stays at night mode. Normal Mode. Set the DNR level from both space DNR level [0‐100] and time DNR level [0‐100] in Expert Mode. Auto: the camera switches between the day mode and the night mode according to the illumination automatically. The sensitivity ranges from 0 to 7, the higher the value is, the easier the mode switches. The filtering © Copyright 2019 TRENDnet. All Rights Reserved. 40 ...
- Page 41 NTSC standard. Capture Mode: Set the capture resolution at a fixed value. Check the corresponding checkbox to select the display of camera name, date or week if required. Edit the camera name in the text field of Camera Name. Select from the drop‐down list to set the time format and date format. Select from the drop‐down list to set the time format, date format, display mode, OSD size and OSD color. Configure the text overlay settings. (1) Check the checkbox in front of the textbox to enable the on‐screen display. © Copyright 2019 TRENDnet. All Rights Reserved. 41 ...
- Page 42 TRENDnet User’s Guide TV‐IP345PI (2) Input the characters in the textbox. Privacy Mask Note: Up to 8 text overlays are configurable. Display extra information on the screen over the image. Adjust the position and alignment of text frames. Left align, right align and custom are selectable. If you select custom, you can use the mouse to click and drag text frames in the live view window to adjust their positions. Note: The alignment adjustment is only applicable to Text Overlay items. Click Save to save the settings. Check the checkbox of Enable Privacy Mask to enable this function. Click Draw Area. Click and drag the mouse in the live video window to draw the mask area. Note: You are allowed to draw up to 4 areas on the same image. Click Stop Drawing to finish drawing or click Clear All to clear all of the areas you set without saving them. Click Save to save the settings. © Copyright 2019 TRENDnet. All Rights Reserved. 42 ...
-
Page 43: Events
TRENDnet User’s Guide TV‐IP345PI Events Check the checkbox of Enable Motion Detection. Check the checkbox of Enable Dynamic Analysis for Motion if you want to mark the detected objects with green rectangles. Motion Detection Click Draw Area. Click and drag the mouse on the live video to draw a Set up how the motion detection event will be triggered and what actions will be triggered. motion detection area. Click Stop Drawing to finish drawing one area. (Optional) Click Clear All to clear all of the areas. (Optional) Move the slider to set the sensitivity of the detection. Steps: Click Arming Schedule to edit the arming schedule. Click on the time bar and drag the mouse to select the time period. © Copyright 2019 TRENDnet. All Rights Reserved. 43 ... - Page 44 (Optional) Click Delete to delete the current arming schedule, or click Save to save the settings. Move the mouse to the end of each day, a copy dialogue box pops up, and you can copy the current settings to other days. Click Save to save the settings. Note: The time of each period can’t be overlapped. Up to 8 periods can be configured for each day. Task 3: Set the Linkage Method for Motion Detection Check the checkbox to select the linkage method. Audible Warning, Send Email, Notify Surveillance Center, Upload to FTP/Memory Card/NAS, Trigger © Copyright 2019 TRENDnet. All Rights Reserved. 44 ...
-
Page 45: Storage
5 seconds, the camera starts to record at 9:59:55. The Pre‐record time can be configured as No Pre‐record, 5s, 10s, 15s, 20s, 25s, 30s or not limited. Post‐record: The time you set to stop recording after the scheduled time or the event. For example, if an alarm triggered recording ends at 11:00, and the post‐record time is set as 5 seconds, the camera records until 11:00:05. The Post‐record time can be configured as 5s, 10s, 30s, 1 min, 2 min, 5 min or 10 min. Stream Type: Select the stream type for recording. 1. Check the checkbox of Enable to enable scheduled recording. Note: The record parameter configurations vary depending on the camera 2. Click Advanced to set the camera record parameters. model. © Copyright 2019 TRENDnet. All Rights Reserved. 45 ... - Page 46 If you select Alarm, the video will be recorded when the alarm is configure the event settings. triggered via the external alarm input channels. 4. Select the record type, and click‐and‐drag the mouse on the time bar to Besides configuring the recording schedule, you have to set the set the record schedule. Alarm Type and check the checkbox of Trigger Channel in the 5. Click Save to save the settings. Linkage Method of Alarm Input Settings interface. Record Triggered by Motion & Alarm If you select Motion & Alarm, the video will be recorded when the motion and alarm are triggered at the same time. © Copyright 2019 TRENDnet. All Rights Reserved. 46 ...
- Page 47 Capture You can configure the scheduled snapshot and event‐triggered snapshot. The captured picture can be stored in the local storage or network storage. Click Save to save the settings. Go to Capture Parameters tab to configure the capture parameters. (1) Check the Enable Timing Snapshot checkbox to enable continuous snapshot. (2) Select the picture format, resolution, quality and capture interval. (3) Check the Enable Event‐triggered Snapshot checkbox to enable event‐triggered snapshot. (4) Select the picture format, resolution, quality, capture interval, and capture number. Set the time interval between two snapshots. Click Save to save the settings. Go to Capture Schedule tab to configure the capture schedule by click‐ and‐drag the mouse on the time bar. You can copy the record schedule to other days by clicking the green copy icon on the right of each time bar. Click Advanced to select stream type. © Copyright 2019 TRENDnet. All Rights Reserved. 47 ...
-
Page 48: Regulations
RoHS • Consult the dealer or an experienced radio/TV technician for help. This product is RoHS compliant. FCC Caution: Any changes or modifications not expressly approved by the party responsible for compliance could void the user’s authority to operate this equipment. This device complies with Part 15 of the FCC Rules. Operation is subject to the following two conditions: (1) This device may not cause harmful interference, and (2) this device must accept any interference received, including interference that may cause undesired operation. © Copyright 2019 TRENDnet. All Rights Reserved. 48 ... -
Page 49: Europe - Eu Declaration Of Conformity
Käesolevaga kinnitab TRENDnet seadme TV‐IP345PI vastavust [Slovenian] zahtevami in ostalimi relevantnimi določili direktiivi 2004/108/EÜ ja 2006/95/EÜ põhinõuetele ja direktive2004/108/ES in 2006/95/ES. nimetatud direktiivist tulenevatele teistele asjakohastele Slovensky [Slovak] TRENDnettýmtovyhlasuje, že TV‐IP345PI sätetele. spĺňazákladnépožiadavky a English Hereby, TRENDnet, declares that this TV‐IP345PI is in všetkypríslušnéustanoveniaSmernice 2004/108/ES a compliance with the essential requirements and other relevant 2006/95/ES. provisions of Directive 2004/108/EC and 2006/95/EC. Suomi [Finnish] TRENDnet vakuuttaa täten että TV‐IP345PI tyyppinen laite on Español [Spanish] Por medio de la presente TRENDnet declara que el TV‐IP345PI direktiivin2004/108/EY ja 2006/95/EY oleellisten vaatimusten ja cumple con los requisitos esenciales y cualesquiera otras sitä koskevien direktiivin muiden ehtojen mukainen. disposiciones aplicables o exigibles de la Directiva 2004/108/CE Svenska [Swedish] Härmed intygar TRENDnet att denna TV‐IP345PI står I y 2006/95/CE. överensstämmelse med de väsentliga egenskapskrav och övriga Ελληνική [Greek] ΜΕ ΤΗΝ ΠΑΡΟΥΣΑTRENDnet ΔΗΛΩΝΕΙ ΟΤΙ TV‐IP345PI relevanta bestämmelser som framgår av direktiv 2004/108/EG ΣΥΜΜΟΡΦΩΝΕΤΑΙ ΠΡΟΣ ΤΙΣ ΟΥΣΙΩΔΕΙΣ ΑΠΑΙΤΗΣΕΙΣ ΚΑΙ ΤΙΣ och 2006/95/EG. ΛΟΙΠΕΣ ΣΧΕΤΙΚΕΣ ΔΙΑΤΑΞΕΙΣ ΤΗΣ ΟΔΗΓΙΑΣ 2004/108/EK, 2006/95/ΕΚ και. © Copyright 2019 TRENDnet. All Rights Reserved. 49 ... -
Page 50: Limited Warranty
LIMITATION OF LIABILITY: TO THE FULL EXTENT ALLOWED BY LAW TRENDNET ALSO products that are replaced become the property of TRENDnet. Replacement products EXCLUDES FOR ITSELF AND ITS SUPPLIERS ANY LIABILITY, WHETHER BASED IN may be new or reconditioned. TRENDnet does not issue refunds or credit. Please CONTRACT OR TORT (INCLUDING NEGLIGENCE), FOR INCIDENTAL, CONSEQUENTIAL, contact the point‐of purchase for their return policies. INDIRECT, SPECIAL, OR PUNITIVE DAMAGES OF ANY KIND, OR FOR LOSS OF REVENUE TRENDnet shall not be responsible for any software, firmware, information, or ... - Page 51 ...
Need help?
Do you have a question about the TV-IP345PI and is the answer not in the manual?
Questions and answers