Advertisement
Quick Links
Advertisement

Subscribe to Our Youtube Channel
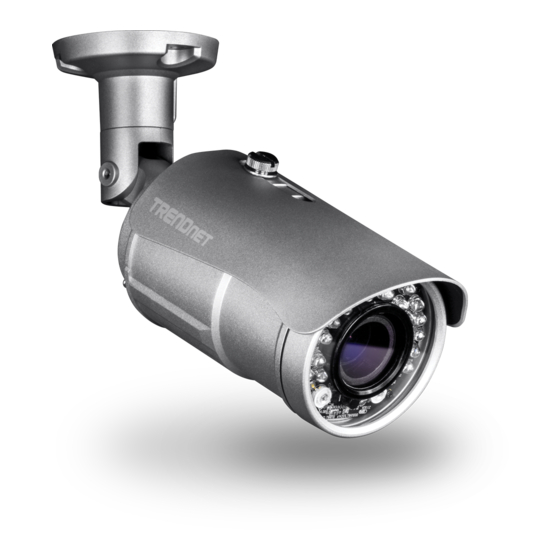
Summary of Contents for TRENDnet TV-IP344PI
- Page 1 Quick Installation Guide TV-IP344PI (V1)
- Page 2 Table of Content 1 English 1. Before You Start 2. Hardware Installation and Configuration...
-
Page 3: Before You Start
The TV-IP344PI only works with Power over Ethernet (PoE) devices that follow the IEEE Ÿ 802.3af standard. The TV-IP344PI has a 5.5 mm barrel connector for an optional 12 V DC 1A power adapter. Ÿ Optional power supply not included. -
Page 4: Hardware Installation And Configuration
2. Hardware Installation and Configuration 1. Do not install or mount the IP camera until after you complete the installation steps below. Temporarily place the IP camera next to your computer. 2. Insert the Utility CD-ROM into your CD-ROM drive. 3. - Page 5 6. Connect a network cable from the camera's network port to your PoE source. The IR LEDs will turn on and show a dim visible red light. Allow 60 seconds for the camera to boot up. Then click Next. Next 7.
- Page 6 8. Select DHCP option to assign an IP by DHCP server, select “Fixed IP” to set IP address manually. Click Next. Next 9. If you select “Fixed IP”, fill out the IP address, subnet mask, default gateway, and DNS server. Please ensure that the IP address of the camera and the computer must be within the same network.
- Page 7 11. Initial Setup is complete! Your camera is now connected to your network. Click the hyperlink to confirm access to the management page. This will open up a web browser. To resume installation, minimize the web browser and then click Next. Next 12.
- Page 8 13. To managemultiple cameras and for more advanced features, please install the TRENDnetVIEW Pro software. Install the software by clicking Install TRENDnetVIEW Pro Software in the Autorun window and refer to the TRENDnetVIEW Pro User's Guide on the CD for more information. Note See User's Guide for advanced management functions Ÿ...
- Page 9 14. Install the camera in your desired location. To connect the IP camera to your network with PoE, please use either of the following examples: Using the TV-IP344PI with a PoE switch (TPE-S50) TV-IP-344PI Internet TPE-S50 Non-PoE Connect the provided network cable from the Power over Ethernet switch (e.g. TPE-S50) to Ÿ...
- Page 10 Non-PoE Connect the power adapter to the TPE-113GI and then to a power outlet. Ÿ Connect a network cable from the TV-IP344PI to the TPE-113GI's PWR+DATA OUT (PoE) Ÿ port. Connect a network cable from a switch or router (e.g. TEW-818DRU) to the TPE-113GI's Ÿ...
-
Page 11: Mounting The Camera
Mounting the camera Note: For tips on capturing appropriate camera viewing angle, please refer to the user's guide. 1. Loosen the locking bolts and manually position the camera as desired . 2. Place the provided template label on the wall or ceiling. Drill hole Wire hole Drill hole... - Page 12 8. Align the mounting bracket with the screw anchors, and then use the provided screws to secure the camera to the mounting surface. 9. Power up the camera by connecting the other end of the cable to a PoE switch or injector on your network.
- Page 13 Indoor/Outdoor 4 MP Motorized Varifocal PoE IR Network Camera Trade Name: TRENDnet TRENDnet hereby declare that the product is in compliance with the essential requirements and other relevant provisions under our sole responsibility. EN 55022: 2010 + AC: 2011 Class A...
- Page 14 каждого продукта на сайте компании TRENDnet. Garantia Limitada A TRENDnet garante seus produtos contra defeitos de material e mão de obra sob condições normais de uso e serviço. Os períodos de garantia específicos estão listados em cada uma das páginas dos respectivos produtos no site da TRENDnet.
- Page 15 Safety notes Before using your TRENDnet device for the first time, it is essential to read and understand all safety and operating instructions. Keep instructions in a safe place for future reference. Some TRENDnet products are rated for outdoor applications and can sustain certain weather conditions.
- Page 16 Product Warranty Registration If you have any questions regarding the product Please take a moment to register your installation, please contact our Technical Support. product online. Go to TRENDnet’s website at: Toll free US/Canada: 1-866-845-3673 www.trendnet.com/register Regional phone numbers available at www.trendnet.com/support...


Need help?
Do you have a question about the TV-IP344PI and is the answer not in the manual?
Questions and answers