
Related Manuals for Silicon Graphics POWER CHALLENGE


Summary of Contents for Silicon Graphics POWER CHALLENGE
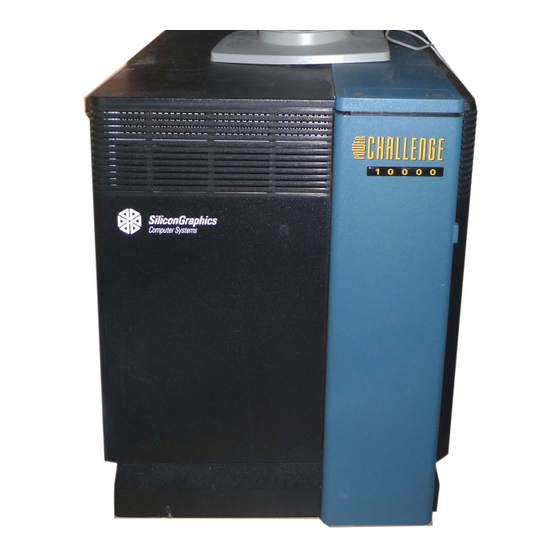
- Page 1 ™ Deskside POWER CHALLENGE ™ CHALLENGE L Owner’s Guide Document Number 007-1732-050...
- Page 2 Mountain View, CA 94039-7311. Silicon Graphics and IRIS are registered trademarks and CHALLENGE, IRIX, Extreme, POWER CHALLENGE, and Onyx are trademarks of Silicon Graphics, Inc. MIPS is a registered trademark and R4400 and R8000 are trademarks of MIPS Technologies, Inc. UNIX is a registered trademark in the United States and other countries, licensed exclusively through X/Open Company Ltd.
-
Page 3: Table Of Contents
Contents List of Figures ixix List of Tables xixi About This Guide xiii Conventions xiv Compliance Information xv Introducing the Challenge Deskside Servers 1 Features and Options 1 The Challenge Board Set 2 I/O Interfaces 5 Ibus Interface 5 Flat Cable Interface 6 VMEbus Interface 6 SCSI-2 Interface 7 Ethernet Interface 7... - Page 4 Contents System Controller 22 SCSI Drive Rack 24 Cooling System 24 Power Supplies 27 Getting Started 29 Chassis Components 29 Opening the Front Door 31 Internal Front-Loading Drives 33 SCSI Limitations 33 Powering On the Challenge Deskside System 37 Powering Off the Challenge Deskside System 39 Rebooting Your System 39 Installing Optional Peripherals 41 SCSI Configuration 41...
- Page 5 Contents Using the System Controller 80 The Power-On Process 81 If the System Hangs 82 System Controller On Functions 82 The Master CPU Selection Menu 85 The Event History Log Menu 85 Boot Status Menu 86 The CPU Activity Display 87 Recovering From a System Crash 88 Safety and Comfort 91 Human Factors Guidelines for Setting Up Your Workstation 91...
- Page 6 Contents 150 MB Tape Drive Preventive Maintenance 107 Digital Linear Tape Maintenance 109 Loading a Cleaning Cartridge 110 DLT Tape Cartridge Care and Handling 111 Removing a Jammed Tape Cartridge 112 System Controller Messages 113 Challenge IO4 PROM, Mezzanine, and Troubleshooting 121 Hardware Configuration Commands 121 Checking and Updating the Hardware Inventory 121 Displaying Information About the Current Hardware Configuration...
- Page 7 Contents VME Pins 136 Index 143...
-
Page 9: List Of Figures
List of Figures VCCI Information xvi Figure In-1 CE insignia xvi Figure In-2 Challenge Deskside System Functional Block Diagram 4 Figure 1-1 Chassis Front and Rear Views 12 Figure 2-1 Basic I/O Panel Configuration 14 Figure 2-2 Optional Visualization Console I/O Panel Graphics Figure 2-3 Connectors 16 RS-232 and RS-422 Serial Connectors 18... - Page 10 Loading a Disc Into the CD-ROM Caddy 56 Figure 4-8 Disc Loaded in Caddy 57 Figure 4-9 CD-ROM Drive Front Panel Controls 58 Figure 4-10 Connecting an External SCSI Device 59 Figure 4-11 Single-Ended 68-Pin Connector 60 Figure 4-12 68-Pin Differential SCSI Connector 62 Figure 4-13 Connecting a Serial Printer or Modem 66 Figure 4-14...
- Page 11 List of Tables Required Air Clearances for the Deskside Chassis 9 Table 1-1 Standard I/O Connectors 15 Table 2-1 Optional Visualization Console Video Connector Table 2-2 Description 17 Server System IO4 Board Connector Labelling 19 Table 2-3 Centronics Compatible Parallel Port Pin Assignments 21 Table 2-4 System Controller Boot Status Messages 38 Table 3-1...
- Page 12 P3 VME Pin Assignments 139 Table E-3 Signal Definitions 140 Table E-4...
-
Page 13: About This Guide
About This Guide This guide is designed to help you learn to use, manage, and troubleshoot your POWER CHALLENGE™ or CHALLENGE™ L deskside server. For purposes of brevity, the term Challenge is used generically to describe both models unless there is a specific reason to differentiate them. -
Page 14: Conventions
IRIS Essentials • IRIX™ Advanced Site and Server Administration Guide Conventions The Deskside POWER Challenge and Challenge L Owner’s Guide uses these conventions: • References to documents are in italics. • References to other chapters and sections within this guide are in quotation marks. -
Page 15: Compliance Information
Compliance Information Compliance Information FCC WARNING This equipment has been tested and found compliant with the limits for a Class A digital device, pursuant to Part 15 of the FCC rules. These limits are designed to provide reasonable protection against harmful interference when the equipment is operated in a commercial environment. -
Page 16: Figure In-1 Vcci Information
Caution: Your workstation has several governmental and third-party approvals, licenses, and permits. Do not modify this product in any way that is not expressly approved by Silicon Graphics, Inc. If you do, you may lose these approvals and your governmental agency authority to operate this... -
Page 17: Introducing The Challenge Deskside Servers
Features and Options Your Challenge deskside server comes with the following features: • POWER Challenge models come with an IP21 CPU board using one or two R8000™ microprocessors on each board ® • Challenge models come with an IP19 CPU board with up to four MIPS R4400™... -
Page 18: The Challenge Board Set
IO4 Although the Challenge deskside servers are similar in size and external appearance to previous Silicon Graphics deskside systems, most internal features are different in design. The internal drive rack supports up to seven half-height (or one half-height and three full-height) devices that are controlled by either one or two SCSI-2 buses. - Page 19 The MC3 system memory board can be populated with 16 MB or 64 MB SIMM modules. The MC3 has 32 SIMM sockets. Up to 2 GB of on-board memory is available for Challenge and up to 6 GB on POWER Challenge.
-
Page 20: Figure 1-1 Challenge Deskside System Functional Block Diagram
Chapter 1: Introducing the Challenge Deskside Servers System Controller Board Memory Board POWERchannel-2 Boards Interface Modules Internal Serial Remote VMEbus Ethernet SCSI Ports SCSI Boards Figure 1-1 Challenge Deskside System Functional Block Diagram... -
Page 21: I/O Interfaces
I/O Interfaces I/O Interfaces The main Challenge I/O subsystem consists of one or more IO4 boards, which plug directly into the Ebus and use optional mezzanine cards. Mezzanine cards are daughter boards that plug into IO4 boards to allow expansion and customizing. See Appendix D for additional information on mezzanine boards. -
Page 22: Flat Cable Interface
Chapter 1: Introducing the Challenge Deskside Servers Flat Cable Interface The IO4 contains two FCI interfaces that are proprietary to Silicon Graphics. FCIs are synchronous, point-to-point interfaces that allow communication between devices connected by a cable. The FCI is used to connect to the VME64 bus adapter. -
Page 23: Scsi-2 Interface
I/O Interfaces SCSI-2 Interface The IO4 contains two 16-bit SCSI-2 device controllers. Each controller can operate with a bandwidth of up to 20 MB per second and can be configured for either single-ended or differential operation. To accommodate extra SCSI channels, optional SCSI mezzanine cards contain three 16-bit SCSI-2 controllers. -
Page 24: System And Scsi Backplanes
The enclosure comes with an 11-slot cardcage and backplane that includes five VME expansion slots. Note that only two VME slots are available when a POWER Challenge system uses the optional visualization console. To the right of the cardcage is room for seven half-height (or one half-height and three full-height) SCSI devices. -
Page 25: Operating Considerations
Operating Considerations will maintain a log with the last error message(s) received before the shutdown. Chapter 2 shows the location of the System Controller’s front panel on the chassis. Figure 3-4 in Chapter 3 identifies its related control buttons. To understand and use the System Controller, see “Using the System Controller”... - Page 26 Additional specifications are provided in Appendix A, “Hardware Specifications.” If you have any questions concerning physical location or site preparation, contact your Silicon Graphics system support engineer (SSE) or other authorized support organization representative before your system is installed. Chapters 2 through 5 in this guide discuss hardware topics common to all...
-
Page 27: Touring The Chassis
Warning: To avoid electric shock and/or to prevent a fire hazard, do not disassemble the POWER Challenge or Challenge deskside system. No user-serviceable parts are located within the chassis. All internal installation and maintenance must be performed by Silicon Graphics trained personnel. -
Page 28: Figure 2-1 Chassis Front And Rear Views
Chapter 2: Touring the Chassis Figure 2-1 Chassis Front and Rear Views... -
Page 29: Challenge Deskside System I/O Panels And Connectors
Challenge Deskside System I/O Panels and Connectors Challenge Deskside System I/O Panels and Connectors The Challenge deskside chassis is a compact unit that contains an 11-slot cardcage, system boards, a power supply, and selected peripherals and cables. System connector locations are indicated in Figure 2-2, and connector descriptions are listed in Table 2-1. -
Page 30: Figure 2-2 Basic I/O Panel Configuration
Chapter 2: Touring the Chassis System Console tty_1 Parallel Network Serial Serial RS232 RS232 tty_3 tty_2 keyboard Serial RS422 peripheral peripheral Interrupts tty_4 power power 0 1 2 3 tty_4 tty_3 tty_2 tty_1 RS422 RS232 RS232 RS232 Interrupts Ethernet Powered Keyboard/ Parallel peripheral... -
Page 31: Table 2-1 Standard I/O Connectors
Challenge Deskside System I/O Panels and Connectors Table 2-1 Standard I/O Connectors Connector Type Connector Description Connector Function ® 25-Pin sub-D parallel Centronics compatible Drives parallel printer parallel port 15-Pin sub-D Ethernet 15-Pin Ethernet Standard AUI Ethernet connection 9-Pin sub-D RS-232 or RS-232 serial port tty_3 Supports either RS-232 round 8-pin DIN powered... -
Page 32: Figure 2-3 Optional Visualization Console I/O Panel Graphics Connectors
Chapter 2: Touring the Chassis System Console tty_1 Parallel Network Serial Serial RS232 RS232 tty_3 tty_2 keyboard Serial RS422 peripheral peripheral Interrupts tty_4 power power Optional Visualization Console I/O Panel Graphics Connectors Figure 2-3... -
Page 33: Serial And Din Connectors
8-pin powered connector or the 9-pin sub-D; you cannot use both simultaneously. For all POWER Challenge and Challenge systems, Silicon Graphics recommends the use of RS-232 serial cables no longer than 30 feet (9.15 meters). Longer runs introduce a greater possibility of line noise occurring. -
Page 34: Enabling Additional Serial Ports
Chapter 2: Touring the Chassis RS−232 Connector Pin 5 Clear to Send (CTS) Pin 4 Request to Send (RTS) Pin 3 Receive Data (RD) Pin 2 Transmit Data (TD) Pin 1 NOT USED Pin 9 Data Terminal Ready (DTR) Pin 8 Data Carrier Detect (DCD) Pin 7 Signal Ground (GND) Pin 6 Grounded RS−422 Connector... -
Page 35: Table 2-3 Server System Io4 Board Connector Labelling
Challenge Deskside System I/O Panels and Connectors *VECTOR: bustype=EPC module=epcserial unit=1 slot=? ioa=1 3. Remove the leading “*” and enter the appropriate slot number of the additional IO4 that has serial ports that require enabling. For example, you would change the question mark after slot= to a 4 if an additional IO4 was installed in slot 4. -
Page 36: Figure 2-5 Rs-232 Powered 8-Pin Din Connector
Note that comments in the file /etc/inittab are somewhat outdated and can be potentially confusing as they refer to nomenclature and architecture of older Silicon Graphics systems when referring to serial ports. When “I/O” board is mentioned you should infer “VME serial I/O controller,” and where “CPU board”... -
Page 37: Parallel Printer Ports
Challenge Deskside System I/O Panels and Connectors Parallel Printer Ports The parallel printer port on the system I/O panel is a 25-pin, Centronics- compatible connector. Table 2-4 shows the pin assignments and the signals that they carry. The optimum recommended length for a cable used with this parallel Note: port is 10 feet (3 meters). -
Page 38: System Controller
Chapter 2: Touring the Chassis Table 2-4 (continued) Centronics Compatible Parallel Port Pin Assignments Assignment PE (Paper Empty) SLCT (Select) AUTOFD ERROR INIT (Reset) SLCTIN 18 through 25 System Controller A narrow front door on the right side of the chassis allows you to access the System Controller front panel and install front-loading devices in the drive rack. -
Page 39: Figure 2-6 Challenge Deskside System Controller And Drives Location
System Controller Access to the Manager functions should be limited to trained system administrators and service personnel only. System controller front panel Drive access door Front− loading drives Figure 2-6 Challenge Deskside System Controller and Drives Location Always remove the key from the System Controller’s front panel Note: before closing the front door covering the LCD panel and drive bays. -
Page 40: Scsi Drive Rack
Chapter 2: Touring the Chassis SCSI Drive Rack The SCSI drive rack (shown in Figure 2-5) is a vertically oriented enclosure, with seven half-height drive bays. Each bay is defined by a sheet-metal drive tray. The SCSI drive sled slides into the tray and locks in place with its connectors pushed into the SCSI backplane. - Page 41 Cooling System The vaned rotor is in contact with the System Controller and changes speed to provide more or less airflow, depending on the temperature of incoming air (see Figure 2-7). These changes are initiated by a temperature sensor that helps the System Controller adjust the rotor fan for efficient cooling with the lowest possible noise level.
-
Page 42: Figure 2-7 Chassis Cooling
Chapter 2: Touring the Chassis Rear 9.7 inch rotary fan Deflector Deflector Front Incoming cool air Warm air Power supply Drive bays Outgoing air Figure 2-7 Chassis Cooling... -
Page 43: Power Supplies
Five VME slots are provided for the addition of third-party, special application boards. POWER Challenge systems using optional visualization console Note: graphics have only two VME slots available. ®... -
Page 44: Figure 2-8 Power Receptacle And Circuit Breaker On Rear Panel
Chapter 2: Touring the Chassis Circuit breaker AC power receptacle Figure 2-8 Power Receptacle and Circuit Breaker on Rear Panel... -
Page 45: Getting Started
Chapter 3 Getting Started This chapter describes the procedures you should follow to operate your Challenge deskside server chassis correctly. Customer maintenance is limited to the outside of the chassis, which comprises plastic panels, front loading devices (FLDs), customer-related connections, and cables attached to the I/O panel. No user-serviceable parts are found within the chassis. -
Page 46: Figure 3-1 Challenge Deskside Components
Chapter 3: Getting Started Top hat Top panel Side panel Sheet metal cover Rear panel Side panel Front door Bumper Drive door Figure 3-1 Challenge Deskside Components... -
Page 47: Opening The Front Door
Chassis Components Warning: To avoid electric shock and/or a fire hazard, do not disassemble the Challenge deskside system chassis. No user-serviceable parts are located inside the unit. Before connecting or disconnecting any terminal, peripheral, or Note: front-loading drive, be sure the system is powered off and the primary power source is disconnected. -
Page 48: Figure 3-2 Opening The Chassis Front Door
Chapter 3: Getting Started Releasing the retainer latches Opening door at 90° to chassis 90° Figure 3-2 Opening the Chassis Front Door... -
Page 49: Internal Front-Loading Drives
SCSI Limitations Internal Front-Loading Drives The Challenge deskside system comes standard with a SCSI drive rack that holds seven half-height, front-loading devices (FLDs). Each FLD must be mounted on a drive sled before it can be mounted in the rack. The drive sled adapts the drive’s power and signal connectors to the connectors on the SCSI drive backplane. - Page 50 Chapter 3: Getting Started To operate external SCSI devices, you must order your system’s IO4 with extra mezzanine SCSI channel daughter boards. These are the mezzanine options mentioned in Chapter 1; they connect to the I/O panel and then to external devices.
- Page 51 SCSI Limitations Challenge L systems enable the Ethernet only on the master (first) IO4 by default. To enable an additional Ethernet port on an optional installed IO4 board you can use the following steps: Edit the file /var/sysgen/system/irix.sm. 2. Add a vector line that looks similar to the following: VECTOR: bustype=EPC module=epcserial unit=1 slot=4 This vector line configures the Ethernet interface on the IO4 in slot 4 as et1.
-
Page 52: Figure 3-3 Connecting An Ethernet Cable
Chapter 3: Getting Started Slide−latch 15−pin Ethernet connector Figure 3-3 Connecting an Ethernet Cable... -
Page 53: Powering On The Challenge Deskside System
Powering On the Challenge Deskside System Powering On the Challenge Deskside System Use the following procedure to power on your Challenge deskside chassis: 1. Make sure the power switches on all of the equipment are turned off. 2. Plug the power cord into each component. Make sure to connect the cords to three-pronged, grounded outlets only. -
Page 54: Table 3-1 System Controller Boot Status Messages
Chapter 3: Getting Started If you pressed < > within five seconds after the completion of the power-on diagnostic, you should see a menu similar to the following: System Maintenance Menu 1) Start System 2) Install System Software 3) Run Diagnostics 4) Recover System 5) Enter Command Monitor Option ? -
Page 55: Powering Off The Challenge Deskside System
Powering Off the Challenge Deskside System Powering Off the Challenge Deskside System The server should be completely powered down only for relocation, routine maintenance, or repair. Before beginning this procedure, log out and shut down the software using the software instructions that follow: 1. -
Page 56: Figure 3-4 Key Switch Positions On The System Controller Front Panel
Chapter 3: Getting Started Fault LED Power−on LED System Controller LCD Mgr position On position Off position Key switch Menu Scroll Scroll Execute down Figure 3-4 Key Switch Positions on the System Controller Front Panel... -
Page 57: Installing Optional Peripherals
No internal parts or devices should be added to the system by the end user. Doing so may void UL, CSA, and TUV safety agency approvals. Check with your service provider or Silicon Graphics before attempting any internal alteration to the system. - Page 58 Chapter 4: Installing Optional Peripherals It is important to know the exact type of drive and the protocols it uses before you configure and connect it to your system. If you are unsure, contact your sales representative or service provider before the installation; otherwise, you may degrade SCSI performance or crash your system.
-
Page 59: Installing And Configuring Additional Flds
Installing and Configuring Additional FLDs The service person must follow the guidelines in Table 4-1 to make a SCSI drive work in a deskside system. Table 4-1 Overview of Drive Installation Guidelines Drive Drive Sled Board SCSI Rack IO4 Configuration Transfer Rate Configuration Channel Backplane... - Page 60 Chapter 4: Installing Optional Peripherals Each internally installed FLD must mount on a sled that uses a SCSI channel adapter board. To determine the sled board settings, do the following: • Be sure the sled-to-drive connector cable is plugged into the correct SCSI channel: single-ended(A) or differential (B).
- Page 61 Installing and Configuring Additional FLDs Single−ended, 50−pin SCSI drive on channel A No jumpers set; reserved for future use. Channel A = single−ended Channel B = differential Differential, 68−pin SCSI drive on channel B No jumpers set; reserved for future use. Power connector Channel A =...
- Page 62 Chapter 4: Installing Optional Peripherals Both channels on the SCSI backplane set for single−ended No jumpers set; reserved for future use. Both channels= single−ended Both channels on the SCSI backplane set for differential No jumpers set; reserved for future use. Power connector Both channels=...
-
Page 63: Installing A Half-Height Fld
Installing and Configuring Additional FLDs Installing a Half-Height FLD The drive must be properly mounted on a drive sled and configured for a channel and operating protocol (single-ended or differential). See Figure 4-3. Follow these instructions to install a half-height front-loading device: If your drive did not come already mounted on a sled, place it on top, as shown in Figure 4-3. -
Page 64: Figure 4-3 Installing A Half-Height Scsi Drive On A Sled And Loading
Chapter 4: Installing Optional Peripherals Drive EMI shield Drive shelf Drive sled Figure 4-3 Installing a Half-Height SCSI Drive on a Sled and Loading It... -
Page 65: Removing An Fld
Installing and Configuring Additional FLDs Removing an FLD Follow these instructions to remove a front loading device: 1. Power off the system, as described in Chapter 3. 2. Open the drive door. 3. Slide the locking lever on the drive sled all the way to the left and gently pull the drive and sled assembly out. -
Page 66: Figure 4-4 Drive Removal Example
Chapter 4: Installing Optional Peripherals Slide drive lever left to unlock sled Drive lever in locked position Figure 4-4 Drive Removal Example... -
Page 67: Installing A Full-Height Fld
Installing and Configuring Additional FLDs Installing a Full-Height FLD Each drive must be properly mounted on a drive sled and configured for a particular channel and SCSI transmission protocol (single-ended or differential). Refer to Figure 4-3 for the mounting position of the drive on a sled. -
Page 68: Figure 4-5 Pulling Off The Side Panel And Removing The Retaining
Chapter 4: Installing Optional Peripherals Drive shelf retaining screw Figure 4-5 Pulling Off the Side Panel and Removing the Retaining Screw Retain the drive shelf if there is a possibility that you will need to Note: install half-height drives at a later date. -
Page 69: Figure 4-6 Installing A Full-Height Front Loading Device
Installing and Configuring Additional FLDs Drive shelf retaining screw Drive shelf above chosen drive bay Sled lever in locked position Figure 4-6 Installing a Full-Height Front Loading Device... - Page 70 Chapter 4: Installing Optional Peripherals Figure 4-7 Deskside Installation Positions for Optional DLT Drives...
-
Page 71: Installing And Using An Optional Cd-Rom
8. See the IRIS Software Installation Guide for complete instructions on loading software. Load IRIX 5.3 or later (6.0 or later for POWER Challenge) from the initial prompt. Select 2, as shown in the following example menu, to load the operating system from a CD-ROM FLD.:... -
Page 72: Figure 4-8 Loading A Disc Into The Cd-Rom Caddy
Chapter 4: Installing Optional Peripherals If a CD-ROM or Local Tape is attached, a number will be listed next to them instead of an ’X’.: 10. A series of dots appears as the operating system loads. See Appendix B for information on proper maintenance and use of your CD-ROM drive and discs. -
Page 73: Figure 4-9 Disc Loaded In Caddy
Installing and Using an Optional CD-ROM Figure 4-9 Disc Loaded in Caddy Do not insert the disc into the drive without a caddy. Note:... -
Page 74: Installing External Scsi Devices
Chapter 4: Installing Optional Peripherals Push down to open Emergency eject hole Drive door Push to eject Power LED Stereo Volume cartridge headphone dial Drive−active jack (busy) LED Figure 4-10 CD-ROM Drive Front Panel Controls Installing External SCSI Devices External SCSI devices connect to the system using an optional 68-pin differential (DF SCSI) or single-ended (SE SCSI) connector that must first be installed on the I/O panel. -
Page 75: Figure 4-11 Connecting An External Scsi Device
Installing External SCSI Devices Figure 4-11 Connecting an External SCSI Device Note: A differential connector is labeled DF SCSI and a singled-ended connector is labeled SE SCSI. -
Page 76: Figure 4-12 Single-Ended 68-Pin Connector
Chapter 4: Installing Optional Peripherals Figure 4-12 Single-Ended 68-Pin Connector The hyphen preceding a signal name indicates that the signal is low. Note that 8-bit devices that connect to the P-cable leave these signals open: -DB(8), -DB(9), -DB(10), -DB(11), -DB(12), -DB(13), -DB(14), -DB(15), -DB(P1). All other signals are connected as shown in Table 4-2. - Page 77 Installing External SCSI Devices Table 4-2 (continued) 68-Pin Single-Ended, High-Density SCSI Pinouts Signal Name Pin Number Pin Number Signal Name Ground -DB(6) Ground -DB(7) Ground -DB(P) Ground Ground Ground Ground TERMPWR TERMPWR TERMPWR TERMPWR Reserved Reserved Ground Ground Ground -ATN Ground Ground Ground...
-
Page 78: Figure 4-13 68-Pin Differential Scsi Connector
Chapter 4: Installing Optional Peripherals Figure 4-13 68-Pin Differential SCSI Connector The hyphen preceding a signal name indicates that the signal is low. Note that 8-bit devices that connect to the P-cable leave these signals open: -DB(12), -DB(13), -DB(14), -DB(15), -DB(P1), -DB(8), -DB(9), -DB(10), -DB(11), +DB(12), +DB(13), +DB(14), +DB(15), +DB(P1), +DB(8), +DB(9), +DB(10), +DB(11). - Page 79 Installing External SCSI Devices Table 4-3 (continued) 68-Pin Differential, High-Density SCSI Pinouts Signal Name Connector Cable Signal Name Contact Contact Number Number +DB(3) -DB(3) +DB(4) -DB(4) +DB(5) -DB(5) +DB(6) -DB(6) +DB(7) -DB(7) +DB(P) -DB(P) DIFFSENS Ground TERMPWR TERMPWR TERMPWR TERMPWR Reserved Reserved +ATN...
-
Page 80: Connecting A Serial Printer
Chapter 4: Installing Optional Peripherals Table 4-3 (continued) 68-Pin Differential, High-Density SCSI Pinouts Signal Name Connector Cable Signal Name Contact Contact Number Number +DB(10) -DB(10) +DB(11) -DB(11) Connecting a Serial Printer A serial printer can be connected to your system by connecting a printer or null modem cable to one of the 9-pin RS-232 serial connectors on the I/O panel. - Page 81 Connecting a Serial Printer 5. Attach the printer power cord and turn on the printer.
-
Page 82: Figure 4-14 Connecting A Serial Printer Or Modem
Chapter 4: Installing Optional Peripherals 9−Pin RS−232 printer/modem connectors Connecting a Serial Printer or Modem Figure 4-14... - Page 83 Connecting a Serial Printer Your serial printer must work in concert with the LP spooling system that your Challenge deskside server uses. The LP spooling system allows you to add or remove printers, and to change interface programs, devices, and the system default printer.
-
Page 84: Connecting An Ascii Terminal
Chapter 4: Installing Optional Peripherals ® To add a PostScript serial printer to port 2, become the superuser, and enter the following: # mkPS PostScript ttyd2 # /usr/lib/lpadmin -dPostScript Refer to the IRIX Advanced Site and Server Administration Guide for more information about configuring your printer. - Page 85 Connecting an ASCII Terminal To attach an ASCII terminal, complete the following steps: 1. Locate the RS-232 connector designated for the console and labeled tty_1. 2. Attach one end of the console cable to the RS-232 connector and route it out the back of the unit.
-
Page 86: Helpful Serial Port Commands
Chapter 4: Installing Optional Peripherals 5. Add the following line to your ~/.login file. This sets the terminal type, syntax, and erase/kill parameters automatically when you log in: % eval ‘tset -s -Q’ 6. Check terminal connection and function using the following: % cat /etc/group >... -
Page 87: Connecting A Modem
A modem can be connected to your system by connecting a modem cable to one of the 9-pin serial connectors on the I/O panel. The pin assignments are listed in Table 4-6. A 9-pin to 25-pin cable may be required. Silicon Graphics supports Hayes 2400 and Telebit modems. Edit the /etc/uucp/fix-hayes or /etc/uucp/fix-telebit files for information on specific models supported (see... -
Page 88: Connecting A Parallel Printer
Chapter 4: Installing Optional Peripherals Once you are sure that your cable is correctly configured, use the following general procedures to connect a modem to your system: 1. Make sure that the power switch on the modem is turned off. 2. - Page 89 Connecting a Parallel Printer 3. Connect the other end to the parallel printer. Be sure you have confirmed pin and signal compatibility before making the connection. (See Table 4-7.) Caution: Before plugging the printer into either a 110 VAC or a 220 VAC outlet, be sure that the electrical rating on the label is in either the 100–120 VAC or the 200–240 VAC range, whichever applies.
-
Page 90: Table 4-7 Centronics Compatible Parallel Port Pin Assignments
Chapter 4: Installing Optional Peripherals Refer to the IRIX Advanced Site and Server Administration Guide for additional information about configuring your printer. The parallel printer port on the system I/O panel is a 25-pin, Centronics compatible connector. Table 4-7 shows the pin assignments and signals as they relate to a 36-pin Centronics connector. -
Page 91: Figure 4-15 Connecting A Parallel Printer Cable
Connecting a Parallel Printer Parallel printer connector Figure 4-15 Connecting a Parallel Printer Cable... - Page 92 Chapter 4: Installing Optional Peripherals...
-
Page 93: Having Trouble
Chapter 5 Having Trouble? This chapter contains hardware-specific information that can be helpful if you are having trouble with your Power Challenge or Challenge L deskside system. Maintaining Your Hardware and Software This section gives you some basic guidelines to help keep your hardware and the software that runs on it in good working order. -
Page 94: Software Do's And Don'ts
Chapter 5: Having Trouble? • Ensure that all cables are plugged in completely. • Ensure that the system has power surge protection. Software Do’s and Don’ts When your system is up and running, follow these guidelines: • Do not turn off power to a system that is currently started up and running software. -
Page 95: Physical Inspection Checklist
Physical Inspection Checklist If the behavior of your system is operational, marginal, or faulty, first do a physical inspection using the checklist below. If all of the connections seem solid, go on to the section “Using the System Controller” and try to isolate the problem. -
Page 96: Using The System Controller
Chapter 5: Having Trouble? Using the System Controller The System Controller has three basic operating modes: • It acts as a control conduit when directed by an operator to power off or boot up the system. It actively displays a running account of the boot process and flags any errors encountered. -
Page 97: The Power-On Process
Using the System Controller the operator from repeatedly applying power when an overvoltage condition exists. The Power-On Process You can monitor the boot process when you power on the system by watching the System Controller. When you turn the key switch to the On (middle) position on the System Controller front panel, it enables voltage to flow to the system backplane. -
Page 98: If The System Hangs
Chapter 5: Having Trouble? If your CPU has only two microprocessors on board, you should see: PROCESSOR STATUS If you receive a processor status message followed by , you have a CPU B+DD with two of its microprocessors disabled. Contact your system administrator to determine why this was done. - Page 99 System Controller On Functions When the System Controller detects a fault condition, it turns off power to the system boards and peripherals. The 48 VDC supplied to the system backplane stays on unless the shutdown was caused by an over-limit temperature condition or other situation that would be harmful to the system.
-
Page 100: Figure 5-1 System Controller Front Panel Components
Chapter 5: Having Trouble? This list describes the buttons in order, from left to right: • Press the Menu button to place the display in the menu mode. • Press the Scroll up button to move up one message in the menu. •... -
Page 101: The Master Cpu Selection Menu
System Controller On Functions Four information options are available to the user when the key is in the On (middle) position: • the Master CPU Selection menu • the Event History Log menu • the Boot Status menu • the CPU Activity Display The information displays are further described in the following sections, table, and figure. -
Page 102: Boot Status Menu
Chapter 5: Having Trouble? take place. An internal System Controller error never causes the Challenge deskside system to shut down. Whenever possible, the System Controller alerts the master CPU that a system-threatening error situation exists and a shutdown is about to happen. -
Page 103: The Cpu Activity Display
System Controller On Functions Table 5-1 (continued) System Controller Master CPU Status Messages Master CPU Status Message Context and Meaning of Message BOOT ARBITRATION INCOMPLETE The system was unable to assign a FAULT NO MASTER system master CPU. BOOT ARBITRATION ABORTED An operator pushed one of the front panel buttons while the System Controller was searching for the system... -
Page 104: Recovering From A System Crash
Chapter 5: Having Trouble? Challenge CPU Board Microprocessor Activity Graph (Histogram) Figure 5-2 Recovering From a System Crash To minimize data loss from a system crash, back up your system daily and verify the backups. Often a graceful recovery from a crash depends upon good backups. - Page 105 Recovering From a System Crash on to the next method, and so on. Here is an overview of the different crash recovery methods: • rebooting the system Rebooting usually fixes problems associated with a simple system crash. • restoring system software If you do not find a simple hardware connection problem and you cannot reboot the system, a system file might be damaged or missing.
-
Page 107: Safety And Comfort
Chapter 6 Safety and Comfort This chapter gives you some important information on setting up the workstations that are clients of your Challenge deskside server. The information is intended to help set up a workstation for maximum safety and comfort. Human Factors Guidelines for Setting Up Your Workstation You can increase the comfort and safety of your work environment and decrease your chances of cumulative trauma disorders by following the... -
Page 108: Ansi Standard For Vdt Workstations
Chapter 6: Safety and Comfort ANSI Standard for VDT Workstations Adjustment parameters for workstations are defined in Figure 6-1. Guidelines are shown for small adults (standing height of 150 cm or 59 in) and large adults (standing height of 185 cm or 73 in). Midpoints are also interpolated for persons of more average height. -
Page 109: Cad Operator Preferences
Human Factors Guidelines for Setting Up Your Workstation Local VDT guidelines issued by country, state, or municipality may apply and supercede the guidelines in Table 6-1. Table 6-1 ANSI/HFS 100–1988 Guidelines for VDT Workplace Adjustment Adjustment Small Adult Midpoint Large Adult cm (in.) cm (in.) cm (in.) -
Page 110: Tips For Setting Up And Using Your Workstation
Chapter 6: Safety and Comfort Tips for Setting Up and Using Your Workstation The following tips may be useful for setting up an ergonomic work environment that is safe, comfortable, and productive. Although you may be able to perform this procedure yourself, it is useful to work with a friend to achieve the best fit. -
Page 111: Adjusting Your Chair, Work Surface, And Monitor
Tips for Setting Up and Using Your Workstation Adjusting Your Chair, Work Surface, and Monitor 1. Adjust your chair first, from a seated position if possible. Your lower leg and thigh should form approximately a 90-degree angle at the knee, and your feet should rest flat on the floor. -
Page 112: Electrostatic Discharge
30 feet away, stretch, and move around. Electrostatic Discharge Silicon Graphics designs and tests its products to be resistant to effects of electrostatic discharge (ESD). ESD is a source of electromagnetic interference and can cause problems ranging from data errors and lockups to permanent component damage. -
Page 113: Hardware Specifications
Appendix A Hardware Specifications The physical, electrical, environmental, and power specifications for the Challenge deskside server chassis are listed in Table A-1. Table A-1 Challenge Deskside Server Specifications Parameter Characteristics Height 26 inches (65 cm) Width 21 inches (54 cm) Depth 29 inches (74 cm) Weight... - Page 114 Appendix A: Hardware Specifications Table A-1 (continued) Challenge Deskside Server Specifications Parameter Characteristics AC Receptacle Type Nema 5-20P for 110 VAC or Nema 6-20P for 220-240 VAC; IEC 30916A/220V 2P/3W International Operating Temperature to 35 C at sea level Nonoperating Temperature –15 to +65 C at sea level...
-
Page 115: Maintaining Drives
Appendix B Maintaining Drives This chapter describes how to use and maintain removable media drives. It includes descriptions of front panel lights and switches and instructions on cleaning and maintenance. Always use digital data grade tapes to store or back up information Note: from your system. -
Page 116: Archive Python 4320 Nt (4 Mm Dat Drive)
Appendix B: Maintaining Drives Archive Python 4320 NT (4 mm DAT Drive) The Archive Python 4320 NT provides 1.3 GB of storage on a 60-meter DDS DAT cassette, and 2.0 GB of storage on a 90-meter DDS DAT cassette. The 4320 NT drive complies with the American National Standards Institute (ANSI) Digital Data Storage (DDS) format and uses a small DAT with 4 mm tape. -
Page 117: Cleaning The 4 Mm Dat Drive
Archive Python 4320 NT (4 mm DAT Drive) Cleaning the 4 mm DAT Drive To clean a 4 mm DAT drive: 1. Insert the cleaning kit into the drive. The drive automatically detects that the cassette is a cleaning cassette, then loads and runs the cassette. After about 10 to 15 seconds, the cleaning is complete and the drive ejects the cassette. -
Page 118: Care And Cleaning Of The Exabyte 8 Mm Tape Drive
Appendix B: Maintaining Drives Care and Cleaning of the Exabyte 8 mm Tape Drive ® Cleaning the tape drive requires use of an Exabyte 8 mm cleaning cartridge, or one approved by Exabyte. Caution: Use of cleaning materials not approved by Exabyte may void the tape drive’s warranty. -
Page 119: Removing A Jammed 8 Mm Tape Cartridge
Care and Cleaning of the Exabyte 8 mm Tape Drive Table B-2 8 mm Tape Drive Front Panel Status Indicators Yellow LED Green LED Meaning and Corrective Action Power-on initialization—approximately 60 seconds. Passed power-on self tests. Tape is loaded, drive is ready. Off or On Slow Flashing The drive is reading or writing a tape (normal... -
Page 120: Cd-Rom Care And Maintenance
Appendix B: Maintaining Drives If neither of these two steps ejects the jammed cassette, contact your service provider. CD-ROM Care and Maintenance CD-ROM drives are most vulnerable to damage when they are unpacked and not yet mounted in a computer system. When handling a drive after unpacking, there are two major types of damage to be aware of: •... -
Page 121: Cd-Rom Environmental Considerations
CD-ROM Care and Maintenance Figure B-1 Handling a Compact Disc CD-ROM Environmental Considerations Bringing a disc from a cold to a warm environment may cause moisture to form on its surface. Wipe any condensed moisture off with a soft lint-free cloth (not a paper towel) before use. -
Page 122: Cd-Rom Front Panel Operational Features
Appendix B: Maintaining Drives CD-ROM Front Panel Operational Features A number of operational items are located on the front panel of the CD-ROM drive: • The headphone jack receptacle accepts a 3.5-mm diameter stereo plug. Monitoring of audio signals is available. •... -
Page 123: 150 Mb Tape Drive Preventive Maintenance
150 MB Tape Drive Preventive Maintenance Drive status Seconds elapsed On Off LED off − drive ready Caddy load/spin up/standby LED off − disc auto−ejects Unacceptable disc media Cleaning of disc or drive needed Disc is playing an audio track Disc access and transfer = LED on = LED off... - Page 124 Appendix B: Maintaining Drives Clean the tape head by following these steps: 1. Remove the tape cartridge from the tape drive. 2. Push the head loading lever to the right, as if you had installed a tape. This engages the tape head, allowing you to reach it. 3.
-
Page 125: Digital Linear Tape Maintenance
Digital Linear Tape Maintenance Cleaning the Tape Head Figure B-3 Digital Linear Tape Maintenance The Digital Linear Tape (DLT) drive is a high-performance, high-capacity, 1/2-inch streaming cartridge tape product designed for use on midrange and high-end computing systems. Using data compression and compaction, the DLT drive features a potential formatted capacity of 10-20 GB... -
Page 126: Loading A Cleaning Cartridge
Appendix B: Maintaining Drives (depending on data compression capabilities) and a sustained user data transfer rate of up to 2.5 MB per second. To clean a drive, use only an approved cleaning cartridge (see Figure B-4). You can use a DLT cleaning cartridge approximately 20 times before you must replace it. -
Page 127: Dlt Tape Cartridge Care And Handling
Digital Linear Tape Maintenance Do not attempt to remove the tape from the drive while it is going Note: through the cleaning cycle. DLT Tape Cartridge Care and Handling To help your DLT cartridges last as long as possible, store them in a clean environment. -
Page 128: Removing A Jammed Tape Cartridge
Appendix B: Maintaining Drives Removing a Jammed Tape Cartridge The following instructions are intended to help you if a tape cartridge becomes jammed in the DLT and will not unload. In the case of a stacker that fails to unload, note that a full magazine precludes the tape from unloading. Before calling your service provider, you should try the following: 1. -
Page 129: System Controller Messages
Appendix C System Controller Messages Tables C-1 through C-3 list messages that can appear in the System Controller’s event history log. Table C-1 System Events - Immediate Power-off Error Message Failure Area/Possible Solution POKA FAIL The System Controller detects a power supply fault and initiates the power-off sequence (except 48V). - Page 130 Appendix C: System Controller Messages Table C-1 (continued) System Events - Immediate Power-off Error Message Failure Area/Possible Solution 12VDC OVER Same as above. VOLTAGE -5.2VDC OVER Same as above. VOLTAGE -12VDC OVER Same as above. VOLTAGE 48VDC OVER Same as above. VOLTAGE 1.5VDC UNDER The System Controller detects a power supply fault and...
-
Page 131: Table C-2 System Events - Delayed Power-Off
Table C-1 (continued) System Events - Immediate Power-off Error Message Failure Area/Possible Solution -5.2VDC HIGH Same as above. WARNING -5.2VDC LOW Same as above. WARNING -12VDC HIGH Same as above. WARNING -12VDC LOW Same as above. WARNING 48VDC HIGH Same as above. WARNING 48 VDC LOW Same as above. -
Page 132: Table C-3 System Events - Informative
Appendix C: System Controller Messages Table C-2 (continued) System Events - Delayed Power-off Error Message Failure Area/Possible Solution BLOWER A RPM FAIL The System Controller detects a fan not at speed. An alarm is sent to the CPU, five seconds later the System Controller initiates the power-off sequence (rackmount systems only). -
Page 133: Table C-4 Internal System Controller Error Messages
Table C-3 (continued) System Events - Informative Error Message Error Meaning BOOT ERROR System Controller bootmaster arbitration could not find any host CPU responding on the serial bus. The System Controller is not able to communication with the host CPU. The host CPU may not be running or may continue to boot normally. - Page 134 Appendix C: System Controller Messages Table C-4 (continued) Internal System Controller Error Messages Error Message Error Meaning COP FAILURE The Computer Operating Properly (COP) timer exceeded time limits. The System Controller firmware must write to a COP timer port before it times out.
- Page 135 Table C-4 (continued) Internal System Controller Error Messages Error Message Error Meaning STACK FAULT PID 0–6 One of the seven stack areas used by a System Controller process overflowed its assigned boundaries. TEMP SENSOR FAILURE The System Controller detected an invalid measurement from the temperature sensor.
-
Page 137: Challenge Io4 Prom, Mezzanine, And Troubleshooting
Appendix D Challenge IO4 PROM, Mezzanine, and Troubleshooting This appendix supplies information about the Challenge IO4 PROM (Programmable Read Only Memory) Command Monitor. This information is separated into hardware configuration commands, environment variables, and known bugs. Basic mezzanine board configurations on the IO4 and troubleshooting tips are also covered. -
Page 138: Displaying Information About The Current Hardware Configuration
Appendix D: Challenge IO4 PROM, Mezzanine, and Troubleshooting PROM to wait for operator intervention when the inventory checker notices a problem. You can configure the system so that it continues to boot in spite of nonterminal failures by setting the nonstop environment variable (see the “Environment Variables”... -
Page 139: Pod (Power On Diagnostics) Mode
Environment Variables POD (Power On Diagnostics) Mode In the unlikely event of an extreme hardware failure, the system may drop down into a low-level diagnostic environment known as POD mode. This mode is used as an aid to system diagnosis and is not intended for use by customers. -
Page 140: Starting The System Automatically
Appendix D: Challenge IO4 PROM, Mezzanine, and Troubleshooting The root variable tells IRIX the name of the device that holds the root filesystem. Because this variable is used by IRIX, rather than by the PROM, its format is different from the “SystemPartition” and “OSLoadPartition” variables. -
Page 141: Allowing The System To Boot In Spite Of Nonterminal Hardware Failures
Known Bugs Allowing the System to Boot in Spite of Nonterminal Hardware Failures By default, the PROM will stop and generate a warning message if it finds that a component has failed. However, the failure of a single processor or bank of memory may not be serious enough to prevent the system from coming up. -
Page 142: Disk Formatting Fails Using Standalone Fx
Appendix D: Challenge IO4 PROM, Mezzanine, and Troubleshooting Disk Formatting Fails Using Standalone fx Systems running IRIX release 5.2 or earlier have a PROM problem that causes failure to format in the standalone version of fx. The PROM’s SCSI driver improperly calculates the duration of timeout requests and the PROM times out prematurely. -
Page 143: Mezzanine Options Available With One Io4
VME bus: adapter 0 mapped to adapter 3 VME bus: adapter 3 Integral IO4 parallel port: Ebus slot 5 The GCAM board is used only on POWER Challenge systems that Note: have the visualization console (Extreme) option installed. Each system is slightly different, but all systems have at least one IO4 installed. -
Page 144: Mezzanine Options Available With Two Io4S
You can always have one or two short optional mezzanine boards installed on the primary IO4. This is determined by whether you have the visualization console option installed in your POWER Challenge system. When you order a second optional IO4 you can choose the option of having one of the following mezzanine configurations installed:... -
Page 145: Mezzanine Options Available With Three Io4S
Mezzanine Board Configurations Standard Configuration Extreme Graphics Option IO4 board IO4 board VCAM installed Optional GCAM installed Optional short Mezz board Optional short Mezz boards First Additional IO4 Board Configuration Options Optional long Optional short Optional long and Optional short and Mezz boards Mezz boards short Mezz boards... -
Page 146: Figure D-3 Optional Second And Third Io4 Configuration
Appendix D: Challenge IO4 PROM, Mezzanine, and Troubleshooting Standard Configuration Extreme Graphics Option IO4 board IO4 board VCAM installed Optional GCAM installed Optional short Mezz board Optional short Mezz boards First Additional IO4 Board Configuration Options Optional long Optional short Optional long and Optional short and Mezz boards... -
Page 147: Io4 Troubleshooting
IO4 Troubleshooting IO4 Troubleshooting There are a number of troubleshooting steps you can use to identify if the IO4 is the cause of system level faults. Always check for loose connections or damaged cables when trouble with IO4 peripherals occurs. Never plug the Ethernet connector in while the system is powered on. -
Page 149: Challenge Vmebus Implementation
Warning: All board installations or removals should be performed only by Silicon Graphics trained or certified personnel. Unauthorized access to the cardcage area could result in system damage or even bodily harm, and could void warranty or safety agency approvals for the system. -
Page 150: Vme Board Dimensions
Appendix E: Challenge VMEbus Implementation VME Board Dimensions The Challenge board slots have a 9U (vertical) form factor and measure 15.75 inches (400 mm) horizontally. The board edges must also be less than or equal to 0.062 inches (1.57 mm). If the board is thicker, the edge of the board must be milled to fit in the card guide. -
Page 151: Special Vme Considerations
Special VME Considerations allotment would already be saturated. In addition, it is also possible to use a single 150-watt VMEbus board, providing the remaining VME slots are also not used. Special VME Considerations Generally, there are VME boards or devices that should not be integrated into the Challenge system. -
Page 152: Table E-1 P1 Vme Pin Assignments
Appendix E: Challenge VMEbus Implementation Note that in some VME enclosures, these plates supply the required additional EMI shielding. However, the Challenge chassis already provides sufficient shielding for boards inside the chassis, so these plates are not necessary. VME Pins Table E-1 through Table E-3 list the pin assignments of the VME P1, P2, and P3 connectors. - Page 153 VME Pins Table E-1 (continued) P1 VME Pin Assignments Row A Row B Row C BG3OUT* BERR* BR0* SYSRESET* LWORD* WRITE* BR2* BR3* DTACK* IACK* IACKIN* SERCLK IACKOUT* SERDAT* IRQ7* IRQ6* IRQ5* IRQ4* IRQ3* IRQ2* IRQ1* -12V +5VSTDBY +12V...
-
Page 154: Table E-2 P2 Vme Pin Assignments
Appendix E: Challenge VMEbus Implementation Table E-2 P2 VME Pin Assignments Row A Row B Row C (Note: This row is (Note: This row is user-defined.) user-defined). RESERVED... - Page 155 VME Pins Table E-2 (continued) P2 VME Pin Assignments Row A Row B Row C (Note: This row is (Note: This row is user-defined.) user-defined). Table E-3 P3 VME Pin Assignments Row A Row B Row C 1 through 25 Not connected 26, 27 +12V...
- Page 156 Appendix E: Challenge VMEbus Implementation Table E-4 Signal Definitions Signal Name Definition D00 through Data lines. These lines are tri-state and are not defined until the data strobes (DS0* and DS1*) are asserted by the MASTER. A00 through Address lines. These lines are tri-state and are not defined until the address strobe (AS*) is asserted by the MASTER.
- Page 157 VME Pins Table E-4 (continued) Signal Definitions Signal Name Definition DTACK Data transfer acknowledge. Asserted by SLAVE to indicate a successful bus transfer. WRITE Write not or read. LWORD Indicates long word transfer (D32). SYSCLK 16 MHz system clock. (Does not control bus timing.) SERCLK Serial data clock.
- Page 159 Index Numbers 1/4-inch tape drive backups for the system preventive maintenance behavior 4-mm DAT drive. See DAT drive. faulty operation of the system 64bit RISC microprocessors in system boot process monitored from the System Controller 8 mm tape drive cleaning Boot Status menu front panel lights removing jammed cassettes...
- Page 160 Index CPU activity graph external appearance of the chassis external SCSI connector data compression DAT drive fans capacities fault LED cleaning on System Controller data transfer rate FCI interfaces front panel lights front door loading and unloading cassettes opening of removing jammed cassettes front loading device daughter boards.
- Page 161 Index Ibus noise interfaces on the SCSI bus information options NVRAM on the System Controller NVRAM log file installing devices front loading SCSI device list of features Off-line switcher (OLS) IO4 mezzanine daughter boards opening the front door I/O panel operating protocols accessing of drives...
- Page 162 Index serial ports commands and configuration POWERpath-2 system bus serial printer power receptacle connection power specifications LP spooling setup example shut down system software R8000 microprocessor shutdown procedure ranges of adjustment in the work environment sled board settings for SCSI devices reboot command software...
- Page 163 Index System events Terminal connection of optional ASCII device unload button, on tape drive user-serviceable parts using the keyboard VDT Workstation Adjustment board power budget slots VME expansion slots VME Interface description of work environment comfort and safety of...
Need help?
Do you have a question about the POWER CHALLENGE and is the answer not in the manual?
Questions and answers