Table of Contents
Advertisement
Quick Links
Advertisement
Table of Contents

Related Manuals for Silicon Graphics Rackable C2108-TY10


Summary of Contents for Silicon Graphics Rackable C2108-TY10
- Page 1 ® Rackable™ C2108-TY10 System User’s Guide 007-5688-003...
- Page 2 Contractor/manufacturer is SGI, 1140 E. Arques Avenue, Sunnyvale, CA 94085. TRADEMARKS AND ATTRIBUTIONS Silicon Graphics, SGI, the SGI logo, and Rackable are trademarks or registered trademarks of Silicon Graphics International Corp. or its subsidiaries in the United States and/or other countries worldwide.
-
Page 3: Record Of Revision
Record of Revision Version Description September 2010 Original printing. August 2011 Miscellaneous corrections. 007-5688-003... -
Page 5: Table Of Contents
Contents Record of Revision . . iii About This Guide . .xvii Introduction Server Board Features . Processors . Memory . Serial ATA . PCI Expansion Slots UIO . Onboard Controllers/Ports . ATI Graphics Controller Other Features . Server Chassis Features . System Power . - Page 6 Contents Ambient Operating Temperature Reduced Airflow Mechanical Loading . Circuit Overloading . . 10 Reliable Ground . . 10 Install the System into a Rack . 10 Separate the Sections of the Rack Rails . . 10 Outer Rack Rails. .
- Page 7 Memory DIMM Layout . 36 Memory DIMM Rules . . 37 Mixing Processors and DIMM Speeds . . 39 Hard Disk Drives (SGI Rackable C2108-TY10 Chassis) . . 45 PCI Card Slotting . . 46 Installing Selected PCI cards . . 47 Power Supply .
- Page 8 Contents Drive Bay Installation/Removal . . 53 Accessing the Drive Bays . . 53 SATA Drive Installation. . 54 Mounting a SATA Drive in a Drive Carrier . 54 Installing/Removing Hot-swap SATA Drives . . 54 Hard Drive Backplane . .
- Page 9 Contents Restore on AC Power Loss . 65 Watch Dog Timer . . 65 Processor and Clock Options . . 65 Ratio CMOS Setting . . 65 C1E Support . 65 Hardware Prefetcher (Available when supported by the CPU) . 66 Adjacent Cache Line Prefetch (Available when supported by the CPU) .
- Page 10 Contents I/O Port Decode. . 72 RAS Sticky Error Handling. . 72 VGA 16-Bit Decode . 72 IDE and SATA Configuration . . 73 SATA#1 Configuration . . 73 Primary IDE Settings . . 73 Hot Plug. . 76 IDE Detect Timeout (sec) . .
- Page 11 Contents Set LAN Configuration . . 84 IP Address Configuration . . 84 Parameter Selector . . 84 IP Address . . 84 Current IP Address in BMC . 84 MAC Address Configuration . . 85 Parameter Selector . . 85 Mac Address .
- Page 12 Contents Load Optimal Defaults . . 93 Load Fail-Safe Defaults . . 93 BIOS Error Codes . . 95 System Specifications . . 97 Processors . 97 Chipset . 97 BIOS . . 97 Memory Capacity . 97 SATA Controller . .
- Page 13 Memory DIMM Locations . . 36 Figure 5-8 Memory Block Diagram . . 37 Figure 5-9 SGI Rackable C2108-TY10 Disk Drive Locations . . 45 Figure 5-10 Base PCI card configuration . . 47 Figure 6-1 Front and Rear Chassis Views .
- Page 14 Figures Figure 7-1 System Overview Main BIOS Setup Screen . . 61 Figure 7-2 Advanced Settings Screen . 63 Figure 7-3 Security Settings Screen . . 88 Figure 7-4 Boot Settings Screen . . 90 Figure 7-5 Exit Options Screen . .
- Page 15 Tables Tables Table 5-1 Jumper Descripton . 32 Table 5-2 Recommended Memory DIMM Configurations . . 40 Table 5-3 Non-Optimal Memory DIMM Configurations . . 43 Table A-1 BIOS Error Codes . 95 007-5688-003...
-
Page 17: About This Guide
• Chapter 4, “System Safety” Provides system safety information. • Chapter 5, “Advanced Severboard Setup” Provides procedures to install a node board into the SGI Rackable C2108-TY10 chassis, connect the data and power cables, and install expansion cards. 007-5688-003 xvii... - Page 18 Describes the steps required to install components and perform maintenance on the SGI Rackable C2108-TY10 chassis. • Chapter 7, “BIOS” Describes the AMI BIOS Setup Utility for the SGI Rackable C2108-TY10 severboard. • Appendix A, “BIOS Error Codes,” Provides BIOS error code information.
-
Page 19: Related Publications
Related Publications The following SGI and LSI documents are relevant to the SGI Rackable C2108-TY10 server: • MegaRAID SAS Software User’s Guide, publication number, publication number 860-0488-00x • MegaRAID 1078-based SAS RAID Controllers User’s Guide, publication number 860-0489-00x • LSI Integrated SAS for RAID User’s Guide, publication number 860-0476-00x •... -
Page 20: Product Support
Conventions The following conventions are used throughout this document: Convention Meaning This fixed-space font denotes literal items such as commands, files, Command routines, path names, signals, messages, and programming language structures. variable The italic typeface denotes variable entries and words or concepts being defined. - Page 21 Reader Comments If you have comments about the technical accuracy, content, or organization of this document, contact SGI. Be sure to include the title and document number of the manual with your comments. (Online, the document number is located in the front matter of the manual. In printed manuals, the document number is located at the bottom of each page.) You can contact SGI in any of the following ways: •...
-
Page 23: Introduction
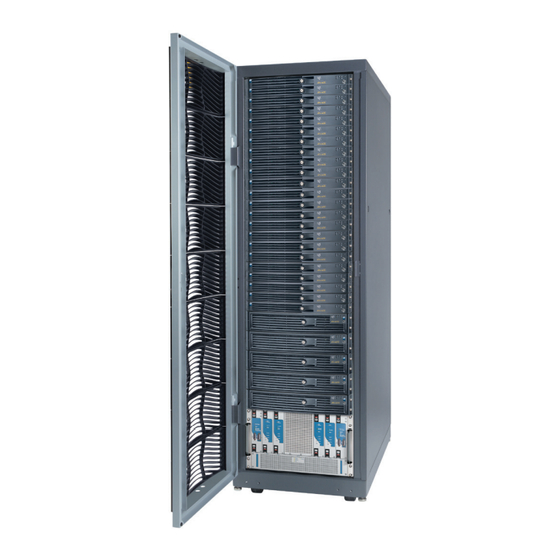
Driver CD, which ships with all SGI Rackable systems, and on systems that are pre-installed in the factory. For more information, check with your sales or service representative. . It has two The SGI Rackable C2108-TY10 server is a 2U rackmount server (see Figure 1-1) - Page 24 1: Introduction • Two passive heatsinks • One air shroud • SATA and SAS Accessories – One SAS/SATA backplane – One 2-ft. SATA cable – Two 35-cm SATA cables – Two 40-cm SGPIO cables – Two 48-cm SATA cables – One 70-cm SATA cable –...
-
Page 25: Server Board Features
Server Board Features Server Board Features At the heart of the SGI Rackable C2108-TY10 system is a dual processor serverboard based on the Intel 5520 + ICH10R chipset and designed to provide maximum performance. Below are the main features of the serverboard. -
Page 26: Onboard Controllers/Ports
CPU overheat sensors, virus protection and BIOS rescue. Server Chassis Features The following is a general outline of the main features of the SGI Rackable C2108-TY10 server chassis. System Power The SGI Rackable C2108-TY10 server chassis features a redundant 720W power supply composed of two separate power modules. -
Page 27: Serial Ata Subsystem
Server Chassis Features Serial ATA Subsystem The SGI Rackable C2108-TY10 server chassis supports up to six 3 Gb/s Serial ATA drives. The SATA drives are hot-swappable units and are connected to a backplane that provides power and control. Note: The operating system you have installed must support RAID to enable the hot-swap capability of the SATA drives. -
Page 28: Figure 1-2 Intel 5520/Ich10R Chipset System Block Diagram
1: Introduction CPU1 CPU2 Port1 Port0 Ports 82575 Ports Intel 5520 RJ45RJ45 Ports Ports Ports CLINK 9,10 Chnl A SST25 VF016 Chnl B CLINK JMB368 ICH10R SATA SATA #1 SATA #2 83627 SATA #3 SATA #4 SATA #5 SATA #6 ES1000 Floppy Figure 1-2... -
Page 29: Server Installation
This chapter provides a quick setup checklist to get the SGI Rackable C2108-TY10 operational. Unpack the System Inspect the shipping container that the SGI Rackable C2108-TY10 was shipped in and note if it was damaged in any way. If the server shows damage, file a damage claim with the carrier who delivered it. -
Page 30: Warnings And Precautions
Rack Precautions Warning: The SGI Rackable C2108-TY10 server weighs 57 lbs (26 kg). Always use proper lifting techniques when your move the server. Always get the assistance of another qualified person when you install the sever in a location above your shoulders. Failure to do so may result in serious personal injury or damage to the equipment. -
Page 31: Server Precautions
Rack Mounting Considerations Server Precautions • Review the electrical and general safety precautions. • Determine the placement of each component in the rack before you install the rails. • Install the heaviest server components in the bottom of the rack first, and then work up. •... -
Page 32: Circuit Overloading
(for example, the use of power strips, and so on). Install the System into a Rack This section provides information on installing the SGI Rackable C2108-TY10 into a rack. If the system has already been mounted into a rack, refer to “Check the Node Board Setup”... -
Page 33: Figure 2-1 Separating And Installing The Rack Rails
Install the System into a Rack 4. Separate the inner rail from the outer rail assembly. Rail Assembly Extending the Rails Quick- Release Tab Separating the Inner Rail Extension Figure 2-1 Separating and Installing the Rack Rails 007-5688-003... -
Page 34: Outer Rack Rails
8. Repeat steps 1-3 for the remaining outer rail. Install the Inner Rail Extension The SGI Rackable C2108-TY10 chassis includes a set of inner rails in two sections: inner rails and inner rail extensions. The inner rails are pre-attached to the chassis, and do not interfere with normal use of the chassis if you decide not to use a server rack The inner rail extension is attached to the inner rail to mount the chassis in the rack. -
Page 35: Install The Server In A Rack
Install the Server in a Rack Warning: The SGI Rackable C2108-TY10 server weighs 57 lbs (26 kg) Always use proper lifting techniques when your move the server. Always get the assistance of another qualified person when you install the sever in a location above your shoulders. Failure to do so may result in serious personal injury or damage to the equipment. -
Page 36: Check The Node Board Setup
2: Server Installation Check the Node Board Setup Use the following sections to open the top cover and check that each node board is properly installed and all the connections have been made. Access the Inside of the Chassis Grasp the two handles on either side and pull the unit straight out until it locks (you will hear a “click”). -
Page 37: Figure 2-3 Accessing The Inside Of The System
Check the Node Board Setup Figure 2-3 Accessing the Inside of the System 007-5688-003... -
Page 38: Check The Cpus (Processors)
For detailed information about how to install disk drives, see “Hard Disk Drives (SGI Rackable C2108-TY10 Chassis)” on page If you have more than 4TB of storage, you must create multiple volumes to fully utilize your RAID disks. -
Page 39: Check The Airflow
Check the Node Board Setup Refer to the MegaRAID SAS Software User's Guide, SGI publication number 860-0488-00x and the MegaRAID 1078-based SAS RAID Controllers User's Guide, SGI publication number 860-0489-00x for more information about configuring your system disks. A slim DVD-ROM may be preinstalled in your server. Refer to Chapter 6 if you need to install a DVD-ROM disk drive to the system. -
Page 41: System Interface
Chapter 3 System Interface Overview There are several LEDs on the control panel as well as others on the SATA drive carriers to keep you constantly informed of the overall status of the system as well as the activity and health of specific components. -
Page 42: Control Panel Leds
3: System Interface Figure 3-2 System Power On Button Control Panel LEDs The control panel located on the front of the chassis has several LEDs. These LEDs provide you with critical information related to different parts of the system. This section explains what each LED indicates when illuminated and any corrective action you may need to take. -
Page 43: Nic1
Control Panel LEDs the cables and make sure all fans are present and operating normally. You should also check to make sure that the chassis covers are installed. This LED will remain flashing or on as long as the indicated condition exists. Figure 3-4 Overheat/Fan Fail LED NIC1... -
Page 44: Power
3: System Interface Figure 3-7 Hard Drive Activity LED Power The power LED indicates power is being supplied to the system's power supply units is shown in Figure 3-8. This LED should normally be illuminated when the system is operating. Figure 3-8 Power On LED SATA Drive Carrier LEDs... -
Page 45: System Safety
Basic electrical safety precautions should be followed to protect yourself from harm and the SGI Rackable C2108-TY10 system from damage, as follows: • Be aware of the locations of the power on/off switch on the chassis as well as the room's emergency power-off switch, disconnection switch or electrical outlet. -
Page 46: General Safety Precautions
General Safety Precautions Follow these rules to ensure general safety: • Keep the area around the SGI Rackable C2108-TY10 system clean and free of clutter. • The SGI Rackable C2108-TY10 system weighs approximately 57 lbs (25.9 kg.) when fully loaded. When lifting the system, two people at either end should lift slowly with their feet spread out to distribute the weight. -
Page 47: Esd Precautions
ESD Precautions • Place the chassis top cover and any system components that have been removed away from the system or on a table so that they won't accidentally be stepped on. • While working on the system, do not wear loose clothing such as neckties and unbuttoned shirt sleeves, which can come into contact with electrical circuits or be pulled into a cooling fan. -
Page 49: Advanced Severboard Setup
Chapter 5 Advanced Severboard Setup This chapter includes procedures to install a node board into the SGI Rackable C2108-TY10 chassis, connect the data and power cables, and install expansion cards. A layout and quick reference chart is included in this chapter for your reference. See “Serverboard... -
Page 50: Esd Precautions
Caution: The node board is shipped in antistatic packaging to avoid electrostatic discharge damage. Be sure to use ESD precautions when you unpack replacement components for the SGI Rackable C2108-TY10 server. Failure to do so can result in damage to the equipment. Connecting the Control Panel JF1 contains header pins for various front control panel connectors. -
Page 51: I/O Ports
I/O Ports Ground x (Key) x (Key) Power On LED HDD LED NIC1 LED NIC2 LED OH/Fan Fail LED Power Fail LED Ground Reset (Button) Ground Power (Button) Figure 5-1 Control Panel Header Pins I/O Ports The I/O ports are color coded in conformance with the PC 99 specification. See Figure 5-2 below for the colors and locations of the various I/O ports. -
Page 52: Serverboard Details
5: Advanced Severboard Setup Serverboard Details The 2U SGI Rackable C2108-TY10 chassis has one node board. It can be configured with 1 or 2 processor sockets. When configuring two processors, the following rules apply: • Both processor sockets must have identical revisions, core voltage, and bus/core speed. -
Page 53: Figure 5-3 Node Board Features
Serverboard Details P2 DIMM3A PWR I2C Fan7 JPW1 JPW4 JPW3 CPU1 Fan P2 DIMM3B P2 DIMM3C P2 DIMM2A JPP1 P2 DIMM2B JPP0 P2 DIMM2C CPU1 P2 DIMM1A P2 DIMM1B P2 DIMM1C P1 DIMM1C P1 DIMM1B P1 DIMM1A CPU2 P1 DIMM2C P1 DIMM2B P1 DIMM2A P1 DIMM3C... -
Page 54: Serverboard Quick Reference
Caution: Exercise extreme care when installing or removing DIMM modules to prevent any possible damage. SGI Rackable C2108-TY10 serverboard supports up to 144 GB of DDR3 1333/1066/800 registered ECC SDRAM in 18 DIMM slots. Three-way interleaved memory is supported. For optimal memory performance, install DIMMs three at a time. -
Page 55: Figure 5-4 Dimm Installation
Installing Memory Table 5-2). Always spread DIMMs across all three banks for each CPU (see Figure 5-3). Gently press down on the DIMM module until it snaps into place in the slot. Repeat for all modules. 2. To remove a DIMM module, use your thumbs to gently push the release tabs near both ends of the module (see Figure 5-4). -
Page 56: Figure 5-5 Installing Dimm Modules
5: Advanced Severboard Setup Figure 5-5 Installing DIMM Modules 007-5688-003... -
Page 57: Memory Configuration
Figure 5-6 Removing a DIMM Module Memory Configuration When configured with two processors, the SGI Rackable C2108-TY10 can be configured with a maximum of eighteen memory DIMMs. Unlike previous processors, the Nehalem-EP processor has the memory controller embedded within the processor socket. There are nine memory DIMMs that are controlled by each processor. -
Page 58: Memory Dimm Layout
P1 DIMM1A P1 DIMM2C P1 DIMM2B P1 DIMM2A P1 DIMM3C P1 DIMM3B P1 DIMM3A Figure 5-7 Memory DIMM Locations Memory DIMM Layout The SGI Rackable C2108-TY10 Nehalem-EP memory controller has three channels with three memory DIMM slots on each channel. 007-5688-003... -
Page 59: Memory Dimm Rules
Memory Block Diagram Memory DIMM Rules Use the following rules when installing memory DIMMs: The minimum memory allowed on SGI Rackable C2108-TY10 cluster nodes is defined by whether or not the compute nodes are diskless: • Diskless compute nodes: 8GB per node memory minimum •... - Page 60 5: Advanced Severboard Setup of ranks. If this option is used, populate the higher ranking DIMMs furthest from the processor (slot A). • For maximum memory performance the DIMMs within a node must be identical in: – Speed (1066 or 1333 Mtransfer/sec) –...
-
Page 61: Mixing Processors And Dimm Speeds
Installing Memory Mixing Processors and DIMM Speeds The Nehalem-EP processor is rated for the maximum DIMM speed that it will support. Configuring memory DIMMs that have a DIMM speed that is greater than the processors capability to support will result in the memory DIMM running at the maximum speed of the processor - not the maximum speed of the DIMM. -
Page 62: Table 5-2 Recommended Memory Dimm Configurations
5: Advanced Severboard Setup Table 5-2 Recommended Memory DIMM Configurations Processor 1 Processor 2 Maximum Total Node Memory/ Memory Channel Channel Channel Channel Channel Channel Core Speed Size (MT/s) 1A: 2GB 2A: 2GB 3A: 2GB 1A: 2GB 2A: 2GB 3A: 2GB 1.5 GB/core 12 GB 1333... - Page 63 Installing Memory Table 5-2 Recommended Memory DIMM Configurations (continued) Processor 1 Processor 2 Maximum Total Node Memory/ Memory Channel Channel Channel Channel Channel Channel Core Speed Size (MT/s) 1A: 8GB 2A: 8GB 3A: 8GB 1A: 8GB 2A: 8GB 3A: 8GB 18 GB/core 144 GB 1B: 8GB...
- Page 64 5: Advanced Severboard Setup Table 5-2 Recommended Memory DIMM Configurations (continued) Processor 1 Processor 2 Maximum Total Node Memory/ Memory Channel Channel Channel Channel Channel Channel Core Speed Size (MT/s) 1A: 8GB 2A: 8GB 3A: 8GB 1A: 8GB 2A: 8GB 3A: 8GB 9 GB/core 72 GB...
- Page 65 Installing Memory Table 5-3 Non-Optimal Memory DIMM Configurations Processor 1 Processor 2 Maximum Total Node Memory/ Memory Channel Channel Channel Channel Channel Channel Core Speed Size (MT/s) 1A: 2GB 2A: none 3A: none 1A: 2GB 2A: none 3A: none 0.5 GB/core 4 GB 1333 1B: none...
-
Page 66: Table 5-3 Non-Optimal Memory Dimm Configurations
5: Advanced Severboard Setup Table 5-3 Non-Optimal Memory DIMM Configurations (continued) Processor 1 Processor 2 Maximum Total Node Memory/ Memory Channel Channel Channel Channel Channel Channel Core Speed Size (MT/s) 1A: 4GB 2A: 4GB 3A: 4GB 1A: 4GB 2A: 4GB 3A: 4GB 4 GB/core 32 GB... -
Page 67: Hard Disk Drives (Sgi Rackable C2108-Ty10 Chassis)
Hard Disk Drives (SGI Rackable C2108-TY10 Chassis) Table 5-3 Non-Optimal Memory DIMM Configurations (continued) Processor 1 Processor 2 Maximum Total Node Memory/ Memory Channel Channel Channel Channel Channel Channel Core Speed Size (MT/s) 1A: 8GB 2A: 8GB 3A: 8GB 1A: 8GB... -
Page 68: Pci Card Slotting
3+3, and eight drives is a 4+4. The operating system will be striped across all drives in the primary set and then mirrored on the secondary set of drives. Note: all drives must be the same type PCI Card Slotting There are three basic configurations of the SGI Rackable C2108-TY10: • No RAID card installed •... -
Page 69: Installing Selected Pci Cards
• PCIe InfiniBand card - use either slot 4 or slot 6 • PCI-X GigE card - use either slot 2 or slot 3 The SGI Rackable C2108-TY10 PCI slots are configured as follows: • Slot 0 - UIO •... -
Page 70: Power Supply
5: Advanced Severboard Setup • X8 = 2GB/s maximum transfer rate in each direction PCIe Gen2 supports the following maximum bandwidths per slot: • Gen2 PCIe runs at 5.0 GT/s (GT/s = GigaTransfers per second) • Supports a maximum of 500 MB/s/lane •... -
Page 71: Advanced Chassis Setup
Chapter 6 Advanced Chassis Setup This chapter covers the steps required to install components and perform maintenance on the SGI Rackable C2108-TY10 chassis shown in Figure 6-1. For component installation, follow the steps in the order given to eliminate the most common problems encountered. If some steps are unnecessary, skip ahead to the step that follows. -
Page 72: Figure 6-1 Front And Rear Chassis Views
6: Advanced Chassis Setup Dedicated PCI expansion slots Mouse BMC port Power Ethernet port 1 port Keyboard supplies ports ports Slim DVD-ROM drive System System Main LEDs reset power ports port 2 RESET COMPACT Figure 6-1 Front and Rear Chassis Views 007-5688-003... -
Page 73: Static-Sensitive Device
Static-Sensitive Device Static-Sensitive Device Electrostatic discharge (ESD) can damage electronic components. To prevent damage to any printed circuit boards (PCBs), it is important to handle them very carefully. The following measures are generally sufficient to protect your equipment from ESD damage. Precautions •... -
Page 74: System Fans
6: Advanced Chassis Setup System Fans Three 8-cm hot-swap fans provide the cooling for the system. It is very important that the chassis top cover is properly installed and making a good seal in order for the cooling air to circulate properly through the chassis and cool the components. -
Page 75: Replacing System Fans
Drive Bay Installation/Removal Replacing System Fans This section describes how to remove or install a system fan. Removing a Fan Remove the chassis cover. 2. Press the tabs on the sides of the fan to unlock and remove the fan and its housing. The fan's power connections will automatically detach. -
Page 76: Sata Drive Installation
6: Advanced Chassis Setup SATA Drive Installation The SATA drives are mounted in drive carriers to simplify their installation and removal from the chassis. These carriers also help promote proper airflow for the drives. For this reason, even empty carriers without hard drives installed must remain in the chassis. Mounting a SATA Drive in a Drive Carrier To add a new SATA drive, install the drive into the carrier with the printed circuit board side facing down so that the mounting holes align with those in the carrier. -
Page 77: Figure 6-4 Removing Sata Drive Carrier
Drive Bay Installation/Removal Handle Release button Figure 6-4 Removing SATA Drive Carrier Note: Your operating system must have RAID support to enable the hot-plug capability of the drives. Important: Regardless of how many hard drives are installed, all drive carriers must remain in the drive bays to maintain proper airflow. -
Page 78: Hard Drive Backplane
Drives mount on rails and should "click" into place to be correctly and fully installed in their bays. Power Supply The SGI Rackable C2108-TY10 system has a 720 watt redundant power supply consisting of two power modules. Each power supply module has an auto-switching capability, which enables it to automatically sense and operate at a 100V - 240V input voltage. -
Page 79: Power Supply Failure
Power Supply Power Supply Failure If either of the two power supply modules fail, the other module will take the full load and allow the system to continue operation without interruption. The PWR Fail LED will illuminate and remain on until the failed unit has been replaced. The power supply units have a hot-swap capability, meaning you can replace the failed unit without powering down the system. -
Page 81: Bios
Chapter 7 BIOS This chapter describes the AMI BIOS Setup Utility for the SGI Rackable C2108-TY10 severboard. The AMI ROM BIOS is stored in a Flash EEPROM and can be easily updated. This chapter describes the basic navigation of the AMI BIOS Setup Utility setup screens. -
Page 82: How To Change The Configuration Data
7: BIOS Note: Options printed in Bold are default settings. How To Change the Configuration Data The configuration data that determines the system parameters may be changed by entering the AMI BIOS Setup utility. This Setup utility can be accessed by pressing <Del> at the appropriate time during system boot. -
Page 83: System Time/System Update
Main Setup Figure 7-1 System Overview Main BIOS Setup Screen System Time/System Update Use this option to change the system time and date. Highlight System Time or System. Date using the arrow keys. Key in new values through the keyboard and press <Enter>. Press the <Tab> key to move between fields. -
Page 84: Processor
7: BIOS • BIOS Build Date: This item displays the date when this BIOS was completed. • AMI BIOS Core Version: This item displays the revision number of the AMI BIOS Core upon which your BIOS was built. Processor The AMI BIOS will automatically display the status of the processor used in your system: •... -
Page 85: Boot Features
Advanced Setup Configurations Figure 7-2 Advanced Settings Screen Boot Features This section describes the Boot Features options. Quick Boot If Enabled, this option will skip certain tests during POST to reduce the time needed for system boot. The options are Enabled and Disabled. Note: The default option is highlighted in bold face throughout this chapter. -
Page 86: Quiet Boot
7: BIOS Quiet Boot This option allows the bootup screen options to be modified between POST messages or the OEM logo. Select Disabled to display the POST messages. Select Enabled to display the OEM logo instead of the normal POST messages. The options are Enabled and Disabled. AddOn ROM Display Mode This sets the display mode for Option ROM. -
Page 87: Power Button Function
Advanced Setup Configurations Power Button Function If set to Instant_Off, the system will power off immediately as soon as the user hits the power button. If set to 4_Second_Override, the system will power off when the user presses the power button for 4 seconds or longer. -
Page 88: Hardware Prefetcher (Available When Supported By The Cpu)
7: BIOS Hardware Prefetcher (Available when supported by the CPU) If set to Enabled, the hardware prefetcher will pre fetch streams of data and instructions from the main memory to the L2 cache in the forward or backward manner to improve CPU performance. The options are Disabled and Enabled. -
Page 89: Intel Eist Technology
Advanced Setup Configurations Intel EIST Technology Enhanced Intel SpeedStep Technology (EIST) allows the system to automatically adjust processor voltage and core frequency in an effort to reduce power consumption and heat dissipation. Please refer to Intel’s web site for detailed information. The options are Disable (Disable GV3) and Enable (Enable GV3). -
Page 90: Advanced Chipset Control
7: BIOS Advanced Chipset Control The items included in the Advanced Settings submenu are listed below: CPU Bridge Configuration QPI Links Speed This feature selects QPI's data transfer speed. The options are Slow-mode, and Full Speed. QPI Frequency This selects the desired QPI frequency. The options are Auto, 4.800 GT, 5.866GT, 6.400 GT. QPI L0s and L1 This enables the QPI power state to low power. - Page 91 Advanced Setup Configurations A memory error-correction scheme where the Processor writes corrected data back into the memory block from where it was read by the Processor. The options are Enabled and Disabled. Patrol Scrubbing A memory error-correction scheme that works in the background looking for and correcting resident errors.
-
Page 92: Serial Debug Message Level
7: BIOS This is the air flow speed to the DIMM modules. Each step is one mm/ sec. The default is [1500]. Press "+" or "-" on your keyboard to change this value. Altitude This feature defines how many meters above or below sea level the system is located. The options are Sea Level or Below, 1~300, 301~600, 601~900, 901~1200, 1201~1500, 1501~1800, 1801~2100, 2101~2400, 2401~2700, 2701~3000. -
Page 93: Crystal Beach/ Direct Cache Access (Dca)
Advanced Setup Configurations Crystal Beach/ Direct Cache Access (DCA) This feature is available when Crystal Beach/DMA is enabled.This feature works in conjunction with the Intel I/O AT to accelerate the performance of the TOE device. When this feature set to Enabled, it will enhance overall system performance by providing direct cache access for data transferring. -
Page 94: Usb 2.0 Controller Mode
7: BIOS USB 2.0 Controller Mode This setting allows you to select the USB 2.0 Controller mode. The options are Hi-Speed (480 Mbps) and Full Speed (12 Mbps). BIOS EHCI Hand-Off Select Enabled to enable BIOS Enhanced Host Controller Interface support to provide a workaround solution for an operating system that does not have EHCI Hand-Off support. -
Page 95: Ide And Sata Configuration
Advanced Setup Configurations IDE and SATA Configuration When this submenu is selected, the AMI BIOS automatically detects the presence of the IDE devices and displays the following items: SATA#1 Configuration If Compatible is selected, it sets SATA#1 to legacy compatibility mode, while selecting Enhanced sets SATA#1 to native SATA mode. - Page 96 7: BIOS submenu screen for detailed options of these items. Set the correct configurations accordingly. The items included in the submenu are: Type Select the type of device connected to the system. The options are Not Installed, Auto, CD/DVD and ARMD. LBA/Large Mode LBA (Logical Block Addressing) is a method of addressing data on a disk drive.
- Page 97 Advanced Setup Configurations of 32-Bits. Select Enabled to enable 32-Bit data transfer. DMA Mode Select Auto to allow the BIOS to automatically detect IDE DMA mode when the IDE disk drive support cannot be determined. Select SWDMA0 to allow the BIOS to use Single Word DMA mode 0. It has a data transfer rate of 2.1 MBs.
-
Page 98: Hot Plug
7: BIOS Select UDMA6 to allow the BIOS to use Ultra DMA mode 6. It has a data transfer rate of 133 MBs. The options are Auto, SWDMAn, MWDMAn, and UDMAn. S.M.A.R.T. For Hard disk drives Self-Monitoring Analysis and Reporting Technology (SMART) can help predict impending drive failures. -
Page 99: Pci Latency Timer
Advanced Setup Configurations PCI Latency Timer This feature sets the latency Timer of each PCI device installed on a PCI bus. Select 64 to set the PCI latency to 64 PCI clock cycles. The options are 32, 64, 96, 128, 160, 192, 224 and 248. PCI IDE BusMaster When enabled, the BIOS uses PCI bus mastering for reading/writing to IDE drives. - Page 100 7: BIOS Base Address, IRQ This item displays the based address and IRQ of the serial port specified above. The options are COM 1 and COM 2. Serial Port Mode This feature allows the user to set the serial port mode for Console Redirection. The options are 115200 8, n 1;...
-
Page 101: Hardware Health Monitor
Advanced Setup Configurations Hardware Health Monitor This feature allows the user to monitor system health and review the status of each item as displayed. CPU Overheat Alarm This option allows the user to select the CPU Overheat Alarm setting which determines when the CPU OH alarm will be activated to provide warning of possible CPU overheat. - Page 102 ‘Temperature Tolerance’ is, and not the other way around. This results in better CPU thermal management. The SGI Rackable C2108-TY10 system leverages this feature by assigning a temperature status to certain thermal conditions in the processor (Low, Medium and High). This makes it easier for the user to understand the CPU’s temperature status, rather than by just simply seeing a...
-
Page 103: Acpi Configuration
Advanced Setup Configurations The system temperature will be displayed (in degrees in Celsius and Fahrenheit) as it is detected by the BIOS. Fan Speed Readings This feature displays the fan speed readings from Fan1 through Fan8. Fan Speed Control Monitor This feature allows the user to decide how the system controls the speeds of the onboard fans. -
Page 104: Apic Acpi Sci Irq
7: BIOS APIC ACPI SCI IRQ When this item is set to Enabled, APIC ACPI SCI IRQ is supported by the system. The options are Enabled and Disabled. Headless Mode This feature is used to enable system to function without a keyboard, monitor or mouse attached The options are Enabled and Disabled. -
Page 105: Ipmi Configuration
Advanced Setup Configurations IPMI Configuration Intelligent Platform Management Interface (IPMI) is a set of common interfaces that IT administrators can use to monitor system health and to manage the system as a whole. For more information on the IPMI specifications, please visit Intel's website at www.intel.com. Status of BMC Baseboard Management Controller (BMC) manages the interface between system management software and platform hardware. -
Page 106: Set Lan Configuration
7: BIOS Caution: Any cleared information is unrecoverable. Make absolutely sure that you no longer need any data stored in the log before clearing the BMC Event Log. Set LAN Configuration Set this feature to configure the IPMI LAN adapter with a network address as shown in the following graphics. -
Page 107: Mac Address Configuration
Advanced Setup Configurations MAC Address Configuration Enter the Mac address for this machine. This should be in decimal and in dotted quad form (for example, 192.168.10.253). The value of each three-digit number separated by dots should not exceed 255. Parameter Selector Use this feature to select the parameter of your Mac Address configuration. -
Page 108: Sel Pef Configuration
7: BIOS SEL PEF Configuration PEF Support Select Enabled to enable the function of Platform Event Filter (PEF) which will interpret BMC events and perform actions based on pre-determined settings or events and performs actions based on pre-determined settings or 'traps' under IPMI 1.5 specifications. For example, powering the system down or sending an alert when a triggering event is detected. -
Page 109: Pef Startup Delay
Advanced Setup Configurations This feature enables or disables startup delay. The options are Enabled and Disabled. PEF Startup Delay Note: Available if the item-PEF Startup is enabled. This sets the pre-determined time to delay PEF after system power-ups and resets. Refer to Table 24.6 of the IPMI 1.5 Specification for more information at www.intel.com. -
Page 110: Mark All Events As Read
7: BIOS Mark all events as read This option marks all events as read. The options are OK and Cancel. Clear event log This option clears the Event Log memory of all messages. The options are OK and Cancel. Security Settings The AMIBIOS Setup Utility provides a Supervisor and a User password. -
Page 111: Boot Configuration
Boot Configuration This feature indicates if a supervisor's password has been entered (installed). User Password This feature indicates if a user's password has been entered (installed). Change Supervisor Password Select this option and press <Enter> to access the submenu, and then enter the password. Change User Password Select this option and press <Enter>... -
Page 112: Boot Device Priority
7: BIOS Figure 7-4 Boot Settings Screen Boot Device Priority This feature allows the user to specify the sequence of priority for the Boot Device. The settings are 1st boot device, 2nd boot device, 3rd boot device, 4th boot device, 5th boot device and Disabled. -
Page 113: Hard Disk Drives
Exit Options Hard Disk Drives This feature allows the user to specify the boot sequence from all available hard disk drives. The settings are Disabled and a list of all hard disk drives that have been detected (for example, 1st Drive, 2nd Drive, 3rd Drive, etc). -
Page 114: Save Changes And Exit
7: BIOS Figure 7-5 Exit Options Screen Save Changes and Exit When you have completed the system configuration changes, select this option to leave the BIOS Setup Utility and reboot the computer, so the new system configuration parameters can take effect. Select Save Changes and Exit from the Exit menu and press <Enter>. -
Page 115: Discard Changes
Exit Options Discard Changes Select this option and press <Enter> to discard all the changes and return to the AMI BIOS Utility Program. Load Optimal Defaults To set this feature, select Load Optimal Defaults from the Exit menu and press <Enter>. Then, select OK to allow the AMI BIOS to automatically load Optimal Defaults to the BIOS Settings. -
Page 117: Bios Error Codes
Appendix A BIOS Error Codes During Power-On Self-Test (POST) routines, which are performed each time the system is powered on, errors may occur. Non-fatal errors are those which, in most cases, allow the system to continue the boot-up process. The error messages normally appear on the screen. Fatal errors are those which will not allow the system to continue the boot-up procedure. -
Page 119: System Specifications
Appendix B System Specifications Processors Single or dual Intel Xeon 5500 processors (both CPUs must be of the same type) Chipset Intel 5520/ICH10R chipset BIOS 32 Mb AMI® SPI Flash ROM Memory Capacity Eighteen DIMM sockets supporting up to 144 GB of DDR3-1333/1066/800 registered ECC SDRAM Note: Interleaved memory - requires memory must be installed four modules at a time. -
Page 120: Sata Drive Bays
B: System Specifications SATA Drive Bays Eight hot-swap drive bays to house six standard SATA drives Peripheral Drive Bays One slim DVD-ROM drive Expansion Slots Two PCI-Express Gen. 2 x8 slots (one in a x16 slot), one PCI-Express x4 slot (in a x8 slot), three 64-bit 133/100 MHz PCI-X slots and one UIO slot. -
Page 121: System Cooling
System Cooling System Cooling Three (3) 8-cm system cooling fans System Input Requirements AC Input Voltage: 100-240V AC auto-range Rated Input Current: 9A - 4A Rated Input Frequency: 50 to 60 Hz Efficiency: 80+ (Gold Level) Power Supply Rated Output Power: 720W (Part# PWS-721P-1R) Rated Output Voltages: +12V (59A), +5Vsb (4A) Operating Environment Operating Temperature: 0º... -
Page 122: Regulatory Compliance
B: System Specifications Regulatory Compliance Electromagnetic Emissions: FCC Class A, EN 55022 Class A, EN 61000-3-2/-3-3, CISPR 22 Class A Electromagnetic Immunity: EN 55024/CISPR 24, (EN 61000-4-2, EN 61000-4-3, EN 61000-4-4, EN 61000-4-5, EN 61000-4-6, EN 61000-4-8, EN 61000-4-11) Safety: CSA/EN/IEC/UL 60950-1 Compliant, UL or CSA Listed (USA and Canada), CE Marking (Europe) California Best Management Practices Regulations for Perchlorate Materials: This Perchlorate warning applies only to products containing CR (Manganese Dioxide) Lithium coin cells.
Need help?
Do you have a question about the Rackable C2108-TY10 and is the answer not in the manual?
Questions and answers