Sun Oracle Fire X4170 M2 Installation Manual

Sun Oracle Fire X4170 M2 Installation Manual

Servers
Table of Contents

Advertisement

Quick Links

Sun Fire X4170 M2 and
X4270 M2 Servers
Installation Guide
Part No.: E27205-02
January 2012

Advertisement

Table of Contents
loading

Summary of Contents for Sun Oracle Fire X4170 M2

  • Page 1 Sun Fire X4170 M2 and X4270 M2 Servers Installation Guide Part No.: E27205-02 January 2012...
  • Page 2 Copyright © 2010, 2011, 2012 Oracle and/or its affiliates. All rights reserved. This software and related documentation are provided under a license agreement containing restrictions on use and disclosure and are protected by intellectual property laws. Except as expressly permitted in your license agreement or allowed by law, you may not use, copy, reproduce, translate, broadcast, modify, license, transmit, distribute, exhibit, perform, publish, or display any part, in any form, or by any means.
  • Page 3: Table Of Contents

    Contents Using This Documentation vii Preparing to Install the Sun Fire X4170 M2 and X4270 M2 Servers 1 Tools and Equipment Needed 1 Server Installation Task Checklist 2 ESD Precautions 3 Opening the Box 3 Unpacking 3 Package Contents Inventory 4...
  • Page 4 Installing the Server Into the Slide-Rail Assemblies 27 ▼ Install Server Into the Slide-Rail Assemblies 28 Installing the Cable Management Arm on the Sun Fire X4170 M2 Server 30 ▼ Install Cable Management Arm 30 Installing the Cable Management Arm on the Sun Fire X4270 M2 Server 36 ▼...
  • Page 5 Connecting Power Cords to the Server 47 ▼ Connect the Power Cords 47 Connecting to Oracle ILOM and Applying Main Power to the Server 49 Connecting to Oracle ILOM 49 Network Defaults 50 ▼ Log In to Oracle ILOM Using a Serial Connection 50 ▼...
  • Page 6 Configuring the Preinstalled Oracle VM Software 74 ▼ Configure Oracle VM 75 Using Oracle VM 77 If You Need Help 81 Setup Troubleshooting 81 Locate the Server Serial Number 83 Index 85 Sun Fire X4170 M2 and X4270 M2 Servers Installation Guide • January 2012...
  • Page 7: Using This Documentation

    This guide is intended for system administrators, network administrators, and service technicians who have an understanding of server systems. Product Information For information about Sun Fire X4170 M2 and X4270 M2 Servers, go to the following web sites: http://www.oracle.com/goto/x4170m2 ■...
  • Page 8: Related Documentation

    E19245-01 Oracle Integrated Lights http://www.oracle.com/pls/topic/lookup?ctx=ilom30 Out Manager (Oracle ILOM) 3.0 documentation Oracle Hardware http://www.oracle.com/pls/topic/lookup?ctx=ohmp Management Pack documentation Feedback Provide feedback about this documentation at: http://www.oracle.com/goto/docfeedback viii Sun Fire X4170 M2 and X4270 M2 Servers Installation Guide • January 2012...
  • Page 9 Support and Accessibility Description Links Access electronic support http://support.oracle.com through My Oracle Support For hearing impaired: http://www.oracle.com/accessibility/support.html Learn about Oracle’s http://www.oracle.com/us/corporate/accessibility/index.html commitment to accessibility Using This Documentation...
  • Page 10 Sun Fire X4170 M2 and X4270 M2 Servers Installation Guide • January 2012...
  • Page 11: Preparing To Install The Sun Fire X4170 M2 And X4270 M2 Servers

    Preparing to Install the Sun Fire X4170 M2 and X4270 M2 Servers This chapter describes Oracle’s Sun Fire X4170 M2 and X4270 M2 Servers hardware and the information you need to know before you begin to install the servers into a rack.
  • Page 12: Server Installation Task Checklist

    Servers Installation Guide for Windows • Oracle Solaris 10 Operating System Operating Systems • Oracle VM • VMware ESX/ESXi • Microsoft Windows Server 2008 or 2008 R2 Operating Systems Sun Fire X4170 M2 and X4270 M2 Servers Installation Guide • January 2012...
  • Page 13: Esd Precautions

    Opening the Box Carefully open the shipping box. Unpacking Unpack all server components from the packing cartons. shows the FIGURE 1-1 packing contents: Chapter 1 Preparing to Install the Sun Fire X4170 M2 and X4270 M2 Servers...
  • Page 14: Package Contents Inventory

    Unpacking the Box FIGURE 1-1 Package Contents Inventory The following items should be packaged with the Sun Fire X4170 M2 and X4270 M2 Servers: Sun Fire 4170 M2 or X4270 M2 Server ■ Power cord, packaged separately with country kit ■...
  • Page 15: Options

    Sun Fire X4170 M2 Server Service Manual or the Sun Fire X4270 M2 Server Service Manual. Server Description This section shows the front and back of the Sun Fire X4170 M2 and X4270 M2 Servers. 
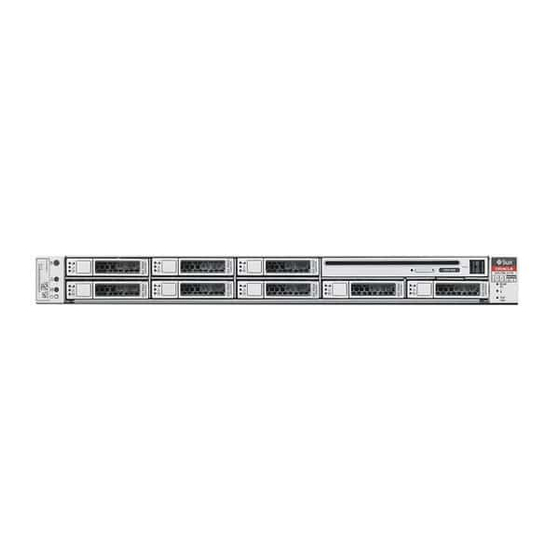
Front Panel Features...
  • Page 16 11 Hard disk drive 5 (optional) Disk configuration label Note – In , the storage drives are numbered 0 to 23 from left to right. FIGURE 1-4 Sun Fire X4170 M2 and X4270 M2 Servers Installation Guide • January 2012...
  • Page 17: Back Panel

    Level): amber Power/OK LED: green 10 Disk configuration label Back Panel shows the Sun Fire X4170 M2 Server back panel and describes its FIGURE 1-5 components. Chapter 1 Preparing to Install the Sun Fire X4170 M2 and X4270 M2 Servers...
  • Page 18 Sun Fire X4270 M2 Server back panel without rear mounted FIGURE 1-6 storage drives. shows the Sun Fire X4270 M2 Server back panel with rear FIGURE 1-7 mounted storage drives. Sun Fire X4170 M2 and X4270 M2 Servers Installation Guide • January 2012...
  • Page 19 PCI Express Module slot (4) (filler panel shown) 13 USB 2.0 ports (0, 1) PCI Express Module slot (2) (filler panel shown) 14 HD15 video connector (analog VGA) Chapter 1 Preparing to Install the Sun Fire X4170 M2 and X4270 M2 Servers...
  • Page 20: Server Supported Components

    Boot disk drive 1 14 HD15 video connector (analog VGA) Server Supported Components This section describes the components that are supported in the Sun Fire X4170 M2 and X4270 M2 Servers. Sun Fire X4170 M2 Server Supported Components The following table describes the components of the Sun Fire X4170 M2 Server.
  • Page 21 Oracle Integrated Lights Out Manager 3.0 Sun Fire X4270 M2 Server Supported Components The following table describes the components of the Sun Fire X4270 M2 Server. Chapter 1 Preparing to Install the Sun Fire X4170 M2 and X4270 M2 Servers...
  • Page 22: Sun Fire X4270 M2 Server Supported Components

    GbE ports (sideband management) Power supplies Up to two hot-pluggable power supplies Cooling fans Redundant hot-pluggable fans Management software Oracle Integrated Lights Out Manager 3.0 Sun Fire X4170 M2 and X4270 M2 Servers Installation Guide • January 2012...
  • Page 23: Server Specifications

    Server Specifications Physical Specifications lists the physical specifications for the Sun Fire X4170 M2 and X4270 M2 TABLE 1-4 Servers. Servers Physical Specifications TABLE 1-4 Parameter Sun Fire X4170 M2 Server Sun Fire X4270 M2 Server Height 1.7 inches/43.4 mm 3.4 inches/87.1 mm...
  • Page 24: Environmental Requirements

    Volt-Ampere rating 1261 VA @ 240 VAC, 0.98 P.F. Environmental Requirements lists the environmental requirements for the Sun Fire X4170 M2 and X4270 TABLE 1-6 M2 Servers. Sun Fire X4170 M2 and X4270 M2 Servers Installation Guide • January 2012...
  • Page 25: Managing Your Server

    Up to 93% relative humidity, non-condensing (single, non-rack system) Altitude (operating) • For the Sun Fire X4170 M2 Server: Up to 3000 m, maximum (single, non-rack system) ambient temperature is derated by 1 degree C per 300 m above 900 m •...
  • Page 26 If your server is one of many x86 and SPARC servers that you want to manage ■ from a single interface, you can use the Oracle Enterprise Manager Ops Center. For more details, see http://www.oracle.com/in/products/enterprise-manager- opscenter-044497-en-in.html Sun Fire X4170 M2 and X4270 M2 Servers Installation Guide • January 2012...
  • Page 27: Installing The Server Into A Rack With Slide-Rails

    ■ “Installing the Server Into the Slide-Rail Assemblies” on page 27 ■ “Installing the Cable Management Arm on the Sun Fire X4170 M2 Server” on ■ page 30 “Installing the Cable Management Arm on the Sun Fire X4270 M2 Server” on ■...
  • Page 28: Server Installation Process Overview

    “Disassembling Slide-Rails” on page 20 “Installing the Mounting Brackets Onto the Server” on page 22 “Installing the Cable Management Arm on the Sun Fire X4170 M2 Server” on page 30 “Installing the Cable Management Arm on the Sun Fire X4270 M2 Server”...
  • Page 29 Depth: (not including PSU handle): 685.80 mm (27.0 inches) Width: (not including ears): 425.45 mm (16.75 inches) Height: Sun Fire X4170 M2 Server: 43.43 mm (1.71 inches), Sun Fire X4270 M2 Server: 87.12 mm (3.43 inches) Caution – Always load equipment into a rack from the bottom up so that the rack will not become top-heavy and tip over.
  • Page 30: Disassembling Slide-Rails

    3. Squeeze and hold the tabs at the top and bottom of the lock while you pull the mounting bracket out of the slide-rail assembly until it reaches the stop FIGURE 2-1 Sun Fire X4170 M2 and X4270 M2 Servers Installation Guide • January 2012...
  • Page 31: Disassemble Tool-Less Slide-Rails

    4. Push the mounting bracket release button toward the front of the mounting bracket ( ), and simultaneously withdraw the mounting bracket from FIGURE 2-1 the slide-rail assembly. 5. Repeat for the remaining slide-rail assembly. Disassembling the Bolt-On Slide-Rail Before Installation FIGURE 2-1 Figure Legend Slide-rail lock...
  • Page 32: Installing The Mounting Brackets Onto The Server

    ( FIGURE 2-2 Sun Fire X4170 M2 and X4270 M2 Servers Installation Guide • January 2012...
  • Page 33 Aligning the Mounting Bracket With the Server Chassis FIGURE 2-2 Figure Legend Chassis front Slide-rail lock Mounting bracket Mounting bracket clip 2. With the heads of the four chassis locating pins protruding though the four keyed openings in the mounting bracket, pull the mounting bracket toward the front of the chassis until the mounting bracket clip locks into place with an audible click ( FIGURE 2-2...
  • Page 34: Attaching The Slide-Rail Assemblies To The Rack

    If your rack does not have threaded mounting holes, insert the mounting ■ screws through both the slide-rail brackets and rack posts, then secure them with the caged nuts. Sun Fire X4170 M2 and X4270 M2 Servers Installation Guide • January 2012...
  • Page 35 Attaching Slide-Rail Assembly to Rack Post FIGURE 2-3 Figure Legend Slide-rail assembly Rack post Slide-rail assembly bracket on outside of rack post Step 1 Step 2 3. Repeat for the remaining slide-rail assembly. 4. From the front of the rack, set the proper width of the rails using the spacer FIGURE 2-4 Chapter 2 Installing the Server Into a Rack With Slide-Rails...
  • Page 36 Step 6 for the side-rail assembly at the rear of the rack. 8. If available, extend the anti-tip bar at the bottom of the rack ( FIGURE 2-5 Sun Fire X4170 M2 and X4270 M2 Servers Installation Guide • January 2012...
  • Page 37: Attach Tool-Less Slide-Rail Assemblies

    Extending the Anti-tip Bar FIGURE 2-5 Caution – If your rack does not have an anti-tip bar, the rack could tip over. ▼ Attach Tool-less Slide-Rail Assemblies To attach tool-less slide-rail assemblies to the rack: ● Refer to the installation card included with the rackmount kit for instructions on attaching tool-less slide-rail assemblies to the rack.
  • Page 38: Install Server Into The Slide-Rail Assemblies

    3. Insert the mounting brackets into the slide-rails, then push the server into the rack until the mounting brackets encounter the slide-rail stops (approximately 12 inches, or 30 cm). Sun Fire X4170 M2 and X4270 M2 Servers Installation Guide • January 2012...
  • Page 39 Inserting the Server With Mounting Brackets Into the Slide-Rails FIGURE 2-6 Figure Legend Inserting mounting bracket into slide rail Slide-rail release button Slide-rail lock 4. Simultaneously push and hold the slide-rail release buttons on each mounting bracket while you push the server into the rack ( ).
  • Page 40: Installing The Cable Management Arm On The Sun Fire X4170 M2 Server

    The cable management arm (CMA) is an optional assembly that you can use to route the server cables in the rack. ▼ Install Cable Management Arm Use this procedure to install the optional CMA. Sun Fire X4170 M2 and X4270 M2 Servers Installation Guide • January 2012...
  • Page 41 1. Unpack the CMA parts. 2. Take the CMA to the back of the equipment rack and ensure that you have adequate room to work around the back of the server. Note – References to “left” or “right” in this procedure assume that you are facing the back of the equipment rack.
  • Page 42 6. Insert the CMA’s mounting bracket connector into the right slide-rail until the connector locks into place with an audible click ( FIGURE 2-10 Sun Fire X4170 M2 and X4270 M2 Servers Installation Guide • January 2012...
  • Page 43 Inserting the CMA Mounting Bracket Into the Back of the Right Slide-Rail FIGURE 2-10 Figure Legend CMA mounting bracket Right slide-rail 7. Insert the right CMA slide-rail connector into the right slide-rail assembly until the connector locks into place with an audible click ( FIGURE 2-11 Chapter 2 Installing the Server Into a Rack With Slide-Rails...
  • Page 44 8. Insert the left CMA slide-rail connector into the rail extension on the left slide- rail assembly until the connector locks into place with an audible click FIGURE 2-12 Sun Fire X4170 M2 and X4270 M2 Servers Installation Guide • January 2012...
  • Page 45 Connecting the CMA to the Rail Extension Connector FIGURE 2-12 Figure Legend CMA extension arm (on left slide-rail) CMA extension 9. Install and route cables to your server, as required. Note – Instructions for installing the server cables are provided in “Back Panel Connectors”...
  • Page 46: Installing The Cable Management Arm On The Sun Fire X4270 M2 Server

    The cable management arm (CMA) is an optional assembly that you can use to route the server cables in the rack. ▼ Install Cable Management Arm Use this procedure to install the optional CMA. Sun Fire X4170 M2 and X4270 M2 Servers Installation Guide • January 2012...
  • Page 47 1. Unpack the CMA parts. 2. Take the CMA to the back of the equipment rack and ensure that you have adequate room to work around the back of the server. Note – References to “left” or “right” in this procedure assume that you are facing the back of the equipment rack.
  • Page 48 Inserting the CMA Rail Extension Into the Back of the Left Slide-Rail FIGURE 2-14 Figure Legend CMA rail extension Left slide-rail 5. Verify that the CMA rail extension engages the slide-rail ( FIGURE 2-15 Sun Fire X4170 M2 and X4270 M2 Servers Installation Guide • January 2012...
  • Page 49 Engaging the CMA Rail Extension With the Left Slide-Rail FIGURE 2-15 Note – Support the CMA in the remaining installation steps. Do not allow the arm to hang by its own weight until it is secured by all three attachment points. 6.
  • Page 50: Cma Mounting Bracket

    Right slide-rail 7. Insert the right CMA slide-rail connector into the right slide-rail assembly until the connector locks into place with an audible click ( FIGURE 2-17 Sun Fire X4170 M2 and X4270 M2 Servers Installation Guide • January 2012...
  • Page 51 Inserting CMA Slide-Rail Connector Into the Back of the Right Slide-Rail FIGURE 2-17 Figure Legend CMA slide-rail connector Right slide-rail 8. Insert the left CMA slide-rail connector into the rail extension on the left slide- rail assembly until the connector locks into place with an audible click FIGURE 2-18 Chapter 2 Installing the Server Into a Rack With Slide-Rails...
  • Page 52 “Back Panel Connectors” on page 10. If required, attach the cable hangers to the CMA, and snap them into place to secure the cables ( FIGURE 2-19 Sun Fire X4170 M2 and X4270 M2 Servers Installation Guide • January 2012...
  • Page 53 Note – Cable hangers are preinstalled on the CMA. Perform the procedure in this step if you need to reinstall cable hangers on the CMA. For best results, place three cable hangers, evenly spaced, on the rear-facing side of the CMA and three cable hangers on the side of the CMA nearest the server. Installing CMA Cable Hangers FIGURE 2-19 Figure Legend...
  • Page 54: Verifying Operation Of The Slide-Rails And Cma

    5. Adjust the cable straps and CMA, as required. Sun Fire X4170 M2 and X4270 M2 Servers Installation Guide • January 2012...
  • Page 55: Attaching Cables And Power Cords

    ■ “Connecting Power Cords to the Server” on page 47 ■ Back Panel Connectors shows and describes the locations of the Sun Fire X4170 M2 Server back FIGURE 3-1 panel connectors. Sun Fire X4170 M2 Server Back Panel Connectors FIGURE 3-1...
  • Page 56: Attaching Cables To The Server

    Connect external cables to the server in the following order. Refer to FIGURE 3-1 FIGURE 3-2 1. Connect an Ethernet cable to the Gigabit Ethernet (NET) connectors as needed for OS support [6]. Sun Fire X4170 M2 and X4270 M2 Servers Installation Guide • January 2012...
  • Page 57: Connecting Power Cords To The Server

    2. If you plan to interact with the system console directly, connect any external devices, such as mouse and keyboard to the server’s USB connectors [7] and/or a monitor to the HD15 video connector [8]. 3. If you plan to connect to Oracle Integrated Lights Out Manager (Oracle ILOM) software over the network, connect an Ethernet cable to the Ethernet port labeled NET MGT [5].
  • Page 58 Sun Fire X4170 M2 and X4270 M2 Servers Installation Guide • January 2012...
  • Page 59: Connecting To Oracle Ilom And Applying Main Power To The Server

    C H A P T E R Connecting to Oracle ILOM and Applying Main Power to the Server This chapter describes how to access the Oracle Integrated Lights Out Manager (Oracle ILOM) command-line interface (CLI) to manage the server. It also describes how to apply main power to the server.
  • Page 60: Network Defaults

    Network Defaults The Sun Fire X4170 M2 and X4270 M2 Servers support dual-stack IPv4 and IPv6 settings, which enable Oracle ILOM to fully operate in an IPv4 and IPv6 network environment. For IPv4 configurations, DHCP is enabled by default, allowing a DHCP server on the network to automatically assign network settings to the server.
  • Page 61: Log In To Oracle Ilom Using An Ethernet Connection

    3. Press Enter to establish a connection between your serial console and Oracle ILOM. A login prompt to Oracle ILOM appears. 4. Log in to the Oracle ILOM command-line interface (CLI) using an Administrator account. Oracle ILOM displays a default command prompt (->), indicating that you have successfully logged in to Oracle ILOM.
  • Page 62: Modify Network Settings

    Note – You can also change network settings using the BIOS Setup Utility. For instructions on using the BIOS Setup Utility, see the Sun Fire X4170 M2 Server Service Manual or the Sun Fire X4270 M2 Server Service Manual.
  • Page 63 Property Set Property Value Description The network state is state set state=enabled enabled by default. To enable a static network pendingipdiscovery set pendingipdiscovery= configuration, set static pendingipdiscovery to static. By default, pendingipdiscovery is set to dhcp. To assign multiple static pendingipaddress set pendingipaddress= network settings, type the...
  • Page 64 Note – The IPv6 configuration options take affect after they are set. You do not need to commit these changes under the /network target. Sun Fire X4170 M2 and X4270 M2 Servers Installation Guide • January 2012...
  • Page 65 Note – You can enable the stateless auto-configuration option to run at the same time as when the option for dhcpv6_stateless is enabled or as when the option for dhcpv6_stateful is enabled. However, the auto-configuration options for dhcpv6_stateless and dhcpv6_stateful should not be enabled to run at the same time 8.
  • Page 66: Test Ipv4 Or Ipv6 Network Configuration

    For example:-> set ping6= fe80::211:5dff:febe:5000 Ping of fe80::211:5dff:febe:5000 succeeded ▼ Exit Oracle ILOM ● To end an Oracle ILOM session, at the CLI prompt, type exit. Sun Fire X4170 M2 and X4270 M2 Servers Installation Guide • January 2012...
  • Page 67: Exit Oracle Ilom

    Applying Main Power to the Server After you have verified that you can connect to Oracle ILOM and are ready to install or configure an operating system, apply main power to the server. ▼ Apply Main Power to the Server 1.
  • Page 68 Sun Fire X4170 M2 and X4270 M2 Servers Installation Guide • January 2012...
  • Page 69: Installing Or Configuring An Operating System

    For an up-to-date list of the latest operating systems supported on the Sun Fire X4170 M2 and X4270 M2 Servers, go to the following web sites and navigate to the appropriate page: ■...
  • Page 70: Configuring A Preinstalled Operating System

    For an up-to-date list of the latest operating systems supported on the Sun Fire X4170 M2 and X4270 M2 Servers, go to the following web sites and navigate to the appropriate page: http://www.oracle.com/goto/x4170m2...
  • Page 71 ■ http://www.oracle.com/goto/x4270m2 Preinstalled Operating Systems Available for the Sun Fire X4170 M2 and TABLE 5-2 X4270 M2 Servers Operating System For Configuration Information, See: Oracle Solaris Chapter 6 of this guide Virtual Machine Chapter 7 of this guide Software Chapter 5...
  • Page 72 Sun Fire X4170 M2 and X4270 M2 Servers Installation Guide • January 2012...
  • Page 73: Configuring The Preinstalled Solaris 10 Operating System

    C H A P T E R Configuring the Preinstalled Solaris 10 Operating System This chapter explains the steps for configuring the Oracle Solaris 10 Operating System (OS) that is preinstalled on server, if ordered. Note – Unlike with SPARC systems, you will not see the output of the preinstalled Solaris 10 image through a monitor when you power on the server.
  • Page 74 Do you want to configure Kerberos security on this • Yes machine? • No* If yes, gather this information: Default realm: Administration server: First KDC: (Optional) Additional KDCs: Sun Fire X4170 M2 and X4270 M2 Servers Installation Guide • January 2012...
  • Page 75 Worksheet for Operating System Configuration (Continued) TABLE 6-1 Your Answers: Information for Installation Description or Example Defaults (*) Name service Name service If applicable, which name service should this system • NIS+ use? • NIS • DNS • LDAP • None* Domain name Provide the name of the domain in which the system resides.
  • Page 76: Configuring Server Raid Drives

    If you want to configure your server drives in a RAID, refer to the following documents for instructions on configuring RAID and installing the Solaris 10 OS. LSI MegaRAID SAS Software User’s Guide, which is available at: ■ http://www.lsi.com/http://www.lsi.com/support/sun Sun Fire X4170 M2 and X4270 M2 Servers Installation Guide • January 2012...
  • Page 77: Configuring The Preinstalled Oracle Solaris 10 Operating System

    Sun Fire X4170 M2 and X4270 M2 Servers Installation Guide for Linux, Virtual ■ Machine Software, and Oracle Solaris Operating Systems, which is available at: http://www.oracle.com/pls/topic/lookup?ctx=E19762-01 http://www.oracle.com/pls/topic/lookup?ctx=E19245-01 Configuring the Preinstalled Oracle Solaris 10 Operating System After you have completed the configuration worksheet, use the following procedure to configure the preinstalled Oracle Solaris software.
  • Page 78 (DHCP or static IP address). After you have entered the system configuration information, the server completes the boot process and displays the Oracle Solaris login prompt. Sun Fire X4170 M2 and X4270 M2 Servers Installation Guide • January 2012...
  • Page 79: Oracle Solaris 10 Operating System User Information

    Select the Documentation tab, then select Product Documentation. ■ See the Sun Fire X4170 M2 and X4270 M2 Servers Product Notes for patch and other ■ late-breaking information. For patches and instructions, go to the My Oracle Support web site and navigate to the appropriate page: http://support.oracle.com...
  • Page 80: Reinstalling The Oracle Solaris Operating System

    To download the Solaris 10 Operating System, go to: ■ http://www.oracle.com/technetwork/server- storage/solaris10/downloads/index.html To download Solaris patches, go to the My Oracle Support web site at: ■ http://support.oracle.com Sun Fire X4170 M2 and X4270 M2 Servers Installation Guide • January 2012...
  • Page 81: Oracle Vm Software

    C H A P T E R Configuring the Preinstalled Oracle VM Software This chapter explains the steps for configuring the Oracle VM software that is preinstalled on the server, if ordered. This chapter includes the following topics: “Configuration Worksheets” on page 71 ■...
  • Page 82: Oracle Vm Manager Configuration

    Oracle VM Server to the existing VM Manager. In this case, when the installation script asks Deploy Oracle VM Manager virtual machine?, enter n (no). It is not necessary to fill out the worksheet in TABLE 7-2 Sun Fire X4170 M2 and X4270 M2 Servers Installation Guide • January 2012...
  • Page 83 However, if you do not currently have an Oracle VM Manager in your configuration, enter y (yes) in response to the question about deploying a VM Manager, and then configure the Oracle VM Manager by responding to the on-screen prompts. Use to collect the information you will need to configure the Oracle VM TABLE 7-2 Manager.
  • Page 84: Configuring The Preinstalled Oracle Vm Software

    Ethernet connection. “Log In to Oracle ILOM Using a Serial Connection” on page 50 “Log In to Oracle ILOM Using an Ethernet Connection” on page Sun Fire X4170 M2 and X4270 M2 Servers Installation Guide • January 2012...
  • Page 85 2. If main power has not yet been applied to the server, apply main power. “Apply Main Power to the Server” on page 3. From the Oracle ILOM prompt, type the following command and answer the prompt: -> start /SP/console Are you sure you want to start /SP/console (y/n)? y Serial console started.
  • Page 86 Oracle VM Server software. After you have responded to all the prompts for system information, the server completes the boot process and displays the Oracle VM login prompt. Sun Fire X4170 M2 and X4270 M2 Servers Installation Guide • January 2012...
  • Page 87: Using Oracle Vm

    Using Oracle VM For complete information about using Oracle VM, refer to the Oracle VM documentation available at the following location: http://www.oracle.com/technetwork/documentation/vm.096300.html The following information should help you get started: Either two or three VMs are installed on the server as part of the preinstalled ■...
  • Page 88 Configuring the Virtual Machine FIGURE 7-2 Selecting an Interface FIGURE 7-3 Sun Fire X4170 M2 and X4270 M2 Servers Installation Guide • January 2012...
  • Page 89 Chapter 7 Configuring the Preinstalled Oracle VM Software...
  • Page 90 Sun Fire X4170 M2 and X4270 M2 Servers Installation Guide • January 2012...
  • Page 91: Setup Troubleshooting

    C H A P T E R If You Need Help This chapter describes troubleshooting information and how to troubleshoot server problems. Support contacts are also included. This chapter includes the following topics: “Setup Troubleshooting” on page 81 ■ “Locate the Server Serial Number” on page 83 ■...
  • Page 92 1. Press the Power/OK button to power off the server and wait 20 to 30 seconds. 2. Press the Power/OK button again to power on the system. Sun Fire X4170 M2 and X4270 M2 Servers Installation Guide • January 2012...
  • Page 93: Locate The Server Serial Number

    Note – For additional troubleshooting information, see the Sun Fire X4170 M2 Server Service Manual, the Sun Fire X4270 M2 Server Service Manual, and the Oracle x86 Servers Diagnostics Guide. Locate the Server Serial Number You might need to have your server’s serial number when you ask for service on your system.
  • Page 94 System Information Needed for Support (Continued) TABLE 8-2 System Configuration Information Needed Your Information IP address Server name (system host name) Network or internet domain name Proxy server configuration Sun Fire X4170 M2 and X4270 M2 Servers Installation Guide • January 2012...
  • Page 95: Index

    Gigabit Ethernet (LAN) connectors, 47 cable hangers installing on Sun Fire X4270 M2 Server, 42 cable hooks and straps installing on Sun Fire X4170 M2 Server, 35 ILOM SP connecting to, 49 cable management arm (CMA) default user name and password, 50, 51 installing on Sun Fire X4170 M2 Server, 30 initial setup and configuration, 49...
  • Page 96 Sun Fire X4170 M2 Server, 35 tool-less slide-rail assemblies, 21 CMA slide-rail connector, 33, 40 installing, 27 installing cables on Sun Fire X4170 M2 Server, 35 tools and equipment Sun Fire X4170 M2 and X4270 M2 Servers Installation Guide • January 2012...
  • Page 97 needed for server installation, 1 troubleshooting information, 81 unpacking the server, 3 Index...
  • Page 98 Sun Fire X4170 M2 and X4270 M2 Servers Installation Guide • January 2012...

This manual is also suitable for:

Fire x4270 m2

Table of Contents