
Related Manuals for Sun Oracle X2-4


Summary of Contents for Sun Oracle X2-4
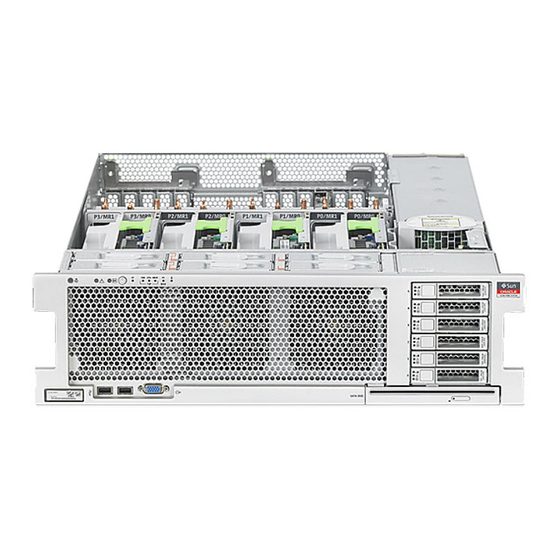
- Page 1 Sun Server X2-4 (formerly Sun Fire X4470 M2) Service Manual Part No.: E20784-06 April 2013...
- Page 2 Copyright © 2011, 2012, 2013 , Oracle and/or its affiliates. All rights reserved. This software and related documentation are provided under a license agreement containing restrictions on use and disclosure and are protected by intellectual property laws. Except as expressly permitted in your license agreement or allowed by law, you may not use, copy, reproduce, translate, broadcast, modify, license, transmit, distribute, exhibit, perform, publish, or display any part, in any form, or by any means.
-
Page 3: Table Of Contents
Server Front Panel Features 1–9 Server Back Panel Features 1–10 Performing Service Related Tasks 1–11 Preparing to Service the Sun Server X2-4 2–1 Location of Replaceable Components 2–1 Tools and Equipment Needed 2–3 Performing Electrostatic Discharge and Static Prevention Measures 2–3 2.3.1... - Page 4 Install a Disk Drive Filler Panel 3–5 Servicing Fan Modules (CRU) 3–5 3.2.1 About Server Fans 3–6 3.2.2 Fan Module LED Reference 3–6 3.2.3 Detecting Fan Module Failure 3–7 3.2.4 Removing and Installing Fan Modules 3–7 Sun Server X2-4 Service Manual • April 2013...
- Page 5 ▼ Remove a Fan Module 3–8 ▼ Install a Fan Module 3–9 Servicing Power Supplies (CRU) 3–11 3.3.1 Power Supply LED Reference 3–11 3.3.2 Detecting a Power Supply Failure 3–12 3.3.3 Removing and Installing Power Supplies 3–12 ▼ Remove a Power Supply 3–13 ▼...
- Page 6 Remove the Fan Board 5–8 ▼ Install the Fan Board 5–10 Servicing the Power Supply Backplane (FRU) 5–12 ▼ Remove the Power Supply Backplane 5–12 ▼ Install the Power Supply Backplane 5–14 Sun Server X2-4 Service Manual • April 2013...
- Page 7 Servicing the Disk Drive Backplane (FRU) 5–15 ▼ Remove the Disk Drive Backplane 5–16 ▼ Install the Disk Drive Backplane 5–17 Servicing the Motherboard (FRU) 5–19 ▼ Remove the Motherboard 5–19 ▼ Install the Motherboard 5–20 Returning the Server to Operation 6–1 Replacing the Server Top Cover 6–1 ▼...
- Page 8 Prerequisites for Restoring SP Firmware Using the Preboot Menu 8–12 ▼ Restore the SP Firmware Image Using the Preboot Menu 8–12 8.3.5 Preboot Menu Command Summary 8–13 Contacting Support 8–15 Locating the Chassis Serial Number 8–16 viii Sun Server X2-4 Service Manual • April 2013...
- Page 9 A. Server Specifications A–1 Physical Specifications A–1 Electrical Specifications A–1 Environmental Requirements A–2 B. BIOS Setup Utility Menus B–1 BIOS Main Menu Selections B–2 BIOS Advanced Menu Selections B–3 BIOS PCIPnP Menu Selections B–12 BIOS Boot Menu Selections B–14 BIOS Security Menu Selections B–16 BIOS IO/MMIO Menu Selections B–17 BIOS Chipset Menu Selections B–19 BIOS Exit Menu Selections B–21...
- Page 10 Gathering Information for the Physical Media Request D–5 ▼ Request Physical Media (Online) D–5 ▼ Request Physical Media (By Phone) D–6 Installing Updates D–7 D.5.1 Installing Firmware D–7 D.5.2 Installing Hardware Drivers and OS Tools D–8 Index Index–1 Sun Server X2-4 Service Manual • April 2013...
-
Page 11: Using This Documentation
This service manual explains how to replace parts in Oracle’s Sun Server X2-4 and how to use and maintain the system. Note – The Sun Server X2-4 was formerly named the Sun Fire X4470 M2 server. This former name might still appear in the software. The new product name does not indicate any change in system features or functionality. -
Page 12: Related Documentation
Oracle Integrated Lights http://www.oracle.com/pls/topic/lookup?ctx= Out Manager (ILOM) 3.0 ilom30 Oracle Integrated Lights http://www.oracle.com/pls/topic/lookup?ctx= Out Manager (ILOM) 3.1 ilom31 (for Sun Server X2-4 Software Release 1.3 and above) Oracle Hardware http://www.oracle.com/pls/topic/lookup?ctx= Installation Assistant Sun Server X2-4 Service Manual • April 2013... -
Page 13: Index
Support and Accessibility Description Links Access electronic support http://support.oracle.com through My Oracle Support For hearing impaired: http://www.oracle.com/accessibility/support. html Learn about Oracle’s http://www.oracle.com/us/corporate/accessibi commitment to accessibility lity/index.html Using This Documentation xiii... - Page 14 Sun Server X2-4 Service Manual • April 2013...
-
Page 15: Sun Server X2-4 Service Manual Overview
Section 1.4 “Performing Service Related Tasks” on page 1-11 ■ System Overview Oracle’s Sun Server X2-4 is a 3 rack unit (RU) rackmount server that uses the Intel Xeon E7 platform. This section describes the major features, components, and capabilities of the server. -
Page 16: Block Diagrams
1.1.2 Block Diagrams shows a block diagram for a Sun Server X2-4 with four CPUs. FIGURE 1-1 shows a block diagram for a Sun Server X2-4 with two CPUs. FIGURE 1-2 Note – In the diagrams, the PCIe SAS/RAID Controller is shown as installed in Slot 2. -
Page 17: Processors (Cpus)
Two CPU Block Diagram FIGURE 1-2 1.1.3 Processors (CPUs) The Sun Server X2-4 supports two or four processors (CPUs), as shown in FIGURE 1-1 . The two-CPU configuration must have CPUs (with heatsinks) in FIGURE 1-2 sockets 0 and 2 and heatsink filler panels installed in sockets 1 and 3. -
Page 18: Memory
1.1.4 Memory Each CPU in the Sun Server X2-4 has four SMI channels leading to Intel 7510 Scalable Memory Buffers (located on two memory risers). Each memory buffer has an SMI link to the CPU and two DDR3 interfaces. Each SMI interface can operate at speeds of 6.4 GT/s, which correspond to DDR3 operation at 1067 MT/s. -
Page 19: Cooling
1.1.5 Cooling The Sun Server X2-4 is cooled from front to back. Cooling occurs in two areas of the chassis, separated by a plastic dividing wall. In the power supply cooling zone, fans at the back of the power supplies cool the drive bays as well as the power supplies,... -
Page 20: Input/Output (I/O)
Server Cooling Zones FIGURE 1-4 Figure Legend Power supply cooling zone Chassis cooling zone 2 Chassis cooling zone 1 Chassis cooling zone 0 1.1.6 Input/Output (I/O) For internal storage, the server chassis provides: Sun Server X2-4 Service Manual • April 2013... -
Page 21: Summary Of Supported Components And Capabilities
RAID volume is configured on the HBA card, the drive bays for the RAID members must hold the same type of storage device.) 1.1.7 Summary of Supported Components and Capabilities The following table summarizes the components and capabilities of the Sun Server X2-4. Chapter 1 Sun Server X2-4 Service Manual Overview... - Page 22 (4 or 6) is unpopulated. Cluster card slot One specialized slot dedicated for use in storage appliances. The Sun Server X2-4 does not support populating this slot with standard PCIe cards. Sun Server X2-4 Service Manual • April 2013...
-
Page 23: Server Front Panel Features
Component Sun Server X2-4 PCI Express I/O cards For a list of I/O cards that are customer-orderable options, go to the Sun x86 Servers web site and navigate to the Sun Server X2-4 page: http://www.oracle.com/technetwork/server-storage/sun-x8 6/overview/index.html Ethernet ports Four 10/100/1000 RJ-45 GbE ports on rear panel. -
Page 24: Server Back Panel Features
Over Temperature Warning LED: amber 17 Hard disk drive 5 (optional) USB 2.0 connectors (2) Server Back Panel Features shows the Sun Server X2-4 back panel and describes its components. FIGURE 1-6 1-10 Sun Server X2-4 Service Manual • April 2013... -
Page 25: Performing Service Related Tasks
Performing Service Related Tasks This guide contains information and procedures for maintaining and servicing your server. identifies the sections in this guide that describe the task you want TABLE 1-2 to perform. Chapter 1 Sun Server X2-4 Service Manual Overview 1-11... - Page 26 Troubleshoot the server Chapter 8 Review server hardware specifications Appendix A Review BIOS Setup Utility menus Appendix B Review connector pinouts Appendix C Download software and firmware for the Appendix D server 1-12 Sun Server X2-4 Service Manual • April 2013...
- Page 27 Section 2.8 “Removing or Installing Filler Panels” on page 2-9 ■ Section 2.9 “Attaching Devices to the Server” on page 2-10 ■ Location of Replaceable Components identifies the replaceable component locations on the Sun Server X2-4, FIGURE 2-1 with the top cover removed.
- Page 28 FIGURE 2-1 Figure Legend Motherboard Low-profile PCIe cards Power supplies Power supply backplane Disk backplane System lithium battery CPUs and heatsinks Memory risers Fan board Fan modules DVD drive Hard disk drives (HDD) Sun Server X2-4 Service Manual • April 2013...
-
Page 29: Preparing To Service The Sun Server X2-4
PCIe cards. When servicing or removing server components, attach an antistatic strap to your wrist and then to a metal area on the chassis. Following this practice equalizes the electrical potentials between you and the server. Chapter 2 Preparing to Service the Sun Server X2-4... -
Page 30: Using An Antistatic Mat
A disposable ESD mat (shipped with some optional system components) ■ Positioning the Server for Maintenance To remove and replace components in the Sun Server X2-4, you must extend the server to the maintenance position. ▼ Extend the Server to the Maintenance Position 1. -
Page 31: Releasing The Cable Management Arm
1. Press and hold the tab [1]. 2. Swing the CMA out of the way [2]. When you have finished with the service procedure, swing the CMA closed and latch it to the left rack rail. Chapter 2 Preparing to Service the Sun Server X2-4... -
Page 32: Powering Off The Server
Powering Off the Server Many service procedures require you to remove main power from the server. To remove main power from the server, use one of the methods described in the following table. Sun Server X2-4 Service Manual • April 2013... -
Page 33: Power Off The Server Using The Service Processor Command-Line Interface
The ILOM command-line interface (CLI) prompt appears (->). Depending on the type of problem, you might want to view server status or log files, or run diagnostics before you shut down the server. Chapter 2 Preparing to Service the Sun Server X2-4... -
Page 34: Removing The Server Top Cover
1. Ensure that the AC power cords are disconnected from the server power supplies. 2. To unlatch the server top cover, insert your fingers under the two cover latches and simultaneously lift both latches in an upward motion ( )[1]. FIGURE 2-4 Sun Server X2-4 Service Manual • April 2013... -
Page 35: Removing Or Installing Filler Panels
The filler panels are installed at the factory and must remain in the server until you replace them with a purchased module to ensure proper airflow through the system. If you remove a filler panel and continue to operate your system with an empty Chapter 2 Preparing to Service the Sun Server X2-4... -
Page 36: Attaching Devices To The Server
Attaching Devices to the Server As part of servicing the Sun Server X2-4, you might have to connect devices to the server. The following sections describe the locations of connectors on the server and the order in which you should attach cables and devices to the server. -
Page 37: Cabling The Server
4. If you plan to access the Oracle ILOM command-line interface (CLI) using the management port, connect a serial null modem cable to the RJ-45 serial port labeled SER MGT. Chapter 2 Preparing to Service the Sun Server X2-4 2-11... - Page 38 2-12 Sun Server X2-4 Service Manual • April 2013...
-
Page 39: Servicing Cru Components That Do Not Require Server Power Off
C H A P T E R Servicing CRU Components That Do Not Require Server Power Off This chapter describes how to service customer-replaceable units (CRUs) that do not require you to power off the server. It contains the following topics: Section 3.1 “Servicing Disk Drives (CRU)”... -
Page 40: Removing And Installing Disk Drives And Disk Drive Filler Panels
▼ Remove a Disk Drive Filler Panel 1. Attach an antistatic wrist strap. Section 2.3 “Performing Electrostatic Discharge and Static Prevention Measures” on page 2-3. 2. Identify the disk drive filler panel you want to remove. Sun Server X2-4 Service Manual • April 2013... -
Page 41: Remove A Disk Drive
3. On the disk drive filler panel you want to remove, push the release button to open the latch. 4. Grasp the latch and pull the filler panel out of the drive slot. Caution – The latch is not an ejector. Do not bend it too far to the right. Doing so can damage the latch. -
Page 42: Install A Disk Drive
1. Unpack the disk drive and place it on an antistatic mat. 2. Verify that the release lever on the disk drive is fully opened. Sun Server X2-4 Service Manual • April 2013... -
Page 43: Install A Disk Drive Filler Panel
3. Slide the drive into the drive slot until it is fully seated. Installing a Disk Drive FIGURE 3-3 4. Close the latch to lock the drive in place. 5. Do one of the following: If you have cold-swapped the drive, restore power to the server. Complete the ■... -
Page 44: About Server Fans
The fan module is faulty. Required The front and rear panel Service Action Required LEDs are also lit if the system detects a fan module fault. shows the fan module LED status locations. FIGURE 3-4 Sun Server X2-4 Service Manual • April 2013... -
Page 45: Detecting Fan Module Failure
Fan Module Status LEDs FIGURE 3-4 3.2.3 Detecting Fan Module Failure The following LEDs are lit when a fan module fault is detected: Front and rear Service Action Required LEDs ■ Fan Module Service Action Required (TOP) LED on the front of the server ■... -
Page 46: Remove A Fan Module
Caution – When changing the fan modules, note that only the fan modules can be removed or replaced. Do not service any other components in the fan compartment unless the system is shut down and the power cords are removed. Sun Server X2-4 Service Manual • April 2013... -
Page 47: Install A Fan Module
Removing a Fan Module FIGURE 3-5 ▼ Install a Fan Module Refer to when completing the following procedure. FIGURE 3-6 1. Unpack the replacement fan module and place it on an antistatic mat. 2. Install the replacement fan module into the server. The fan modules are keyed to ensure that they are installed in the correct orientation. - Page 48 LEDs might stay lit until power is restored to the server and the server can determine that the fan module is functioning properly. 6. Return the server to the normal rack position. Section 6.2 “Returning the Server to the Normal Rack Position” on page 6-2. 3-10 Sun Server X2-4 Service Manual • April 2013...
-
Page 49: Servicing Power Supplies (Cru)
Servicing Power Supplies (CRU) The power supplies on the Sun Server X2-4 are redundant. That is, the server needs only one power supply to operate. Redundant power supplies enable you to remove and replace a power supply without shutting down the server, provided that the other power supply is online and working. -
Page 50: Detecting A Power Supply Failure
Use the following procedures to remove and install power supplies. Caution – Hazardous voltages are present. To reduce the risk of electric shock and danger to personal health, follow the instructions. 3-12 Sun Server X2-4 Service Manual • April 2013... -
Page 51: Remove A Power Supply
▼ Remove a Power Supply Refer to when completing the following procedure. FIGURE 3-8 1. Prepare for servicing: a. Attach an antistatic wrist strap. Section 2.3 “Performing Electrostatic Discharge and Static Prevention Measures” on page 2-3. b. If necessary, release the cable management arm to access the power supplies. Section 2.5 “Releasing the Cable Management Arm”... -
Page 52: Install A Power Supply
Caution – Install an A239A or A239C power supply, labeled for upright installation, in the Sun Server X2-4. The A239A/A239C power supply correctly exhausts air from the rear of the server. Do not install an A239 or A239B power supply, which might cause the system to overheat and shut down. - Page 53 Installing a Power Supply FIGURE 3-9 4. Reconnect the power cord to the power supply. 5. Verify that the AC Present LED is lit. Section 3.3.1 “Power Supply LED Reference” on page 3-11. 6. Verify that the following LEDs are not lit: Service Action Required LED on the power supply ■...
- Page 54 3-16 Sun Server X2-4 Service Manual • April 2013...
-
Page 55: Servicing Cru Components That Require Server Power Off
C H A P T E R Servicing CRU Components That Require Server Power Off This chapter describes how to service customer-replaceable units (CRUs) that require you to power down the system before servicing. It contains the following topics: Section 4.1 “Servicing Memory Risers and DIMMs (CRU)” on page 4-1 ■... -
Page 56: Cpus, Memory Risers, And Dimms Physical Layout
“Install Memory Risers and DIMMs” on page 4-13. 4.1.1 CPUs, Memory Risers, and DIMMs Physical Layout The physical layout of the CPUs, memory risers, and DIMMs is shown in FIGURE 4-1 FIGURE 4-2 Sun Server X2-4 Service Manual • April 2013... -
Page 57: Memory Riser Population Rules
Sun Server X2-4. Before installing memory risers in the server, ensure that the memory riser contains this label. The system firmware checks if the installed CPUs are for the Sun Server X2-4. The system firmware raises a fault for memory risers whose model belongs with the other family of CPUs. -
Page 58: Memory Riser Dimm Population Rules
FIGURE 4-2 4.1.3 Memory Riser DIMM Population Rules The memory riser DIMM population rules for the Sun Server X2-4 are as follows: 1. Maximum memory operating speed is 1066 MHz. This also applies to supported DIMMs rated for higher speeds. -
Page 59: Memory Performance Guidelines
U-shaped metal clips on the top of the DIMM. 4. Each memory riser supports up to 8 DIMMs, with a maximum 64 DIMMs for a 4-socket Sun Server X2-4. 5. DIMM slots are color coded with the following population order: Blue ■... -
Page 60: Recommended Memory Placement
4.1.4.1 Recommended Memory Placement For the Sun Server X2-4, the operating speed of the DIMMs does not decrease as more DIMMs are installed. For best memory performance, follow these simple guidelines to add or replace DIMMs in the server. Use one or more sizes of DIMMs, with an even number of DIMMs of each size. -
Page 61: Dimm Fault Isolation
4.1.5 DIMM Fault Isolation The eight DIMMs supported on each memory riser card in the Sun Server X2-4 are divided into two logical DDR3 channels. The first logical channel contains DIMMs installed in slots D0, D1, D4 and D5. The second logical channel contains DIMMs installed in slots D2, D4, D6 and D7. -
Page 62: Removing And Installing Memory Risers, Dimms, And Filler Panels
▼ Remove a DIMM Filler Panel 1. Prepare for servicing: a. Attach an antistatic wrist strap. Section 2.3 “Performing Electrostatic Discharge and Static Prevention Measures” on page 2-3. Sun Server X2-4 Service Manual • April 2013... -
Page 63: Remove A Memory Riser And Dimm
b. Power off the server. Section 2.6 “Powering Off the Server” on page 2-6. c. Extend the server to the maintenance position. Section 2.4 “Positioning the Server for Maintenance” on page 2-4. d. Remove the top cover. Section 2.7 “Removing the Server Top Cover” on page 2-8. - Page 64 Fault Remind Button on the Air Divider FIGURE 4-3 3. Lift the memory riser that has its Service Action Required LED lit straight up to remove the memory riser from the memory module socket ( FIGURE 4-4 4-10 Sun Server X2-4 Service Manual • April 2013...
- Page 65 Removing the Memory Riser FIGURE 4-4 4. Identify the faulty or misconfigured DIMM(s) by pressing the Fault Remind button on the memory riser ( FIGURE 4-5 If the DIMM Service Action Required LED is off: DIMM is operating properly. ■ If the DIMM Service Action Required LED is on (amber): DIMM is faulty or ■...
- Page 66 Rotate both DIMM slot ejectors outward as far as they will go. The DIMM is partially ejected from the socket. b. Carefully lift the DIMM straight up to remove it from the socket. 4-12 Sun Server X2-4 Service Manual • April 2013...
-
Page 67: Install Memory Risers And Dimms
DIMM Socket Release and Alignment FIGURE 4-6 Figure Legend DIMM connector slot DIMM connector key DIMM ejector lever Caution – Whenever you remove a memory riser or DIMM, you should replace it with another memory riser or a DIMM or a filler panel; otherwise, the server might overheat due to improper airflow. - Page 68 Step 4 5. Repeat through until all replacement DIMMs are installed. 6. Push the memory riser module into the associated CPU memory riser slot until the riser module locks in place. 4-14 Sun Server X2-4 Service Manual • April 2013...
- Page 69 Installing a Memory Riser Module FIGURE 4-8 7. Return the server to operation: a. Install the top cover. Section 6.1 “Replacing the Server Top Cover” on page 6-1. b. Return the server to the normal rack position. Section 6.2 “Returning the Server to the Normal Rack Position” on page 6-2.
-
Page 70: Install A Memory Riser Filler Panel
Return the server to the normal rack position. Section 6.2 “Returning the Server to the Normal Rack Position” on page 6-2. c. Power on the server. Section 6.3 “Powering On the Server” on page 6-3. 4-16 Sun Server X2-4 Service Manual • April 2013... -
Page 71: Servicing Pcie Cards (Cru)
1-10. 4.2.1 PCIe Card Configuration Rules The server supports up to ten low-profile PCIe 2.0 cards. Refer to the Sun Server X2-4 Product Notes for details about supported PCIe cards, along with card quantity and slot restrictions. The following PCIe card slots are available on the server: Slots 0 and 9: x4 electrical interface ■... -
Page 72: Pcie Cards With Bootable Devices
BIOS Setup Utility in order to disable I/O allocation from the PCIPnP menu. The exception to this workaround is that if PXE network booting will use a Quad Gigabit Ethernet card, you should leave I/O allocation enabled for that slot. 4-18 Sun Server X2-4 Service Manual • April 2013... -
Page 73: Removing And Installing Pcie Cards And Pcie Card Filler Panels
Since BIOS does not allocate I/O space for empty slots, maximizing the number of empty PCIe slots in the server might also help to avoid the "PCI resource exhaustion" event. 4.2.4 Removing and Installing PCIe Cards and PCIe Card Filler Panels Use the following procedures to remove and install PCIe cards and PCIe card filler panels. -
Page 74: Remove A Pcie Card
Extend the server to the maintenance position. Section 2.4 “Positioning the Server for Maintenance” on page 2-4. d. Remove the top cover. Section 2.7 “Removing the Server Top Cover” on page 2-8. 4-20 Sun Server X2-4 Service Manual • April 2013... - Page 75 2. Locate the PCIe card that you want to remove. Section 1.3 “Server Back Panel Features” on page 1-10 for information about PCIe slots and their locations. 3. If necessary, make a note of where the PCIe cards are installed. 4.
-
Page 76: Install A Pcie Card
3. Install the PCIe card into the PCIe card slot. Installing a PCIe Card FIGURE 4-10 4. Return the PCIe card slot crossbar to its closed and locked position. 5. Return the server to operation: 4-22 Sun Server X2-4 Service Manual • April 2013... -
Page 77: Install A Pcie Card Filler Panel
a. Install the top cover. Section 6.1 “Replacing the Server Top Cover” on page 6-1. b. Return the server to the normal rack position. Section 6.2 “Returning the Server to the Normal Rack Position” on page 6-2. c. Reconnect all power cords to the server power supplies and power on the server. -
Page 78: Servicing The Dvd Drive And Dvd Driver Filler Panel (Cru)
2-6. 2. Push down on the latch on the top left corner of the DVD drive or filler panel. 3. Slide the DVD drive or filler panel out of the server. 4-24 Sun Server X2-4 Service Manual • April 2013... -
Page 79: Install The Dvd Drive Or Dvd Drive Filler Panel
Caution – Whenever you remove the DVD drive or filler panel, you should replace it with another DVD drive or a filler panel; otherwise the server might overheat due to improper airflow. Removing the DVD Drive or Filler Panel FIGURE 4-11 ▼... - Page 80 Return the server to the normal rack position. Section 6.2 “Returning the Server to the Normal Rack Position” on page 6-2. b. Power on the server. Section 6.3 “Powering On the Server” on page 6-3. 4-26 Sun Server X2-4 Service Manual • April 2013...
-
Page 81: Servicing The System Lithium Battery (Cru)
Servicing the System Lithium Battery (CRU) The system battery maintains system time when the server is powered off and disconnected from AC power. If the IPMI logs indicate a battery failure, you should replace the system battery. Use the following procedures to remove and replace the system battery. -
Page 82: Install The System Battery
ILOM clock using the Oracle ILOM CLI or the web interface. For instructions, see the Oracle Integrated Lights Out Manager (ILOM) 3.1 Documentation Library at http://www.oracle.com/pls/topic/lookup?ctx=ilom31 5. Return the server to operation: 4-28 Sun Server X2-4 Service Manual • April 2013... - Page 83 a. Install the top cover. Section 6.1 “Replacing the Server Top Cover” on page 6-1. b. Return the server to the normal rack position. Section 6.2 “Returning the Server to the Normal Rack Position” on page 6-2. c. Reconnect all power cords to the server power supplies and power on the server.
- Page 84 4-30 Sun Server X2-4 Service Manual • April 2013...
-
Page 85: Servicing Fru Components
C H A P T E R Servicing FRU Components This chapter describes how to service field-replaceable units (FRUs). You must power down the system and remove the AC power cords before servicing all FRU components. Note – Only authorized service providers (ASPs) should service FRU components. This chapter contains the following topics: Section 5.1 “Servicing the CPU and Heatsink (FRU)”... -
Page 86: Cpu Placement
3. Lift the heatsink filler panel out of the chassis. Caution – Whenever you remove a heatsink filler panel, you should replace it with a heatsink or another heatsink filler panel; otherwise, the server might overheat due to improper airflow. Sun Server X2-4 Service Manual • April 2013... -
Page 87: Remove A Heatsink And Cpu
4. If you are installing a CPU into a CPU socket where a CPU has never been installed, remove the CPU cover plate: a. Disengage the CPU release lever by pushing down and moving it to the side away from the CPU socket, and then rotating the lever upward. b. - Page 88 Also, be careful not to get the grease on your fingers as this could result in contamination of components. 4. If you are replacing the CPU as well as the heatsink, remove the CPU: Sun Server X2-4 Service Manual • April 2013...
-
Page 89: Install A Heatsink And Cpu
a. Disengage the CPU release lever by pushing down and moving it to the side away from the CPU, and then rotating the lever upward. b. Open the load plate and carefully remove the CPU. Removing the Heatsink and CPU FIGURE 5-2 ▼... - Page 90 Ensure that the load plate sits flat around the periphery of the CPU. c. Engage the release lever by rotating it downward and slipping it under the catch. 3. Install the heatsink. Sun Server X2-4 Service Manual • April 2013...
- Page 91 a. If you are reusing an existing cleaned heatsink, use the syringe (supplied with the new or replacement CPU) to apply thermal grease on top of the CPU in a star pattern. Note – You do not need to complete this step if you have a new heatsink since new heatsinks come with thermal grease already applied.
-
Page 92: Install A Heatsink Filler Panel
Section 2.3 “Performing Electrostatic Discharge and Static Prevention Measures” on page 2-3. b. Power off the server completely and disconnect all power cords from the server power supplies. Section 2.6 “Powering Off the Server” on page 2-6. Sun Server X2-4 Service Manual • April 2013... - Page 93 c. Extend the server to the maintenance position. Section 2.4 “Positioning the Server for Maintenance” on page 2-4. d. Remove the top cover. Section 2.7 “Removing the Server Top Cover” on page 2-8. 2. Remove all fan modules. “Remove a Fan Module” on page 3-8.
-
Page 94: Install The Fan Board
Reposition the front memory riser guide, routing the fan board and power cable through the riser guide. c. Plug the fan board cable and power cable into the connectors on the motherboard. 5-10 Sun Server X2-4 Service Manual • April 2013... - Page 95 d. Tighten the three captive screws to hold the front memory riser guide in place. e. Secure the fan board unit in place by reinserting and tightening the two screws on each side of the outside of the chassis. Installing the Fan Board FIGURE 5-5 4.
-
Page 96: Servicing The Power Supply Backplane (Fru)
Extend the server to the maintenance position. Section 2.4 “Positioning the Server for Maintenance” on page 2-4. d. Remove the top cover. Section 2.7 “Removing the Server Top Cover” on page 2-8. 5-12 Sun Server X2-4 Service Manual • April 2013... - Page 97 2. Pull both power supplies at least part way out of the chassis, to disconnect them from the power supply backplane. “Remove a Power Supply” on page 3-13. 3. Remove the memory riser or filler panel closest to the air divider. Section 4.1.8 “Removing and Installing Memory Risers, DIMMs, and Filler Panels”...
-
Page 98: Install The Power Supply Backplane
7. Reinstall the air divider by sliding it into the chassis. 8. Reinstall the memory riser or filler panel closest to the air divider. Section 4.1.8 “Removing and Installing Memory Risers, DIMMs, and Filler Panels” on page 4-8. 5-14 Sun Server X2-4 Service Manual • April 2013... -
Page 99: Servicing The Disk Drive Backplane (Fru)
Installing the Power Supply Backplane FIGURE 5-7 9. Push the power supplies all the way back into the chassis. “Install a Power Supply” on page 3-14. 10. Return the server to operation: a. Install the top cover. Section 6.1 “Replacing the Server Top Cover” on page 6-1. -
Page 100: Remove The Disk Drive Backplane
4. Remove power cable, ribbon data cable, and any SAS/SATA cables from the disk drive backplane. 5. Push up on the wire tab in the upper corner and pull the disk drive backplane up and out of the chassis. 5-16 Sun Server X2-4 Service Manual • April 2013... -
Page 101: Install The Disk Drive Backplane
Removing the Disk Drive Backplane FIGURE 5-8 ▼ Install the Disk Drive Backplane Refer to when completing the following procedure. FIGURE 5-9 1. Unpack the replacement disk drive backplane and place it on an antistatic mat. 2. Insert the disk drive backplane into the chassis. Verify that the disk drive backplane is seated properly at the bottom, in the small slot near the DVD drive. - Page 102 Note – The product serial number used for service entitlement and warranty coverage might need to be reprogrammed on the disk backplane by authorized service personnel with the correct product serial number located on the chassis EZ label. 5-18 Sun Server X2-4 Service Manual • April 2013...
-
Page 103: Servicing The Motherboard (Fru)
Servicing the Motherboard (FRU) Use the following procedures to remove and install the motherboard. Caution – These procedures require that you handle components that are sensitive to electrostatic discharge. This discharge can cause server components to fail. To avoid damage, ensure that you follow the antistatic practices as described in Section 2.3 “Performing Electrostatic Discharge and Static Prevention Measures”... -
Page 104: Install The Motherboard
1. Unpack the replacement motherboard and place it on an antistatic mat. 2. Grasp the motherboard by the handle and hold the cables off to the side while sliding the motherboard toward the back of the chassis. 5-20 Sun Server X2-4 Service Manual • April 2013... - Page 105 3. Align the rear Locate button with its corresponding hole in the back of the chassis, and ensure that the Locate button is not jammed in the down position. Section 5.1 “Servicing 4. Replace the CPUs and heatsinks on the motherboard. See the CPU and Heatsink (FRU)”...
- Page 106 Installing the Motherboard FIGURE 5-11 5-22 Sun Server X2-4 Service Manual • April 2013...
-
Page 107: Returning The Server To Operation
C H A P T E R Returning the Server to Operation This chapter describes the procedures you must follow to return the server to operation after servicing components. It contains the following topics: Section 6.1 “Replacing the Server Top Cover” on page 6-1 ■... -
Page 108: Returning The Server To The Normal Rack Position
▼ Return the Server to the Normal Rack Position Refer to when completing the following procedure. FIGURE 6-2 1. Release the slide rails from the fully extended position by pushing the release tabs on the side of each rail. Sun Server X2-4 Service Manual • April 2013... -
Page 109: Powering On The Server
Inserting Server Back Into Rack FIGURE 6-2 2. While pushing on the release tabs, slowly push the server into the rack. Ensure that the cables do not get in the way. 3. Reconnect the cables to the back of the server. If the cable management arm (CMA) is in the way, disconnect the left CMA release and swing the CMA open. - Page 110 Caution – Do not operate the server without all fans, component heatsinks, air baffles, and the cover installed. Severe damage to server components can occur if the server is operated without adequate cooling mechanisms. Sun Server X2-4 Service Manual • April 2013...
-
Page 111: Servicing The Server At Boot Time
C H A P T E R Servicing the Server at Boot Time This chapter describes the Basic Input/Output System (BIOS) Setup Utility. It contains the following topics: Section 7.1 “Powering On the Server” on page 7-1 ■ Section 7.2 “About the BIOS” on page 7-2 ■... -
Page 112: About The Bios
Attempt to enter password fails three times Correctable ECC Correctable ECC (error correction code) error detected Does not apply Uncorrectable ECC Uncorrectable ECC error detected Does not apply No system memory No physical memory detected in the system Sun Server X2-4 Service Manual • April 2013... - Page 113 BIOS POST Events (Continued) TABLE 7-1 Boot Continues Event Cause on Host? No usable system memory All installed memory has experienced an unrecoverable failure Hard disk controller failure No disk controller found Keyboard failure Keyboard cannot be initialized Boot media failure No removable boot media is found No video device No video controller is found...
-
Page 114: Bios Post F1 And F2 Errors
When or where the error occurred ■ lists some of the F1 and F2 error messages that could appear during the TABLE 7-2 POST diagnostics along with instructions for how to possibly resolve the error reported. Sun Server X2-4 Service Manual • April 2013... - Page 115 BIOS POST F1 and F2 Error Messages TABLE 7-2 BIOS POST Error Message Error Type Resolution Uncorrectable Error Detected on Last Boot:IOH(n) IOH error • Press F1 to continue. Protocol Error (Please Check SP Log for more • Check the SP event log in Oracle ILOM Details) for more details.
- Page 116 • CMOS Checksum Bad CMOS error • Press F2 to enter BIOS Setup Utility to load system defaults. • CMOS Date/Time Not Set • Check the SP event log in Oracle ILOM for more details. Sun Server X2-4 Service Manual • April 2013...
-
Page 117: How Bios Post Memory Testing Works
BIOS POST F1 and F2 Error Messages (Continued) TABLE 7-2 BIOS POST Error Message Error Type Resolution Password check failed Password • Press F1 to continue. check error • Check the SP event log in Oracle ILOM for more details. Note - This type of error indicates that the password entered does not match the password specified in the BIOS Setup... -
Page 118: Ethernet Port Device And Driver Naming
Ethernet Port Device and Driver Naming The Sun Server X2-4 supports up to four 10/100/1000BASE-T Gigabit Ethernet ports, located on the back of the chassis. The ports are labeled NET 0, NET 1, NET2, and NET 3, as shown in... -
Page 119: Ethernet Port Booting Priority
Ethernet Port Naming FIGURE 7-2 7.6.1 Ethernet Port Booting Priority The order in which the BIOS detects the Ethernet ports during bootup is listed below. Note – You can change the boot priority using the Boot Device Priority screen available in the Boot menu of the BIOS Setup Utility. 1. - Page 120 Configure QPI features. IO/MMIO ratio configuration options. Chipset Configuration options for the South Bridge devices. Exit Saves or discards changes. identifies the sub-menus that you can access from each of the top-level FIGURE 7-3 BIOS menus. 7-10 Sun Server X2-4 Service Manual • April 2013...
-
Page 121: Performing Common Bios Procedures
Sun Server X2-4 Module BIOS Configuration Utility Menu Tree FIGURE 7-3 For an example of the options that are available on the BIOS Setup Utility menus, see Appendix Performing Common BIOS Procedures This section includes instructions for performing some common procedures using the BIOS Setup Utility. -
Page 122: Access The Bios Setup Utility
F1 Control-Q ■ F2 Control-E. ■ F7 Control-D ■ F8 Control-P ■ F9 Control-O ■ F10 Control-S ■ F12 Control-N ■ The BIOS Setup Utility Main screen appears ( FIGURE 7-4 7-12 Sun Server X2-4 Service Manual • April 2013... -
Page 123: Reset The Bios Password
BIOS Setup Utility Main Screen FIGURE 7-4 ▼ Reset the BIOS Password To reset the BIOS password, complete the following steps: 1. Access the BIOS Setup Utility. “Access the BIOS Setup Utility” on page 7-12. 2. Navigate to the Security menu option. The Security screen appears ( FIGURE 7-5 Chapter 7... - Page 124 BIOS Security Screen FIGURE 7-5 3. Select the password (user or supervisor) that you want to change, then press Enter. The Enter New Password dialog box appears ( FIGURE 7-6 7-14 Sun Server X2-4 Service Manual • April 2013...
-
Page 125: Configure Support For Tpm
▼ Configure Support for TPM If you intend to use the Trusted Platform Module (TPM) feature set that is provided in Windows Server 2008, you must configure the Sun Server X2-4 to enable this feature. Note – TPM enables you to administer the TPM security hardware in your server. - Page 126 The Trusted Computing screen appears ( FIGURE 7-8 Trusted Computing Screen FIGURE 7-8 4. Select TCG/TPM Support, then press Enter. A screen appears listing the available TCG/TPM options ( FIGURE 7-9 7-16 Sun Server X2-4 Service Manual • April 2013...
- Page 127 TCG/TPM Support Screen FIGURE 7-9 5. Set the TCG/TPM Support option to Yes. Note – If the TCG/TPM Support option is already set to Yes, you should still complete the remaining steps in this procedure to ensure that all TPM configuration requirements are satisfied.
-
Page 128: Configure Sp Lan Settings
10. Press F10 to exit BIOS. ▼ Configure SP LAN Settings You can assign an IP address for the server SP from the BIOS Setup Utility on the IPMI 2.0 Configuration menu. 7-18 Sun Server X2-4 Service Manual • April 2013... - Page 129 Note – You can also specify the LAN settings for the SP using Oracle ILOM. For instructions for setting the IP address in Oracle ILOM, see the Oracle Integrated Lights Out Manager (ILOM) 3.1 Documentation Library at http://www.oracle.com/pls/topic/lookup?ctx=ilom31. To set the IP address, complete the following steps: 1.
- Page 130 Set LAN Configuration Option FIGURE 7-12 5. Use the arrow keys to select and specify the appropriate LAN configuration settings ( FIGURE 7-13 7-20 Sun Server X2-4 Service Manual • April 2013...
-
Page 131: Configure Option Rom Settings
LAN Configuration Dialog Box FIGURE 7-13 6. Press F10 to save the changes and exit BIOS. ▼ Configure Option ROM Settings The BIOS Option ROM is 128 Kbytes. Of these 128 Kbytes, approximately 80 Kbytes are used by the VGA controller, the disk controller, and the network interface card. Approximately 48 Kbytes remain for the Option ROM. -
Page 132: Configuring Serial Port Sharing
If the network is not set up, and you switch the serial port owner to the host server, you will be unable to connect using the CLI or 7-22 Sun Server X2-4 Service Manual • April 2013... -
Page 133: Assign Serial Port Output Using The Cli
web interface to change the serial port owner back to the SP. To return the serial port owner setting to the SP, you will need to restore access to the serial port on the server. For more details about restoring access to the server port on your server, see the Oracle Integrated Lights Out Manager (ILOM) 3.1 Documentation Library at http://www.oracle.com/pls/topic/lookup?ctx=ilom31. -
Page 134: Bios And Sp Updates
Oracle ILOM firmware upgrade has been completed. Announcements and information about firmware releases are available in the ■ Product Notes documentation for your server. See Sun Server X2-4 Product Notes. Information about how to update firmware is available in the Oracle Integrated ■... -
Page 135: Troubleshooting The Server And Ilom Defaults
Section 8.5 “Locating the Chassis Serial Number” on page 8-16 ■ Troubleshooting the Server The Sun Server X2-4 and its accompanying software and firmware contain many diagnostic tools and features that can help you complete the following tasks: Isolate problems when a failure occurs on a component ■... -
Page 136: Diagnostic Tools
Runs on startup. Local, but can be Self-Test (POST) firmware system: CPUs, memory, and Available when the accessed through motherboard I/O bridge operating system is not Oracle ILOM integrated circuits. running. Remote Console. Sun Server X2-4 Service Manual • April 2013... -
Page 137: Diagnostic Tool Documentation
Library ilom31 • Oracle Integrated Lights Out • http://www.oracle.com/ Manager (ILOM) 3.1 Supplement pls/topic/lookup?ctx= for Sun Server X2-4 SunServerX2-4 Preboot Menu • Using the Preboot Menu Utility • Section 8.3 “Using the Preboot Menu Utility” on page 8-4 Chapter 8... -
Page 138: Using The Preboot Menu Utility
Section 8.3.2 “Restoring Oracle ILOM to Default Settings” on page 8-9 ■ Section 8.3.3 “Restoring Oracle ILOM Access to the Serial Console” on page 8-10 ■ Section 8.3.4 “Restoring the SP Firmware Image” on page 8-11 ■ Sun Server X2-4 Service Manual • April 2013... -
Page 139: Accessing The Preboot Menu
Section 8.3.5 “Preboot Menu Command Summary” on page 8-13 ■ 8.3.1 Accessing the Preboot Menu To access the Preboot Menu, you must reset the SP and interrupt the boot process. You can interrupt the ILOM boot process by either: Using the Locate button on the local server. ■... -
Page 140: Access The Preboot Menu
Type "h" and [Enter] for a list of commands, or "?" [Enter] for command-line key bindings. Type "h cmd" for summary of 'cmd' command. Warning: SP will warm-reset after 300 seconds of idle time. Sun Server X2-4 Service Manual • April 2013... -
Page 141: Edit Preboot Menu For Remote Serial Access
Set 'bootretry' to -1 to disable the time-out. Preboot> 4. You can perform any of the following tasks or type boot to exit the Preboot Menu. Enable remote access to the Preboot Menu. ■ For instructions, see “Edit Preboot Menu for Remote Serial Access” on page 8-7. - Page 142 Values for preferred are {[ 0 ]| 1 }. Set preferred? [<not set>] Values for preserve_conf are {[ yes ]| no }. Set preserve_conf? [yes] Values for check_physical_presence are {[ yes ]| no }. Set check_physical_presence? [yes] no Sun Server X2-4 Service Manual • April 2013...
-
Page 143: Edit Mode Settings In Preboot Menu
Set check_physical_presence? [no] Enter 'y[es]' to commit changes: [no] y Summary: Changed 2 settings. Preboot> 8.3.1.2 Edit Mode Settings in Preboot Menu In addition to changing the settings required in the Preboot Menu to enable remote access, you can also change other edit mode settings in the Preboot Menu. For a list of these settings, see TABLE 8-3 Edit Mode Preboot Menu Command Settings... -
Page 144: Reset Oracle Ilom Configuration Using The Preboot Menu
ILOM access to the serial console. ▼ Restore Access to the Serial Console Using the Preboot Menu 1. Access the Preboot Menu as described in Section 8.3.1 “Accessing the Preboot Menu” on page 8-5. 8-10 Sun Server X2-4 Service Manual • April 2013... -
Page 145: Restoring The Sp Firmware Image
2. At the Preboot> prompt, type edit. The Preboot Menu enters edit mode. In edit mode, the Preboot Menu displays its selections one-by-one, offering you a chance to change each one. To change a setting, type the new value, then press Enter. ■... -
Page 146: Prerequisites For Restoring Sp Firmware Using The Preboot Menu
Caution – The use of the net flash command is reserved for use by service personnel only. net flash tftpIPaddress path/nameILOM-version-Sun_Server_X2-4.pkg.flash where: tftpIPaddress is the IP address of a TFTP server. ■ 8-12 Sun Server X2-4 Service Manual • April 2013... -
Page 147: Preboot Menu Command Summary
path is the path to the file relative to /tftpboot. ■ version is the version of SP firmware. ■ For example: net flash 10.8.173.25 images/ILOM-3_1_x-x-rxxxx-Sun_Server_X2-4.pkg After a series of messages, the Preboot Menu prompt appears. 3. At the Preboot> prompt, type the reset command to restart the SP. For example: Preboot>... - Page 148 Caution - If you start the host when Oracle ILOM is off, the BIOS does not send error events, or power messages to the SP. This can cause the server to lose power. • hard-off – Turns the host off. 8-14 Sun Server X2-4 Service Manual • April 2013...
-
Page 149: Contacting Support
Preboot Menu Commands (Continued) TABLE 8-4 Command Description { config | dhcp | ping | flash } • config – Starts a dialog that enables you to change the Oracle ILOM network settings. • dhcp – Changes the network addressing from static to DHCP. Note - You must set ipdiscovery = dhcp using the net config command first. -
Page 150: Locating The Chassis Serial Number
Locate the yellow Customer Information Sheet (CIS) attached to your server ■ packaging. This sheet includes the serial number. From Oracle ILOM, enter the show/SYS command or go to the System ■ Information tab in the Oracle ILOM browser interface. 8-16 Sun Server X2-4 Service Manual • April 2013... -
Page 151: Server Specifications
A P P E N D I X Server Specifications This appendix includes specifications for the Sun Server X2-4. It contains the following topics: Section A.1 “Physical Specifications” on page A-1 ■ Section A.2 “Electrical Specifications” on page A-1 ■... -
Page 152: Electrical Specifications
1 degree C per 300 m above 900 m Altitude (nonoperating) (single, non-rack Up to 12,000 m system) Accoustic noise 8.9 B idle and operating, 75 dBA bystander position Sun Server X2-4 Service Manual • April 2013... - Page 153 Appendix A Server Specifications...
- Page 154 Sun Server X2-4 Service Manual • April 2013...
- Page 155 A P P E N D I X BIOS Setup Utility Menus This appendix shows the menu selections available in the BIOS Setup Utility. Note – The menus shown in this appendix are examples. The BIOS version numbers, menu information, and menu selections are subject to change over the life of the product.
-
Page 156: Bios Main Menu Selections
BIOS Main Menu Selections BIOS Main Menu FIGURE B-1 Sun Server X2-4 Service Manual • April 2013... -
Page 157: Bios Advanced Menu Selections
BIOS Advanced Menu Selections BIOS Advanced Menu–Advanced Settings Screen FIGURE B-2 Appendix B BIOS Setup Utility Menus... - Page 158 BIOS Advanced Menu–CPU Configuration First Screen FIGURE B-3 Sun Server X2-4 Service Manual • April 2013...
- Page 159 BIOS Advanced Menu–CPU Configuration Second Screen FIGURE B-4 BIOS Advanced Menu–IDE Configuration Screen FIGURE B-5 Appendix B BIOS Setup Utility Menus...
- Page 160 BIOS Advanced Menu–ACPI Configuration Screen FIGURE B-6 Sun Server X2-4 Service Manual • April 2013...
- Page 161 BIOS Advanced Menu–AHCI Configuration Screen FIGURE B-7 Appendix B BIOS Setup Utility Menus...
- Page 162 BIOS Advanced Menu–I/O Virtualization Screen FIGURE B-8 Sun Server X2-4 Service Manual • April 2013...
- Page 163 BIOS Advanced Menu–IPMI 2.0 Configuration Screen FIGURE B-9 BIOS Advanced Menu–IPMI 2.0 Configuration–Set LAN Configuration Screen FIGURE B-10 Appendix B BIOS Setup Utility Menus...
- Page 164 BIOS Advanced Menu–Intel VT-d Configuration Screen FIGURE B-11 BIOS Advanced Menu–PCI Express Configuration Screen FIGURE B-12 B-10 Sun Server X2-4 Service Manual • April 2013...
- Page 165 BIOS Advanced Menu–Remote Access Configuration Screen FIGURE B-13 BIOS Advanced Menu–Trusted Computing Screen FIGURE B-14 Appendix B BIOS Setup Utility Menus B-11...
-
Page 166: Bios Pcipnp Menu Selections
BIOS PCIPnP Menu Selections BIOS PCIPnP Menu First Screen FIGURE B-15 B-12 Sun Server X2-4 Service Manual • April 2013... - Page 167 BIOS PCIPnP Menu Second Screen FIGURE B-16 Appendix B BIOS Setup Utility Menus B-13...
-
Page 168: Bios Boot Menu Selections
BIOS Boot Menu Selections BIOS Boot Menu FIGURE B-17 B-14 Sun Server X2-4 Service Manual • April 2013... - Page 169 BIOS Boot Menu–Boot Settings Configuration Screen FIGURE B-18 BIOS Boot Menu–Boot Device Priority Screen FIGURE B-19 Appendix B BIOS Setup Utility Menus B-15...
-
Page 170: Bios Security Menu Selections
BIOS Security Menu Selections BIOS Security Menu FIGURE B-20 B-16 Sun Server X2-4 Service Manual • April 2013... -
Page 171: Bios Io/Mmio Menu Selections
BIOS IO/MMIO Menu Selections BIOS IO/MMIO Menu FIGURE B-21 Appendix B BIOS Setup Utility Menus B-17... - Page 172 BIOS IO/MMIO Menu–IO/MMIO Ration Configuration Screen FIGURE B-22 B-18 Sun Server X2-4 Service Manual • April 2013...
-
Page 173: Bios Chipset Menu Selections
BIOS Chipset Menu Selections BIOS Chipset Menu FIGURE B-23 Appendix B BIOS Setup Utility Menus B-19... - Page 174 BIOS Chipset Menu–South Bridge Configuration Screen FIGURE B-24 B-20 Sun Server X2-4 Service Manual • April 2013...
-
Page 175: Bios Exit Menu Selections
BIOS Exit Menu Selections BIOS Exit Menu FIGURE B-25 Appendix B BIOS Setup Utility Menus B-21... - Page 176 B-22 Sun Server X2-4 Service Manual • April 2013...
-
Page 177: Usb Connectors
A P P E N D I X Connector Pinouts This appendix includes pinout information for all connectors on Oracle’s Sun Server X2-4. It contains the following topics: Section C.1 “USB Connectors” on page C-1 ■ Section C.2 “Serial Connector” on page C-2 ■... -
Page 178: Serial Connector
Ready to Send Gigabit-Ethernet Connectors Four RJ-45 Gigabit-Ethernet connectors (NET0, NET1, NET2, NET3) can be accessed from the back panel. The Ethernet interfaces operate at 10 Mbit/sec, 100 Mbit/sec, and 1000 Mbit/sec. Sun Server X2-4 Service Manual • April 2013... -
Page 179: Gigabit-Ethernet Connectors
Gigabit Ethernet Connector FIGURE C-3 Figure Legend Transmit/Receive Data 0 + Transmit/Receive Data 2 – Transmit/Receive Data 0 – Transmit/Receive Data 1 – Transmit/Receive Data 1 + Transmit/Receive Data 3 + Transmit/Receive Data 2 + Transmit/Receive Data 3 – Network Management Port Connector The network management connector (NET MGT) is an RJ-45 connector located on the motherboard and can be accessed from the back panel. -
Page 180: Video Connectors
15 VGA 12C Serial Clock Blue Ground Serial Attached SCSI (SAS) Connector The SAS connector is located on the motherboard. It is connected with a SAS cable to the disk drive backplane. SAS Connector FIGURE C-6 Sun Server X2-4 Service Manual • April 2013... - Page 181 lists the pinouts for the SAS connector. TABLE C-1 SAS Connector Pinouts TABLE C-1 Signal Segment Second mate Transmit from PHY to hard drive Second mate Receive from hard drive to PHY Second mate Back-side Signal Second mate Second mate Second mate Power Segment 3.3V...
- Page 182 Sun Server X2-4 Service Manual • April 2013...
-
Page 183: Getting Server Firmware And Software
A P P E N D I X Getting Server Firmware and Software This section explains the options for accessing server firmware and software. Section D.1 “Firmware and Software Updates” on page D-1 ■ Section D.2 “Firmware and Software Access Options” on page D-2 ■... -
Page 184: Firmware And Software Access Options
Oracle Hardware Installation Assistant – Oracle Hardware Installation Assistant ■ is a factory-installed feature for the Sun Server X2-4 that allows you to easily update server firmware and software. For more information about Oracle Hardware Installation Assistant, refer to the Oracle Hardware Installation Assistant 2.5 User’s Guide for x86 Servers at... -
Page 185: Accessing Firmware And Software
When to Download This Package Name Description Package X4470 M2 SERVER SW 1.3 – Oracle ILOM and BIOS You need the latest ILOM_AND_BIOS platform firmware. X4470 M2 SERVER SW 1.3 – Oracle Hardware You need to manually ORACLE_HARDWARE_ Installation Assistant recover or update Oracle INSTALLATION_ASSISTANT recovery and ISO update... -
Page 186: Requesting Physical Media
The screen appears with search fields. 5. In the Product field, select the product from the drop-down list. Alternatively, type a full or partial product name (for example, Sun Server X2-4) until a match appears. 6. In the Release field, select a software release from the drop-down list. -
Page 187: Gathering Information For The Physical Media Request
In the Request Category drop-down menu, select the following: Software and OS Media Request b. In the Request Summary field, type: PMR for latest software release for Sun Server X2-4. 5. In the Request Details section, answer the questions shown in the following table. -
Page 188: Request Physical Media (By Phone
Section D.4.2 “Gathering Information for the Physical Media Request” on page D-5 before making the request. 1. Call Oracle support, using the appropriate number from the Oracle Global Customer Support Contacts Directory at: http://www.oracle.com/us/support/contact-068555.html Sun Server X2-4 Service Manual • April 2013... -
Page 189: Installing Updates
My Oracle Support, provide this information to the support representative. If you are unable to access the software release information, request the latest ■ software release for the Sun Server X2-4. Installing Updates The following sections provide information about installing firmware and software updates: Section D.5.1 “Installing Firmware”... -
Page 190: Installing Hardware Drivers And Os Tools
Oracle Hardware Installation Assistant 2.5 User’s Guide for x86 Servers at http://www.oracle.com/pls/topic/lookup?ctx=hia. Other deployment mechanisms, such as JumpStart, KickStart, or third-party tools. ■ For more information, refer to your operating system documentation. Sun Server X2-4 Service Manual • April 2013... - Page 191 Index classification labels for DIMM, 4-7 components, location of replaceable, 2-1 antistatic mat, 2-4 connecting devices to server, 2-10 antistatic wrist strap, 2-3 connector locations, 2-10 attaching devices to server, 2-10 connector pinouts. See pinouts cooling, 1-5 back panel features, 1-10 cover, removing, 2-8 battery, system cover, replacing, 6-1...
- Page 192 LEDs, location of, 1-9, 1-10 disk drive, installing, 3-5 locating chassis serial number, 8-16 disk drive, removing, 3-2 location of replaceable components, 2-1 DVD drive, installing, 4-25 DVD drive, removing, 4-24 Index-2 Sun Server X2-4 Service Manual • April 2013...
- Page 193 removing, 3-13 power supply backplane maintenance position, extending server to, 2-4 installing, 5-14 memory removing, 5-12 overview of architecture, 1-4 servicing, 5-12 memory riser powering off server, 2-6 filler panels, installing, 4-16 powering on server, 6-3 filler panels, removing, 4-8 installing, 4-13 Preboot Menu physical layout, 4-2...
- Page 194 8-15 tools and equipment needed, 2-3 top cover, removing, 2-8 TPM (Trusted Platform Module), 7-15 troubleshooting information needed when contacting support, 8- overview, 8-1 USB connector pinouts, C-1 video connector Index-4 Sun Server X2-4 Service Manual • April 2013...
Need help?
Do you have a question about the X2-4 and is the answer not in the manual?
Questions and answers