Table of Contents
Advertisement
Advertisement
Table of Contents

Related Manuals for HP ProCurve 1810G


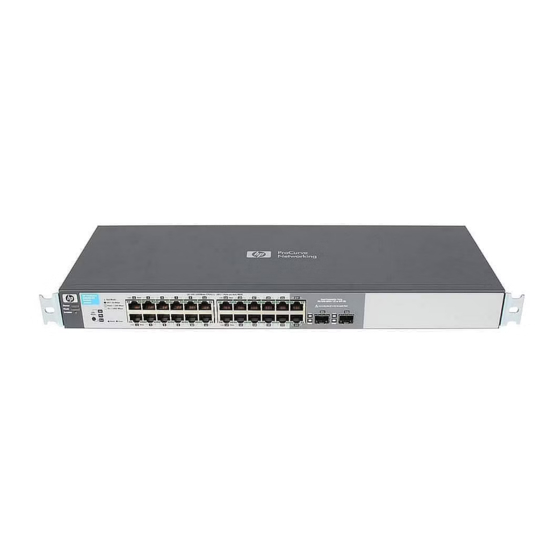
Summary of Contents for HP ProCurve 1810G
- Page 1 HP ProCurve 1810G Switches Management and Configuration Guide...
- Page 3 HP ProCurve 1810G Switches August 2009 Management and Configuration Guide...
- Page 4 Publication Number The only warranties for HP products and services are set forth in the express 5992-5475 warranty statements accompanying such products and services. Nothing August 2009 herein should be construed as constituting an additional warranty.
-
Page 5: Table Of Contents
Contents Preface About This Document ..............v About Your Switch Manual Set . - Page 6 Loop Protection ..............4-6 5 Security Advanced Security .
-
Page 7: About This Document
Preface About This Document HP ProCurve 1810G switch software provides rich layer 2 and Quality of Service (QoS) functionality for switches operating in small business networks. This guide describes how to configure HP ProCurve 1810G switch software features by using the Web-based graphical user interface (GUI). -
Page 8: Overview Of Switch Software Features
Preface Note For the latest version of all HP ProCurve documentation, visit the HP ProCurve Networking Web site at www.hp.com/go/procurve/manuals. Then select your switch product. Overview of Switch Software Features HP ProCurve 1810G switches include support for the following features:... - Page 9 Preface Feature 1810G-8 1810G-24 Port Status Security: Denial of Service (DoS) Security: Storm Control Protection SNMP Read Only Read Only Software Downloads (TFTP, HTTP) SSL (Secure Socket Layer) Syslog System Information Time Protocol (SNTP) Troubleshooting VLANs (maximum)
- Page 10 Preface viii...
-
Page 11: Getting Started
Getting Started This chapter describes how to make the initial connections to the switch and provides an overview of the Web interface. Connecting the Switch to a Network To enable remote management of the switch through a Web browser, the switch must be connected to the network. -
Page 12: Getting Started With The Web Interface
Getting Started Getting Started With the Web Interface Getting Started With the Web Interface This section describes the following Web pages: ■ “Logging On” on page 4 ■ “Interface Layout and Features” on page 5 Logging On Note Please use one of the following browsers to access the Web interface: ■... -
Page 13: Interface Layout And Features
Getting Started Getting Started With the Web Interface Interface Layout and Features Figure 1-2 shows the initial view. Figure 1-2. Interface Layout and Features Web Applet Common Links Navigation Pane Click on any topic in the navigation page to display related configuration options. The System Description page displays when you first log on and when you click Home or Status >... -
Page 14: Saving Changes
“Saving Changes” below. Click Refresh to refresh the page with the latest information from the switch. ■ Click Support to access the HP ProCurve Web site (Internet access required). ■ Click Logout to end the current management session. ■ Saving Changes When you click , changes are saved only for the current boot session. - Page 15 Off—The system is powered by the external power adapter. Note 8-port HP ProCurve 1810G switches may be PoE Powered Devices (PD) through port 1 only. (24-port ProCurve 1810G switches do not support PoE). The 8-port switches provide an additional PD LED, which turns On if it is receiving PoE power through port 1.
- Page 16 Getting Started Getting Started With the Web Interface Note The left-port LED is not depicted in the Web Applet. It indicates link status, as follows: ■ On—The port is enabled and receiving a link indication or other signal from the connected device.
-
Page 17: Status Pages
Status Pages You can use the Status pages to view system information and statistics. System Description The System Description page displays when you first log on and when you click Home or Status > System Description in the navigation pane. It displays basic information such as the software version and system up time. -
Page 18: Log
Status Pages The Log table displays logged system messages, such as configuration failures and user sessions. The log page displays the 100 most recent log entries. The newest log entry, by default, is displayed at the bottom of the list. Note If more than 100 logs accumulate, their Log Index numbers continue to increment beyond 100 and the oldest entries are deleted (for example, if 200 log entries were generated since the system was last... -
Page 19: Port Summary
Status Pages Port Summary Port Summary The Port Summary page displays a port summary at the top of the page and provides configuration and status information for each port. Scroll down the page to view the Port Statistics table, which provides per-port statistics on packets transmitted and received. - Page 20 Status Pages Port Summary Table 2-1. Port Summary Fields Field Description Port Summary Interface Displays list of physical and logical interfaces supported or configured on a particular platform. Physical Type Displays whether the port is operating in copper mode or fiber mode. Port Status The physical status (Up or Down) of the port.
-
Page 21: Lldp Statistics
Status Pages LLDP Statistics LLDP Statistics The Link Layer Discovery Protocol (LLDP) Statistics page displays summary and per-port information for LLDP frames transmitted and received on the switch. To display this page, click Status > LLDP Statistics in the navigation pane. Figure 2-4. - Page 22 Status Pages LLDP Statistics Table 2-2. LLDP Statistics Page Fields Field Description LLDP Global Statistics Insertions The number of times the complete set of information advertised by a particular MAC Service Access Point (MSAP) has been inserted into tables associated with the remote systems.
-
Page 23: Trunk
Status Pages Trunk Trunk The Trunk Status page displays the configuration summary and status of each trunk. To display this page, click Status > Trunk in the navigation pane. Figure 2-5 displays the configuration summary and status of a trunk named Trunk1. This trunk is configured in dynamic mode and has 3 and 5 interfaces as its active members. -
Page 24: Mac Table
Status Pages MAC Table MAC Table The MAC Table displays the MAC addresses associated with incoming packets on each port. Entries are kept until they are aged-out based on the MAC Table Aging Interval, which cannot be configured and set to 300 seconds by default. To display the MAC Table, click Status >... -
Page 25: Loop Protection
Status Pages Loop Protection Loop Protection The Loop Protection status page displays the whether Loop Protection is enabled or disabled on each port, the action to be taken, and how the feature is configured to operate on each port. Figure 2-7. Loop Protection Page Table 2-5. -
Page 26: Dual Image
Status Pages Dual Image Click Clear to reset all counters to 0. ■ Click the Refresh link above the page to re-display the page with the latest status from the ■ switch. For instructions on configuring this feature and a description of these fields, see “Loop Protection”... -
Page 27: Clock
Status Pages Clock Clock The Clock status page displays the current time, time zone, and Daylight Savings Time settings. To display this page, click Status > Clock in the navigation bar. Figure 2-9. Clock Status Page Table 2-7. Clock Status Fields Field Description Current Time... - Page 28 Status Pages Clock Field Description Daylight Savings Time Daylight Savings Time Shows whether Daylight Savings Time is enabled and the mode of operation: • Disabled—No clock adjustment will be made for Daylight Savings Time. • Recurring—The settings will be in effect for the upcoming period and subsequent years. •...
-
Page 29: Network Setup
Network Setup You can use the Network Setup pages to configure how a management computer connects to the switch and how the switch connects to a server to synchronize its time. Get Connected Use the Get Connected page to configure settings for the network interface. The network interface is the logical interface, defined with an IP address, mask, and gateway, used for connecting a management station to the switch via any of the switch's front-panel ports. - Page 30 Network Setup Get Connected Table 3-1. Get Connected Fields Field Description Network Details Protocol Type Select the type of network connection: • Static: Select this option to enable the IP address, mask, and gateway fields for data entry. • DHCP: Select this option to enable the switch to obtain IP information from a DHCP server on the network.
-
Page 31: Simple Network Time Protocol
Simple Network Time Protocol Simple Network Time Protocol ProCurve 1810G switch software supports the Simple Network Time Protocol (SNTP). SNTP ensures accurate network device clock time synchronization up to the millisecond. Time synchronization is performed by a network SNTP server. The software operates only as an SNTP client and cannot provide time services to other systems. -
Page 32: Time Zone
Network Setup Time Zone Click Apply to save any changes for the current boot session; the changes take effect ■ immediately. Use the Maintenance > Save Configuration page to have the setting remain in effect after a reboot. Click the Refresh link above the page to re-display the page with current settings from the ■... -
Page 33: Daylight Savings Time
Network Setup Daylight Savings Time Daylight Savings Time Use this page to configure if and when Daylight Savings Time (DST) occurs for your time zone. When configured, the system time will adjust automatically during Daylight Savings Time. To display the Time Zone page, click Network Setup > Daylight Savings Time in the navigation pane. The page displays differently depending on the mode selected in the Daylight Savings Time field. - Page 34 Network Setup Daylight Savings Time Table 3-4. Daylight Savings Time Fields Field Description Daylight Savings Time Select how DST will operate: • Disabled—No clock adjustment will be made for DST. • Recurring—The settings will be in effect for the upcoming period and subsequent years. •...
-
Page 35: Switching Pages
Switching Pages You can use the Switching Pages to configure port operation and capabilities. Port Configuration Use the Port Configuration page to view and configure parameters for port operation. To access this page, click in the navigation pane. Switching > Port Configuration Figure 4-1. -
Page 36: Jumbo Frames
Switching Pages Jumbo Frames Field Description Link Speed Configure the duplex mode and transmission rate for the selected port. (These options may change depending on the port type.) • Auto—The rates and duplex mode will be auto-negotiated. • 10HDX—10Mbps, half-duplex •... -
Page 37: Port Mirroring
Switching Pages Port Mirroring Port Mirroring Port mirroring sends a copy of all packets sent and/or received on one port (the source port) to another port (the destination port) for monitoring and analysis by an external network analyzer. Multiple switch ports can be configured as source ports, with each port mirrored to the same destination. -
Page 38: Flow Control
Switching Pages Flow Control Table 4-3. Port Mirroring Fields Field Description Enable Mirroring Select to enable port mirroring capability globally on the switch. Clear to disable the feature. Destination Port Select the port to which packets will be mirrored. Source Port For each source port you want to mirror to the destination port, select the direction of the packets to be mirrored: Direction... -
Page 39: Green Features
Green Features ProCurve 1810G switch software allows user to enable or disable Green Mode. When enabled, LEDs on the switch are turned off. In Green Mode, the switch consumes less power than in normal high- performance mode. -
Page 40: Loop Protection
Loop Protection Loops in a network can consume switch resources and degrade performance. Detecting loops manually can be very cumbersome and time consuming. ProCurve 1810G switch software provides an automatic Loop Protection feature. Loop Protection may be enabled or disabled globally and on a port-by-port basis. When enabled globally, the software sends loop protection packets to a reserved layer 2 multicast destination address on all the ports on which the feature is enabled. - Page 41 Switching Pages Loop Protection Table 4-6. Loop Protection Fields“ Field Description Loop Protection Select to enable globally enable this feature. Transmission Time Enter the time interval, in seconds, between sending Loop Protection packets. Shutdown Time Set the number of seconds that a port remains shut down if a loop has been detected on the port.
- Page 42 Switching Pages Loop Protection...
-
Page 43: Security
Security HP ProCurve 1810G switch software includes a robust set of built-in denial-of-service (DoS) and storm- control protections, and allows configuring secure HTTP (HTTPS) management sessions. Advanced Security HP ProCurve 1810G switch software provides the following built-in security features: ■... -
Page 44: Secure Connection
Secure Connection HP ProCurve 1810G switch software allows the administrator to enable or disable Secure HTTP protocol (HTTPS). When enabled, the administrator can establish a secure connection with the switch using the Secure Sockets Layer (SSL) protocol. Secure HTTP can help ensure that communication between the management system and the switch is protected from eavesdropping and man-in-the- middle attacks. - Page 45 Security Secure Connection After validating the CA, the browser and switch negotiate the highest level of security available ■ to both. The browser uses the public key to encrypt a random number and send it to the switch. The switch uses a private key stored in memory (not advertised on the certificate) to decrypt it.
-
Page 46: Downloading Ssl Certificates And Diffie-Hellman Files
Security Secure Connection If the value of the Certificate Present? field is True, you can click Delete to delete the existing ■ certificate. If you click Download Certificates, the Update Manager page will be displayed to enable you to ■ download a certificate file to the switch. -
Page 47: Generating Certificates
Security Secure Connection Select the protocol to use, based on the server type that the certificate is stored on: TFTP or HTTP. For an HTTP upload, browse for the file on your local computer or network. For a TFTP upload, enter the Server IP address, and specify the File Name (full path without the server IP address). - Page 48 Security Secure Connection...
-
Page 49: Trunks
A trunk can aggregate up to four physical ports. ■ ■ On HP ProCurve 1810G-24 switches, up to eight trunks can be created. On HP ProCurve 1810G-8 switches, up to four trunks can be created. ■ After you create the trunk, it appears in a list at the bottom of the page where you can modify its properties or delete it. - Page 50 Trunks Trunk Configuration Figure 6-1. Trunk Configuration Page Table 6-1. Trunk Configuration Fields Field Description Configuration Create Select to enable the fields for creating a new trunk. Trunk Name Specify a name for the trunk. Number of Trunks created The number of trunks created. The maximum number of trunks is platform-dependent. Trunk List Interface The interface number for the trunk.
-
Page 51: Trunk Membership
Trunks Trunk Membership Trunk Membership Use this page to specify the switch ports that are included in each trunk. To access the page, click Trunk > Trunk Membership in the navigation pane. As shown in the example configuration in Figure 6-2, ports 2 and 3 have been added to Trunk1. - Page 52 Trunks Trunk Membership...
-
Page 53: Virtual Lan
Virtual LAN On a Layer 2 switch, Virtual LAN (VLAN) support offers some of the benefits of both bridging and routing. Like a bridge, a VLAN switch forwards traffic based on the Layer 2 header, which is fast, and like a router, it partitions the network into logical segments, which provides better administration, security and management of multicast traffic. -
Page 54: Vlan Ports
Virtual LAN VLAN Ports Table 7-1. VLAN Configuration Fields Field Description Create VLAN Select this box to create a new VLAN. Apply to create the VLAN. Create VLAN ID Specify the numeric VLAN Identifier from 2 to 4093 and click Note: VLAN ID 1 is pre-configured on the switch and is always named “Default.”... -
Page 55: Participation / Tagging
Virtual LAN Participation / Tagging Table 7-2. VLAN Ports Fields Field Description Interface Select the port on which to configure the VLAN settings. PVID The VLAN ID that this port will assign to untagged frames or priority-tagged frames received on this port (range 1–4093, default = 1). The PVID is not user-configurable and always corresponds to VLAN ID of the port’s untagged VLAN membership. - Page 56 Virtual LAN Participation / Tagging Figure 7-3. Participation/Tagging Page Table 7-3. Participation/Tagging Fields Field Description VLAN Select the VLAN to configure. Tag / Untag / Exclude All For a port or trunk to participate in a VLAN, its tagging policy must be defined. By default, all ports and trunks are configured as untagged members of VLAN1, and are excluded from all other newly created VLANs.
-
Page 57: Example-Creating A Management Vlan
Example—Creating a Management VLAN A management VLAN can be created to restrict user access. Access restrictions can be applied to a set of users capable of accessing the HP ProCurve 1810G switch software. Follow these steps to create a management VLAN. - Page 58 Virtual LAN Example—Creating a Management VLAN...
-
Page 59: Link Layer Discovery Protocol (Llpd)
Link Layer Discovery Protocol (LLPD) The IEEE 802.1AB defined standard, Link Layer Discovery Protocol (LLDP), allows stations residing on an IEEE 802 LAN to advertise major capabilities and physical descriptions. This information is viewed by a network manager to identify system topology and detect bad configurations on the LAN. LLDP is a one-way protocol;... - Page 60 Link Layer Discovery Protocol (LLPD) LLDP Configuration Table 8-1. LLDP Configuration Fields Field Description Global Transmit Interval Specify the interval at which frames are transmitted. The default is 30 seconds, and the valid range is 5–32768 seconds. Transmit Hold Specify the multiplier on the transmit interval to assign to TTL (range 2–10, default = 4). Re-Initialization Delay Specify the delay before a re-initialization (range 1–10 seconds, default = 2).
-
Page 61: Lldp Local Device
Link Layer Discovery Protocol (LLPD) LLDP Local Device LLDP Local Device Use the LLDP Local Device page to view information about devices on the network for which the switch has received LLDP information. To display this page, click LLDP > Local Device in the navigation pane. Figure 8-2. -
Page 62: Lldp Remote Device
Link Layer Discovery Protocol (LLPD) LLDP Remote Device LLDP Remote Device Use the LLDP Remote Device page to view information about remote devices for which the switch has received LLDP information. To display the LLDP Remote Device page, click LLDP > Remote Device in the navigation pane. -
Page 63: Diagnostics
Diagnostics Ping Test Use the Ping Test page to determine whether another device on the network is reachable. Ping provides a synchronous response when initiated. To display the Ping Test page, click Diagnostics > Ping Test in the navigation pane. The following example shows the output of the ping test. -
Page 64: Log Configuration
Min/Max/Avg RTT—Specifies the Minimum, Maximum, Average Round Trip Time (msec). Log Configuration HP ProCurve 1810G switch software supports logging system messages to the Log file or forwarding messages over the network using the Syslog protocol. Syslog messages can be captured by a designated host on the network that is running a Syslog daemon. -
Page 65: Reboot Switch
Diagnostics Reboot Switch Table 9-2. Log Configuration Fields Field Description Enable Buffered Specify which type of system messages are logged by using the Buffered Logging Level setting: Logging • Emergency: Alerts the user of the highest level of system error classified as urgent. •... -
Page 66: Factory Defaults
Diagnostics Factory Defaults Note If you have downloaded a configuration file and want those setting to take affect after the next reboot, be sure to clear the Save Configuration check box. Otherwise, the configuration file will be overwritten and the switch will reboot with the current configuration instead of the downloaded configuration. Select Save Configuration if you want the current configuration to be saved prior to the reboot. -
Page 67: Support File
Diagnostics Support File Support File Use the support file page to display summary information for the switch on a single page. The support file page includes the following data: ■ System description ■ The active Image and the image that will be active after a reboot, and the user-configured descriptions of these images. -
Page 68: Locator
Diagnostics Locator Locator The Locator LED is a special LED that enables locating the device physically. When enabling the Locate setting via the Web interface, the Locate LED on the switch blinks for 30 minutes and then turns off. To access this page, click Diagnostics > Locator in the navigation pane. Figure 9-5. -
Page 69: Maintenance Pages
Maintenance Pages Backup Manager Backup Manager page provides a means to save a backup copy of the switch’s image or configuration files on a local system or network directory. To access this page, click the Maintenance > Backup Manager. The page displays different options depending on the protocol and image or file type selected for the backup. -
Page 70: Example-Backing Up A Configuration File
Maintenance Pages Backup Manager For a backup using HTTP, click Apply to begin the backup process. A window displays with a ■ prompt to save the file in the desired location. For backup using TFTP, ensure that the TFTP server is running and click Apply. Use a TFTP ■... - Page 71 Maintenance Pages Backup Manager Click OK. For an HTTP transfer, browse to the location where you want to save the file. A progress bar indicates that the backup is in progress and the page displays the following message: Code (Configuration) upload through HTTP (TFTP) is in Progress. Please wait...
-
Page 72: Update Manager
Maintenance Pages Update Manager Update Manager Update Manager enables a new image or configuration file to be uploaded from the local system or network to the switch. To access this page, click Maintenance > Update Manager in the navigation pane. Update Manager displays different options depending on the transfer protocol, file or image type selected for an update. -
Page 73: Example-Updating The Switch Software
Maintenance Pages Update Manager Field Description Update Type Select the file type to be updated: • Code—Update the software image file specified. • Configuration—Update up the configuration file. • To update an SSL certificate or key encryption file, select the certificate type (for a description of these files, see “Secure Connection”... - Page 74 Maintenance Pages Update Manager Click OK. The following page displays: Click OK. The following message displays on the Update Manager page: Code (Configuration) download through HTTP (TFTP) is in Progress. Please wait... When the transfer is complete, a window like the following displays: Click OK.
- Page 75 Maintenance Pages Update Manager Click Back to re-display the Update Manager page. Note that, in this example, the image was downloaded as the inactive (backup) image. To complete the update process and to activate the backup image as the operating software, use the Dual Image Configuration page.
-
Page 76: Password Manager
Maintenance Pages Password Manager Password Manager Use the Password Manager to change the password used to access the Web interface. To access this page, click the Maintenance > Password Manager. Figure 10-3 shows the Password Manager page. Figure 10-3. Password Manager Page Note Passwords must be at least 8 characters but no more than 64 characters long. -
Page 77: Save Configuration
Maintenance Pages Save Configuration Save Configuration Use the Save Configuration page to save any changes applied since the last reboot. If the switch reboots before the applied changes are saved, the changes will be lost. To access this page, click Maintenance >... - Page 78 Maintenance Pages Dual Image Configuration Table 10-3. Dual Image Configuration Fields Field Description Image Name Select the image you want to perform an action on. You can activate the selected image, delete it, or configure a description of it. Options are Image1 and Image2. Active Image The currently active image.
- Page 80 To learn more, visit www.hp.com/go/procurve/ © Copyright 2009 Hewlett-Packard Development Company, L.P. The information contained herein is subject to change without notice. The only warranties for HP products and services are set forth in the express warranty statements accompanying such products and services.
Need help?
Do you have a question about the ProCurve 1810G and is the answer not in the manual?
Questions and answers