
Subscribe to Our Youtube Channel
Related Manuals for Strong SRT 8525


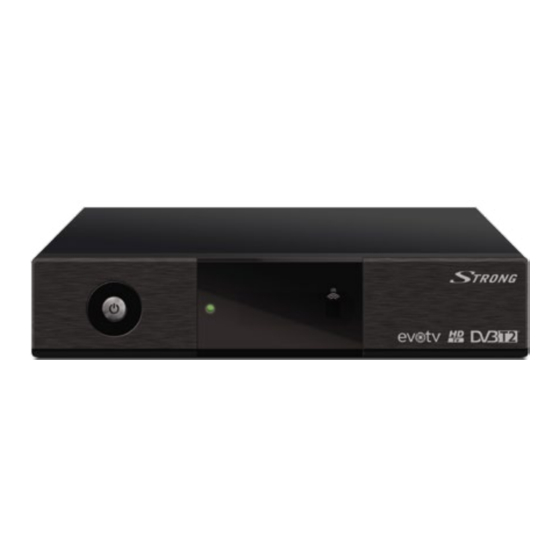
Summary of Contents for Strong SRT 8525
-
Page 1: User Manual
Digital Terrestrial HD Receiver SRT 8525 User Manual Up to Man./ Auto High Definition Digital Favourite 0.70 Watt TV Info Search Subtitles 30 Timers MP3/JPG MPEG Recording Channels Audio lists Stand-by... -
Page 4: Table Of Contents
7.0 TRoUblEshooTIng 8.0 TEChnICAl sPECIfICATIon 9.0 APPEnDIx sTRong declares that this item complies with the basic requirements and other relevant regulations of directives CE 2004/108/EC and 73/23/EC, Rohs 2002/95/EC Subject to alterations. In consequence of continuous research and development technical specifications, design and appearance of products may change. -
Page 5: Introduction
PART 2 • English 1.0 InTRoDUCTIon 1.1 safety Instructions Do noT InsTAll YoUR RECEIvER In a closed or poorly ventilated cabinet; directly on top of or under any other equipment; „ „ on a surface which might obstruct the ventilation slots. Do noT ExPosE ThE RECEIvER oR ITs ACCEssoRIEs To direct sunlight or any other equipment that generates heat;... -
Page 6: Accessories
„ the receiver. Always make backups of data on your USB storage device before using it with this receiver. STRONG will not take responsibility for any loss of information or circumstances caused by loss of information. Please ensure that the USB device is already formatted to FAT/FAT32 or NTFS. If it is not, „... -
Page 7: Remote Control
PART 2 • English AUDIo (l/R) To connect to your TV or VCR, alternatively you can connect to an amplifier or HIFI system using an RCA cable. vIDEo To connect to your TV or VCR using an RCA cable. s/PDIf To connect to a digital home theatre or audio amplifier with an audio cinch cable. -
Page 8: Installing The Batteries
PART 2 • English 23. : For multimedia playback: to start playback of the previous file 24. " For multimedia playback: to start playback of the next file 25. 4 No function 26. 1 For multimedia playback: to start playback 27. -
Page 9: Connecting To Tv With Scart Cable
PART 2 • English 3.3 Connecting to Tv with sCART cable Fig. 6 The receiver is also equipped with a SCART connector; alternatively, the TV set can be connected to the receiver using a good quality SCART cable. 3.4 Connecting to Tv with cinch cable Fig. -
Page 10: Antenna Adjustment
5.0 QUICk gUIDE To UsIng YoUR RECEIvER We at STRONG understand that you can’t wait to enjoy your new high definition digital terrestrial receiver. The following quick guide will help you getting familiar with the basic operation of this device. -
Page 11: Adjusting Volume And Audio
PART 2 • English 5.1.2 Channel list Press ok in viewing mode to display the channel list. Use pq in the list to highlight your channel of choice and press ok to switch to this channel. To scroll to the next or previous 9 channels you can also use the P+/P- buttons. -
Page 12: Electronic Tv Programme Guide (Epg)
PART 2 • English The information banner is automatically removed from the screen after a certain time, specified by the setting for Banner timeout within the Time Setting menu. For details refer to chapter 6.3.3. noTE: Event information will be displayed when available. Availability depends on the broadcast. -
Page 13: Using External Usb Storage Devices
PART 2 • English 5.7 Using external Usb storage devices We strongly recommend you to carefully read and follow the specified points mentioned in chapter 1.5 Usage of external USB devices! Further please consider these points when you use your receiver with an external USB storage device: Before you disconnect the USB device from the receiver, we recommend using the „... - Page 14 PART 2 • English Now your TV channel list will be shown. To switch between the TV and radio list use tu. To navigate within the list, use the pq buttons. To move a channel to a new position, use the pq buttons to Move select the channel, then press the RED button.
-
Page 15: Channel Search
PART 2 • English the LCN method will allow you to save the strongest channels broadcasted in your area, only. By Service Name: The channels will be sorted in alphabetical order. By Frequency: The channels will be sorted in ascending order of the frequency in which they are broadcasted. -
Page 16: System Setup
PART 2 • English Band: For the VHF frequency band commonly used 7 MHz, for UHF frequency 8 MHz is used. Signal level and quality indicators will help you ensure that you have signal on the selected frequency channel or frequency entered, as well as to adjust the antenna, if necessary. After you have entered the settings correctly you will need to select Search (directly above the signal bars) and press ok. - Page 17 PART 2 • English about the possibility to control the TV format via the menu of your TV set. HDMI Output: Allows you to change the resolution of the HDMI output. If the connected TV does not support the set resolution you will see a black screen.
-
Page 18: Tools
PART 2 • English WARnIng: By resetting your receiver to the factory default, all your settings and stored channels will be permanently deleted. Please use this option with care! After selecting this menu and pressing ok you will be asked to enter the PIN code (DEfAUlT PIn: 0000). -
Page 19: Records
In the Information menu you can get information about the hardware and software version installed in your receiver. Furthermore, you will find information about our website: www.strong.tv. Please open this menu when you call our hotline or contact the support. The person who answers your call/email might ask for the information given on this screen. - Page 20 PART 2 • English Before you use the recording functions of your receiver, please ensure that your USB device is connected properly and that it is formatted in the required file system. This will enable you to watch and manage recordings. 6.5.1 Records list After selecting this menu a list of the recordings will appear on screen.
-
Page 21: Multimedia
PART 2 • English 6.5.4 Remove Usb device This menu item only appears if a USB device is connected.Select the menu item and press ok to safely remove theUSB device from your receiver.Now you can disconnect the USB device after the message USB device is removed disappears. -
Page 22: Irdeto Ca Status
PART 2 • English AUDIo: Allows you to switch between the supported audio languages. If a file contains more than one audio track, then each press of this button will switch to the next audio track. sUb: Displays a list of subtitles, if available in the same folder for this movie. Displays technical details of the currently played file. -
Page 23: Troubleshooting
PART 2 • English 6.7.6 Announcement box In this menu you can read announcements sent by the operator. 6.7.7 Region status This menu displays the specific regional data according to the country this product is developed for. 7.0 TRoUblEshooTIng There may be many reasons that affect the correct operation of your receiver. If the receiver does not work as you expect, please follow the steps outlined below. -
Page 24: Technical Specification
PART 2 • English Problem Possible reason Remedy Message “No The channel is scrambled. Either you have tuned to a channel which rights” or “Pay is not part of your subscription or you have TV channel” not been patient enough to wait until the channel of your basic subscription has opened. -
Page 25: General Data
Supported formats JPG, PNG, BMP *STRONG can’t guarantee the playback of all files in the mentioned formats. The possibility to playback depends on the used codecs, data rates and resolution. For a detailed list of supported codecs, please refer to the Appendix. -
Page 26: Appendix
PART 2 • English 9.0 APPEnDIx video specifications file Audio Container video Codec sPEC Profile Comment Extension Codec Rate mpg, MP2, MP4: GMC 1920x1080 mpeg, MPG, MPEG MPEG-1, 2 MP3, Main Profile is not @ 30p Mbit/s LPCM supported H.264: Main MP2, ts, trp, Profile and High... - Page 27 PART 2 • English Audio specifications Audio Codec file Extension bitRate/samplingRate 32 Kbps ~ 448 Kbps(Bit rate) MPEG-1 Layer2 32 KHz ~ 48 kHz(Sampling rate) 32 Kbps ~ 320 Kbps(Bit rate) MPEG-1 Layer3 32 KHz ~ 48 KHz(Sampling rate) 32 Kbps ~ 192 Kbps(Bit rate) OGG Vobis 8 KHz ~ 48 KHz(Sampling rate) 24 Kbps ~ 384 Kbps(Bit rate)
Need help?
Do you have a question about the SRT 8525 and is the answer not in the manual?
Questions and answers