Table of Contents
Advertisement
Quick Links
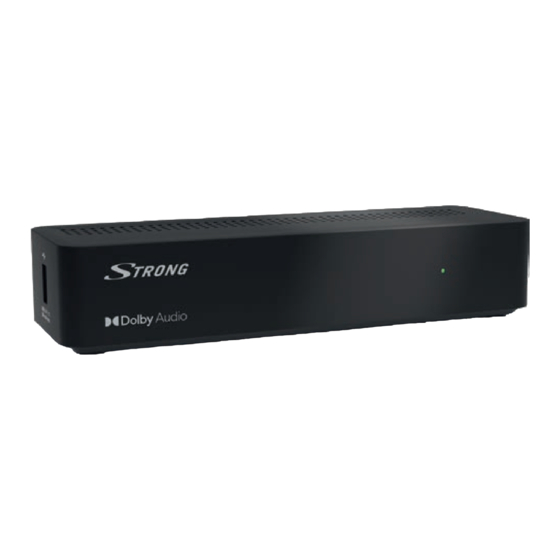
Digital Terrestrial HD Receiver
SRT 8213
Installation Instructions
Installationsanleitung
Instructions d'installation
Istruzioni per l'installazione
Instrucciones de instalación
Installationsanvisning
Instrukcja instalacji
Pokyny k instalaci
Pokyny k inštalácii
Upute za instalaciju
Telepítési Utasítás
Εγχειρίδιο χρήστη
Handleiding
Advertisement
Table of Contents

Related Manuals for Strong SRT 8213


Summary of Contents for Strong SRT 8213
- Page 1 Digital Terrestrial HD Receiver SRT 8213 Installation Instructions Pokyny k instalaci Installationsanleitung Pokyny k inštalácii Instructions d'installation Upute za instalaciju Istruzioni per l'installazione Telepítési Utasítás Instrucciones de instalación Εγχειρίδιο χρήστη Installationsanvisning Handleiding Instrukcja instalacji...
- Page 4 Supplied by STRONG AUSTRIA Represented by STRONG Ges.m.b.H Teinfaltstraße 8/4.Stock A-1010 Vienna, Austria Email: support_at@strong.tv 11 Aug 2021 18:09...
- Page 5 Licenses THIS PRODUCT IS LICENSED UNDER THE AVC PATENT PORTFOLIO LICENSE FOR THE PERSONAL AND NONCOMMERCIAL USE OF A CONSUMER TO (i) ENCODE VIDEO IN COMPLIANCE WITH THE AVC STANDARD (“AVC VIDEO”) AND/OR (ii) DECODE AVC VIDEO THAT WAS ENCODED BY A CONSUMER ENGAGED IN A PERSONAL AND NON-COMMERCIAL ACTIVITY AND/OR WAS OBTAINED FROM A VIDEO PROVIDER LICENSED TO PROVIDE AVC VIDEO.
-
Page 6: Table Of Contents
3.7 Extended connections for your home entertainment STRONG declares that this device SRT 8213 complies with the basic requirements and other relevant regulations of directives EMC 2014/30/EU, LVD 2014/35/EU and RoHS 2011/65/EU. Subject to alterations. In consequence of continuous research and development technical specifications, design and appearance of products may change. -
Page 7: Introduction
1.0 INTRODUCTION 1.1 Safety Instructions DO NOT INSTALL YOUR RECEIVER: In a closed or poorly ventilated cabinet; directly on top of or under any other equipment; on a surface which might obstruct the ventilation slots. DO NOT EXPOSE THE RECEIVER OR ITS ACCESSORIES: To direct sunlight or any other equipment that generates heat;... -
Page 8: Equipment Set-Up
USB 2.0 specifications, recording, playback and other multimedia functions of the receiver might not work properly. STRONG cannot guarantee the playback of files although extensions are listed, as it depends on codec, data bit rate and resolution used (all MPEG codec formats are supported). -
Page 9: Your Receiver
2.0 YOUR RECEIVER 2.1 DEFAULT PIN: 1234 2.2 Front Panel Fig. 1 1. Mode Indicator LED RED indicates that the receiver is in STANDBY mode. 2.3 Side Panel Fig. 2 1. USB To connect your USB storage device. 2.4 Rear Panel Fig. -
Page 10: Installing The Batteries
13. 2 Press to pause playback 14. 5 6 Fast rewind/fast forward. 15. 4 Starts recording of the currently watched programme 16. u Press to continue playback. 17. 78 Jump function in multimedia playback 18. 3 Stop playback. 19. COLOUR BUTTONS In different menus for specific functions * Subtitles, Videotext, EPG (Electronic Programme Guide), and Audio languages are depending on availability in the specific broadcast 2.6 Installing the batteries... -
Page 11: Connection
3.0 CONNECTION 3.1 Connecting to a terrestrial antenna Fig. 7 To receive broadcast signals, your terrestrial indoor or outdoor antenna must be connected to the ANT IN connector on the back of the receiver. Use a proper shielded antenna cable and suitable connectors. -
Page 12: Extended Connections For Your Home Entertainment
3.7 Extended connections for your home entertainment Fig. 9 Connecting to a Digital Audio Amplifier with S/PDIF By connecting your receiver to a digital amplifier or home cinema set, you can enjoy the best possible sound quality and multi-channel audio (depending on broadcast). Connect your Digital Audio Amplifier or home cinema set with a suitable cinch cable to the S/PDIF connector on the back of the receiver. -
Page 13: Quick Guide To Using Your Receiver
5.0 QUICK GUIDE TO USING YOUR RECEIVER We at STRONG understand that you can’t wait to enjoy your new high definition digital terrestrial receiver. The following quick guide will make you familiar with the basic operation of this device. We do, however, advice you to read the full manual to get the best performance from your receiver. -
Page 14: Changing Channels
6.1 Changing channels Following ways are possible for changing channels with your new receiver: Via direct access using the 0~9 buttons. Via the channel list through OK and the P+/P- buttons. Via the pq buttons. 6.1.1 Direct access via 0~9 buttons To gain direct access to a certain channel, simply enter its number with the 0~9 buttons on the remote control. -
Page 15: Subtitles
6.5 Subtitles Some channels support a choice of subtitle languages. Press SUB in viewing mode to display a list of available subtitle languages. Select your subtitle of choice with pq and press OK to confirm. Press to leave without making changes.* * Availability of DVB/Hard of Hearing subtitles depends on the broadcast. -
Page 16: Main Menu
6.7.3 Timer recording There are 2 ways to set a timer: Programming a record timer via the EPG The easiest way to record an event is via the EPG. Press the EPG button to open the EPG, then use pq to select a channel. After that, press t u and use pq to select an event. You can book a record timer by pressing 4. -
Page 17: Channel Editing And Programme Information
The next option Modulation is to select between Only DVB-T or DVB-T+T2 modulation type. When in doubt, use the DVB-T+T2 setting. If you use an active antenna (with built-in amplifier), then switch the Antenna Power to On. If you use a passive antenna (without built-in amplifier), then select Off. - Page 18 add to a favourite group. When the highlight is on the channel of your choice, press OK. At the right hand side you will see your new created favourite list. If you like to remove a channel from a favourite list, simply press u and select that channel and press OK to delete.
-
Page 19: Settings
7.2.3 EPG Information This menu item opens the Electronic Programme Guide (EPG). 7.3 Settings Use t u to select Settings in the main menu. Use pq to highlight the submenu of choice and press OK to select. 7.3.1 Language This menu allows you to set up your language preferences. Use t u to select the language for the On Screen Display. - Page 20 transfer Dolby® Digital/Dolby® audio to a home cinema set through coaxial S/ PDIF. (Not Dolby® Digital Plus.) Audio Description: AD. Set this option to On if you like to have support of an audio track that describes the content on screen. Useful for the visual impaired. Audio Description Volume offset: Select the volume from the AD audio track.
-
Page 21: Multimedia
Use pq to move the highlight to the setting of choice. Values can be changed with t u. Press to leave. GMT Usage: Set to Auto for broadcaster defined time depending of country selection you made in the First Installation Wizard. Normally, the clock/time will be correct and also follow up the summer time changes automatically. - Page 22 files as MP3, OGG and FLAC formats. Select Pictures to playback your favourite pictures in JPG or BMP format.* When entering the Playback of Multimedia, the highlight is on the root folder of the USB storage device. Press OK to open the directory respectively its folders/subfolders. On screen in the right upper corner the root folders are displayed for easier navigation.
- Page 23 Formatting will permanently delete ALL data stored on the connected device. Please make a backup copy of all data you wish to keep before entering the Format menu. STRONG cannot be held responsible for loss of data from USB devices used with this receiver.
-
Page 24: Network
It is possible to use USB storage devices already formatted in NTFS. * STRONG cannot guarantee the playback of files although extensions are listed, as it depends on codec, data bit rate and resolution used (all MPEG codec formats are supported). -
Page 25: Troubleshooting
If the receiver does not work properly after checking it, please contact your dealer or the local Service Hotline or send email to our Support via www.strong.tv. Do NOT try to open or disassemble the receiver. It may cause a dangerous situation and warranty will be void. -
Page 26: Technical Specifications
Forgotten PIN code Forgotten channel Contact your local Service Hotline lock code or send an email to our Support via www.strong.tv Press INFO on the remote control to After moving the The antenna signals are too receiver to another weak... - Page 27 MP3, FLAC, OGG* Picture view: BMP, JPG* * STRONG cannot guarantee the playback of all files although extensions are listed, as it depends on codec, data bit rate and resolution used (all MPEG codec formats are supported). Connectors IR sensor...
Need help?
Do you have a question about the SRT 8213 and is the answer not in the manual?
Questions and answers