Table of Contents
Advertisement
Quick Links
Digital Terrestrial HD Receiver
SRT 8215
Installati on Instructi ons
Installati onsanleitung
Instructi ons d'installati on
Istruzioni per l'installazione
Instrucciones de instalación
Installati onsanvisning
Instrukcja instalacji
Pokyny k instalaci
Pokyny k inštalácii
Upute za instalaciju
Telepítési Utasítás
Εγχειρίδιο χρήστη
Handleiding
Advertisement
Table of Contents

Related Manuals for Strong SRT 8215


Summary of Contents for Strong SRT 8215
- Page 1 Digital Terrestrial HD Receiver SRT 8215 Installati on Instructi ons Pokyny k instalaci Installati onsanleitung Pokyny k inštalácii Instructi ons d'installati on Upute za instalaciju Istruzioni per l'installazione Telepítési Utasítás Instrucciones de instalación Εγχειρίδιο χρήστη Installati onsanvisning Handleiding Instrukcja instalacji...
- Page 4 Supplied by STRONG AUSTRIA Represented by STRONG Ges.m.b.H Teinfaltstraße 8/4.Stock A-1010 Vienna, Austria Email: support_at@strong.tv 18 Oct 2021 20:07...
- Page 5 LICENSES THIS PRODUCT IS LICENSED UNDER THE AVC PATENT PORTFOLIO LICENSE FOR THE PERSONAL AND NONCOMMERCIAL USE OF A CONSUMER TO (i) ENCODE VIDEO IN COMPLIANCE WITH THE AVC STANDARD (“AVC VIDEO”) AND/OR (ii) DECODE AVC VIDEO THAT WAS ENCODED BY A CONSUMER ENGAGED IN A PERSONAL AND NON-COMMERCIAL ACTIVITY AND/OR WAS OBTAINED FROM A VIDEO PROVIDER LICENSED TO PROVIDE AVC VIDEO.
-
Page 6: Table Of Contents
4.0 STARTING UP FOR THE FIRST TIME STRONG declares that this device SRT 8215 complies with the basic requirements and other relevant regulations of directives EMC 2014/30/EU, LVD 2014/35/EU and RoHS 2011/65/EU. Subject to alterations. In consequence of continuous research and development technical specifications, design and appearance of products may change. -
Page 7: Introduction
1.0 INTRODUCTION 1.1 Safety Instructions DO NOT INSTALL YOUR RECEIVER: In a closed or poorly ventilated cabinet; directly on top of or under any other equipment; on a surface which might obstruct the ventilation slots. DO NOT EXPOSE THE RECEIVER OR ITS ACCESSORIES: To direct sunlight or any other equipment that generates heat;... -
Page 8: Equipment Set-Up
USB 2.0 specifications, recording, playback and other multimedia functions of the receiver might not work properly. STRONG cannot guarantee the playback of files although extensions are listed, as it depends on codec, data bit rate and resolution used (all MPEG codec formats are supported). -
Page 9: Rear Panel
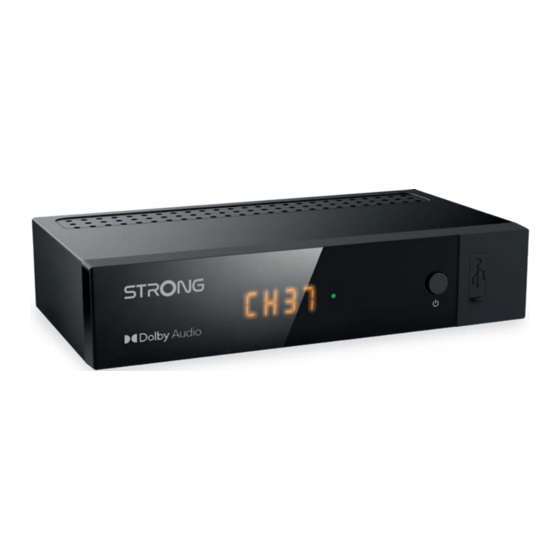
2. LED Display Shows channel number and time in standby 3. Mode Indicator LED Green indicates that the receiver is On. 4. Standby/ON button Switches the receiver ON or into Standby 5. USB To connect your USB storage device. 2.3 Rear Panel Fig. -
Page 10: Installing The Batteries
2.5 Installing the batteries Fig. 4 Open the cover on the remote control and insert 2x AAA type batteries into the compartment. Observe correct polarity of the batteries when inserting. A terminal diagram is shown inside the compartment. 1. Remove the cover. 2. -
Page 11: Connecting A Usb Storage Device
3.4 Connecting a USB storage device Fig. 6 This port can be used for USB storage devices such as USB pen drives or HDD with a maximum peak current of 500 mA. It is recommended to use USB 2.0 storage devices (or higher) for playback of video files or HD movies. -
Page 12: Quick Guide To Using Your Receiver
Factory Setting in the menu Tools. (DEFAULT PIN: 0000). 5.0 QUICK GUIDE TO USING YOUR RECEIVER We at STRONG understand that you can’t wait to enjoy your new high-definition digital terrestrial receiver. The following quick guide will make you familiar with the basic operation of this device. We do, however, advice you to read the full manual to get the best performance from your receiver. -
Page 13: Info Banner
6.1.2 TV list Press OK in viewing mode to display the TV list. Use p q in the channel list to highlight your channel of choice and press OK once to select the highlighted channel. Press OK again to leave the channel list mode. -
Page 14: Record, Timeshift And Format
NOTE: Availability of EPG data depends on broadcast. 6.7 Record, Timeshift and Format To use these functions, you must connect a USB memory device to the USB port at the front panel. For best performance, especially of HD content, we advise to use Hard Disk drives USB 2.0 or higher. These must be formatted in FAT32 format, otherwise Record and Timeshift function will not work. -
Page 15: Main Menu
Number 6 Opens the option to select and deselect for deleting a record file(s). Marks a recording for deletion. When all recordings you want to delete are marked, press EXIT. 7.0 MAIN MENU The main menu gives you access to Installation, Channels, System Setup, Multimedia and Network functions. -
Page 16: Channel Editing
7.1.5 Scan Mode Use p q to select Scan mode and select between Free which will only install Free-to-Air channels or All. This means that channels that are Free-to-Air or scrambled will be searched and stored. Be aware that you receiver only can show Free-to-Air channels. 7.2 Channel Editing Use t u to select Edit Channel in the main menu. -
Page 17: System Setup
7.2.2 Radio Channel List manager Create favourite lists, move channels in order, lock channels with PIN protection and delete channels from the radio list. The functions of handling are the same as in the TV Channel List as described above. The only difference is that in the Radio manager there is no video information, so it will always display the radio background on the preview screen. - Page 18 Region: Select or check region to define timezone. GMT Usage: Set By Region for broadcaster defined time depending of country selection you made in the First Installation Wizard. Normally, the clock/time will be correct and also follow up the summertime changes automatically. In some regions close to neighbouring countries it can happen that the wrong time zone is followed.
-
Page 19: Media Player
7.3.7 OSD Setting This menu allows you to select long or shorter time for banner which appears after switching channels. If you like can also select some transparency of menu, to see in background the TV programme. Sets the time after which on screen banners and messages disappear. The OSD Timeout: range is 1~10 seconds. - Page 20 It is NOT possible to use USB storage devices “already” formatted in NTFS. *STRONG cannot guarantee the playback of files although extensions are listed, as it depends on codec, data bit rate and resolution used (all MPEG codec formats are supported).
-
Page 21: Tools
7.5 Tools The Tools menu consists of the following submenus: Information, Factory Settings, Upgrade By USB and Network. Connect first the CAT5E (or better) cable into RJ-45 ETHERNET port of your receiver and the other end into your router. Before you can use the Internet functions you need to check the setup of the Internet connection in the Network Setting menu. -
Page 22: Upgrade By Usb
If the receiver does not work properly after checking it, please contact your dealer or the local Service Hotline or send email to our Support via www.strong.tv. Do NOT try to open or disassemble the receiver. It may cause a dangerous situation and warranty will be void. -
Page 23: Technical Specifications
Forgotten PIN code Forgotten channel Contact your local Service Hotline lock code or send an email to our Support via www.strong.tv Press 2 x INFO on the remote control to After moving the The antenna signals are too receiver to another... - Page 24 MP3, FLAC, OGG* Picture view: BMP, JPG* *STRONG cannot guarantee the playback of all files although extensions are listed, as it depends on codec, data bit rate and resolution used (all MPEG codec formats are supported). Connectors ANT IN - IEC Female TV SCART (CVBS, Audio L/R) JACK 3.5mm (Audio output L/R)
Need help?
Do you have a question about the SRT 8215 and is the answer not in the manual?
Questions and answers