Avaya S8500 Installing And Configuring
Media server
Hide thumbs
Also See for S8500:
- Manual (330 pages) ,
- Job aids for field replacements (186 pages) ,
- Installing and configuring (118 pages)

Related Manuals for Avaya S8500


Summary of Contents for Avaya S8500
-
Page 1: Installing And Configuring The Avaya S8500 Media Server
Installing and Configuring the Avaya S8500 Media Server Release 3.1 03-300143 Release 3.1 June 2006 Issue 4.1... - Page 2 Avaya support Avaya provides a telephone number for you to use to report problems or to ask questions about your product. The support telephone number is 1-800-242-2121 in the United States. For additional support telephone...
-
Page 3: Table Of Contents
Preinstallation tasks to complete at the customer site ... . . S8500 hardware ........ - Page 4 Enabling network time servers ......Using the Avaya Installation Wizard ......
- Page 5 Opening the TCP ports on the S8500 LSP ..... . Resetting the S8500 LSP .......
- Page 6 S8500 LEDs ........
-
Page 7: Chapter 1: Introduction
Chapter 1: Introduction Use these procedures to install Avaya Communication Manager and configure a new Avaya S8500 Media Server and the associated components in an IP-connected port network (IP-PNC) configuration. To configure the media server, use the Avaya Installation Wizard. To configure gateways and... -
Page 8: How To Use Avaya Installation Documents
How to use Avaya installation documents Use this document as a guide to install and configure Avaya media servers. For information about a particular task, use the index or the table of contents to locate the page on which the information is described. -
Page 9: Pre-Installation Requirements
Media Server (555-234-100) Return to this document and see: ● Important: If the S8500 Media Server is configured as an LSP, skip the following section. Important: Chapter 6: IP interface configuration to program the IP interface. Install an S8500 Media Server as an LSP on page 75 if the S8500 Media Server is configured as an LSP. -
Page 10: Obtaining The Appropriate Documentation
Chapter 1: Introduction Obtaining the appropriate documentation Avaya recommends that you have copies of the following documents available when you do the installation. The Documentation for Avaya Communication Manager, Media Gateways and Servers CD (03-300151) includes these documents. Quick Start for Hardware Installation: Avaya S8500 Media Server (555-245-701) — a quick ●... -
Page 11: Obtaining Login Ids And Passwords
CD.To get the latest firmware for the media server BIOS, the remote maintenance board, and the programmable circuit packs, go to the Avaya Support Web site (http://support.avaya.com) and click Downloads. From the list, identify and copy the required firmware. -
Page 12: Obtaining The License File And The Avaya Authentication File
For more information on generating the license file and the Avaya authentication file, see the RFA Information page at http://rfa.avaya.com. Before you arrive on site, you must download the license and the Avaya authentication file to your Services laptop. You install these files as part of the installation. -
Page 13: About Asg And The Unique On-Site Password
About ASG and the unique on-site password After you install the Avaya authentication file, Access Security Gateway (ASG) protects Avaya services logins to the media server. The ASG challenge-and-response protocol confirms the validity of each user, reducing the opportunity for unauthorized access. -
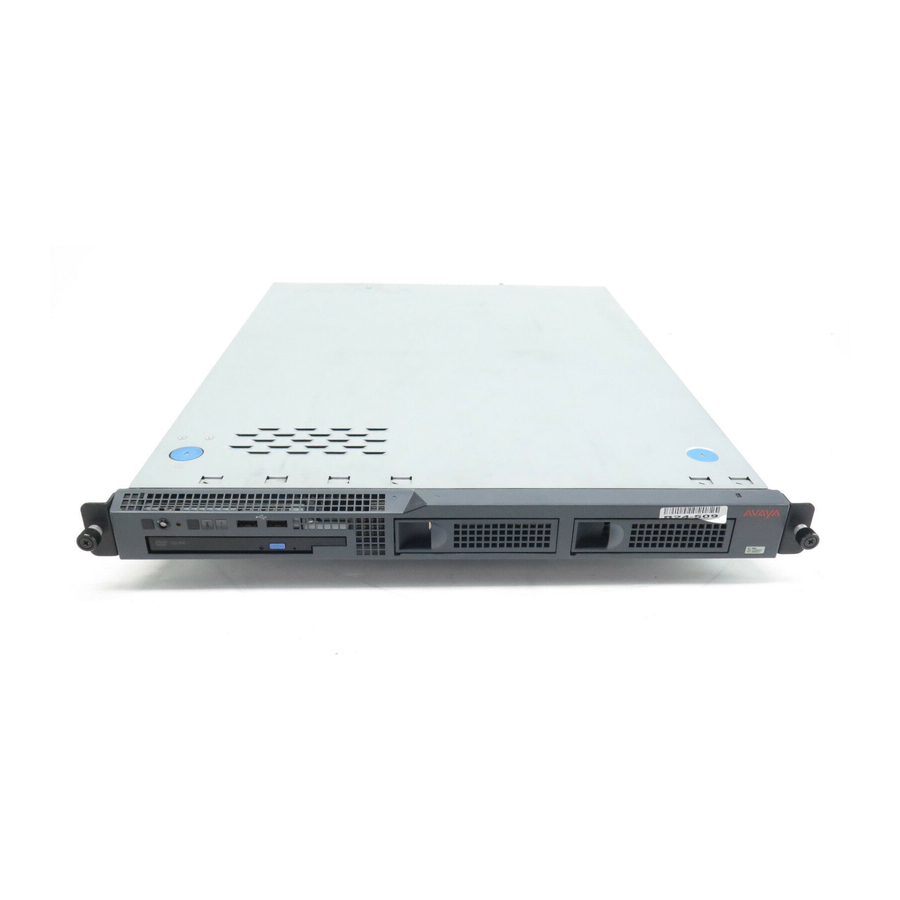
Page 14: S8500 Hardware
S8500 hardware The hardware components for the S8500C and 8500B versions of the S8500 Media Server are very similar but the layout of the components on the front and back panels are different. The following four diagrams show the hardware components on the front and back panels of the S8500C and S8500B with the default port assignments. - Page 15 5. SAMP Services port (SAMP Eth 2) 14. Ethernet 1 6. SAMP card 15. Video connector 7. Dual NIC 16. Serial connector 8. Ethernet 4 17. Keyboard connector 9. Ethernet 3 Installing and Configuring the Avaya S8500 Media Server June 2006...
- Page 16 3. Mouse connector 8. Serial connector 4. Ethernet port (Eth 0) 9. USB ports 5. Dual NIC with Ethernet ports Eth 2 and Eth 3 10. Ethernet port (Eth 1) Installing and Configuring the Avaya S8500 Media Server June 2006...
-
Page 17: Equipment Specifications
Equipment specifications Equipment specifications The S8500 Media Server control network components consist of the media server, one UPS, and an Avaya-provided Ethernet switch (optional). The physical specifications for the control network components are shown in Table Table 1: S8500 control network components specifications... - Page 18 Chapter 1: Introduction Table 2 outlines the features and specifications of the Avaya S8500 Media Server. The differences between the S8500B and S8500C versions are noted. Table 2: S8500 Media Server specifications Feature S8500B S8500C Micro- CPU: 3.0 GHz Pentium (P4) CPU: 3.2 GHz Pentium (P4)
- Page 19 Equipment specifications Environmental specifications for the S8500 Media Servers are shown in Table Table 3: S8500 Media Server environmental specifications Parameter S8500B Specifications S8500C Specifications Acoustical Sound power, idling: 65 decibel maximum Same as S8500B Noise Sound power, operating: 65 decibel...
-
Page 20: About The Server Availability Management Processor
SAMP by the SAMP ● About SAMP connections The SAMP card is installed in PCI-X slot 1 of the Avaya S8500 Media Server. Slot 1 is a full-height, three-quarters length slot. Installing and Configuring the Avaya S8500 Media Server June 2006... - Page 21 SAMP for the S8500B. Figure 5: SAMP connections for S8500B on page 22 shows the locations of the connections on the SAMP for the S8500C. Installing and Configuring the Avaya S8500 Media Server June 2006...
- Page 22 LAO 051706 Figure notes: 1. SAMP Eth2—to the services laptop 3. USB connection for the modem computer (cross-connect CAT5 cable) 4. External power to the SAMP 2. SAMP Eth1 (not used) Installing and Configuring the Avaya S8500 Media Server June 2006...
-
Page 23: About Samp Software
SAMP before you can use it. If a SAMP software update file is available on the Avaya Support website, one of the preinstallation tasks required that you load the file on your laptop: see Using the Avaya Server Availability Management Processor (SAMP) (03-300322) for how to install software on the SAMP and change the default settings. -
Page 24: About Media Server Port Connections
S8500 port connections Use standard CAT5 cables with RJ45 connectors on each end to connect to the various ports. If the S8500 Media Server has only one port network, connect that port network through the dual NIC. Figure 8: S8500C Media Server connectivity guide shows typical connectivity for the S8500B Media Server. - Page 25 Ethernet switch if the (straight-through CAT5 cable) control network is dedicated 4. Eth4—Not used (straight-through CAT5 cable) 2. Eth1—To the Services laptop computer (cross-over CAT5 cable) Installing and Configuring the Avaya S8500 Media Server June 2006...
-
Page 26: About Modem Connections
You cannot connect USB modems to rotary lines. A touch tone line is required. Note: On an Avaya S8500 Media Server, connect the modem to the USB port on the SAMP. Avaya defaults on the SAMP set the required options on the SAMP modem. For modem... -
Page 27: Release
About media gateways About media gateways In a new installation, the Avaya S8500 Media Server works with only the Avaya G650 Media Gateway. In a migration, the media server works with the following Avaya media gateways: MCC1 ● SCC1 ●... - Page 28 Chapter 1: Introduction .Table 4 lists the possible uses of the PE interface for an S8500 primary controller. Table 4: Use of the PE interface for a simplex S8500 primary controller Possible functions of Status of the function Administration needed?
-
Page 29: About S8500 Lsp Mode
Starting with release 3.1 of Communication Manager, you can configure the S8500 as a local survivable processor (LSP), and, the S8500 can be the primary controller for an IP network with port networks. This new functionality is enabled by allowing H.248 gateways and H.323 endpoints to use the Processor Ethernet (PE) interface of the S8500 instead of a C-LAN interface to register with the S8500. -
Page 30: S8500 Lsp License File
● Call Detail Recording (CDR) ● The S8500 as a primary controller can connect to gateways and endpoints that use both C-LANs and the PE interface. The traffic over these interfaces can be load balanced. S8500 LSP license file The license file for an LSP must have the following attributes: The Local Survivable Processor (FEAT_LSP) field is set to y. -
Page 31: High-Level Overview Of Installation Process
The S8300, S8400, S8500, and S8700-series Media Servers on Release 3.1 of ● Communication Manager A Server Availability Management Processor (SAMP), which is used with the S8500 Media ● Server A Maintenance Processor Complex (MPC), which is used with the S8400 Media Server ●... -
Page 32: Installing Expanded Meet-Me Conferencing
Configuring the SAMP The Server Availability Management Processor (SAMP) circuit card is installed at the factory with Avaya defaults, but you must configure the SAMP to fit your specific installation. The Avaya Installation Wizard automatically administers the SAMP. Configuring the media server Use the Avaya Installation Wizard to configure the media server. -
Page 33: Completing The Installation Administration
To finish the media server installation, you must clear alarms, enable alarm reporting, back up the server files, and register the configuration. Testing the finished installation Test the finished installation to verify the correct operation of the complete configuration. Installing and Configuring the Avaya S8500 Media Server June 2006... - Page 34 Chapter 1: Introduction Installing and Configuring the Avaya S8500 Media Server June 2006...
-
Page 35: Chapter 2: Snmp Configuration
After you install and connect the control network equipment, you must configure the SNMP modules in each Avaya-supplied UPS to send alarms or traps to the media servers. This process requires that you also configure the SNMP subagent in the Avaya-supplied Ethernet switch. -
Page 36: Default Ip Addresses For The Ups
- No parity - 8 data bits - 1 stop bit - No flow control Note: Avaya Terminal Emulation and HyperTerminal are supported terminal emulation Note: applications. If a Network Management System (NMS) is to monitor the UPS, you coordinated the ●... -
Page 37: Administering The Snmp Module
SNMP module and the other end of the cable to the next available port on the Ethernet switch for Control Network A (CNA). For a connectivity guide, see the Quick Start for Hardware Installation: Avaya S8500 Media Server (555-245-701). After you configure the SNMP module in the UPS, you must configure the SNMP subagent on the Avaya Ethernet switch. - Page 38 Chapter 2: SNMP Configuration Setting selected traps (alarming) The default is to set all traps, which can result in large log entries. To avoid this problem, Avaya recommends that you set only the following traps: UPS on Battery—Indicates an AC power failure. Based on the level of battery reserve, a ●...
-
Page 39: Configuring The Snmp Subagent In The Avaya Ethernet Switch (If Used)
The community string (get, set, trap) ● The brand, the model, or the firmware load of the Ethernet switch that Avaya supplies can change without notice. For this reason, this document does not provide specific instructions on how to connect to and configure the SNMP subagent. For more information, see the documentation that comes with the Ethernet switch. -
Page 40: Default Ip Addresses For The Ethernet Switch
- No parity - 8 data bits - 1 stop bit - No flow control Note: Avaya Terminal Emulation and HyperTerminal are supported terminal emulation Note: applications. If a Network Management System (NMS) is to monitor the Ethernet switch, you ●... -
Page 41: Configuring The Ethernet Switch
Note: 1. Connect the RS-232 serial port of your Services laptop computer to the port labeled Console on the front of Ethernet switch 1 (CNA). Use the flat cable supplied with the Avaya Ethernet switch. 2. Open a VT-100 terminal emulation session on your computer. - Page 42 100 speed and full duplex. 11. When you finish, disconnect your computer from the Ethernet switch. 12. If two Ethernet switches are present for CNA, repeat Steps 1 through 10 for the second switch. Installing and Configuring the Avaya S8500 Media Server June 2006...
-
Page 43: Chapter 3: Communication Manager Installation
A new media server comes with a blank hard disk drive. Use the bootable software distribution CD-ROM to install the Linux operating system and Avaya Communication Manager. This chapter covers the following tasks: Clearing the ARP cache on the laptop on page 43 ●... -
Page 44: Applying Powering To The Media Server
3. Immediately place the Avaya Communication Manager CD-ROM into the CD-ROM drive on the media server. Or, If you are installing an S8500 Media Server to run the Expanded Meet-me Conferencing (EMMC) application, use the CD-ROM that is labeled EMMC Software Disk 1. -
Page 45: Installing Avaya Communication Manager
3. Select Install, ensure that <OK> is highlighted, and press Enter. 4. On the Select Release Version screen, ensure that the Build line and <OK> are highlighted. Press Enter to partition the hard disk drive and reformat the partitions. Installing and Configuring the Avaya S8500 Media Server June 2006... - Page 46 6. Perform one of the following actions: a. If you are installing the S8500 Media Server as a call controller, continue with the next section of this document. b. If you are installing an S8500 Media Server to run the Expanded Meet-me Conferencing (EMMC) application, you are finished with this document.
-
Page 47: Chapter 4: Media Server Configuration
Opening the Maintenance Web Interface Chapter 4: Media server configuration After you install the Communication Manager software, you must use the Avaya Installation Wizard to configure the media server. This section covers the following tasks: Opening the Maintenance Web Interface on page 47 ●... -
Page 48: Copying Files To The Media Server
Internet. To use a network time server, the NTP service must be enabled. The Avaya Installation Wizard prompts you to enable the NTP service. If you do not use the Installation Wizard, use the Configure Server function on the Maintenance Web Interface to configure the network time servers. -
Page 49: Using The Avaya Installation Wizard
Note: already enabled, you do not need to disable it. When the Avaya Installation Wizard prompts you for information about the network time servers, enter the DNS name or the IP address for the primary network time server and the secondary and the tertiary time servers if any. -
Page 50: Verifying Rmb Ip Information
You might need to update the SAMP firmware if the most current version is not installed. Information about the versions that require updates should be included in your project planning information. For how to update SAMP software, see Using the Avaya Server Availability Management Processor (SAMP). To update the firmware: 1. -
Page 51: Verifying The Media Server Connection To The Customer Lan (If Provided)
6. Verify that the ping was successful. Enabling firewall settings For the media server to receive SNMP traps from the UPS and the Avaya Ethernet switch, you must enable the snmptrap,162/udp port. The default is disabled. 1. Open the Maintenance Web Interface. -
Page 52: Configuring The Modem
3. Click Continue until you get to the Specify how you want to use this wizard page. 4. Select Configure individual services and click Continue. 5. On the menu on the left, click Set Modem Interface. Installing and Configuring the Avaya S8500 Media Server June 2006... - Page 53 For example, to change the country code to Japan, type AT%T19,0,10. 8. Click Change. The system displays a message that indicates that a modem route was added successfully. 9. Click Close Window. Installing and Configuring the Avaya S8500 Media Server June 2006...
-
Page 54: Checking Led Activity On The Dual Nic
Checking LED activity on the dual NIC When the S8500 Media Server is in service, check the LEDs on each port of the dual network interface card (NIC) for connection and activity. Ensure that the LED on the left that indicates connection is lit and the LED on the right that indicates activity is lit or blinking. -
Page 55: Configuring The Dual Network Interface Card
Configuring the dual network interface card Configuring the dual network interface card This section describes the tasks required to configure the optional dual network interface card (NIC) on the Avaya S8500 Media Server. The tasks include: Configuring the network interface card on page 55 ●... - Page 56 If supported, select VLAN 802.1q priority tagging. 10. Click Change. The system displays the status of the configuration update. When the update is complete, the system displays the following message: Successfully configured ethernet interfaces. Installing and Configuring the Avaya S8500 Media Server June 2006...
-
Page 57: Testing Connectivity To Customer's Network
2. Type command and click OK to open an MS-DOS command window. 3. Type ping serveripaddress and press Enter, where serveripaddress is the IP address of media server. 4. Verify that the ping was successful. Installing and Configuring the Avaya S8500 Media Server June 2006... - Page 58 Chapter 4: Media server configuration 5. If DNS is administered, type ping servername and press Enter, where servername is the host name of media server. 6. Verify that the ping was successful. Installing and Configuring the Avaya S8500 Media Server June 2006...
-
Page 59: Chapter 5: Ip Interface Translations
For Communication Manager terminal emulation, use a program such as Avaya Native Configuration Manager, Avaya Terminal Emulation, or HyperTerminal. You also can use Avaya Site Administration to issue SAT commands. To administer some of the features in the latest release of Avaya Communication Manager, you must use the latest version of Avaya Site Administration. -
Page 60: Inputting Initial System Translations
Number of Portnetworks: 1 Survivable Remote EPN? n Location: 1 IP Network Region:1 Cabinet Holdover: A-carrier-only Room: Floor: Building: CARRIER DESCRIPTION Carrier Carrier Type Number not-used not-used not-used G650-port G650-port Installing and Configuring the Avaya S8500 Media Server June 2006... -
Page 61: Enabling The Ipsi
4. Set the Switch Identifier field to the switch ID letter. Acceptable switch ID letters are A through J. A is the default setting. 5. Set the IPSI Control of Port Networks field to enabled. 6. Press Enter to save the changes. Installing and Configuring the Avaya S8500 Media Server June 2006... -
Page 62: Adding The Ipsi To The System
3. Submit the screen to save the changes. 4. Repeat this procedure for each IPSI. Saving translations To save the translations to the hard disk drive, at the SAT, type save translation and press Enter. Installing and Configuring the Avaya S8500 Media Server June 2006... -
Page 63: Chapter 6: Ip Interface Configuration
IPSIs might generate an alarm if the firmware is not the most current. The alarm stops automatically once you upgrade the IPSI firmware. For how to connect the S8500 Ethernet cables, see About media server port connections page 24. -
Page 64: Ipsi Address Configuration
Note: To program DHCP addressing, you must complete certain sequences within a Note: predetermined time-out interval. Avaya recommends that you read the following procedure completely before you start so that you are familiar with these sequences in advance. Perform one of the following tasks depending on whether you use static or dynamic addressing:... - Page 65 LED display. When the correct letter shows, stop. The letter flashes a few times, or 5 seconds, then stops. The next character down starts to flash. Installing and Configuring the Avaya S8500 Media Server June 2006...
-
Page 66: Setting The Cabinet Number
IPSI, the center of the "V" fills in. The filled in "V" looks like the bottom half of a diamond. For a duplicated control network, repeat these steps for the second IPSI in the cabinet. Installing and Configuring the Avaya S8500 Media Server June 2006... -
Page 67: Programming The Ipsi For Static Addressing
1. Services laptop computer 3. NIC adapter cable (if necessary) 2. PCMCIA Network Interface Card (NIC) 4. CAT5 crossover cable to IPSI Note: Ensure that you have the password before proceeding. Note: Installing and Configuring the Avaya S8500 Media Server June 2006... - Page 68 6. Log in as craft. Prompt = [IPADMIN]: 7. Type show control interface and press Enter and then type show port 1 and press Enter to see the current control interface settings. Installing and Configuring the Avaya S8500 Media Server June 2006...
- Page 69 13. Type quit and press Enter to save the changes and exit the IPSI session. 14. Telnet to 192.11.13.6 and login. 15. Use show control interface to verify the administration. 16. Type exit and press Enter to see the changes. Installing and Configuring the Avaya S8500 Media Server June 2006...
-
Page 70: Setting The Vlan And Diffserv Parameters
IPSI. Note: The IP address, subnet mask, and gateway control network settings become Note: effective when you exit the IPADMIN session. 3. Disconnect the laptop from the IPSIfaceplate. Installing and Configuring the Avaya S8500 Media Server June 2006... - Page 71 Clear the ARP cache on the laptop before connecting to another IPSI. If you do Note: not clear the cache, the laptop appears to stop and does not connect to the next IPSI. 5. Repeat this procedure for each IPSI circuit pack. Installing and Configuring the Avaya S8500 Media Server June 2006...
-
Page 72: Verifying Connectivity To The Media Server
2. Select Query All and click View. 3. Verify the firmware release for each IPSI. 4. If an upgrade is required, follow the procedures in Firmware Download Procedures at: ftp://ftp.avaya.com/incoming/Up1cku9/tsoweb/firmware/TNpackFirmwareDownloadInstructions.pdf Installing and Configuring the Avaya S8500 Media Server June 2006... -
Page 73: Enabling Control Of The Ipsis
3. Submit the screen to save the changes. Verifying the license status On the Maintenance Web Interface, under Security, click License File and verify that the license mode is now normal. Installing and Configuring the Avaya S8500 Media Server June 2006... - Page 74 Chapter 6: IP interface configuration Installing and Configuring the Avaya S8500 Media Server June 2006...
-
Page 75: Chapter 7: Install An S8500 Media Server As An Lsp
For how to administer PE, see Administrator Guide for Avaya Communication Manager (03-300509). To install a new S8500 Media Server as an LSP, first complete the tasks in Quick Start for Hardware Installation: Avaya S8500 Media Server. Then complete the tasks in the previous... - Page 76 For the Registration address field, enter the IP address of a C-LAN that controls ● the primary controller. If the primary controller is an S8500 Media Server, this address can be a PE IP address, if used, for the primary controller.
-
Page 77: Administering The Primary Controller
If a G700 Media Gateway provides the serial number for the S8500 LSP license, skip this step and continue with Installing and verifying the license on the new LSP on page 78. -
Page 78: Installing And Verifying The License On The New Lsp
Installing and verifying the license on the new LSP On the S8500 LSP, install a new license file with the appropriate settings for an LSP server. To install the license file and the authentication file, complete the following steps: 1. - Page 79 Opening the TCP ports on the S8500 LSP 1. In the Maintenance Web Interface, under Security, click Firewall. The system displays the Firewall Web page. Note: The ftp, telnet, and tftp services are not required. Note: 2. In the Input to Server column, ensure that the check box for snmp is selected.
-
Page 80: Resetting The S8500 Lsp
Verifying that the primary controller identifies the new LSP and has sent the translations 1. Wait several minutes after you reset the S8500 LSP. On the primary controller, run the SAT command list survivable-processor to verify that the LSP server registers, and that translations are updated. -
Page 81: Readministering Media Gateways To Point To The Lsp
For how to change the controller list of the media gateway, see one of the following documents: Installation and Upgrades for the Avaya G700 Media Gateway and Avaya S8300 Media ● Server, 555-234-100 Installation and Upgrades for the Avaya G250 Media Gateways, 03-300434 ●... - Page 82 Chapter 7: Install an S8500 Media Server as an LSP Installing and Configuring the Avaya S8500 Media Server June 2006...
-
Page 83: Chapter 8: Postinstallation Administration
3. To verify the location of the IPSI circuit packs,type list ipserver-interface and press Enter. For more information, see your planning documents and check the administration status on the following items: ● list station ● list trunk-group ● list hunt-group Installing and Configuring the Avaya S8500 Media Server June 2006... -
Page 84: Setting Rules For Daylight Savings Time
Locations screen or the Date and Time screens. 3. When you finish, submit the screen to save the changes. Installing and Configuring the Avaya S8500 Media Server June 2006... -
Page 85: Setting Locations (If Necessary)
2. In the ARS Prefix 1 Required for 10-Digit NANP Calls? field, type y. 3. Type the information in the various fields for each media gateway. In the Name field for location 1, type Main. 4. Submit the screen to save the changes. Installing and Configuring the Avaya S8500 Media Server June 2006... -
Page 86: Verifying The Date And The Time
You can resolve alarms on the active media server only. 2. Select the server alarms to clear and click Clear. 3. Using SAT commands or other standard troubleshooting procedures, to resolve any major alarms. Installing and Configuring the Avaya S8500 Media Server June 2006... -
Page 87: Backing Up Files To The Compact Flash Media
Backing up files to the compact flash media Backing up files to the compact flash media Note: Avaya requires the use of industrial grade compact flash media. For more Note: information, see Hardware Description and Reference for Avaya Communication Manager (555-245-207). -
Page 88: Enabling Alarms To Inads By Way Of The Snmp Module
- https must be enabled to access the Maintenance Web Interface - def-sat must be enabled to access the SAT commands - 162/udp must be enabled to receive SNMP traps from the UPS and the Avaya Ethernet switch Installing and Configuring the Avaya S8500 Media Server... -
Page 89: Chapter 9: Installation Verification
1. On a SAT command line, type test license and press Enter. 2. Verify that the Test Results screen shows PASS in the Results column. Installing and Configuring the Avaya S8500 Media Server June 2006... -
Page 90: S8500 Leds
Chapter 9: Installation verification S8500 LEDs The Avaya S8500 Media Servers have five or six LEDs on the front and four LEDs on the back. The S8500B and S8500C have the same LEDs but in different locations. The S8500B can have an additional LED indicating activity on the optional floppy disk drive. - Page 91 LEDs have the same location and function as shown in Figure 13. See Figure 2: S8500C back panel on page 15. For more information on LEDs, see Maintenance Procedures for Avaya Communication Manager, Media Gateways and Servers, 03-300432. Installing and Configuring the Avaya S8500 Media Server June 2006...
-
Page 92: Avaya C360 Ethernet Switch Leds
LEDs are selectable with a set of two left/right buttons. The port LEDs display the status of the selected function for each port. For more information about the on/off and blinking states of the LEDs, see the documentation for the Ethernet switch. System and port function LEDs on C360 Avaya Ethernet switches LED Name Description System LEDs... -
Page 93: Ups Leds
Figure notes: 1. Normal mode indicator 5. Off button 2. Battery mode indicator 6. On button 3. Bypass mode indicator 7. Bar graph indicators 4. Test/Alarm reset button 8. Alarm indicators Installing and Configuring the Avaya S8500 Media Server June 2006... -
Page 94: Tn2312Bp Ipsi Leds
For a static address, the display shows (Figure 16: IPSI LED display for a static IP address on page 96) I P. - Connectivity Installing and Configuring the Avaya S8500 Media Server June 2006... - Page 95 7. Network control RJ45 connector 3. Amber LED 8. Four-character LED display 4. Yellow LED (tone clock status) 9. Pushbutton switch 5. Emergency transfer LED 10. Slot for the maintenance cable Installing and Configuring the Avaya S8500 Media Server June 2006...
- Page 96 Chapter 9: Installation verification Figure 16: IPSI LED display for a static IP address Figure notes: 1. The IPSI has a static IP 2. The IPSI has connectivity and an IP address. address. Installing and Configuring the Avaya S8500 Media Server June 2006...
- Page 97 Figure 17: IPSI LED display indicating connectivity status for a DHCP IP address Connectivity status The IPSI is connected to a media server. The IPSI has an IP address. The Services laptop computer is connected to the IPSI services port. Installing and Configuring the Avaya S8500 Media Server June 2006...
- Page 98 Chapter 9: Installation verification Installing and Configuring the Avaya S8500 Media Server June 2006...
-
Page 99: Appendix A: Media Server Access
SSH access, how to log on to the server command line with PuTTY. Note: A version of PuTTY that is defaulted for SSH server access is available for Avaya Note: Services personnel only. In this version, some values shown in the procedure below are pre-selected. - Page 100 Appendix A: Media server access Note: Many Avaya products support access with SSH. However, Avaya does not Note: provide support for third-party clients that are used for SSH access. Problems with an SSH client, including PuTTY, are the responsibility of the user or the SSH client vendor.
-
Page 101: Connecting To The Media Server Directly
For specific information, see Configuring the network for Windows 2000 and XP page 106. Once you connect, use a terminal emulation program or a Web browser to administer the media server. Installing and Configuring the Avaya S8500 Media Server June 2006... - Page 102 Appendix A: Media server access Figure 18: Services laptop computer connected directly to the S8500 Media Server cadlsrv3 KLC 093004 Figure notes: 1. Services laptop computer 3. NIC adapter cable (if necessary) 2. Network interface card (NIC) 4. CAT5 cross-over cable...
-
Page 103: Connecting To The Media Server Remotely Over The Network
33.5 kilobits per second. On the S8500 Media Server, access the media server through the remote maintenance board (SAMP) that is installed in the media server. For how to access the SAMP, see Using the Avaya Server Availability Management Processor (SAMP) (03-300322). -
Page 104: Accessing The Maintenance Web Interface
Directly to the Services port on the media server. For more information, see Services ● laptop computer connected directly to the S8500 Media Server on page 102. To access the Maintenance Web Interface, you must first bypass any proxy servers. -
Page 105: Using The Sat Command Line Prompt
Avaya Native Configuration Manager, Avaya Terminal Emulation, and Note: HyperTerminal are the only terminal emulation programs that Avaya supports. Use either the IP address or the DNS host name to establish a network connection to the media server. Use port 5023 for this connection. When prompted, log in. -
Page 106: Logins For Avaya Technicians And Businesspartners
The revised password is recorded by RFA and is obtained from ASG Conversant at 1-800-248-1234 or 1-720-444-5557. Customers can set up their own logins to access Avaya media servers. You must have superuser permission to create or change logins and passwords. NOTE: do not start login IDs with a number. -
Page 107: Setting The Browser Options For Internet Explorer 6.0
If the IP addresses have the first or first and second octets the same, you can shorten the addresses to xxx.xxx.* (example, 135.9.*). 5. Click OK to close each dialog box. Installing and Configuring the Avaya S8500 Media Server June 2006... - Page 108 Appendix A: Media server access Installing and Configuring the Avaya S8500 Media Server June 2006...
-
Page 109: Appendix B: Installation Troubleshooting
109 ● Troubleshooting the configuration of the media server hardware on page 110 ● Troubleshooting the installation of the license file and the Avaya authentication file ● page 112 Troubleshooting the installation of the media server hardware Problem... -
Page 110: Troubleshooting The Configuration Of The Media Server Hardware
Cannot use SAT Ensure that you are using the correct IP address, 192.11.13.6 ● commands and port 5023 Ensure that you are using the correct login and password. ● 1 of 2 Installing and Configuring the Avaya S8500 Media Server June 2006... - Page 111 The IPSI is not administered. ● The system The IPSI does not have the current firmware. Upgrade the ● generates an alarm firmware. when first connect to IPSI 2 of 2 Installing and Configuring the Avaya S8500 Media Server June 2006...
-
Page 112: Troubleshooting The Installation Of The License File And The Avaya Authentication File
30-minute timer lapsed. In a SAT session, type reset system 1 and press Enter to reset the 30-minute clock. ASG does not work Re-install the Avaya authentication files. ● Installing and Configuring the Avaya S8500 Media Server June 2006... -
Page 113: Index
... upgrading firmware version ....verify translations Installing and Configuring the Avaya S8500 Media Server June 2006... - Page 114 ... . . static IP addressing, setting ... overview of installation process Installing and Configuring the Avaya S8500 Media Server June 2006...
- Page 115 ....using DHCP IP address ....using this documentation Installing and Configuring the Avaya S8500 Media Server June 2006...
-
Page 116: Installing And Configuring The Avaya S8500 Media Server June
Index Installing and Configuring the Avaya S8500 Media Server June 2006...
Need help?
Do you have a question about the S8500 and is the answer not in the manual?
Questions and answers