Table of Contents
Advertisement
Quick Links
Download this manual
See also:
Manual
Advertisement
Table of Contents

Subscribe to Our Youtube Channel
Related Manuals for Sierra Wireless 4G LTE Tri-Fi Hotspot


Summary of Contents for Sierra Wireless 4G LTE Tri-Fi Hotspot
-
Page 1: User Guide
Sierra Wireless™ 4G LTE Tri-Fi Hotspot User Guide ©2012 Sprint. Sprint and the logo are trademarks of Sprint. Other marks are trademarks of their respective owners. -
Page 2: Table Of Contents
Table of Contents Get Started ..........................10 Your Device ...........................10 Package Contents ......................11 Care and Maintenance .......................11 System Requirements ......................11 Setting Up Your Device ......................12 Device Setup ........................12 Activating Your Device .......................17 Getting Help ..........................19 Visiting the Sprint Website ....................20 Contacting Sprint Customer Service ..................20 Online Help ........................20 Device Basics ...........................22 Components of Your Device ....................23... - Page 3 Launching and Ending A Network Connection ...............33 Launching Your Network Connection .................33 Ending Your Network Connection ..................34 Sharing Your Connection.......................34 Manually Entering the Wi-Fi information ................34 Connecting Through WPS ....................34 Connecting Through USB ......................37 Making a Tethered Connection ..................38 TRU-Install .........................39 Browser Interface Home Page ....................41 Home Page Basics ........................42 Displaying the Home Page of the Device ................42...
- Page 4 Battery Information and Settings ..................56 Internet Connection Information ..................57 microSD Card Information and Settings ................58 Sounds Information and Settings ..................59 Alerts .............................60 3G Activation Required ......................61 GPS Privacy Agreement ....................61 SD Card Error ........................62 Software Update Available ....................62 Viewing Device Information ....................63 Updates ..........................65 Automatically Checking for Updates ...................65 Manually Checking for Updates ..................66...
- Page 5 Device Tab: Display Panel ....................76 Device Tab: microSD Card Panel ..................77 Device Tab: Sounds Panel ....................78 Device Tab: About Panel ....................79 Device Tab: Log Panel .......................80 WAN Tab ...........................81 WAN Tab: Setup Panel ......................81 WAN Tab: 3G Panel ......................83 WAN Tab: 4G Panel ......................84 WAN Tab: 4G LTE Panel ....................86 WAN Tab: GPS Panel ......................87 Wi-Fi Tab ...........................88...
- Page 6 Resetting the Software to Default Setting: General ............104 Resetting the Software to Default Settings: Using the Reset Button ......... 105 Resetting the Software to Default Settings: Using the Browser Interface ......106 Exporting and Importing Settings ..................106 Exporting Settings ......................107 Importing Settings ......................
- Page 7 Setting the GPS Mode ..................... 124 Setting the GPS Fix Rate ....................125 Using Metric Units ......................125 Changing Your Mapping Service ..................126 Performance Setting: GPS ....................126 Accuracy .......................... 126 Using the microSD Card Slot ....................127 Before Using the microSD Card Slot ................... 127 Enabling the microSD Card Slot ..................
- Page 8 Questions About WPS ......................138 What is WPS? ........................138 How do I Use WPS? ......................138 If a Wireless Device has a WPS Button or a WPS Software Option, Must I Use it to Connect Via Wi-Fi? ........................138 How Do I Access My Corporate Network Through a VPN? ..........
- Page 9 WPS Not Available. Wi-Fi currently disabled ..............152 WPS Not Available. WEP or WPA security not allowed ............ 153 WPS Not Available. Max connected devices ..............153 WPS Not Available. MAC Filter list empty ................ 153 WPS PIN Chksum Error ....................154 WPS PIN Mismatch.
- Page 10 OpenSSL License ......................173 Original SSLeay License ....................174 PPPD License ........................176 PPPStats License ......................177 PPPDump License ......................177 SSH2 License ........................178 UUID License ........................179 Zlib License ........................179 Trademarks ......................... 180 Copyright ..........................180 Limitation of Liability ......................180 Additional Information and Updates ..................
-
Page 11: Get Started
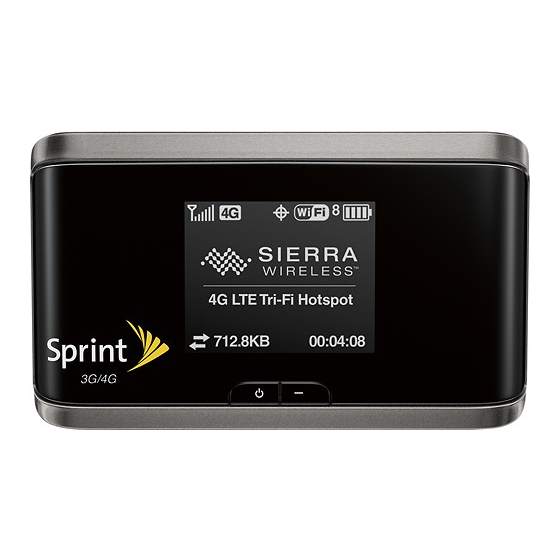
Get Started This section gives you all the information you need to set up your device and Sprint service the first time. Your Device System Requirements Setting Up Your Device Getting Help Your Device The following illustrations show your device’s primary external features and buttons: Front View Bottom View (Battery Cover Removed) Get Started... -
Page 12: Package Contents
● Do not apply adhesive labels to the device. They may cause the device to overheat and may alter the antenna’s performance. System Requirements This section lists items that are required to use your Sierra Wireless™ 4G LTE Tri-Fi Hotspot. ● One or more computers that support Wi-Fi (802.11b/g/n) Get Started... -
Page 13: Setting Up Your Device
● Web browser (required if you’ll be using the browser interface to view status and to configure settings). The following browsers are supported: Internet Explorer (version 6.0 or higher) Mozilla Firefox (version 2.0 or higher) Google Chrome (version 2.0.172.28 or higher) ... - Page 14 After you’ve connected to the Wi-Fi network, the device LCD displays “Open any web page to continue setup.” 7. Open your Web browser. The “Welcome to your Sierra Wireless™ 4G LTE Tri-Fi Hotspot” window opens. Note: This window displays the administrator password and the address of the device home page.
- Page 15 Changing the Password and Settings During the device setup, you can select Set up my Sierra Wireless™ 4G LTE Tri-Fi Hotspot to change the following settings: ● Administrator password — This password is used to log in to the home page, where you can view and customize your device settings.
- Page 16 Note: All the devices used with the Sierra Wireless 4G LTE Tri-Fi Hotspot must support the selected security type. Note: WPS is available only if you select either a WPA2 Personal option (including WPA/WPA2 Personal) or (not recommended) no security. (See Connecting Through WPS.)
- Page 17 Note: WPS is available only if you select either a WPA2 Personal option (including WPA/WPA2 Personal) or (not recommended) no security. (See Connecting Through WPS.) Note: You can also view the expanded list of Wi-Fi security options in the Security panel of the Wi-Fi tab of the Advanced Settings window.
-
Page 18: Activating Your Device
● WPA/WPA2 Personal (recommended setting if any of your devices are more than two years old) — Wi-Fi devices that use either WPA or WPA2 can connect to the Sierra Wireless 4G LTE Tri-Fi Hotspot. This setting is supported by most Wi-Fi devices. Your Device is Now Restarting The “Your device is now restarting”... - Page 19 ● “3G Activation Required” alert (displayed on the home page; available if you have already set up with Sprint a wireless account that is associated with your Sierra Wireless 4G LTE Tri-Fi Hotspot) ● Device Self-Activation wizard (displayed if you haven’t yet set up a wireless account that is associated with your Sierra Wireless 4G LTE Tri-Fi Hotspot) Activating Your Device Through the “3G Activation Required”...
-
Page 20: Getting Help
Activating Your Device Through the Activation Wizard If you haven’t set up with Sprint a wireless account that is associated with your Sierra Wireless 4G LTE Tri-Fi Hotspot, the Device Self-Activation wizard is automatically displayed. To activate your device through the Device Self-Activation wizard: 1. -
Page 21: Visiting The Sprint Website
Visiting the Sprint Website Contacting Sprint Customer Service Online Help Visiting the Sprint Website Sign on to sprint.com to get up-to-date information on Sprint services, options, and more. You can also: ● Review coverage maps. ● Access your account information. ●... - Page 22 Contextual Help in the Advanced Settings Window When you move the cursor over an item in Advanced Settings, help information on this item, if available, appears to the right of the window. To turn this feature on or off: 1. Make sure you’re logged in to the home page. 2.
-
Page 23: Device Basics
Device Basics Learn about the buttons, connectors, and other components of your Sierra Wireless 4G LTE Tri-Fi Hotspot. Components of Your Device 3G and 4G Networks Battery Power Button Other Buttons and Switches Reset Button microSD Card Slot Your device provides a simple way to use your 3G or 4G Internet connection with any Wi-Fi- enabled device, and to share your Internet connection with friends and family. -
Page 24: Components Of Your Device
Components of Your Device Your device consists of several main components. ● Wi-Fi access point The Wi-Fi access point connects your computers and other Wi-Fi-enabled devices to your device. ● 3G modem The 3G modem connects your device to the Internet via the 3G (CDMA 1X/EVDO) network (more widely available, compared with 4G). -
Page 25: Battery
The battery compartment is on the back of the device. The battery is replaceable. If you need a new battery, visit the Sierra Wireless online store at sierrawireless.com/eStore. Chargers and other accessories are also available from the Sprint Store at sprint.com. -
Page 26: Charging The Battery
3. Replace the battery compartment cover. Charging the Battery You need to recharge your device’s battery periodically. You can continue using your device while it is charging. The faster method is to connect the device to the AC charger. (See “Using the AC Charger with Your Device’s micro-USB Port”, below.) Alternatively, you can connect the device to your computer, although this charges more slowly. - Page 27 When charging, the LCD shows and, if the device is off, displays a message “Charging... xx% complete” (where “xx” is a number value). When the device is charged, the LCD shows: ● (if the device is on) ● and the message “Fully charged” (if the device is off). Charging Through Your Computer Note: If you’ll be using USB for data transfer (and not just for charging the device), you must install the device driver.
-
Page 28: Power Button
When the device is charged, the LCD shows Power Button Use the power button to turn your device on and off. The power button also is a status indicator. Turning Your Device On and Off Using the Power Button to Determine the Device State Controlling the Device Using the Power Button Turning Your Device On and Off Use the power button on your device to turn it on and off. -
Page 29: Using The Power Button To Determine The Device State
Turning Your Device Off ► Press and hold the power button until the device turns off. Using the Power Button to Determine the Device State The power button on the device also indicates the device’s status. See the following table: Description Your action Power button... -
Page 30: Other Buttons And Switches
Other Buttons and Switches This section describes the navigation button, WPS button, and the mute switch. Navigation Button The navigation button is next to the power button . Briefly press the navigation button to go to the next information screen, if available. (See LCD Information Screens.) WPS Button... -
Page 31: Restarting The Device
For information on using this button, see Restarting the Device Resetting the Software to Default Settings: Using the Reset Button. Restarting the Device If the device or the home page seems to stop responding, you can reset (restart) the device by pressing the reset button. -
Page 32: Lcd
4. Replace the battery compartment cover. The LCD has several icons that help you determine the status of your device and its connections. If the LCD is not lit, see “Turning Your Device On” in Turning Your Device On and Off. -
Page 33: Lcd Information Screens
Messages Displayed on the Device LCD. LCD Information Screens The LCD of the Sierra Wireless 4G LTE Tri-Fi Hotspot can display, on separate screens, summary information. ● Connection information (the Wi-Fi network name [SSID] and password [if the Wi-Fi Password Reminder feature is enabled]) ●... -
Page 34: Your Network Connection
Your Network Connection Find out how to launch, share, and end your network connection. Launching and Ending A Network Connection Sharing Your Connection Connecting Through USB Launching and Ending A Network Connection Learn how to manually launch a connection, and how to end it. Launching Your Network Connection Ending Your Network Connection Launching Your Network Connection... -
Page 35: Ending Your Network Connection
Note: The Wi-Fi connection is still available, so users can, for example, share files by using a microSD card. Sharing Your Connection Your Sierra Wireless 4G LTE Tri-Fi Hotspot provides two ways of sharing your network connection with other users. ● User manually enters the Wi-Fi information ●... - Page 36 The WPS feature is available on certain cameras, printers, smartphones, and laptops. These devices have either a hardware button or a WPS-related option in the software. Please consult the user documentation of your device. To turn this feature on or off: 1.
- Page 37 1. Press the WPS button on your Sierra Wireless 4G LTE Tri-Fi Hotspot. 2. When the LCD of your Sierra Wireless 4G LTE Tri-Fi Hotspot displays “WPS Started”, press (within 2 minutes) the WPS button on the wireless device you want to connect or select the WPS-related option in the device’s software.
-
Page 38: Connecting Through Usb
Within 2 minutes, start connecting from the WPS-related PIN option in the device’s software or from the Wi-Fi Protected Setup Wizard. Your Sierra Wireless 4G LTE Tri-Fi Hotspot and the wireless device will communicate and establish the connection. The status is displayed in the WPS Setup window (below the Connect button) and also on the LCD of the Sierra Wireless 4G LTE Tri-Fi Hotspot. -
Page 39: Making A Tethered Connection
Note: If you’ll be using USB for data transfer (and not just for charging the device), you must install the device driver. (See Making a Tethered Connection.) Use the micro-USB cable when: ● You want to charge the device, but you don’t want to use the AC charger, or the AC charger is not available. -
Page 40: Tru-Install
If you’re running Windows Vista and the AutoPlay window opens, click Run setup.exe. 4. In the TRU-Install window, click OK. 5. Install the Sierra Wireless USB driver. (Follow the onscreen instructions.) To install the device driver on Mac: 1. Make sure the device is turned on. - Page 41 1. In the address bar of your Web browser, type http://192.168.0.1 to display the home page. 2. Make sure you’re logged in to the home page (the text “Admin Logged in” is displayed near the upper left corner of the home page). If you’re not logged in, in the Admin Login section (in the upper left area of the home page), enter the administrator password (1–...
-
Page 42: Browser Interface Home Page
Browser Interface Home Page Access your device and connection information, and configure device settings from the browser interface home page. Home Page Basics Home Page Buttons Icons and Text Alerts Viewing Device Information Updates The home page is the entry page of the browser interface that lets you: ●... -
Page 43: Home Page Basics
Callout item Description When you click an icon or the text next to it, a window opens to the right. The window contains additional status information and, if you’re logged in, commonly-used configurable settings. (See Icons and Text.) Use this area to enter the administrator password and log in. When you’re logged in, you can change settings. -
Page 44: Logging On As An Administrator
● SSID value (field in Advanced settings > Wi-Fi > Network and also in Advanced settings > Router > LAN) Note: If you’re using the Google Chrome Web browser, after typing in the address bar, press the Down Arrow key and then the Enter key. (If you press only the Enter key, a Google search is started, using the information you typed in.) If your Web browser displays an error message, see Cannot Display the Home... - Page 45 Virtual Device The right half of the home page contains an image of your device. This is a “virtual device” — it reflects most of the icons and text displayed on the real device. Mini Window If you click the virtual device in the home page, the Mini Window opens — an image of the device in a separate Web browser window.
-
Page 46: Turning Your Device Off
Setup Pages At any time, you can rerun the device setup, if required. The Welcome to your Sierra Wireless™ 4G LTE Tri-Fi Hotspot window opens in two cases. ● Automatically, as part of the initial setup of your newly purchased device. -
Page 47: Home Page Buttons
● To change security settings, select Set up my Sierra Wireless™ 4G LTE Tri-Fi Hotspot. Home Page Buttons The home page has several buttons that open a browser window or perform certain actions on the device. The top horizontal part of the home page has several buttons. -
Page 48: Advanced Settings
For more information, see Setup Pages. Advanced Settings From the Advanced Settings window you can configure all the settings of the device and the browser interface. The Advanced Settings window has the following tabs, each with several panels: ● Device tab. (See Device Tab.) ●... -
Page 49: Connect/Disconnect Button
● Download the user guide. ● View the important information booklet. This booklet contains regulatory notices, warranty, and other information. Connect/Disconnect Button This button connects or disconnects your device from the 3G or 4G network. Note: This button appears only when you’re logged in. WPS Button This button starts a WPS (Wi-Fi Protected Setup) session. - Page 50 Most of these icons are also shown on the physical device and Virtual Device (Virtual Device). When you hold the mouse over an icon, the corresponding icon on the Virtual Device is highlighted. If you click an icon or the text, a window opens with additional information, as shown in the following screenshot: If you’re logged in, the window may also display configurable settings.
-
Page 51: Signal Information
Note: A more complete set of configurable settings is available in the Advanced Settings window. (See Advanced Settings.) Signal Information Learn how to determine the signal strength and get detailed 3G/4G status information. Icon Description No signal Very weak signal Excellent signal Click the signal strength icon to display the Signal Quality window. -
Page 52: Mobile Broadband Information And Settings
● Scan for 4G button (available only if 4G is in power save mode — the LCD of the device displays “Power Save Mode. 4G Network not found”). Click this button to search for and attempt to connect to a 4G network. (Whether or not a connection to 4G occurs depends on the WAN Mode setting;... -
Page 53: Roaming Information And Settings
● 3G Only — Connection can be established only to 3G. ● 4G Only — Connection can be established only to 4G or 4G LTE. (If you don’t have 4G or 4G LTE coverage, you can save power by selecting 3G Only.) Note: The following options are not available if 3G Only is selected. -
Page 54: Alert Information
If you do not select this field, you can connect only when you’re inside a Sprint coverage area. Note: If you change the value of this field, the device restarts (after you click Save). ● Allow 3G international access field (if you’re logged in) — allows 3G roaming outside of the United States and Puerto Rico (for example, in Canada). -
Page 55: Wi-Fi Users Information And Settings
● HEPE — The Horizontal Estimated Position Error reflects accuracy (horizontal/vertical precision). Note: For best results, minimize the number of obstructions between your device and the GPS satellites. ● Timestamp — This indicates the time of the last fix. Configuring the Settings When you’re logged in, the following settings are available: View privacy agreement (link displayed if you haven’t yet accepted the GPS privacy agreement). - Page 56 ● — Wi-Fi of the Sierra Wireless 4G LTE Tri-Fi Hotspot has been disabled through the browser interface. (To enable Wi-Fi, change the Disable Wi-Fi setting in the Wi-Fi Users window [see “Connected Users Information”, below].) The icon is on the left side of the home page.
-
Page 57: Battery Information And Settings
Long Range —This setting allows you to use your wireless devices farther from your Sierra Wireless 4G LTE Tri-Fi Hotspot, at the cost of shorter battery life and the increased possibility of interference with/from other nearby Wi-Fi devices. ● AC powered. Choose one of the following: ... -
Page 58: Internet Connection Information
Standby (Low Power) Mode When the device is in standby (low power) mode, the 3G/4G modem radios, the Wi-Fi radio, and the LCD are off, and the power button is flashing (approximately every 8 seconds). When you’re logged in, you can set how soon the device goes into standby mode when no Wi-Fi users are connected to it (Standby Timer). -
Page 59: Microsd Card Information And Settings
WAN DNS Secondary — This is the address of the Internet system used to translate names (for example, sprint.com) into IP addresses. The secondary DNS is used when there is a problem with the primary DNS. Default Gateway — This is the address of the node on the computer network that the network software uses when an IP address does not match any other routes in the routing table (that is, when an IP packet’s destination address is outside of the local subnet). -
Page 60: Sounds Information And Settings
Click the microSD icon ( ) to display the SD Card Information and Settings window. The window displays: ● The card status (see the list above) ● Storage capacity of the card, and space available (displayed only if a card is detected) ●... -
Page 61: Alerts
• Routing hardware settings reset • Device startup failure Wi-Fi user has joined — A sound is played when a Wi-Fi user connects to your network. This is useful, for example, to detect an unwelcome Wi-Fi user if you’re the only one using the device. -
Page 62: 3G Activation Required
The options and instructions shown in the alert window depend on the alert event. Please read the instructions carefully. They may state, for example, that you have to reconnect to Wi-Fi after an update is installed. Tip: You can view a list of available alerts on the “Alerts” LCD information screen. (See Information Screens.) 3G Activation Required... -
Page 63: Sd Card Error
Display the GPS Privacy Agreement alert window. (See Alert Information.) 3. Read the agreement, and select I have read the foregoing and hereby agree to ..SD Card Error Learn about recommended steps if you’re having problems reading from the microSD card, or if the SD Card Error alert window opens or the device LCD displays “SD Card error.”... -
Page 64: Viewing Device Information
5. In the Software Update Available alert window, click Update Options. 6. Read the information in the Software Installation Options window. 7. To install the update, click Download and install now. — or — If you are not in a strong signal area, make a note of the URL displayed in the window and click I’ll get the update later. - Page 65 ● Reconditioned — This field indicates whether your device has been returned for service or repair and reconditioned (if applicable). ● Total Bytes — This is the amount of data transferred over the 3G network during the lifetime of the device. ●...
-
Page 66: Updates
● Reset the 3G and 4G configuration of the device to default settings (Reset Device to Factory Defaults). (See Resetting the 3G and 4G Configurations to Default Settings.) ● Reset the 3G and 4G configuration of the radios of the device to default settings (Reset Radios to Factory Defaults). -
Page 67: Manually Checking For Updates
2. Click Advanced settings ( 3. Click Device > Basic. 4. In the Check for Updates list, click a value. Note: If the Check for Updates list is not available, your device supports the Guaranteed Update feature, which automatically checks for updates, at a pre-determined frequency. This feature requires 4G or 4G LTE coverage. -
Page 68: Upgrading Firmware From A File
Upgrading Firmware From a File Use this option when you have an updated firmware file that you’ve, for example, downloaded from the Sprint or Sierra Wireless website. Note: During installation of the update: • DO NOT turn off or unplug the device. - Page 69 Save the file. Note the filename and path. 8. Click the Browse button next to the Update Firmware From File field, and click the firmware file to upload to the device. 9. Click Update. Please wait while the upgrade occurs; this may take several minutes. The device LCD shows the upgrade status.
-
Page 70: Device Settings
● Long Range — This setting allows you to use your wireless devices farther from your Sierra Wireless 4G LTE Tri-Fi Hotspot, at the cost of shorter battery life and the increased possibility of interference with/from other nearby Wi-Fi devices. -
Page 71: Ac Power Settings
● Long Range — This setting allows you to use your wireless devices farther from your Sierra Wireless 4G LTE Tri-Fi Hotspot but increases the possibility of interference with or from nearby wireless networks. -
Page 72: Display Settings
If you enable automatic login: ● Anyone who uses the computer will automatically be logged in to the home page (as long as no one else has already logged in from another computer); entering the administrator password is not required. ●... -
Page 73: Turning The Lcd On Or Off
Turning the LCD On or Off Turning the LCD off helps prolong the battery life, but you can’t check the LCD for status icons and messages. 1. Log in to the home page. 2. Click Advanced settings > Device > Display. 3. -
Page 74: Sound Settings
2. Click Advanced settings > Device > Display. 3. Set the Power Button LED field to On or Off. Sound Settings You can enable or disable sounds for various events. Enabling and Disabling Sounds for Specific Events. Low Battery Alert Critical Battery Level Alert You can enable or disable sounds of the device through: ●... -
Page 75: Low Battery Alert
● Internet Disconnected — A sound is played when you lose the connection to the Internet. ● Wi-Fi User Has Joined — A sound is played when a Wi-Fi user connects to your network. This is useful, for example, to detect an unwelcome Wi-Fi user if you’re the only one using the device. -
Page 76: Advanced Settings
Note: System alerts include several types of events, for example: • Critical battery • Critical temperature • Software update available • Routing hardware settings reset • Device startup failure Advanced Settings Learn about advanced configuration of the device and the browser interface. From the Advanced Settings window you can configure all the settings of the device and the browser interface. -
Page 77: Device Tab: Basic Panel
Device Tab: Basic Panel Use the Basic panel of the Device tab to access and configure general options for the device. 1. Log in to the home page. 2. Click Advanced settings ( 3. Click Device > Basic. From this window, you can view or adjust these settings, or perform the following actions: ●... -
Page 78: Device Tab: Microsd Card Panel
2. Click Advanced settings ( 3. Click Device > Display. From this window, you can view or adjust these settings: ● Power Button LED — You can enable the power button light on the device. (See Enabling and Disabling the Power Button LED.) ●... -
Page 79: Device Tab: Sounds Panel
Device Tab: Sounds Panel From the Sounds panel of the Device tab, you can enable or disable sounds for specific types of events. 1. Log in to the home page. 2. Click Advanced settings ( 3. Click Device > Sounds. 4. -
Page 80: Device Tab: About Panel
Device Tab: About Panel View information about your device. 1. Log in to the home page. 2. Click Advanced settings ( 3. Click Device > About. Note: 4G and 4G LTE information is not available if WAN Mode is “3G Only.” (WAN Mode is in Advanced settings >... -
Page 81: Device Tab: Log Panel
The MEID (Mobile Equipment Identifier) is the unique second-generation serial number assigned to the 3G component of the device. ● PRL Version — The PRL (Preferred Roaming List) is an account configuration item set by your service provider. It controls the radio channels and network carrier used by the 3G modem. -
Page 82: Wan Tab
1. Log in to the home page. 2. Click Advanced settings ( 3. Click Device > Log. From this window, you can: ● Enable logging of system events. (See “Enabling and Disabling Logging of System Events” in System Events.) ● Export logs. (See “Exporting System Events” in System Events and “Exporting the Connection History”... - Page 83 ● Active Network — This is the network that is currently being used for your data connection: 3G, 4G, 4G LTE, or none. ● Network Operator — This field shows the carrier that your device was activated with. ● Session Duration — The session duration indicates how long you’ve been connected to the network.
-
Page 84: Wan Tab: 3G Panel
● Failover Wait-time — This setting specifies how long the device should wait, after it loses the connection with the preferred network, before it attempts to connect to the other network (not available if WAN Mode is “3G Only” or “4G Only”). ●... -
Page 85: Wan Tab: 4G Panel
● Connection Status — This field reflects the status of the 3G connection: connected, not connected, or dormant. Dormant means a connection is established, but no data is being transferred. ● Service Type — This is the network that is currently being used for your data connection (1xRTT, EVDO, or EVDO Rev. - Page 86 1. Log in to the home page. 2. Click Advanced settings ( 3. Click WAN > 4G. Note: 4G information is not available if WAN Mode is “3G Only or 4G Mode is “LTE Only.” (WAN Mode and 4G Mode are in Advanced settings > WAN > Setup.) From this window, you can view this 4G information, or perform the following actions: ●...
-
Page 87: Wan Tab: 4G Lte Panel
Scan for Private Network In some cases, a private network may be available in your location. Such a network may be provided, for example, on a college or university campus (to extend access to campus network resources) or in a large building complex (to improve network service). To access a private network: 1. -
Page 88: Wan Tab: Gps Panel
Strength Indicator (RSSI). ● PLMN ID — This information identifies the Public Land Mobile Network that is currently serving the Sierra Wireless 4G LTE Tri-Fi Hotspot. ● IMSI — The International Mobile Station Identity (IMSI) uniquely identifies a wireless device within the service provider’s network. The IMSI is also known as MSID by some service providers. -
Page 89: Wi-Fi Tab
● Mapping Service — This determines the mapping service (for example, Google Maps or MapQuest) that displays the GPS results (in a separate browser window). ● Performance Value — This specifies the amount of time the device should wait for a satellite to be discovered. - Page 90 Long Range — This setting allows you to use your wireless devices farther from your Sierra Wireless 4G LTE Tri-Fi Hotspot, at the cost of shorter battery life and the increased possibility of interference with/from other nearby Wi-Fi devices.
-
Page 91: Wi-Fi Tab: Security Panel
● Wi-Fi Power Save Mode — If this field is set to “On,” the Wi-Fi component of the Sierra Wireless 4G LTE Tri-Fi Hotspot enters power save mode, when possible. If your computer tends to lose the Wi-Fi connection and stops responding, set this field to “Off.”... -
Page 92: Wi-Fi Tab: Mac Filter Panel
● Password Reminder — This feature displays the Wi-Fi password on the LCD of the device. (See “Wi Fi Password Reminder” in Wi-Fi Password.) ● Basic Rate — This setting determines the type of wireless devices that can connect to your network. -
Page 93: Router Tab Settings
● Display a list of computers that are currently connected through Wi-Fi (List of connected devices). (See Displaying a List of Currently Connected Computers.) Router Tab Settings From the Router tab you can enable or disable various features, as well as configure their settings. -
Page 94: Basic Panel: General
Wi-Fi and only after they provide the correct Wi-Fi password (if Wi-Fi security is enabled). This setting does not affect the ability to charge the Sierra Wireless 4G LTE Tri-Fi Hotspot through the micro-USB cable. ● Port Forwarding — Port forwarding lets you forward incoming traffic to specific ports and devices (per their local IP address) on your network. -
Page 95: Basic Panel: Upnp (Universal Plug And Play)
● UPnP (universal plug and play). (See Basic Panel: UPnP (Universal Plug and Play).) ● SPI (stateful packet inspection). (See Basic Panel: SPI (Stateful Packet Inspection).) ● Router Settings Reset. (See Resetting the Software to Default Settings: Using the Browser Interface.) Basic Panel: UPnP (Universal Plug and Play) UPnP provides simple and robust connectivity among consumer electronics, intelligent... - Page 96 From this window, you can view or adjust these settings, or perform the following actions: ● Router IP Address — This is the routing hardware’s IP address on the LAN. ● Subnet Mask — This is the routing hardware’s internal LAN subnet mask. ●...
-
Page 97: Lan Panel: Dhcp
Manual — The routing hardware assigns DHCP clients the DNS servers specified in the Manual DNS Server #1 and #2 fields. Use this option to access a DNS server that provides customized addressing or if you have a local DNS server on your network. If DNS Relay is disabled, the routing hardware rejects DNS requests targeting the internal DNS proxy. - Page 98 Enabling DHCP 1. Log in to the home page. 2. Click Advanced settings > Router > LAN. 3. Next to DHCP Server, select Enable. Configuring DHCP To configure DHCP settings, DHCP must be enabled (Advanced settings > Router > LAN > DHCP Server).
-
Page 99: Lan Panel: Dns Mode
reservation.” You might want to do this with, for example, a Web server, FTP server, or media server. Viewing the Static IP Assignment List 1. Log in to the home page. 2. Click Advanced settings > Router > LAN. 3. Make sure DHCP is enabled (DHCP Server). 4. -
Page 100: Port Forward Panel: General
1. Log in to the home page. 2. Click Advanced settings ( 3. Click Router > LAN. 4. Set DNS Mode to one of the following: Auto — The DNS server specified by Sprint is used. DNS Relay is enabled by default. -
Page 101: Port Forward Panel: Enabling Port Forwarding
● Remove an application from the port forwarding list. (See Port Forward Panel: Disabling Port Forwarding for an Application.) Port Forward Panel: Enabling Port Forwarding Before you can use or configure Port Forwarding, you must enable it. 1. Log in to the home page. 2. -
Page 102: Port Trigger Panel: General
1. Make sure you’ve enabled port forwarding. (See Port Forward Panel: Enabling Port Forwarding.) 2. Click Advanced settings > Router > Port Forward. 3. To keep the application in the list (in case you want to re-enable port forwarding later on), clear the Enable check box. -
Page 103: Port Trigger Panel: Enabling Port Triggering For Specified Protocols And Ports
Port Trigger Panel: Enabling Port Triggering for Specified Protocols and Ports After you’ve enabled port triggering, you can enable it for specified protocols and ports. 1. Make sure you've enabled port triggering. (See Port Trigger Panel: Enabling Port Triggering.) 2. Click Advanced settings > Router > Port Trigger. 3. -
Page 104: Dmz Panel: General
— or — To remove the entry from the list: Click the row that you want to remove. A row of buttons (Delete, OK, Cancel) appears. Click Delete. DMZ Panel: General You can select one computer to receive all unsolicited incoming connections. The IP address of the DMZ (“demilitarized zone”) is the default recipient of incoming packets (from the Internet) that are not handled by port forwarding rules, port triggering rules, or NAT’d connections:... -
Page 105: Resetting The Software To Default Setting: General
3. Specify the computer that you want exposed to the Internet: in the Destination IP Address field, enter the IP address of the computer. (If you don’t know how to find the IP address, see Finding the IP Address.) 4. In the Source IP Address section, specify what incoming traffic (not handled by port forwarding, port triggering, or NAT) to forward to this computer. -
Page 106: Resetting The Software To Default Settings: Using The Reset Button
● Through the software. (See Resetting the Software to Default Settings: Using the Browser Interface.) ● Through the reset button on the device. (See Resetting the Software to Default Settings: Using the Reset Button.) Resetting the Software to Default Settings: Using the Reset Button You can reset the software to default settings from the device itself, without having to use the browser interface. -
Page 107: Resetting The Software To Default Settings: Using The Browser Interface
4. Replace the battery compartment cover. 5. Check the device LCD. If it displays “Reset to factory defaults? Press to accept,” press the power button on the device. 6. Follow the instructions on the device LCD. Resetting the Software to Default Settings: Using the Browser Interface It’s easy to reset the software to default settings through the browser interface. -
Page 108: Exporting Settings
Importing Settings Exporting Settings Settings include configuration information for the device, network, and browser interface. You can, for example, save the current configuration, then make some changes and test them. You can then use the Import button to restore (load) the saved configuration. To export the settings to a text file: 1. -
Page 109: System Events
Enabling and Disabling Logging of Connects and Disconnects 1. Log in to the home page. 2. Click Advanced settings > Device > Log. 3. In the Connect/Disconnect section, select Enable or Disable. 4. Click Save. Exporting the Connection History 1. Log in to the home page. 2. -
Page 110: Setting The Method Used For Time Acquisition
● Critical temperature ● Routing hardware settings reset ● Firmware update Enabling and Disabling Logging of System Events 1. Log in to the home page. 2. Click Advanced settings > Device > Log. 3. In the Verbose System Event Logging section, select Enable or Disable. 4. - Page 111 NTP — The device’s clock is synchronized to a Network Time Protocol server on the Internet; not as accurate as when using the 3G setting, but doesn’t require 3G coverage. Use this setting if you have 4G or 4G LTE but no 3G coverage. Device Settings...
-
Page 112: Configuring The Wi-Fi Network
Configuring the Wi-Fi Network Learn how to configure the Wi-Fi network, including its security and range. SSID (Wi-Fi Network Name) Wi-Fi Security Host Name (Device Name) Setting the Maximum Number of Wi-Fi Users Wi-Fi Channel Disabling Wi-Fi When Connected Through USB You can configure basic settings of the Wi-Fi network through the setup pages. -
Page 113: Ssid (Wi-Fi Network Name)
The SSID identifies your Wi-Fi network and is visible to other Wi-Fi-enabled devices. It appears on your device’s LCD screen; if more than one Sierra Wireless 4G LTE Tri-Fi Hotspot is available, you can use this name to tell the devices apart. -
Page 114: Wi-Fi Security
Learn about the various Wi-Fi security options available to you. By default, Wi-Fi security is enabled for your device and the Wi-Fi network. Note: All the devices used with the Sierra Wireless 4G LTE Tri-Fi Hotspot must support the selected security type. -
Page 115: Wi-Fi Password
WPA/WPA2 Personal (recommended setting if any of your devices are more than two years old) — Wi-Fi devices that use either WPA or WPA2 can connect to the Sierra Wireless 4G LTE Tri-Fi Hotspot. Supported by most Wi-Fi devices. 4. Click Save. - Page 116 ● Use both uppercase and lowercase letters To change the Wi-Fi password: 1. Log in to the home page. 2. Click Advanced settings > Wi-Fi > Security. 3. In the Wi-Fi Password field, type the password; the maximum length depends on the Wi-Fi security type that you’ve selected.
-
Page 117: Allowing Or Denying Computers Access To The Network
4. Do one of the following: If the computer you want to allow access is currently connected to the Sierra Wireless 4G LTE Tri-Fi Hotspot, click List of connected devices. In the row for the computer, click Add. — or —... -
Page 118: Displaying A List Of Currently Connected Computers
5. Repeat step 4 for each computer for which you want to allow access. Specifying Computers That Are Not Allowed to Access the Network 1. Log in to the home page. 2. Click Advanced settings > Wi-Fi > MAC Filter. 3. -
Page 119: Host Name (Device Name)
Click Advanced settings > Wi-Fi > Mac Filter, and click List of connected devices. A row displays the icon if the user is logged in as administrator. Host Name (Device Name) The host name is, in essence, a name you’re giving the device. The host name is shown on your device’s LCD screen;... -
Page 120: Wi-Fi Channel
Click Advanced settings > Wi-Fi > Network, and click a value in the Max Number of Users list. Wi-Fi Channel The Wi-Fi channel is the active channel of the Wi-Fi access point. If your network is having performance issues (possibly caused by other Wi-Fi networks in the vicinity using the same channel), try a different Wi-Fi channel. -
Page 121: Configuring 3G, 4G, And 4G Lte
Configuring 3G, 4G, and 4G LTE Learn about configuring network settings and also resetting the configurations to default settings. Viewing 3G Activation Information Resetting the 3G and 4G Configurations to Default Settings. Resetting the 3G and 4G Radio Configurations to Default Settings See also: ●... -
Page 122: Resetting The 3G And 4G Radio Configurations To Default Settings
latter starts automatically.) • Any changes you’ve made to the settings are lost. 1. Log in to the home page. 2. Click Advanced settings > Device > About. 3. Click Reset Device to Factory Defaults. 4. When prompted, enter the SPC (Service Programming Code). (If you don’t know your SPC, contact Sprint.) To be able to establish a data connection after you’ve reset the device to factory defaults, you must first:... -
Page 123: Location Services And Settings
Location Services and Settings This section describes how to use and configure location-based navigation. Sprint Location Services GPS Settings Sprint Location Services Your device offers location-based navigation to help you figure out where you are and get you where you’re going. Requirements for GPS Service Enabling GPS Displaying Your Location Information... -
Page 124: Displaying Your Location Information
Note: If Enable GPS is not available, you must accept the GPS privacy agreement. (See Privacy Agreement.) 3. If the GPS privacy agreement opens, you must read and accept it. Displaying Your Location Information You can easily display your location information. 1. -
Page 125: Gps Settings
3. Click one of these icons to search for items of interest, as shown in the following table: Icon Click to search for: Text (search string) that you enter. Electronics-related businesses Restaurants Local hotels Local banks (ATM machines) Local gas stations Local coffee shops The results of the search are displayed in a new browser window or tab. -
Page 126: Setting The Gps Fix Rate
The location fix can be done: ● Once (“one-time”), or ● Periodically (“continuous”) — used, for example, for turn-by-turn (TBT) navigation applications. To set the GPS mode: 1. Make sure you’re logged in to the home page. 2. Click Advanced settings > WAN > GPS. 3. -
Page 127: Changing Your Mapping Service
Changing Your Mapping Service You can change the mapping service (for example, Google Maps or MapQuest) that displays the GPS results (in a separate browser window). 1. Make sure you’re logged in to the home page. 2. Click the GPS icon on the left side of the home page. -
Page 128: Using The Microsd Card Slot
Using the microSD Card Slot Your device is equipped with a microSD (Secure Digital) memory card slot that allows you to store and share images, videos, music, and documents. A microSD memory card (not included) is required. The device supports microSD cards up to 32 GB. Note: Using microSD cards larger than 32 GB can cause data loss and damage your device. -
Page 129: Enabling Dlna Media Server
Enable. Enabling DLNA Media Server Your Sierra Wireless 4G LTE Tri-Fi Hotspot can serve as a Digital Media Server (DMS), providing content to networked digital media players (DMP) and digital media renderers (DMR). You can, for example, play audio or movie files (stored on the microSD card inserted in your hotspot) on a computer, tablet, mobile phone, or TV that supports DLNA. -
Page 130: Microsd Shared Folder Name
3. If you’ve selected Administrator + Guest: Optionally, change the Set Guest Username and Set Guest Password fields (up to 20 characters each with spaces allowed). Give the guest username and password to people whom you want to allow access to the card. -
Page 131: Removing A Microsd Card
3. Check the status of the microSD card. (See microSD Card Information and Settings.) Removing a microSD Card Before removing your device’s microSD card, use the Safe-Eject SD Card button. 1. Make sure you and other users have completed any file transfers. 2. - Page 132 Note: In the information that follows, <Hostname> is the value of the Hostname field (in Advanced settings > Wi-Fi > Network and also in Advanced settings > Router > LAN). Windows 1. In Windows Explorer or Internet Explorer, type one of the following: ...
- Page 133 Other operating systems Please see the user documentation for your operating system or computer. If security has been enabled for the microSD card, you will be prompted to enter the username and password for the microSD card. (See Setting Up Access to the microSD Card.) Using the microSD Card Slot...
-
Page 134: Frequently Asked Questions
You may have to manually connect to Wi-Fi after certain events — for example, as part of the initial device setup, or after a software update. Tip: The Wi-Fi network name and password are displayed on one of the LCD information screens of the Sierra Wireless 4G LTE Tri-Fi Hotspot. (See LCD Information Screens.) Frequently Asked Questions... -
Page 135: Is Roaming On 4G Supported
Tip: Alternatively, you can use WPS to connect a device to the Sierra Wireless 4G LTE Tri-Fi Hotspot, if your device supports WPS. (See Connecting Through WPS.) To connect to Wi-Fi: 1. Do one of the following, depending on your operating system. -
Page 136: What Do I Do If I Forget The Administrator Password
Note: If you’ve forgotten both the Wi-Fi password and the administrator (login) password, then you must reset the software to default settings. (See Resetting the Software to Default Settings: General.) What Do I Do if I Forget the Administrator Password? Here’s what to do if you forgot the Administrator Password. -
Page 137: If The Connection Is "Always On," Am I Always Being Billed
How can I Stream Files to my Computer, Tablet, or Mobile Phone? Your Sierra Wireless 4G LTE Tri-Fi Hotspot can serve as a Digital Media Server (DMS), providing content to networked digital media players (DMP) and digital media renderers (DMR). -
Page 138: What Is Gps
Connection.) 2. Set GPS Mode (in Advanced settings > WAN > GPS) to Continuous. 3. Determine the COM port number that your Sierra Wireless device (that is, your Sierra Wireless 4G LTE Tri-Fi Hotspot) is using. In the following example for Windows, the Device Manager shows that COM 18 is used. -
Page 139: Questions About Wps
(If you don't know how to access the Device Manager, see http://sierrawireless.custhelp.com/app/answers/detail/a_id/698.) 4. Configure your GPS application to use the same COM port. For help, see the documentation of the GPS application. Questions About WPS Find answers to common questions about WPS. What is WPS? How do I Use WPS? If a Wireless Device has a WPS Button or a WPS Software Option, Must I Use it to Connect Via... -
Page 140: How Do I Access My Corporate Network Through A Vpn
How Do I Access My Corporate Network Through a VPN? The answer to this question depends on whether you’re using Sprint Data Link Using Sprint Data Link Sprint Data Link is a network feature that allows you to directly connect to your corporate VPN. With Data Link, you and your mobile workforce can maintain a secure, seamless VPN connection between your enterprise network and the advanced Sprint Mobile Broadband Network. -
Page 141: Tips
Tips This section provides information on getting the most out of your device and your network connection. Extending Battery Life Device Location Improving Signal Strength Improving 3G Network Service Improving Wi-Fi Performance Security Tips Finding the MAC Address Finding the IP Address Extending Battery Life There are several ways you can extend the battery life. -
Page 142: Device Location
● Move the device and your computer to another location — you may be in or near a structure that is blocking the signal. Every obstacle (for example, walls, ceilings, furniture) between the Sierra Wireless 4G LTE Tri-Fi Hotspot and other wireless devices decreases the signal strength. -
Page 143: Improving 3G Network Service
● If you cannot obtain service, contact Sprint — a network or account problem may be preventing you from obtaining service. ● Consider purchasing the desktop cradle for the Sierra Wireless 4G LTE Tri-Fi Hotspot from the Sprint Store at sprint.com... -
Page 144: Security Tips
Click Hardware. Click Device Manager. 2. Double-click Network adapters. 3. Double-click the Wi-Fi client network adapter of your computer — for example, “Intel(R) WiFi Link 5100 AGN” in the screenshot below. 4. If the Wi-Fi client network adapter is by Intel, click Advanced and, in the Property list, click Power Management and move the slider all the way to the right (to Highest). -
Page 145: Finding The Mac Address
● Change the Wi-Fi network name (SSID) and Wi-Fi password on a regular basis. (See SSID (Wi-Fi Network Name) Wi-Fi Password.) ● Disable SSID Broadcast. (See Wi-Fi Tab: Network Panel.) ● Use the highest level of Wi-Fi security that your devices support. (See Wi-Fi Security.) ●... -
Page 146: Finding The Ip Address
4. Select Advanced. 5. Select Ethernet. The Ethernet ID is listed. This is the same as the MAC address. Linux Please see the user documentation of the Linux distribution. Other operating systems Please see the user documentation for your operating system or computer. Finding the IP Address You’ll need to know the IP address of a device when configuring certain features. -
Page 147: Troubleshooting
Troubleshooting Learn about various troubleshooting tips, and what to do when a specific message is displayed. General Tips Connection Errors LCD Is Dark Insufficient Signal Strength Messages Displayed on the Device LCD Cannot Connect to Wi-Fi WPS-Related Messages Cannot Connect Through USB Cannot Display the Home Page Cannot Connect to the 3G or 4G Network The Device Seems to Have Stopped Charging... -
Page 148: Connection Errors
● The knowledge base at the Sierra Wireless website (www.sierrawireless.com/support/customer_help.aspx) may also be useful. Connection Errors If any of the following 4G LTE connection errors are displayed on the LCD, on the Mini Window, or on the Virtual Device, contact Sprint and provide them with the name and number of the error. -
Page 149: Lcd Is Dark
Message type not compatible with the protocol state Information element non-existent or not implemented Conditional IE error Message not compatible with the protocol state Protocol error, unspecified Error unknown Lower layer failure T3410 timeout T3420 timeout T3418 timeout NAS EMM not registered Service loss Other value Protocol error, unspecified... -
Page 150: Messages Displayed On The Device Lcd
● You are outside a 4G, 4G LTE, or 3G coverage area. ● Your device’s internal antenna is pointing in the wrong direction. ● You are in or near a structure that is blocking the signal. ● You are near a device that is causing radio signal interference. ●... -
Page 151: Connection Error
3. If the “Update failed” message is still displayed, contact Sprint. Cannot Connect to Wi-Fi If your computer cannot connect to the Wi-Fi network of the Sierra Wireless 4G LTE Tri-Fi Hotspot, there are several things you should check. Make sure that:... -
Page 152: Wps-Related Messages
● Always is not selected (for Advanced settings > Wi-Fi > Network > Disable Wi-Fi). ● Your computer supports the type of Wi-Fi security that the network is set to use. Note: All the devices used with the Sierra Wireless 4G LTE Tri-Fi Hotspot must support the selected security type. -
Page 153: Wps Failed. Wps Could Not Add The Device To The Network
WPS Failed. WPS could not add the device to the network If the LCD of your Sierra Wireless 4G LTE Tri-Fi Hotspot displays this message, the device you are trying to connect may not be WPS-enabled. Use the manual method to connect the W-Fi... -
Page 154: Wps Not Available. Wep Or Wpa Security Not Allowed
4. Click Save. 5. Retry the WPS process. WPS Not Available. WEP or WPA security not allowed If the LCD of your Sierra Wireless 4G LTE Tri-Fi Hotspot displays this message, go through the following steps. 1. Click Advanced settings ( 2. -
Page 155: Wps Pin Chksum Error
Cannot Connect Through USB If your computer cannot connect to the Sierra Wireless 4G LTE Tri-Fi Hotspot through the micro-USB cable, go through the following steps. 1. Make sure that you've installed the device driver, as described in Making a Tethered Connection. -
Page 156: Cannot Display The Home Page
Cannot Display the Home Page Your Web browser may display an error message when you try to display the home page. The error message depends on your Web browser. ● “Could not connect to remote server” (Opera) ● “Internet Explorer cannot display the webpage” (Internet Explorer) ●... -
Page 157: Cannot Connect To The 3G Or 4G Network
● If DHCP is enabled on the device, make sure DHCP is enabled on your computer. (See LAN Panel: DHCP.) ● Check your Web browser settings. Open the Control Panel in Windows. Double-click Internet Options. From the Security tab, restore the default settings. ... -
Page 158: The Device Seems To Have Stopped Charging
● Check with Sprint — a network or account problem may be preventing your device from obtaining service. The Device Seems to Have Stopped Charging If the “About...” LCD information screen shows “chrg paused” or the text after the battery icon (on the home page) includes “Charging paused,”... -
Page 159: Technical Specifications
Technical Specifications This section lists the electrical, radio frequency, and other parameters of the device for those who require technical information. LED Operation Radio Frequency and Electrical Specifications Software Specifications Environmental Specifications Mechanical Specifications LED Operation Using the Power Button to Determine the Device State. -
Page 160: Software Specifications
WiMAX: 2495 to 2690 MHz GPS: 1575.42 MHz Software Specifications This section lists the specifications that the device supports. Item Description CDMA (3G) specification IS-2000 Release 0 Data service IS-707A LTE (4G) specification 3GPP Release 9 WiMAX (4G) specification IEEE 802.16e-2005 Wi-Fi specification IEEE 802.11b IEEE 802.11g... -
Page 161: Environmental Specifications
Pass-through of the following VPN types: PPTP IPSec Tunneling of multiple VPN sessions simultaneously is supported. Environmental Specifications This section describes the environmental conditions that the device can be used in. Item Description Operating temperature 32 to 95°F Storage temperature -4 to +140°F Humidity 90% at +140°F... -
Page 162: Safety Information
Sierra Wireless 4G LTE Tri-Fi Hotspot are used in a normal manner with a well-constructed network, the device should not be used in situations where failure to transmit or receive data could result in damage of any kind to the user or any other party, including but not limited to personal injury, death, or loss of property. -
Page 163: Proper Battery Use And Disposal
● Do not expose to water or other liquids, fire, explosion, or other hazards. ● Use the battery only in the Sierra Wireless 4G LTE Tri-Fi Hotspot. ● If using with a charger, use only the AC charger supplied with the device. -
Page 164: Regulatory Notices
(up to 300 GHz) FCC ID: N7NAC803S. RF Exposure - The Sierra Wireless 4G LTE Tri-Fi Hotspot has been tested for compliance with FCC RF exposure limits in a portable configuration. At least 1.0 cm of separation distance between the Sierra Wireless 4G LTE Tri-Fi Hotspot and the user’s body must be maintained at... - Page 165 ● Consult the dealer or an experienced radio/TV technician for help. CAUTION: Any changes or modifications not expressly approved by Sierra Wireless could void the user’s authority to operate the equipment. This device complies with Parts 15, 24, and 27 of the FCC Rules. Operation is subject to the...
-
Page 166: Legal
This product may contain technology developed by or for Sierra Wireless Inc. This product includes technology licensed from QUALCOMM® 3G. This product is manufactured or sold by Sierra Wireless Inc. or its affiliates under one or more patents licensed from InterDigital Group. -
Page 167: Gnu General Public License
SSH2 License UUID License Zlib License GNU General Public License Version 2, June 1991 Copyright (C) 1989, 1991 Free Software Foundation, Inc. 51 Franklin St, Fifth Floor, Boston, MA 02110-1301 USA Everyone is permitted to copy and distribute verbatim copies of this license document, but changing it is not allowed. - Page 168 making the program proprietary. To prevent this, we have made it clear that any patent must be licensed for everyone's free use or not licensed at all. The precise terms and conditions for copying, distribution and modification follow. GNU GENERAL PUBLIC LICENSE TERMS AND CONDITIONS FOR COPYING, DISTRIBUTION AND MODIFICATION 0.
- Page 169 These requirements apply to the modified work as a whole. If identifiable sections of that work are not derived from the Program, and can be reasonably considered independent and separate works in themselves, then this License, and its terms, do not apply to those sections when you distribute them as separate works.
- Page 170 parties who have received copies, or rights, from you under this License will not have their licenses terminated so long as such parties remain in full compliance. 5. You are not required to accept this License, since you have not signed it. However, nothing else grants you permission to modify or distribute the Program or its derivative works.
- Page 171 9. The Free Software Foundation may publish revised and/or new versions of the General Public License from time to time. Such new versions will be similar in spirit to the present version, but may differ in detail to address new problems or concerns. Each version is given a distinguishing version number.
- Page 172 To do so, attach the following notices to the program. It is safest to attach them to the start of each source file to most effectively convey the exclusion of warranty; and each file should have at least the "copyright" line and a pointer to where the full notice is found. <one line to give the program's name and a brief idea of what it does.>...
-
Page 173: Iperf License
iPerf License Copyright (c) 1999-2007, The Board of Trustees of the University of Illinois All Rights Reserved. Iperf performance test Mark Gates Ajay Tirumala Jim Ferguson Jon Dugan Feng Qin Kevin Gibbs John Estabrook National Laboratory for Applied Network Research National Center for Supercomputing Applications University of Illinois at Urbana-Champaign http://www.ncsa.uiuc.edu... -
Page 174: Miniupnpd License
MERCHANTABILITY, FITNESS FOR A PARTICULAR PURPOSE AND NONINFRINGEMENT. IN NO EVENT SHALL THE CONTIBUTORS OR COPYRIGHT HOLDERS BE LIABLE FOR ANY CLAIM, DAMAGES OR OTHER LIABILITY, WHETHER IN AN ACTION OF CONTRACT, TORT OR OTHERWISE, ARISING FROM, OUT OF OR IN CONNECTION WITH THE SOFTWARE OR THE USE OR OTHER DEALINGS IN THE SOFTWARE. -
Page 175: Original Ssleay License
2. Redistributions in binary form must reproduce the above copyright notice, this list of conditions and the following disclaimer in the documentation and/or other materials provided with the distribution. 3. All advertising materials mentioning features or use of this software must display the following acknowledgment: “This product includes software developed by the OpenSSL Project for use in the OpenSSL Toolkit. - Page 176 This library is free for commercial and non-commercial use as long as the following conditions are adhered to. The following conditions apply to all code found in this distribution, be it the RC4, RSA, lhash, DES, etc., code; not just the SSL code. The SSL documentation included with this distribution is covered by the same copyright terms except that the holder is Tim Hudson (tjh@cryptsoft.com).
-
Page 177: Pppd License
The licence and distribution terms for any publicly available version or derivative of this code cannot be changed. I.e. this code cannot simply be copied and put under another distribution licence [including the GNU Public Licence.] PPPD License Copyright (c) 1984-2000 Carnegie Mellon University. All rights reserved. Redistribution and use in source and binary forms, with or without modification, are permitted provided that the following conditions are met: 1. -
Page 178: Pppstats License
1. Redistributions of source code must retain the above copyright notice, this list of conditions and the following disclaimer. 2. The name(s) of the authors of this software must not be used to endorse or promote products derived from this software without prior written permission. 3. -
Page 179: Ssh2 License
3. The name(s) of the authors of this software must not be used to endorse or promote products derived from this software without prior written permission. 4. Redistributions of any form whatsoever must retain the following acknowledgment: “This product includes software developed by Paul Mackerras <paulus@samba.org>”. -
Page 180: Uuid License
NEGLIGENCE OR OTHERWISE) ARISING IN ANY WAY OUT OF THE USE OF THIS SOFTWARE, EVEN IF ADVISED OF THE POSSIBILITY OF SUCH DAMAGE. UUID License Copyright (c) 2004-2008 Ralf S. Engelschall <rse@engelschall.com> Copyright (c) 2004-2008 The OSSP Project <http://www.ossp.org/> This file is part of OSSP uuid, a library for the generation of UUIDs which can found at http://www.ossp.org/pkg/lib/uuid/ Permission to use, copy, modify, and distribute this software for any purpose with or without fee is hereby granted, provided that the above copyright notice and this permission notice appear in... -
Page 181: Trademarks
Notwithstanding the foregoing, in no event shall Sierra Wireless and/or its affiliates aggregate liability arising under or in connection with the Sierra Wireless product, regardless of the number of events, occurrences, or claims giving rise to liability, be in excess of the price paid by the purchaser for the Sierra Wireless product. -
Page 182: Index
Index 3G panel of the WAN tab, 83 Activation failed, 149 Activation information, viewing, 120 Activation Wizard, 19 Cannot connect, 156 Configuration, resetting to default settings, 120 Data transmission rates, 23 Firmware version, 64, 80 Lifetime data, 82 Mobile Broadband Information window, 51 network service, improving, 142 Overview, 23 PRI version, 64, 80... - Page 183 Status, 50 4G LTE 4G LTE panel of the WAN tab, 86 Cannot connect, 156 Channel list, 83 Connection status, 86 Data transmission rates, 23 Driver version, 64, 80 Firmware version, 64, 80 MAC address, 64, 80 Service type, 86 4G LTE panel of the WAN tab, 86 4G Mode, 82 4G Only (WAN Mode), 52, 82...
- Page 184 3G Activation Required alert, 18, 61 Activation Wizard, 19 Date of original activation, 120 Device Activation Required message, 150 Failed, 149 Active IP Addresses, 83 Active network, 50, 82 Admin Login area of the home page, 43 Admin password. See Administrator password Admin Setup button, 46 Administrator.
- Page 185 Application updates, 65 ATM machines, searching for, 124 Auto (DNS Mode), 95, 99 Automatic (Accuracy) - GPS, 88, 126 Automatic (Performance Value) - GPS, 88, 126 Automatically checking for updates, 65 Automatically log in Enabling, 71 List of computers configured, 71 Auto-reconnect to network, 52 Baby monitors, 141 Backlight (LCD on the device), adjusting, 72...
- Page 186 Box contents, 11 Brightness of LCD, 72 Broadcast the SSID (Wi-Fi network name), 89 Browser interface. See also Home page Updates, 65 Browsers supported, 12 BSID (Base Station ID), 85 Buttons Home page, 46 On device (drawing), 10 Cannot check for updates, 157 Cannot connect through USB, 154 Cannot connect to the 3G/4G network, 156 Cannot connect to Wi-Fi, 150...
- Page 187 Alert, 78 Cannot connect, 156 Launching a connection, 33 Playing a sound, 73 Sharing your connection, 34 Connect/Disconnect (logging), 108 Connected How to tell you’re connected to 3G/4G, 133 Playing a sound, 59 Wi-Fi users information, 54 Connected computers, displaying a list of, 117 Connected users information, 55 Connecting the device to your computer USB, 38...
- Page 188 Could not connect to remote server, 155 Coverage maps, 20 Coverage Type (3G), 84 Coverage type(s) available, 50, 84 Critical battery level, 56 Critical battery level alert, 74 CTS/RTS handshaking, 90 Current location, viewing in a Web browser, 123 Current, electrical (specifications), 158 Currently connected computers, displaying a list of, 117 Customer Service, contacting, 20 Dark LCD, 148...
- Page 189 Turning off, 45 Device Activation Required message, 150 Device driver, installing Mac, 39 TRU-Install (automatic driver installation), enabling or disabling, 39 Windows, 39 Device name (host name) Changing, 118 Input rules, 118 Linking to SSID, 112 Device tab About panel, 79 Basic panel, 76 Display panel, 76 Log panel, 80...
- Page 190 DMZ panel of the Router tab, 103 Enabling, 103 DMZ panel of the Router tab, 103 DNS Mode, 95, 98 DNS of the WAN, 57 DNS Relay, 96 Dormant, 84 Download speeds, 23 Drawing of hardware, 10 DRC Cover, 84 DRC Value, 84 Driver version 4G LTE component, 64, 80...
- Page 191 System event log, 109 Failover Wait-time, 83 Failover, Primary WAN (log event), 108 FAQ (Frequently Asked Questions), 133 FAX, 159 FCC (regulatory) notices, 163 FCC ID, 163 Feedback button, 47 Firefox browser, 12 Firewall software, 155 Firmware version 3G component, 64, 80 4G component, 64, 80 4G LTE component, 64, 80 Routing hardware, 63, 79...
- Page 192 Accuracy, 126 Availability, 137 Enabling, 122 Enhanced Local Search, 137 FAQ, 136 Fix rate, 125 GPS Fix Not Available, 157 GPS Information and Settings window, 53 GPS panel of the WAN tab, 87 Limitations, 137 Location information, displaying, 123 Location, current, viewing in a Web browser, 123 Mapping service, 54, 88, 126 Mode, 54, 87, 124 Not working or doesn’t seem to be available, 157...
- Page 193 Cannot display, 155 Description, 41 Displaying, 42 Icons and text, 48 Logging in, 43 Virtual device, 44 Horizontal Estimated Position Error (HEPE), 54 Host name Changing, 118 Input rules, 118 Linking to SSID, 112 Hotels, searching for, 124 Humidity specification, 160 Icons Home page, 48 LCD, 31...
- Page 194 Assigning, 98 DHCP Range, 95 DMZ computer, 104 Finding for a device, 145 Port forwarding, 100 Removing, 98 Routing hardware, 95 WWAN, of the device, 57 ipconfig command, 145 ipconfig/all command, 144 iPerf License, 172 Knowledge base, 147 LAN panel of the Router tab, 94 Last checked (update server), 76 Last Error Code, 87 Last User Has Left (playing a sound), 60, 74, 78...
- Page 195 Connection history, 107 System events, 108 Log panel of the Device tab, 80 Logging in Automatically, 70 Steps to log in, 43 Login address used for 4G service (Realm), 85 Login password Changing, 70 Default value, 14 Forgotten; what do I do?, 135 Long Range (Wi-Fi) AC powered, 56, 70 Battery or USB powered, 56, 89...
- Page 196 Manual (Performance Value) - GPS, 88, 126 Manual DNS Server fields, 96, 99 Manually checking for updates, 66 Manufacturer information, 63, 79 Map me button, 47, 123 Mapping service, 54, 88, 126 MapQuest, 54, 88 Max DHCP Clients, 95, 97 Max Number of Users field, 89 Max Wi-Fi users field, 55, 118 Maximum number of Wi-Fi users, 55, 89, 119...
- Page 197 MTU (Maximum Transmission Unit) size, 58 MTU field, 95 Mute switch, location, 29 NAI (Network Access Identifier), 84 NAP-ID (Network Access Provider ID), 85 Navigation button, 29 Network. See also 3G, 4G, and Wi-Fi 3G information, 83 3G, overview, 23 4G information, 85 4G LTE information, 86 4G, overview, 23...
- Page 198 Online Help Contextual help, 21 Displaying, 20 Updates, getting, 65 Oops! This link appears to be broken, 155 OpenSSL License, 173 Opera browser, 12 Operator, network 3G, 120 4G (NSP-ID), 85 Carrier the device was activated for, 63, 79 Optimization (MTU field), 95 Original activation date, 120 Original SSLeay License, 174 OTAPA, 159...
- Page 199 Port Trigger panel of the Router tab, 101 Port triggering Description, 101 Enabling, 101 Ports, adding, 102 Ports, removing, 102 Power button (on the device) Enabling, 72 Interpreting, 28 Location, 10 Pressing, results of, 28 Turning the device on or off, 27 Power Button LED field, 73 Power Off button (on home page), 45, 48 Power Save Mode, Wi-Fi, 90...
- Page 200 Port triggering, 102 Protocols, network, supported, 159 QoS (Quality of Service), 90 Quality of Service (QoS), 90 Questions, frequently asked (FAQ), 133 Radio frequency (RF) specifications, 158 Realm, 85 Receive frequencies, 158 Recharging the battery, 25 Reconditioned Status, 64, 79 Reference Signal Received Power (RSRP), 50, 86 Reference Signal Received Quality (RSRQ), 50, 86 Regulatory notices, 48, 163...
- Page 201 Router tab Basic panel, 93 DMZ panel, 103 LAN panel, 94 Port Forward panel, 99 Port Trigger panel, 101 Routing hardware Firmware version, 63, 79 IP address, 95 PRI version, 63, 79 Resetting to default settings, 104 Subnet mask, 95 Routing hardware settings reset Performing, 104 Playing a sound, 60, 73...
- Page 202 Session Duration, 57, 82 Session Total Data, 82 Set Guest Password (for microSD card access), 129 Set Guest Username (for microSD card access), 129 Set up my Sierra Wireless 4G LTE Tri-Fi Hotspot option, 14 Setting up the device, 12 Settings Exporting, 107...
- Page 203 Log event, 108 Software Version field, 63, 79 Sounds panel of the Device tab, 78 Sounds window, 59 Sounds, enabling and disabling All (mute switch), 29 Individually, 73 Source IP Address (DMZ), 104 Specifications Electrical, 158 Environmental, 160 Mechanical, 160 Radio frequency (RF), 158 Software, 159 Speeds, download, 23...
- Page 204 Streaming GPS data, 137 Subnet mask, 95 Support button, 47 Support, contacting, 20 Switchback Wait-time, 83 Switchback, Primary WAN (log event), 108 System alerts (playing a sound), 59, 73, 78 System events log, 108 System ID (SID), 84 System requirements, 11 TCP/IP settings, 96 Technical support, contacting, 20 telnet support, 139...
- Page 205 Cannot connect through USB, 154 Cannot connect to the 3G/4G network, 156 Cannot connect to Wi-Fi, 150 Cannot display the home page, 155 Charging paused, 135 Connection errors, list of, 147 General tips, 146 TRU-Install, 39 TTY support, 159 Turn Backlight Off, 72 Turning the device off, 28, 45 Turning the device on, 27 TVs, 141...
- Page 206 Warning (EMI), 163 Warning (software settings reset), 104 Warranty, 48 Web browsers supported, 12 Web server, accessing, 99 Website Sierra Wireless, 180 Sprint, 20 WEP, 16, 113 When connected to USB (disable Wi-Fi), 55, 89, 119 Whitelist, 91, 116 Wi-Fi Alerts (user has joined, or left), 74, 78 Blocking a computer’s access, 55...
- Page 207 Connecting to, 133 Disabling when connected through USB, 55, 89, 119 Long range, 56, 69, 89 MAC address, 63, 79 MAC Filter panel of the Wi-Fi tab, 91 Maximum number of users, 55, 118 Network panel of the Wi-Fi tab, 88 Password, 114 Password Reminder, 115 Password, forgot, 134...
- Page 208 WMM (Wi-Fi Multimedia) support, 90 WMM Support field, 90 Work Mode, 82 WPA, 16, 114 WPA2, 17, 114 WPS (Wi-Fi Protected Setup) Error messages, 151 FAQ, 138 Performing, 34 WPS button, 29 WPS Failed, 152 WPS Mismatch, 154 WPS Multiple Sessions Error, 154 WPS Not Available.
Need help?
Do you have a question about the 4G LTE Tri-Fi Hotspot and is the answer not in the manual?
Questions and answers