Table of Contents
Advertisement
Quick Links
Advertisement
Table of Contents

Related Manuals for CyberData 011098A


Summary of Contents for CyberData 011098A
- Page 1 VoIP V2 Speaker Operations Guide Part #011098*, RAL 9002, Gray White, Standard Part #011099, RAL 9003, Signal White, Optional *Replaces #011021 Document Part #930274I for Firmware Version 6.0.1 CyberData Corporation 3 Justin Court Monterey, CA 93940 (831) 373-2601...
- Page 2 CyberData Corporation. This manual, and the products, software, firmware, and/or hardware described in this manual are the property of CyberData Corporation, provided under the terms of an agreement between CyberData Corporation and recipient of this manual, and their use is subject to that agreement and its terms.
- Page 3 • Updates the text of the following note for Section 2.2.4.1, "Reset Test Function Management (RTFM) Switch": “Using the RTFM switch will lock the digital volume level to 4 and disable the analog volume control dial.” Operations Guide 930274I CyberData Corporation...
-
Page 4: Important Safety Instructions
Electrical Hazard: This product should be installed by a licensed electrician according to all local electrical and building codes. GENERAL ALERT Warning Electrical Hazard: To prevent injury, this apparatus must be securely attached to the floor/wall in accordance with the installation instructions. GENERAL ALERT CyberData Corporation 930274I Operations Guide... - Page 5 Potential safety hazards are identified in this manual through the use of words Danger, Warning, and Caution, the specific hazard type, and pictorial alert icons. CyberData Corporation 930274I Operations Guide...
- Page 6 Private Branch Exchange Power over Ethernet (as per IEEE 802.3af standard) RTFM Reset Test Function Management Session Initiated Protocol u-law A companding algorithm, primarily used in the digital telecommunication Unified Communications VoIP Voice over Internet Protocol CyberData Corporation 930274I Operations Guide...
-
Page 7: Table Of Contents
C.4.2 Warranty & RMA Returns Outside of the United States ............ 67 C.4.3 Spare in the Air Policy ......................68 C.4.4 Return and Restocking Policy ....................68 C.4.5 Warranty and RMA Returns Page ..................68 Index Operations Guide 930274I CyberData Corporation... -
Page 8: Chapter 1 Product Overview
1 Product Overview The CyberData SIP-enabled V2 Speaker is a Power-over-Ethernet (PoE 802.3af) and Voice-over-IP (VoIP) public address loudspeaker that easily connects into existing local area networks with a single CAT5 cable connection. The speaker is compatible with most SIP-based IP PBX. In a non-SIP environment, the speaker is capable of receiving broadcast audio via multicast. -
Page 9: How To Identify This Product
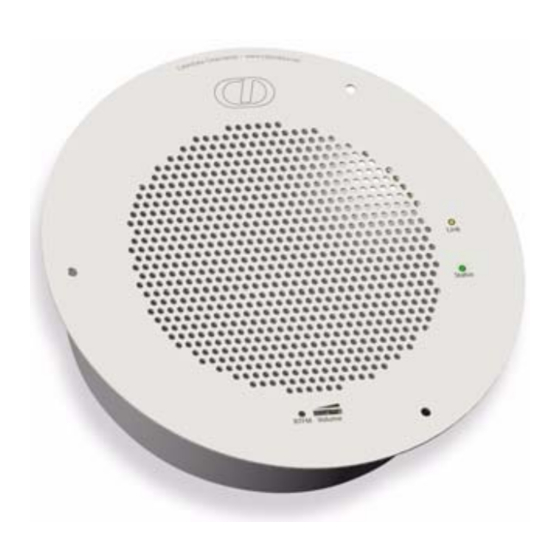
• 011098*, RAL 9002, Gray White, Standard Color • 011099, RAL 9003, Signal White, Optional Color *Replaces 011021. Figure 1-1. Model Number Label WWW.CYBERDATA.NET SPEAKER,V2,VoIP INDOOR PAGING, CEILING/WALL MOUNTED, RoHS 011098A / 021037C 098000001 Model number Operations Guide 930274I CyberData Corporation... -
Page 10: Installation
• High efficiency speaker driver • PoE 802.3af Enabled (Powered-over- Ethernet) • Network and external speaker volume control • Peer-to-peer capability • User-uploadable ring and alert tones • Auto detect for CyberData Clock kit • Nightringer • Buffered page Operations Guide 930274I CyberData Corporation... -
Page 11: Supported Protocols
Facilitates hosting for the configuration file for Autoprovisioning. • Audio Encodings PCMU (G.711 mu-law) PCMA (G.711 A-law) Packet Time 20 ms 1.5 Supported SIP Servers The following link contains information on how to configure the speaker for the supported SIP servers: http://www.cyberdata.net/support/server/index.html Operations Guide 930274I CyberData Corporation... -
Page 12: Product Specifications
011099, RAL 9003, Signal White, Optional Color *Replaces 011021. a.Auxiliary power input for use when PoE power is not available. 12 VDC @ 1A. Do not use auxiliary power input when speaker J1 is connected to a PoE power source. Operations Guide 930274I CyberData Corporation... -
Page 13: Optional Connections (J9 And J10)
*Do not use auxiliary power input when speaker J1 is connected to a PoE power source. 1.8 Dimensions Figure 1-4 shows the dimensions for the V2 Speaker. Figure 1-4. Dimensions 3.0 [75] 9.0 [229] Dimensions are in Inches [Millimeter] Operations Guide 930274I CyberData Corporation... -
Page 14: Chapter 2 Installing The Voip V2 Speaker
The installation template for the V2 Speaker is located on the Installation Quick Reference Guide that is included in the packaging with each speaker. Table 2-1. Parts Quantity Part Name Illustration V2 Speaker Assembly Installation Quick Reference Guide Speaker Mounting Accessory Kit (Part #070054A) Operations Guide 930274I CyberData Corporation... -
Page 15: Device Configuration
Installing the VoIP V2 Speaker Device Configuration 2.2 Device Configuration Set up and configure each speaker before you mount it. CyberData delivers each speaker with the following factory default values: Table 2-2. Factory Network Default Settings—Default of Network Parameter Factory Default Setting... -
Page 16: Connect Power To The Speaker
VoIP V2 Speaker to a 802.3af compliant PoE switch via a Cat 5 Ethernet cable. Figure 2-1. VoIP V2 Speaker to a 802.3af Compliant PoE Switch Cat 5 Ethernet cable 802.3af Compliant PoE Switch VoIP V2 Speaker Operations Guide 930274I CyberData Corporation... - Page 17 A PoE Injector is a power supply solution for those who have a standard Non PoE Switch. Figure 2-2. VoIP V2 Speaker (with PoE Injector) to a Non PoE Switch PoE Injector (Part #010867A) Cat 5 Ethernet cable Non PoE Switch VoIP V2 Speaker Operations Guide 930274I CyberData Corporation...
- Page 18 AUX POWER (+) AUX SPEAKER (-) (+12VDC @ 1A) AUX SPEAKER (+) AUX POWER (-) RELAY COM RELAY NO LINE OUT (-) +5V OUT LINE OUT (+) AC adaptor +12 VDC @ 1 Amps (UL-listed, LPS-rated) Operations Guide 930274I CyberData Corporation...
-
Page 19: Installation Options
LINE OUT (+) Alert Strobe External Device Such as an Electric Door Strike or Strobe Light Output Contacts AC or DC-rated Depending Upon AC or DC External Device Power Source Requirements as Required by an External Device Operations Guide 930274I CyberData Corporation... - Page 20 Clock Kit and an auxiliary speaker. The V2 Speaker may only be used separately with an auxiliary speaker or used separately with a Clock Kit. See Figure 2-6, GENERAL ALERT "Clock Kit with Extra Speaker Connection is NOT ALLOWED." Operations Guide 930274I CyberData Corporation...
- Page 21 Figure 2-6. Clock Kit with Extra Speaker Connection is ALLOWED. NOT ALLOWED 16 gauge wire and a maximum length of 20 feet 8 Ohm Analog Speaker (CD Part Number 011072) VoIP Clock Kit (Wall Mount Version) Operations Guide 930274I CyberData Corporation...
- Page 22 Total Harmonic Distortion 0.5% maximum Output Impedance 10k ohm AUX POWER (+) AUX SPEAKER (-) (+12VDC @ 1A) AUX POWER (-) AUX SPEAKER (+) RELAY COM RELAY NO LINE OUT (-) +5V OUT LINE OUT (+) Amplifier Factory Floor Operations Guide 930274I CyberData Corporation...
-
Page 23: Confirm That The Speaker Is Operational And Linked To The Network
The front power/status LED will remain solid on during operation. 2.2.3.2 Link LED • The Link LED is illuminated when the network link to the speaker is established. • The Link LED blinks to indicate network traffic. Operations Guide 930274I CyberData Corporation... -
Page 24: Confirm The Ip Address And Test The Audio
The speaker will use DHCP to obtain the new IP address (DHCP-assigned address or default to 10.10.10.10 if a DHCP server is not present). Note Pressing and holding the RTFM switch for longer than five seconds will restore the speaker to the factory default settings. Operations Guide 930274I CyberData Corporation... -
Page 25: Adjust The Volume
The external volume control can be disabled from the web interface by selecting Digital Volume Control on the Device Configuration Page (see Section 2.3.3, "Configure the Device Parameters"). Figure 2-10. Volume Control Volume control dial Operations Guide 930274I CyberData Corporation... -
Page 26: How To Set The Factory Default Settings
2. The speaker announces that it is restoring the factory default settings. Note The speaker will use DHCP to obtain the new IP address (DHCP-assigned address or default to 10.10.10.10 if a DHCP server is not present). Operations Guide 930274I CyberData Corporation... -
Page 27: Configure The Speaker Parameters
Table 2-3. Factory Network Default Settings—Default of Network Parameter Factory Default Setting IP Addressing DHCP IP Address 10.10.10.10 Web Access Username admin Web Access Password admin Subnet Mask 255.0.0.0 Default Gateway 10.0.0.1 a. Default if there is not a DHCP server present. Operations Guide 930274I CyberData Corporation... -
Page 28: V2 Speaker Web
Link to the Event Configuration page. Link to the Autoprovisioning Configuration page. Link to the Update Firmware page. a.This page is used only if the CyberData Clock Kit (part number 011023 [wall-mounted version] or 011024 [flush-mounted version]) is installed. Operations Guide... -
Page 29: Log In To The Configuration Home Page
Make sure that the PC is on the same IP network as the V2 Speaker. Note You may also download CyberData’s VoIP Discovery Utility program which allows you to easily find and configure the default web address of the CyberData VoIP products. - Page 30 Configure the Speaker Parameters 2. When prompted, use the following default Web Access Username and Web Access Password to access the Home Page (Figure 2-12): Web Access Username: admin Web Access Password: admin Figure 2-12. Home Page Operations Guide 930274I CyberData Corporation...
- Page 31 Shows the current status of the Nightringer. Click the Save button to save your configuration settings. Note: You need to reboot for changes to take effect. Click on the Reboot button to reboot the system. Operations Guide 930274I CyberData Corporation...
-
Page 32: Configure The Device Parameters
Installing the VoIP V2 Speaker Configure the Speaker Parameters 2.3.3 Configure the Device Parameters 1. Click the Device Configuration button to open the Device Configuration page. Figure 2-13. Figure 2-13. Device Configuration Page Operations Guide 930274I CyberData Corporation... - Page 33 Audio button is pressed, you will hear a voice message for testing the device audio quality and volume. Click on the Test Relay button to do a relay test. Click on the Reboot button to reboot the system. 3. After changing the parameters, click the Save button. Operations Guide 930274I CyberData Corporation...
-
Page 34: Configure The Network Parameters
Table 2-7 the remaining parameters indicated in . If you select DHCP, go to Step IP Address* Enter the Static IP address. Subnet Mask Enter the Subnet Mask address. Default Gateway Enter the Default Gateway address. Operations Guide 930274I CyberData Corporation... - Page 35 V2 Speaker if appropriate. 4. Connect the V2 Speaker to the target network. 5. From a system on the same network as the V2 Speaker, open a browser with the new IP address of the V2 Speaker. Operations Guide 930274I CyberData Corporation...
-
Page 36: Configure The Sip Parameters
Configure the Speaker Parameters 2.3.5 Configure the SIP Parameters 1. Click SIP Config to open the SIP Configuration page (Figure 2-15). Note For specific server configurations, go to the following website address: http://www.cyberdata.net/support/server/index.html Figure 2-15. SIP Configuration Page Operations Guide 930274I CyberData Corporation... - Page 37 Click the Save button to save your configuration settings. Note: You need to reboot for changes to take effect. Click on the Reboot button to reboot the system. 3. After changing the parameters, click on the Save button. Operations Guide 930274I CyberData Corporation...
-
Page 38: Configure The Night Ringer Parameters
Installing the VoIP V2 Speaker Configure the Speaker Parameters 2.3.6 Configure the Night Ringer Parameters 1. Click on the Nightringer button to open the Nightringer Configuration page. See Figure 2-16. Figure 2-16. Nightringer Configuration Setup Operations Guide 930274I CyberData Corporation... - Page 39 Click the Save button to save your configuration settings. Note: You need to reboot for changes to take effect. Click on the Reboot button to reboot the system. 3. After changing the parameters, click on the Save button. Operations Guide 930274I CyberData Corporation...
-
Page 40: Configure The Multicast Parameters
Installing the VoIP V2 Speaker Configure the Speaker Parameters 2.3.7 Configure the Multicast Parameters 1. Click on the Multicast Configuration button to open the Multicast Configuration page. See Figure 2-17. Figure 2-17. Multicast Configuration Setup Operations Guide 930274I CyberData Corporation... - Page 41 Ringtones all play at the same priority level. This means that it is possible to have a nightring tone Nightringtones and a normal ringtone playing at the same time. The maximum ringtone duration is 2,097,152 bytes or about four minutes of ulaw audio. Operations Guide 930274I CyberData Corporation...
- Page 42 When the speaker is playing back buffered audio and this buffered audio is interrupted by a higher priority stream, once the higher priority streams is finished, the speaker will restart the lower priority stream from the beginning. Operations Guide 930274I CyberData Corporation...
-
Page 43: Configure The Audio Parameters
Figure 2-20. The Audio Configuration page is used to add custom audio to the board. User uploaded audio will take precedence over the audio files shipped with the Intercom. Figure 2-18. Audio Configuration Page Operations Guide 930274I CyberData Corporation... - Page 44 Installing the VoIP V2 Speaker Configure the Speaker Parameters Figure 2-19. Audio Configuration Page (continued) Operations Guide 930274I CyberData Corporation...
- Page 45 Installing the VoIP V2 Speaker Configure the Speaker Parameters Figure 2-20. Audio Configuration Page (continued) Operations Guide 930274I CyberData Corporation...
- Page 46 '9' corresponds to the spoken word “nine.” Corresponds to the spoken word “dot.” (24 character limit) Audiotest Corresponds to the message “This is the CyberData IP speaker test message...” (24 character limit) Pagetone Corresponds to a simple tone that is unused by default (24 character limit).
- Page 47 Web Page Item Description The Save button will download a new user audio file to the board once you've selected the file by using the Browse button. The Save button will delete any pre-existing user-uploaded audio files. Operations Guide 930274I CyberData Corporation...
- Page 48 RIFF (little-endian) data, WAVE audio, Microsoft PCM, 16 bit, mono 8000 Hz You can use the free utility Audacity to convert audio files into this format. See Figure 2-21 through Figure 2-23. Figure 2-21. Audacity 1 Figure 2-22. Audacity 2 Operations Guide 930274I CyberData Corporation...
- Page 49 Configure the Speaker Parameters When you export an audio file with Audacity, save the output as: WAV (Microsoft) signed 16 bit PCM. ● Figure 2-23. WAV (Microsoft) signed 16 bit PCM WAV (Microsoft) signed 16 bit PCM Operations Guide 930274I CyberData Corporation...
-
Page 50: Configure The Ntp Server And Clock Parameters
Figure 2-24. Note The Clock Configuration page is always visible. If a clock is not installed, the Clock Status will indicate NOT INSTALLED. Otherwise it shows INSTALLED. Figure 2-24. NTP Server and Clock Configuration Page Operations Guide 930274I CyberData Corporation... - Page 51 Click on this button to set the clock after entering the current time. Click the Save button to save your configuration settings. Note: You need to reboot for changes to take effect. Click on the Reboot button to reboot the system. Operations Guide 930274I CyberData Corporation...
- Page 52 Time of day to change M11.1.0/2:00:00 The date and time when daylight savings ends. The eleventh month (November) The 1st occurrence of the day (next item) in the month Sunday /2:00:00 Time of day to change Operations Guide 930274I CyberData Corporation...
- Page 53 Eniwetok GMT-11 Samoa GMT-10 Hawaii GMT-9 Alaska GMT-8 PST, Pacific US GMT-7 MST, Mountain US GMT-6 CST, Central US GMT-5 EST, Eastern US GMT-4 Atlantic, Canada GMT-3 Brazilia, Buenos Aries GMT-2 Mid-Atlantic GMT-1 Cape Verdes Operations Guide 930274I CyberData Corporation...
- Page 54 GMT+3 Moscow, Kuwait GMT+4 Abu Dhabi, Muscat GMT+5 Islamabad, Karachi GMT+6 Almaty, Dhaka GMT+7 Bangkok, Jakarta GMT+8 Hong Kong, Beijing GMT+9 Tokyo, Osaka GMT+10 Sydney, Melbourne, Guam GMT+11 Magadan, Soloman Is. GMT+12 Fiji, Wellington, Auckland Operations Guide 930274I CyberData Corporation...
-
Page 55: Configure The Event Parameters
Click the Event Config button to open the Event Configuration page (Figure 2-26). The Event Configuration page specifies a remote server that can be used to receive HTTP POST events when actions take place on the board. Figure 2-26. Event Configuration Page Operations Guide 930274I CyberData Corporation... - Page 56 Click the Save button to save your configuration settings. Note: You need to reboot for changes to take effect. Click on the Test Event button to test an event. Click on the Reboot button to reboot the system. Operations Guide 930274I CyberData Corporation...
-
Page 57: Example Packets For Events
Here are example packets for every event: POST xmlparse_engine HTTP/1.1 Host: 10.0.3.79 User-Agent: CyberData/1.0.0 Content-Length: 197 Content-Type: application/x-www-form-urlencoded <?xml version="1.0" encoding="ISO-8859-1"?> <cyberdata NAME='CyberData VoIP Device' MAC='0020f70015b6'> <event>POWERON</event> </cyberdata> POST xmlparse_engine HTTP/1.1 Host: 10.0.3.79 User-Agent: CyberData/1.0.0 Content-Length: 199 Content-Type: application/x-www-form-urlencoded <?xml version="1.0"... - Page 58 Installing the VoIP V2 Speaker Configure the Speaker Parameters User-Agent: CyberData/1.0.0 Content-Length: 197 Content-Type: application/x-www-form-urlencoded <?xml version="1.0" encoding="ISO-8859-1"?> <cyberdata NAME='CyberData VoIP Device' MAC='0020f70015b6'> <event>RINGING</event> </cyberdata> POST xmlparse_engine HTTP/1.1 Host: 10.0.3.79 User-Agent: CyberData/1.0.0 Content-Length: 234 Content-Type: application/x-www-form-urlencoded <?xml version="1.0" encoding="ISO-8859-1"?> <cyberdata NAME='CyberData VoIP Device' MAC='0020f70015b6'>...
- Page 59 Installing the VoIP V2 Speaker Configure the Speaker Parameters Content-Type: application/x-www-form-urlencoded <?xml version="1.0" encoding="ISO-8859-1"?> <cyberdata NAME='CyberData VoIP Device' MAC='0020f70015b6'> <event>NIGHTRINGING</event> </cyberdata> Operations Guide 930274I CyberData Corporation...
-
Page 60: Configure The Autoprovisioning Parameters
Installing the VoIP V2 Speaker Configure the Speaker Parameters 2.3.11 Configure the Autoprovisioning Parameters 1. Click the Autoprovisioning button to open the Autoprovisioning Configuration page. Figure 2-27. Figure 2-27. Autoprovisioning Configuration Page Operations Guide 930274I CyberData Corporation... - Page 61 Click the Save button to save your configuration settings. Note: You need to reboot for changes to take effect. Click on the Reboot button to reboot the system. 3. After changing the parameters, click the Save button. Operations Guide 930274I CyberData Corporation...
- Page 62 The board gets its autoprovisioning information from an XML-formatted file hosted from a TFTP server. CyberData will provide a template for this XML file and the user can modify it for their own use.
- Page 63 3. The board downloads and writes the firmware file again. CyberData has timed a firmware upgrade at 140 seconds. Therefore, if you suspect the board is stuck in a loop, either remove or comment out the FirmwareVersion line in the XML file and let the board boot as it normally does.
- Page 64 You can force a change to the audio files on the board by clicking Restore Default on the Audio Configuration page or by changing the autoprovisioning file with “default” set as the file name. Operations Guide 930274I CyberData Corporation...
-
Page 65: Upgrade The Firmware And Reboot The V2 Speaker
2. Unzip the V2 Speaker version file. This file may contain the following: • Firmware file • Release notes 3. Log in to the V2 Speaker home page as instructed in Section 2.3.2, "Log in to the Configuration Home Page". Operations Guide 930274I CyberData Corporation... - Page 66 Therefore, in the case of a firmware upgrade to version 3.3.0 or later, CyberData recommends that you go to the Device Config page and make sure the following values are set properly.
- Page 67 Use the Browse button to navigate to the location of the Intercom firmware file that you want to upload. Click on the Submit button to automatically upload the selected firmware and reboot the system. Click on the Reboot button to reboot the system. Operations Guide 930274I CyberData Corporation...
-
Page 68: Reboot The V2 Speaker
1. Click Update Firmware to open the Upgrade Firmware page (Figure 2-29). Figure 2-29. Reboot System Section Reboot 2. Click Reboot. A normal restart will occur and you will see the following Reboot page. Figure 2-30. Reboot Page Operations Guide 930274I CyberData Corporation... -
Page 69: Appendix A Mounting The Speaker
Illustration #8 Nylon Thumb Nuts #8 Fender Washers 8-32 x 1 1/4" Mounting Screws Table A-2. Drywall Mounting Components (Part of the Accessory Kit) Quantity Part Name Illustration Plastic Ribbed Anchors #8 Sheet Metal Screws Operations Guide 930274I CyberData Corporation... - Page 70 #8 Nylon Thumb Nut (3x) #8 Fender Washer (3x) *Ceiling Tile or Dry Wall *Optional Reinforcement Mount P/N: 010991A (Sold Seperately) Template VoIP V2 Speaker Assembly Dry Wall Mounting Kit #6 Screw (3x) Ceiling Mounting Screw #8-32x1 1/4" (3X) Operations Guide 930274I CyberData Corporation...
- Page 71 For drop ceiling mounting, use the three 8-32 x 1 1/4" MOUNTING SCREWS, #8 NYLON THUMB NUTS, and #8 FENDER WASHERS to secure the speaker. Note For weak ceiling tile, CyberData offers a reinforcing mount (CyberData part number 010991A). •...
-
Page 72: Appendix B Setting Up A Tftp Server
1. Install and start the software. 2. Select File Configure Security tab Transmit Only. 3. Make a note of the default directory name, and then move the firmware files to be uploaded to that directory. Operations Guide 930274I CyberData Corporation... -
Page 73: Appendix C Troubleshooting/Technical Support
Phone: 831-373-2601, Extension 136 Email: RMA@CyberData.net When returning a product to CyberData, an approved CyberData RMA number must be printed on the outside of the original shipping package. No product will be accepted for return without an approved RMA number. Send the product, in its original package, to the following address:... -
Page 74: Warranty
Warranty RMA Status Form If you need to inquire about the repair status of your product(s), please use the CyberData RMA Status form at the following web address: http://www.cyberdata.net/support/rmastatus.html C.4 Warranty CyberData warrants its product against defects in material or workmanship for a period of two years from the date of purchase. -
Page 75: Spare In The Air Policy
C.4.3 Spare in the Air Policy CyberData now offers a Spare in the Air no wait policy for warranty returns within the United States and Canada. More information about the Spare in the Air policy is available at the following web address: http://www.cyberdata.net/support/warranty/spareintheair.html... -
Page 76: Index
8-32 x 1 1/4" mounting screws 62, 64 configuration page configurable parameters 26 confirming IP address 17, 19 contact information 66 contact information for CyberData 66 Current Network Settings 28 address, configuration login 22 current network settings 28 adjusting volume 19... - Page 77 9 lease, SIP server expiration time 30, 32 priority lengthy pages 34 assigning 34 link LED 64 product Linux, setting up a TFTP server on 65 configuring 20 local SIP port 30 mounting 62 Operations Guide 930274I CyberData Corporation...
- Page 78 & RMA returns within the United States 67 password for login 30 warranty and RMA returns page 68 unregister from 30 warranty policy at CyberData 67 user ID for login 30 web access password 8, 20 SIP settings 30...
Need help?
Do you have a question about the 011098A and is the answer not in the manual?
Questions and answers