
Related Manuals for CYBEX Arc Trainer 770A


Summary of Contents for CYBEX Arc Trainer 770A
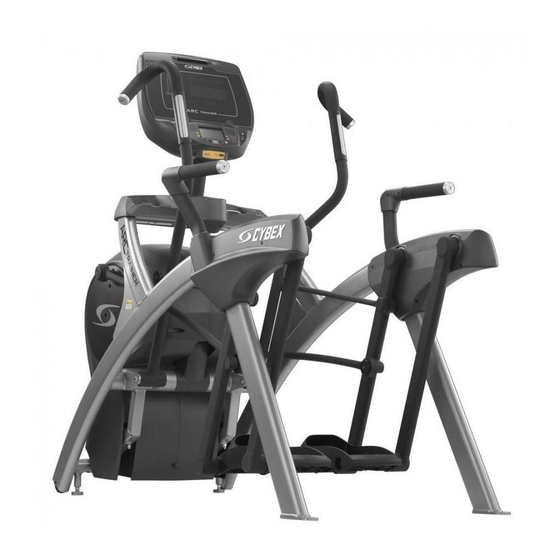
- Page 1 ® Cybex 770A/770AT Arc Trainer Service Manual Cardiovascular Systems Part Number 770A-901 C www.cybexintl.com...
-
Page 2: Table Of Contents
Apple. DISCLAIMER: Cybex International, Inc., makes no representations or warranties regarding the contents of this manual. We reserve the right to revise this document at any time or to make changes to the product described within it without notice or obligation to notify any person of such revisions or changes. - Page 3 Cybex Service Manual FCC Compliance Information This equipment has been tested and found to comply with the limits for a Class B digital device, against harmful interference in a residential installation. This equipment generates, uses and can radiate radio frequency energy and, if not installed and used in accordance with the instructions, may cause harmful interference to radio communications.
-
Page 4: Safety
Cybex Service Manual Safety Read all instructions and warnings before using. DANGER: For E3VEM (E3 View Embedded Monitor) or Optional Power Supply Unit must be grounded. This unit is equipped with an optional equipment-grounding conductor cord and a grounding plug. - Page 5 Verify there is enough room for safe access and operation of unit. Use Cybex AC power adapters only. Do not use the optional power adapter in damp or wet locations. Do not use the unit if: (1) the unit is plugged into an optional power adapter that has a damaged cord;...
-
Page 6: Warnings
Keep a repair log of all maintenance activities. Disconnect the optional power adapter before servicing unit. Do not use attachments unless recommended for the unit by Cybex. The unit may generate electromagnetic or other forms of interference, or it may be affected by interference from other equipment nearby. - Page 7 Cybex Service Manual Do not defeat the safety purpose of the polarized or grounding-type plug. A polarized plug has two blades with one wider than the other. A grounding type plug has two blades and a third grounding outlet, consult an electrician for replacement of the obsolete outlet.
- Page 8 To replace any worn or damaged decals do one of the following: Visit www.cybexintl.com to shop parts list and exploded-view diagram on the Cybex web site at www.cybexintl.com. Warning decals indicate a potentially hazardous situation that could result in death or serious injury if the precautions are not observed.
- Page 9 Cybex Service Manual 770A-331-4 770A-332-4 CAUTION Moving parts. Keep hands away when in use. DE-17219-4 B DE-17219-4 (2) DE-17155-4 750A-372-4...
- Page 10 Maintenance All preventive maintenance activities must be performed on a regular basis. Performing routine preventive maintenance actions can aid in providing safe, trouble-free operation of all Cybex Strength Systems equipment. Cybex is not responsible for performing regular inspection and maintenance actions for your machines.
-
Page 11: Preventive Maintenance Activities
Cybex is not responsible for performing regular inspection and maintenance actions for your unit. Instruct all personnel in equipment inspection and maintenance actions and also in accident reporting/ maintenance or service concerns. - Page 12 Cybex Service Manual Remove the two lower screws securing the access cover using a Phillips screwdriver. Upper Screws (2) Access Cover Lower Screws (2) Remove two upper screws securing the access cover using a Phillips screwdriver. Refer to the above diagram.
- Page 13 There are two drive belts that may become loose, worn or cracked. Unless the belts have been removed and not replaced properly, it is unlikely the belts will come loose or need to be re-tensioned. Primary Drive Belt Secondary Drive Belt technician.
- Page 14 Cybex Service Manual Do not over tighten screws. Replace and tighten the two upper screws removed in step 2 using a Phillips screwdriver Replace and tighten the two lower screws removed in step 1 using a Phillips screwdriver Test unit for proper operation.
-
Page 15: Remove Access Cover
This is the minimum recommended service. Press the Cybex logo icon to display the Access Toolbox and Lock Screen options. Press the Access Toolbox icon to access the Toolbox login screen. Enter the sequence: Press the Statistics icon to access the Recorded Statistics screen. -
Page 16: Statistics
S a i ic The Statistics screen allows tracking of equipment usage. Press the Cybex logo icon to display the Access Toolbox and Lock Screen options. Press the Access Toolbox icon to access the Toolbox login screen. -
Page 17: Customer Service
To order parts online go to www.cybexintl.com. The following information located on the serial number decal will assist our Cybex representatives in serving you. Unit Serial Number, Product Name and Model Number Part Description and Part Number if you have it. All parts can be found on the web at www.cybexintl.com... - Page 18 Provide the model and serial number of your Cybex equipment. At Cybex’s discretion, the technician may request that you return the problem part(s) to Cybex for evaluation and repair or replacement. The technician will assign you a RMA number and will send you an ARS label.
- Page 19 Cybex Service Manual Materials damaged in shipment should not be returned for credit. Shipping damages are the Apparent Damage Upon receipt of your shipment, check all items carefully. Any damage seen with a visual check must claims. Concealed Damage Damage not seen with a visual check upon receipt of a shipment but notices later must be reported to the carrier as soon as possible.
-
Page 20: Service
Service Warnin All warnings and cautions listed in this chapter are as follows: WARNING: WARNING:... - Page 21 The 770A and 770AT models have two display options, LED or E3VEM shown below. LED Display Bar Graph Heart Rate Indicator Muscle ® Incline Meter Data Enunciator Readouts E3VEM Display...
- Page 22 Control Control Name Description INCLINE UP Adjust Incline up. INCLINE DOWN Adjust Incline down. RESISTANCE UP Adjust Resistance up. RESISTANCE DOWN Adjust Resistance down. VOLUME UP Adjust Volume up. VOLUME DOWN Adjust Volume down. CHANNEL/TRACK iPod - NEXT track. CONTROL A/V - Channel CHANNEL/TRACK iPod - PREVIOUS track.
- Page 23 Icon Icon Name Description QUICK Quick Start enters Active Mode at the default incline and resistance with time counting up from 0:00. START WORKOUTS Tap Workouts icon to enter workout group selection. Tap TV icon to enter TV control menu. If TV is not connected, icon will be grayed out.
- Page 24 Select after entering information to enter value. CLEAR Clear any values selected. INFO Select to provide more information and details. SCALE Displays current value and high/low range. CYBEX Tap Cybex logo to access Screen Lock and LOGO Toolbox. See Preventive Maintenance section.
-
Page 25: Muscle Map And Incline Meter
Muscle Map – An anatomical representation of the human body with primary muscle groups lit by multi-color LED’s. The color of the LED displays which muscle groups are targeted and the relative intensity of the exercise. The LED colors display intensity level. Color Level Yellow... - Page 26 Incline Incline CardioTouch Resistance Resistance Keys Display Screen Display Keys Volume STOP Key Fan Key Channel/Track Keys Keys — Incline and Resistance are shown in the LED displays. — User controls for Incline, Resistance, Volume, STOP Screen — Tap the icons to make selections.
-
Page 27: Setup
Initial setup Perform this procedure during the installation of the unit. Once complete, refer to Setup Options below. Tap the Cybex logo icon to display the Access Toolbox and Lock Screen options. Tap the Access Toolbox icon to display the Access to Toolbox login screen. - Page 28 Enter the sequence: Tap the Setup icon to display the setup menu. The Setup options are: Time See Initial setup above. Date See Initial setup above. Units See Initial setup above. A/V Device (not shown for Select No TV or Wireless TV. E3VEM) Active when A/V Device is set to Wireless TV.
- Page 29 Service diagnostics allows testing, monitoring or altering of unit controls and performance. Tap the Cybex logo icon to display the Access Toolbox and Lock Screen options. Tap the Access Toolbox icon to display the Access to Toolbox login screen. Enter the sequence: Tap the Statistics icon to display the Arc Trainer Totals icon.
-
Page 30: Error Codes
Verify foot plates are completely stopped. Grasp handrail and step carefully onto foot plates. Begin striding.The control panel will light up and be in the Dormant Mode. Tap the Cybex logo icon to display the Access Toolbox and Lock Screen options. - Page 31 Error Code Listing Error Code # Meaning Controller watchdog tripped Dead Battery LCB latched on / can’t shut down Incline out of range Incline timeout To reset the error log tap the Reset Log icon. An empty error log will display “Empty Log”. Exit Error Log by tapping the Toolbox icon...
- Page 32 Remove Arm Handle Linkage (770AT models only) wrench. Arm Handle Linkage Right side shown Spacer Flat Washer Handle SHCS Hole (not shown) Remove arm handle linkage from handle. Remove Foot Plate Assembly Remove both SHCS and washers securing foot plate using a 3/16” Allen wrench. Rear Foot Plate Shaft Front Foot Washer...
- Page 33 Right Top Rear Cover #8 Screws (5) #10 Screws (2) Right Outer Rear Cover #8 Screws (3) Remove the right inner rear cover and two screws using a Phillips screwdriver. Right Inner Rear Cover #10 Screws (2)
- Page 34 Remove Front Foot Plate Arm Remove BHSCS and washer securing front foot plate arm using a 7/32” Allen wrench. BHSCS Washer Front Foot Plate Arm Remove front foot plate arm using a rubber mallet. Remove Rear Foot Plate Arm Remove BHSCS and washer securing rear foot plate arm using a 7/32” Allen wrench. BHSCS Washer Rear Foot...
- Page 35 Install Rear Foot Plate Arm Position new rear foot plate arm in place. Loctite BHSCS Washer Rear Foot Plate Arm Place a drop of Loctite on the BHSCS and another drop inside the shaft into where the BHSCS will be tightened. Install BHSCS and washer to rear foot plate arm using a 7/32”...
- Page 36 Install Pivot Cover Install the right inner rear cover with two screws using a Phillips screwdriver. Right Inner Rear Cover #10 Screws (2) #10 Screws (2) Right Outer Rear Cover #8 Screws (3) Right Top Rear Cover #8 Screws (5)
- Page 37 Install the right inner and outer collars with two screws using a Phillips screwdriver. Collars are marked with an “R” on the inside and have a left and right side. (Not used on 625AT models). #6 Screws (2) “R” Right Outer Collar Right Inner Collar Install Foot Plate Assembly Slide foot plate onto the foot plate shafts.
- Page 38 Install Linkage Rod Place linkage rod in correct position. Flat SCHS Washer Spacer Loctite Linkage Flat Spacer SCHS Washer Place a drop of loctite on the SHCS and place another drop of loctite into the shaft (where the SHCS will be tightened into). Complete installation Operate the unit at all levels to verify proper operation.
- Page 39 Remove linkage arm wrench. Handle SHCS Linkage Spacer Flat Washer Remove arm handle Remove BHSCS, washer, and pivot pin securing arm handle using two 7/32” Allen wrenches. The BHSCS and washer from only one side needs to be removed. Loctite Arm Handle Pivot Pin BHSCS...
- Page 40 Tighen SHCS securely. SHCS must be tightened to a minimum of 90 lbs-in. Install heart rate cable Plug heart rate cable into connector in frame. Socket Frame Heart Rate Cable Complete installation Operate the unit at all levels to verify proper operation. Hold the hand grips on the console handrail until a heart rate is displayed, typically less than thirty seconds.
-
Page 41: Linkage Rod
Begin striding.The control panel will light up and be in the Dormant Mode. Press the elevation + key to elevate to level 20 incline. Stop striding and verify foot plates are completely stopped. Unplug the battery connector from the control board. If unit has optional A/C power kit, unplug power cord from power outlet. -
Page 42: Pulley And Crank Shaft Assembly
WARNING: Release drive belt tension Using a 7/16” or 1/2” socket wrench, loosen the two Hex Head Cap Screws (HHCS). Alternate a few turns to each HHCS until they bottom out (DO NOT REMOVE). HHCS Lower Pivot Drive Belts Shaft Remove control board assembly Disconnect lower cables from control board. - Page 43 Remove counter weights FHSCS (2) Counter Torque to 250 lbs-in Weight Loctite (2) Pulley and Crank Shaft Assemby Remove lower pivot assembly using a 7/16” or 1/2” socket wrench. Screw Lock Washer Flat Washer Lower Pivot Drive Belts Shaft Remove the lower pivot assembly out of the drive belts and from the frame. Installing lower pivot assembly that both drive belts are straight and centered in place.
- Page 44 Verify that both pulleys are aligned properly using a straight edge. The straight edge must be no more than 1/16” from pulley edge. Pulley The straight edge Touch Straight must be no more Edge Here than 1/16” from (two places) The straight edge must be no more Touch Straight Edge...
- Page 45 Install crank shaft assembly The new bearings have been pre-assembled on the new crank shaft assembly and are not adjustable. Place the assembly into the primary belt and slide the alignment pins into the holes on the pillow blocks. Pulley Pillow Block and Crank Shaft...
- Page 46 Alignment of belts and pulleys Verify that both pulleys are aligned properly using a straight edge. The straight edge must be no more than 1/16” from pulley edge. Pulley The straight edge Touch Straight must be no more Edge Here than 1/16”...
- Page 47 Install linkage rods Place linkage rod in correct position. Place a drop of loctite on the SHCS and place another drop of loctite into the shaft (where the SHCS will be tightened into). Connect battery connector Connect battery connector to control board. Install controller cover Place the controller cover into position.
- Page 48 Tools Required Phillips screwdriver Side cutter Double sided tape Disconnect optional external power source Unplug the unit from the power outlet. WARNING: Remove the four screws securing the front cover in place using a Phillips screwdriver. Screws (4) Front Cover Remove front cover.
- Page 49 Unplug power supply cable jack from controller board. Power 8” Wire Ties Cord Power Supply Hole in 15” Wire Tie Drive Frame Power Supply Cable Assembly Add double sided tape to back of power supply. Power Cord Drive Frame Assembly Power Supply Double Side Tape...
- Page 50 Remove excess wire tie with side cutters. Power 8” Wire Ties Cord Power Supply Hole in 15” Wire Tie Drive Frame Power Supply Cable Assembly Route power cord down through hole in drive frame assembly. Route power supply cable up along drive frame assembly. Controller Cover Power Supply...
- Page 51 Install front cover Install four screws securing front cover using a Phillips screwdriver. Screws (4) Front Cover Complete installation Plug the power cord into the power outlet. Operate the unit at all levels to verify proper operation. Tools Required Side cutter 3/16”...
-
Page 52: Incline Motor
Remove incline motor cover Remove both screws securing the incline motor cover using a Phillips screwdriver. Incline Motor Cover Screw Remove incline motor cover. Remove lower incline motor support pin and retaining ring Incline Grooved Motor Retaining Ring Remove grooved pin securing incline motor to main frame. Tilt front end assembly forward Tilt front end assembly forward carefully until it stops. - Page 53 Remove front access cover Remove both lower and upper screws securing front access cover using a Phillips screwdriver. Upper Screw (2) Front Access Cover Lower Screw (2) Linkage Arm Remove the front access cover. Remove left linkage rod SHCS Flat washer Spacer Linkage Place linkage rod down on frame.
- Page 54 Remove left shroud Remove the eight screws securing left shroud using a Phillips screwdriver. Screw Left Shroud Remove left shroud. Unplug incline motor cable Loosen the top two screws and remove the bottom two screws using a phillips screwdriver. Top Screws Cable Incline Motor...
- Page 55 Remove incline motor Grooved Retaining Ring Incline Motor Remove grooved pin securing incline motor to main frame. Remove incline motor. Install new incline motor Place new incline motor in position. Verify center of holes is equal to 10.50” (27 cm). (27cm) Install a retaining ring to one side of grooved pin using a 1/2”...
- Page 56 Plug the new incline motor cable into control board. Top Screws Cable Incline Motor Cable Controller Cover Control Board Bottom Screws Install wire tie securing the new incline motor cable to frame. Remove excess wire tie with side cutters. Install controller cover and both lower screws to frame using a Phillips screwdriver. Tighen all four screws securing the contoller cover using a Phillips screwdriver.
- Page 57 Attach a retaining ring to one side of grooved pin using a 1/2” ID external retaining-ring tool or plier. Incline Grooved Motor Retaining Ring Install the grooved pin securing the new incline motor to the main frame assembly. Attach a retaining ring to the other side of grooved pin using a 1/2” ID external retaining-ring tool or plier.
- Page 58 Perform calibration procedure Hold the handrails to steady self while stepping into the foot plates. Begin striding. CYBEX Press and hold Cybex logo for 6 seconds to access Screen LOGO Lock and Toolbox. See Preventive Maintenance section. LANGUAGE Press and hold language logo for 6 seconds to access...
- Page 59 C n ac ear Ra e Gri Tools Required Phillips screwdriver Side Cutter Tape Remove back cover Remove four screws securing back cover to the console using a Phillips screwdriver. Back Cover Screws (4)
- Page 60 Remove grips Remove the two screws securing bottom grip to top grip using a Phillips screwdriver. Repeat step for right side. Top Grip Red heart rate wire Black heart rate wire Bottom Grip Screws (2) Disconnect the red and black heart rate wires from each grip. Leave caps in place. Install heart rate cable Unplug heart rate connector from heart board cable.
- Page 61 Install grips Top Grip Red heart rate wire must be on the top Black heart rate wire must be on the bottom Bottom Grip Screws (2) Pull the black wire through Connect the red wire to the tab on the top grip. Verify connection is secure. Connect the black wire to the tab on the bottom grip.
-
Page 62: Accessory Tray
Complete installation Operate the unit at all levels to verify proper operation. Hold the contact heart rate grips until a heart rate is displayed, typically less than thirty seconds. Tools Required Phillips screwdriver (regular and stubby) Remove accessory tray bottom Remove the three screws securing the accessory tray bottom to the accessory tray base using a Phillips screwdriver. - Page 63 Remove accessory tray top Remove the two screws securing the accessory tray top to the accessory tray bottom using a stubby Phillips screwdriver. Accessory Tray Top Screws (2) Remove accessory tray base Remove the four screws securing the accessory tray base to the frame using a stubby Phillips screwdriver.
- Page 64 Install accessory tray base Install the four screws using a stubby Phillips screwdriver. Accessory Tray Base Coax Cable (optional) Frame Screws (4) HT592526 Install accessory tray top Install the two screws using a stubby Phillips screwdriver. Accessory Tray Top Accessory Tray Base Screws (2) HT552512...
- Page 65 Install accessory tray bottom Install the accessory tray bottom to the accessory tray base with three screws using a Phillips screwdriver. Accessory Tray Bottom Accessory Tray Base Screws (2) Screw (1) HT552512 HT532512 Complete installation Operate the unit at all levels to verify proper operation.
-
Page 66: Appendix A - Error Code Flowcharts
Cybex Service Manual Appendix A - Error Code Flowcharts c ar ERROR 4 - LCB IGNORED SHUTDOWN Note ERROR 4 present in log. Restart unit. Does the error reoccur after restart? Check data cable continuity, and reseat data cable connections. - Page 67 Cybex Service Manual ERROR 5 - DRIVE COMMUNICATION LOST Note ERROR 5 present in log. Restart unit. Does the error reoccur after restart? Check Battery voltage verify that the voltage is above 12.5 V Charge or replace Is the Battery OK?
- Page 68 Cybex Service Manual ERROR 8 - APPROCHING OVER TEMPERATURE Note ERROR 8 present in log. Restart unit. Does the error reoccur after restart? Remove front cover. clear any dust/debris from brake/generator and lower controller board Restart Unit. does the error return ?
- Page 69 Cybex Service Manual ERROR 9 - DISPLAY WATCHDOG TRIGGERED Note ERROR 9 present in log. Restart unit. Does the error reoccur after restart? Check data cable for continuity and damage reseat all connections on cable Did the data cable check out OK? Replace data cable.
- Page 70 Cybex Service Manual ERROR 22 - POWER SUPPLY IRREGULARITY - GENERATOR POWER NO SPEED SIGNAL Note ERROR 22 present in log. Restart unit. Does the error reoccur after restart? Check all 3 legs of generator for correct ohm reading,(26.5 ohms) and power out(0-300VAC).
- Page 71 Cybex Service Manual ERROR 23 - POWER SUPPLY IRREGULARITY - SPEED SIGNAL BUT NO GENERATOR POWER - FATAL condition,ERROR 23 present in log. Restart unit. Does the error reoccur after restart? Check all 3 legs of generator for correct ohm reading,(26.5 ohms) and...
- Page 72 Cybex Service Manual ERROR 24 - INCLINE MOVING TOO SLOWLY Note ERROR 24 present in log. Restart unit. Does the error reoccur after restart? Check battery voltage in diagnostic mode. Voltage needs to be above 12.5 VDC in order for incline to...
- Page 73 Cybex Service Manual ERROR 25 - INCLINE MOVEMENT FEEDBACK STOPPED Note dashes in incline window and no response from incline. ERROR 25 present in log. Restart unit. Does the error reoccur after restart? Check battery voltage in diagnostic mode. Voltage needs to be above 12.5...
- Page 74 Cybex Service Manual ERROR 26 - INCLINE DISABLED Note dashes in incline window and no response from incline. ERROR 26 present in log. Restart unit. Does the error reoccur after restart? Check battery voltage in diagnostic mode. Voltage needs to be above 12.5...
- Page 75 Cybex Service Manual ERROR 27 - LOW BATTERY Note ERROR 27 present in log. Restart unit. Does the error reoccur after restart? Check battery voltage in diagnostic mode. Voltage needs to be above 12.5 VDC in order for incline to...
- Page 76 Cybex Service Manual ERROR 28 - OVER TEMPERATURE Note ERROR 28 present in log. allow unit to cool, restart unit. Does the error reoccur after restart? Remove front cover. clear any dust/debris from brake/generator and lower controller board Restart Unit. does...
- Page 77 Cybex Service Manual ERROR 29 - CONTROLLER WATCHDOG TRIGGERED Note ERROR 29 present in log. Restart unit. Does the error reoccur after restart? Check data cable continuity and connections. Is the data cable Replace data cable. Replace lower controller board.
- Page 78 Cybex Service Manual ERROR 30 - DEAD BATTERY Note disabled fan and incline. ERROR 30 present in log. Restart unit. Does the error reoccur after restart? Check Battery voltage in diagnostic mode. Sshould be above 12.5 VDC Is the Battery OK?
- Page 79 Cybex Service Manual ERROR 35 - LCB LATCHED ON - CAN'T SHUT DOWN Note ERROR 35 present in log. Restart unit. Does the error reoccur after restart? Replace lower controller board. Completed.
- Page 80 Cybex Service Manual ERROR 37 - INCLINE OUT OF RANGE Note dashes in incline window and no response from incline. ERROR 37 present in log. Restart unit. Does the error reoccur after restart? Check battery voltage in diagnostic mode. Voltage needs to be above 12.5...
- Page 81 Cybex Service Manual ERROR 38 - INCLINE TIMEOUT Note dashes in incline window and no response from incline. ERROR 38 present in log. Restart unit. Does the error reoccur after restart? Check battery voltage in diagnostic mode. Voltage needs to be above 12.5 VDC in order for incline to function properly.
Need help?
Do you have a question about the Arc Trainer 770A and is the answer not in the manual?
Questions and answers