Advertisement
Quick Links
Advertisement

Related Manuals for CYBEX Arc Trainer 771AT


Summary of Contents for CYBEX Arc Trainer 771AT
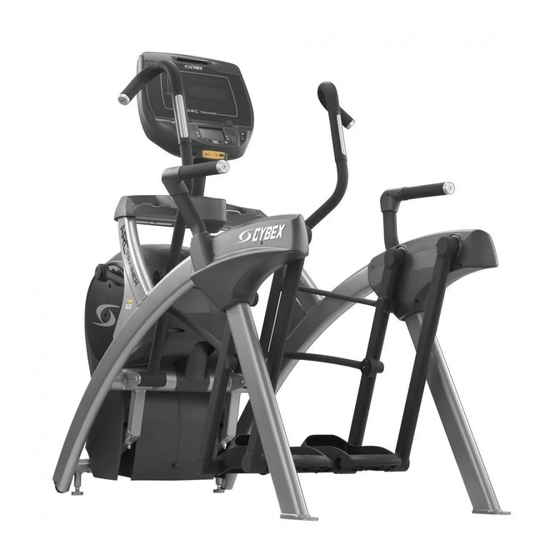
- Page 1 ® Cybex 771A, 771AT Arc Trainer Service Manual www.cybexintl.com...
- Page 2 © Copyright , Life Fitness, LLC. All Rights Reserved. Life Fitness, Hammer Strength, Cybex, ICG and SCIFIT are registered trademarks of Life Fitness, LLC and its affiliated companies and subsidiaries. Brunswick and related trademarks used under license from Brunswick Corporation.
- Page 3 Cybex 771A, 771AT Arc Trainer Part Number FCC Compliance Information Changes or modifications to this unit not expressly approved by the party responsible for compliance could void the user’s authority to operate the equipment. This equipment has been tested and found to comply with the limits for a Class B digital device, pursuant to part 15 of the FCC Rules.
- Page 4 • Connect unit to a grounded outlet. • Do not use voltage adapter or extension cord. Cybex is not responsible for injuries or damages as a result of cord or plug modification. • Verify voltage requirements of unit match local voltage requirements.
- Page 5 Cybex 771A, 771AT Arc Trainer Part Number Australia AS/NZS 3112 GB 2099-1 and GB Chinese 1002-1 Brazil IEC-60320-C13 Important Safety Instructions (Save These Instructions) Shock and electrocution hazard. • Unplug unit and let sit 10 minutes before cleaning or performing maintenance.
- Page 6 • Do not attempt electrical or mechanical repairs. Seek qualified repair personnel when servicing. If you live in the USA, contact Cybex Customer Service at 888-462-9239. If you live outside the USA, contact Cybex Customer Service at 508-533-4300.
- Page 7 Cybex 771A, 771AT Arc Trainer Part Number Canadian Page 7 of 229...
- Page 8 Cybex 771A, 771AT Arc Trainer Part Number Label Placement 770A-331-X Label, Warning, Access tray, Left 770A-331-E Label, Warning, Access tray, Left, Canadian 770A-332-X Label, Warning, Access tray, Right 770A-332-E Label, Warning, Access tray, Right, Canadian DE000004-X Decal, Caution moving parts...
- Page 9 Cybex 771A, 771AT Arc Trainer Part Number DE-17155-X Label, Warning, Hot flywheel 525AT-400 Label, Warning, Disconnect Power 525AT-401 Label, Warning, Disconnect Power 525AT-402 Label, Warning, Disconnect Power 525AT-418 Label, Warning, Disconnect Power Page 9 of 229...
- Page 10 Cybex equipment. Cybex is not responsible for performing regular inspection and maintenance actions for your machines. Instruct all personnel in equipment inspection and maintenance actions and also in accident reporting and recording.
- Page 11 CardioTouch Screen While in Dormant Mode press the Cybex logo icon to access the Lock and Toolbox options. Press the Lock screen for cleaning icon to lock the screen for 10 seconds. The CardioTouch screen will stay locked for 10 seconds to prevent any key presses from being processed.
- Page 12 Cybex 771A, 771AT Arc Trainer Part Number Drive Belts Remove front access cover 1. Remove screws securing front access cover using a Phillips screwdriver. Item Description Qty. Screw Front access cover 2. Remove access cover. Burn hazard. Do not touch flywheel until cool.
- Page 13 Cybex 771A, 771AT Arc Trainer Part Number Secondary Belt The narrower of the two belts. It has grooves that keep it aligned on the flywheel's drive pulley. Install Access Cover Do not over tighten screws. 1. Replace and tighten the two upper screws using a Phillips screwdriver.
- Page 14 All maintenance activities shall be performed by qualified personnel. Failure to do so could result in serious injury. This is the minimum recommended service. Determine distance Press and hold Cybex logo for 6 seconds to access CYBEX LOGO Screen Lock and Toolbox. Press and hold language logo for 6 seconds to ac- LANGUAGE ICON cess Screen Lock and Toolbox.
- Page 15 Contact qualified service technician to check elevation assembly, replace any worn parts and lubricate elevation bushings. Statistics The Statistics screen allows tracking of equipment usage. Press and hold Cybex logo for 6 seconds to access CYBEX LOGO Screen Lock and Toolbox. Press and hold language logo for 6 seconds to ac- LANGUAGE ICON cess Screen Lock and Toolbox.
- Page 16 Cybex 771A, 771AT Arc Trainer Part Number Exit Set Up Mode by tapping the Toolbox icon, then tap the Home icon . The screen will refresh. Page 16 of 229...
- Page 17 To speak with a customer service representative, call 800-351-3737 (for customers living within the USA) or 847-288-3700 (for customers outside the USA). The following information located on the serial number decal will assist our Cybex representatives in serving you. • Unit Serial Number, Product Name and Model Number •...
- Page 18 Contact your authorized Cybex dealer on all warranty-related matters. Your local Cybex dealer will request a RMA from Cybex, if applicable. Under no circumstances will defective parts or equipment be accepted by Cybex without proper RMA and an Automated Return Service (ARS) label.
- Page 19 Cybex 771A, 771AT Arc Trainer Part Number Service Console Layout Console Display LED Display Bar Graph Data Readouts Muscle Map Heart Rate Indicator Incline Meter Enunciator Page 19 of 229...
- Page 20 Cybex 771A, 771AT Arc Trainer Part Number E3 View Monitor User Control Symbols Used Control Control Name Description INCLINE UP Adjust Incline up. INCLINE DOWN Adjust Incline down. RESISTANCE UP Adjust Resistance +up. Page 20 of 229...
- Page 21 Cybex 771A, 771AT Arc Trainer Part Number Control Control Name Description RESISTANCE DOWN Adjust Resistance -down. VOLUME UP Adjust Volume up. VOLUME DOWN Adjust Volume down. CHANNEL UP A/V - Channel UP CHANNEL DOWN A/V - Channel DOWN Press STOP once to end the workout session STOP and start the Workout Review.
- Page 22 Cybex 771A, 771AT Arc Trainer Part Number Icon Icon Name Description HOME Return to opening screen. START Enter Active Mode. If pause feature is enabled, pause icon is shown. Press PAUSE Pause icon once to enter pause mode. If pause feature is disabled, stop icon is shown. Press STOP Stop icon or STOP button once to enter Workout review.
- Page 23 Icon Name Description Displays current value in the minimum and maximum SCALE range. Press and hold Cybex logo for 6 seconds to access CYBEX LOGO Screen Lock and Toolbox. Press and hold language logo for 6 seconds to access LANGUAGE ICON Screen Lock and Toolbox.
- Page 24 Cybex 771A, 771AT Arc Trainer Part Number Muscle Map and Incline Meter Muscle Map An anatomical representation of the human body with primary muscle groups lit by multi-color LED’s. The color of the LED displays which muscle groups are tar- geted and the relative intensity of the exercise.
- Page 25 3. Begin striding. Initial setup Perform this procedure during the installation of the unit. Once complete, refer to Setup Options below. Press and hold Cybex logo for 6 seconds to access CYBEX LOGO Screen Lock and Toolbox. Press and hold language logo for 6 seconds to ac- LANGUAGE ICON cess Screen Lock and Toolbox.
- Page 26 Cybex 771A, 771AT Arc Trainer Part Number Press and hold Cybex logo for 6 seconds to access CYBEX LOGO Screen Lock and Toolbox. Press and hold language logo for 6 seconds to ac- LANGUAGE ICON cess Screen Lock and Toolbox.
- Page 27 Cybex 771A, 771AT Arc Trainer Part Number Choose Default Resistance Mode. Choices are: Arc (default resistance), Constant Power (default power), or Adaptive Power (default level). Quick Start Mode Set default resistance, power, or level. Select default language to display on CardioTouch screen. Toolbox is only Language available in English.
- Page 28 Dormant Mode. 2. Hold the handrails to steady self while stepping into the foot plates. 3. Begin striding. Press and hold Cybex logo for 6 seconds to ac- CYBEX LOGO cess Screen Lock and Toolbox. Press and hold language logo for 6 seconds to LANGUAGE ICON access Screen Lock and Toolbox.
- Page 29 Tools Required: Headphones (not included) Setting up the Cybex Wireless Audio Receiver Module requires three steps: 1. Determine the type of transmitter used (MYE 900MHz, Broadcast Vision 863MHz, etc. 2. Set A/V Device to Wireless TV.
- Page 30 Cybex 771A, 771AT Arc Trainer Part Number 900 MHz System 863 MHz System 806 MHz System C 900 Cardio Theater E 863 Enercise J2 806 Japan 30 channels E 900 Enercise A 863 Audeon B 900 Broadcast Vision Setup UHF Transmitters For transmitter types 900 MHz, 863 MHz or 806 MHz.
- Page 31 Cybex 771A, 771AT Arc Trainer Part Number Review channels Tap Up or Down to listen to available channels with the headphones. 2. Delete unwanted channels by pressing Delete to delete channel. Repeat process for additional unwanted channels. 3. Adjust the Near/Far setting for channels that are available but not showing.
- Page 32 Cybex product. C.A.B. (Console Adapter Box) or Connected TV setup option 1. Access setup screen. Press and hold Cybex logo for 6 seconds to ac- CYBEX LOGO cess Screen Lock and Toolbox. Press and hold language logo for 6 seconds to LANGUAGE ICON access Screen Lock and Toolbox.
- Page 33 Cybex 771A, 771AT Arc Trainer Part Number Enter the sequence: 4. Tap Setup at the main Toolbox screen. Tap the Shift Right icon to navigate to the TV Source icon. 6. Tap Device Installed to select A/V type. 7. Select C.A.B. (Console Adapter Box) or Connected TV from the A/V options.
- Page 34 Cybex 771A, 771AT Arc Trainer Part Number • HDMI - The facility needs to supply the connection cable between the Set Top Box and the HDMI coupler at the base of the unit. Set the Device Installed to STB+HDMI. STB (Set Top Box) Setup Set Top Box Variables Determine which configuration you have.
- Page 35 Cybex 771A, 771AT Arc Trainer Part Number Typical Cable or Set Top Box Connections Input to STB The STB can use a distributed RF signal over coax (Cable), or distributed Internet Protocol over Ethernet (IPTV.) The source is up to the facility and the system in- stalled.
- Page 36 Cybex 771A, 771AT Arc Trainer Part Number MYE HDMI with STB NEAR to equipment MYE Coax with STB NEAR to equipment MYE Coax with STB FAR from equipment (up to 1000’ range if unobstructed) BV CAB or Connected TV STB This system uses a transmitter mounted inside the console and a 14”...
- Page 37 Cybex 771A, 771AT Arc Trainer Part Number BVE CAB or Connected TV Coax with STB NEAR Equipment BVE CAB or Connected TV Coax with STB FAR from equipment BVE CAB or Connected TV HDMI with STB NEAR equipment BV C.A.B. for Broadcast Vision or C-tv (Connected TV), TV-on-a-stand This system uses a Console Adapter Box attached to the Broadcast Vision TV-on-a-stand.
- Page 38 Cybex 771A, 771AT Arc Trainer Part Number STB (Set Top Box) Setup Option 1. Access setup screen. Press and hold Cybex logo for 6 seconds to ac- CYBEX LOGO cess Screen Lock and Toolbox. Press and hold language logo for 6 seconds to LANGUAGE ICON access Screen Lock and Toolbox.
- Page 39 All LED's should blink once as confirmation. E3 View Monitor Setup Access Setup Screen Press and hold Cybex logo for 6 seconds to access CYBEX LOGO Screen Lock and Toolbox. Press and hold language logo for 6 seconds to ac- LANGUAGE ICON cess Screen Lock and Toolbox.
- Page 40 Cybex 771A, 771AT Arc Trainer Part Number 3. Tap the Setup icon to display the Setup menu. Tap the Shift Right icon to navigate to the EPEM Setup icon. 5. Tap the EPEM Setup icon. Tap the Setup icon to advance to the SETUP MODE screen.
- Page 41 Cybex 771A, 771AT Arc Trainer Part Number Default Display Mode Select TV + Data, TV Only or Data Only On/Off Turn the E3 View Monitor on or off Reset the setup values and clear all pro- Reset Defaults grammed channels.
- Page 42 Cybex 771A, 771AT Arc Trainer Part Number 2. Tap to access access Picture menu. Brightness Adjust range from 1 to 100. Default is 65. Contrast Adjust range from 1 to 100. Default is 70. Color Adjust range from 1 to 100. Default is 75.
- Page 43 Cybex 771A, 771AT Arc Trainer Part Number 2. Tap to access Channels menu. ATSC Monitor DVB-T Monitor Feature Settings Signal (ATSC only) Select Air, Cable STD, Cable IRC, or Cable HRC. Auto Program See Below Manual Program (DVB-T only) See Below...
- Page 44 Cybex 771A, 771AT Arc Trainer Part Number 3. Tap to select Mode. ATSC Monitor Mode Channel Sequence Additional Digital Signal Channel Map 4. Tap to set the scope of channel scanning. Option Description Analog Only (De- TV searches for analog channels only...
- Page 45 Cybex 771A, 771AT Arc Trainer Part Number 11. Tap (Yes) to start auto programming. Tap (No) button to cancel the operation. The TV will now search all available channels with an on-screen progress percentage displayed. Any tuning Mode that includes Digital channels will require several minutes to complete auto programming.
- Page 46 Cybex 771A, 771AT Arc Trainer Part Number 5. Tap to set the scope of channel scanning. Option Description Analog Only (De- TV searches for analog channels only fault) Digital Only TV searches for digital channels only Analog and Digi- TV searches for both analog and digital channels 6.
- Page 47 Cybex 771A, 771AT Arc Trainer Part Number 4. Tap to select ATV or DTV. Adjust settings for Storage, System, Band, Channel, Name, or Search. Select ATV Mode Save to save settings. DTV Mode Select UHF channel. Select Save to save settings.
- Page 48 Cybex 771A, 771AT Arc Trainer Part Number Tap the Setup icon to return to the previous menu. To exit, Tap the Setup icon until the programming menus disappear. If there are more analog channels to be added or deleted, repeat steps 3 through 5.
- Page 49 Setup Complete Diagnostics Diagnostic menus display service information. Access Diagnostic menus Press and hold Cybex logo for 6 seconds to access CYBEX LOGO Screen Lock and Toolbox. Press and hold language logo for 6 seconds to ac- LANGUAGE ICON cess Screen Lock and Toolbox.
- Page 50 • OEM Diags (Diagnostics) Setup options - LED, E3 View Monitor Enter setup options. Press and hold Cybex logo for 6 seconds to access CYBEX LOGO Screen Lock and Toolbox. Press and hold language logo for 6 seconds to ac- LANGUAGE ICON cess Screen Lock and Toolbox.
- Page 51 Date. Setup options - Cybex GO Monitor Enter setup options. Press and hold Cybex logo for 6 seconds to access CYBEX LOGO Screen Lock and Toolbox. Press and hold language logo for 6 seconds to ac- LANGUAGE ICON cess Screen Lock and Toolbox.
- Page 52 Cybex 771A, 771AT Arc Trainer Part Number Select default language to display on CardioTouch screen. Toolbox is only Language available in English. Include Optional Languages. Select optional languages to display on CardioTouch screen. Choices are Include or Off. Statistics 1. Tap the Statistics icon to display the Arc Trainer Totals icon.
- Page 53 Error codes notify user of a problem condition and are displayed on the console. Error codes can also help to indicate the part of the unit most likely to be causing the problem. Access error log Press and hold Cybex logo for 6 seconds to access CYBEX LOGO Screen Lock and Toolbox.
- Page 54 Cybex 771A, 771AT Arc Trainer Part Number Error Code Description Error 5 Drive Communication Issue Error 6 Membrane Fault (stuck key) Error 8 Approaching Over-Temperature Error 9 MCC Watchdog Triggered Error 12 Graphics Board Watchdog Triggered Upper Display watchdog Triggered...
- Page 55 Cybex 771A, 771AT Arc Trainer Part Number Error 2 - GFX communications issue Cause: MCC is receiving incomplete, erroneous, or no information from the Graphics Board that occurred even after three re-tries. Service: If this occurs in Dormant, the cause is likely a software defect or power fluctuation. If this occurs mostly in active mode, it could be due to static discharge or increased data traffic.
- Page 56 Cybex 771A, 771AT Arc Trainer Part Number Flowchart: Error 2 Page 56 of 229...
- Page 57 • NTS and MCC could potentially be out of sync, requiring a full-system power cycle. If this recurs, the NTS firmware may need to be updated. • Call Cybex and have a technician verify the firmware and update it if necessary. • Attempt the Check for Updates button in the Toolbox/Setup/AV Display/Network Setup.
- Page 58 Cybex 771A, 771AT Arc Trainer Part Number Flowchart: Error 4 Page 58 of 229...
- Page 59 Cybex 771A, 771AT Arc Trainer Part Number Error 5: Drive Communication Issue Cause: Loss of communication with the drive, the drive has not given a valid response in 350- 400ms. Service: Power outages are most suspect. • Check the battery.
- Page 60 Cybex 771A, 771AT Arc Trainer Part Number Flowchart: Error 5 Page 60 of 229...
- Page 61 Cybex 771A, 771AT Arc Trainer Part Number Error 6 - Membrane Fault (Stuck Key) Cause: Membrane is showing a key constantly activated (noticed at power-up.) Service: • Check the membrane and thumb controls for signs of fatigue, cracking, or possible moisture intrusion.
- Page 62 Cybex 771A, 771AT Arc Trainer Part Number Flowchart: Error 6 Page 62 of 229...
- Page 63 Cybex 771A, 771AT Arc Trainer Part Number Error 8: Approaching Over-Temperature Cause: Drive is reporting a temperature of 100+°C Service: • If Error 8 is alone in the log, or with other Error 8’s, then the product may be getting warm simply from excessive high-powered use.
- Page 64 Cybex 771A, 771AT Arc Trainer Part Number Flowchart: Error 8 Page 64 of 229...
- Page 65 Cybex 771A, 771AT Arc Trainer Part Number Error 9: MCC Watchdog triggered Cause: A software task has failed, causing a delay in the routine running of the code. If the delay is long enough, a hardware timer in the processor will re-boot the processor. When the processor comes up, it will communicate what caused the reset (watchdog vs.
- Page 66 Cybex 771A, 771AT Arc Trainer Part Number Flowchart: Error 9 Page 66 of 229...
- Page 67 Cybex 771A, 771AT Arc Trainer Part Number Error 12: Graphics Board Watchdog triggered Cause: A software task has failed, causing a delay in the routine running of the code on the Graphics Board. If the delay is long enough, a hardware timer in the processor will re-boot the processor. When the processor comes up, it will communicate what caused the reset (watchdog vs.
- Page 68 Cybex 771A, 771AT Arc Trainer Part Number Flowchart: Error 12 Page 68 of 229...
- Page 69 Cybex 771A, 771AT Arc Trainer Part Number Error 13: Upper Display watchdog triggered Cause: A software task has failed, causing a delay in the routine running of the code on the upper display. If the delay is long enough, a hardware timer in the processor will re-boot the processor. When the processor comes up, it will communicate what caused the reset (watchdog vs.
- Page 70 Cybex 771A, 771AT Arc Trainer Part Number Flowchart: Error 13 Page 70 of 229...
- Page 71 • Ensure all grounds are in place and connected to un-painted and un-corroded surfaces. • Check drive and display communications with the Cybex test protocol software on a laptop. • Reprogram or replace the drive and replace the console cable.
- Page 72 Cybex 771A, 771AT Arc Trainer Part Number Flowchart: Error 14 Page 72 of 229...
- Page 73 Cybex 771A, 771AT Arc Trainer Part Number Error 15: Embedded A/V Device Failure Cause: A software task has failed, causing a delay in the routine running of the code on the Graphics Board. If the delay is long enough, a hardware timer in the processor will re-boot the processor. When the processor comes up, it will communicate what caused the reset (watchdog vs.
- Page 74 Cybex 771A, 771AT Arc Trainer Part Number Flowchart: Error 15 Page 74 of 229...
- Page 75 Cybex 771A, 771AT Arc Trainer Part Number Error 16: Membrane Fault (No Membrane) Cause: Membrane is showing a general fault of communications such as registers can’t be set, corrupt responses, or no responses (such as the membrane being unplugged.) Service: •...
- Page 76 Cybex 771A, 771AT Arc Trainer Part Number Flowchart: Error 16 Page 76 of 229...
- Page 77 Cybex 771A, 771AT Arc Trainer Part Number Error 17 - LCB ignored shut-down, Console pulled hardware reset Cause: LCB is locked up, or a loss of valid communication, or a hardware failure on the LCB. Console requested a shut down and saw the LCB remained on battery w/o a speed signal for more than 120 seconds.
- Page 78 Cybex 771A, 771AT Arc Trainer Part Number Flowchart: Error 17 Page 78 of 229...
- Page 79 Cybex 771A, 771AT Arc Trainer Part Number Error 22 - Power Supply Irregularity / Generator Power but no Speed Signal Cause: The LCB power supply is being powered sufficiently by the generator, yet the LCB recognizes no speed signal. It is indicative of a LCB failure or one phase of the generator is open.
- Page 80 Cybex 771A, 771AT Arc Trainer Part Number Flowchart: Error 22 Page 80 of 229...
- Page 81 Cybex 771A, 771AT Arc Trainer Part Number Error 23 - Power Supply Irregularity / Speed Signal but no Generator Power - Fatal Cause: The LCB recognizes a valid speed signal from the generator, yet does not have sufficient power from it.
- Page 82 Cybex 771A, 771AT Arc Trainer Part Number Flowchart: Error 23 Page 82 of 229...
- Page 83 Cybex 771A, 771AT Arc Trainer Part Number Error 24 - Incline moving too slowly Cause: Incline is commanded to move yet the change in feedback is slower than the minimum allowed. Service: • Bad or low battery, poor battery connection •...
- Page 84 Cybex 771A, 771AT Arc Trainer Part Number Flowchart: Error 24 Page 84 of 229...
- Page 85 Cybex 771A, 771AT Arc Trainer Part Number Error 25 - Incline movement feedback stopped Cause: Incline is commanded to move yet the feedback indicates the value is not changing or ceases to change as expected Service: • Bad or low battery, poor battery connection •...
- Page 86 Cybex 771A, 771AT Arc Trainer Part Number Flowchart: Error 25 Page 86 of 229...
- Page 87 Cybex 771A, 771AT Arc Trainer Part Number Error 26 - Incline disabled Cause: Incline feedback problems could not be remedied by re-calibrating after an Error 25. Service: • Bad or low battery, poor battery connection • Incline motor lead screw requires lubrication •...
- Page 88 Cybex 771A, 771AT Arc Trainer Part Number Flowchart: Error 26 Related Links Error 25 - Incline movement feedback stopped Page 88 of 229...
- Page 89 Cybex 771A, 771AT Arc Trainer Part Number Error 27 - Low Battery Cause: Battery voltage is reported to be below the limit of 10.7v DC and the controller has issued the low battery warning. Service: • Battery and/or battery cables need attention.
- Page 90 Cybex 771A, 771AT Arc Trainer Part Number Flowchart: Error 27 Page 90 of 229...
- Page 91 Cybex 771A, 771AT Arc Trainer Part Number Error 28: Over-Temperature Cause: The system is exceeding the maximum allowed temperature, either due to extreme use or a short in the generator windings. Over-temperature can damage the battery or cause the battery charge and LCB processor not to function properly.
- Page 92 Cybex 771A, 771AT Arc Trainer Part Number Flowchart: Error 28 Page 92 of 229...
- Page 93 Cybex 771A, 771AT Arc Trainer Part Number Error 29: Controller watchdog triggered Cause: A software task has failed to reset the Watchdog in the lower controller or a memory fault was detected there. Service: Lower Board needs servicing or replacement.
- Page 94 Cybex 771A, 771AT Arc Trainer Part Number Flowchart: Error 29 Page 94 of 229...
- Page 95 Cybex 771A, 771AT Arc Trainer Part Number Error 30: Dead Battery Cause: The voltage on the battery was measured to be below the minimum required to power the system. This can be as high as 10.7v DC (not actually FLAT). Causes include running the unit below the charge speed for too long, excessive use of the battery without sufficient re-charge, battery is incapable of holing a charge or there is a software failure.
- Page 96 Cybex 771A, 771AT Arc Trainer Part Number Flowchart: Error 30 Page 96 of 229...
- Page 97 Cybex 771A, 771AT Arc Trainer Part Number Error 35: LCB Latched On / Can’t shut down Cause: The drive is powered off of the generator yet it senses it is on battery, or some other internal LCB power management has failed.
- Page 98 Cybex 771A, 771AT Arc Trainer Part Number Error 37: Incline Out of Range Cause: Incline is commanded to move yet the feedback indicates the value is outside of the expected range. Service: • Incline motor’s potentiometer is physically rotated out of position •...
- Page 99 Cybex 771A, 771AT Arc Trainer Part Number Flowchart: Error 37 Page 99 of 229...
- Page 100 Cybex 771A, 771AT Arc Trainer Part Number Error 38: Incline Timeout Cause: Incline is commanded to move yet the feedback indicates it has not reached the target within the allotted timeframe. Service: • Incline motor’s potentiometer is physically rotated out of position •...
- Page 101 Cybex 771A, 771AT Arc Trainer Part Number Flowchart: Error 38 Page 101 of 229...
- Page 102 Cybex 771A, 771AT Arc Trainer Part Number Error 45: AC Incline Timeout UP Switch not encountered within time limits going UP. Cause: Incline is commanded to move up to the home switch, but does not encounter the switch within expected time limit.
- Page 103 Cybex 771A, 771AT Arc Trainer Part Number Flowchart: Error 45 Page 103 of 229...
- Page 104 Cybex 771A, 771AT Arc Trainer Part Number Error 46: AC Incline Timeout DOWN Switch not encountered within time limits going DOWN. Cause: Incline is commanded to move down to the home switch, but does not encounter the switch within expected time limit.
- Page 105 Cybex 771A, 771AT Arc Trainer Part Number Flowchart: Error 46 Page 105 of 229...
- Page 106 2. Delete any files on USB stick. Verify USB stick is blank. 3. Go to the LF World service product pages for the latest software files or contact Cybex Customer Service at 508-533-4300 to receive via email. Page 106 of 229...
- Page 107 Cybex 771A, 771AT Arc Trainer Part Number 4. Unzip file to a folder on PC. Zip file contains the following files: • Folder labeled “boot” • Empty text file with model name of product • Other single files Example of folder contents 5.
- Page 108 Cybex 771A, 771AT Arc Trainer Part Number 3. Insert USB stick into the internal USB port. Do NOT insert USB stick into optional E3 View Monitor. Item Description Qty. Internal USB port, MCC board 4. Turn power on. Console damage may occur.Do NOT turn the power off, press any keys, or remove the USB stick during this procedure.
- Page 109 Cybex 771A, 771AT Arc Trainer Part Number Install software through external USB port 1. Insert USB stick into the external USB port. Item Description Qty. External USB port 2. Turn power on. Console damage may occur.Do NOT turn the power off, press any keys, or remove the USB stick during this procedure.
- Page 110 Cybex 771A, 771AT Arc Trainer Part Number Item Description Qty. Console assembly Back cover Screws Complete update 1. Turn power on. • Option 1: Plug in 24 Volt power supply. • Option 2: Begin striding unit until console lights up.
- Page 111 Cybex 771A, 771AT Arc Trainer Part Number 2. Begin striding. Press and hold Cybex logo for 6 seconds to ac- CYBEX LOGO cess Screen Lock and Toolbox. Press and hold language logo for 6 seconds to LANGUAGE ICON access Screen Lock and Toolbox.
- Page 112 Cybex 771A, 771AT Arc Trainer Part Number Remove heart rate grips 1. Remove the three screws securing back grip to front grip using a Phillips screwdriver. Item Description Qty. Back grip Front grip White (or red) heart rate wire must be on inside (palm side)
- Page 113 Cybex 771A, 771AT Arc Trainer Part Number 6. Position the strain relief plug on heart rate cable 4” (10 cm) from connector. All coils must be contained within this area. 7. Install the strain relief plug into hole on handle using a strain relief plier and a rubber mallet.
- Page 114 Cybex 771A, 771AT Arc Trainer Part Number Install heart rate grips 1. Pull the black heart rate wire through the lowest back hole. Item Description Qty. Back grip Front grip White (or red) heart rate wire must be on inside (palm side)
- Page 115 Cybex 771A, 771AT Arc Trainer Part Number Remove pivot covers 1. Remove the left inner and outer collars and two screws using a Phillips screwdriver. Item Description Qty. Screw Left outer collar Left inner collar 2. Remove the left top rear cover and five screws using a Phillips screwdriver.
- Page 116 Cybex 771A, 771AT Arc Trainer Part Number 4. Remove the left inner rear cover and two screws using a Phillips screwdriver. Item Description Left inner rear cover Screws 5. Repeat steps 1 through 4 for the right side. Install pivot covers 1.
- Page 117 Cybex 771A, 771AT Arc Trainer Part Number 3. Install the left top rear cover with five screws using a Phillips screwdriver. Item Description Left top rear cover Screws 4. Loosen the two screws in the left inner and outer collars using a Phillips screwdriver.
- Page 118 Cybex 771A, 771AT Arc Trainer Part Number Remove heart rate cable Unplug heart rate cable from socket in frame. Item Description Qty. Socket in frame Heart rate cable Remove front arm handle linkage 1. Remove screw, flat washer, cap, and spacer securing arm handle linkage using a 3/16” Allen wrench.
- Page 119 Cybex 771A, 771AT Arc Trainer Part Number Remove arm handle 1. Remove screw, washer, and pivot pin securing arm handle using two 7/32” Allen wrenches. The screw and washer from only one side needs to be removed. Item Description Qty.
- Page 120 Cybex 771A, 771AT Arc Trainer Part Number Install front arm handle linkage 1. Install arm handle linkage to handle. Item Description Qty. Screw Flat washer Spacer Arm handle linkage Handle 2. Place a drop of loctite on threads of screw.
- Page 121 Cybex 771A, 771AT Arc Trainer Part Number Arm Handle Linkage Tools Required: • 3/16” Allen wrench • Loctite ® #242 • Torque wrench, with 3/16" Allen wrench Remove front arm handle linkage 1. Remove screw, flat washer, cap, and spacer securing arm handle linkage using a 3/16” Allen wrench.
- Page 122 Cybex 771A, 771AT Arc Trainer Part Number Install rear arm handle linkage 1. Install arm handle linkage to front foot plate arm. Item Description Qty. Arm handle linkage Front foot plate arm Flat washer Screw 2. Place a drop of loctite on threads of screw. Place another drop of loctite into the threads of the shaft.
- Page 123 Cybex 771A, 771AT Arc Trainer Part Number Linkage Rod Tools Required: • 3/16” Allen wrench • Loctite ® #242 • Torque wrench, with 3/16" Allen wrench Remove linkage rod Procedure shows right side. 1. Remove Socket Head Cap Screw (SHCS), flat washer, cap and spacer from both ends of linkage rod using a 3/16”...
- Page 124 Cybex 771A, 771AT Arc Trainer Part Number Complete Installation Operate the unit at all levels to verify proper operation. Foot Plate Assembly Tools Required: • 5/32” Allen wrench • Loctite ® #242 Remove foot plate assembly 1. Remove both SHCS and washers securing foot plate using a 5/32” Allen wrench.
- Page 125 Cybex 771A, 771AT Arc Trainer Part Number Complete Installation Operate the unit at all levels to verify proper operation. Foot Plate Arms Tools Required: • 3/16” Allen wrench • 5/32” Allen wrench • 7/32” Allen wrench • Phillips screwdriver • Rubber mallet •...
- Page 126 Cybex 771A, 771AT Arc Trainer Part Number Remove front arm handle linkage 1. Remove screw, flat washer, cap, and spacer securing arm handle linkage using a 3/16” Allen wrench. Item Description Qty. Screw Flat washer Spacer Arm handle linkage Handle 2.
- Page 127 Cybex 771A, 771AT Arc Trainer Part Number Remove pivot covers 1. Remove the left inner and outer collars and two screws using a Phillips screwdriver. Item Description Qty. Screw Left outer collar Left inner collar 2. Remove the left top rear cover and five screws using a Phillips screwdriver.
- Page 128 Cybex 771A, 771AT Arc Trainer Part Number 4. Remove the left inner rear cover and two screws using a Phillips screwdriver. Item Description Left inner rear cover Screws 5. Repeat steps 1 through 4 for the right side. Remove rear arm handle linkage 1.
- Page 129 Cybex 771A, 771AT Arc Trainer Part Number Remove front foot plate arm 1. Remove Button Head Socket Cap Screw (BHSCS) and washer securing front foot plate arm using a 7/32” Allen wrench. Item Description Qty. BHSCS Washer Front foot plate arm 2.
- Page 130 Cybex 771A, 771AT Arc Trainer Part Number Install rear foot plate arm 1. Position rear foot plate arm in place. Item Description Qty. BHSCS Washer Rear foot plate arm ® Loctite #242 2. Place a drop of Loctite on the BHSCS and another drop inside the shaft into where the BHSCS will be tightened.
- Page 131 Cybex 771A, 771AT Arc Trainer Part Number Install rear arm handle linkage 1. Install arm handle linkage to front foot plate arm. Item Description Qty. Arm handle linkage Front foot plate arm Flat washer Screw 2. Place a drop of loctite on threads of screw. Place another drop of loctite into the threads of the shaft.
- Page 132 Cybex 771A, 771AT Arc Trainer Part Number 2. Install the left outer rear cover with five screws using a Phillips screwdriver. Item Description Left outer rear cover Screws 3. Install the left top rear cover with five screws using a Phillips screwdriver.
- Page 133 Cybex 771A, 771AT Arc Trainer Part Number 8. Repeat steps 1 through 7 for the right side. Install foot plate assembly 1. Slide foot plate onto the foot plate shafts. Item Description Qty. SHCS Washer Foot plate Front foot plate shaft Rear foot plate shaft ®...
- Page 134 Cybex 771A, 771AT Arc Trainer Part Number Front Access Cover Tools Required: • Phillips screwdriver Remove front access cover 1. Remove screws securing front access cover using a Phillips screwdriver. Item Description Qty. Screw Front access cover 2. Remove access cover.
- Page 135 Cybex 771A, 771AT Arc Trainer Part Number Crank Covers and Shrouds Tools Required: • 3/16” Allen wrench • Phillips screwdriver • Long Phillips screwdriver • 9/16” Socket wrench • Torque wrench, with 3/16" Allen wrench • Loctite ® #242 • Clean cloth (2) Disconnect power source Unplug the power cord from the power outlet.
- Page 136 Cybex 771A, 771AT Arc Trainer Part Number Remove controller cover and incline unit 1. Remove screw securing controller cover using a Phillips screwdriver. Item Description Qty. Cable tie Incline motor cable Controller cover Control board Screw 2. Remove controller cover.
- Page 137 Cybex 771A, 771AT Arc Trainer Part Number Remove crank covers 1. Remove both screws securing crank cover using a Phillips screwdriver. Item Description Qty. Screw Crank cover Crank arm Flush mount Crank shaft 2. Remove crank cover. 3. Repeat steps for other crank cover.
- Page 138 Cybex 771A, 771AT Arc Trainer Part Number Install shrouds 1. Place both shrouds in position. Item Description Qty. Screw Left shroud 2. Install screws securing each side cover using a long Phillips screwdriver. Install crank covers 1. Inspect crank arm mounting. Crank arm should be flush with crank shaft. Adjust with 9/16” socket wrench if needed.
- Page 139 Cybex 771A, 771AT Arc Trainer Part Number Install linkage rods 1. Install linkage rod on crank arm. Item Description Qty. Screw, SHCS .250-20 x Flat washer Spacer Linkage rod ® ® 2. Place a drop of Loctite #242 on SHCS and place another drop of Loctite #242 into the threads of the shaft.
- Page 140 Cybex 771A, 771AT Arc Trainer Part Number Install front access cover Do not over tighten screws. 1. Place front access cover in place. Item Description Qty. Screw Front access cover 2. Install screws using a Phillips screwdriver. Complete Installation Operate the unit at all levels to verify proper operation.
- Page 141 Cybex 771A, 771AT Arc Trainer Part Number Remove front access cover 1. Remove screws securing front access cover using a Phillips screwdriver. Item Description Qty. Screw Front access cover 2. Remove access cover. Burn hazard. Do not touch flywheel until cool.
- Page 142 Cybex 771A, 771AT Arc Trainer Part Number 3. Plug all cables into control board. Item Description Qty. Cable tie Battery cable Incline motor cable Controller cover Control Board Screw Install front access cover Do not over tighten screws. 1. Place front access cover in place.
- Page 143 Cybex 771A, 771AT Arc Trainer Part Number Remove front access cover 1. Remove screws securing front access cover using a Phillips screwdriver. Item Description Qty. Screw Front access cover 2. Remove access cover. Burn hazard. Do not touch flywheel until cool.
- Page 144 Cybex 771A, 771AT Arc Trainer Part Number Remove battery 1. Remove screw securing battery bracket using a Phillips screwdriver. Item Description Battery Screw Battery bracket Red (+) and Black (-) bat- tery terminals 2. Remove red (+) and black (-) female terminals from battery. Pull at terminal and not wire.
- Page 145 Cybex 771A, 771AT Arc Trainer Part Number 2. Install the screws securing the control board assembly in place using a Phillips screwdriver. 3. Plug all cables into control board. Item Description Qty. Cable tie Battery cable Incline motor cable Controller cover...
- Page 146 Cybex 771A, 771AT Arc Trainer Part Number • Clean cloth (2) Remove linkage rods 1. Remove socket head cap screw (SHCS), flat washer, cap and spacer securing linkage rod using a 3/16” Allen wrench. Item Description Qty. Screw, SHCS .250-20 x...
- Page 147 Cybex 771A, 771AT Arc Trainer Part Number Remove crank arms 1. Loosen but do not remove HHCS on each crank arm using a 9/16” socket wrench. Item Description Qty. Crank arm shaft Crank arm Washer HHCS 2. Remove crank arms from crank arm shaft.
- Page 148 Cybex 771A, 771AT Arc Trainer Part Number Install crank covers 1. Inspect crank arm mounting. Crank arm should be flush with crank shaft. Adjust with 9/16” socket wrench if needed. NOTE: Crank shaft bolt must be tightened to 30 lbs-ft.
- Page 149 Cybex 771A, 771AT Arc Trainer Part Number Crank Shaft Assembly Tools Required: • 3/16” Allen wrench • 7/32” Allen wrench • Phillips screwdriver • Long Phillips screwdriver • 9/16” Open end wrench • 7/16” Socket wrench • 1/2” Socket wrench •...
- Page 150 Cybex 771A, 771AT Arc Trainer Part Number Remove controller cover and incline unit 1. Remove screw securing controller cover using a Phillips screwdriver. Item Description Qty. Cable tie Incline motor cable Controller cover Control board Screw 2. Remove controller cover.
- Page 151 Cybex 771A, 771AT Arc Trainer Part Number Remove crank covers 1. Remove both screws securing crank cover using a Phillips screwdriver. Item Description Qty. Screw Crank cover Crank arm Flush mount Crank shaft 2. Remove crank cover. 3. Repeat steps for other crank cover.
- Page 152 Cybex 771A, 771AT Arc Trainer Part Number Remove shrouds 1. Remove seven screws securing left shroud in place using a long Phillips screwdriver. Item Description Qty. Screw Left shroud 2. Remove three screws securing right shroud in place using a long Phillips screwdriver.
- Page 153 Cybex 771A, 771AT Arc Trainer Part Number Remove crank shaft assembly 1. Remove the four bolts, eight flat washers and four nuts securing crank shaft assembly to frame using a 9/16” socket wrench and a 9/16” open end wrench. Item Description Qty.
- Page 154 Cybex 771A, 771AT Arc Trainer Part Number Install counter weights 1. Apply Loctite to threads of FHSCS and inside the counter weight hole (where the FHSCS will be tightened into). Item Description Qty. FHSCS Counter weight ® Loctite #242 Pulley and crank shaft assem-...
- Page 155 Cybex 771A, 771AT Arc Trainer Part Number Tension drive belt Tighten one HHCS a few turns then tighten the other HHCS a few turns using a 7/16” or 1/2” socket wrench. Alternate until both HHCS are secure. NOTE: Verify that both pulleys are aligned properly using a straight edge. The straight edge must be no more than 1/16”...
- Page 156 Cybex 771A, 771AT Arc Trainer Part Number Install crank arms 1. Slide each crank arm in place. Item Description Qty. Crank arm shaft Crank arm Washer HHCS The face of each crank arm should be flush with the end of each shaft.
- Page 157 Cybex 771A, 771AT Arc Trainer Part Number Install linkage rods 1. Install linkage rod on crank arm. Item Description Qty. Screw, SHCS .250-20 x Flat washer Spacer Linkage rod ® ® 2. Place a drop of Loctite #242 on SHCS and place another drop of Loctite #242 into the threads of the shaft.
- Page 158 Cybex 771A, 771AT Arc Trainer Part Number Install front access cover Do not over tighten screws. 1. Place front access cover in place. Item Description Qty. Screw Front access cover 2. Install screws using a Phillips screwdriver. Complete Installation Operate the unit at all levels to verify proper operation.
- Page 159 Cybex 771A, 771AT Arc Trainer Part Number Remove front access cover 1. Remove screws securing front access cover using a Phillips screwdriver. Item Description Qty. Screw Front access cover 2. Remove access cover. Burn hazard. Do not touch flywheel until cool.
- Page 160 Cybex 771A, 771AT Arc Trainer Part Number Remove linkage rods 1. Remove socket head cap screw (SHCS), flat washer, cap and spacer securing linkage rod using a 3/16” Allen wrench. Item Description Qty. Screw, SHCS .250-20 x Flat washer Spacer Linkage rod 2.
- Page 161 Cybex 771A, 771AT Arc Trainer Part Number Remove shrouds 1. Remove seven screws securing left shroud in place using a long Phillips screwdriver. Item Description Qty. Screw Left shroud 2. Remove three screws securing right shroud in place using a long Phillips screwdriver.
- Page 162 Cybex 771A, 771AT Arc Trainer Part Number 2. Tighten one HHCS a few turns then tighten the other HHCS a few turns using a 1/2” socket wrench. Alternate until both HHCS are secure. Verify that both pulleys are aligned properly using a straight edge.
- Page 163 Cybex 771A, 771AT Arc Trainer Part Number Install crank covers 1. Inspect crank arm mounting. Crank arm should be flush with crank shaft. Adjust with 9/16” socket wrench if needed. NOTE: Crank shaft bolt must be tightened to 30 lbs-ft.
- Page 164 Cybex 771A, 771AT Arc Trainer Part Number Install controller cover 1. Plug incline motor cable into control board. Item Description Qty. Cable tie Incline motor cable Controller cover Control board Screw 2. Place the controller cover into position. 3. Install screw securing the cover in place using a Phillips screwdriver.
- Page 165 Cybex 771A, 771AT Arc Trainer Part Number Tools Required: • Phillips screwdriver • Side cutter • Double sided tape • Cable tie, 8" (2) • Cable tie, 15" Disconnect power source Unplug the power cord from the power outlet. Shock and electrocution hazard.
- Page 166 Cybex 771A, 771AT Arc Trainer Part Number Remove controller cover 1. Remove screw securing controller cover using a Phillips screwdriver. Item Description Qty. Screw Controller cover Control board 2. Remove controller cover. Remove power supply 1. Remove 8” cable tie securing power supply cable to drive frame assembly using side cutters.
- Page 167 Cybex 771A, 771AT Arc Trainer Part Number 3. Remove 8” and 15” cable ties securing power supply to the drive frame using side cutters. Item Description Qty. Power supply Power cord 8” Cable tie 15” Cable tie Power supply cable Hole in drive frame assem- 4.
- Page 168 Cybex 771A, 771AT Arc Trainer Part Number 3. Secure power supply to the drive frame with 15” cable tie and power cord with two 8” cable ties. Remove excess cable tie with side cutters. Item Description Qty. Power supply Power cord 8”...
- Page 169 Cybex 771A, 771AT Arc Trainer Part Number Install controller cover 1. Place the controller cover into position. Item Description Qty. Screw Controller cover Control Board 2. Install screw securing the cover in place using a Phillips screwdriver. Install front access cover Do not over tighten screws.
- Page 170 Cybex 771A, 771AT Arc Trainer Part Number • 3/16” Allen wrench • Torque wrench, with 3/16" Allen wrench • Loctite ® #242 • Clean cloth (2) Disconnect power source Unplug the power cord from the power outlet. Shock and electrocution hazard.
- Page 171 Cybex 771A, 771AT Arc Trainer Part Number Remove lower motor mount shaft 1. Remove retaining ring from motor mount shaft using retaining ring pliers. Item Description Qty. Motor mount shaft Retaining ring Incline motor 2. Remove motor mount shaft securing incline motor to main frame.
- Page 172 Cybex 771A, 771AT Arc Trainer Part Number Remove front access cover 1. Remove screws securing front access cover using a Phillips screwdriver. Item Description Qty. Screw Front access cover 2. Remove access cover. Burn hazard. Do not touch flywheel until cool.
- Page 173 Cybex 771A, 771AT Arc Trainer Part Number Remove left shroud 1. Remove eight screws securing left shroud using a long Phillips screwdriver. Item Description Qty. Screw Left shroud 2. Remove left shroud. Remove incline motor cable 1. Remove controller cover using a Phillips screwdriver.
- Page 174 Cybex 771A, 771AT Arc Trainer Part Number Remove incline motor 1. Remove retaining ring from motor mount shaft using retaining ring pliers. Item Description Qty. Retaining ring Motor mount shaft Incline motor 2. Remove motor mount shaft securing incline motor to main frame.
- Page 175 Cybex 771A, 771AT Arc Trainer Part Number 7. Turn the tube nut with your fingers until it measures the correct center to center length. This length is measured from the center of the top hole to the center of the bottom hole.
- Page 176 Cybex 771A, 771AT Arc Trainer Part Number Item Description Qty. Screw Left shroud Install lower motor mount shaft 1. Tilt front end assembly backward carefully until holes in incline motor align with the holes in the support bracket on main frame.
- Page 177 Calibrate Incline motor 770A 1. Hold the handrails to steady self while stepping into the foot plates. 2. Begin striding. Press and hold Cybex logo for 6 seconds to ac- CYBEX LOGO cess Screen Lock and Toolbox. Press and hold language logo for 6 seconds to LANGUAGE ICON access Screen Lock and Toolbox.
- Page 178 Cybex 771A, 771AT Arc Trainer Part Number Enter the sequence: 5. At the main Toolbox screen, tap the OEM Diags icon, then the Incline Calibration icon. 6. Stop striding. Wait until foot plates come to a complete stop before dismounting unit. Hold handrails to steady self while stepping off unit.
- Page 179 Cybex 771A, 771AT Arc Trainer Part Number Remove Accessory Tray Bottom 1. Remove the three screws securing the accessory tray bottom to the accessory tray base using a Phillips screwdriver. Item Description Qty. Accessory Tray Bottom Accessory Tray Top Screw, Pan Head Phillips, 6 x .50"...
- Page 180 Cybex 771A, 771AT Arc Trainer Part Number Item Description Accessory tray base Frame Screws Install Accessory Tray Base Install the four screws securing accessory tray base to frame using a Phillips screwdriver. Item Description Accessory tray base Frame Screws Install Accessory Tray Top Install screws securing accessory tray top to accessory tray base using a stubby Phillips screwdriver.
- Page 181 Cybex 771A, 771AT Arc Trainer Part Number Install accessory tray bottom Install the accessory tray bottom to the accessory tray base with three screws using a Phillips screwdriver. Item Description Qty. Accessory Tray Bottom Accessory Tray Top Screw, Pan Head Phillips, 6 x .50"...
- Page 182 Cybex 771A, 771AT Arc Trainer Part Number Item Description Qty. Console assembly Back cover Screws Remove console assembly Remove the six screws securing the console assembly to the console support using a Phillips screwdriver. Item Description Qty. Console assembly Console support...
- Page 183 Cybex 771A, 771AT Arc Trainer Part Number Disconnect console cables 1. Disconnect console cables from MCC board. MCC board cables Item Description Qty. MYE/BV, Gray CSAFE, Red Console cable Upper display Headphone jack iPod (optional) Heart rate Handset membrane iPod board assembly (option- 2.
- Page 184 Cybex 771A, 771AT Arc Trainer Part Number 3. Unplug optional iPod cable. The iPod cable is held in place by a notch in the access cover. a) Press in both side latches of cable connector. b) Ensure latches disengage from the connector.
- Page 185 Cybex 771A, 771AT Arc Trainer Part Number 3. Remove the four screws securing the PCA display board to the bezel using a Phillips screwdriver. Item Description Qty. Bezel PCA display board Screw Install display board 1. Install the four screws securing the PCA display board to the bezel using a Phillips screwdriver.
- Page 186 Cybex 771A, 771AT Arc Trainer Part Number Connect console cables 1. Install console cables to MCC board. MCC board cables Item Description Qty. MYE/BV, Gray CSAFE, Red Console cable Upper display Headphone jack iPod (optional) Heart rate Handset membrane iPod board assembly (option- 2.
- Page 187 Cybex 771A, 771AT Arc Trainer Part Number Item Description Qty. Console assembly Back cover Screws Update software Update software using the following procedure. Complete installation 1. Plug the optional power cord into the power outlet. 2. Operate the unit at all levels to verify proper operation.
- Page 188 Cybex 771A, 771AT Arc Trainer Part Number Item Description Qty. Console assembly Back cover Screws Remove console assembly Remove the six screws securing the console assembly to the console support using a Phillips screwdriver. Item Description Qty. Console assembly Console support...
- Page 189 Cybex 771A, 771AT Arc Trainer Part Number Disconnect console cables 1. Disconnect console cables from MCC board. MCC board cables Item Description Qty. MYE/BV, Gray CSAFE, Red Console cable Upper display Headphone jack iPod (optional) Heart rate Handset membrane iPod board assembly (option- 2.
- Page 190 Cybex 771A, 771AT Arc Trainer Part Number 3. Unplug optional iPod cable. The iPod cable is held in place by a notch in the access cover. a) Press in both side latches of cable connector. b) Ensure latches disengage from the connector.
- Page 191 Cybex 771A, 771AT Arc Trainer Part Number Item Description Qty. Console assembly MCC board Screw Connect console cables 1. Install console cables to MCC board. MCC board cables Item Description Qty. MYE/BV, Gray CSAFE, Red Console cable Upper display Headphone jack...
- Page 192 Cybex 771A, 771AT Arc Trainer Part Number Item Description Qty. Console assembly Console support Screws Install back cover Install the four screws securing the back cover to the console assembly using a Phillips screwdriver. Item Description Qty. Console assembly Back cover...
- Page 193 Cybex 771A, 771AT Arc Trainer Part Number Disconnect Power Source Unplug the power cord from the power outlet. Shock and electrocution hazard. • Unplug unit and let sit 10 minutes before cleaning or performing maintenance. • Electrical charge can remain in unit after unplugging.
- Page 194 Cybex 771A, 771AT Arc Trainer Part Number Item Description Qty. Console assembly Console support Screws Disconnect console cables 1. Disconnect console cables from MCC board. MCC board cables Item Description Qty. MYE/BV, Gray CSAFE, Red Console cable Upper display Headphone jack...
- Page 195 Cybex 771A, 771AT Arc Trainer Part Number 2. Unplug cables from MCC board by un-latching connectors with the following procedure: a) Press in the top of the cable connector. Item Description Qty. DO NOT PULL CONNEC- TOR OUT BY THE WIRES!
- Page 196 Cybex 771A, 771AT Arc Trainer Part Number Remove CardioTouch screen 1. Remove the seven screws and clip from the bezel using a Phillips screwdriver. Item Description Qty. Bezel CardioTouch screen Clip Screw 2. Remove the CardioTouch screen and clean the area of the bezel with a clean cloth and rubbing alcohol.
- Page 197 Cybex 771A, 771AT Arc Trainer Part Number Install CardioTouch screen 1. Place the new CardioTouch screen in place in the bezel. Item Description Qty. Bezel CardioTouch screen Clip Screw 2. Install seven screws and clip, tighten by hand. 3. Tighten the seven screws in the order shown to 4 in-lbs (0.45 Nm) using a torque screwdriver.
- Page 198 Cybex 771A, 771AT Arc Trainer Part Number Connect console cables 1. Install console cables to MCC board. MCC board cables Item Description Qty. MYE/BV, Gray CSAFE, Red Console cable Upper display Headphone jack iPod (optional) Heart rate Handset membrane iPod board assembly (option- 2.
- Page 199 Cybex 771A, 771AT Arc Trainer Part Number Item Description Qty. Console assembly Back cover Screws Calibrate CardioTouch screen 1. Tap the Access Toolbox icon to display the Access to Toolbox login screen. Enter the sequence: 3. Tap the OEM Diags icon, then the Touch Test icon.
- Page 200 Cybex 771A, 771AT Arc Trainer Part Number Shock and electrocution hazard. • Unplug unit and let sit 10 minutes before cleaning or performing maintenance. • Electrical charge can remain in unit after unplugging. • Keep water and liquids away from electrical parts.
- Page 201 Cybex 771A, 771AT Arc Trainer Part Number Disconnect console cables 1. Disconnect console cables from MCC board. MCC board cables Item Description Qty. MYE/BV, Gray CSAFE, Red Console cable Upper display Headphone jack iPod (optional) Heart rate Handset membrane iPod board assembly (option- 2.
- Page 202 Cybex 771A, 771AT Arc Trainer Part Number 3. Unplug optional iPod cable. The iPod cable is held in place by a notch in the access cover. a) Press in both side latches of cable connector. b) Ensure latches disengage from the connector.
- Page 203 Cybex 771A, 771AT Arc Trainer Part Number 3. Remove the four screws securing the PCA display board to the bezel using a Phillips screwdriver. Item Description Qty. Bezel PCA display board Screw Remove CardioTouch screen 1. Remove the seven screws and clip from the bezel using a Phillips screwdriver.
- Page 204 Cybex 771A, 771AT Arc Trainer Part Number Remove book tabs Remove the two screws securing the book tabs to the bezel using a Phillips screwdriver. Item Description Qty. Book Tabs Bezel Screw Install book tabs Install the two screws securing the book tabs to the new bezel using a Phillips screwdriver.
- Page 205 Cybex 771A, 771AT Arc Trainer Part Number Install CardioTouch screen 1. Place the new CardioTouch screen in place in the bezel. Item Description Qty. Bezel CardioTouch screen Clip Screw 2. Install seven screws and clip, tighten by hand. 3. Tighten the seven screws in the order shown to 4 in-lbs (0.45 Nm) using a torque screwdriver.
- Page 206 Cybex 771A, 771AT Arc Trainer Part Number Install display board 1. Install the four screws securing the PCA display board to the bezel using a Phillips screwdriver. Item Description Qty. Bezel PCA display board Screw 2. Install the six screws securing the mounting plate to the console assembly using a Phillips screwdriver.
- Page 207 Cybex 771A, 771AT Arc Trainer Part Number Connect console cables 1. Install console cables to MCC board. MCC board cables Item Description Qty. MYE/BV, Gray CSAFE, Red Console cable Upper display Headphone jack iPod (optional) Heart rate Handset membrane iPod board assembly (option- 2.
- Page 208 Cybex 771A, 771AT Arc Trainer Part Number Item Description Qty. Console assembly Back cover Screws Complete installation 1. Plug the optional power cord into the power outlet. 2. Operate the unit at all levels to verify proper operation. E3 View Bezel Tools Required: •...
- Page 209 Cybex 771A, 771AT Arc Trainer Part Number Item Description Qty. Console assembly Back cover Screws Remove console assembly Remove the six screws securing the console assembly to the console support using a Phillips screwdriver. Item Description Qty. Console assembly Console support...
- Page 210 Cybex 771A, 771AT Arc Trainer Part Number Disconnect console cables 1. Disconnect console cables from MCC board. MCC board cables Item Description Qty. MYE/BV, Gray CSAFE, Red Console cable Upper display Headphone jack iPod (optional) Heart rate Handset membrane iPod board assembly (option- 2.
- Page 211 Cybex 771A, 771AT Arc Trainer Part Number 3. Unplug optional iPod cable. The iPod cable is held in place by a notch in the access cover. a) Press in both side latches of cable connector. b) Ensure latches disengage from the connector.
- Page 212 Cybex 771A, 771AT Arc Trainer Part Number Remove CardioTouch screen 1. Remove the seven screws and clip from the bezel using a Phillips screwdriver. Item Description Qty. Bezel CardioTouch screen Clip Screw 2. Remove the CardioTouch screen and clean the area of the bezel with a clean cloth and rubbing alcohol.
- Page 213 Cybex 771A, 771AT Arc Trainer Part Number Item Description Qty. Book Tabs Bezel Screw Install book tabs Install the two screws securing the book tabs to the new bezel using a Phillips screwdriver. Item Description Qty. Book Tabs Bezel Screw Install CardioTouch screen 1.
- Page 214 Cybex 771A, 771AT Arc Trainer Part Number 3. Tighten the seven screws in the order shown to 4 in-lbs (0.45 Nm) using a torque screwdriver. 4. Connect the ground cable connector to the tab on fan mounting plate or optional E3 View Monitor if installed.
- Page 215 Cybex 771A, 771AT Arc Trainer Part Number Connect console cables 1. Install console cables to MCC board. MCC board cables Item Description Qty. MYE/BV, Gray CSAFE, Red Console cable Upper display Headphone jack iPod (optional) Heart rate Handset membrane iPod board assembly (option- 2.
- Page 216 Cybex 771A, 771AT Arc Trainer Part Number Item Description Qty. Console assembly Back cover Screws Complete installation 1. Plug the optional power cord into the power outlet. 2. Operate the unit at all levels to verify proper operation. E3 View Monitor and Bezel Tools Required: •...
- Page 217 Cybex 771A, 771AT Arc Trainer Part Number Item Description Qty. Console assembly Back cover Screws Remove console assembly Remove the six screws securing the console assembly to the console support using a Phillips screwdriver. Item Description Qty. Console assembly Console support...
- Page 218 Cybex 771A, 771AT Arc Trainer Part Number Disconnect console cables 1. Disconnect console cables from MCC board. MCC board cables Item Description Qty. MYE/BV, Gray CSAFE, Red Console cable Upper display Headphone jack iPod (optional) Heart rate Handset membrane iPod board assembly (option- 2.
- Page 219 Cybex 771A, 771AT Arc Trainer Part Number 3. Unplug optional iPod cable. The iPod cable is held in place by a notch in the access cover. a) Press in both side latches of cable connector. b) Ensure latches disengage from the connector.
- Page 220 Cybex 771A, 771AT Arc Trainer Part Number Remove components from bezel 1. Remove the five screws securing the MCC board and cable clamp to the monitor using a Phillips screwdriver. Item Description Qty. Bezel MCC board Monitor Book tab Thumb control cable...
- Page 221 Cybex 771A, 771AT Arc Trainer Part Number Install components on bezel 1. Install the two screws securing the book tabs to the new bezel using a Phillips screwdriver. Item Description Qty. Bezel MCC board Monitor Book tab Thumb control cable...
- Page 222 Cybex 771A, 771AT Arc Trainer Part Number Install fan 1. Install screws securing fan and louver to console assembly using a Phillips screwdriver. Item Description Qty. Console assembly Louver Screw CardioTouch cable 2. Plug fan cable into MCC board. Connect console cables 1.
- Page 223 Cybex 771A, 771AT Arc Trainer Part Number Item Description Qty. Console assembly Console support Screws Install back cover Install the four screws securing the back cover to the console assembly using a Phillips screwdriver. Item Description Qty. Console assembly Back cover...
- Page 224 Cybex 771A, 771AT Arc Trainer Part Number Item Description Qty. MYE Universal Receiver Module 900/800 MHz, AD-26036 Cable, RJ45, AW-19404 Disconnect Power Source Unplug the power cord from the power outlet. Shock and electrocution hazard. • Unplug unit and let sit 10 minutes before cleaning or performing maintenance.
- Page 225 Cybex 771A, 771AT Arc Trainer Part Number Item Description Qty. Console assembly Back cover Screws Install wireless audio receiver module 1. Remove adhesive backing from wireless audio receiver module. IMPORTANT: The wireless audio receiver module must be installed as shown. Otherwise console support can block signals.
- Page 226 Cybex 771A, 771AT Arc Trainer Part Number 3. Plug RJ45 cable into wireless audio receiver module. Item Description Qty. RJ45 cable Wireless audio receiver module Audio, gray (J14) MCC board 4. Route RJ45 cable as shown and plug into gray audio connector (J14) on MCC board.
- Page 227 Cybex 771A, 771AT Arc Trainer Part Number Schematics Schematic 771A/771AT LED Display Page 227 of 229...
- Page 228 Cybex 771A, 771AT Arc Trainer Part Number Schematic 771A/771AT E3 View Monitor Page 228 of 229...
- Page 229 Columbia Center III - 9525 West Bryn Mawr Ave, Rosemont, IL 60018 • 800-351-3737 • 847-288-3700 • FAX 800-216-8893 www.cybexintl.com...
Need help?
Do you have a question about the Arc Trainer 771AT and is the answer not in the manual?
Questions and answers