American Megatrends MegaRAC G2 User Manual
American megatrends megarac g2 battery backup unit: user guide
Hide thumbs
Also See for MegaRAC G2:
- Datasheet (2 pages) ,
- Install manual (2 pages) ,
- Features (4 pages)
Table of Contents
Advertisement
Quick Links
Advertisement
Table of Contents

Related Manuals for American Megatrends MegaRAC G2


Summary of Contents for American Megatrends MegaRAC G2
- Page 1 MegaRAC™ G2 User’s Guide MAN-827 03/03/03...
- Page 2 IBM, AT, VGA, PS/2, and OS/2 are registered trademarks and XT and CGA are trademarks of the International Business Machines Corporation. Other trademarks and trade names may be used in this document to refer to either the entities claiming the marks and names or their products. American Megatrends, Inc.
-
Page 3: Table Of Contents
Other Laws in Other Areas....................... 8 Step 3 Install the Optional Modem Daughterboard ..............9 Step 4 Plug in the MegaRAC G2 Card into the Host System and Attach Internal Cables ..9 Step 5 Connect External Cables....................10 Step 6 Confirm the Motherboard’s BIOS Settings ..............10 Step 7 Install the Operating System and MegaRAC G2 Drivers .......... - Page 4 Console Redirection Toolbar Status ..................70 Console Redirection Toolbar Toggle Buttons ................ 71 Setting up Virtual Floppy on Windows 2000/XP (OEM VERSION ONLY)......72 Start Floppy Drive Redirection (OEM VERSION ONLY) ............75 Stop Floppy Drive Redirection (OEM VERSION ONLY)............77 Start CD-ROM Drive Redirection ...................
- Page 5 Appendix C G2 Mouse Booster................... 125 G2 Mouse Booster ........................125 Appendix D MegaRAC G2 Flash Utility ................127 MegaRAC G2 Card Flash Utility ....................127 Appendix E Troubleshooting : Screen Distortion............. 133 Problem............................ 133 Solution ............................ 134 Appendix F Serial Over LAN ....................
- Page 6 Continued Appendix I MAC Address Map................... 151 Notes............................152 Appendix J Host System USB Mouse and Keyboard Considerations for Linux 7.x..153 Overview ..........................153 File Description ........................153 Check Your AMIBIOS Settings ....................153 USB Keyboard ......................... 153 USB Mouse ..........................154 If linking to XFree86…......................
-
Page 7: Limited Warranty
Limited Warranty The buyer agrees that if this product proves to be defective, American Megatrends is only obligated to repair or replace this product at American Megatrends’ discretion according to the terms and conditions of the warranty registration card that accompanies this product. -
Page 8: Packing List
(even if American Megatrends has been advised of the possibility of such damages). - Page 9 Communications. English translation of the notice above: “This digital apparatus does not exceed the Class A limits for radio noise emissions from digital apparatus set out in the interference-causing equipment standard entitled “Digital Apparatus,” ICES-003 of the Canadian Department of Communications.”...
- Page 10 MegaRAC G2 User’s Guide...
-
Page 11: Chapter 1 Introduction
Power Supply switching logic between optional 6 V wall adapter, 5 V PCI and optional on-board battery Battery Backup (Optional) provides 30 minutes of battery backup in case of host system or optional wall adapter power failure Form Factor •... - Page 12 • Console Redirection via 10/100 megabit Ethernet LAN • up to 15 screens per second high speed redirection hardware engine • no overhead on the host system, complete operating system independence • redirect BIOS screens and setup screens •...
-
Page 13: Chapter 2 Installing Your Megarac G2 Card
Electro-Static Discharge (ESD) can damage the MegaRAC G2 card and other system components. Keep your MegaRAC G2 card in its anti-static bag until it is to be installed. Avoid contact with any component or connector on any adapter card, printed circuit board, or memory module. -
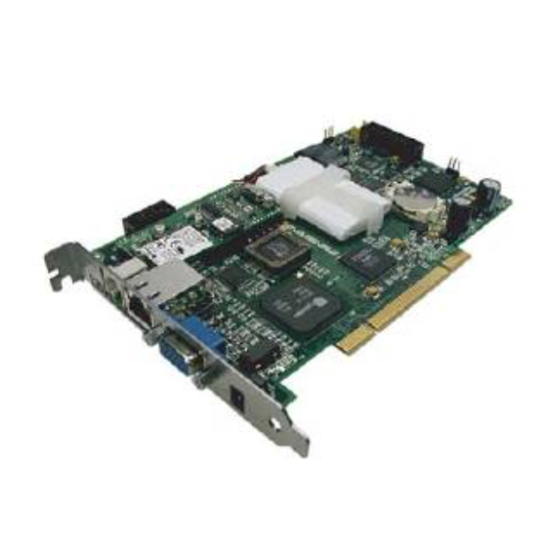
Page 14: Step 1 Unpack The Megarac G2 Card (And Check Jumper Settings)
MegaRAC G2 card from another when you run programs such as WinFlash and G2Seek. You can write down your MegaRAC G2 card’s MAC address in the table below or in Appendix I, MAC Address Map. See the first line for an example. MAC Address... -
Page 15: J5 Megarac G2 Feature Connector
Not Connected Ground JP2 Flash Write Enable/Disable You can write-protect your MegaRAC G2 card’s firmware so that it cannot be flashed. By default, pins one and two are shorted so that you can flash the firmware. Description VCC3 Write-Protect Enabled... -
Page 16: Jp6 Diagnostic And Recovery Mode Jumper
Continued JP6 Diagnostic and Recovery Mode Jumper This jumper is primarily used to recover a failed flash attempt. By shorting pins one and two, you can place your MegaRAC G2 card into Diagnostics Mode. By shorting pins two and three, you can place your MegaRAC G2 card into Recovery Mode. See Appendix D, WinFlash.exe for more information on how to recover your MegaRAC G2 card. -
Page 17: Charging The Battery Pack
Disconnect the battery pack cable from the J1 jumper on the MegaRAC G2 card. Remove the plastic battery clip and then replace the Battery Backup Unit. Install a new battery pack and connect the new battery pack to the J1 jumper. Align and snap the plastic battery clip into the three mounting holes over the battery pack. -
Page 18: Disposing Of A Battery Pack
Disposing of a Battery Pack WARNING! Do not dispose of the MegaRAC G2 optional battery pack by fire. Do not mutilate the battery pack. Do not damage it in any way. Toxic chemicals can be released if it is damaged. Do not short-circuit the battery pack. -
Page 19: Step 3 Install The Optional Modem Daughterboard
The MegaRAC G2 modem daughterboard is an optional component. Locate JP4 on the MegaRAC G2 card. It has a series of pinholes that allow you to insert the modem daughterboard. Match the modem daughterboard and the pin holes so that the pins align properly. -
Page 20: Step 5 Connect External Cables
Install the operating system (if applicable) on the host system. (Not required in Windows 2000/XP) If prompted for the display adapter drivers, install the MegaRAC G2 management board display adapter drivers located on the driver CD in the VGA Drivers folder. -
Page 21: Step 8 Install The American Megatrends Megarac G2 Windows Host Components
MegaRAC G2 Windows Host Components: Step Description Insert your MegaRAC G2 CD into the host system. The host system is the system that has the MegaRAC G2 card installed into it. Browse to the following folder and file: CDROM\HostSide\Win32\Setup.exe Double left click the Setup.exe icon to begin the installation of the American Megatrends MegaRAC G2 Windows Host Component. - Page 22 The Customer Information window opens. Enter your name and your organization’s name in the appropriate fields. Select the option for Install this application for and left click the Next button. The Setup Type window opens. Select the Complete setup option. Left click the Next button.
- Page 23 Step 8 Install the American Megatrends MegaRAC G2 Windows Host Components, Continued Step Description The Install Program window opens. Left click the Install button. The Installation Progress window opens. Cont’d Chapter Two : Installing Your MegaRAC G2 Card...
- Page 24 Step 8 Install the American Megatrends MegaRAC G2 Windows Host Components, Continued Step Description The installation is complete. Left click the Finish button. MegaRAC G2 User’s Guide...
-
Page 25: Step 9 Setup Your Client Internet Browser
Crash screen. Follow the instructions in the table below: Step Description Open Internet Options. To get there, open your Internet Explorer browser, left click Tools and then Internet Options. The Internet Options window opens. Left click the Settings button. Cont’d... - Page 26 Other settings can cause old data to be displayed when performing operations on the MegaRAC Next, you must setup Internet Explorer to allow the downloading of Signed ActiveX controls and also allow it to run Signed ActiveX controls. To do this, left click the Security tab and then the Custom Level button.
- Page 27 Description The Security Settings window opens. Left click the Enable button under the Download signed ActiveX controls section. Scroll down and left click the Enable button under the Run ActiveX controls and plug-ins section. Left click the OK button. Cont’d...
- Page 28 Step Description You are prompted with a Warning window. Left click the Yes button to accept the changes to the Internet zone and to go back to the Internet Options window. Left click the Apply button and then the OK button to make the changes.
-
Page 29: Step 10 Connect To The Megarac G2 From A Client System
To do this, you must know the MegaRAC G2 card’s IP address. If you have installed the MegaRAC G2 on a network that uses DHCP, you can search the network for the MegaRAC G2 card. To locate and find out its IP address, you must install and run G2Seek. - Page 30 192.168.0.0 to 192.168.1.0. Left click the Add>> button when finished. The name and IP range of the MegaRAC G2 will display in the right field. Place a check in the box next to the range of IP addresses. Left click on the Next button.
- Page 31 The name and IP range of the MegaRAC G2 will display in the Selected IP Range window. Left click on the Next button. If the IP range is correct, G2Seek will locate the MegaRAC G2 card. It will list all MegaRAC G2 cards it has discovered.
- Page 32 In this example, the MegaRAC G2 card’s IP address is 192.168.0.14. Double left click on the IP address to start managing the MegaRAC G2 card and write down its IP address. Left click on the Finish button after G2Seek discovers all MegaRAC G2 cards.
-
Page 33: Step 11 Load The Megarac G2 Sdk File For Your Server Board Model (Oem Version Only)
Step Description The quick navigation bar on the left side of the GUI has a series of section buttons. Left click on the Information button and then left click the Host Health icon. Left click the Upload SDK File button. - Page 34 VERSION ONLY), Continued Step Description Insert the MegaRAC G2 CD and browse to it. Select the SDKPorts directory. Select your motherboard manufacturer. In this example, we are using an American Megatrends motherboard, so we will select the American Megatrends folder. Note: The Choose File browse window differs from operating system to operating system.
- Page 35 The SDK file may be corrupt. Try to upload the SDK file again. • The SDK file you uploaded may be for a different motherboard. Make sure you are uploaded the correct SDK file. Chapter Two : Installing Your MegaRAC G2 Card...
- Page 36 MegaRAC G2 User’s Guide...
-
Page 37: Chapter 3 Locating Your Megarac G2 Card
MegaRAC G2 from another system on the same network. This document refers to this other system as a client system. To do this, you must know the MegaRAC G2 card’s IP address. If you have installed the MegaRAC G2 on a network that uses DHCP, you can search the network for the MegaRAC G2 card. - Page 38 192.168.0.0 to 192.168.1.0. Left click the Add>> button when finished. The name and IP range of the MegaRAC G2 will display in the right field. Place a check in the box next to the range of IP addresses. Left click on the Next button.
- Page 39 The name and IP range of the MegaRAC G2 will display in the Selected IP Range window. Left click on the Next button. If the IP range is correct, G2Seek will locate the MegaRAC G2 card. It will list all MegaRAC G2 cards it has discovered.
-
Page 40: Ip Address Range
In this example, the MegaRAC G2 card’s IP address is 192.168.0.14. We can double left click on the IP to begin managing the card or we can write down the IP and access it from an Internet browser. Left click on the Finish button after G2Seek discovers all MegaRAC G2 cards. - Page 41 Continued Note: The Start and End IP addresses can be the same if you only wish to scan for one MegaRAC G2 card with that specific IP address. When you have finished entering all the IP address ranges to be scanned, make sure that they appear correctly in the list box.
-
Page 42: Schedule Discovery
IP Address Range, Continued If the IP range is correct, G2Seek will locate the MegaRAC G2 card. It will list all MegaRAC G2 cards it has discovered. Left click on the Finish button after G2Seek discovers all MegaRAC G2 cards. -
Page 43: Usage
Usage Once the program has been installed and setup, you can access it any time by double left clicking on its icon on the task bar. The screen that was last viewed will appear. Chapter Three : Locating Your MegaRAC G2 Card... - Page 44 MegaRAC G2 User’s Guide...
-
Page 45: Chapter 4 Using Your Megarac G2
The MegaRAC G2 has a user-friendly Graphics User Interface (GUI) called Remote Access Companion for MegaRAC G2. It is designed to be easy to use. It has a low learning curve because it uses a standard Internet browser. You can expect to be up and running in less than five minutes. - Page 46 Section Icons and Functions, Continued This table allows you to become familiar with the many icons used in the GUI. Section Icon Name Description Information System This page contains general information describing the Information MegaRAC G2 card's firmware and the host system.
- Page 47 Event Log Policy This page allows you to set what happens when the event logs are full. You can either set up the MegaRAC G2 card to stop logging events or roll over the log files. Advanced This page allows you to perform advanced I2C configurations.
-
Page 48: Default User Name And Password
Default User Name and Password When you first try to access your MegaRAC G2 card, you will be prompted to enter a user name and password. The default user name and password are as follows: Field Default racg2 User Name... - Page 49 Welcome Screen/ Section, Continued By clicking on a section button, you can navigate to a different section. See Section Icons and Functions at the beginning of this chapter for a brief description of each section and their accompanying icons and functions.
-
Page 50: Ami Online Screen Shot
Welcome Screen/ Section, Continued AMI Online Screen Shot MegaRAC G2 card Online Screen Shot MegaRAC G2 User’s Guide... -
Page 51: Megarac G2 Information
MegaRAC G2 Information You can left click on the Information section button to view the MegaRAC G2 card’s firmware build and version date, health, and event log information. These functions are divided into four subsections. The following table gives you a brief description of each. -
Page 52: System Information
System Information The System Information screen is a subsection of the Information group. The following table describes the information listed in this subsection in detail: Field Description Version Information This field gives the MegaRAC G2 card’s firmware version number. Build Date This field gives the MegaRAC G2 card’s build date. -
Page 53: Health Of The Megarac G2 Card
Health of the MegaRAC G2 Card The MegaRAC G2 Health Information screen is a subsection of the Information group. The following table describes the information listed in this subsection in detail: Field Description MegaRAC G2 Health Functional This health status means that the MegaRAC G2 Status card is operating within normal parameters. -
Page 54: Host Health Information (Oem Version Only)
The Host Health Information screen is a subsection of the Information group. You can load and delete a loaded Sensor Definition Kit (SDK) file from this screen. An SDK file is a file that contains all the hardware monitoring values and thresholds for your given motherboard. -
Page 55: Loading An Sdk File
Host Health Information (OEM VERSION ONLY), Continued Loading an SDK File The following table is a pictorial description of how to load an SDK file: Step Description Left click the Upload SDK File button. Left click the Browse button. Cont’d... - Page 56 Loading an SDK File, Continued Step Description Insert the MegaRAC G2 CD and browse to it. Select the SDKPorts directory. Select your motherboard manufacturer. In this example, we are using an American Megatrends motherboard, so we will select the American Megatrends folder.
- Page 57 If your serverboard does not have or support a BMC, check the 20-pin cable or the 3-pin or 4-pin IPMB connector to see if the cable is plugged in correctly. • The SDK file may be corrupt. Try to upload the SDK file again.
-
Page 58: Sdk Explained
CPU Fan Gives the CPU fan’s RPM reading. Chassis Fan Gives the chassis fan’s RPM reading. The following symbols are used to indicate the health of each of the voltage fields: Symbol Definition Indicates that the value is within tolerance levels. -
Page 59: Show Thresholds
Host Health Information (OEM VERSION ONLY), Continued Show Thresholds The following table is a pictorial description of how to display the hardware health thresholds: Step Description Left click the Show Thresholds button. The following screen appears. Cont’d Chapter Four : Using Your MegaRAC G2 Card... -
Page 60: Sdk Thresholds Explained
Low Critical This column displays the low critical warning value. When this value is reached, an alert can be sent and an event is added to the event log. Low Warning This column displays the low warning value. When this value is reached, an alert can be sent and an event is added to the event log. -
Page 61: Hide Thresholds
Host Health Information (OEM VERSION ONLY), Continued Hide Thresholds The following table is a pictorial description of how to hide the hardware health thresholds: Step Description Left click the Hide Thresholds button. The following screen appears. Cont’d Chapter Four : Using Your MegaRAC G2 Card... -
Page 62: Deleting An Sdk File
Step Description Left click the Delete SDK File button. The SDK File Delete confirmation page appears. This page allows you to delete the SDK file currently stored on the MegaRAC G2 card. Note: Without an SDK file, host system health monitoring is not possible. - Page 63 Host Health Information (OEM VERSION ONLY), Continued Deleting an SDK File, Continued Step Description Left click the Delete Current SDK File button Left click the OK button. Cont’d Chapter Four : Using Your MegaRAC G2 Card...
- Page 64 Host Health Information (OEM VERSION ONLY), Continued Deleting an SDK File, Continued Step Description The following screen appears. MegaRAC G2 User’s Guide...
-
Page 65: Event Log
Note: Information in the system event log can be copied to the clipboard, and then pasted into other documents, such as email messages or reports. Highlight the text you wish to copy by left clicking and dragging the cursor. Copy the text by right clicking, and select "copy."... -
Page 66: Clear Event Logs
Event Log, Continued Clear Event Logs This button allows you to clear all events in the log. Once the log reaches 512 events, it cannot log any new events. Note: The MegaRAC G2 card automatically issues an alert when the logs are 75 percent full. - Page 67 Event Log, Continued Clear Event Logs, Continued Step Description The following screen appears showing that all events are cleared. Cont’d Chapter Four : Using Your MegaRAC G2 Card...
-
Page 68: Refresh Event Logs
Event Log, Continued Refresh Event Logs This button allows you to refresh the event log. The following table is a pictorial description of how to refresh the event logs: Step Description Left click the Refresh button. The event log appears with the newest list of events. -
Page 69: Megarac G2 Card Management
You can left click on the Management section button to remotely control and redirect your MegaRAC G2 card and host system. This is the most powerful feature of the MegaRAC G2 card. These functions are divided into two subsections. The following table gives you a brief description of each. -
Page 70: Remote Console
The low color mode is recommended for low speed connections such as those over a Wide Area Network or home DSL. If you are connecting over a LAN at high speeds you can use the High Color Mode. In order to change modes you will have to stop redirection and reconnect in the appropriate mode. -
Page 71: Redirection
Redirection The most powerful feature of your MegaRAC G2 card is the ability to redirect the host system’s console. To redirect the host system’s console is the ability to manage your host system as if it were physically in front of you, but not. - Page 72 MegaRAC G2 Next, you must setup Internet Explorer to allow the downloading of Signed ActiveX controls and also allow it to run Signed ActiveX controls. To do this, left click the Security tab and then the Custom Level button. Cont’d...
- Page 73 Description The Security Settings window opens. Left click the Enable button under the Download signed ActiveX controls section. Scroll down and left click the Enable button under the Run ActiveX controls and plug-ins section. Left click the OK button. Cont’d...
- Page 74 Step Description You are prompted with a Warning window. Left click the Yes button to accept the changes to the Internet zone and to go back to the Internet Options window. Left click the Apply button and then the OK button to make the changes.
-
Page 75: Staring Redirection
Step Description Select the Color Mode option that you want to use. If you want to enable compression, place a check in the box next to the Use Compression item. Left click the Start Redirection button. The Remote Console Key Help window will open. -
Page 76: Remote Console Shortcut Key Combinations
The most powerful feature of your MegaRAC G2 card is the ability to redirect the host system’s console. To Redirect the host system’s console is the ability to manage your host system as if it were physically in front of you, but not. The following table is a list of basic keystrokes and their functions: Cont’d... -
Page 77: Console Redirection Window
Stop Console Redirection This menu item can be used to halt Console Redirection. Restart This menu item can be used to stop Console Redirection and then start Console Redirection again. Full Screen This menu item can be used to view the Console Redirection in Full Screen mode. - Page 78 <CTRL>, <ALT> and <DEL> keys down simultaneously on the host system that you are redirecting. F10 Key This menu item can be used to act as if you depressed the <F10> key when in Console Redirection. F11 Key This menu item can be used to act as if you depressed the <F11>...
- Page 79 Dropdown Description Menu Item View This dropdown menu item contains the Toolbar menu item that allows you to start the Console Redirection toolbar. The following window is a screen capture of the Console Redirection toolbar. Help This dropdown menu item contains the About RConsoleOCX Control menu item that allows you to view the RConsoleOCX Control version number and copyright information.
-
Page 80: Console Redirection Toolbar
Follow the steps in the table below to begin the Console Redirection toolbar: Step Description Left click the View dropdown menu. The dropdown menu will open. Left click on the Toolbar menu item. The Console Redirection toolbar will open. Console Redirection Toolbar Status... -
Page 81: Console Redirection Toolbar Toggle Buttons
Icon Description When you see this icon, it means that the Console Redirection is on. You can left click this icon to stop Console Redirection. When you see this icon, it means that Console Redirection is stopped. You can left click this icon to start Console Redirection. -
Page 82: Setting Up Virtual Floppy On Windows 2000/Xp (Oem Version Only)
Virtual CD-ROM device does not require any special drivers. You can select the default option Microsoft Windows provides. Left click the Don’t search I will choose the driver to install option and left click the Next button. Cont’d MegaRAC G2 User’s Guide... - Page 83 Left click the Have Disk button. Left click the Browse button and browse to the MegaRAC G2 CD. Select the amivirtfl.inf file located on the MegaRAC G2 CD located in the USB Floppy folder. Left click the Open button. Cont’d...
- Page 84 Step Description Left click the OK button. Once this file is installed onto the host system, Windows 2000/XP recognizes the device. You can now redirect the floppy drive. Note: Windows 2000/XP may ask you to reboot of the host system.
-
Page 85: Start Floppy Drive Redirection (Oem Version Only)
Redirection, Continued Start Floppy Drive Redirection (OEM VERSION ONLY) Follow the steps in the table below to begin the Floppy Drive Redirection: Step Description There are two ways to start the Floppy Drive Redirection. One way is to use the Console Redirection toolbar. - Page 86 Start Floppy Drive Redirection (OEM VERSION ONLY), Continued Step Description Select the Floppy Drive you want to redirect. Left click the OK button. Floppy Drive Redirection will begin immediately. If you used the Console Redirection toolbar to start the Floppy Drive Redirection, you will see the following: Notice that the Drive Redirection icon changes.
-
Page 87: Stop Floppy Drive Redirection (Oem Version Only)
The second way is to use the Console Redirection dropdown menu. If you used the Console Redirection toolbar, simply left click the Floppy Drive Redirection icon. If you used the Console Redirection dropdown menu, simply left click the Stop Device Redirection. -
Page 88: Start Cd-Rom Drive Redirection
Redirection, Continued Start CD-ROM Drive Redirection Follow the steps in the table below to begin the CD-ROM Drive Redirection: Step Description There are two ways to start the CD-ROM Drive Redirection. One way is to use the Console Redirection toolbar. - Page 89 Start CD-ROM Drive Redirection, Continued Step Description Select the CD-ROM Drive you want to redirect. Left click the OK button. CD-ROM Drive Redirection will begin immediately. If you used the Console Redirection toolbar to start the CD-ROM Drive Redirection, you will see the following: Notice that the Drive Redirection icon changes.
-
Page 90: Stop Cd-Rom Drive Redirection
Description There are two ways to stop the CD-ROM Drive Redirection. One way is to use the Console Redirection toolbar. If you used the Console Redirection toolbar, simply left click the CD-ROM Drive Redirection icon. The second way is to use the Console Redirection dropdown menu. If you used the Console Redirection dropdown menu, simply left click the Stop Device Redirection. -
Page 91: Stopping Console Redirection
The following Console Redirection message box will appear. Once Console Redirection has stopped, you can close both the Console Redirection and Remote Console Key Help window. You can also leave these two windows open and start redirection again once you are ready. -
Page 92: Crash Screen
Crash Screen This page allows you to view the last text-based screen in the event that the host system locks up or freezes during a blue screen. This is useful because it allows you to troubleshoot the host system. Note: To view the Crash Screen, you need to have Java™... -
Page 93: Megarac G2 Card Configurations
You can left click on the Configuration section button to administer users, configure network parameters, and perform several other powerful management features. These functions are divided into six subsections. The following table gives you a brief description of each. Each subsection is explained in more detail further in this section. Function Icon... -
Page 94: Administrator Setup
Administrator Setup The Administrators screen is a subsection of the Configuration group. This page allows you to configure the administrators who have access to the MegaRAC G2 card. The following table describes the information listed in this subsection in detail:... -
Page 95: Adding An Administrator
Left click the Add button. Enter a user name in the Username field. Your user name must be no more than eight characters long. Enter a password in the Password field. Your password must be at least eight characters long. Confirm your password by entering your password again in the Confirm Password field. - Page 96 MegaRAC G2 Card Configurations, Continued Adding an Administrator, Continued Step Description Left click the OK button. Cont’d MegaRAC G2 User’s Guide...
-
Page 97: Editing An Administrator
Step Description Left click an administrator from the Select Administrator field. Once the administrator you want to edit is highlighted, left click the Edit button. Enter a new password in the Password field. Your password must be at least eight characters long. - Page 98 MegaRAC G2 Card Configurations, Continued Editing an Administrator, Continued Step Description Left click the OK button. Cont’d MegaRAC G2 User’s Guide...
-
Page 99: Removing An Administrator
Left click an administrator from the Select Administrator field. Once the administrator you want to remove is highlighted, left click the Remove button. A confirmation dialog box will open. Left click the OK button to confirm deletion or left click the Cancel button to cancel. - Page 100 MegaRAC G2 Card Configurations, Continued Removing an Administrator, Continued Step Description Left click the OK button. Cont’d MegaRAC G2 User’s Guide...
-
Page 101: Networking Options
Continued Networking Options The Networking Information screen is a subsection of the Configuration group. This page allows you to configure the network parameters for the MegaRAC G2 card. The following table describes the information listed in this subsection in detail:... - Page 102 Save Button This button allows you to save your configuration. Note: You are prompted to close your Internet browser and reconnect to the new IP address if you make changes to the Networking Information screen. Cont’d MegaRAC G2 User’s Guide...
-
Page 103: Setting Up Date And Time
The Date-Time Configuration screen is a subsection of the Configuration group. This page shows the date and time on the MegaRAC G2 card. You can also set the MegaRAC G2 card's date and time by entering appropriate values in the Set boxes and left clicking the Sync button. -
Page 104: Maintenance/ Flash
Once you enter into Flash Mode and choose to cancel the firmware flash operation, the MegaRAC G2 card must be reset. This means that you must close the Internet browser and log back onto the MegaRAC G2 card before you can perform any other types of operations. -
Page 105: Updating Your Megarac G2 Card's Firmware
MegaRAC G2 Card Configurations, Continued Updating Your MegaRAC G2 Card’s Firmware Follow the steps in the table below to update your MegaRAC G2 card’s firmware: Step Description Left click the Enter Flash Mode button. A warning box will open. Left click the OK button. - Page 106 MegaRAC G2 Card Configurations, Continued Updating Your MegaRAC G2 Card’s Firmware, Continued Step Description Left click the Browse button to locate the firmware (*.IMA) update file. Left click the Open button. Cont’d MegaRAC G2 User’s Guide...
- Page 107 Step Description Left click the Next button to go to the next step. The MegaRAC G2 card firmware wizard will begin to check the existing firmware against the firmware file you are trying to load. Cont’d Chapter Four : Using Your MegaRAC G2 Card...
- Page 108 Left click the OK button when you see the following dialog box. If the dialog box prompted that an update is necessary, left click the Flash button. If the wizard determined that no flash is necessary, you can left click the Cancel button.
- Page 109 After the Firmware Upgrade Wizard has been completed successfully, the MegaRAC G2 card will automatically reset itself. This is done in order for the image upgrade to take effect. You cannot perform any other operation within your current Internet browser session Close your Internet browser session and reconnect to your MegaRAC G2 card.
-
Page 110: Mail Configuration
Some SMTP servers also require a valid From Address to send out mail. You can use the From Address fields to specify a valid address that your mail server will accept. The following table describes the information listed in this... -
Page 111: Alert Recipients
SNMP via PPP Alert Level This dropdown menu allows you to choose when an alert is sent out. You can have alerts sent out for all events or critical events only. By default, alerts are disabled. Email Address This field allows you to enter an email address of the person who is to receive the alert. -
Page 112: Select Your Event Log Policy
Continued Select Your Event Log Policy This page allows you to set what happens when the event logs are full. You can either set up the MegaRAC G2 card to stop logging events or roll over the log files. MegaRAC G2 User’s Guide... -
Page 113: Advanced Megarac G2 Card Configurations
The MegaRAC G2 card uses I2C to communicate with host system sensors as well as with a BMC using IPMI. If the host system or BMC are using the same I2C slave address, problems with sensor access can occur. You can change the MegaRAC G2 card's slave address to solve this problem. -
Page 114: Ipmi Configuration
I2C bus. If there is a BMC present, you can configure the MegaRAC G2 card to use IPMI to power on and off the host system. You can also use the BMC's Sensor Data Records (SDR) for health monitoring. This precludes the need to create or upload an SDK. -
Page 115: Modem Configuration
BMC chip with the MegaRAC G2 card. This field allows you to change the MegaRAC G2 card’s BMC I2C Host System BMC address so that it does not conflict with the host system or the I2C’s I2C Address slave address. - Page 116 The following table describes the information listed in this subsection in detail: Item Description Serial Port This field displays the serial port the modem is on. This value is hard coded and you cannot change it. Speed This dropdown menu allows you to set the speed of the modem.
-
Page 117: Host Heartbeat
The MegaRAC G2 Server Heartbeat program is located on your MegaRAC G2 CD and must be installed on the host system. The host system is the system that has the MegaRAC G2 card physically installed into it. -
Page 118: Megarac G2 Server Heartbeat
Step Description To install the MegaRAC G2 Server Heartbeat Time Interval program, left click the START button and then left click RUN. Do NOT double click on the MegaRAC G2 Server Heartbeat icon to install it. MegaRAC G2 Note: card expects a heartbeat from the host system after every configured elapsed time interval to know that the operating system on host system is up and running. -
Page 119: Appendix A Megarac G2 Feature Cable
If you do not use the chassis power on switch or chassis reset switch pins, you should place a plastic cap on them so that they do not short your motherboard. Do not use a standard jumper. It will short the connection. - Page 120 MegaRAC G2 User’s Guide...
-
Page 121: Appendix B Wincuri, Lincuri, And G2Configapp
The G2ConfigApp program allows you to configure the MegaRAC G2 card. You can run the G2ConfigApp program from the host system or from a client system. The client system is the system that will connect to the MegaRAC G2 card remotely through the network. This is basically WinCuri with a GUI. - Page 122 If you are running the G2ConfigApp program from a remote system, select the second radial button labeled ‘I want to connect to a G2 on the network’. Type in the MegaRAC G2 card’s IP address in the field to the right of Card IP. Type in your user name and password in the appropriate fields and left click on the Ok button.
-
Page 123: User Manager Tab
Field/ Button Description User Name The selected MegaRAC G2 card user is displayed in this field when you left click a user from the List of Users field. Current Password When you change a user’s password, you must enter the current password first. This field allows you to enter the current password. -
Page 124: About
Dropdown Box privacy protocol. Add New User Button The Add New User button allows you to add a new administrator to the MegaRAC G2 card’s user list. The user name must be no more than eight characters long. Delete User Button The Delete User button allows you to delete an existing administrator from the user list. -
Page 125: Network Configuration Tab
Dropdown Box method. You can choose either DHCP or STATIC method. Internet Address The Internet Address field allows you to specify a new IP address when you use a STATIC configuration method. Network Mask The Network Mask field allows you to specify a new network mask when you use a STATIC configuration method. -
Page 126: Firmware Flash Tab
The Exit button allows you to log off the MegaRAC G2 Card Configuration. Complete Flash You can place a check in the box next to Complete Flash Mode to write the updated flash Mode image to the MegaRAC G2’s firmware hub. By default, both options under it are enabled. -
Page 127: Advanced Tab
The New MAC Address field allows you to specify a new MAC address. Apply Button The Apply button allows you to set the MegaRAC G2 card with the MAC address that you entered into the New MAC Address field. Reset the MegaRAC The Reset the MegaRAC G2 Card Now button allows you to reset the MegaRAC G2 card’s... -
Page 128: Server Information Tab
The Server Location field allows you to specify the physical location of the host system. Server OS The Server OS field allows you to specify the operating system loaded on the host system. Server Description The Server Description field allows you to describe the host system. -
Page 129: Wincuri
The WinCuri program is a command prompt-based program that you can use to configure the MegaRAC G2 card. It allows you all the functionality of both the Internet browser- based Remote Access Companion for MegaRAC G2 and the G2ConfigApp program. - Page 130 Script file format is any of the other argument formats mentioned below For e.g : WinCuri -script myscr.scr -script ScriptFile myscr.scr can contain the following lines if you want to get all users and then get network config -user -listall...
-
Page 131: Lincuri
The LinCuri program is a command prompt-based program that you can use to configure the MegaRAC G2 card in RedHat Linux. It allows you all the functionality of both the Internet browser-based Remote Access Companion for MegaRAC G2 and the G2ConfigApp program. -
Page 132: Lincuri Help File
Script file format is any of the other argument formats mentioned below For e.g : LinCuri -script myscr.scr -script ScriptFile myscr.scr can contain the following lines if you want to get all users and then get network config -user -listall... - Page 133 -Net -SetDHCP -Net -SetSTATIC IP Netmask Gateway Host HeartBeat commands ----------------------------- -HB -GetHB -HB -SetHB <Heartbeat Time Interval (Seconds)> - <Between 6 and 2147483646> General purpose commands ----------------------------- -Gen -Reset -SaveConfig|-NoConfig (Reset G2 card) -SaveConfig (Save Configuration) -NoConfig (Don't save Configuration)
- Page 134 MegaRAC G2 User’s Guide...
-
Page 135: Appendix C G2 Mouse Booster
Console Redirection. Note: When the G2 Mouse Booster program is running, you will see two cursors. One is the cursor on the host system. The other is the cursor on the client system. Follow the instructions in the table below to use the G2 Mouse Booster program. - Page 136 MegaRAC G2 User’s Guide...
-
Page 137: Appendix D Megarac G2 Flash Utility
MegaRAC G2 Card Flash Utility The WinFlash.exe program is a recovery tool that can be executed from a remote client system located on the same network as the MegaRAC G2 card. You can use it to recover a failed flash attempt. - Page 138 Description Left click the Card Settings button to begin. The Active Cards in Recovery Mode screen appears and starts to search for MegaRAC G2 cards in Recovery Mode. Left click the MegaRAC G2 card’s MAC address that you want to configure.
- Page 139 The MegaRAC G2 Flash Utility automatically assigns a card number to the Number MegaRAC G2 card that it locates in Recovery Mode. This is helpful when you are dropdown box trying to flash more than one MegaRAC G2 card. Think of the Select Card Number dropdown box as a shortcut to other MegaRAC G2 cards that are in Recovery Mode.
- Page 140 When you left click the Get Flash Information button, the Flash Information screen appears. Note: Pay special attention to the size of the Erase Block Size (in Kbytes). You need to select the correct Flash Block Size in the Program (Write) Flash section.
- Page 141 Left click the Select an Image to flash button to select an image (*.IMA) to flash. Note: Make sure that the file attributes of the image file are NOT Read-Only. If they are, you will receive and the following error message: Left click the Open button to select the image.
- Page 142 Continued Step Description Select how you want to flash the image to the MegaRAC G2 card. You can select to flash one or multiple sections or simply flash the Full Image. Note: It is recommended that you flash the Full Image if a failed flash has occurred. If you select Full Image, you also have the option to flash the Boot Loader.
-
Page 143: Appendix E Troubleshooting : Screen Distortion
Normal Blurry Symptom The MegaRAC G2 card's VGA chip has both a digital and analog signal. See the picture below. The digital signal is the FPD. The analog signal is the Monitor. Cont’d Appendix E : Troubleshooting Screen Distortion 133... -
Page 144: Solution
Symptom, Continued When the analog signal is set lower than 1024x768 (for example: 800x600), the MegaRAC G2 card’s video controller will use ratio metric expansion to bring the screen to 1024x768. Because of this, the screen will become blurry. Solution To correct this, set the screen resolution on the host system to 1024x768. -
Page 145: Appendix F Serial Over Lan
Appendix F Serial Over LAN Hardware Setup There are two ways to attach the host system’s serial port to the MegaRAC G2 card’s serial port. • Internally using a 9-pin ribbon cable • Externally using a null modem cable Internal... -
Page 146: External
Continued External The other is to use an external serial port connector and null modem cable. To do this, you must have an external 9-pin serial port connector and cable plugged into the MegaRAC G2 card’s serial port connector at JP1. Once the external 9-pin serial port... -
Page 147: Bios
Set the Serial Port Number to [COM1] or [COM2] depending on the serial (COM) port you are using. Set the Serial Port Mode baud rate you desire. By default, it is set to [19200 8,n,1]. If available, you can set the Post-Boot Support option. When enabled, the MegaRAC G2 attempts to output the DOS screens or the initial windows text screens. -
Page 148: Connecting Using Hyper Terminal
Connecting using Hyper Terminal The best way to connect to telnet into the MegaRAC G2 card is through Hyper Terminal. It is assumed that you know how to use Hyper Terminal. Usage of Hyper Terminal is therefore not documented in this appendix. - Page 149 Connecting using Hyper Terminal, Continued Note: To invoke the <DEL> key, map the <DEL> key to the <BACKSPACE> key in the Hyper Terminal Properties window. Appendix F : Serial Over LAN 139...
- Page 150 MegaRAC G2 User’s Guide...
-
Page 151: Appendix G : Modem Daughterboard 141
Appendix F: Serial over LAN Note: Host system health information is only available if you have a Sensor Definition Kit (SDK) file for the host system’s motherboard or it has a Baseboard Management Controller (BMC). The BMC must be IPMI 1.0 compliant or greater. -
Page 152: Modem Daughterboard Installation
Unpack the modem daughterboard. Locate JP4 on the MegaRAC G2 card. It has a series of pinholes that allow you to insert the modem daughterboard. Match the modem daughterboard and the pin holes so that the pins align properly. Insert the modem daughterboard by sliding it straight down into the MegaRAC G2 card. -
Page 153: Modem Daughterboard Installation Illustration
Modem Daughterboard Installation, Continued Modem Daughterboard Installation Illustration Plug the modem daughter board into JP4 Modem Daughterboard Pin Alignment Illustration Empty Empty Empty Empty Appendix G : Modem Daughterboard 143... -
Page 154: Configuring The Modem
This field displays the serial port the modem is on. This value is hard coded and you cannot change it. Speed This dropdown menu allows you to set the baud rate of the modem. Set this value to the highest available baud rate that your Remote Access Server (RAS) or ISP supports. Modem Init... - Page 155 Outgoing Calls, Continued Step Action Left click the Configuration tab and then left click on the Alerts icon. The following screen appears: Destination This dropdown menu allows you to choose and configure up to eight destination types. You can leave this value as Destination 1.
- Page 156 PPP Password Enter your password in this field. Left click the Save button. Your MegaRAC G2 card can now send alerts by dialing out and establishing a Point to Point Protocol (PPP) connection with your Remote Access Server (RAS) or ISP.
-
Page 157: Incoming Calls
Step Action Log into the MegaRAC G2 card through the local network. Left click the Advanced tab and then left click on the Modem Configuration icon. The following screen appears: Locate the PPP Server Configuration table. Use the following values: Server IP Address Enter the IP address you want the MegaRAC G2 card to use during a PPP session. - Page 158 TCP/IP (Winsock) and port 100. Type in the IP address of the card into the host address field. Use the same IP address that you typed in the Server IP Address field. You will be prompted for the username and password. Use the same username and password that you would...
-
Page 159: Appendix H Port Usage
Direction 5121 Remote Keyboard and Mouse data Bi-directional. Data sent from the (iUSB HID) MegaRAC G2 card to the client as well as from the client to the MegaRAC G2 card. 5120 CD Redirection (iUSB – CD) Bi-directional. Data sent from the... - Page 160 MegaRAC G2 User’s Guide...
-
Page 161: Appendix Imac Address Map
Appendix I MAC Address Map MAC Address Location Description Windows 2000 Advanced 00-40-D9-02-9B-3C Server Room, Rack 2, 5 Server, Mail Server Appendix I : MAC Address Map 151... -
Page 162: Notes
Notes MegaRAC G2 User’s Guide... -
Page 163: Appendix J : Host System Usb Mouse And Keyboard Considerations For Linux 7.X 153
Check your system BIOS to verify that the OnBoard USB and Legacy USB options are Enabled. If not, the USB devices cannot function. USB Keyboard You will be able to redirect the keyboard and use the keyboard on the host system at the same time. Note: LILO is not USB aware. -
Page 164: Usb Mouse
Refresh the X server. After you make and save all the changes to the XF86Config (or XF86Config-4) file, press the <CTRL>, <ALT> and <BkSp> keys to restart the X server and let the new settings take effect. If this does not work, type “startx” in text mode or reboot the host system. -
Page 165: Appendix K Gtkrconsole For Linux
GtkRConsole for Linux Installation If you are using a Linux client system to connect to the MegaRAC G2 card, you can run the gtkRConsole utility to remotely control the MegaRAC G2 card and redirect the host system’s keyboard, video, and mouse. - Page 166 MegaRAC G2 User’s Guide...
-
Page 167: Index
Locating Your MegaRAC G2 Card, iii, 27, 28, 29, 30 Editing an Administrator, iv, 87, 88 ESD, iii, v, 3, 141, 142 Event Log, iv, 36, 37, 41, 55, 56, 57, 58, 83, 102, 105, 120, 122 MAC Address, iii, 4... - Page 168 System Information, iv, 36, 41, 42, 118 Redirection, ii, iv, ix, 1, 2, 9, 11, 37, 60, 61, 62, 63, 64, 65, 66, 67, 68, 69, 70, 71, 72, 73, 74, 75, 76, 77, 78, 79, 80, 81, 103, 106, 125, 141, 148, 149...
Need help?
Do you have a question about the MegaRAC G2 and is the answer not in the manual?
Questions and answers