
Related Manuals for Smeg Tethys D60


Summary of Contents for Smeg Tethys D60
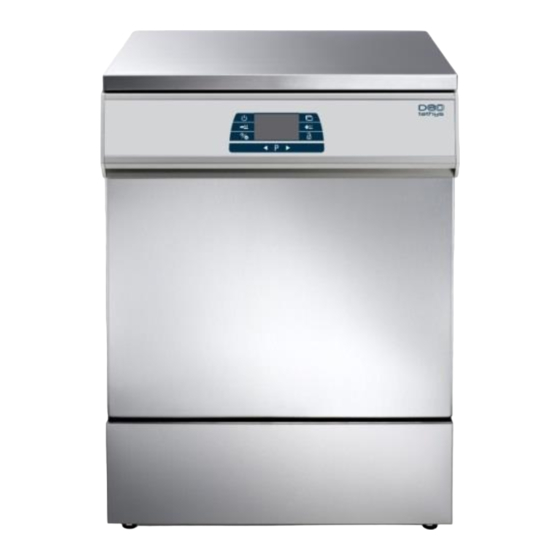
- Page 1 Tethys D60 - Tethys T60 Tethys T45 WASHER DISINFECTOR USER MANUAL Translation of the original instructions issued in Italian...
- Page 2 CEFLA S.C. Via Selice Provinciale, 23/A - 40026 Imola BO Italy Tel. +39 0542.653111 - Fax +39 0542.653344 • www.mocom.it 19 390 4840 03 24/02/2018 Manual Ed. Date User Manual Tethys D60 - Tethys T60 - Tethys T45 Page 2 - 77...
-
Page 3: Table Of Contents
PROGRAMS INSTALLED ............................. 22 5.6.1 RESINS - SOFTENER, REGENERATION AND WASHING PHASE ..............22 5.6.2 DRYING PHASE – Only for Tethys D60 ...................... 23 5.6.3 CUSTOM PROGRAMS ..........................25 A0 THERMAL DISINFECTION PARAMETER ......................26 PREPARING THE LOAD FOR WASHING AND DISINFECTION ................27 END OF CYCLE .............................. - Page 4 10.3 POSITIONING THE APPLIANCE .......................... 67 10.4 ELECTRICAL SYSTEM REQUIREMENTS ....................... 70 10.4.1 Tethys D60, Tethys T60 - Power supply cable ................... 70 10.4.2 Tethys T45 - Power supply cable and disconnection device ..............70 10.4.3 Disconnection device ..........................71 WATER CONNECTION FITTINGS ........................72...
-
Page 5: Introduction
1 INTRODUCTION Tethys D60, Tethys T60, Tethys T45 - instrument washers for use in hospitals, class IIb medical devices (in accordance with the classification criteria established by Directive 93/42 and subsequent additions and amendments, extended and amended by EC Directive 2007/47). -
Page 6: Intended Use
Treatment in an Instrument Washer is no substitute for sterilisation. Disinfection in an instrument washer is intended to reduce the risks for the staff who handle laboratory instruments to prepare them for subsequent use. User Manual Tethys D60 - Tethys T60 - Tethys T45 Page 6 - 77... -
Page 7: Standard 15883
The basic appliance does not feature a physical port for the insertion of probes with cable: the use of wireless probes (dataloggers or similar) is recommended. User Manual Tethys D60 - Tethys T60 - Tethys T45 Page 7 - 77... -
Page 8: List Of Models
- “Tethys D60-1” indicates single-phase model: “ 1N~ ” - “Tethys D60-3” indicates three-phase model, 230V between phases, no neutral: “ 3~ ” - “Tethys D60”. If the model does not have a suffix it will be three-phase, with neutral, 400V between phases: “ 3N~ ”. -
Page 9: Washing Trolleys And Accessories
WASHING TROLLEYS AND ACCESSORIES The Tethys D60, Tethys T60, Tethys T45 are supplied with the standard washing trolleys. Contact your local dealer for details of the range of racks and baskets best suited to your washing requirements. Installation, maintenance and any repairs must be carried out by authorised technical staff. -
Page 10: Key To The Symbols Used In The Manual And On The Appliance
This symbol appears on the appliance’s technical data label and in this manual, indicating that it is a medical device which holds CE CERTIFICATION issued by IMQ (“0051” is the code number of the notified body IMQ). User Manual Tethys D60 - Tethys T60 - Tethys T45 Page 10 - 77... -
Page 11: General Warnings
Tethys D60, Tethys T60: 23kg Tethys T45: 15kg Tethys D60: For optimal DRYING, the load for processing must never exceed 15 kg. With use of the glassware washer, localised or general discolouring of the heating element may occur. This is normal since it is due to the operating mode and does not reduce the appliance’s effectiveness. -
Page 12: Accessing And Reusing The Device After An Incomplete Cycle
Contact authorised technical staff in the event of a failure. Do not touch the heating elements fig. 3 – Guideline View of inside of chamber, detail of heating elements. User Manual Tethys D60 - Tethys T60 - Tethys T45 Page 12 - 77... -
Page 13: Door Opening
To open the door without connecting the appliance to the electricity supply (useful for emergencies or in case of power blackouts), the manual release system has to be used (see next point). User Manual Tethys D60 - Tethys T60 - Tethys T45 Page 13 - 77... -
Page 14: Manual Door Release Procedure
Insert a screwdriver or a rod 4 mm in diameter into the hole in the bottom of the centre of the front panel. 4. Push the pin upward until the lock is released. fig. 5 – Diagram showing how to release the lock by hand in any emergency. User Manual Tethys D60 - Tethys T60 - Tethys T45 Page 14 - 77... -
Page 15: Description Of Controls And Programs
Start / Stop Door opening Selection Selection In the figures mentioned in this document, we use only the Tethys D60 front panel layout. The same considerations and procedures apply to the Tethys T60, Tethys T45 models, unless otherwise specified. User Manual... -
Page 16: Controls - Detailed Description
Time left to end of current cycle With appliance in standby Maximum temperature reached in the cycle set -- : 90 With cycle running During washing: Tank temperature User Manual Tethys D60 - Tethys T60 - Tethys T45 Page 16 - 77... -
Page 17: A0 Parameter Display
". The transition from one screen to the next occurs automatically after 3 seconds or by short press of the "Functions" key. fig. – The A0 value is displayed split into thousands (t) and units (u) User Manual Tethys D60 - Tethys T60 - Tethys T45 Page 17 - 77... -
Page 18: Indicator Leds - Introduction
(Only for Tethys D60) Time: time left on Appliance maintenance display Thermal disinfection, Lack of salt identifies cycles with thermal disinfection Drying Alarm (Only for Tethys D60) User Manual Tethys D60 - Tethys T60 - Tethys T45 Page 18 - 77... -
Page 19: Indicator Leds - Detailed Explanation
Replace the can of detergent which is running out with a new can as soon as possible. Maintenance: filter replacement Only for Tethys D60. Active if the dryer is present and the absolute filter is installed. The LED indicates that the absolute filter needs to be replaced. - Page 20 Identifies a cycle with thermal disinfection; the LED flashes when a thermal disinfection phase is in progress. Drying Only for Tethys D60. The LED comes on to identify a cycle with drying phase, even during selection. The LED flashes when the drying phase is in progress. Remaining time With cycle running: The LED lights up when the display shows the time remaining.
-
Page 21: Selecting The Washing Programme
4. Once the selection has been made, the Functions button can be used to scroll through the program parameters. 5. Only for Tethys D60: If the program includes a drying phase, its duration can be adjusted using the Drying Decrease and Drying Increase buttons. -
Page 22: Programs Installed
PROGRAMS INSTALLED See enclosed document: “Tethys T45 Program Table”, “Tethys D60-Tethys T60 Program Table”. The data provided may be subject to modification. The drying phase is only present in the Tethys D60. CUSTOM PROGRAMS In addition to the standard programs, which cannot be modified by the user, modifiable programs are also available. -
Page 23: Drying Phase - Only For Tethys D60
Users can also select a SEPARATE DRYING CYCLE by pressing the “Drying Decrease” button for 2 seconds: the message “PdrY” appears on the display. The drying time can still be adjusted as described above. fig. 12 – Display screen: separate drying program. User Manual Tethys D60 - Tethys T60 - Tethys T45 Page 23 - 77... - Page 24 Dryer duct and does not correspond to the temperature reached by the load. Temperatures in the chamber during drying never exceed 90°C. User Manual Tethys D60 - Tethys T60 - Tethys T45 Page 24 - 77...
-
Page 25: Custom Programs
5. Mains Water Program 4. Neutralisation 6. Demi Rinse 7. Hot Demi Rinse Disinfection / Td + 9. Drying Wash (cold) Enzymatic Wash Disinfection Rinse lubrication User Manual Tethys D60 - Tethys T60 - Tethys T45 Page 25 - 77... -
Page 26: A0 Thermal Disinfection Parameter
EUROPEAN STANDARD EN 15883 “Washer-Disinfectors” , with particular reference to section 3 Terms and Definitions and annex B, A concept. of part 1 of the standard, 15883-1. User Manual Tethys D60 - Tethys T60 - Tethys T45 Page 26 - 77... -
Page 27: Preparing The Load For Washing And Disinfection
Before processing instruments or any other object, check on the manufacturer’s instructions that the items are approved for automatic treatment in Instruments Washer and also the recommended maximum washing temperature. User Manual Tethys D60 - Tethys T60 - Tethys T45 Page 27 - 77... -
Page 28: End Of Cycle
Wait about 10 minutes with the door open before removing the processed load, to allow the material in the washing chamber to cool, and if necessary to dry. User Manual Tethys D60 - Tethys T60 - Tethys T45 Page 28 - 77... -
Page 29: Interrupting A Program In Execution
16 – Interrupting a Program: hold down the Start/Stop button fig. 17 – Display screen, Suspension of program 5: S 05 “. User Manual Tethys D60 - Tethys T60 - Tethys T45 Page 29 - 77... -
Page 30: Program Special Options
19 – Once the cycle start command is given, the display alternates the program selected with the time remaining before it actually starts. User Manual Tethys D60 - Tethys T60 - Tethys T45 Page 30 - 77... -
Page 31: Temporary Disabling Of Demineralised Water
This option can only be used if the use of demineralised water has been activated. (See parameter “7-Demineralised water” below in the setup parameters section, in the: SETUP MODE - “FUNCTIONS”) User Manual Tethys D60 - Tethys T60 - Tethys T45 Page 31 - 77... -
Page 32: Deleting "Delayed Start" - "No Demi" Settings
RESET to be performed until the automatic process for dealing with the alarm has been completed. User Manual Tethys D60 - Tethys T60 - Tethys T45 Page 32 - 77... - Page 33 23 – RESET: during the RESET the display shows “ P- “. At the end of the RESET cycle, “ E- “ appears on the display. User Manual Tethys D60 - Tethys T60 - Tethys T45 Page 33 - 77...
-
Page 34: Printing The Cycle And Appliance Parameters
Once the Setup mode has been accessed, the various items available can be scrolled using the Functions button (5). Note on Tethys D60: a short press on the button Drying + (6) has the same meaning of the short press on button Functions (5) in the following cases: When entering password, to switch from one character to the next. -
Page 35: Access And Parameter Modification
Functions - Selection of the parameter required (see detail of the parameters in the points which follow). Note on Tethys D60: a short press on the button Drying + has the same meaning of the short press on button Functions. - Page 36 25 – Cloc parameters. Hold down the Start/Stop button to access the parameters, in this case identified as C1, C2, etc. Parameter C1 sets the current year. Use the Selection buttons to modify the parameter. Use the Functions buttons to move to another parameter. Confirm changes using the Start/Stop button. User Manual Tethys D60 - Tethys T60 - Tethys T45 Page 36 - 77...
-
Page 37: Set" Parameters
The initial default setting is 500. (e.g. the display shows “-8:50”). The value can be reset by an authorised engineer. User Manual Tethys D60 - Tethys T60 - Tethys T45 Page 37 - 77... - Page 38 Sets the serial port communication speed “-E: Pr” = 9600 bps (for Printer connection) “-E: Ln” = 11500 bps (for connection to WD-LANE - LAN accessory). User Manual Tethys D60 - Tethys T60 - Tethys T45 Page 38 - 77...
-
Page 39: Appliance Data Storage, Overwriting
In this case the appliance is cut out and will not perform any more cycles until the data from the memory are downloaded to free spaces; this can only be done using the TRACELOG software. User Manual Tethys D60 - Tethys T60 - Tethys T45 Page 39 - 77... - Page 40 The following is an example of data stored in the internal memory, with a key to their interpretation. The data can be accessed using the TRACELOG software. User Manual Tethys D60 - Tethys T60 - Tethys T45 Page 40 - 77...
- Page 41 Start drying: TA_TARGET: 120 TA1: 73 2012/10/17 12:04:47 End drying: TA1: 89 2012/10/17 12:09:07 END PROGRAM: 7 ================================================================================ fig. 28 – Example of cycle data stored in the appliance’s memory. User Manual Tethys D60 - Tethys T60 - Tethys T45 Page 41 - 77...
-
Page 42: Cloc" - Date And Time Parameters
Selection buttons (4-8): for modifying the value of the parameter. c) Functions button (5) – quick press: to move from one parameter to the next. (on Tethys D60 the operator can also use the “Drying +” key (6) with the same function). -
Page 43: Setting The "Pren" "Program Enabling" Function
“oF” to disable display of the program on the screen). Start / Stop – hold down to confirm the modification. Door opening – hold down to quit the screen for display/modification. User Manual Tethys D60 - Tethys T60 - Tethys T45 Page 43 - 77... - Page 44 30 - Example of use of the “PrEn” function to disable display of program “06” on the screen. User Manual Tethys D60 - Tethys T60 - Tethys T45 Page 44 - 77...
-
Page 45: Installation Instructions
Carry out a prewash to prevent this if necessary. User Manual Tethys D60 - Tethys T60 - Tethys T45 Page 45 - 77... -
Page 46: Using Detergent And Neutralising Agent
SERVICE to charge the system with liquid. The pipeline from the jerry can to the pump must be filled to ensure that the product is dispensed properly during subsequent washing cycles. User Manual Tethys D60 - Tethys T60 - Tethys T45 Page 46 - 77... -
Page 47: Liquid Detergent Intake System
3. Detergent intake filter, fitted directly on the suction nozzle pipe. fig. 32 – Configuration with LEVEL SENSOR, Tethys D60: Detergent suction nozzle with integral level sensor. The suction nozzle is complete with filter: make sure that the filter is always correctly positioned to ensure no lumps are drawn in. -
Page 48: Detergent Jerry Can Level Sensors - Optional For Tethys T60, Tethys T45
(each peristaltic pump has a terminal for connection of the relative level sensor). This procedure must be carried out by authorised technical staff. User Manual Tethys D60 - Tethys T60 - Tethys T45 Page 48 - 77... -
Page 49: Recommended Detergents
Do not use powder detergents: this may damage instruments’ internal mechanisms and corrode titanium surfaces. Do not add detergent to the acid neutralising agent jerry can: this will reduce the effectiveness of the wash. User Manual Tethys D60 - Tethys T60 - Tethys T45 Page 49 - 77... - Page 50 FLAMMABILITY Always refer to detergent technical data sheets to assess the products’ flammability. Do not use flammable products in the appliance. User Manual Tethys D60 - Tethys T60 - Tethys T45 Page 50 - 77...
-
Page 51: Alarms And Warning Messages
If drying performance deteriorates, users should have the filter changed earlier. The appliance does not signal this type of wear, but only wear arising from the hours actually worked. User Manual Tethys D60 - Tethys T60 - Tethys T45 Page 51 - 77... - Page 52 - The second category, “NON FATAL ALARMS”, are warning messages and not malfunctions; the display shows "A-" followed by the alarm number. Press the “Start/Stop” button to continue using the device. User Manual Tethys D60 - Tethys T60 - Tethys T45 Page 52 - 77...
- Page 53 3. Check that all the device’s connections (electricity and water) are correct and there have been no changes from the initial installation conditions. 4. Contact the After-Sales Service. fig. 35 – RESET cycle selection buttons (“Start/Stop” + “Functions”) buttons User Manual Tethys D60 - Tethys T60 - Tethys T45 Page 53 - 77...
- Page 54 “ML”. Circulating pump For the user: follow the DEFAULT PROCEDURE described above. pressure too low. If the alarm does not disappear, follow the RESET PROCEDURE. User Manual Tethys D60 - Tethys T60 - Tethys T45 Page 54 - 77...
- Page 55 3. Blockages or restrictions in hoses. failure. For the user: follow the DEFAULT PROCEDURE described above. If the alarm does not disappear, follow the RESET PROCEDURE. User Manual Tethys D60 - Tethys T60 - Tethys T45 Page 55 - 77...
- Page 56 P2 empty), the Start/Stop button will have to be pressed twice or more before the cycle can be started. (The device’s internal memory records the event but allows execution of the cycle). User Manual Tethys D60 - Tethys T60 - Tethys T45 Page 56 - 77...
- Page 57 Press the Start/Stop button to override the message and continue using the device. The device’s internal memory records the event. With a fouled filter, drying will be poor. User Manual Tethys D60 - Tethys T60 - Tethys T45 Page 57 - 77...
- Page 58 If leaks are noticed around the device: turn off the water supply AF:96 Chamber water level incorrect. taps. For the user: follow the DEFAULT PROCEDURE described above. If the alarm does not disappear, follow the RESET PROCEDURE. User Manual Tethys D60 - Tethys T60 - Tethys T45 Page 58 - 77...
-
Page 59: Cleaning And Maintenance
After cleaning, a washing cycle should be carried out without a load for processing, to remove any detergent residues. fig. 36 – The inside and outside of the device must be cleaned. User Manual Tethys D60 - Tethys T60 - Tethys T45 Page 59 - 77... - Page 60 It is essential to clean the filters carefully in accordance with the instructions given above: the appliance washer will be unable to operate correctly if the filters are fouled. Fit the filters back in place with care before starting a washing program. User Manual Tethys D60 - Tethys T60 - Tethys T45 Page 60 - 77...
-
Page 61: Tethys D60, Tethys T60 - Filter Elements
Push the central filter “D” up from below to extract it from the micro-filter and separate the two parts of the plastic filter by pressing the body of the filter in the zone shown by the arrows. Lift out the central filter. User Manual Tethys D60 - Tethys T60 - Tethys T45 Page 61 - 77... -
Page 62: If The Device Is To Be Out Of Use
2. If water stagnates in the device, make sure that: There are no tight bends in the drain hose. The drain trap is not clogged. User Manual Tethys D60 - Tethys T60 - Tethys T45 Page 62 - 77... -
Page 63: Servicing And Routine Check Time Intervals
2. Run PROGRAM 6, or another program with a thermal disinfection phase, without instruments for processing in the appliance, for precautionary cleaning/disinfection of the washing chamber. User Manual Tethys D60 - Tethys T60 - Tethys T45 Page 63 - 77... -
Page 64: Every Six Months
WARNING The manufacturer declines all responsibility in the event of appliance malfunctions, or injury or damage, arising from the failure to comply with the above recommendations. User Manual Tethys D60 - Tethys T60 - Tethys T45 Page 64 - 77... -
Page 65: Installation
+7mm Net weight 72 kg 56 kg Weight of appliance + packaging 90 kg 66 kg MATERIALS Washing chamber AISI 316L External surface AISI 304 User Manual Tethys D60 - Tethys T60 - Tethys T45 Page 65 - 77... - Page 66 IIb medical devices (in accordance with the classification criteria established by MEDICAL DEVICE Directive 93/42 and subsequent additions and amendments, extended and amended by CLASSIFICATION EC Directive 2007/47). User Manual Tethys D60 - Tethys T60 - Tethys T45 Page 66 - 77...
-
Page 67: Product Dimensions - Measurements In Mm
The installer engineer is responsible for the correct operation of the appliance after installation and must also provide the user with all information required for its correct use. During installation, the protective film must be removed from the steel outer surfaces. User Manual Tethys D60 - Tethys T60 - Tethys T45 Page 67 - 77... - Page 68 2. PC connection cable, for communication of data by means of TRACELOG software. Tethys D60, Tethys T60 fig. 42 – Diagram of connections on rear of appliance. User Manual Tethys D60 - Tethys T60 - Tethys T45 Page 68 - 77...
- Page 69 Hi = normal height stated in the document HB = height of appliance stand HMi = height recalculated for appliance installed on stand fig. 43 – Optional Stand. User Manual Tethys D60 - Tethys T60 - Tethys T45 Page 69 - 77...
-
Page 70: Electrical System Requirements
(the cables fitted are marked with their types and characteristics). This replacement may only be made by authorised technical staff. Use genuine spare parts. 10.4.1 Tethys D60, Tethys T60 - Power supply cable Characteristics of the power supply cable supplied with the appliance: FROR 5 x 2.5 mm (5G2.5), 450/750 V, IMQ mark (three-phase version) -
Page 71: Disconnection Device
However, a protective device specifically for the appliance (e.g. magnetothermal breaker or fuse on every phase, suitably rated for the electrical data stated above) should be installed in the room’s electrical panel. User Manual Tethys D60 - Tethys T60 - Tethys T45 Page 71 - 77... -
Page 72: Water Connection Fittings
Note to prevent the risk of clogging or damage: if the water pipe is new or has been unused for a long time, before connecting the water supply make sure that the water is clear and free of impurities. User Manual Tethys D60 - Tethys T60 - Tethys T45 Page 72 - 77... -
Page 73: Water Supply System Requirements
If demineralised water is not available, do not connect the relative hose to hot and/or cold water intakes. Leave the “demineralised water" hose disconnected. The appliance’s SETTINGS must be corrected accordingly by the Authorised Service Centre. User Manual Tethys D60 - Tethys T60 - Tethys T45 Page 73 - 77... -
Page 74: Water Drain
Tethys D60 Tethys T60 Tethys T45 fig. 47 – Drain connection. 65 cm < H < 80cm, X < 20cm. N.ro 2 drain pipes are provided. User Manual Tethys D60 - Tethys T60 - Tethys T45 Page 74 - 77... - Page 75 A drain pipe 50 mm in diameter is recommended. No extensions must be added to the drain hose supplied with the appliance. Any extensions might cause problems of flow-back into the chamber. User Manual Tethys D60 - Tethys T60 - Tethys T45 Page 75 - 77...
-
Page 76: Data Connection
Tethys D60, Tethys T60 - RS-232 port Tethys T45 - RS-232 port fig. 51 – Position of the RS-232 serial port on the rear of the device User Manual Tethys D60 - Tethys T60 - Tethys T45 Page 76 - 77... - Page 77 Manufacturer: SMEG SPA 42016 GUASTALLA (RE) – VIA LEONARDO DA VINCI 4 (ITA) - Italy User Manual Tethys D60 - Tethys T60 - Tethys T45 Page 77 - 77...
Need help?
Do you have a question about the Tethys D60 and is the answer not in the manual?
Questions and answers